
Minimizing Energy Losses in Ducts at 11207 Schwartz Dr, Galveston, TX 77554

11207 Schwartz Dr, Galveston, TX 77554

Minimizing Energy Losses in Ducts
Minimizing energy losses in ducts by seeing if the ducts are poorly sealed or insulated. That could tell you why your energy bill in high. Your air ducts are one of the most important systems in your home, and if the ducts are poorly sealed or insulated, they are likely contributing to higher energy bills.
Your home’s duct system is a branching network of tubes in the walls, floors, and ceilings; it carries the air from your home’s furnace and central air conditioner to each room. Ducts are made of sheet metal, fiberglass, or other materials.
Ducts that leak heated air into unheated spaces can add hundreds of dollars a year to your heating and cooling bills, but you can reduce that loss by sealing and insulating your ducts. Insulating ducts in unconditioned spaces is usually very cost-effective. Existing ducts may also be blocked or may require simple upgrades.
Designing and Installing New Duct Systems
In new home construction or in retrofits, proper duct system design is critical. In recent years, energy-saving designs have sought to include ducts and heating systems in the conditioned space.
Efficient and well-designed duct systems distribute air properly throughout your home without leaking to keep all rooms at a comfortable temperature. The system should provide balanced supply and return flow to maintain a neutral pressure within the house.
Even well sealed and insulated ducts will leak and lose some heat, so many new energy-efficient homes place the duct system within the conditioned space of the home. The simplest way to accomplish this is to hide the ducts in dropped ceilings and in corners of rooms. Ducts can also be located in a sealed and insulated chase extending into the attic or built into raised floors. In both of these latter cases, care must be taken during construction to prevent contractors from using the duct chases for wiring or other utilities.
In either case, actual ducts must be used — chases and floor cavities should not be used as ducts. Regardless of where they are installed, ducts should be well sealed. Although ducts can be configured in a number of ways, the “trunk and branch” and “radial” supply duct configurations are most suitable for ducts located in conditioned spaces.
Air return duct systems can be configured in two ways: each room can have a return duct that sends air back to the heating and cooling equipment or return grills can be located in central locations on each floor. For the latter case, either grills must be installed to allow air to pass out of closed rooms, or short “jumper ducts” can be installed to connect the vent in one room with the next, allowing air to flow back to the central return grilles. Door undercuts help, but they are usually not sufficient for return airflow.
You can perform a simple check for adequate return air capacity by doing the following:
- Close all exterior doors and windows
- Close all interior room doors
- Turn on the central air handler
- “Crack” interior doors one by one and observe if the door closes or further opens “on its own.” (Whether it closes or opens will depend on the direction of the air handler-driven air flow.) Rooms served by air-moved doors have restricted return air flow and need pressure relief as described above.
Maintaining and Upgrading Existing Duct Systems
Sealing your ducts to prevent leaks is even more important if the ducts are located in an unconditioned area such as an attic or vented crawlspace. If the supply ducts are leaking, heated or cooled air can be forced out of unsealed joints and lost. In addition, unconditioned air can be drawn into return ducts through unsealed joints.
Although minor duct repairs are easy to make, qualified professionals should seal and insulate ducts in unconditioned spaces to ensure the use of appropriate sealing materials.
Aside from sealing your ducts, the simplest and most effective means of maintaining your air distribution system is to ensure that furniture and other objects are not blocking the airflow through your registers, and to vacuum the registers to remove any dust buildup.
Existing duct systems often suffer from design deficiencies in the return air system, and modifications by the homeowner (or just a tendency to keep doors closed) may contribute to these problems. Any rooms with a lack of sufficient return airflow may benefit from relatively simple upgrades, such as the installation of new return-air grilles, undercutting doors for return air, or installing a jumper duct.
Some rooms may also be hard to heat and cool because of inadequate supply ducts or grilles. If this is the case, you should first examine whether the problem is the room itself: fix any problems with insulation, air leakage, or inefficient windows first. If the problem persists, you may be able to increase the size of the supply duct or add an additional duct to provide the needed airflow to the room.
Minor Duct Repair Tips for Minimizing Energy Losses in Ducts
- Check your ducts for air leaks. First, look for sections that should be joined but have separated and then look for obvious holes.
- Duct mastic is the preferred material for sealing ductwork seams and joints. It is more durable than any available tape and generally easier for a do-it-yourself installation. Its only drawback is that it will not bridge gaps over ¼ inch. Such gaps must be first bridged with web-type drywall tape, or a good quality heat approved tape.
- If you use tape to seal your ducts, avoid cloth-backed, rubber adhesive duct tape — it tends to fail quickly. Instead, use mastic, butyl tape, foil tape, or other heat-approved tapes. Look for tape with the Underwriters Laboratories (UL) logo.
- Remember that insulating ducts in the basement will make the basement colder. If both the ducts and the basement walls are not insulated, consider insulating both. Water pipes and drains in unconditioned spaces could freeze and burst if the heat ducts are fully insulated because there would be no heat source to prevent the space from freezing in cold weather. However, using an electric heating tape wrap on the pipes can prevent this. Check with a professional contractor.
- Hire a professional to install both supply and return registers in the basement rooms after converting your basement to a living area.
- Be sure a well-sealed vapor barrier exists on the outside of the insulation on cooling ducts to prevent moisture condensation.
- If you have a fuel-burning furnace, stove, or other appliance or an attached garage, install a carbon monoxide (CO) monitor to alert you to harmful CO levels.
- Be sure to get professional help when doing ductwork. A qualified professional should always perform changes and repairs to a duct system.
Minimizing Energy Losses in Ducts at 4158 Great Blue Heron Dr, Galveston, TX 77554

4158 Great Blue Heron Dr, Galveston, TX 77554

Minimizing Energy Losses in Ducts
Minimizing energy losses in ducts by seeing if the ducts are poorly sealed or insulated. That could tell you why your energy bill in high. Your air ducts are one of the most important systems in your home, and if the ducts are poorly sealed or insulated, they are likely contributing to higher energy bills.
Your home’s duct system is a branching network of tubes in the walls, floors, and ceilings; it carries the air from your home’s furnace and central air conditioner to each room. Ducts are made of sheet metal, fiberglass, or other materials.
Ducts that leak heated air into unheated spaces can add hundreds of dollars a year to your heating and cooling bills, but you can reduce that loss by sealing and insulating your ducts. Insulating ducts in unconditioned spaces is usually very cost-effective. Existing ducts may also be blocked or may require simple upgrades.
Designing and Installing New Duct Systems
In new home construction or in retrofits, proper duct system design is critical. In recent years, energy-saving designs have sought to include ducts and heating systems in the conditioned space.
Efficient and well-designed duct systems distribute air properly throughout your home without leaking to keep all rooms at a comfortable temperature. The system should provide balanced supply and return flow to maintain a neutral pressure within the house.
Even well sealed and insulated ducts will leak and lose some heat, so many new energy-efficient homes place the duct system within the conditioned space of the home. The simplest way to accomplish this is to hide the ducts in dropped ceilings and in corners of rooms. Ducts can also be located in a sealed and insulated chase extending into the attic or built into raised floors. In both of these latter cases, care must be taken during construction to prevent contractors from using the duct chases for wiring or other utilities.
In either case, actual ducts must be used — chases and floor cavities should not be used as ducts. Regardless of where they are installed, ducts should be well sealed. Although ducts can be configured in a number of ways, the “trunk and branch” and “radial” supply duct configurations are most suitable for ducts located in conditioned spaces.
Air return duct systems can be configured in two ways: each room can have a return duct that sends air back to the heating and cooling equipment or return grills can be located in central locations on each floor. For the latter case, either grills must be installed to allow air to pass out of closed rooms, or short “jumper ducts” can be installed to connect the vent in one room with the next, allowing air to flow back to the central return grilles. Door undercuts help, but they are usually not sufficient for return airflow.
You can perform a simple check for adequate return air capacity by doing the following:
- Close all exterior doors and windows
- Close all interior room doors
- Turn on the central air handler
- “Crack” interior doors one by one and observe if the door closes or further opens “on its own.” (Whether it closes or opens will depend on the direction of the air handler-driven air flow.) Rooms served by air-moved doors have restricted return air flow and need pressure relief as described above.
Maintaining and Upgrading Existing Duct Systems
Sealing your ducts to prevent leaks is even more important if the ducts are located in an unconditioned area such as an attic or vented crawlspace. If the supply ducts are leaking, heated or cooled air can be forced out of unsealed joints and lost. In addition, unconditioned air can be drawn into return ducts through unsealed joints.
Although minor duct repairs are easy to make, qualified professionals should seal and insulate ducts in unconditioned spaces to ensure the use of appropriate sealing materials.
Aside from sealing your ducts, the simplest and most effective means of maintaining your air distribution system is to ensure that furniture and other objects are not blocking the airflow through your registers, and to vacuum the registers to remove any dust buildup.
Existing duct systems often suffer from design deficiencies in the return air system, and modifications by the homeowner (or just a tendency to keep doors closed) may contribute to these problems. Any rooms with a lack of sufficient return airflow may benefit from relatively simple upgrades, such as the installation of new return-air grilles, undercutting doors for return air, or installing a jumper duct.
Some rooms may also be hard to heat and cool because of inadequate supply ducts or grilles. If this is the case, you should first examine whether the problem is the room itself: fix any problems with insulation, air leakage, or inefficient windows first. If the problem persists, you may be able to increase the size of the supply duct or add an additional duct to provide the needed airflow to the room.
Minor Duct Repair Tips for Minimizing Energy Losses in Ducts
- Check your ducts for air leaks. First, look for sections that should be joined but have separated and then look for obvious holes.
- Duct mastic is the preferred material for sealing ductwork seams and joints. It is more durable than any available tape and generally easier for a do-it-yourself installation. Its only drawback is that it will not bridge gaps over ¼ inch. Such gaps must be first bridged with web-type drywall tape, or a good quality heat approved tape.
- If you use tape to seal your ducts, avoid cloth-backed, rubber adhesive duct tape — it tends to fail quickly. Instead, use mastic, butyl tape, foil tape, or other heat-approved tapes. Look for tape with the Underwriters Laboratories (UL) logo.
- Remember that insulating ducts in the basement will make the basement colder. If both the ducts and the basement walls are not insulated, consider insulating both. Water pipes and drains in unconditioned spaces could freeze and burst if the heat ducts are fully insulated because there would be no heat source to prevent the space from freezing in cold weather. However, using an electric heating tape wrap on the pipes can prevent this. Check with a professional contractor.
- Hire a professional to install both supply and return registers in the basement rooms after converting your basement to a living area.
- Be sure a well-sealed vapor barrier exists on the outside of the insulation on cooling ducts to prevent moisture condensation.
- If you have a fuel-burning furnace, stove, or other appliance or an attached garage, install a carbon monoxide (CO) monitor to alert you to harmful CO levels.
- Be sure to get professional help when doing ductwork. A qualified professional should always perform changes and repairs to a duct system.
Minimizing Energy Losses in Ducts at 819 Dorothy St, Houston, TX 77008

819 Dorothy St, Houston, TX 77008
Minimizing Energy Losses in Ducts
Minimizing energy losses in ducts by seeing if the ducts are poorly sealed or insulated. That could tell you why your energy bill in high. Your air ducts are one of the most important systems in your home, and if the ducts are poorly sealed or insulated, they are likely contributing to higher energy bills.
Your home’s duct system is a branching network of tubes in the walls, floors, and ceilings; it carries the air from your home’s furnace and central air conditioner to each room. Ducts are made of sheet metal, fiberglass, or other materials.
Ducts that leak heated air into unheated spaces can add hundreds of dollars a year to your heating and cooling bills, but you can reduce that loss by sealing and insulating your ducts. Insulating ducts in unconditioned spaces is usually very cost-effective. Existing ducts may also be blocked or may require simple upgrades.
Designing and Installing New Duct Systems
In new home construction or in retrofits, proper duct system design is critical. In recent years, energy-saving designs have sought to include ducts and heating systems in the conditioned space.
Efficient and well-designed duct systems distribute air properly throughout your home without leaking to keep all rooms at a comfortable temperature. The system should provide balanced supply and return flow to maintain a neutral pressure within the house.
Even well sealed and insulated ducts will leak and lose some heat, so many new energy-efficient homes place the duct system within the conditioned space of the home. The simplest way to accomplish this is to hide the ducts in dropped ceilings and in corners of rooms. Ducts can also be located in a sealed and insulated chase extending into the attic or built into raised floors. In both of these latter cases, care must be taken during construction to prevent contractors from using the duct chases for wiring or other utilities.
In either case, actual ducts must be used — chases and floor cavities should not be used as ducts. Regardless of where they are installed, ducts should be well sealed. Although ducts can be configured in a number of ways, the “trunk and branch” and “radial” supply duct configurations are most suitable for ducts located in conditioned spaces.
Air return duct systems can be configured in two ways: each room can have a return duct that sends air back to the heating and cooling equipment or return grills can be located in central locations on each floor. For the latter case, either grills must be installed to allow air to pass out of closed rooms, or short “jumper ducts” can be installed to connect the vent in one room with the next, allowing air to flow back to the central return grilles. Door undercuts help, but they are usually not sufficient for return airflow.
You can perform a simple check for adequate return air capacity by doing the following:
- Close all exterior doors and windows
- Close all interior room doors
- Turn on the central air handler
- “Crack” interior doors one by one and observe if the door closes or further opens “on its own.” (Whether it closes or opens will depend on the direction of the air handler-driven air flow.) Rooms served by air-moved doors have restricted return air flow and need pressure relief as described above.
Maintaining and Upgrading Existing Duct Systems
Sealing your ducts to prevent leaks is even more important if the ducts are located in an unconditioned area such as an attic or vented crawlspace. If the supply ducts are leaking, heated or cooled air can be forced out of unsealed joints and lost. In addition, unconditioned air can be drawn into return ducts through unsealed joints.
Although minor duct repairs are easy to make, qualified professionals should seal and insulate ducts in unconditioned spaces to ensure the use of appropriate sealing materials.
Aside from sealing your ducts, the simplest and most effective means of maintaining your air distribution system is to ensure that furniture and other objects are not blocking the airflow through your registers, and to vacuum the registers to remove any dust buildup.
Existing duct systems often suffer from design deficiencies in the return air system, and modifications by the homeowner (or just a tendency to keep doors closed) may contribute to these problems. Any rooms with a lack of sufficient return airflow may benefit from relatively simple upgrades, such as the installation of new return-air grilles, undercutting doors for return air, or installing a jumper duct.
Some rooms may also be hard to heat and cool because of inadequate supply ducts or grilles. If this is the case, you should first examine whether the problem is the room itself: fix any problems with insulation, air leakage, or inefficient windows first. If the problem persists, you may be able to increase the size of the supply duct or add an additional duct to provide the needed airflow to the room.
Minor Duct Repair Tips for Minimizing Energy Losses in Ducts
- Check your ducts for air leaks. First, look for sections that should be joined but have separated and then look for obvious holes.
- Duct mastic is the preferred material for sealing ductwork seams and joints. It is more durable than any available tape and generally easier for a do-it-yourself installation. Its only drawback is that it will not bridge gaps over ¼ inch. Such gaps must be first bridged with web-type drywall tape, or a good quality heat approved tape.
- If you use tape to seal your ducts, avoid cloth-backed, rubber adhesive duct tape — it tends to fail quickly. Instead, use mastic, butyl tape, foil tape, or other heat-approved tapes. Look for tape with the Underwriters Laboratories (UL) logo.
- Remember that insulating ducts in the basement will make the basement colder. If both the ducts and the basement walls are not insulated, consider insulating both. Water pipes and drains in unconditioned spaces could freeze and burst if the heat ducts are fully insulated because there would be no heat source to prevent the space from freezing in cold weather. However, using an electric heating tape wrap on the pipes can prevent this. Check with a professional contractor.
- Hire a professional to install both supply and return registers in the basement rooms after converting your basement to a living area.
- Be sure a well-sealed vapor barrier exists on the outside of the insulation on cooling ducts to prevent moisture condensation.
- If you have a fuel-burning furnace, stove, or other appliance or an attached garage, install a carbon monoxide (CO) monitor to alert you to harmful CO levels.
- Be sure to get professional help when doing ductwork. A qualified professional should always perform changes and repairs to a duct system.
Minimizing Energy Losses in Ducts at 324 Aurora St, Houston, TX 77008

324 Aurora St, Houston, TX 77008
Minimizing Energy Losses in Ducts
Minimizing energy losses in ducts by seeing if the ducts are poorly sealed or insulated. That could tell you why your energy bill in high. Your air ducts are one of the most important systems in your home, and if the ducts are poorly sealed or insulated, they are likely contributing to higher energy bills.
Your home’s duct system is a branching network of tubes in the walls, floors, and ceilings; it carries the air from your home’s furnace and central air conditioner to each room. Ducts are made of sheet metal, fiberglass, or other materials.
Ducts that leak heated air into unheated spaces can add hundreds of dollars a year to your heating and cooling bills, but you can reduce that loss by sealing and insulating your ducts. Insulating ducts in unconditioned spaces is usually very cost-effective. Existing ducts may also be blocked or may require simple upgrades.
Designing and Installing New Duct Systems
In new home construction or in retrofits, proper duct system design is critical. In recent years, energy-saving designs have sought to include ducts and heating systems in the conditioned space.
Efficient and well-designed duct systems distribute air properly throughout your home without leaking to keep all rooms at a comfortable temperature. The system should provide balanced supply and return flow to maintain a neutral pressure within the house.
Even well sealed and insulated ducts will leak and lose some heat, so many new energy-efficient homes place the duct system within the conditioned space of the home. The simplest way to accomplish this is to hide the ducts in dropped ceilings and in corners of rooms. Ducts can also be located in a sealed and insulated chase extending into the attic or built into raised floors. In both of these latter cases, care must be taken during construction to prevent contractors from using the duct chases for wiring or other utilities.
In either case, actual ducts must be used — chases and floor cavities should not be used as ducts. Regardless of where they are installed, ducts should be well sealed. Although ducts can be configured in a number of ways, the “trunk and branch” and “radial” supply duct configurations are most suitable for ducts located in conditioned spaces.
Air return duct systems can be configured in two ways: each room can have a return duct that sends air back to the heating and cooling equipment or return grills can be located in central locations on each floor. For the latter case, either grills must be installed to allow air to pass out of closed rooms, or short “jumper ducts” can be installed to connect the vent in one room with the next, allowing air to flow back to the central return grilles. Door undercuts help, but they are usually not sufficient for return airflow.
You can perform a simple check for adequate return air capacity by doing the following:
- Close all exterior doors and windows
- Close all interior room doors
- Turn on the central air handler
- “Crack” interior doors one by one and observe if the door closes or further opens “on its own.” (Whether it closes or opens will depend on the direction of the air handler-driven air flow.) Rooms served by air-moved doors have restricted return air flow and need pressure relief as described above.
Maintaining and Upgrading Existing Duct Systems
Sealing your ducts to prevent leaks is even more important if the ducts are located in an unconditioned area such as an attic or vented crawlspace. If the supply ducts are leaking, heated or cooled air can be forced out of unsealed joints and lost. In addition, unconditioned air can be drawn into return ducts through unsealed joints.
Although minor duct repairs are easy to make, qualified professionals should seal and insulate ducts in unconditioned spaces to ensure the use of appropriate sealing materials.
Aside from sealing your ducts, the simplest and most effective means of maintaining your air distribution system is to ensure that furniture and other objects are not blocking the airflow through your registers, and to vacuum the registers to remove any dust buildup.
Existing duct systems often suffer from design deficiencies in the return air system, and modifications by the homeowner (or just a tendency to keep doors closed) may contribute to these problems. Any rooms with a lack of sufficient return airflow may benefit from relatively simple upgrades, such as the installation of new return-air grilles, undercutting doors for return air, or installing a jumper duct.
Some rooms may also be hard to heat and cool because of inadequate supply ducts or grilles. If this is the case, you should first examine whether the problem is the room itself: fix any problems with insulation, air leakage, or inefficient windows first. If the problem persists, you may be able to increase the size of the supply duct or add an additional duct to provide the needed airflow to the room.
Minor Duct Repair Tips for Minimizing Energy Losses in Ducts
- Check your ducts for air leaks. First, look for sections that should be joined but have separated and then look for obvious holes.
- Duct mastic is the preferred material for sealing ductwork seams and joints. It is more durable than any available tape and generally easier for a do-it-yourself installation. Its only drawback is that it will not bridge gaps over ¼ inch. Such gaps must be first bridged with web-type drywall tape, or a good quality heat approved tape.
- If you use tape to seal your ducts, avoid cloth-backed, rubber adhesive duct tape — it tends to fail quickly. Instead, use mastic, butyl tape, foil tape, or other heat-approved tapes. Look for tape with the Underwriters Laboratories (UL) logo.
- Remember that insulating ducts in the basement will make the basement colder. If both the ducts and the basement walls are not insulated, consider insulating both. Water pipes and drains in unconditioned spaces could freeze and burst if the heat ducts are fully insulated because there would be no heat source to prevent the space from freezing in cold weather. However, using an electric heating tape wrap on the pipes can prevent this. Check with a professional contractor.
- Hire a professional to install both supply and return registers in the basement rooms after converting your basement to a living area.
- Be sure a well-sealed vapor barrier exists on the outside of the insulation on cooling ducts to prevent moisture condensation.
- If you have a fuel-burning furnace, stove, or other appliance or an attached garage, install a carbon monoxide (CO) monitor to alert you to harmful CO levels.
- Be sure to get professional help when doing ductwork. A qualified professional should always perform changes and repairs to a duct system.
Minimizing Energy Losses in Ducts at 1130 Nicholson St, Houston, TX 77008


1130 Nicholson St, Houston, TX 77008

Minimizing Energy Losses in Ducts
Minimizing energy losses in ducts by seeing if the ducts are poorly sealed or insulated. That could tell you why your energy bill in high. Your air ducts are one of the most important systems in your home, and if the ducts are poorly sealed or insulated, they are likely contributing to higher energy bills.
Your home’s duct system is a branching network of tubes in the walls, floors, and ceilings; it carries the air from your home’s furnace and central air conditioner to each room. Ducts are made of sheet metal, fiberglass, or other materials.
Ducts that leak heated air into unheated spaces can add hundreds of dollars a year to your heating and cooling bills, but you can reduce that loss by sealing and insulating your ducts. Insulating ducts in unconditioned spaces is usually very cost-effective. Existing ducts may also be blocked or may require simple upgrades.
Designing and Installing New Duct Systems
In new home construction or in retrofits, proper duct system design is critical. In recent years, energy-saving designs have sought to include ducts and heating systems in the conditioned space.
Efficient and well-designed duct systems distribute air properly throughout your home without leaking to keep all rooms at a comfortable temperature. The system should provide balanced supply and return flow to maintain a neutral pressure within the house.
Even well sealed and insulated ducts will leak and lose some heat, so many new energy-efficient homes place the duct system within the conditioned space of the home. The simplest way to accomplish this is to hide the ducts in dropped ceilings and in corners of rooms. Ducts can also be located in a sealed and insulated chase extending into the attic or built into raised floors. In both of these latter cases, care must be taken during construction to prevent contractors from using the duct chases for wiring or other utilities.
In either case, actual ducts must be used — chases and floor cavities should not be used as ducts. Regardless of where they are installed, ducts should be well sealed. Although ducts can be configured in a number of ways, the “trunk and branch” and “radial” supply duct configurations are most suitable for ducts located in conditioned spaces.
Air return duct systems can be configured in two ways: each room can have a return duct that sends air back to the heating and cooling equipment or return grills can be located in central locations on each floor. For the latter case, either grills must be installed to allow air to pass out of closed rooms, or short “jumper ducts” can be installed to connect the vent in one room with the next, allowing air to flow back to the central return grilles. Door undercuts help, but they are usually not sufficient for return airflow.
You can perform a simple check for adequate return air capacity by doing the following:
- Close all exterior doors and windows
- Close all interior room doors
- Turn on the central air handler
- “Crack” interior doors one by one and observe if the door closes or further opens “on its own.” (Whether it closes or opens will depend on the direction of the air handler-driven air flow.) Rooms served by air-moved doors have restricted return air flow and need pressure relief as described above.
Maintaining and Upgrading Existing Duct Systems
Sealing your ducts to prevent leaks is even more important if the ducts are located in an unconditioned area such as an attic or vented crawlspace. If the supply ducts are leaking, heated or cooled air can be forced out of unsealed joints and lost. In addition, unconditioned air can be drawn into return ducts through unsealed joints.
Although minor duct repairs are easy to make, qualified professionals should seal and insulate ducts in unconditioned spaces to ensure the use of appropriate sealing materials.
Aside from sealing your ducts, the simplest and most effective means of maintaining your air distribution system is to ensure that furniture and other objects are not blocking the airflow through your registers, and to vacuum the registers to remove any dust buildup.
Existing duct systems often suffer from design deficiencies in the return air system, and modifications by the homeowner (or just a tendency to keep doors closed) may contribute to these problems. Any rooms with a lack of sufficient return airflow may benefit from relatively simple upgrades, such as the installation of new return-air grilles, undercutting doors for return air, or installing a jumper duct.
Some rooms may also be hard to heat and cool because of inadequate supply ducts or grilles. If this is the case, you should first examine whether the problem is the room itself: fix any problems with insulation, air leakage, or inefficient windows first. If the problem persists, you may be able to increase the size of the supply duct or add an additional duct to provide the needed airflow to the room.
Minor Duct Repair Tips for Minimizing Energy Losses in Ducts
- Check your ducts for air leaks. First, look for sections that should be joined but have separated and then look for obvious holes.
- Duct mastic is the preferred material for sealing ductwork seams and joints. It is more durable than any available tape and generally easier for a do-it-yourself installation. Its only drawback is that it will not bridge gaps over ¼ inch. Such gaps must be first bridged with web-type drywall tape, or a good quality heat approved tape.
- If you use tape to seal your ducts, avoid cloth-backed, rubber adhesive duct tape — it tends to fail quickly. Instead, use mastic, butyl tape, foil tape, or other heat-approved tapes. Look for tape with the Underwriters Laboratories (UL) logo.
- Remember that insulating ducts in the basement will make the basement colder. If both the ducts and the basement walls are not insulated, consider insulating both. Water pipes and drains in unconditioned spaces could freeze and burst if the heat ducts are fully insulated because there would be no heat source to prevent the space from freezing in cold weather. However, using an electric heating tape wrap on the pipes can prevent this. Check with a professional contractor.
- Hire a professional to install both supply and return registers in the basement rooms after converting your basement to a living area.
- Be sure a well-sealed vapor barrier exists on the outside of the insulation on cooling ducts to prevent moisture condensation.
- If you have a fuel-burning furnace, stove, or other appliance or an attached garage, install a carbon monoxide (CO) monitor to alert you to harmful CO levels.
- Be sure to get professional help when doing ductwork. A qualified professional should always perform changes and repairs to a duct system.
Minimizing Energy Losses in Ducts at 4215 Sterling St, Houston, TX 77051


4215 Sterling St, Houston, TX 77051
Minimizing Energy Losses in Ducts
Minimizing energy losses in ducts by seeing if the ducts are poorly sealed or insulated. That could tell you why your energy bill in high. Your air ducts are one of the most important systems in your home, and if the ducts are poorly sealed or insulated, they are likely contributing to higher energy bills.
Your home’s duct system is a branching network of tubes in the walls, floors, and ceilings; it carries the air from your home’s furnace and central air conditioner to each room. Ducts are made of sheet metal, fiberglass, or other materials.
Ducts that leak heated air into unheated spaces can add hundreds of dollars a year to your heating and cooling bills, but you can reduce that loss by sealing and insulating your ducts. Insulating ducts in unconditioned spaces is usually very cost-effective. Existing ducts may also be blocked or may require simple upgrades.
Designing and Installing New Duct Systems
In new home construction or in retrofits, proper duct system design is critical. In recent years, energy-saving designs have sought to include ducts and heating systems in the conditioned space.
Efficient and well-designed duct systems distribute air properly throughout your home without leaking to keep all rooms at a comfortable temperature. The system should provide balanced supply and return flow to maintain a neutral pressure within the house.
Even well sealed and insulated ducts will leak and lose some heat, so many new energy-efficient homes place the duct system within the conditioned space of the home. The simplest way to accomplish this is to hide the ducts in dropped ceilings and in corners of rooms. Ducts can also be located in a sealed and insulated chase extending into the attic or built into raised floors. In both of these latter cases, care must be taken during construction to prevent contractors from using the duct chases for wiring or other utilities.
In either case, actual ducts must be used — chases and floor cavities should not be used as ducts. Regardless of where they are installed, ducts should be well sealed. Although ducts can be configured in a number of ways, the “trunk and branch” and “radial” supply duct configurations are most suitable for ducts located in conditioned spaces.
Air return duct systems can be configured in two ways: each room can have a return duct that sends air back to the heating and cooling equipment or return grills can be located in central locations on each floor. For the latter case, either grills must be installed to allow air to pass out of closed rooms, or short “jumper ducts” can be installed to connect the vent in one room with the next, allowing air to flow back to the central return grilles. Door undercuts help, but they are usually not sufficient for return airflow.
You can perform a simple check for adequate return air capacity by doing the following:
- Close all exterior doors and windows
- Close all interior room doors
- Turn on the central air handler
- “Crack” interior doors one by one and observe if the door closes or further opens “on its own.” (Whether it closes or opens will depend on the direction of the air handler-driven air flow.) Rooms served by air-moved doors have restricted return air flow and need pressure relief as described above.
Maintaining and Upgrading Existing Duct Systems
Sealing your ducts to prevent leaks is even more important if the ducts are located in an unconditioned area such as an attic or vented crawlspace. If the supply ducts are leaking, heated or cooled air can be forced out of unsealed joints and lost. In addition, unconditioned air can be drawn into return ducts through unsealed joints.
Although minor duct repairs are easy to make, qualified professionals should seal and insulate ducts in unconditioned spaces to ensure the use of appropriate sealing materials.
Aside from sealing your ducts, the simplest and most effective means of maintaining your air distribution system is to ensure that furniture and other objects are not blocking the airflow through your registers, and to vacuum the registers to remove any dust buildup.
Existing duct systems often suffer from design deficiencies in the return air system, and modifications by the homeowner (or just a tendency to keep doors closed) may contribute to these problems. Any rooms with a lack of sufficient return airflow may benefit from relatively simple upgrades, such as the installation of new return-air grilles, undercutting doors for return air, or installing a jumper duct.
Some rooms may also be hard to heat and cool because of inadequate supply ducts or grilles. If this is the case, you should first examine whether the problem is the room itself: fix any problems with insulation, air leakage, or inefficient windows first. If the problem persists, you may be able to increase the size of the supply duct or add an additional duct to provide the needed airflow to the room.
Minor Duct Repair Tips for Minimizing Energy Losses in Ducts
- Check your ducts for air leaks. First, look for sections that should be joined but have separated and then look for obvious holes.
- Duct mastic is the preferred material for sealing ductwork seams and joints. It is more durable than any available tape and generally easier for a do-it-yourself installation. Its only drawback is that it will not bridge gaps over ¼ inch. Such gaps must be first bridged with web-type drywall tape, or a good quality heat approved tape.
- If you use tape to seal your ducts, avoid cloth-backed, rubber adhesive duct tape — it tends to fail quickly. Instead, use mastic, butyl tape, foil tape, or other heat-approved tapes. Look for tape with the Underwriters Laboratories (UL) logo.
- Remember that insulating ducts in the basement will make the basement colder. If both the ducts and the basement walls are not insulated, consider insulating both. Water pipes and drains in unconditioned spaces could freeze and burst if the heat ducts are fully insulated because there would be no heat source to prevent the space from freezing in cold weather. However, using an electric heating tape wrap on the pipes can prevent this. Check with a professional contractor.
- Hire a professional to install both supply and return registers in the basement rooms after converting your basement to a living area.
- Be sure a well-sealed vapor barrier exists on the outside of the insulation on cooling ducts to prevent moisture condensation.
- If you have a fuel-burning furnace, stove, or other appliance or an attached garage, install a carbon monoxide (CO) monitor to alert you to harmful CO levels.
- Be sure to get professional help when doing ductwork. A qualified professional should always perform changes and repairs to a duct system.
Minimizing Energy Losses in Ducts at 519 Milwaukee St, Houston, TX 77009
519 Milwaukee St, Houston, TX 77009

Minimizing Energy Losses in Ducts
Minimizing energy losses in ducts by seeing if the ducts are poorly sealed or insulated. That could tell you why your energy bill in high. Your air ducts are one of the most important systems in your home, and if the ducts are poorly sealed or insulated, they are likely contributing to higher energy bills.
Your home’s duct system is a branching network of tubes in the walls, floors, and ceilings; it carries the air from your home’s furnace and central air conditioner to each room. Ducts are made of sheet metal, fiberglass, or other materials.
Ducts that leak heated air into unheated spaces can add hundreds of dollars a year to your heating and cooling bills, but you can reduce that loss by sealing and insulating your ducts. Insulating ducts in unconditioned spaces is usually very cost-effective. Existing ducts may also be blocked or may require simple upgrades.
Designing and Installing New Duct Systems
In new home construction or in retrofits, proper duct system design is critical. In recent years, energy-saving designs have sought to include ducts and heating systems in the conditioned space.
Efficient and well-designed duct systems distribute air properly throughout your home without leaking to keep all rooms at a comfortable temperature. The system should provide balanced supply and return flow to maintain a neutral pressure within the house.
Even well sealed and insulated ducts will leak and lose some heat, so many new energy-efficient homes place the duct system within the conditioned space of the home. The simplest way to accomplish this is to hide the ducts in dropped ceilings and in corners of rooms. Ducts can also be located in a sealed and insulated chase extending into the attic or built into raised floors. In both of these latter cases, care must be taken during construction to prevent contractors from using the duct chases for wiring or other utilities.
In either case, actual ducts must be used — chases and floor cavities should not be used as ducts. Regardless of where they are installed, ducts should be well sealed. Although ducts can be configured in a number of ways, the “trunk and branch” and “radial” supply duct configurations are most suitable for ducts located in conditioned spaces.
Air return duct systems can be configured in two ways: each room can have a return duct that sends air back to the heating and cooling equipment or return grills can be located in central locations on each floor. For the latter case, either grills must be installed to allow air to pass out of closed rooms, or short “jumper ducts” can be installed to connect the vent in one room with the next, allowing air to flow back to the central return grilles. Door undercuts help, but they are usually not sufficient for return airflow.
You can perform a simple check for adequate return air capacity by doing the following:
- Close all exterior doors and windows
- Close all interior room doors
- Turn on the central air handler
- “Crack” interior doors one by one and observe if the door closes or further opens “on its own.” (Whether it closes or opens will depend on the direction of the air handler-driven air flow.) Rooms served by air-moved doors have restricted return air flow and need pressure relief as described above.
Maintaining and Upgrading Existing Duct Systems
Sealing your ducts to prevent leaks is even more important if the ducts are located in an unconditioned area such as an attic or vented crawlspace. If the supply ducts are leaking, heated or cooled air can be forced out of unsealed joints and lost. In addition, unconditioned air can be drawn into return ducts through unsealed joints.
Although minor duct repairs are easy to make, qualified professionals should seal and insulate ducts in unconditioned spaces to ensure the use of appropriate sealing materials.
Aside from sealing your ducts, the simplest and most effective means of maintaining your air distribution system is to ensure that furniture and other objects are not blocking the airflow through your registers, and to vacuum the registers to remove any dust buildup.
Existing duct systems often suffer from design deficiencies in the return air system, and modifications by the homeowner (or just a tendency to keep doors closed) may contribute to these problems. Any rooms with a lack of sufficient return airflow may benefit from relatively simple upgrades, such as the installation of new return-air grilles, undercutting doors for return air, or installing a jumper duct.
Some rooms may also be hard to heat and cool because of inadequate supply ducts or grilles. If this is the case, you should first examine whether the problem is the room itself: fix any problems with insulation, air leakage, or inefficient windows first. If the problem persists, you may be able to increase the size of the supply duct or add an additional duct to provide the needed airflow to the room.
Minor Duct Repair Tips for Minimizing Energy Losses in Ducts
- Check your ducts for air leaks. First, look for sections that should be joined but have separated and then look for obvious holes.
- Duct mastic is the preferred material for sealing ductwork seams and joints. It is more durable than any available tape and generally easier for a do-it-yourself installation. Its only drawback is that it will not bridge gaps over ¼ inch. Such gaps must be first bridged with web-type drywall tape, or a good quality heat approved tape.
- If you use tape to seal your ducts, avoid cloth-backed, rubber adhesive duct tape — it tends to fail quickly. Instead, use mastic, butyl tape, foil tape, or other heat-approved tapes. Look for tape with the Underwriters Laboratories (UL) logo.
- Remember that insulating ducts in the basement will make the basement colder. If both the ducts and the basement walls are not insulated, consider insulating both. Water pipes and drains in unconditioned spaces could freeze and burst if the heat ducts are fully insulated because there would be no heat source to prevent the space from freezing in cold weather. However, using an electric heating tape wrap on the pipes can prevent this. Check with a professional contractor.
- Hire a professional to install both supply and return registers in the basement rooms after converting your basement to a living area.
- Be sure a well-sealed vapor barrier exists on the outside of the insulation on cooling ducts to prevent moisture condensation.
- If you have a fuel-burning furnace, stove, or other appliance or an attached garage, install a carbon monoxide (CO) monitor to alert you to harmful CO levels.
- Be sure to get professional help when doing ductwork. A qualified professional should always perform changes and repairs to a duct system.
Minimizing Energy Losses in Ducts at 304 Ave F, South Houston, TX 77587

304 Ave F, South Houston, TX 77587
Minimizing Energy Losses in Ducts
Minimizing energy losses in ducts by seeing if the ducts are poorly sealed or insulated. That could tell you why your energy bill in high. Your air ducts are one of the most important systems in your home, and if the ducts are poorly sealed or insulated, they are likely contributing to higher energy bills.
Your home’s duct system is a branching network of tubes in the walls, floors, and ceilings; it carries the air from your home’s furnace and central air conditioner to each room. Ducts are made of sheet metal, fiberglass, or other materials.
Ducts that leak heated air into unheated spaces can add hundreds of dollars a year to your heating and cooling bills, but you can reduce that loss by sealing and insulating your ducts. Insulating ducts in unconditioned spaces is usually very cost-effective. Existing ducts may also be blocked or may require simple upgrades.
Designing and Installing New Duct Systems
In new home construction or in retrofits, proper duct system design is critical. In recent years, energy-saving designs have sought to include ducts and heating systems in the conditioned space.
Efficient and well-designed duct systems distribute air properly throughout your home without leaking to keep all rooms at a comfortable temperature. The system should provide balanced supply and return flow to maintain a neutral pressure within the house.
Even well sealed and insulated ducts will leak and lose some heat, so many new energy-efficient homes place the duct system within the conditioned space of the home. The simplest way to accomplish this is to hide the ducts in dropped ceilings and in corners of rooms. Ducts can also be located in a sealed and insulated chase extending into the attic or built into raised floors. In both of these latter cases, care must be taken during construction to prevent contractors from using the duct chases for wiring or other utilities.
In either case, actual ducts must be used — chases and floor cavities should not be used as ducts. Regardless of where they are installed, ducts should be well sealed. Although ducts can be configured in a number of ways, the “trunk and branch” and “radial” supply duct configurations are most suitable for ducts located in conditioned spaces.
Air return duct systems can be configured in two ways: each room can have a return duct that sends air back to the heating and cooling equipment or return grills can be located in central locations on each floor. For the latter case, either grills must be installed to allow air to pass out of closed rooms, or short “jumper ducts” can be installed to connect the vent in one room with the next, allowing air to flow back to the central return grilles. Door undercuts help, but they are usually not sufficient for return airflow.
You can perform a simple check for adequate return air capacity by doing the following:
- Close all exterior doors and windows
- Close all interior room doors
- Turn on the central air handler
- “Crack” interior doors one by one and observe if the door closes or further opens “on its own.” (Whether it closes or opens will depend on the direction of the air handler-driven air flow.) Rooms served by air-moved doors have restricted return air flow and need pressure relief as described above.
Maintaining and Upgrading Existing Duct Systems
Sealing your ducts to prevent leaks is even more important if the ducts are located in an unconditioned area such as an attic or vented crawlspace. If the supply ducts are leaking, heated or cooled air can be forced out of unsealed joints and lost. In addition, unconditioned air can be drawn into return ducts through unsealed joints.
Although minor duct repairs are easy to make, qualified professionals should seal and insulate ducts in unconditioned spaces to ensure the use of appropriate sealing materials.
Aside from sealing your ducts, the simplest and most effective means of maintaining your air distribution system is to ensure that furniture and other objects are not blocking the airflow through your registers, and to vacuum the registers to remove any dust buildup.
Existing duct systems often suffer from design deficiencies in the return air system, and modifications by the homeowner (or just a tendency to keep doors closed) may contribute to these problems. Any rooms with a lack of sufficient return airflow may benefit from relatively simple upgrades, such as the installation of new return-air grilles, undercutting doors for return air, or installing a jumper duct.
Some rooms may also be hard to heat and cool because of inadequate supply ducts or grilles. If this is the case, you should first examine whether the problem is the room itself: fix any problems with insulation, air leakage, or inefficient windows first. If the problem persists, you may be able to increase the size of the supply duct or add an additional duct to provide the needed airflow to the room.
Minor Duct Repair Tips for Minimizing Energy Losses in Ducts
- Check your ducts for air leaks. First, look for sections that should be joined but have separated and then look for obvious holes.
- Duct mastic is the preferred material for sealing ductwork seams and joints. It is more durable than any available tape and generally easier for a do-it-yourself installation. Its only drawback is that it will not bridge gaps over ¼ inch. Such gaps must be first bridged with web-type drywall tape, or a good quality heat approved tape.
- If you use tape to seal your ducts, avoid cloth-backed, rubber adhesive duct tape — it tends to fail quickly. Instead, use mastic, butyl tape, foil tape, or other heat-approved tapes. Look for tape with the Underwriters Laboratories (UL) logo.
- Remember that insulating ducts in the basement will make the basement colder. If both the ducts and the basement walls are not insulated, consider insulating both. Water pipes and drains in unconditioned spaces could freeze and burst if the heat ducts are fully insulated because there would be no heat source to prevent the space from freezing in cold weather. However, using an electric heating tape wrap on the pipes can prevent this. Check with a professional contractor.
- Hire a professional to install both supply and return registers in the basement rooms after converting your basement to a living area.
- Be sure a well-sealed vapor barrier exists on the outside of the insulation on cooling ducts to prevent moisture condensation.
- If you have a fuel-burning furnace, stove, or other appliance or an attached garage, install a carbon monoxide (CO) monitor to alert you to harmful CO levels.
- Be sure to get professional help when doing ductwork. A qualified professional should always perform changes and repairs to a duct system.
Minimizing Energy Losses in Ducts at 105 Stoney Creek Dr, Houston, TX 77024

105 Stoney Creek Dr, Houston, TX 77024
Minimizing Energy Losses in Ducts
Minimizing energy losses in ducts by seeing if the ducts are poorly sealed or insulated. That could tell you why your energy bill in high. Your air ducts are one of the most important systems in your home, and if the ducts are poorly sealed or insulated, they are likely contributing to higher energy bills.
Your home’s duct system is a branching network of tubes in the walls, floors, and ceilings; it carries the air from your home’s furnace and central air conditioner to each room. Ducts are made of sheet metal, fiberglass, or other materials.
Ducts that leak heated air into unheated spaces can add hundreds of dollars a year to your heating and cooling bills, but you can reduce that loss by sealing and insulating your ducts. Insulating ducts in unconditioned spaces is usually very cost-effective. Existing ducts may also be blocked or may require simple upgrades.
Designing and Installing New Duct Systems
In new home construction or in retrofits, proper duct system design is critical. In recent years, energy-saving designs have sought to include ducts and heating systems in the conditioned space.
Efficient and well-designed duct systems distribute air properly throughout your home without leaking to keep all rooms at a comfortable temperature. The system should provide balanced supply and return flow to maintain a neutral pressure within the house.
Even well sealed and insulated ducts will leak and lose some heat, so many new energy-efficient homes place the duct system within the conditioned space of the home. The simplest way to accomplish this is to hide the ducts in dropped ceilings and in corners of rooms. Ducts can also be located in a sealed and insulated chase extending into the attic or built into raised floors. In both of these latter cases, care must be taken during construction to prevent contractors from using the duct chases for wiring or other utilities.
In either case, actual ducts must be used — chases and floor cavities should not be used as ducts. Regardless of where they are installed, ducts should be well sealed. Although ducts can be configured in a number of ways, the “trunk and branch” and “radial” supply duct configurations are most suitable for ducts located in conditioned spaces.
Air return duct systems can be configured in two ways: each room can have a return duct that sends air back to the heating and cooling equipment or return grills can be located in central locations on each floor. For the latter case, either grills must be installed to allow air to pass out of closed rooms, or short “jumper ducts” can be installed to connect the vent in one room with the next, allowing air to flow back to the central return grilles. Door undercuts help, but they are usually not sufficient for return airflow.
You can perform a simple check for adequate return air capacity by doing the following:
- Close all exterior doors and windows
- Close all interior room doors
- Turn on the central air handler
- “Crack” interior doors one by one and observe if the door closes or further opens “on its own.” (Whether it closes or opens will depend on the direction of the air handler-driven air flow.) Rooms served by air-moved doors have restricted return air flow and need pressure relief as described above.
Maintaining and Upgrading Existing Duct Systems
Sealing your ducts to prevent leaks is even more important if the ducts are located in an unconditioned area such as an attic or vented crawlspace. If the supply ducts are leaking, heated or cooled air can be forced out of unsealed joints and lost. In addition, unconditioned air can be drawn into return ducts through unsealed joints.
Although minor duct repairs are easy to make, qualified professionals should seal and insulate ducts in unconditioned spaces to ensure the use of appropriate sealing materials.
Aside from sealing your ducts, the simplest and most effective means of maintaining your air distribution system is to ensure that furniture and other objects are not blocking the airflow through your registers, and to vacuum the registers to remove any dust buildup.
Existing duct systems often suffer from design deficiencies in the return air system, and modifications by the homeowner (or just a tendency to keep doors closed) may contribute to these problems. Any rooms with a lack of sufficient return airflow may benefit from relatively simple upgrades, such as the installation of new return-air grilles, undercutting doors for return air, or installing a jumper duct.
Some rooms may also be hard to heat and cool because of inadequate supply ducts or grilles. If this is the case, you should first examine whether the problem is the room itself: fix any problems with insulation, air leakage, or inefficient windows first. If the problem persists, you may be able to increase the size of the supply duct or add an additional duct to provide the needed airflow to the room.
Minor Duct Repair Tips for Minimizing Energy Losses in Ducts
- Check your ducts for air leaks. First, look for sections that should be joined but have separated and then look for obvious holes.
- Duct mastic is the preferred material for sealing ductwork seams and joints. It is more durable than any available tape and generally easier for a do-it-yourself installation. Its only drawback is that it will not bridge gaps over ¼ inch. Such gaps must be first bridged with web-type drywall tape, or a good quality heat approved tape.
- If you use tape to seal your ducts, avoid cloth-backed, rubber adhesive duct tape — it tends to fail quickly. Instead, use mastic, butyl tape, foil tape, or other heat-approved tapes. Look for tape with the Underwriters Laboratories (UL) logo.
- Remember that insulating ducts in the basement will make the basement colder. If both the ducts and the basement walls are not insulated, consider insulating both. Water pipes and drains in unconditioned spaces could freeze and burst if the heat ducts are fully insulated because there would be no heat source to prevent the space from freezing in cold weather. However, using an electric heating tape wrap on the pipes can prevent this. Check with a professional contractor.
- Hire a professional to install both supply and return registers in the basement rooms after converting your basement to a living area.
- Be sure a well-sealed vapor barrier exists on the outside of the insulation on cooling ducts to prevent moisture condensation.
- If you have a fuel-burning furnace, stove, or other appliance or an attached garage, install a carbon monoxide (CO) monitor to alert you to harmful CO levels.
- Be sure to get professional help when doing ductwork. A qualified professional should always perform changes and repairs to a duct system.
Minimizing Energy Losses in Ducts at 1570 Cheshire Ln, Houston, TX 77018


1570 Cheshire Ln, Houston, TX 77018
Minimizing Energy Losses in Ducts
Minimizing energy losses in ducts by seeing if the ducts are poorly sealed or insulated. That could tell you why your energy bill in high. Your air ducts are one of the most important systems in your home, and if the ducts are poorly sealed or insulated, they are likely contributing to higher energy bills.
Your home’s duct system is a branching network of tubes in the walls, floors, and ceilings; it carries the air from your home’s furnace and central air conditioner to each room. Ducts are made of sheet metal, fiberglass, or other materials.
Ducts that leak heated air into unheated spaces can add hundreds of dollars a year to your heating and cooling bills, but you can reduce that loss by sealing and insulating your ducts. Insulating ducts in unconditioned spaces is usually very cost-effective. Existing ducts may also be blocked or may require simple upgrades.
Designing and Installing New Duct Systems
In new home construction or in retrofits, proper duct system design is critical. In recent years, energy-saving designs have sought to include ducts and heating systems in the conditioned space.
Efficient and well-designed duct systems distribute air properly throughout your home without leaking to keep all rooms at a comfortable temperature. The system should provide balanced supply and return flow to maintain a neutral pressure within the house.
Even well sealed and insulated ducts will leak and lose some heat, so many new energy-efficient homes place the duct system within the conditioned space of the home. The simplest way to accomplish this is to hide the ducts in dropped ceilings and in corners of rooms. Ducts can also be located in a sealed and insulated chase extending into the attic or built into raised floors. In both of these latter cases, care must be taken during construction to prevent contractors from using the duct chases for wiring or other utilities.
In either case, actual ducts must be used — chases and floor cavities should not be used as ducts. Regardless of where they are installed, ducts should be well sealed. Although ducts can be configured in a number of ways, the “trunk and branch” and “radial” supply duct configurations are most suitable for ducts located in conditioned spaces.
Air return duct systems can be configured in two ways: each room can have a return duct that sends air back to the heating and cooling equipment or return grills can be located in central locations on each floor. For the latter case, either grills must be installed to allow air to pass out of closed rooms, or short “jumper ducts” can be installed to connect the vent in one room with the next, allowing air to flow back to the central return grilles. Door undercuts help, but they are usually not sufficient for return airflow.
You can perform a simple check for adequate return air capacity by doing the following:
- Close all exterior doors and windows
- Close all interior room doors
- Turn on the central air handler
- “Crack” interior doors one by one and observe if the door closes or further opens “on its own.” (Whether it closes or opens will depend on the direction of the air handler-driven air flow.) Rooms served by air-moved doors have restricted return air flow and need pressure relief as described above.
Maintaining and Upgrading Existing Duct Systems
Sealing your ducts to prevent leaks is even more important if the ducts are located in an unconditioned area such as an attic or vented crawlspace. If the supply ducts are leaking, heated or cooled air can be forced out of unsealed joints and lost. In addition, unconditioned air can be drawn into return ducts through unsealed joints.
Although minor duct repairs are easy to make, qualified professionals should seal and insulate ducts in unconditioned spaces to ensure the use of appropriate sealing materials.
Aside from sealing your ducts, the simplest and most effective means of maintaining your air distribution system is to ensure that furniture and other objects are not blocking the airflow through your registers, and to vacuum the registers to remove any dust buildup.
Existing duct systems often suffer from design deficiencies in the return air system, and modifications by the homeowner (or just a tendency to keep doors closed) may contribute to these problems. Any rooms with a lack of sufficient return airflow may benefit from relatively simple upgrades, such as the installation of new return-air grilles, undercutting doors for return air, or installing a jumper duct.
Some rooms may also be hard to heat and cool because of inadequate supply ducts or grilles. If this is the case, you should first examine whether the problem is the room itself: fix any problems with insulation, air leakage, or inefficient windows first. If the problem persists, you may be able to increase the size of the supply duct or add an additional duct to provide the needed airflow to the room.
Minor Duct Repair Tips for Minimizing Energy Losses in Ducts
- Check your ducts for air leaks. First, look for sections that should be joined but have separated and then look for obvious holes.
- Duct mastic is the preferred material for sealing ductwork seams and joints. It is more durable than any available tape and generally easier for a do-it-yourself installation. Its only drawback is that it will not bridge gaps over ¼ inch. Such gaps must be first bridged with web-type drywall tape, or a good quality heat approved tape.
- If you use tape to seal your ducts, avoid cloth-backed, rubber adhesive duct tape — it tends to fail quickly. Instead, use mastic, butyl tape, foil tape, or other heat-approved tapes. Look for tape with the Underwriters Laboratories (UL) logo.
- Remember that insulating ducts in the basement will make the basement colder. If both the ducts and the basement walls are not insulated, consider insulating both. Water pipes and drains in unconditioned spaces could freeze and burst if the heat ducts are fully insulated because there would be no heat source to prevent the space from freezing in cold weather. However, using an electric heating tape wrap on the pipes can prevent this. Check with a professional contractor.
- Hire a professional to install both supply and return registers in the basement rooms after converting your basement to a living area.
- Be sure a well-sealed vapor barrier exists on the outside of the insulation on cooling ducts to prevent moisture condensation.
- If you have a fuel-burning furnace, stove, or other appliance or an attached garage, install a carbon monoxide (CO) monitor to alert you to harmful CO levels.
- Be sure to get professional help when doing ductwork. A qualified professional should always perform changes and repairs to a duct system.
Minimizing Energy Losses in Ducts at 815 W 21st St, Houston, TX 77008

815 W 21st St, Houston, TX 77008
Minimizing Energy Losses in Ducts
Minimizing energy losses in ducts by seeing if the ducts are poorly sealed or insulated. That could tell you why your energy bill in high. Your air ducts are one of the most important systems in your home, and if the ducts are poorly sealed or insulated, they are likely contributing to higher energy bills.
Your home’s duct system is a branching network of tubes in the walls, floors, and ceilings; it carries the air from your home’s furnace and central air conditioner to each room. Ducts are made of sheet metal, fiberglass, or other materials.
Ducts that leak heated air into unheated spaces can add hundreds of dollars a year to your heating and cooling bills, but you can reduce that loss by sealing and insulating your ducts. Insulating ducts in unconditioned spaces is usually very cost-effective. Existing ducts may also be blocked or may require simple upgrades.
Designing and Installing New Duct Systems
In new home construction or in retrofits, proper duct system design is critical. In recent years, energy-saving designs have sought to include ducts and heating systems in the conditioned space.
Efficient and well-designed duct systems distribute air properly throughout your home without leaking to keep all rooms at a comfortable temperature. The system should provide balanced supply and return flow to maintain a neutral pressure within the house.
Even well sealed and insulated ducts will leak and lose some heat, so many new energy-efficient homes place the duct system within the conditioned space of the home. The simplest way to accomplish this is to hide the ducts in dropped ceilings and in corners of rooms. Ducts can also be located in a sealed and insulated chase extending into the attic or built into raised floors. In both of these latter cases, care must be taken during construction to prevent contractors from using the duct chases for wiring or other utilities.
In either case, actual ducts must be used — chases and floor cavities should not be used as ducts. Regardless of where they are installed, ducts should be well sealed. Although ducts can be configured in a number of ways, the “trunk and branch” and “radial” supply duct configurations are most suitable for ducts located in conditioned spaces.
Air return duct systems can be configured in two ways: each room can have a return duct that sends air back to the heating and cooling equipment or return grills can be located in central locations on each floor. For the latter case, either grills must be installed to allow air to pass out of closed rooms, or short “jumper ducts” can be installed to connect the vent in one room with the next, allowing air to flow back to the central return grilles. Door undercuts help, but they are usually not sufficient for return airflow.
You can perform a simple check for adequate return air capacity by doing the following:
- Close all exterior doors and windows
- Close all interior room doors
- Turn on the central air handler
- “Crack” interior doors one by one and observe if the door closes or further opens “on its own.” (Whether it closes or opens will depend on the direction of the air handler-driven air flow.) Rooms served by air-moved doors have restricted return air flow and need pressure relief as described above.
Maintaining and Upgrading Existing Duct Systems
Sealing your ducts to prevent leaks is even more important if the ducts are located in an unconditioned area such as an attic or vented crawlspace. If the supply ducts are leaking, heated or cooled air can be forced out of unsealed joints and lost. In addition, unconditioned air can be drawn into return ducts through unsealed joints.
Although minor duct repairs are easy to make, qualified professionals should seal and insulate ducts in unconditioned spaces to ensure the use of appropriate sealing materials.
Aside from sealing your ducts, the simplest and most effective means of maintaining your air distribution system is to ensure that furniture and other objects are not blocking the airflow through your registers, and to vacuum the registers to remove any dust buildup.
Existing duct systems often suffer from design deficiencies in the return air system, and modifications by the homeowner (or just a tendency to keep doors closed) may contribute to these problems. Any rooms with a lack of sufficient return airflow may benefit from relatively simple upgrades, such as the installation of new return-air grilles, undercutting doors for return air, or installing a jumper duct.
Some rooms may also be hard to heat and cool because of inadequate supply ducts or grilles. If this is the case, you should first examine whether the problem is the room itself: fix any problems with insulation, air leakage, or inefficient windows first. If the problem persists, you may be able to increase the size of the supply duct or add an additional duct to provide the needed airflow to the room.
Minor Duct Repair Tips for Minimizing Energy Losses in Ducts
- Check your ducts for air leaks. First, look for sections that should be joined but have separated and then look for obvious holes.
- Duct mastic is the preferred material for sealing ductwork seams and joints. It is more durable than any available tape and generally easier for a do-it-yourself installation. Its only drawback is that it will not bridge gaps over ¼ inch. Such gaps must be first bridged with web-type drywall tape, or a good quality heat approved tape.
- If you use tape to seal your ducts, avoid cloth-backed, rubber adhesive duct tape — it tends to fail quickly. Instead, use mastic, butyl tape, foil tape, or other heat-approved tapes. Look for tape with the Underwriters Laboratories (UL) logo.
- Remember that insulating ducts in the basement will make the basement colder. If both the ducts and the basement walls are not insulated, consider insulating both. Water pipes and drains in unconditioned spaces could freeze and burst if the heat ducts are fully insulated because there would be no heat source to prevent the space from freezing in cold weather. However, using an electric heating tape wrap on the pipes can prevent this. Check with a professional contractor.
- Hire a professional to install both supply and return registers in the basement rooms after converting your basement to a living area.
- Be sure a well-sealed vapor barrier exists on the outside of the insulation on cooling ducts to prevent moisture condensation.
- If you have a fuel-burning furnace, stove, or other appliance or an attached garage, install a carbon monoxide (CO) monitor to alert you to harmful CO levels.
- Be sure to get professional help when doing ductwork. A qualified professional should always perform changes and repairs to a duct system.
Minimizing Energy Losses in Ducts at 813 W 21st St, Houston, TX 77008

813 W 21st St, Houston, TX 77008
Minimizing Energy Losses in Ducts
Minimizing energy losses in ducts by seeing if the ducts are poorly sealed or insulated. That could tell you why your energy bill in high. Your air ducts are one of the most important systems in your home, and if the ducts are poorly sealed or insulated, they are likely contributing to higher energy bills.
Your home’s duct system is a branching network of tubes in the walls, floors, and ceilings; it carries the air from your home’s furnace and central air conditioner to each room. Ducts are made of sheet metal, fiberglass, or other materials.
Ducts that leak heated air into unheated spaces can add hundreds of dollars a year to your heating and cooling bills, but you can reduce that loss by sealing and insulating your ducts. Insulating ducts in unconditioned spaces is usually very cost-effective. Existing ducts may also be blocked or may require simple upgrades.
Designing and Installing New Duct Systems
In new home construction or in retrofits, proper duct system design is critical. In recent years, energy-saving designs have sought to include ducts and heating systems in the conditioned space.
Efficient and well-designed duct systems distribute air properly throughout your home without leaking to keep all rooms at a comfortable temperature. The system should provide balanced supply and return flow to maintain a neutral pressure within the house.
Even well sealed and insulated ducts will leak and lose some heat, so many new energy-efficient homes place the duct system within the conditioned space of the home. The simplest way to accomplish this is to hide the ducts in dropped ceilings and in corners of rooms. Ducts can also be located in a sealed and insulated chase extending into the attic or built into raised floors. In both of these latter cases, care must be taken during construction to prevent contractors from using the duct chases for wiring or other utilities.
In either case, actual ducts must be used — chases and floor cavities should not be used as ducts. Regardless of where they are installed, ducts should be well sealed. Although ducts can be configured in a number of ways, the “trunk and branch” and “radial” supply duct configurations are most suitable for ducts located in conditioned spaces.
Air return duct systems can be configured in two ways: each room can have a return duct that sends air back to the heating and cooling equipment or return grills can be located in central locations on each floor. For the latter case, either grills must be installed to allow air to pass out of closed rooms, or short “jumper ducts” can be installed to connect the vent in one room with the next, allowing air to flow back to the central return grilles. Door undercuts help, but they are usually not sufficient for return airflow.
You can perform a simple check for adequate return air capacity by doing the following:
- Close all exterior doors and windows
- Close all interior room doors
- Turn on the central air handler
- “Crack” interior doors one by one and observe if the door closes or further opens “on its own.” (Whether it closes or opens will depend on the direction of the air handler-driven air flow.) Rooms served by air-moved doors have restricted return air flow and need pressure relief as described above.
Maintaining and Upgrading Existing Duct Systems
Sealing your ducts to prevent leaks is even more important if the ducts are located in an unconditioned area such as an attic or vented crawlspace. If the supply ducts are leaking, heated or cooled air can be forced out of unsealed joints and lost. In addition, unconditioned air can be drawn into return ducts through unsealed joints.
Although minor duct repairs are easy to make, qualified professionals should seal and insulate ducts in unconditioned spaces to ensure the use of appropriate sealing materials.
Aside from sealing your ducts, the simplest and most effective means of maintaining your air distribution system is to ensure that furniture and other objects are not blocking the airflow through your registers, and to vacuum the registers to remove any dust buildup.
Existing duct systems often suffer from design deficiencies in the return air system, and modifications by the homeowner (or just a tendency to keep doors closed) may contribute to these problems. Any rooms with a lack of sufficient return airflow may benefit from relatively simple upgrades, such as the installation of new return-air grilles, undercutting doors for return air, or installing a jumper duct.
Some rooms may also be hard to heat and cool because of inadequate supply ducts or grilles. If this is the case, you should first examine whether the problem is the room itself: fix any problems with insulation, air leakage, or inefficient windows first. If the problem persists, you may be able to increase the size of the supply duct or add an additional duct to provide the needed airflow to the room.
Minor Duct Repair Tips for Minimizing Energy Losses in Ducts
- Check your ducts for air leaks. First, look for sections that should be joined but have separated and then look for obvious holes.
- Duct mastic is the preferred material for sealing ductwork seams and joints. It is more durable than any available tape and generally easier for a do-it-yourself installation. Its only drawback is that it will not bridge gaps over ¼ inch. Such gaps must be first bridged with web-type drywall tape, or a good quality heat approved tape.
- If you use tape to seal your ducts, avoid cloth-backed, rubber adhesive duct tape — it tends to fail quickly. Instead, use mastic, butyl tape, foil tape, or other heat-approved tapes. Look for tape with the Underwriters Laboratories (UL) logo.
- Remember that insulating ducts in the basement will make the basement colder. If both the ducts and the basement walls are not insulated, consider insulating both. Water pipes and drains in unconditioned spaces could freeze and burst if the heat ducts are fully insulated because there would be no heat source to prevent the space from freezing in cold weather. However, using an electric heating tape wrap on the pipes can prevent this. Check with a professional contractor.
- Hire a professional to install both supply and return registers in the basement rooms after converting your basement to a living area.
- Be sure a well-sealed vapor barrier exists on the outside of the insulation on cooling ducts to prevent moisture condensation.
- If you have a fuel-burning furnace, stove, or other appliance or an attached garage, install a carbon monoxide (CO) monitor to alert you to harmful CO levels.
- Be sure to get professional help when doing ductwork. A qualified professional should always perform changes and repairs to a duct system.
Minimizing Energy Losses in Ducts at 8531 Greenbush St, Houston, TX 77025


Minimizing Energy Losses in Ducts
Minimizing energy losses in ducts by seeing if the ducts are poorly sealed or insulated. That could tell you why your energy bill in high. Your air ducts are one of the most important systems in your home, and if the ducts are poorly sealed or insulated, they are likely contributing to higher energy bills.
Your home’s duct system is a branching network of tubes in the walls, floors, and ceilings; it carries the air from your home’s furnace and central air conditioner to each room. Ducts are made of sheet metal, fiberglass, or other materials.
Ducts that leak heated air into unheated spaces can add hundreds of dollars a year to your heating and cooling bills, but you can reduce that loss by sealing and insulating your ducts. Insulating ducts in unconditioned spaces is usually very cost-effective. Existing ducts may also be blocked or may require simple upgrades.
Designing and Installing New Duct Systems
In new home construction or in retrofits, proper duct system design is critical. In recent years, energy-saving designs have sought to include ducts and heating systems in the conditioned space.
Efficient and well-designed duct systems distribute air properly throughout your home without leaking to keep all rooms at a comfortable temperature. The system should provide balanced supply and return flow to maintain a neutral pressure within the house.
Even well sealed and insulated ducts will leak and lose some heat, so many new energy-efficient homes place the duct system within the conditioned space of the home. The simplest way to accomplish this is to hide the ducts in dropped ceilings and in corners of rooms. Ducts can also be located in a sealed and insulated chase extending into the attic or built into raised floors. In both of these latter cases, care must be taken during construction to prevent contractors from using the duct chases for wiring or other utilities.
In either case, actual ducts must be used — chases and floor cavities should not be used as ducts. Regardless of where they are installed, ducts should be well sealed. Although ducts can be configured in a number of ways, the “trunk and branch” and “radial” supply duct configurations are most suitable for ducts located in conditioned spaces.
Air return duct systems can be configured in two ways: each room can have a return duct that sends air back to the heating and cooling equipment or return grills can be located in central locations on each floor. For the latter case, either grills must be installed to allow air to pass out of closed rooms, or short “jumper ducts” can be installed to connect the vent in one room with the next, allowing air to flow back to the central return grilles. Door undercuts help, but they are usually not sufficient for return airflow.
You can perform a simple check for adequate return air capacity by doing the following:
- Close all exterior doors and windows
- Close all interior room doors
- Turn on the central air handler
- “Crack” interior doors one by one and observe if the door closes or further opens “on its own.” (Whether it closes or opens will depend on the direction of the air handler-driven air flow.) Rooms served by air-moved doors have restricted return air flow and need pressure relief as described above.
Maintaining and Upgrading Existing Duct Systems
Sealing your ducts to prevent leaks is even more important if the ducts are located in an unconditioned area such as an attic or vented crawlspace. If the supply ducts are leaking, heated or cooled air can be forced out of unsealed joints and lost. In addition, unconditioned air can be drawn into return ducts through unsealed joints.
Although minor duct repairs are easy to make, qualified professionals should seal and insulate ducts in unconditioned spaces to ensure the use of appropriate sealing materials.
Aside from sealing your ducts, the simplest and most effective means of maintaining your air distribution system is to ensure that furniture and other objects are not blocking the airflow through your registers, and to vacuum the registers to remove any dust buildup.
Existing duct systems often suffer from design deficiencies in the return air system, and modifications by the homeowner (or just a tendency to keep doors closed) may contribute to these problems. Any rooms with a lack of sufficient return airflow may benefit from relatively simple upgrades, such as the installation of new return-air grilles, undercutting doors for return air, or installing a jumper duct.
Some rooms may also be hard to heat and cool because of inadequate supply ducts or grilles. If this is the case, you should first examine whether the problem is the room itself: fix any problems with insulation, air leakage, or inefficient windows first. If the problem persists, you may be able to increase the size of the supply duct or add an additional duct to provide the needed airflow to the room.
Minor Duct Repair Tips for Minimizing Energy Losses in Ducts
- Check your ducts for air leaks. First, look for sections that should be joined but have separated and then look for obvious holes.
- Duct mastic is the preferred material for sealing ductwork seams and joints. It is more durable than any available tape and generally easier for a do-it-yourself installation. Its only drawback is that it will not bridge gaps over ¼ inch. Such gaps must be first bridged with web-type drywall tape, or a good quality heat approved tape.
- If you use tape to seal your ducts, avoid cloth-backed, rubber adhesive duct tape — it tends to fail quickly. Instead, use mastic, butyl tape, foil tape, or other heat-approved tapes. Look for tape with the Underwriters Laboratories (UL) logo.
- Remember that insulating ducts in the basement will make the basement colder. If both the ducts and the basement walls are not insulated, consider insulating both. Water pipes and drains in unconditioned spaces could freeze and burst if the heat ducts are fully insulated because there would be no heat source to prevent the space from freezing in cold weather. However, using an electric heating tape wrap on the pipes can prevent this. Check with a professional contractor.
- Hire a professional to install both supply and return registers in the basement rooms after converting your basement to a living area.
- Be sure a well-sealed vapor barrier exists on the outside of the insulation on cooling ducts to prevent moisture condensation.
- If you have a fuel-burning furnace, stove, or other appliance or an attached garage, install a carbon monoxide (CO) monitor to alert you to harmful CO levels.
- Be sure to get professional help when doing ductwork. A qualified professional should always perform changes and repairs to a duct system.
Minimizing Energy Losses in Ducts at 4604 Dewberry St, Houston, TX 77021

4604 Dewberry St, Houston, TX 77021
Minimizing Energy Losses in Ducts
Minimizing energy losses in ducts by seeing if the ducts are poorly sealed or insulated. That could tell you why your energy bill in high. Your air ducts are one of the most important systems in your home, and if the ducts are poorly sealed or insulated, they are likely contributing to higher energy bills.
Your home’s duct system is a branching network of tubes in the walls, floors, and ceilings; it carries the air from your home’s furnace and central air conditioner to each room. Ducts are made of sheet metal, fiberglass, or other materials.
Ducts that leak heated air into unheated spaces can add hundreds of dollars a year to your heating and cooling bills, but you can reduce that loss by sealing and insulating your ducts. Insulating ducts in unconditioned spaces is usually very cost-effective. Existing ducts may also be blocked or may require simple upgrades.
Designing and Installing New Duct Systems
In new home construction or in retrofits, proper duct system design is critical. In recent years, energy-saving designs have sought to include ducts and heating systems in the conditioned space.
Efficient and well-designed duct systems distribute air properly throughout your home without leaking to keep all rooms at a comfortable temperature. The system should provide balanced supply and return flow to maintain a neutral pressure within the house.
Even well sealed and insulated ducts will leak and lose some heat, so many new energy-efficient homes place the duct system within the conditioned space of the home. The simplest way to accomplish this is to hide the ducts in dropped ceilings and in corners of rooms. Ducts can also be located in a sealed and insulated chase extending into the attic or built into raised floors. In both of these latter cases, care must be taken during construction to prevent contractors from using the duct chases for wiring or other utilities.
In either case, actual ducts must be used — chases and floor cavities should not be used as ducts. Regardless of where they are installed, ducts should be well sealed. Although ducts can be configured in a number of ways, the “trunk and branch” and “radial” supply duct configurations are most suitable for ducts located in conditioned spaces.
Air return duct systems can be configured in two ways: each room can have a return duct that sends air back to the heating and cooling equipment or return grills can be located in central locations on each floor. For the latter case, either grills must be installed to allow air to pass out of closed rooms, or short “jumper ducts” can be installed to connect the vent in one room with the next, allowing air to flow back to the central return grilles. Door undercuts help, but they are usually not sufficient for return airflow.
You can perform a simple check for adequate return air capacity by doing the following:
- Close all exterior doors and windows
- Close all interior room doors
- Turn on the central air handler
- “Crack” interior doors one by one and observe if the door closes or further opens “on its own.” (Whether it closes or opens will depend on the direction of the air handler-driven air flow.) Rooms served by air-moved doors have restricted return air flow and need pressure relief as described above.
Maintaining and Upgrading Existing Duct Systems
Sealing your ducts to prevent leaks is even more important if the ducts are located in an unconditioned area such as an attic or vented crawlspace. If the supply ducts are leaking, heated or cooled air can be forced out of unsealed joints and lost. In addition, unconditioned air can be drawn into return ducts through unsealed joints.
Although minor duct repairs are easy to make, qualified professionals should seal and insulate ducts in unconditioned spaces to ensure the use of appropriate sealing materials.
Aside from sealing your ducts, the simplest and most effective means of maintaining your air distribution system is to ensure that furniture and other objects are not blocking the airflow through your registers, and to vacuum the registers to remove any dust buildup.
Existing duct systems often suffer from design deficiencies in the return air system, and modifications by the homeowner (or just a tendency to keep doors closed) may contribute to these problems. Any rooms with a lack of sufficient return airflow may benefit from relatively simple upgrades, such as the installation of new return-air grilles, undercutting doors for return air, or installing a jumper duct.
Some rooms may also be hard to heat and cool because of inadequate supply ducts or grilles. If this is the case, you should first examine whether the problem is the room itself: fix any problems with insulation, air leakage, or inefficient windows first. If the problem persists, you may be able to increase the size of the supply duct or add an additional duct to provide the needed airflow to the room.
Minor Duct Repair Tips for Minimizing Energy Losses in Ducts
- Check your ducts for air leaks. First, look for sections that should be joined but have separated and then look for obvious holes.
- Duct mastic is the preferred material for sealing ductwork seams and joints. It is more durable than any available tape and generally easier for a do-it-yourself installation. Its only drawback is that it will not bridge gaps over ¼ inch. Such gaps must be first bridged with web-type drywall tape, or a good quality heat approved tape.
- If you use tape to seal your ducts, avoid cloth-backed, rubber adhesive duct tape — it tends to fail quickly. Instead, use mastic, butyl tape, foil tape, or other heat-approved tapes. Look for tape with the Underwriters Laboratories (UL) logo.
- Remember that insulating ducts in the basement will make the basement colder. If both the ducts and the basement walls are not insulated, consider insulating both. Water pipes and drains in unconditioned spaces could freeze and burst if the heat ducts are fully insulated because there would be no heat source to prevent the space from freezing in cold weather. However, using an electric heating tape wrap on the pipes can prevent this. Check with a professional contractor.
- Hire a professional to install both supply and return registers in the basement rooms after converting your basement to a living area.
- Be sure a well-sealed vapor barrier exists on the outside of the insulation on cooling ducts to prevent moisture condensation.
- If you have a fuel-burning furnace, stove, or other appliance or an attached garage, install a carbon monoxide (CO) monitor to alert you to harmful CO levels.
- Be sure to get professional help when doing ductwork. A qualified professional should always perform changes and repairs to a duct system.
Minimizing Energy Losses in Ducts at 4418 W Tidwell Rd, Houston, TX 77091

4418 W Tidwell Rd, Houston, TX 77091
Minimizing Energy Losses in Ducts
Minimizing energy losses in ducts by seeing if the ducts are poorly sealed or insulated. That could tell you why your energy bill in high. Your air ducts are one of the most important systems in your home, and if the ducts are poorly sealed or insulated, they are likely contributing to higher energy bills.
Your home’s duct system is a branching network of tubes in the walls, floors, and ceilings; it carries the air from your home’s furnace and central air conditioner to each room. Ducts are made of sheet metal, fiberglass, or other materials.
Ducts that leak heated air into unheated spaces can add hundreds of dollars a year to your heating and cooling bills, but you can reduce that loss by sealing and insulating your ducts. Insulating ducts in unconditioned spaces is usually very cost-effective. Existing ducts may also be blocked or may require simple upgrades.
Designing and Installing New Duct Systems
In new home construction or in retrofits, proper duct system design is critical. In recent years, energy-saving designs have sought to include ducts and heating systems in the conditioned space.
Efficient and well-designed duct systems distribute air properly throughout your home without leaking to keep all rooms at a comfortable temperature. The system should provide balanced supply and return flow to maintain a neutral pressure within the house.
Even well sealed and insulated ducts will leak and lose some heat, so many new energy-efficient homes place the duct system within the conditioned space of the home. The simplest way to accomplish this is to hide the ducts in dropped ceilings and in corners of rooms. Ducts can also be located in a sealed and insulated chase extending into the attic or built into raised floors. In both of these latter cases, care must be taken during construction to prevent contractors from using the duct chases for wiring or other utilities.
In either case, actual ducts must be used — chases and floor cavities should not be used as ducts. Regardless of where they are installed, ducts should be well sealed. Although ducts can be configured in a number of ways, the “trunk and branch” and “radial” supply duct configurations are most suitable for ducts located in conditioned spaces.
Air return duct systems can be configured in two ways: each room can have a return duct that sends air back to the heating and cooling equipment or return grills can be located in central locations on each floor. For the latter case, either grills must be installed to allow air to pass out of closed rooms, or short “jumper ducts” can be installed to connect the vent in one room with the next, allowing air to flow back to the central return grilles. Door undercuts help, but they are usually not sufficient for return airflow.
You can perform a simple check for adequate return air capacity by doing the following:
- Close all exterior doors and windows
- Close all interior room doors
- Turn on the central air handler
- “Crack” interior doors one by one and observe if the door closes or further opens “on its own.” (Whether it closes or opens will depend on the direction of the air handler-driven air flow.) Rooms served by air-moved doors have restricted return air flow and need pressure relief as described above.
Maintaining and Upgrading Existing Duct Systems
Sealing your ducts to prevent leaks is even more important if the ducts are located in an unconditioned area such as an attic or vented crawlspace. If the supply ducts are leaking, heated or cooled air can be forced out of unsealed joints and lost. In addition, unconditioned air can be drawn into return ducts through unsealed joints.
Although minor duct repairs are easy to make, qualified professionals should seal and insulate ducts in unconditioned spaces to ensure the use of appropriate sealing materials.
Aside from sealing your ducts, the simplest and most effective means of maintaining your air distribution system is to ensure that furniture and other objects are not blocking the airflow through your registers, and to vacuum the registers to remove any dust buildup.
Existing duct systems often suffer from design deficiencies in the return air system, and modifications by the homeowner (or just a tendency to keep doors closed) may contribute to these problems. Any rooms with a lack of sufficient return airflow may benefit from relatively simple upgrades, such as the installation of new return-air grilles, undercutting doors for return air, or installing a jumper duct.
Some rooms may also be hard to heat and cool because of inadequate supply ducts or grilles. If this is the case, you should first examine whether the problem is the room itself: fix any problems with insulation, air leakage, or inefficient windows first. If the problem persists, you may be able to increase the size of the supply duct or add an additional duct to provide the needed airflow to the room.
Minor Duct Repair Tips for Minimizing Energy Losses in Ducts
- Check your ducts for air leaks. First, look for sections that should be joined but have separated and then look for obvious holes.
- Duct mastic is the preferred material for sealing ductwork seams and joints. It is more durable than any available tape and generally easier for a do-it-yourself installation. Its only drawback is that it will not bridge gaps over ¼ inch. Such gaps must be first bridged with web-type drywall tape, or a good quality heat approved tape.
- If you use tape to seal your ducts, avoid cloth-backed, rubber adhesive duct tape — it tends to fail quickly. Instead, use mastic, butyl tape, foil tape, or other heat-approved tapes. Look for tape with the Underwriters Laboratories (UL) logo.
- Remember that insulating ducts in the basement will make the basement colder. If both the ducts and the basement walls are not insulated, consider insulating both. Water pipes and drains in unconditioned spaces could freeze and burst if the heat ducts are fully insulated because there would be no heat source to prevent the space from freezing in cold weather. However, using an electric heating tape wrap on the pipes can prevent this. Check with a professional contractor.
- Hire a professional to install both supply and return registers in the basement rooms after converting your basement to a living area.
- Be sure a well-sealed vapor barrier exists on the outside of the insulation on cooling ducts to prevent moisture condensation.
- If you have a fuel-burning furnace, stove, or other appliance or an attached garage, install a carbon monoxide (CO) monitor to alert you to harmful CO levels.
- Be sure to get professional help when doing ductwork. A qualified professional should always perform changes and repairs to a duct system.
Minimizing Energy Losses in Ducts at 4420 W Tidwell Rd, Houston, TX 77091

4420 W Tidwell Rd, Houston, TX 77091
Minimizing Energy Losses in Ducts
Minimizing energy losses in ducts by seeing if the ducts are poorly sealed or insulated. That could tell you why your energy bill in high. Your air ducts are one of the most important systems in your home, and if the ducts are poorly sealed or insulated, they are likely contributing to higher energy bills.
Your home’s duct system is a branching network of tubes in the walls, floors, and ceilings; it carries the air from your home’s furnace and central air conditioner to each room. Ducts are made of sheet metal, fiberglass, or other materials.
Ducts that leak heated air into unheated spaces can add hundreds of dollars a year to your heating and cooling bills, but you can reduce that loss by sealing and insulating your ducts. Insulating ducts in unconditioned spaces is usually very cost-effective. Existing ducts may also be blocked or may require simple upgrades.
Designing and Installing New Duct Systems
In new home construction or in retrofits, proper duct system design is critical. In recent years, energy-saving designs have sought to include ducts and heating systems in the conditioned space.
Efficient and well-designed duct systems distribute air properly throughout your home without leaking to keep all rooms at a comfortable temperature. The system should provide balanced supply and return flow to maintain a neutral pressure within the house.
Even well sealed and insulated ducts will leak and lose some heat, so many new energy-efficient homes place the duct system within the conditioned space of the home. The simplest way to accomplish this is to hide the ducts in dropped ceilings and in corners of rooms. Ducts can also be located in a sealed and insulated chase extending into the attic or built into raised floors. In both of these latter cases, care must be taken during construction to prevent contractors from using the duct chases for wiring or other utilities.
In either case, actual ducts must be used — chases and floor cavities should not be used as ducts. Regardless of where they are installed, ducts should be well sealed. Although ducts can be configured in a number of ways, the “trunk and branch” and “radial” supply duct configurations are most suitable for ducts located in conditioned spaces.
Air return duct systems can be configured in two ways: each room can have a return duct that sends air back to the heating and cooling equipment or return grills can be located in central locations on each floor. For the latter case, either grills must be installed to allow air to pass out of closed rooms, or short “jumper ducts” can be installed to connect the vent in one room with the next, allowing air to flow back to the central return grilles. Door undercuts help, but they are usually not sufficient for return airflow.
You can perform a simple check for adequate return air capacity by doing the following:
- Close all exterior doors and windows
- Close all interior room doors
- Turn on the central air handler
- “Crack” interior doors one by one and observe if the door closes or further opens “on its own.” (Whether it closes or opens will depend on the direction of the air handler-driven air flow.) Rooms served by air-moved doors have restricted return air flow and need pressure relief as described above.
Maintaining and Upgrading Existing Duct Systems
Sealing your ducts to prevent leaks is even more important if the ducts are located in an unconditioned area such as an attic or vented crawlspace. If the supply ducts are leaking, heated or cooled air can be forced out of unsealed joints and lost. In addition, unconditioned air can be drawn into return ducts through unsealed joints.
Although minor duct repairs are easy to make, qualified professionals should seal and insulate ducts in unconditioned spaces to ensure the use of appropriate sealing materials.
Aside from sealing your ducts, the simplest and most effective means of maintaining your air distribution system is to ensure that furniture and other objects are not blocking the airflow through your registers, and to vacuum the registers to remove any dust buildup.
Existing duct systems often suffer from design deficiencies in the return air system, and modifications by the homeowner (or just a tendency to keep doors closed) may contribute to these problems. Any rooms with a lack of sufficient return airflow may benefit from relatively simple upgrades, such as the installation of new return-air grilles, undercutting doors for return air, or installing a jumper duct.
Some rooms may also be hard to heat and cool because of inadequate supply ducts or grilles. If this is the case, you should first examine whether the problem is the room itself: fix any problems with insulation, air leakage, or inefficient windows first. If the problem persists, you may be able to increase the size of the supply duct or add an additional duct to provide the needed airflow to the room.
Minor Duct Repair Tips for Minimizing Energy Losses in Ducts
- Check your ducts for air leaks. First, look for sections that should be joined but have separated and then look for obvious holes.
- Duct mastic is the preferred material for sealing ductwork seams and joints. It is more durable than any available tape and generally easier for a do-it-yourself installation. Its only drawback is that it will not bridge gaps over ¼ inch. Such gaps must be first bridged with web-type drywall tape, or a good quality heat approved tape.
- If you use tape to seal your ducts, avoid cloth-backed, rubber adhesive duct tape — it tends to fail quickly. Instead, use mastic, butyl tape, foil tape, or other heat-approved tapes. Look for tape with the Underwriters Laboratories (UL) logo.
- Remember that insulating ducts in the basement will make the basement colder. If both the ducts and the basement walls are not insulated, consider insulating both. Water pipes and drains in unconditioned spaces could freeze and burst if the heat ducts are fully insulated because there would be no heat source to prevent the space from freezing in cold weather. However, using an electric heating tape wrap on the pipes can prevent this. Check with a professional contractor.
- Hire a professional to install both supply and return registers in the basement rooms after converting your basement to a living area.
- Be sure a well-sealed vapor barrier exists on the outside of the insulation on cooling ducts to prevent moisture condensation.
- If you have a fuel-burning furnace, stove, or other appliance or an attached garage, install a carbon monoxide (CO) monitor to alert you to harmful CO levels.
- Be sure to get professional help when doing ductwork. A qualified professional should always perform changes and repairs to a duct system.
Minimizing Energy Losses in Ducts at 1823 Studewood St, Houston, TX 77008

1823 Studewood St, Houston, TX 77008
Minimizing Energy Losses in Ducts
Minimizing energy losses in ducts by seeing if the ducts are poorly sealed or insulated. That could tell you why your energy bill in high. Your air ducts are one of the most important systems in your home, and if the ducts are poorly sealed or insulated, they are likely contributing to higher energy bills.
Your home’s duct system is a branching network of tubes in the walls, floors, and ceilings; it carries the air from your home’s furnace and central air conditioner to each room. Ducts are made of sheet metal, fiberglass, or other materials.
Ducts that leak heated air into unheated spaces can add hundreds of dollars a year to your heating and cooling bills, but you can reduce that loss by sealing and insulating your ducts. Insulating ducts in unconditioned spaces is usually very cost-effective. Existing ducts may also be blocked or may require simple upgrades.
Designing and Installing New Duct Systems
In new home construction or in retrofits, proper duct system design is critical. In recent years, energy-saving designs have sought to include ducts and heating systems in the conditioned space.
Efficient and well-designed duct systems distribute air properly throughout your home without leaking to keep all rooms at a comfortable temperature. The system should provide balanced supply and return flow to maintain a neutral pressure within the house.
Even well sealed and insulated ducts will leak and lose some heat, so many new energy-efficient homes place the duct system within the conditioned space of the home. The simplest way to accomplish this is to hide the ducts in dropped ceilings and in corners of rooms. Ducts can also be located in a sealed and insulated chase extending into the attic or built into raised floors. In both of these latter cases, care must be taken during construction to prevent contractors from using the duct chases for wiring or other utilities.
In either case, actual ducts must be used — chases and floor cavities should not be used as ducts. Regardless of where they are installed, ducts should be well sealed. Although ducts can be configured in a number of ways, the “trunk and branch” and “radial” supply duct configurations are most suitable for ducts located in conditioned spaces.
Air return duct systems can be configured in two ways: each room can have a return duct that sends air back to the heating and cooling equipment or return grills can be located in central locations on each floor. For the latter case, either grills must be installed to allow air to pass out of closed rooms, or short “jumper ducts” can be installed to connect the vent in one room with the next, allowing air to flow back to the central return grilles. Door undercuts help, but they are usually not sufficient for return airflow.
You can perform a simple check for adequate return air capacity by doing the following:
- Close all exterior doors and windows
- Close all interior room doors
- Turn on the central air handler
- “Crack” interior doors one by one and observe if the door closes or further opens “on its own.” (Whether it closes or opens will depend on the direction of the air handler-driven air flow.) Rooms served by air-moved doors have restricted return air flow and need pressure relief as described above.
Maintaining and Upgrading Existing Duct Systems
Sealing your ducts to prevent leaks is even more important if the ducts are located in an unconditioned area such as an attic or vented crawlspace. If the supply ducts are leaking, heated or cooled air can be forced out of unsealed joints and lost. In addition, unconditioned air can be drawn into return ducts through unsealed joints.
Although minor duct repairs are easy to make, qualified professionals should seal and insulate ducts in unconditioned spaces to ensure the use of appropriate sealing materials.
Aside from sealing your ducts, the simplest and most effective means of maintaining your air distribution system is to ensure that furniture and other objects are not blocking the airflow through your registers, and to vacuum the registers to remove any dust buildup.
Existing duct systems often suffer from design deficiencies in the return air system, and modifications by the homeowner (or just a tendency to keep doors closed) may contribute to these problems. Any rooms with a lack of sufficient return airflow may benefit from relatively simple upgrades, such as the installation of new return-air grilles, undercutting doors for return air, or installing a jumper duct.
Some rooms may also be hard to heat and cool because of inadequate supply ducts or grilles. If this is the case, you should first examine whether the problem is the room itself: fix any problems with insulation, air leakage, or inefficient windows first. If the problem persists, you may be able to increase the size of the supply duct or add an additional duct to provide the needed airflow to the room.
Minor Duct Repair Tips for Minimizing Energy Losses in Ducts
- Check your ducts for air leaks. First, look for sections that should be joined but have separated and then look for obvious holes.
- Duct mastic is the preferred material for sealing ductwork seams and joints. It is more durable than any available tape and generally easier for a do-it-yourself installation. Its only drawback is that it will not bridge gaps over ¼ inch. Such gaps must be first bridged with web-type drywall tape, or a good quality heat approved tape.
- If you use tape to seal your ducts, avoid cloth-backed, rubber adhesive duct tape — it tends to fail quickly. Instead, use mastic, butyl tape, foil tape, or other heat-approved tapes. Look for tape with the Underwriters Laboratories (UL) logo.
- Remember that insulating ducts in the basement will make the basement colder. If both the ducts and the basement walls are not insulated, consider insulating both. Water pipes and drains in unconditioned spaces could freeze and burst if the heat ducts are fully insulated because there would be no heat source to prevent the space from freezing in cold weather. However, using an electric heating tape wrap on the pipes can prevent this. Check with a professional contractor.
- Hire a professional to install both supply and return registers in the basement rooms after converting your basement to a living area.
- Be sure a well-sealed vapor barrier exists on the outside of the insulation on cooling ducts to prevent moisture condensation.
- If you have a fuel-burning furnace, stove, or other appliance or an attached garage, install a carbon monoxide (CO) monitor to alert you to harmful CO levels.
- Be sure to get professional help when doing ductwork. A qualified professional should always perform changes and repairs to a duct system.
Minimizing Energy Losses in Ducts at 5618 Azores Ln, Houston, TX 77091

5618 Azores Ln, Houston, TX 77091
Minimizing Energy Losses in Ducts
Minimizing energy losses in ducts by seeing if the ducts are poorly sealed or insulated. That could tell you why your energy bill in high. Your air ducts are one of the most important systems in your home, and if the ducts are poorly sealed or insulated, they are likely contributing to higher energy bills.
Your home’s duct system is a branching network of tubes in the walls, floors, and ceilings; it carries the air from your home’s furnace and central air conditioner to each room. Ducts are made of sheet metal, fiberglass, or other materials.
Ducts that leak heated air into unheated spaces can add hundreds of dollars a year to your heating and cooling bills, but you can reduce that loss by sealing and insulating your ducts. Insulating ducts in unconditioned spaces is usually very cost-effective. Existing ducts may also be blocked or may require simple upgrades.
Designing and Installing New Duct Systems
In new home construction or in retrofits, proper duct system design is critical. In recent years, energy-saving designs have sought to include ducts and heating systems in the conditioned space.
Efficient and well-designed duct systems distribute air properly throughout your home without leaking to keep all rooms at a comfortable temperature. The system should provide balanced supply and return flow to maintain a neutral pressure within the house.
Even well sealed and insulated ducts will leak and lose some heat, so many new energy-efficient homes place the duct system within the conditioned space of the home. The simplest way to accomplish this is to hide the ducts in dropped ceilings and in corners of rooms. Ducts can also be located in a sealed and insulated chase extending into the attic or built into raised floors. In both of these latter cases, care must be taken during construction to prevent contractors from using the duct chases for wiring or other utilities.
In either case, actual ducts must be used — chases and floor cavities should not be used as ducts. Regardless of where they are installed, ducts should be well sealed. Although ducts can be configured in a number of ways, the “trunk and branch” and “radial” supply duct configurations are most suitable for ducts located in conditioned spaces.
Air return duct systems can be configured in two ways: each room can have a return duct that sends air back to the heating and cooling equipment or return grills can be located in central locations on each floor. For the latter case, either grills must be installed to allow air to pass out of closed rooms, or short “jumper ducts” can be installed to connect the vent in one room with the next, allowing air to flow back to the central return grilles. Door undercuts help, but they are usually not sufficient for return airflow.
You can perform a simple check for adequate return air capacity by doing the following:
- Close all exterior doors and windows
- Close all interior room doors
- Turn on the central air handler
- “Crack” interior doors one by one and observe if the door closes or further opens “on its own.” (Whether it closes or opens will depend on the direction of the air handler-driven air flow.) Rooms served by air-moved doors have restricted return air flow and need pressure relief as described above.
Maintaining and Upgrading Existing Duct Systems
Sealing your ducts to prevent leaks is even more important if the ducts are located in an unconditioned area such as an attic or vented crawlspace. If the supply ducts are leaking, heated or cooled air can be forced out of unsealed joints and lost. In addition, unconditioned air can be drawn into return ducts through unsealed joints.
Although minor duct repairs are easy to make, qualified professionals should seal and insulate ducts in unconditioned spaces to ensure the use of appropriate sealing materials.
Aside from sealing your ducts, the simplest and most effective means of maintaining your air distribution system is to ensure that furniture and other objects are not blocking the airflow through your registers, and to vacuum the registers to remove any dust buildup.
Existing duct systems often suffer from design deficiencies in the return air system, and modifications by the homeowner (or just a tendency to keep doors closed) may contribute to these problems. Any rooms with a lack of sufficient return airflow may benefit from relatively simple upgrades, such as the installation of new return-air grilles, undercutting doors for return air, or installing a jumper duct.
Some rooms may also be hard to heat and cool because of inadequate supply ducts or grilles. If this is the case, you should first examine whether the problem is the room itself: fix any problems with insulation, air leakage, or inefficient windows first. If the problem persists, you may be able to increase the size of the supply duct or add an additional duct to provide the needed airflow to the room.
Minor Duct Repair Tips for Minimizing Energy Losses in Ducts
- Check your ducts for air leaks. First, look for sections that should be joined but have separated and then look for obvious holes.
- Duct mastic is the preferred material for sealing ductwork seams and joints. It is more durable than any available tape and generally easier for a do-it-yourself installation. Its only drawback is that it will not bridge gaps over ¼ inch. Such gaps must be first bridged with web-type drywall tape, or a good quality heat approved tape.
- If you use tape to seal your ducts, avoid cloth-backed, rubber adhesive duct tape — it tends to fail quickly. Instead, use mastic, butyl tape, foil tape, or other heat-approved tapes. Look for tape with the Underwriters Laboratories (UL) logo.
- Remember that insulating ducts in the basement will make the basement colder. If both the ducts and the basement walls are not insulated, consider insulating both. Water pipes and drains in unconditioned spaces could freeze and burst if the heat ducts are fully insulated because there would be no heat source to prevent the space from freezing in cold weather. However, using an electric heating tape wrap on the pipes can prevent this. Check with a professional contractor.
- Hire a professional to install both supply and return registers in the basement rooms after converting your basement to a living area.
- Be sure a well-sealed vapor barrier exists on the outside of the insulation on cooling ducts to prevent moisture condensation.
- If you have a fuel-burning furnace, stove, or other appliance or an attached garage, install a carbon monoxide (CO) monitor to alert you to harmful CO levels.
- Be sure to get professional help when doing ductwork. A qualified professional should always perform changes and repairs to a duct system.
Minimizing Energy Losses in Ducts at 5620 Azores Ln, Houston, TX 77091

5620 Azores Ln, Houston, TX 77091

Minimizing Energy Losses in Ducts
Minimizing energy losses in ducts by seeing if the ducts are poorly sealed or insulated. That could tell you why your energy bill in high. Your air ducts are one of the most important systems in your home, and if the ducts are poorly sealed or insulated, they are likely contributing to higher energy bills.
Your home’s duct system is a branching network of tubes in the walls, floors, and ceilings; it carries the air from your home’s furnace and central air conditioner to each room. Ducts are made of sheet metal, fiberglass, or other materials.
Ducts that leak heated air into unheated spaces can add hundreds of dollars a year to your heating and cooling bills, but you can reduce that loss by sealing and insulating your ducts. Insulating ducts in unconditioned spaces is usually very cost-effective. Existing ducts may also be blocked or may require simple upgrades.
Designing and Installing New Duct Systems
In new home construction or in retrofits, proper duct system design is critical. In recent years, energy-saving designs have sought to include ducts and heating systems in the conditioned space.
Efficient and well-designed duct systems distribute air properly throughout your home without leaking to keep all rooms at a comfortable temperature. The system should provide balanced supply and return flow to maintain a neutral pressure within the house.
Even well sealed and insulated ducts will leak and lose some heat, so many new energy-efficient homes place the duct system within the conditioned space of the home. The simplest way to accomplish this is to hide the ducts in dropped ceilings and in corners of rooms. Ducts can also be located in a sealed and insulated chase extending into the attic or built into raised floors. In both of these latter cases, care must be taken during construction to prevent contractors from using the duct chases for wiring or other utilities.
In either case, actual ducts must be used — chases and floor cavities should not be used as ducts. Regardless of where they are installed, ducts should be well sealed. Although ducts can be configured in a number of ways, the “trunk and branch” and “radial” supply duct configurations are most suitable for ducts located in conditioned spaces.
Air return duct systems can be configured in two ways: each room can have a return duct that sends air back to the heating and cooling equipment or return grills can be located in central locations on each floor. For the latter case, either grills must be installed to allow air to pass out of closed rooms, or short “jumper ducts” can be installed to connect the vent in one room with the next, allowing air to flow back to the central return grilles. Door undercuts help, but they are usually not sufficient for return airflow.
You can perform a simple check for adequate return air capacity by doing the following:
- Close all exterior doors and windows
- Close all interior room doors
- Turn on the central air handler
- “Crack” interior doors one by one and observe if the door closes or further opens “on its own.” (Whether it closes or opens will depend on the direction of the air handler-driven air flow.) Rooms served by air-moved doors have restricted return air flow and need pressure relief as described above.
Maintaining and Upgrading Existing Duct Systems
Sealing your ducts to prevent leaks is even more important if the ducts are located in an unconditioned area such as an attic or vented crawlspace. If the supply ducts are leaking, heated or cooled air can be forced out of unsealed joints and lost. In addition, unconditioned air can be drawn into return ducts through unsealed joints.
Although minor duct repairs are easy to make, qualified professionals should seal and insulate ducts in unconditioned spaces to ensure the use of appropriate sealing materials.
Aside from sealing your ducts, the simplest and most effective means of maintaining your air distribution system is to ensure that furniture and other objects are not blocking the airflow through your registers, and to vacuum the registers to remove any dust buildup.
Existing duct systems often suffer from design deficiencies in the return air system, and modifications by the homeowner (or just a tendency to keep doors closed) may contribute to these problems. Any rooms with a lack of sufficient return airflow may benefit from relatively simple upgrades, such as the installation of new return-air grilles, undercutting doors for return air, or installing a jumper duct.
Some rooms may also be hard to heat and cool because of inadequate supply ducts or grilles. If this is the case, you should first examine whether the problem is the room itself: fix any problems with insulation, air leakage, or inefficient windows first. If the problem persists, you may be able to increase the size of the supply duct or add an additional duct to provide the needed airflow to the room.
Minor Duct Repair Tips for Minimizing Energy Losses in Ducts
- Check your ducts for air leaks. First, look for sections that should be joined but have separated and then look for obvious holes.
- Duct mastic is the preferred material for sealing ductwork seams and joints. It is more durable than any available tape and generally easier for a do-it-yourself installation. Its only drawback is that it will not bridge gaps over ¼ inch. Such gaps must be first bridged with web-type drywall tape, or a good quality heat approved tape.
- If you use tape to seal your ducts, avoid cloth-backed, rubber adhesive duct tape — it tends to fail quickly. Instead, use mastic, butyl tape, foil tape, or other heat-approved tapes. Look for tape with the Underwriters Laboratories (UL) logo.
- Remember that insulating ducts in the basement will make the basement colder. If both the ducts and the basement walls are not insulated, consider insulating both. Water pipes and drains in unconditioned spaces could freeze and burst if the heat ducts are fully insulated because there would be no heat source to prevent the space from freezing in cold weather. However, using an electric heating tape wrap on the pipes can prevent this. Check with a professional contractor.
- Hire a professional to install both supply and return registers in the basement rooms after converting your basement to a living area.
- Be sure a well-sealed vapor barrier exists on the outside of the insulation on cooling ducts to prevent moisture condensation.
- If you have a fuel-burning furnace, stove, or other appliance or an attached garage, install a carbon monoxide (CO) monitor to alert you to harmful CO levels.
- Be sure to get professional help when doing ductwork. A qualified professional should always perform changes and repairs to a duct system.
Minimizing Energy Losses in Ducts at 1107 Brooks St, Houston, TX 77009

1107 Brooks St, Houston, TX 77009
Minimizing Energy Losses in Ducts
Minimizing energy losses in ducts by seeing if the ducts are poorly sealed or insulated. That could tell you why your energy bill in high. Your air ducts are one of the most important systems in your home, and if the ducts are poorly sealed or insulated, they are likely contributing to higher energy bills.
Your home’s duct system is a branching network of tubes in the walls, floors, and ceilings; it carries the air from your home’s furnace and central air conditioner to each room. Ducts are made of sheet metal, fiberglass, or other materials.
Ducts that leak heated air into unheated spaces can add hundreds of dollars a year to your heating and cooling bills, but you can reduce that loss by sealing and insulating your ducts. Insulating ducts in unconditioned spaces is usually very cost-effective. Existing ducts may also be blocked or may require simple upgrades.
Designing and Installing New Duct Systems
In new home construction or in retrofits, proper duct system design is critical. In recent years, energy-saving designs have sought to include ducts and heating systems in the conditioned space.
Efficient and well-designed duct systems distribute air properly throughout your home without leaking to keep all rooms at a comfortable temperature. The system should provide balanced supply and return flow to maintain a neutral pressure within the house.
Even well sealed and insulated ducts will leak and lose some heat, so many new energy-efficient homes place the duct system within the conditioned space of the home. The simplest way to accomplish this is to hide the ducts in dropped ceilings and in corners of rooms. Ducts can also be located in a sealed and insulated chase extending into the attic or built into raised floors. In both of these latter cases, care must be taken during construction to prevent contractors from using the duct chases for wiring or other utilities.
In either case, actual ducts must be used — chases and floor cavities should not be used as ducts. Regardless of where they are installed, ducts should be well sealed. Although ducts can be configured in a number of ways, the “trunk and branch” and “radial” supply duct configurations are most suitable for ducts located in conditioned spaces.
Air return duct systems can be configured in two ways: each room can have a return duct that sends air back to the heating and cooling equipment or return grills can be located in central locations on each floor. For the latter case, either grills must be installed to allow air to pass out of closed rooms, or short “jumper ducts” can be installed to connect the vent in one room with the next, allowing air to flow back to the central return grilles. Door undercuts help, but they are usually not sufficient for return airflow.
You can perform a simple check for adequate return air capacity by doing the following:
- Close all exterior doors and windows
- Close all interior room doors
- Turn on the central air handler
- “Crack” interior doors one by one and observe if the door closes or further opens “on its own.” (Whether it closes or opens will depend on the direction of the air handler-driven air flow.) Rooms served by air-moved doors have restricted return air flow and need pressure relief as described above.
Maintaining and Upgrading Existing Duct Systems
Sealing your ducts to prevent leaks is even more important if the ducts are located in an unconditioned area such as an attic or vented crawlspace. If the supply ducts are leaking, heated or cooled air can be forced out of unsealed joints and lost. In addition, unconditioned air can be drawn into return ducts through unsealed joints.
Although minor duct repairs are easy to make, qualified professionals should seal and insulate ducts in unconditioned spaces to ensure the use of appropriate sealing materials.
Aside from sealing your ducts, the simplest and most effective means of maintaining your air distribution system is to ensure that furniture and other objects are not blocking the airflow through your registers, and to vacuum the registers to remove any dust buildup.
Existing duct systems often suffer from design deficiencies in the return air system, and modifications by the homeowner (or just a tendency to keep doors closed) may contribute to these problems. Any rooms with a lack of sufficient return airflow may benefit from relatively simple upgrades, such as the installation of new return-air grilles, undercutting doors for return air, or installing a jumper duct.
Some rooms may also be hard to heat and cool because of inadequate supply ducts or grilles. If this is the case, you should first examine whether the problem is the room itself: fix any problems with insulation, air leakage, or inefficient windows first. If the problem persists, you may be able to increase the size of the supply duct or add an additional duct to provide the needed airflow to the room.
Minor Duct Repair Tips for Minimizing Energy Losses in Ducts
- Check your ducts for air leaks. First, look for sections that should be joined but have separated and then look for obvious holes.
- Duct mastic is the preferred material for sealing ductwork seams and joints. It is more durable than any available tape and generally easier for a do-it-yourself installation. Its only drawback is that it will not bridge gaps over ¼ inch. Such gaps must be first bridged with web-type drywall tape, or a good quality heat approved tape.
- If you use tape to seal your ducts, avoid cloth-backed, rubber adhesive duct tape — it tends to fail quickly. Instead, use mastic, butyl tape, foil tape, or other heat-approved tapes. Look for tape with the Underwriters Laboratories (UL) logo.
- Remember that insulating ducts in the basement will make the basement colder. If both the ducts and the basement walls are not insulated, consider insulating both. Water pipes and drains in unconditioned spaces could freeze and burst if the heat ducts are fully insulated because there would be no heat source to prevent the space from freezing in cold weather. However, using an electric heating tape wrap on the pipes can prevent this. Check with a professional contractor.
- Hire a professional to install both supply and return registers in the basement rooms after converting your basement to a living area.
- Be sure a well-sealed vapor barrier exists on the outside of the insulation on cooling ducts to prevent moisture condensation.
- If you have a fuel-burning furnace, stove, or other appliance or an attached garage, install a carbon monoxide (CO) monitor to alert you to harmful CO levels.
- Be sure to get professional help when doing ductwork. A qualified professional should always perform changes and repairs to a duct system.
Minimizing Energy Losses in Ducts at 1373 Dewalt St, Houston Unit B, TX 77088

1373 Dewalt St, Houston Unit B, TX 77088
Minimizing Energy Losses in Ducts
Minimizing energy losses in ducts by seeing if the ducts are poorly sealed or insulated. That could tell you why your energy bill in high. Your air ducts are one of the most important systems in your home, and if the ducts are poorly sealed or insulated, they are likely contributing to higher energy bills.
Your home’s duct system is a branching network of tubes in the walls, floors, and ceilings; it carries the air from your home’s furnace and central air conditioner to each room. Ducts are made of sheet metal, fiberglass, or other materials.
Ducts that leak heated air into unheated spaces can add hundreds of dollars a year to your heating and cooling bills, but you can reduce that loss by sealing and insulating your ducts. Insulating ducts in unconditioned spaces is usually very cost-effective. Existing ducts may also be blocked or may require simple upgrades.
Designing and Installing New Duct Systems
In new home construction or in retrofits, proper duct system design is critical. In recent years, energy-saving designs have sought to include ducts and heating systems in the conditioned space.
Efficient and well-designed duct systems distribute air properly throughout your home without leaking to keep all rooms at a comfortable temperature. The system should provide balanced supply and return flow to maintain a neutral pressure within the house.
Even well sealed and insulated ducts will leak and lose some heat, so many new energy-efficient homes place the duct system within the conditioned space of the home. The simplest way to accomplish this is to hide the ducts in dropped ceilings and in corners of rooms. Ducts can also be located in a sealed and insulated chase extending into the attic or built into raised floors. In both of these latter cases, care must be taken during construction to prevent contractors from using the duct chases for wiring or other utilities.
In either case, actual ducts must be used — chases and floor cavities should not be used as ducts. Regardless of where they are installed, ducts should be well sealed. Although ducts can be configured in a number of ways, the “trunk and branch” and “radial” supply duct configurations are most suitable for ducts located in conditioned spaces.
Air return duct systems can be configured in two ways: each room can have a return duct that sends air back to the heating and cooling equipment or return grills can be located in central locations on each floor. For the latter case, either grills must be installed to allow air to pass out of closed rooms, or short “jumper ducts” can be installed to connect the vent in one room with the next, allowing air to flow back to the central return grilles. Door undercuts help, but they are usually not sufficient for return airflow.
You can perform a simple check for adequate return air capacity by doing the following:
- Close all exterior doors and windows
- Close all interior room doors
- Turn on the central air handler
- “Crack” interior doors one by one and observe if the door closes or further opens “on its own.” (Whether it closes or opens will depend on the direction of the air handler-driven air flow.) Rooms served by air-moved doors have restricted return air flow and need pressure relief as described above.
Maintaining and Upgrading Existing Duct Systems
Sealing your ducts to prevent leaks is even more important if the ducts are located in an unconditioned area such as an attic or vented crawlspace. If the supply ducts are leaking, heated or cooled air can be forced out of unsealed joints and lost. In addition, unconditioned air can be drawn into return ducts through unsealed joints.
Although minor duct repairs are easy to make, qualified professionals should seal and insulate ducts in unconditioned spaces to ensure the use of appropriate sealing materials.
Aside from sealing your ducts, the simplest and most effective means of maintaining your air distribution system is to ensure that furniture and other objects are not blocking the airflow through your registers, and to vacuum the registers to remove any dust buildup.
Existing duct systems often suffer from design deficiencies in the return air system, and modifications by the homeowner (or just a tendency to keep doors closed) may contribute to these problems. Any rooms with a lack of sufficient return airflow may benefit from relatively simple upgrades, such as the installation of new return-air grilles, undercutting doors for return air, or installing a jumper duct.
Some rooms may also be hard to heat and cool because of inadequate supply ducts or grilles. If this is the case, you should first examine whether the problem is the room itself: fix any problems with insulation, air leakage, or inefficient windows first. If the problem persists, you may be able to increase the size of the supply duct or add an additional duct to provide the needed airflow to the room.
Minor Duct Repair Tips for Minimizing Energy Losses in Ducts
- Check your ducts for air leaks. First, look for sections that should be joined but have separated and then look for obvious holes.
- Duct mastic is the preferred material for sealing ductwork seams and joints. It is more durable than any available tape and generally easier for a do-it-yourself installation. Its only drawback is that it will not bridge gaps over ¼ inch. Such gaps must be first bridged with web-type drywall tape, or a good quality heat approved tape.
- If you use tape to seal your ducts, avoid cloth-backed, rubber adhesive duct tape — it tends to fail quickly. Instead, use mastic, butyl tape, foil tape, or other heat-approved tapes. Look for tape with the Underwriters Laboratories (UL) logo.
- Remember that insulating ducts in the basement will make the basement colder. If both the ducts and the basement walls are not insulated, consider insulating both. Water pipes and drains in unconditioned spaces could freeze and burst if the heat ducts are fully insulated because there would be no heat source to prevent the space from freezing in cold weather. However, using an electric heating tape wrap on the pipes can prevent this. Check with a professional contractor.
- Hire a professional to install both supply and return registers in the basement rooms after converting your basement to a living area.
- Be sure a well-sealed vapor barrier exists on the outside of the insulation on cooling ducts to prevent moisture condensation.
- If you have a fuel-burning furnace, stove, or other appliance or an attached garage, install a carbon monoxide (CO) monitor to alert you to harmful CO levels.
- Be sure to get professional help when doing ductwork. A qualified professional should always perform changes and repairs to a duct system.
Minimizing Energy Losses in Ducts at 1373 Dewalt St, Houston Unit A, TX 77088

1373 Dewalt St, Houston Unit A, TX 77088
Minimizing Energy Losses in Ducts
Minimizing energy losses in ducts by seeing if the ducts are poorly sealed or insulated. That could tell you why your energy bill in high. Your air ducts are one of the most important systems in your home, and if the ducts are poorly sealed or insulated, they are likely contributing to higher energy bills.
Your home’s duct system is a branching network of tubes in the walls, floors, and ceilings; it carries the air from your home’s furnace and central air conditioner to each room. Ducts are made of sheet metal, fiberglass, or other materials.
Ducts that leak heated air into unheated spaces can add hundreds of dollars a year to your heating and cooling bills, but you can reduce that loss by sealing and insulating your ducts. Insulating ducts in unconditioned spaces is usually very cost-effective. Existing ducts may also be blocked or may require simple upgrades.
Designing and Installing New Duct Systems
In new home construction or in retrofits, proper duct system design is critical. In recent years, energy-saving designs have sought to include ducts and heating systems in the conditioned space.
Efficient and well-designed duct systems distribute air properly throughout your home without leaking to keep all rooms at a comfortable temperature. The system should provide balanced supply and return flow to maintain a neutral pressure within the house.
Even well sealed and insulated ducts will leak and lose some heat, so many new energy-efficient homes place the duct system within the conditioned space of the home. The simplest way to accomplish this is to hide the ducts in dropped ceilings and in corners of rooms. Ducts can also be located in a sealed and insulated chase extending into the attic or built into raised floors. In both of these latter cases, care must be taken during construction to prevent contractors from using the duct chases for wiring or other utilities.
In either case, actual ducts must be used — chases and floor cavities should not be used as ducts. Regardless of where they are installed, ducts should be well sealed. Although ducts can be configured in a number of ways, the “trunk and branch” and “radial” supply duct configurations are most suitable for ducts located in conditioned spaces.
Air return duct systems can be configured in two ways: each room can have a return duct that sends air back to the heating and cooling equipment or return grills can be located in central locations on each floor. For the latter case, either grills must be installed to allow air to pass out of closed rooms, or short “jumper ducts” can be installed to connect the vent in one room with the next, allowing air to flow back to the central return grilles. Door undercuts help, but they are usually not sufficient for return airflow.
You can perform a simple check for adequate return air capacity by doing the following:
- Close all exterior doors and windows
- Close all interior room doors
- Turn on the central air handler
- “Crack” interior doors one by one and observe if the door closes or further opens “on its own.” (Whether it closes or opens will depend on the direction of the air handler-driven air flow.) Rooms served by air-moved doors have restricted return air flow and need pressure relief as described above.
Maintaining and Upgrading Existing Duct Systems
Sealing your ducts to prevent leaks is even more important if the ducts are located in an unconditioned area such as an attic or vented crawlspace. If the supply ducts are leaking, heated or cooled air can be forced out of unsealed joints and lost. In addition, unconditioned air can be drawn into return ducts through unsealed joints.
Although minor duct repairs are easy to make, qualified professionals should seal and insulate ducts in unconditioned spaces to ensure the use of appropriate sealing materials.
Aside from sealing your ducts, the simplest and most effective means of maintaining your air distribution system is to ensure that furniture and other objects are not blocking the airflow through your registers, and to vacuum the registers to remove any dust buildup.
Existing duct systems often suffer from design deficiencies in the return air system, and modifications by the homeowner (or just a tendency to keep doors closed) may contribute to these problems. Any rooms with a lack of sufficient return airflow may benefit from relatively simple upgrades, such as the installation of new return-air grilles, undercutting doors for return air, or installing a jumper duct.
Some rooms may also be hard to heat and cool because of inadequate supply ducts or grilles. If this is the case, you should first examine whether the problem is the room itself: fix any problems with insulation, air leakage, or inefficient windows first. If the problem persists, you may be able to increase the size of the supply duct or add an additional duct to provide the needed airflow to the room.
Minor Duct Repair Tips for Minimizing Energy Losses in Ducts
- Check your ducts for air leaks. First, look for sections that should be joined but have separated and then look for obvious holes.
- Duct mastic is the preferred material for sealing ductwork seams and joints. It is more durable than any available tape and generally easier for a do-it-yourself installation. Its only drawback is that it will not bridge gaps over ¼ inch. Such gaps must be first bridged with web-type drywall tape, or a good quality heat approved tape.
- If you use tape to seal your ducts, avoid cloth-backed, rubber adhesive duct tape — it tends to fail quickly. Instead, use mastic, butyl tape, foil tape, or other heat-approved tapes. Look for tape with the Underwriters Laboratories (UL) logo.
- Remember that insulating ducts in the basement will make the basement colder. If both the ducts and the basement walls are not insulated, consider insulating both. Water pipes and drains in unconditioned spaces could freeze and burst if the heat ducts are fully insulated because there would be no heat source to prevent the space from freezing in cold weather. However, using an electric heating tape wrap on the pipes can prevent this. Check with a professional contractor.
- Hire a professional to install both supply and return registers in the basement rooms after converting your basement to a living area.
- Be sure a well-sealed vapor barrier exists on the outside of the insulation on cooling ducts to prevent moisture condensation.
- If you have a fuel-burning furnace, stove, or other appliance or an attached garage, install a carbon monoxide (CO) monitor to alert you to harmful CO levels.
- Be sure to get professional help when doing ductwork. A qualified professional should always perform changes and repairs to a duct system.
Minimizing Energy Losses in Ducts at 7909 N Main St, Houston, TX 77022

7909 N Main St, Houston, TX 77022
Minimizing Energy Losses in Ducts
Minimizing energy losses in ducts by seeing if the ducts are poorly sealed or insulated. That could tell you why your energy bill in high. Your air ducts are one of the most important systems in your home, and if the ducts are poorly sealed or insulated, they are likely contributing to higher energy bills.
Your home’s duct system is a branching network of tubes in the walls, floors, and ceilings; it carries the air from your home’s furnace and central air conditioner to each room. Ducts are made of sheet metal, fiberglass, or other materials.
Ducts that leak heated air into unheated spaces can add hundreds of dollars a year to your heating and cooling bills, but you can reduce that loss by sealing and insulating your ducts. Insulating ducts in unconditioned spaces is usually very cost-effective. Existing ducts may also be blocked or may require simple upgrades.
Designing and Installing New Duct Systems
In new home construction or in retrofits, proper duct system design is critical. In recent years, energy-saving designs have sought to include ducts and heating systems in the conditioned space.
Efficient and well-designed duct systems distribute air properly throughout your home without leaking to keep all rooms at a comfortable temperature. The system should provide balanced supply and return flow to maintain a neutral pressure within the house.
Even well sealed and insulated ducts will leak and lose some heat, so many new energy-efficient homes place the duct system within the conditioned space of the home. The simplest way to accomplish this is to hide the ducts in dropped ceilings and in corners of rooms. Ducts can also be located in a sealed and insulated chase extending into the attic or built into raised floors. In both of these latter cases, care must be taken during construction to prevent contractors from using the duct chases for wiring or other utilities.
In either case, actual ducts must be used — chases and floor cavities should not be used as ducts. Regardless of where they are installed, ducts should be well sealed. Although ducts can be configured in a number of ways, the “trunk and branch” and “radial” supply duct configurations are most suitable for ducts located in conditioned spaces.
Air return duct systems can be configured in two ways: each room can have a return duct that sends air back to the heating and cooling equipment or return grills can be located in central locations on each floor. For the latter case, either grills must be installed to allow air to pass out of closed rooms, or short “jumper ducts” can be installed to connect the vent in one room with the next, allowing air to flow back to the central return grilles. Door undercuts help, but they are usually not sufficient for return airflow.
You can perform a simple check for adequate return air capacity by doing the following:
- Close all exterior doors and windows
- Close all interior room doors
- Turn on the central air handler
- “Crack” interior doors one by one and observe if the door closes or further opens “on its own.” (Whether it closes or opens will depend on the direction of the air handler-driven air flow.) Rooms served by air-moved doors have restricted return air flow and need pressure relief as described above.
Maintaining and Upgrading Existing Duct Systems
Sealing your ducts to prevent leaks is even more important if the ducts are located in an unconditioned area such as an attic or vented crawlspace. If the supply ducts are leaking, heated or cooled air can be forced out of unsealed joints and lost. In addition, unconditioned air can be drawn into return ducts through unsealed joints.
Although minor duct repairs are easy to make, qualified professionals should seal and insulate ducts in unconditioned spaces to ensure the use of appropriate sealing materials.
Aside from sealing your ducts, the simplest and most effective means of maintaining your air distribution system is to ensure that furniture and other objects are not blocking the airflow through your registers, and to vacuum the registers to remove any dust buildup.
Existing duct systems often suffer from design deficiencies in the return air system, and modifications by the homeowner (or just a tendency to keep doors closed) may contribute to these problems. Any rooms with a lack of sufficient return airflow may benefit from relatively simple upgrades, such as the installation of new return-air grilles, undercutting doors for return air, or installing a jumper duct.
Some rooms may also be hard to heat and cool because of inadequate supply ducts or grilles. If this is the case, you should first examine whether the problem is the room itself: fix any problems with insulation, air leakage, or inefficient windows first. If the problem persists, you may be able to increase the size of the supply duct or add an additional duct to provide the needed airflow to the room.
Minor Duct Repair Tips for Minimizing Energy Losses in Ducts
- Check your ducts for air leaks. First, look for sections that should be joined but have separated and then look for obvious holes.
- Duct mastic is the preferred material for sealing ductwork seams and joints. It is more durable than any available tape and generally easier for a do-it-yourself installation. Its only drawback is that it will not bridge gaps over ¼ inch. Such gaps must be first bridged with web-type drywall tape, or a good quality heat approved tape.
- If you use tape to seal your ducts, avoid cloth-backed, rubber adhesive duct tape — it tends to fail quickly. Instead, use mastic, butyl tape, foil tape, or other heat-approved tapes. Look for tape with the Underwriters Laboratories (UL) logo.
- Remember that insulating ducts in the basement will make the basement colder. If both the ducts and the basement walls are not insulated, consider insulating both. Water pipes and drains in unconditioned spaces could freeze and burst if the heat ducts are fully insulated because there would be no heat source to prevent the space from freezing in cold weather. However, using an electric heating tape wrap on the pipes can prevent this. Check with a professional contractor.
- Hire a professional to install both supply and return registers in the basement rooms after converting your basement to a living area.
- Be sure a well-sealed vapor barrier exists on the outside of the insulation on cooling ducts to prevent moisture condensation.
- If you have a fuel-burning furnace, stove, or other appliance or an attached garage, install a carbon monoxide (CO) monitor to alert you to harmful CO levels.
- Be sure to get professional help when doing ductwork. A qualified professional should always perform changes and repairs to a duct system.
Minimizing Energy Losses in Ducts at 1515 E 31st St, Houston, TX 77022

1515 E 31st St, Houston, TX 77022
Minimizing Energy Losses in Ducts
Minimizing energy losses in ducts by seeing if the ducts are poorly sealed or insulated. That could tell you why your energy bill in high. Your air ducts are one of the most important systems in your home, and if the ducts are poorly sealed or insulated, they are likely contributing to higher energy bills.
Your home’s duct system is a branching network of tubes in the walls, floors, and ceilings; it carries the air from your home’s furnace and central air conditioner to each room. Ducts are made of sheet metal, fiberglass, or other materials.
Ducts that leak heated air into unheated spaces can add hundreds of dollars a year to your heating and cooling bills, but you can reduce that loss by sealing and insulating your ducts. Insulating ducts in unconditioned spaces is usually very cost-effective. Existing ducts may also be blocked or may require simple upgrades.
Designing and Installing New Duct Systems
In new home construction or in retrofits, proper duct system design is critical. In recent years, energy-saving designs have sought to include ducts and heating systems in the conditioned space.
Efficient and well-designed duct systems distribute air properly throughout your home without leaking to keep all rooms at a comfortable temperature. The system should provide balanced supply and return flow to maintain a neutral pressure within the house.
Even well sealed and insulated ducts will leak and lose some heat, so many new energy-efficient homes place the duct system within the conditioned space of the home. The simplest way to accomplish this is to hide the ducts in dropped ceilings and in corners of rooms. Ducts can also be located in a sealed and insulated chase extending into the attic or built into raised floors. In both of these latter cases, care must be taken during construction to prevent contractors from using the duct chases for wiring or other utilities.
In either case, actual ducts must be used — chases and floor cavities should not be used as ducts. Regardless of where they are installed, ducts should be well sealed. Although ducts can be configured in a number of ways, the “trunk and branch” and “radial” supply duct configurations are most suitable for ducts located in conditioned spaces.
Air return duct systems can be configured in two ways: each room can have a return duct that sends air back to the heating and cooling equipment or return grills can be located in central locations on each floor. For the latter case, either grills must be installed to allow air to pass out of closed rooms, or short “jumper ducts” can be installed to connect the vent in one room with the next, allowing air to flow back to the central return grilles. Door undercuts help, but they are usually not sufficient for return airflow.
You can perform a simple check for adequate return air capacity by doing the following:
- Close all exterior doors and windows
- Close all interior room doors
- Turn on the central air handler
- “Crack” interior doors one by one and observe if the door closes or further opens “on its own.” (Whether it closes or opens will depend on the direction of the air handler-driven air flow.) Rooms served by air-moved doors have restricted return air flow and need pressure relief as described above.
Maintaining and Upgrading Existing Duct Systems
Sealing your ducts to prevent leaks is even more important if the ducts are located in an unconditioned area such as an attic or vented crawlspace. If the supply ducts are leaking, heated or cooled air can be forced out of unsealed joints and lost. In addition, unconditioned air can be drawn into return ducts through unsealed joints.
Although minor duct repairs are easy to make, qualified professionals should seal and insulate ducts in unconditioned spaces to ensure the use of appropriate sealing materials.
Aside from sealing your ducts, the simplest and most effective means of maintaining your air distribution system is to ensure that furniture and other objects are not blocking the airflow through your registers, and to vacuum the registers to remove any dust buildup.
Existing duct systems often suffer from design deficiencies in the return air system, and modifications by the homeowner (or just a tendency to keep doors closed) may contribute to these problems. Any rooms with a lack of sufficient return airflow may benefit from relatively simple upgrades, such as the installation of new return-air grilles, undercutting doors for return air, or installing a jumper duct.
Some rooms may also be hard to heat and cool because of inadequate supply ducts or grilles. If this is the case, you should first examine whether the problem is the room itself: fix any problems with insulation, air leakage, or inefficient windows first. If the problem persists, you may be able to increase the size of the supply duct or add an additional duct to provide the needed airflow to the room.
Minor Duct Repair Tips for Minimizing Energy Losses in Ducts
- Check your ducts for air leaks. First, look for sections that should be joined but have separated and then look for obvious holes.
- Duct mastic is the preferred material for sealing ductwork seams and joints. It is more durable than any available tape and generally easier for a do-it-yourself installation. Its only drawback is that it will not bridge gaps over ¼ inch. Such gaps must be first bridged with web-type drywall tape, or a good quality heat approved tape.
- If you use tape to seal your ducts, avoid cloth-backed, rubber adhesive duct tape — it tends to fail quickly. Instead, use mastic, butyl tape, foil tape, or other heat-approved tapes. Look for tape with the Underwriters Laboratories (UL) logo.
- Remember that insulating ducts in the basement will make the basement colder. If both the ducts and the basement walls are not insulated, consider insulating both. Water pipes and drains in unconditioned spaces could freeze and burst if the heat ducts are fully insulated because there would be no heat source to prevent the space from freezing in cold weather. However, using an electric heating tape wrap on the pipes can prevent this. Check with a professional contractor.
- Hire a professional to install both supply and return registers in the basement rooms after converting your basement to a living area.
- Be sure a well-sealed vapor barrier exists on the outside of the insulation on cooling ducts to prevent moisture condensation.
- If you have a fuel-burning furnace, stove, or other appliance or an attached garage, install a carbon monoxide (CO) monitor to alert you to harmful CO levels.
- Be sure to get professional help when doing ductwork. A qualified professional should always perform changes and repairs to a duct system.
Minimizing Energy Losses in Ducts at 3127 Bay St, Houston, TX 77026

3127 Bay St, Houston, TX 77026
Minimizing Energy Losses in Ducts
Minimizing energy losses in ducts by seeing if the ducts are poorly sealed or insulated. That could tell you why your energy bill in high. Your air ducts are one of the most important systems in your home, and if the ducts are poorly sealed or insulated, they are likely contributing to higher energy bills.
Your home’s duct system is a branching network of tubes in the walls, floors, and ceilings; it carries the air from your home’s furnace and central air conditioner to each room. Ducts are made of sheet metal, fiberglass, or other materials.
Ducts that leak heated air into unheated spaces can add hundreds of dollars a year to your heating and cooling bills, but you can reduce that loss by sealing and insulating your ducts. Insulating ducts in unconditioned spaces is usually very cost-effective. Existing ducts may also be blocked or may require simple upgrades.
Designing and Installing New Duct Systems
In new home construction or in retrofits, proper duct system design is critical. In recent years, energy-saving designs have sought to include ducts and heating systems in the conditioned space.
Efficient and well-designed duct systems distribute air properly throughout your home without leaking to keep all rooms at a comfortable temperature. The system should provide balanced supply and return flow to maintain a neutral pressure within the house.
Even well sealed and insulated ducts will leak and lose some heat, so many new energy-efficient homes place the duct system within the conditioned space of the home. The simplest way to accomplish this is to hide the ducts in dropped ceilings and in corners of rooms. Ducts can also be located in a sealed and insulated chase extending into the attic or built into raised floors. In both of these latter cases, care must be taken during construction to prevent contractors from using the duct chases for wiring or other utilities.
In either case, actual ducts must be used — chases and floor cavities should not be used as ducts. Regardless of where they are installed, ducts should be well sealed. Although ducts can be configured in a number of ways, the “trunk and branch” and “radial” supply duct configurations are most suitable for ducts located in conditioned spaces.
Air return duct systems can be configured in two ways: each room can have a return duct that sends air back to the heating and cooling equipment or return grills can be located in central locations on each floor. For the latter case, either grills must be installed to allow air to pass out of closed rooms, or short “jumper ducts” can be installed to connect the vent in one room with the next, allowing air to flow back to the central return grilles. Door undercuts help, but they are usually not sufficient for return airflow.
You can perform a simple check for adequate return air capacity by doing the following:
- Close all exterior doors and windows
- Close all interior room doors
- Turn on the central air handler
- “Crack” interior doors one by one and observe if the door closes or further opens “on its own.” (Whether it closes or opens will depend on the direction of the air handler-driven air flow.) Rooms served by air-moved doors have restricted return air flow and need pressure relief as described above.
Maintaining and Upgrading Existing Duct Systems
Sealing your ducts to prevent leaks is even more important if the ducts are located in an unconditioned area such as an attic or vented crawlspace. If the supply ducts are leaking, heated or cooled air can be forced out of unsealed joints and lost. In addition, unconditioned air can be drawn into return ducts through unsealed joints.
Although minor duct repairs are easy to make, qualified professionals should seal and insulate ducts in unconditioned spaces to ensure the use of appropriate sealing materials.
Aside from sealing your ducts, the simplest and most effective means of maintaining your air distribution system is to ensure that furniture and other objects are not blocking the airflow through your registers, and to vacuum the registers to remove any dust buildup.
Existing duct systems often suffer from design deficiencies in the return air system, and modifications by the homeowner (or just a tendency to keep doors closed) may contribute to these problems. Any rooms with a lack of sufficient return airflow may benefit from relatively simple upgrades, such as the installation of new return-air grilles, undercutting doors for return air, or installing a jumper duct.
Some rooms may also be hard to heat and cool because of inadequate supply ducts or grilles. If this is the case, you should first examine whether the problem is the room itself: fix any problems with insulation, air leakage, or inefficient windows first. If the problem persists, you may be able to increase the size of the supply duct or add an additional duct to provide the needed airflow to the room.
Minor Duct Repair Tips for Minimizing Energy Losses in Ducts
- Check your ducts for air leaks. First, look for sections that should be joined but have separated and then look for obvious holes.
- Duct mastic is the preferred material for sealing ductwork seams and joints. It is more durable than any available tape and generally easier for a do-it-yourself installation. Its only drawback is that it will not bridge gaps over ¼ inch. Such gaps must be first bridged with web-type drywall tape, or a good quality heat approved tape.
- If you use tape to seal your ducts, avoid cloth-backed, rubber adhesive duct tape — it tends to fail quickly. Instead, use mastic, butyl tape, foil tape, or other heat-approved tapes. Look for tape with the Underwriters Laboratories (UL) logo.
- Remember that insulating ducts in the basement will make the basement colder. If both the ducts and the basement walls are not insulated, consider insulating both. Water pipes and drains in unconditioned spaces could freeze and burst if the heat ducts are fully insulated because there would be no heat source to prevent the space from freezing in cold weather. However, using an electric heating tape wrap on the pipes can prevent this. Check with a professional contractor.
- Hire a professional to install both supply and return registers in the basement rooms after converting your basement to a living area.
- Be sure a well-sealed vapor barrier exists on the outside of the insulation on cooling ducts to prevent moisture condensation.
- If you have a fuel-burning furnace, stove, or other appliance or an attached garage, install a carbon monoxide (CO) monitor to alert you to harmful CO levels.
- Be sure to get professional help when doing ductwork. A qualified professional should always perform changes and repairs to a duct system.
Minimizing Energy Losses in Ducts at 4712 Rawley St Unit B, Houston, TX 77020

4712 Rawley St Unit B, Houston, TX 77020
Minimizing Energy Losses in Ducts
Minimizing energy losses in ducts by seeing if the ducts are poorly sealed or insulated. That could tell you why your energy bill in high. Your air ducts are one of the most important systems in your home, and if the ducts are poorly sealed or insulated, they are likely contributing to higher energy bills.
Your home’s duct system is a branching network of tubes in the walls, floors, and ceilings; it carries the air from your home’s furnace and central air conditioner to each room. Ducts are made of sheet metal, fiberglass, or other materials.
Ducts that leak heated air into unheated spaces can add hundreds of dollars a year to your heating and cooling bills, but you can reduce that loss by sealing and insulating your ducts. Insulating ducts in unconditioned spaces is usually very cost-effective. Existing ducts may also be blocked or may require simple upgrades.
Designing and Installing New Duct Systems
In new home construction or in retrofits, proper duct system design is critical. In recent years, energy-saving designs have sought to include ducts and heating systems in the conditioned space.
Efficient and well-designed duct systems distribute air properly throughout your home without leaking to keep all rooms at a comfortable temperature. The system should provide balanced supply and return flow to maintain a neutral pressure within the house.
Even well sealed and insulated ducts will leak and lose some heat, so many new energy-efficient homes place the duct system within the conditioned space of the home. The simplest way to accomplish this is to hide the ducts in dropped ceilings and in corners of rooms. Ducts can also be located in a sealed and insulated chase extending into the attic or built into raised floors. In both of these latter cases, care must be taken during construction to prevent contractors from using the duct chases for wiring or other utilities.
In either case, actual ducts must be used — chases and floor cavities should not be used as ducts. Regardless of where they are installed, ducts should be well sealed. Although ducts can be configured in a number of ways, the “trunk and branch” and “radial” supply duct configurations are most suitable for ducts located in conditioned spaces.
Air return duct systems can be configured in two ways: each room can have a return duct that sends air back to the heating and cooling equipment or return grills can be located in central locations on each floor. For the latter case, either grills must be installed to allow air to pass out of closed rooms, or short “jumper ducts” can be installed to connect the vent in one room with the next, allowing air to flow back to the central return grilles. Door undercuts help, but they are usually not sufficient for return airflow.
You can perform a simple check for adequate return air capacity by doing the following:
- Close all exterior doors and windows
- Close all interior room doors
- Turn on the central air handler
- “Crack” interior doors one by one and observe if the door closes or further opens “on its own.” (Whether it closes or opens will depend on the direction of the air handler-driven air flow.) Rooms served by air-moved doors have restricted return air flow and need pressure relief as described above.
Maintaining and Upgrading Existing Duct Systems
Sealing your ducts to prevent leaks is even more important if the ducts are located in an unconditioned area such as an attic or vented crawlspace. If the supply ducts are leaking, heated or cooled air can be forced out of unsealed joints and lost. In addition, unconditioned air can be drawn into return ducts through unsealed joints.
Although minor duct repairs are easy to make, qualified professionals should seal and insulate ducts in unconditioned spaces to ensure the use of appropriate sealing materials.
Aside from sealing your ducts, the simplest and most effective means of maintaining your air distribution system is to ensure that furniture and other objects are not blocking the airflow through your registers, and to vacuum the registers to remove any dust buildup.
Existing duct systems often suffer from design deficiencies in the return air system, and modifications by the homeowner (or just a tendency to keep doors closed) may contribute to these problems. Any rooms with a lack of sufficient return airflow may benefit from relatively simple upgrades, such as the installation of new return-air grilles, undercutting doors for return air, or installing a jumper duct.
Some rooms may also be hard to heat and cool because of inadequate supply ducts or grilles. If this is the case, you should first examine whether the problem is the room itself: fix any problems with insulation, air leakage, or inefficient windows first. If the problem persists, you may be able to increase the size of the supply duct or add an additional duct to provide the needed airflow to the room.
Minor Duct Repair Tips for Minimizing Energy Losses in Ducts
- Check your ducts for air leaks. First, look for sections that should be joined but have separated and then look for obvious holes.
- Duct mastic is the preferred material for sealing ductwork seams and joints. It is more durable than any available tape and generally easier for a do-it-yourself installation. Its only drawback is that it will not bridge gaps over ¼ inch. Such gaps must be first bridged with web-type drywall tape, or a good quality heat approved tape.
- If you use tape to seal your ducts, avoid cloth-backed, rubber adhesive duct tape — it tends to fail quickly. Instead, use mastic, butyl tape, foil tape, or other heat-approved tapes. Look for tape with the Underwriters Laboratories (UL) logo.
- Remember that insulating ducts in the basement will make the basement colder. If both the ducts and the basement walls are not insulated, consider insulating both. Water pipes and drains in unconditioned spaces could freeze and burst if the heat ducts are fully insulated because there would be no heat source to prevent the space from freezing in cold weather. However, using an electric heating tape wrap on the pipes can prevent this. Check with a professional contractor.
- Hire a professional to install both supply and return registers in the basement rooms after converting your basement to a living area.
- Be sure a well-sealed vapor barrier exists on the outside of the insulation on cooling ducts to prevent moisture condensation.
- If you have a fuel-burning furnace, stove, or other appliance or an attached garage, install a carbon monoxide (CO) monitor to alert you to harmful CO levels.
- Be sure to get professional help when doing ductwork. A qualified professional should always perform changes and repairs to a duct system.
Minimizing Energy Losses in Ducts at 4712 Rawley St Unit A, Houston, TX 77020

4712 Rawley St Unit A, Houston, TX 77020
Minimizing Energy Losses in Ducts
Minimizing energy losses in ducts by seeing if the ducts are poorly sealed or insulated. That could tell you why your energy bill in high. Your air ducts are one of the most important systems in your home, and if the ducts are poorly sealed or insulated, they are likely contributing to higher energy bills.
Your home’s duct system is a branching network of tubes in the walls, floors, and ceilings; it carries the air from your home’s furnace and central air conditioner to each room. Ducts are made of sheet metal, fiberglass, or other materials.
Ducts that leak heated air into unheated spaces can add hundreds of dollars a year to your heating and cooling bills, but you can reduce that loss by sealing and insulating your ducts. Insulating ducts in unconditioned spaces is usually very cost-effective. Existing ducts may also be blocked or may require simple upgrades.
Designing and Installing New Duct Systems
In new home construction or in retrofits, proper duct system design is critical. In recent years, energy-saving designs have sought to include ducts and heating systems in the conditioned space.
Efficient and well-designed duct systems distribute air properly throughout your home without leaking to keep all rooms at a comfortable temperature. The system should provide balanced supply and return flow to maintain a neutral pressure within the house.
Even well sealed and insulated ducts will leak and lose some heat, so many new energy-efficient homes place the duct system within the conditioned space of the home. The simplest way to accomplish this is to hide the ducts in dropped ceilings and in corners of rooms. Ducts can also be located in a sealed and insulated chase extending into the attic or built into raised floors. In both of these latter cases, care must be taken during construction to prevent contractors from using the duct chases for wiring or other utilities.
In either case, actual ducts must be used — chases and floor cavities should not be used as ducts. Regardless of where they are installed, ducts should be well sealed. Although ducts can be configured in a number of ways, the “trunk and branch” and “radial” supply duct configurations are most suitable for ducts located in conditioned spaces.
Air return duct systems can be configured in two ways: each room can have a return duct that sends air back to the heating and cooling equipment or return grills can be located in central locations on each floor. For the latter case, either grills must be installed to allow air to pass out of closed rooms, or short “jumper ducts” can be installed to connect the vent in one room with the next, allowing air to flow back to the central return grilles. Door undercuts help, but they are usually not sufficient for return airflow.
You can perform a simple check for adequate return air capacity by doing the following:
- Close all exterior doors and windows
- Close all interior room doors
- Turn on the central air handler
- “Crack” interior doors one by one and observe if the door closes or further opens “on its own.” (Whether it closes or opens will depend on the direction of the air handler-driven air flow.) Rooms served by air-moved doors have restricted return air flow and need pressure relief as described above.
Maintaining and Upgrading Existing Duct Systems
Sealing your ducts to prevent leaks is even more important if the ducts are located in an unconditioned area such as an attic or vented crawlspace. If the supply ducts are leaking, heated or cooled air can be forced out of unsealed joints and lost. In addition, unconditioned air can be drawn into return ducts through unsealed joints.
Although minor duct repairs are easy to make, qualified professionals should seal and insulate ducts in unconditioned spaces to ensure the use of appropriate sealing materials.
Aside from sealing your ducts, the simplest and most effective means of maintaining your air distribution system is to ensure that furniture and other objects are not blocking the airflow through your registers, and to vacuum the registers to remove any dust buildup.
Existing duct systems often suffer from design deficiencies in the return air system, and modifications by the homeowner (or just a tendency to keep doors closed) may contribute to these problems. Any rooms with a lack of sufficient return airflow may benefit from relatively simple upgrades, such as the installation of new return-air grilles, undercutting doors for return air, or installing a jumper duct.
Some rooms may also be hard to heat and cool because of inadequate supply ducts or grilles. If this is the case, you should first examine whether the problem is the room itself: fix any problems with insulation, air leakage, or inefficient windows first. If the problem persists, you may be able to increase the size of the supply duct or add an additional duct to provide the needed airflow to the room.
Minor Duct Repair Tips for Minimizing Energy Losses in Ducts
- Check your ducts for air leaks. First, look for sections that should be joined but have separated and then look for obvious holes.
- Duct mastic is the preferred material for sealing ductwork seams and joints. It is more durable than any available tape and generally easier for a do-it-yourself installation. Its only drawback is that it will not bridge gaps over ¼ inch. Such gaps must be first bridged with web-type drywall tape, or a good quality heat approved tape.
- If you use tape to seal your ducts, avoid cloth-backed, rubber adhesive duct tape — it tends to fail quickly. Instead, use mastic, butyl tape, foil tape, or other heat-approved tapes. Look for tape with the Underwriters Laboratories (UL) logo.
- Remember that insulating ducts in the basement will make the basement colder. If both the ducts and the basement walls are not insulated, consider insulating both. Water pipes and drains in unconditioned spaces could freeze and burst if the heat ducts are fully insulated because there would be no heat source to prevent the space from freezing in cold weather. However, using an electric heating tape wrap on the pipes can prevent this. Check with a professional contractor.
- Hire a professional to install both supply and return registers in the basement rooms after converting your basement to a living area.
- Be sure a well-sealed vapor barrier exists on the outside of the insulation on cooling ducts to prevent moisture condensation.
- If you have a fuel-burning furnace, stove, or other appliance or an attached garage, install a carbon monoxide (CO) monitor to alert you to harmful CO levels.
- Be sure to get professional help when doing ductwork. A qualified professional should always perform changes and repairs to a duct system.
Minimizing Energy Losses in Ducts at 3003 Norhill Blvd, Houston, TX 77009

3003 Norhill Blvd, Houston, TX 77009
Minimizing Energy Losses in Ducts
Minimizing energy losses in ducts by seeing if the ducts are poorly sealed or insulated. That could tell you why your energy bill in high. Your air ducts are one of the most important systems in your home, and if the ducts are poorly sealed or insulated, they are likely contributing to higher energy bills.
Your home’s duct system is a branching network of tubes in the walls, floors, and ceilings; it carries the air from your home’s furnace and central air conditioner to each room. Ducts are made of sheet metal, fiberglass, or other materials.
Ducts that leak heated air into unheated spaces can add hundreds of dollars a year to your heating and cooling bills, but you can reduce that loss by sealing and insulating your ducts. Insulating ducts in unconditioned spaces is usually very cost-effective. Existing ducts may also be blocked or may require simple upgrades.
Designing and Installing New Duct Systems
In new home construction or in retrofits, proper duct system design is critical. In recent years, energy-saving designs have sought to include ducts and heating systems in the conditioned space.
Efficient and well-designed duct systems distribute air properly throughout your home without leaking to keep all rooms at a comfortable temperature. The system should provide balanced supply and return flow to maintain a neutral pressure within the house.
Even well sealed and insulated ducts will leak and lose some heat, so many new energy-efficient homes place the duct system within the conditioned space of the home. The simplest way to accomplish this is to hide the ducts in dropped ceilings and in corners of rooms. Ducts can also be located in a sealed and insulated chase extending into the attic or built into raised floors. In both of these latter cases, care must be taken during construction to prevent contractors from using the duct chases for wiring or other utilities.
In either case, actual ducts must be used — chases and floor cavities should not be used as ducts. Regardless of where they are installed, ducts should be well sealed. Although ducts can be configured in a number of ways, the “trunk and branch” and “radial” supply duct configurations are most suitable for ducts located in conditioned spaces.
Air return duct systems can be configured in two ways: each room can have a return duct that sends air back to the heating and cooling equipment or return grills can be located in central locations on each floor. For the latter case, either grills must be installed to allow air to pass out of closed rooms, or short “jumper ducts” can be installed to connect the vent in one room with the next, allowing air to flow back to the central return grilles. Door undercuts help, but they are usually not sufficient for return airflow.
You can perform a simple check for adequate return air capacity by doing the following:
- Close all exterior doors and windows
- Close all interior room doors
- Turn on the central air handler
- “Crack” interior doors one by one and observe if the door closes or further opens “on its own.” (Whether it closes or opens will depend on the direction of the air handler-driven air flow.) Rooms served by air-moved doors have restricted return air flow and need pressure relief as described above.
Maintaining and Upgrading Existing Duct Systems
Sealing your ducts to prevent leaks is even more important if the ducts are located in an unconditioned area such as an attic or vented crawlspace. If the supply ducts are leaking, heated or cooled air can be forced out of unsealed joints and lost. In addition, unconditioned air can be drawn into return ducts through unsealed joints.
Although minor duct repairs are easy to make, qualified professionals should seal and insulate ducts in unconditioned spaces to ensure the use of appropriate sealing materials.
Aside from sealing your ducts, the simplest and most effective means of maintaining your air distribution system is to ensure that furniture and other objects are not blocking the airflow through your registers, and to vacuum the registers to remove any dust buildup.
Existing duct systems often suffer from design deficiencies in the return air system, and modifications by the homeowner (or just a tendency to keep doors closed) may contribute to these problems. Any rooms with a lack of sufficient return airflow may benefit from relatively simple upgrades, such as the installation of new return-air grilles, undercutting doors for return air, or installing a jumper duct.
Some rooms may also be hard to heat and cool because of inadequate supply ducts or grilles. If this is the case, you should first examine whether the problem is the room itself: fix any problems with insulation, air leakage, or inefficient windows first. If the problem persists, you may be able to increase the size of the supply duct or add an additional duct to provide the needed airflow to the room.
Minor Duct Repair Tips for Minimizing Energy Losses in Ducts
- Check your ducts for air leaks. First, look for sections that should be joined but have separated and then look for obvious holes.
- Duct mastic is the preferred material for sealing ductwork seams and joints. It is more durable than any available tape and generally easier for a do-it-yourself installation. Its only drawback is that it will not bridge gaps over ¼ inch. Such gaps must be first bridged with web-type drywall tape, or a good quality heat approved tape.
- If you use tape to seal your ducts, avoid cloth-backed, rubber adhesive duct tape — it tends to fail quickly. Instead, use mastic, butyl tape, foil tape, or other heat-approved tapes. Look for tape with the Underwriters Laboratories (UL) logo.
- Remember that insulating ducts in the basement will make the basement colder. If both the ducts and the basement walls are not insulated, consider insulating both. Water pipes and drains in unconditioned spaces could freeze and burst if the heat ducts are fully insulated because there would be no heat source to prevent the space from freezing in cold weather. However, using an electric heating tape wrap on the pipes can prevent this. Check with a professional contractor.
- Hire a professional to install both supply and return registers in the basement rooms after converting your basement to a living area.
- Be sure a well-sealed vapor barrier exists on the outside of the insulation on cooling ducts to prevent moisture condensation.
- If you have a fuel-burning furnace, stove, or other appliance or an attached garage, install a carbon monoxide (CO) monitor to alert you to harmful CO levels.
- Be sure to get professional help when doing ductwork. A qualified professional should always perform changes and repairs to a duct system.
Minimizing Energy Losses in Ducts at 11638 White Water Trail, Houston, TX 77013

11638 White Water Trail, Houston, TX 77013
Minimizing Energy Losses in Ducts
Minimizing energy losses in ducts by seeing if the ducts are poorly sealed or insulated. That could tell you why your energy bill in high. Your air ducts are one of the most important systems in your home, and if the ducts are poorly sealed or insulated, they are likely contributing to higher energy bills.
Your home’s duct system is a branching network of tubes in the walls, floors, and ceilings; it carries the air from your home’s furnace and central air conditioner to each room. Ducts are made of sheet metal, fiberglass, or other materials.
Ducts that leak heated air into unheated spaces can add hundreds of dollars a year to your heating and cooling bills, but you can reduce that loss by sealing and insulating your ducts. Insulating ducts in unconditioned spaces is usually very cost-effective. Existing ducts may also be blocked or may require simple upgrades.
Designing and Installing New Duct Systems
In new home construction or in retrofits, proper duct system design is critical. In recent years, energy-saving designs have sought to include ducts and heating systems in the conditioned space.
Efficient and well-designed duct systems distribute air properly throughout your home without leaking to keep all rooms at a comfortable temperature. The system should provide balanced supply and return flow to maintain a neutral pressure within the house.
Even well sealed and insulated ducts will leak and lose some heat, so many new energy-efficient homes place the duct system within the conditioned space of the home. The simplest way to accomplish this is to hide the ducts in dropped ceilings and in corners of rooms. Ducts can also be located in a sealed and insulated chase extending into the attic or built into raised floors. In both of these latter cases, care must be taken during construction to prevent contractors from using the duct chases for wiring or other utilities.
In either case, actual ducts must be used — chases and floor cavities should not be used as ducts. Regardless of where they are installed, ducts should be well sealed. Although ducts can be configured in a number of ways, the “trunk and branch” and “radial” supply duct configurations are most suitable for ducts located in conditioned spaces.
Air return duct systems can be configured in two ways: each room can have a return duct that sends air back to the heating and cooling equipment or return grills can be located in central locations on each floor. For the latter case, either grills must be installed to allow air to pass out of closed rooms, or short “jumper ducts” can be installed to connect the vent in one room with the next, allowing air to flow back to the central return grilles. Door undercuts help, but they are usually not sufficient for return airflow.
You can perform a simple check for adequate return air capacity by doing the following:
- Close all exterior doors and windows
- Close all interior room doors
- Turn on the central air handler
- “Crack” interior doors one by one and observe if the door closes or further opens “on its own.” (Whether it closes or opens will depend on the direction of the air handler-driven air flow.) Rooms served by air-moved doors have restricted return air flow and need pressure relief as described above.
Maintaining and Upgrading Existing Duct Systems
Sealing your ducts to prevent leaks is even more important if the ducts are located in an unconditioned area such as an attic or vented crawlspace. If the supply ducts are leaking, heated or cooled air can be forced out of unsealed joints and lost. In addition, unconditioned air can be drawn into return ducts through unsealed joints.
Although minor duct repairs are easy to make, qualified professionals should seal and insulate ducts in unconditioned spaces to ensure the use of appropriate sealing materials.
Aside from sealing your ducts, the simplest and most effective means of maintaining your air distribution system is to ensure that furniture and other objects are not blocking the airflow through your registers, and to vacuum the registers to remove any dust buildup.
Existing duct systems often suffer from design deficiencies in the return air system, and modifications by the homeowner (or just a tendency to keep doors closed) may contribute to these problems. Any rooms with a lack of sufficient return airflow may benefit from relatively simple upgrades, such as the installation of new return-air grilles, undercutting doors for return air, or installing a jumper duct.
Some rooms may also be hard to heat and cool because of inadequate supply ducts or grilles. If this is the case, you should first examine whether the problem is the room itself: fix any problems with insulation, air leakage, or inefficient windows first. If the problem persists, you may be able to increase the size of the supply duct or add an additional duct to provide the needed airflow to the room.
Minor Duct Repair Tips for Minimizing Energy Losses in Ducts
- Check your ducts for air leaks. First, look for sections that should be joined but have separated and then look for obvious holes.
- Duct mastic is the preferred material for sealing ductwork seams and joints. It is more durable than any available tape and generally easier for a do-it-yourself installation. Its only drawback is that it will not bridge gaps over ¼ inch. Such gaps must be first bridged with web-type drywall tape, or a good quality heat approved tape.
- If you use tape to seal your ducts, avoid cloth-backed, rubber adhesive duct tape — it tends to fail quickly. Instead, use mastic, butyl tape, foil tape, or other heat-approved tapes. Look for tape with the Underwriters Laboratories (UL) logo.
- Remember that insulating ducts in the basement will make the basement colder. If both the ducts and the basement walls are not insulated, consider insulating both. Water pipes and drains in unconditioned spaces could freeze and burst if the heat ducts are fully insulated because there would be no heat source to prevent the space from freezing in cold weather. However, using an electric heating tape wrap on the pipes can prevent this. Check with a professional contractor.
- Hire a professional to install both supply and return registers in the basement rooms after converting your basement to a living area.
- Be sure a well-sealed vapor barrier exists on the outside of the insulation on cooling ducts to prevent moisture condensation.
- If you have a fuel-burning furnace, stove, or other appliance or an attached garage, install a carbon monoxide (CO) monitor to alert you to harmful CO levels.
- Be sure to get professional help when doing ductwork. A qualified professional should always perform changes and repairs to a duct system.
Minimizing Energy Losses in Ducts at 519 Milwaukee St, Houston, TX 77009
519 Milwaukee St, Houston, TX 77009
Minimizing Energy Losses in Ducts
Minimizing energy losses in ducts by seeing if the ducts are poorly sealed or insulated. That could tell you why your energy bill in high. Your air ducts are one of the most important systems in your home, and if the ducts are poorly sealed or insulated, they are likely contributing to higher energy bills.
Your home’s duct system is a branching network of tubes in the walls, floors, and ceilings; it carries the air from your home’s furnace and central air conditioner to each room. Ducts are made of sheet metal, fiberglass, or other materials.
Ducts that leak heated air into unheated spaces can add hundreds of dollars a year to your heating and cooling bills, but you can reduce that loss by sealing and insulating your ducts. Insulating ducts in unconditioned spaces is usually very cost-effective. Existing ducts may also be blocked or may require simple upgrades.
Designing and Installing New Duct Systems
In new home construction or in retrofits, proper duct system design is critical. In recent years, energy-saving designs have sought to include ducts and heating systems in the conditioned space.
Efficient and well-designed duct systems distribute air properly throughout your home without leaking to keep all rooms at a comfortable temperature. The system should provide balanced supply and return flow to maintain a neutral pressure within the house.
Even well sealed and insulated ducts will leak and lose some heat, so many new energy-efficient homes place the duct system within the conditioned space of the home. The simplest way to accomplish this is to hide the ducts in dropped ceilings and in corners of rooms. Ducts can also be located in a sealed and insulated chase extending into the attic or built into raised floors. In both of these latter cases, care must be taken during construction to prevent contractors from using the duct chases for wiring or other utilities.
In either case, actual ducts must be used — chases and floor cavities should not be used as ducts. Regardless of where they are installed, ducts should be well sealed. Although ducts can be configured in a number of ways, the “trunk and branch” and “radial” supply duct configurations are most suitable for ducts located in conditioned spaces.
Air return duct systems can be configured in two ways: each room can have a return duct that sends air back to the heating and cooling equipment or return grills can be located in central locations on each floor. For the latter case, either grills must be installed to allow air to pass out of closed rooms, or short “jumper ducts” can be installed to connect the vent in one room with the next, allowing air to flow back to the central return grilles. Door undercuts help, but they are usually not sufficient for return airflow.
You can perform a simple check for adequate return air capacity by doing the following:
- Close all exterior doors and windows
- Close all interior room doors
- Turn on the central air handler
- “Crack” interior doors one by one and observe if the door closes or further opens “on its own.” (Whether it closes or opens will depend on the direction of the air handler-driven air flow.) Rooms served by air-moved doors have restricted return air flow and need pressure relief as described above.
Maintaining and Upgrading Existing Duct Systems
Sealing your ducts to prevent leaks is even more important if the ducts are located in an unconditioned area such as an attic or vented crawlspace. If the supply ducts are leaking, heated or cooled air can be forced out of unsealed joints and lost. In addition, unconditioned air can be drawn into return ducts through unsealed joints.
Although minor duct repairs are easy to make, qualified professionals should seal and insulate ducts in unconditioned spaces to ensure the use of appropriate sealing materials.
Aside from sealing your ducts, the simplest and most effective means of maintaining your air distribution system is to ensure that furniture and other objects are not blocking the airflow through your registers, and to vacuum the registers to remove any dust buildup.
Existing duct systems often suffer from design deficiencies in the return air system, and modifications by the homeowner (or just a tendency to keep doors closed) may contribute to these problems. Any rooms with a lack of sufficient return airflow may benefit from relatively simple upgrades, such as the installation of new return-air grilles, undercutting doors for return air, or installing a jumper duct.
Some rooms may also be hard to heat and cool because of inadequate supply ducts or grilles. If this is the case, you should first examine whether the problem is the room itself: fix any problems with insulation, air leakage, or inefficient windows first. If the problem persists, you may be able to increase the size of the supply duct or add an additional duct to provide the needed airflow to the room.
Minor Duct Repair Tips for Minimizing Energy Losses in Ducts
- Check your ducts for air leaks. First, look for sections that should be joined but have separated and then look for obvious holes.
- Duct mastic is the preferred material for sealing ductwork seams and joints. It is more durable than any available tape and generally easier for a do-it-yourself installation. Its only drawback is that it will not bridge gaps over ¼ inch. Such gaps must be first bridged with web-type drywall tape, or a good quality heat approved tape.
- If you use tape to seal your ducts, avoid cloth-backed, rubber adhesive duct tape — it tends to fail quickly. Instead, use mastic, butyl tape, foil tape, or other heat-approved tapes. Look for tape with the Underwriters Laboratories (UL) logo.
- Remember that insulating ducts in the basement will make the basement colder. If both the ducts and the basement walls are not insulated, consider insulating both. Water pipes and drains in unconditioned spaces could freeze and burst if the heat ducts are fully insulated because there would be no heat source to prevent the space from freezing in cold weather. However, using an electric heating tape wrap on the pipes can prevent this. Check with a professional contractor.
- Hire a professional to install both supply and return registers in the basement rooms after converting your basement to a living area.
- Be sure a well-sealed vapor barrier exists on the outside of the insulation on cooling ducts to prevent moisture condensation.
- If you have a fuel-burning furnace, stove, or other appliance or an attached garage, install a carbon monoxide (CO) monitor to alert you to harmful CO levels.
- Be sure to get professional help when doing ductwork. A qualified professional should always perform changes and repairs to a duct system.
Minimizing Energy Losses in Ducts at 143 Island Blvd, Missouri City, TX 77459
143 Island Blvd, Missouri City, TX 77459
Minimizing Energy Losses in Ducts
Minimizing energy losses in ducts by seeing if the ducts are poorly sealed or insulated. That could tell you why your energy bill in high. Your air ducts are one of the most important systems in your home, and if the ducts are poorly sealed or insulated, they are likely contributing to higher energy bills.
Your home’s duct system is a branching network of tubes in the walls, floors, and ceilings; it carries the air from your home’s furnace and central air conditioner to each room. Ducts are made of sheet metal, fiberglass, or other materials.
Ducts that leak heated air into unheated spaces can add hundreds of dollars a year to your heating and cooling bills, but you can reduce that loss by sealing and insulating your ducts. Insulating ducts in unconditioned spaces is usually very cost-effective. Existing ducts may also be blocked or may require simple upgrades.
Designing and Installing New Duct Systems
In new home construction or in retrofits, proper duct system design is critical. In recent years, energy-saving designs have sought to include ducts and heating systems in the conditioned space.
Efficient and well-designed duct systems distribute air properly throughout your home without leaking to keep all rooms at a comfortable temperature. The system should provide balanced supply and return flow to maintain a neutral pressure within the house.
Even well sealed and insulated ducts will leak and lose some heat, so many new energy-efficient homes place the duct system within the conditioned space of the home. The simplest way to accomplish this is to hide the ducts in dropped ceilings and in corners of rooms. Ducts can also be located in a sealed and insulated chase extending into the attic or built into raised floors. In both of these latter cases, care must be taken during construction to prevent contractors from using the duct chases for wiring or other utilities.
In either case, actual ducts must be used — chases and floor cavities should not be used as ducts. Regardless of where they are installed, ducts should be well sealed. Although ducts can be configured in a number of ways, the “trunk and branch” and “radial” supply duct configurations are most suitable for ducts located in conditioned spaces.
Air return duct systems can be configured in two ways: each room can have a return duct that sends air back to the heating and cooling equipment or return grills can be located in central locations on each floor. For the latter case, either grills must be installed to allow air to pass out of closed rooms, or short “jumper ducts” can be installed to connect the vent in one room with the next, allowing air to flow back to the central return grilles. Door undercuts help, but they are usually not sufficient for return airflow.
You can perform a simple check for adequate return air capacity by doing the following:
- Close all exterior doors and windows
- Close all interior room doors
- Turn on the central air handler
- “Crack” interior doors one by one and observe if the door closes or further opens “on its own.” (Whether it closes or opens will depend on the direction of the air handler-driven air flow.) Rooms served by air-moved doors have restricted return air flow and need pressure relief as described above.
Maintaining and Upgrading Existing Duct Systems
Sealing your ducts to prevent leaks is even more important if the ducts are located in an unconditioned area such as an attic or vented crawlspace. If the supply ducts are leaking, heated or cooled air can be forced out of unsealed joints and lost. In addition, unconditioned air can be drawn into return ducts through unsealed joints.
Although minor duct repairs are easy to make, qualified professionals should seal and insulate ducts in unconditioned spaces to ensure the use of appropriate sealing materials.
Aside from sealing your ducts, the simplest and most effective means of maintaining your air distribution system is to ensure that furniture and other objects are not blocking the airflow through your registers, and to vacuum the registers to remove any dust buildup.
Existing duct systems often suffer from design deficiencies in the return air system, and modifications by the homeowner (or just a tendency to keep doors closed) may contribute to these problems. Any rooms with a lack of sufficient return airflow may benefit from relatively simple upgrades, such as the installation of new return-air grilles, undercutting doors for return air, or installing a jumper duct.
Some rooms may also be hard to heat and cool because of inadequate supply ducts or grilles. If this is the case, you should first examine whether the problem is the room itself: fix any problems with insulation, air leakage, or inefficient windows first. If the problem persists, you may be able to increase the size of the supply duct or add an additional duct to provide the needed airflow to the room.
Minor Duct Repair Tips for Minimizing Energy Losses in Ducts
- Check your ducts for air leaks. First, look for sections that should be joined but have separated and then look for obvious holes.
- Duct mastic is the preferred material for sealing ductwork seams and joints. It is more durable than any available tape and generally easier for a do-it-yourself installation. Its only drawback is that it will not bridge gaps over ¼ inch. Such gaps must be first bridged with web-type drywall tape, or a good quality heat approved tape.
- If you use tape to seal your ducts, avoid cloth-backed, rubber adhesive duct tape — it tends to fail quickly. Instead, use mastic, butyl tape, foil tape, or other heat-approved tapes. Look for tape with the Underwriters Laboratories (UL) logo.
- Remember that insulating ducts in the basement will make the basement colder. If both the ducts and the basement walls are not insulated, consider insulating both. Water pipes and drains in unconditioned spaces could freeze and burst if the heat ducts are fully insulated because there would be no heat source to prevent the space from freezing in cold weather. However, using an electric heating tape wrap on the pipes can prevent this. Check with a professional contractor.
- Hire a professional to install both supply and return registers in the basement rooms after converting your basement to a living area.
- Be sure a well-sealed vapor barrier exists on the outside of the insulation on cooling ducts to prevent moisture condensation.
- If you have a fuel-burning furnace, stove, or other appliance or an attached garage, install a carbon monoxide (CO) monitor to alert you to harmful CO levels.
- Be sure to get professional help when doing ductwork. A qualified professional should always perform changes and repairs to a duct system.
Minimizing Energy Losses in Ducts at 6643 Tuskegee St, Houston, TX 77091
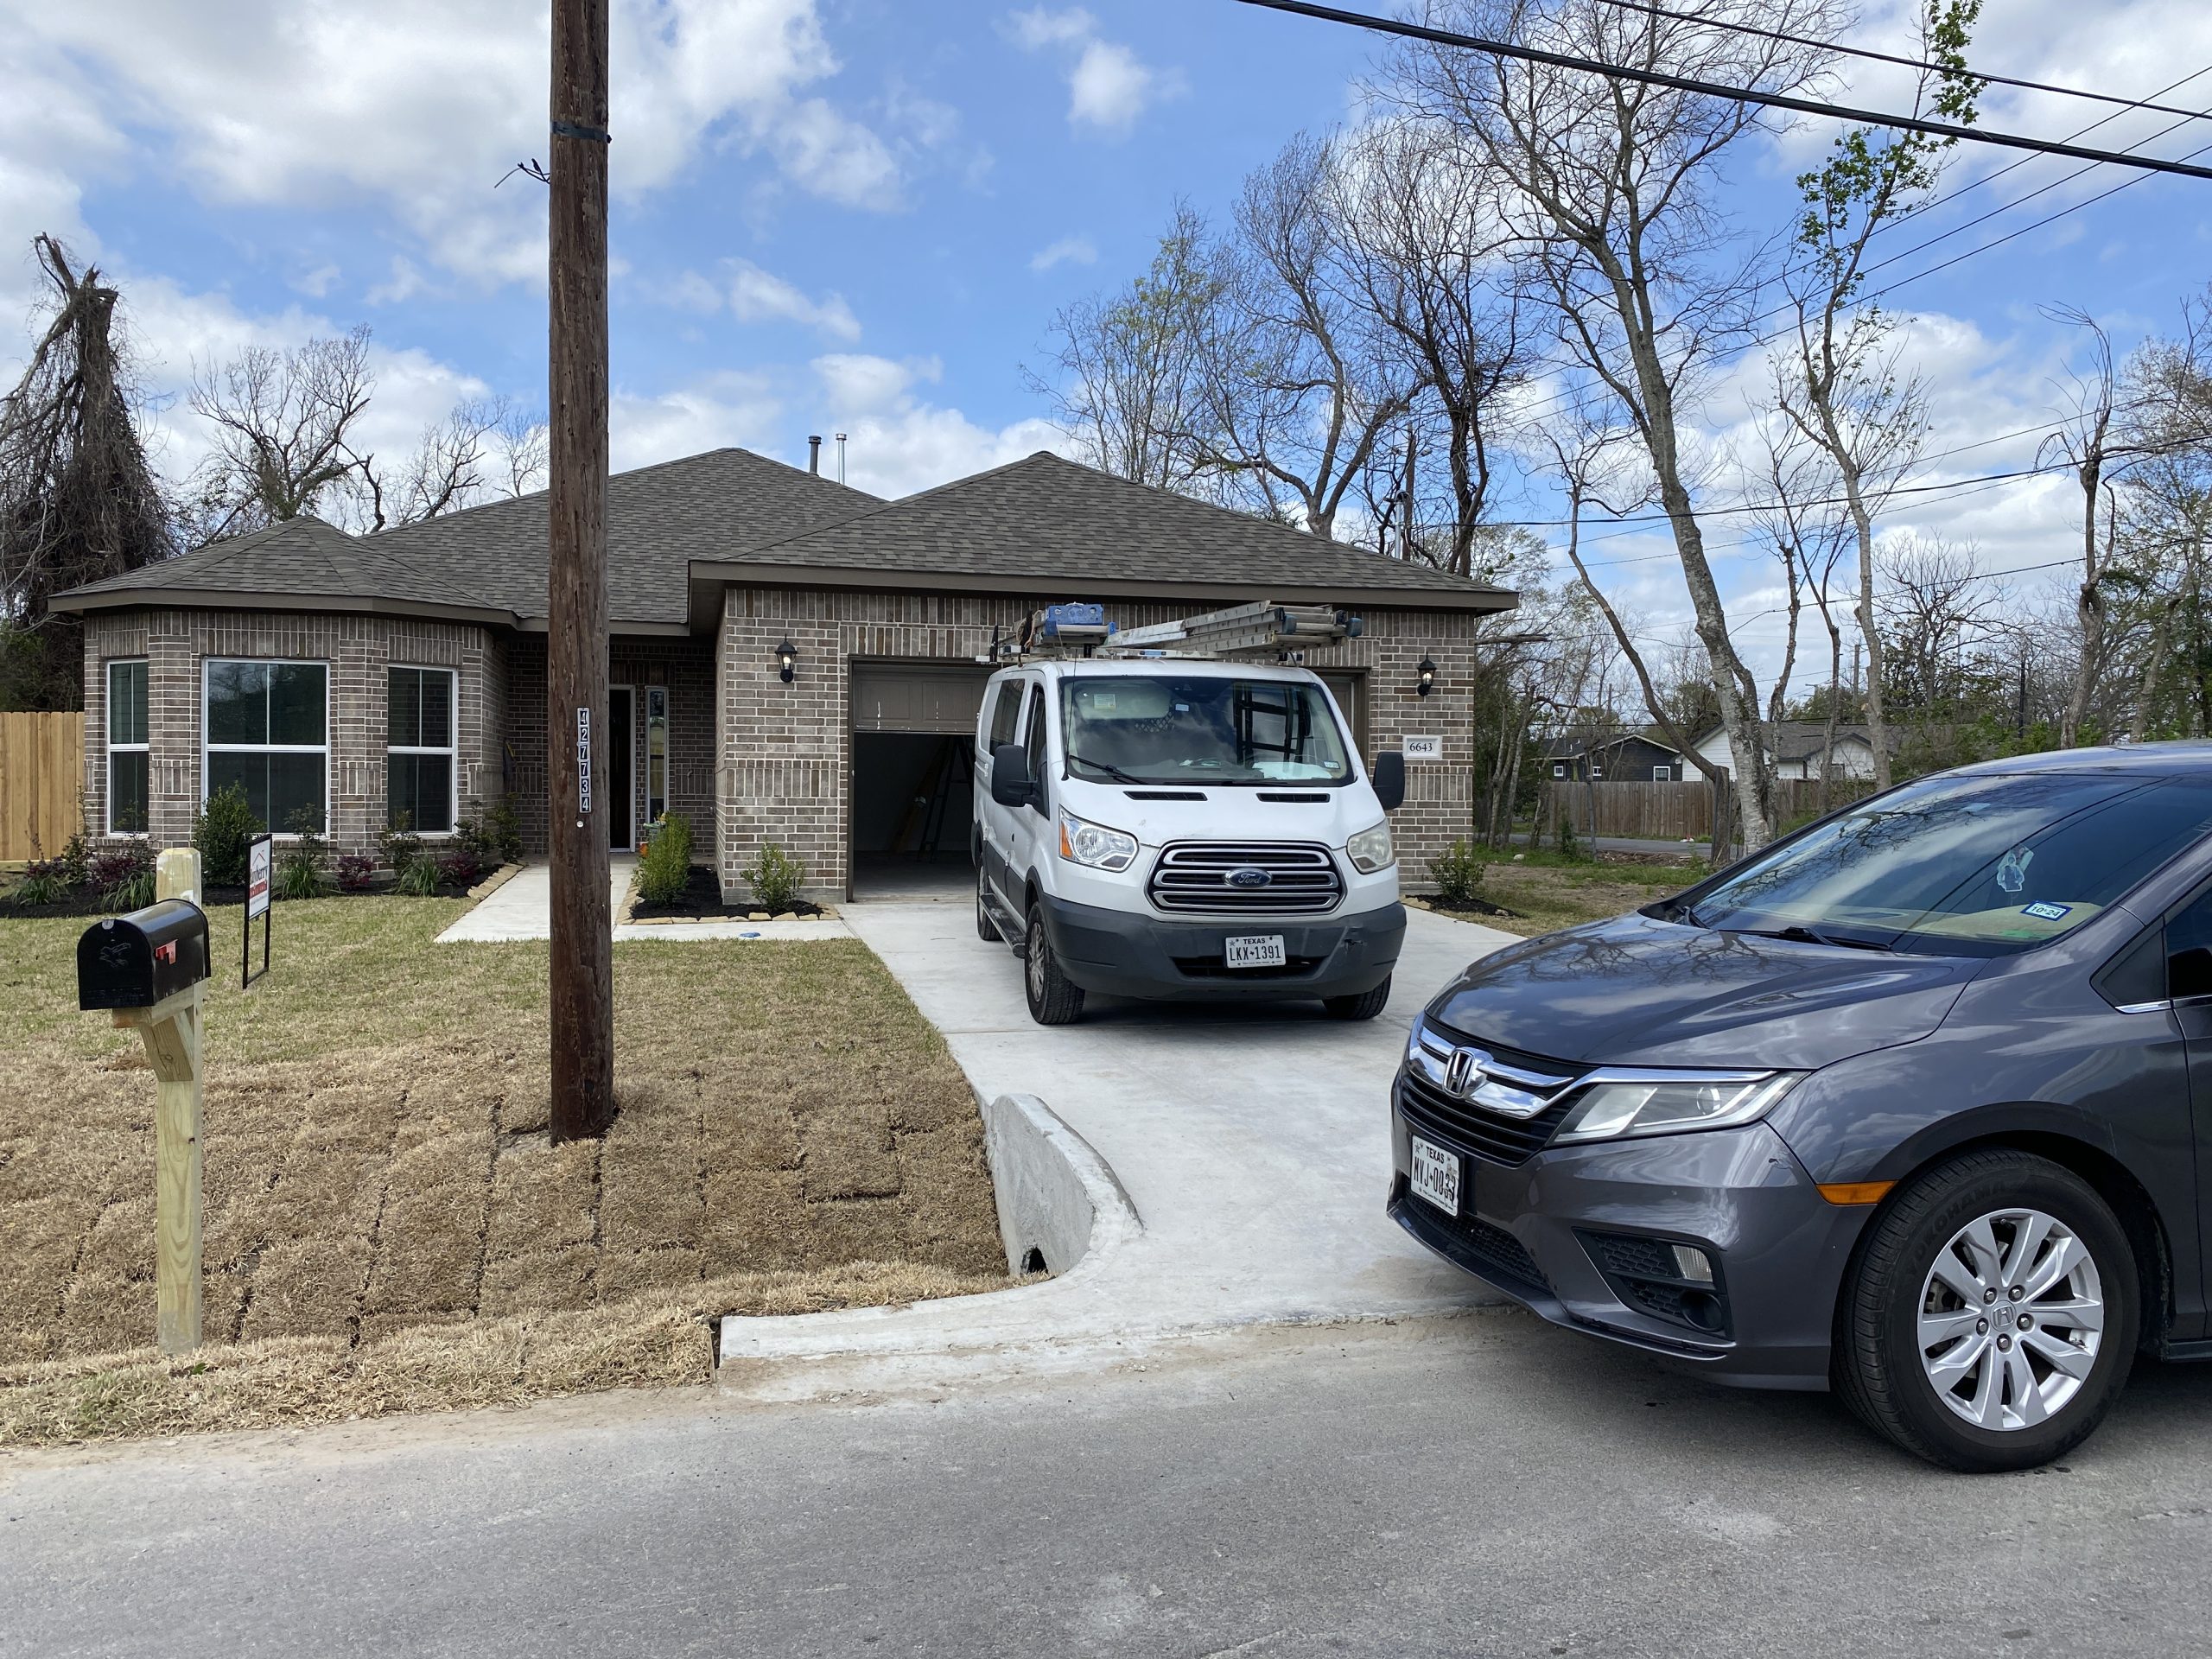
6643 Tuskegee St, Houston, TX 77091
Minimizing Energy Losses in Ducts
Minimizing energy losses in ducts by seeing if the ducts are poorly sealed or insulated. That could tell you why your energy bill in high. Your air ducts are one of the most important systems in your home, and if the ducts are poorly sealed or insulated, they are likely contributing to higher energy bills.
Your home’s duct system is a branching network of tubes in the walls, floors, and ceilings; it carries the air from your home’s furnace and central air conditioner to each room. Ducts are made of sheet metal, fiberglass, or other materials.
Ducts that leak heated air into unheated spaces can add hundreds of dollars a year to your heating and cooling bills, but you can reduce that loss by sealing and insulating your ducts. Insulating ducts in unconditioned spaces is usually very cost-effective. Existing ducts may also be blocked or may require simple upgrades.
Designing and Installing New Duct Systems
In new home construction or in retrofits, proper duct system design is critical. In recent years, energy-saving designs have sought to include ducts and heating systems in the conditioned space.
Efficient and well-designed duct systems distribute air properly throughout your home without leaking to keep all rooms at a comfortable temperature. The system should provide balanced supply and return flow to maintain a neutral pressure within the house.
Even well sealed and insulated ducts will leak and lose some heat, so many new energy-efficient homes place the duct system within the conditioned space of the home. The simplest way to accomplish this is to hide the ducts in dropped ceilings and in corners of rooms. Ducts can also be located in a sealed and insulated chase extending into the attic or built into raised floors. In both of these latter cases, care must be taken during construction to prevent contractors from using the duct chases for wiring or other utilities.
In either case, actual ducts must be used — chases and floor cavities should not be used as ducts. Regardless of where they are installed, ducts should be well sealed. Although ducts can be configured in a number of ways, the “trunk and branch” and “radial” supply duct configurations are most suitable for ducts located in conditioned spaces.
Air return duct systems can be configured in two ways: each room can have a return duct that sends air back to the heating and cooling equipment or return grills can be located in central locations on each floor. For the latter case, either grills must be installed to allow air to pass out of closed rooms, or short “jumper ducts” can be installed to connect the vent in one room with the next, allowing air to flow back to the central return grilles. Door undercuts help, but they are usually not sufficient for return airflow.
You can perform a simple check for adequate return air capacity by doing the following:
- Close all exterior doors and windows
- Close all interior room doors
- Turn on the central air handler
- “Crack” interior doors one by one and observe if the door closes or further opens “on its own.” (Whether it closes or opens will depend on the direction of the air handler-driven air flow.) Rooms served by air-moved doors have restricted return air flow and need pressure relief as described above.
Maintaining and Upgrading Existing Duct Systems
Sealing your ducts to prevent leaks is even more important if the ducts are located in an unconditioned area such as an attic or vented crawlspace. If the supply ducts are leaking, heated or cooled air can be forced out of unsealed joints and lost. In addition, unconditioned air can be drawn into return ducts through unsealed joints.
Although minor duct repairs are easy to make, qualified professionals should seal and insulate ducts in unconditioned spaces to ensure the use of appropriate sealing materials.
Aside from sealing your ducts, the simplest and most effective means of maintaining your air distribution system is to ensure that furniture and other objects are not blocking the airflow through your registers, and to vacuum the registers to remove any dust buildup.
Existing duct systems often suffer from design deficiencies in the return air system, and modifications by the homeowner (or just a tendency to keep doors closed) may contribute to these problems. Any rooms with a lack of sufficient return airflow may benefit from relatively simple upgrades, such as the installation of new return-air grilles, undercutting doors for return air, or installing a jumper duct.
Some rooms may also be hard to heat and cool because of inadequate supply ducts or grilles. If this is the case, you should first examine whether the problem is the room itself: fix any problems with insulation, air leakage, or inefficient windows first. If the problem persists, you may be able to increase the size of the supply duct or add an additional duct to provide the needed airflow to the room.
Minor Duct Repair Tips for Minimizing Energy Losses in Ducts
- Check your ducts for air leaks. First, look for sections that should be joined but have separated and then look for obvious holes.
- Duct mastic is the preferred material for sealing ductwork seams and joints. It is more durable than any available tape and generally easier for a do-it-yourself installation. Its only drawback is that it will not bridge gaps over ¼ inch. Such gaps must be first bridged with web-type drywall tape, or a good quality heat approved tape.
- If you use tape to seal your ducts, avoid cloth-backed, rubber adhesive duct tape — it tends to fail quickly. Instead, use mastic, butyl tape, foil tape, or other heat-approved tapes. Look for tape with the Underwriters Laboratories (UL) logo.
- Remember that insulating ducts in the basement will make the basement colder. If both the ducts and the basement walls are not insulated, consider insulating both. Water pipes and drains in unconditioned spaces could freeze and burst if the heat ducts are fully insulated because there would be no heat source to prevent the space from freezing in cold weather. However, using an electric heating tape wrap on the pipes can prevent this. Check with a professional contractor.
- Hire a professional to install both supply and return registers in the basement rooms after converting your basement to a living area.
- Be sure a well-sealed vapor barrier exists on the outside of the insulation on cooling ducts to prevent moisture condensation.
- If you have a fuel-burning furnace, stove, or other appliance or an attached garage, install a carbon monoxide (CO) monitor to alert you to harmful CO levels.
- Be sure to get professional help when doing ductwork. A qualified professional should always perform changes and repairs to a duct system.
Minimizing Energy Losses in Ducts at 3509 McIlhenny St, Houston, TX 77004
3509 McIlhenny St, Houston, TX 77004
Minimizing Energy Losses in Ducts
Minimizing energy losses in ducts by seeing if the ducts are poorly sealed or insulated. That could tell you why your energy bill in high. Your air ducts are one of the most important systems in your home, and if the ducts are poorly sealed or insulated, they are likely contributing to higher energy bills.
Your home’s duct system is a branching network of tubes in the walls, floors, and ceilings; it carries the air from your home’s furnace and central air conditioner to each room. Ducts are made of sheet metal, fiberglass, or other materials.
Ducts that leak heated air into unheated spaces can add hundreds of dollars a year to your heating and cooling bills, but you can reduce that loss by sealing and insulating your ducts. Insulating ducts in unconditioned spaces is usually very cost-effective. Existing ducts may also be blocked or may require simple upgrades.
Designing and Installing New Duct Systems
In new home construction or in retrofits, proper duct system design is critical. In recent years, energy-saving designs have sought to include ducts and heating systems in the conditioned space.
Efficient and well-designed duct systems distribute air properly throughout your home without leaking to keep all rooms at a comfortable temperature. The system should provide balanced supply and return flow to maintain a neutral pressure within the house.
Even well sealed and insulated ducts will leak and lose some heat, so many new energy-efficient homes place the duct system within the conditioned space of the home. The simplest way to accomplish this is to hide the ducts in dropped ceilings and in corners of rooms. Ducts can also be located in a sealed and insulated chase extending into the attic or built into raised floors. In both of these latter cases, care must be taken during construction to prevent contractors from using the duct chases for wiring or other utilities.
In either case, actual ducts must be used — chases and floor cavities should not be used as ducts. Regardless of where they are installed, ducts should be well sealed. Although ducts can be configured in a number of ways, the “trunk and branch” and “radial” supply duct configurations are most suitable for ducts located in conditioned spaces.
Air return duct systems can be configured in two ways: each room can have a return duct that sends air back to the heating and cooling equipment or return grills can be located in central locations on each floor. For the latter case, either grills must be installed to allow air to pass out of closed rooms, or short “jumper ducts” can be installed to connect the vent in one room with the next, allowing air to flow back to the central return grilles. Door undercuts help, but they are usually not sufficient for return airflow.
You can perform a simple check for adequate return air capacity by doing the following:
- Close all exterior doors and windows
- Close all interior room doors
- Turn on the central air handler
- “Crack” interior doors one by one and observe if the door closes or further opens “on its own.” (Whether it closes or opens will depend on the direction of the air handler-driven air flow.) Rooms served by air-moved doors have restricted return air flow and need pressure relief as described above.
Maintaining and Upgrading Existing Duct Systems
Sealing your ducts to prevent leaks is even more important if the ducts are located in an unconditioned area such as an attic or vented crawlspace. If the supply ducts are leaking, heated or cooled air can be forced out of unsealed joints and lost. In addition, unconditioned air can be drawn into return ducts through unsealed joints.
Although minor duct repairs are easy to make, qualified professionals should seal and insulate ducts in unconditioned spaces to ensure the use of appropriate sealing materials.
Aside from sealing your ducts, the simplest and most effective means of maintaining your air distribution system is to ensure that furniture and other objects are not blocking the airflow through your registers, and to vacuum the registers to remove any dust buildup.
Existing duct systems often suffer from design deficiencies in the return air system, and modifications by the homeowner (or just a tendency to keep doors closed) may contribute to these problems. Any rooms with a lack of sufficient return airflow may benefit from relatively simple upgrades, such as the installation of new return-air grilles, undercutting doors for return air, or installing a jumper duct.
Some rooms may also be hard to heat and cool because of inadequate supply ducts or grilles. If this is the case, you should first examine whether the problem is the room itself: fix any problems with insulation, air leakage, or inefficient windows first. If the problem persists, you may be able to increase the size of the supply duct or add an additional duct to provide the needed airflow to the room.
Minor Duct Repair Tips for Minimizing Energy Losses in Ducts
- Check your ducts for air leaks. First, look for sections that should be joined but have separated and then look for obvious holes.
- Duct mastic is the preferred material for sealing ductwork seams and joints. It is more durable than any available tape and generally easier for a do-it-yourself installation. Its only drawback is that it will not bridge gaps over ¼ inch. Such gaps must be first bridged with web-type drywall tape, or a good quality heat approved tape.
- If you use tape to seal your ducts, avoid cloth-backed, rubber adhesive duct tape — it tends to fail quickly. Instead, use mastic, butyl tape, foil tape, or other heat-approved tapes. Look for tape with the Underwriters Laboratories (UL) logo.
- Remember that insulating ducts in the basement will make the basement colder. If both the ducts and the basement walls are not insulated, consider insulating both. Water pipes and drains in unconditioned spaces could freeze and burst if the heat ducts are fully insulated because there would be no heat source to prevent the space from freezing in cold weather. However, using an electric heating tape wrap on the pipes can prevent this. Check with a professional contractor.
- Hire a professional to install both supply and return registers in the basement rooms after converting your basement to a living area.
- Be sure a well-sealed vapor barrier exists on the outside of the insulation on cooling ducts to prevent moisture condensation.
- If you have a fuel-burning furnace, stove, or other appliance or an attached garage, install a carbon monoxide (CO) monitor to alert you to harmful CO levels.
- Be sure to get professional help when doing ductwork. A qualified professional should always perform changes and repairs to a duct system.
Minimizing Energy Losses in Ducts at 3511 McIlhenny St, Houston, TX 77004
3511 McIlhenny St, Houston, TX 77004
Minimizing Energy Losses in Ducts
Minimizing energy losses in ducts by seeing if the ducts are poorly sealed or insulated. That could tell you why your energy bill in high. Your air ducts are one of the most important systems in your home, and if the ducts are poorly sealed or insulated, they are likely contributing to higher energy bills.
Your home’s duct system is a branching network of tubes in the walls, floors, and ceilings; it carries the air from your home’s furnace and central air conditioner to each room. Ducts are made of sheet metal, fiberglass, or other materials.
Ducts that leak heated air into unheated spaces can add hundreds of dollars a year to your heating and cooling bills, but you can reduce that loss by sealing and insulating your ducts. Insulating ducts in unconditioned spaces is usually very cost-effective. Existing ducts may also be blocked or may require simple upgrades.
Designing and Installing New Duct Systems
In new home construction or in retrofits, proper duct system design is critical. In recent years, energy-saving designs have sought to include ducts and heating systems in the conditioned space.
Efficient and well-designed duct systems distribute air properly throughout your home without leaking to keep all rooms at a comfortable temperature. The system should provide balanced supply and return flow to maintain a neutral pressure within the house.
Even well sealed and insulated ducts will leak and lose some heat, so many new energy-efficient homes place the duct system within the conditioned space of the home. The simplest way to accomplish this is to hide the ducts in dropped ceilings and in corners of rooms. Ducts can also be located in a sealed and insulated chase extending into the attic or built into raised floors. In both of these latter cases, care must be taken during construction to prevent contractors from using the duct chases for wiring or other utilities.
In either case, actual ducts must be used — chases and floor cavities should not be used as ducts. Regardless of where they are installed, ducts should be well sealed. Although ducts can be configured in a number of ways, the “trunk and branch” and “radial” supply duct configurations are most suitable for ducts located in conditioned spaces.
Air return duct systems can be configured in two ways: each room can have a return duct that sends air back to the heating and cooling equipment or return grills can be located in central locations on each floor. For the latter case, either grills must be installed to allow air to pass out of closed rooms, or short “jumper ducts” can be installed to connect the vent in one room with the next, allowing air to flow back to the central return grilles. Door undercuts help, but they are usually not sufficient for return airflow.
You can perform a simple check for adequate return air capacity by doing the following:
- Close all exterior doors and windows
- Close all interior room doors
- Turn on the central air handler
- “Crack” interior doors one by one and observe if the door closes or further opens “on its own.” (Whether it closes or opens will depend on the direction of the air handler-driven air flow.) Rooms served by air-moved doors have restricted return air flow and need pressure relief as described above.
Maintaining and Upgrading Existing Duct Systems
Sealing your ducts to prevent leaks is even more important if the ducts are located in an unconditioned area such as an attic or vented crawlspace. If the supply ducts are leaking, heated or cooled air can be forced out of unsealed joints and lost. In addition, unconditioned air can be drawn into return ducts through unsealed joints.
Although minor duct repairs are easy to make, qualified professionals should seal and insulate ducts in unconditioned spaces to ensure the use of appropriate sealing materials.
Aside from sealing your ducts, the simplest and most effective means of maintaining your air distribution system is to ensure that furniture and other objects are not blocking the airflow through your registers, and to vacuum the registers to remove any dust buildup.
Existing duct systems often suffer from design deficiencies in the return air system, and modifications by the homeowner (or just a tendency to keep doors closed) may contribute to these problems. Any rooms with a lack of sufficient return airflow may benefit from relatively simple upgrades, such as the installation of new return-air grilles, undercutting doors for return air, or installing a jumper duct.
Some rooms may also be hard to heat and cool because of inadequate supply ducts or grilles. If this is the case, you should first examine whether the problem is the room itself: fix any problems with insulation, air leakage, or inefficient windows first. If the problem persists, you may be able to increase the size of the supply duct or add an additional duct to provide the needed airflow to the room.
Minor Duct Repair Tips for Minimizing Energy Losses in Ducts
- Check your ducts for air leaks. First, look for sections that should be joined but have separated and then look for obvious holes.
- Duct mastic is the preferred material for sealing ductwork seams and joints. It is more durable than any available tape and generally easier for a do-it-yourself installation. Its only drawback is that it will not bridge gaps over ¼ inch. Such gaps must be first bridged with web-type drywall tape, or a good quality heat approved tape.
- If you use tape to seal your ducts, avoid cloth-backed, rubber adhesive duct tape — it tends to fail quickly. Instead, use mastic, butyl tape, foil tape, or other heat-approved tapes. Look for tape with the Underwriters Laboratories (UL) logo.
- Remember that insulating ducts in the basement will make the basement colder. If both the ducts and the basement walls are not insulated, consider insulating both. Water pipes and drains in unconditioned spaces could freeze and burst if the heat ducts are fully insulated because there would be no heat source to prevent the space from freezing in cold weather. However, using an electric heating tape wrap on the pipes can prevent this. Check with a professional contractor.
- Hire a professional to install both supply and return registers in the basement rooms after converting your basement to a living area.
- Be sure a well-sealed vapor barrier exists on the outside of the insulation on cooling ducts to prevent moisture condensation.
- If you have a fuel-burning furnace, stove, or other appliance or an attached garage, install a carbon monoxide (CO) monitor to alert you to harmful CO levels.
- Be sure to get professional help when doing ductwork. A qualified professional should always perform changes and repairs to a duct system.
Minimizing Energy Losses in Ducts at 5907 Wheatley Holw Ln, Houston, TX 77091

Ducts at 5907 Wheatley Holw Ln, Houston, TX 77091
Minimizing Energy Losses in Ducts
Minimizing energy losses in ducts by seeing if the ducts are poorly sealed or insulated. That could tell you why your energy bill in high. Your air ducts are one of the most important systems in your home, and if the ducts are poorly sealed or insulated, they are likely contributing to higher energy bills.
Your home’s duct system is a branching network of tubes in the walls, floors, and ceilings; it carries the air from your home’s furnace and central air conditioner to each room. Ducts are made of sheet metal, fiberglass, or other materials.
Ducts that leak heated air into unheated spaces can add hundreds of dollars a year to your heating and cooling bills, but you can reduce that loss by sealing and insulating your ducts. Insulating ducts in unconditioned spaces is usually very cost-effective. Existing ducts may also be blocked or may require simple upgrades.
Designing and Installing New Duct Systems
In new home construction or in retrofits, proper duct system design is critical. In recent years, energy-saving designs have sought to include ducts and heating systems in the conditioned space.
Efficient and well-designed duct systems distribute air properly throughout your home without leaking to keep all rooms at a comfortable temperature. The system should provide balanced supply and return flow to maintain a neutral pressure within the house.
Even well sealed and insulated ducts will leak and lose some heat, so many new energy-efficient homes place the duct system within the conditioned space of the home. The simplest way to accomplish this is to hide the ducts in dropped ceilings and in corners of rooms. Ducts can also be located in a sealed and insulated chase extending into the attic or built into raised floors. In both of these latter cases, care must be taken during construction to prevent contractors from using the duct chases for wiring or other utilities.
In either case, actual ducts must be used — chases and floor cavities should not be used as ducts. Regardless of where they are installed, ducts should be well sealed. Although ducts can be configured in a number of ways, the “trunk and branch” and “radial” supply duct configurations are most suitable for ducts located in conditioned spaces.
Air return duct systems can be configured in two ways: each room can have a return duct that sends air back to the heating and cooling equipment or return grills can be located in central locations on each floor. For the latter case, either grills must be installed to allow air to pass out of closed rooms, or short “jumper ducts” can be installed to connect the vent in one room with the next, allowing air to flow back to the central return grilles. Door undercuts help, but they are usually not sufficient for return airflow.
You can perform a simple check for adequate return air capacity by doing the following:
- Close all exterior doors and windows
- Close all interior room doors
- Turn on the central air handler
- “Crack” interior doors one by one and observe if the door closes or further opens “on its own.” (Whether it closes or opens will depend on the direction of the air handler-driven air flow.) Rooms served by air-moved doors have restricted return air flow and need pressure relief as described above.
Maintaining and Upgrading Existing Duct Systems
Sealing your ducts to prevent leaks is even more important if the ducts are located in an unconditioned area such as an attic or vented crawlspace. If the supply ducts are leaking, heated or cooled air can be forced out of unsealed joints and lost. In addition, unconditioned air can be drawn into return ducts through unsealed joints.
Although minor duct repairs are easy to make, qualified professionals should seal and insulate ducts in unconditioned spaces to ensure the use of appropriate sealing materials.
Aside from sealing your ducts, the simplest and most effective means of maintaining your air distribution system is to ensure that furniture and other objects are not blocking the airflow through your registers, and to vacuum the registers to remove any dust buildup.
Existing duct systems often suffer from design deficiencies in the return air system, and modifications by the homeowner (or just a tendency to keep doors closed) may contribute to these problems. Any rooms with a lack of sufficient return airflow may benefit from relatively simple upgrades, such as the installation of new return-air grilles, undercutting doors for return air, or installing a jumper duct.
Some rooms may also be hard to heat and cool because of inadequate supply ducts or grilles. If this is the case, you should first examine whether the problem is the room itself: fix any problems with insulation, air leakage, or inefficient windows first. If the problem persists, you may be able to increase the size of the supply duct or add an additional duct to provide the needed airflow to the room.
Minor Duct Repair Tips for Minimizing Energy Losses in Ducts
- Check your ducts for air leaks. First, look for sections that should be joined but have separated and then look for obvious holes.
- Duct mastic is the preferred material for sealing ductwork seams and joints. It is more durable than any available tape and generally easier for a do-it-yourself installation. Its only drawback is that it will not bridge gaps over ¼ inch. Such gaps must be first bridged with web-type drywall tape, or a good quality heat approved tape.
- If you use tape to seal your ducts, avoid cloth-backed, rubber adhesive duct tape — it tends to fail quickly. Instead, use mastic, butyl tape, foil tape, or other heat-approved tapes. Look for tape with the Underwriters Laboratories (UL) logo.
- Remember that insulating ducts in the basement will make the basement colder. If both the ducts and the basement walls are not insulated, consider insulating both. Water pipes and drains in unconditioned spaces could freeze and burst if the heat ducts are fully insulated because there would be no heat source to prevent the space from freezing in cold weather. However, using an electric heating tape wrap on the pipes can prevent this. Check with a professional contractor.
- Hire a professional to install both supply and return registers in the basement rooms after converting your basement to a living area.
- Be sure a well-sealed vapor barrier exists on the outside of the insulation on cooling ducts to prevent moisture condensation.
- If you have a fuel-burning furnace, stove, or other appliance or an attached garage, install a carbon monoxide (CO) monitor to alert you to harmful CO levels.
- Be sure to get professional help when doing ductwork. A qualified professional should always perform changes and repairs to a duct system.
Minimizing Energy Losses in Ducts at 800 Wilkes St, Houston, TX 77009

800 Wilkes St, Houston, TX 77009
Minimizing Energy Losses in Ducts
Minimizing energy losses in ducts by seeing if the ducts are poorly sealed or insulated. That could tell you why your energy bill in high. Your air ducts are one of the most important systems in your home, and if the ducts are poorly sealed or insulated, they are likely contributing to higher energy bills.
Your home’s duct system is a branching network of tubes in the walls, floors, and ceilings; it carries the air from your home’s furnace and central air conditioner to each room. Ducts are made of sheet metal, fiberglass, or other materials.
Ducts that leak heated air into unheated spaces can add hundreds of dollars a year to your heating and cooling bills, but you can reduce that loss by sealing and insulating your ducts. Insulating ducts in unconditioned spaces is usually very cost-effective. Existing ducts may also be blocked or may require simple upgrades.
Designing and Installing New Duct Systems
In new home construction or in retrofits, proper duct system design is critical. In recent years, energy-saving designs have sought to include ducts and heating systems in the conditioned space.
Efficient and well-designed duct systems distribute air properly throughout your home without leaking to keep all rooms at a comfortable temperature. The system should provide balanced supply and return flow to maintain a neutral pressure within the house.
Even well sealed and insulated ducts will leak and lose some heat, so many new energy-efficient homes place the duct system within the conditioned space of the home. The simplest way to accomplish this is to hide the ducts in dropped ceilings and in corners of rooms. Ducts can also be located in a sealed and insulated chase extending into the attic or built into raised floors. In both of these latter cases, care must be taken during construction to prevent contractors from using the duct chases for wiring or other utilities.
In either case, actual ducts must be used — chases and floor cavities should not be used as ducts. Regardless of where they are installed, ducts should be well sealed. Although ducts can be configured in a number of ways, the “trunk and branch” and “radial” supply duct configurations are most suitable for ducts located in conditioned spaces.
Air return duct systems can be configured in two ways: each room can have a return duct that sends air back to the heating and cooling equipment or return grills can be located in central locations on each floor. For the latter case, either grills must be installed to allow air to pass out of closed rooms, or short “jumper ducts” can be installed to connect the vent in one room with the next, allowing air to flow back to the central return grilles. Door undercuts help, but they are usually not sufficient for return airflow.
You can perform a simple check for adequate return air capacity by doing the following:
- Close all exterior doors and windows
- Close all interior room doors
- Turn on the central air handler
- “Crack” interior doors one by one and observe if the door closes or further opens “on its own.” (Whether it closes or opens will depend on the direction of the air handler-driven air flow.) Rooms served by air-moved doors have restricted return air flow and need pressure relief as described above.
Maintaining and Upgrading Existing Duct Systems
Sealing your ducts to prevent leaks is even more important if the ducts are located in an unconditioned area such as an attic or vented crawlspace. If the supply ducts are leaking, heated or cooled air can be forced out of unsealed joints and lost. In addition, unconditioned air can be drawn into return ducts through unsealed joints.
Although minor duct repairs are easy to make, qualified professionals should seal and insulate ducts in unconditioned spaces to ensure the use of appropriate sealing materials.
Aside from sealing your ducts, the simplest and most effective means of maintaining your air distribution system is to ensure that furniture and other objects are not blocking the airflow through your registers, and to vacuum the registers to remove any dust buildup.
Existing duct systems often suffer from design deficiencies in the return air system, and modifications by the homeowner (or just a tendency to keep doors closed) may contribute to these problems. Any rooms with a lack of sufficient return airflow may benefit from relatively simple upgrades, such as the installation of new return-air grilles, undercutting doors for return air, or installing a jumper duct.
Some rooms may also be hard to heat and cool because of inadequate supply ducts or grilles. If this is the case, you should first examine whether the problem is the room itself: fix any problems with insulation, air leakage, or inefficient windows first. If the problem persists, you may be able to increase the size of the supply duct or add an additional duct to provide the needed airflow to the room.
Minor Duct Repair Tips for Minimizing Energy Losses in Ducts
- Check your ducts for air leaks. First, look for sections that should be joined but have separated and then look for obvious holes.
- Duct mastic is the preferred material for sealing ductwork seams and joints. It is more durable than any available tape and generally easier for a do-it-yourself installation. Its only drawback is that it will not bridge gaps over ¼ inch. Such gaps must be first bridged with web-type drywall tape, or a good quality heat approved tape.
- If you use tape to seal your ducts, avoid cloth-backed, rubber adhesive duct tape — it tends to fail quickly. Instead, use mastic, butyl tape, foil tape, or other heat-approved tapes. Look for tape with the Underwriters Laboratories (UL) logo.
- Remember that insulating ducts in the basement will make the basement colder. If both the ducts and the basement walls are not insulated, consider insulating both. Water pipes and drains in unconditioned spaces could freeze and burst if the heat ducts are fully insulated because there would be no heat source to prevent the space from freezing in cold weather. However, using an electric heating tape wrap on the pipes can prevent this. Check with a professional contractor.
- Hire a professional to install both supply and return registers in the basement rooms after converting your basement to a living area.
- Be sure a well-sealed vapor barrier exists on the outside of the insulation on cooling ducts to prevent moisture condensation.
- If you have a fuel-burning furnace, stove, or other appliance or an attached garage, install a carbon monoxide (CO) monitor to alert you to harmful CO levels.
- Be sure to get professional help when doing ductwork. A qualified professional should always perform changes and repairs to a duct system.
Minimizing Energy Losses in Ducts at 8614 San Juanico St, Houston, TX 77044
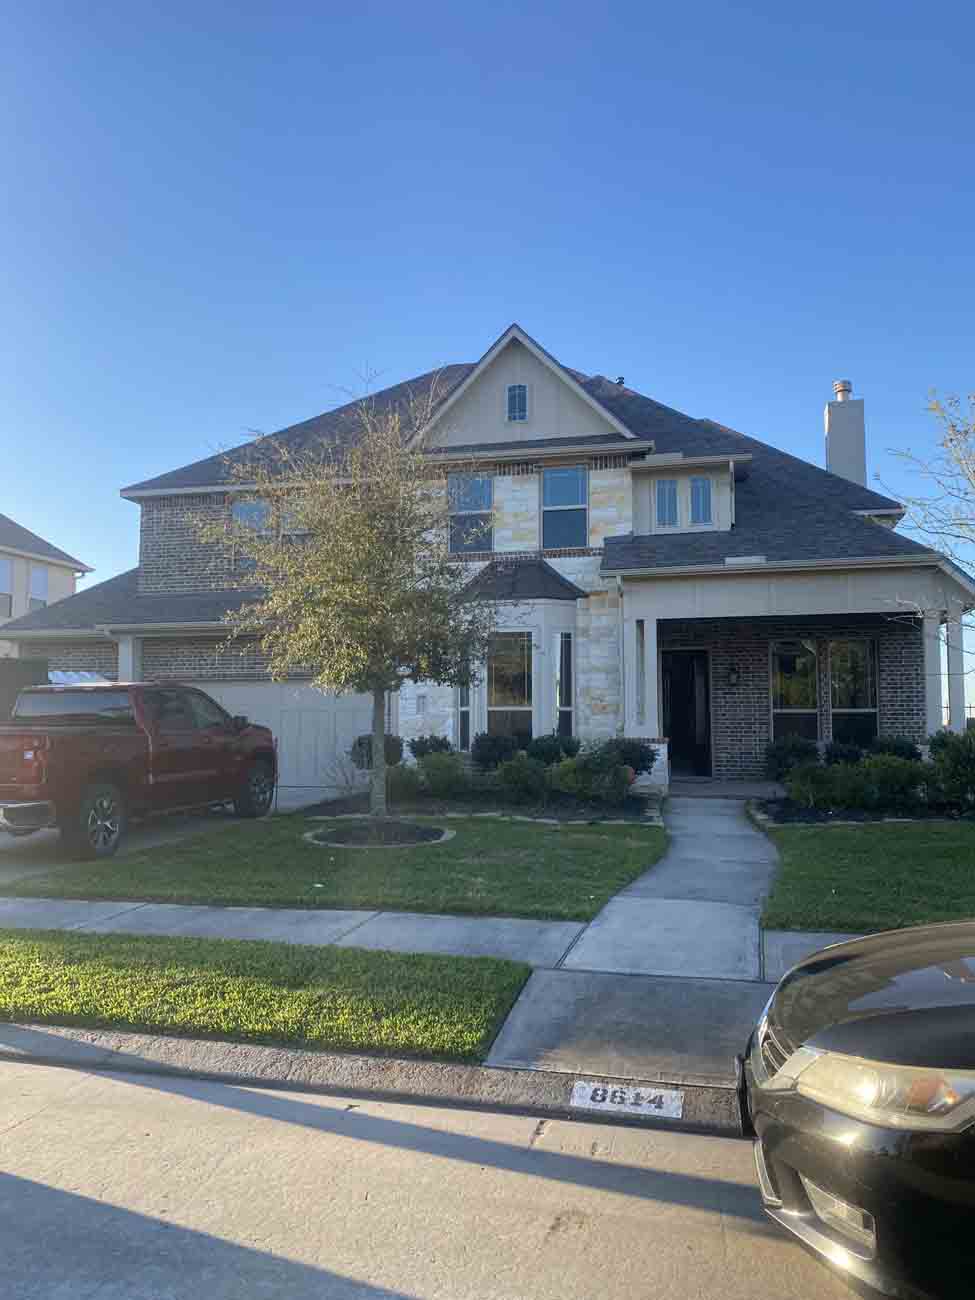
8614 San Juanico St, Houston, TX 77044
Minimizing Energy Losses in Ducts
Minimizing energy losses in ducts by seeing if the ducts are poorly sealed or insulated. That could tell you why your energy bill in high. Your air ducts are one of the most important systems in your home, and if the ducts are poorly sealed or insulated, they are likely contributing to higher energy bills.
Your home’s duct system is a branching network of tubes in the walls, floors, and ceilings; it carries the air from your home’s furnace and central air conditioner to each room. Ducts are made of sheet metal, fiberglass, or other materials.
Ducts that leak heated air into unheated spaces can add hundreds of dollars a year to your heating and cooling bills, but you can reduce that loss by sealing and insulating your ducts. Insulating ducts in unconditioned spaces is usually very cost-effective. Existing ducts may also be blocked or may require simple upgrades.
Designing and Installing New Duct Systems
In new home construction or in retrofits, proper duct system design is critical. In recent years, energy-saving designs have sought to include ducts and heating systems in the conditioned space.
Efficient and well-designed duct systems distribute air properly throughout your home without leaking to keep all rooms at a comfortable temperature. The system should provide balanced supply and return flow to maintain a neutral pressure within the house.
Even well sealed and insulated ducts will leak and lose some heat, so many new energy-efficient homes place the duct system within the conditioned space of the home. The simplest way to accomplish this is to hide the ducts in dropped ceilings and in corners of rooms. Ducts can also be located in a sealed and insulated chase extending into the attic or built into raised floors. In both of these latter cases, care must be taken during construction to prevent contractors from using the duct chases for wiring or other utilities.
In either case, actual ducts must be used — chases and floor cavities should not be used as ducts. Regardless of where they are installed, ducts should be well sealed. Although ducts can be configured in a number of ways, the “trunk and branch” and “radial” supply duct configurations are most suitable for ducts located in conditioned spaces.
Air return duct systems can be configured in two ways: each room can have a return duct that sends air back to the heating and cooling equipment or return grills can be located in central locations on each floor. For the latter case, either grills must be installed to allow air to pass out of closed rooms, or short “jumper ducts” can be installed to connect the vent in one room with the next, allowing air to flow back to the central return grilles. Door undercuts help, but they are usually not sufficient for return airflow.
You can perform a simple check for adequate return air capacity by doing the following:
- Close all exterior doors and windows
- Close all interior room doors
- Turn on the central air handler
- “Crack” interior doors one by one and observe if the door closes or further opens “on its own.” (Whether it closes or opens will depend on the direction of the air handler-driven air flow.) Rooms served by air-moved doors have restricted return air flow and need pressure relief as described above.
Maintaining and Upgrading Existing Duct Systems
Sealing your ducts to prevent leaks is even more important if the ducts are located in an unconditioned area such as an attic or vented crawlspace. If the supply ducts are leaking, heated or cooled air can be forced out of unsealed joints and lost. In addition, unconditioned air can be drawn into return ducts through unsealed joints.
Although minor duct repairs are easy to make, qualified professionals should seal and insulate ducts in unconditioned spaces to ensure the use of appropriate sealing materials.
Aside from sealing your ducts, the simplest and most effective means of maintaining your air distribution system is to ensure that furniture and other objects are not blocking the airflow through your registers, and to vacuum the registers to remove any dust buildup.
Existing duct systems often suffer from design deficiencies in the return air system, and modifications by the homeowner (or just a tendency to keep doors closed) may contribute to these problems. Any rooms with a lack of sufficient return airflow may benefit from relatively simple upgrades, such as the installation of new return-air grilles, undercutting doors for return air, or installing a jumper duct.
Some rooms may also be hard to heat and cool because of inadequate supply ducts or grilles. If this is the case, you should first examine whether the problem is the room itself: fix any problems with insulation, air leakage, or inefficient windows first. If the problem persists, you may be able to increase the size of the supply duct or add an additional duct to provide the needed airflow to the room.
Minor Duct Repair Tips for Minimizing Energy Losses in Ducts
- Check your ducts for air leaks. First, look for sections that should be joined but have separated and then look for obvious holes.
- Duct mastic is the preferred material for sealing ductwork seams and joints. It is more durable than any available tape and generally easier for a do-it-yourself installation. Its only drawback is that it will not bridge gaps over ¼ inch. Such gaps must be first bridged with web-type drywall tape, or a good quality heat approved tape.
- If you use tape to seal your ducts, avoid cloth-backed, rubber adhesive duct tape — it tends to fail quickly. Instead, use mastic, butyl tape, foil tape, or other heat-approved tapes. Look for tape with the Underwriters Laboratories (UL) logo.
- Remember that insulating ducts in the basement will make the basement colder. If both the ducts and the basement walls are not insulated, consider insulating both. Water pipes and drains in unconditioned spaces could freeze and burst if the heat ducts are fully insulated because there would be no heat source to prevent the space from freezing in cold weather. However, using an electric heating tape wrap on the pipes can prevent this. Check with a professional contractor.
- Hire a professional to install both supply and return registers in the basement rooms after converting your basement to a living area.
- Be sure a well-sealed vapor barrier exists on the outside of the insulation on cooling ducts to prevent moisture condensation.
- If you have a fuel-burning furnace, stove, or other appliance or an attached garage, install a carbon monoxide (CO) monitor to alert you to harmful CO levels.
- Be sure to get professional help when doing ductwork. A qualified professional should always perform changes and repairs to a duct system.
Minimizing Energy Losses in Ducts at 16518 Locke Haven Dr, Houston, TX 77059
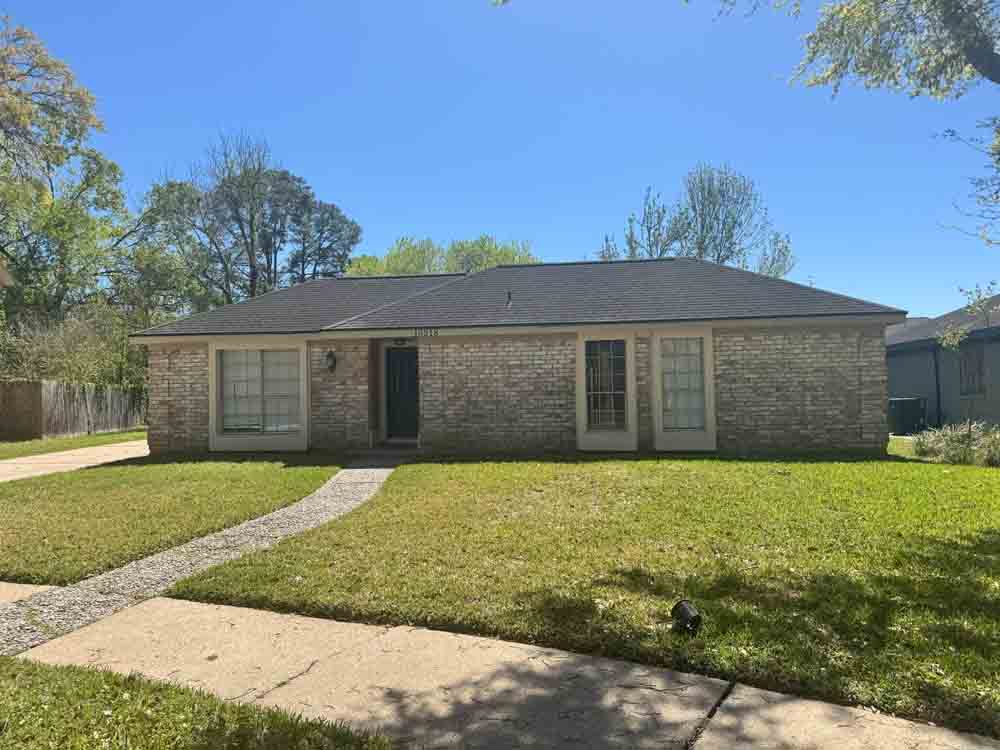
16518 Locke Haven Dr, Houston, TX 77059
Minimizing Energy Losses in Ducts
Minimizing energy losses in ducts by seeing if the ducts are poorly sealed or insulated. That could tell you why your energy bill in high. Your air ducts are one of the most important systems in your home, and if the ducts are poorly sealed or insulated, they are likely contributing to higher energy bills.
Your home’s duct system is a branching network of tubes in the walls, floors, and ceilings; it carries the air from your home’s furnace and central air conditioner to each room. Ducts are made of sheet metal, fiberglass, or other materials.
Ducts that leak heated air into unheated spaces can add hundreds of dollars a year to your heating and cooling bills, but you can reduce that loss by sealing and insulating your ducts. Insulating ducts in unconditioned spaces is usually very cost-effective. Existing ducts may also be blocked or may require simple upgrades.
Designing and Installing New Duct Systems
In new home construction or in retrofits, proper duct system design is critical. In recent years, energy-saving designs have sought to include ducts and heating systems in the conditioned space.
Efficient and well-designed duct systems distribute air properly throughout your home without leaking to keep all rooms at a comfortable temperature. The system should provide balanced supply and return flow to maintain a neutral pressure within the house.
Even well sealed and insulated ducts will leak and lose some heat, so many new energy-efficient homes place the duct system within the conditioned space of the home. The simplest way to accomplish this is to hide the ducts in dropped ceilings and in corners of rooms. Ducts can also be located in a sealed and insulated chase extending into the attic or built into raised floors. In both of these latter cases, care must be taken during construction to prevent contractors from using the duct chases for wiring or other utilities.
In either case, actual ducts must be used — chases and floor cavities should not be used as ducts. Regardless of where they are installed, ducts should be well sealed. Although ducts can be configured in a number of ways, the “trunk and branch” and “radial” supply duct configurations are most suitable for ducts located in conditioned spaces.
Air return duct systems can be configured in two ways: each room can have a return duct that sends air back to the heating and cooling equipment or return grills can be located in central locations on each floor. For the latter case, either grills must be installed to allow air to pass out of closed rooms, or short “jumper ducts” can be installed to connect the vent in one room with the next, allowing air to flow back to the central return grilles. Door undercuts help, but they are usually not sufficient for return airflow.
You can perform a simple check for adequate return air capacity by doing the following:
- Close all exterior doors and windows
- Close all interior room doors
- Turn on the central air handler
- “Crack” interior doors one by one and observe if the door closes or further opens “on its own.” (Whether it closes or opens will depend on the direction of the air handler-driven air flow.) Rooms served by air-moved doors have restricted return air flow and need pressure relief as described above.
Maintaining and Upgrading Existing Duct Systems
Sealing your ducts to prevent leaks is even more important if the ducts are located in an unconditioned area such as an attic or vented crawlspace. If the supply ducts are leaking, heated or cooled air can be forced out of unsealed joints and lost. In addition, unconditioned air can be drawn into return ducts through unsealed joints.
Although minor duct repairs are easy to make, qualified professionals should seal and insulate ducts in unconditioned spaces to ensure the use of appropriate sealing materials.
Aside from sealing your ducts, the simplest and most effective means of maintaining your air distribution system is to ensure that furniture and other objects are not blocking the airflow through your registers, and to vacuum the registers to remove any dust buildup.
Existing duct systems often suffer from design deficiencies in the return air system, and modifications by the homeowner (or just a tendency to keep doors closed) may contribute to these problems. Any rooms with a lack of sufficient return airflow may benefit from relatively simple upgrades, such as the installation of new return-air grilles, undercutting doors for return air, or installing a jumper duct.
Some rooms may also be hard to heat and cool because of inadequate supply ducts or grilles. If this is the case, you should first examine whether the problem is the room itself: fix any problems with insulation, air leakage, or inefficient windows first. If the problem persists, you may be able to increase the size of the supply duct or add an additional duct to provide the needed airflow to the room.
Minor Duct Repair Tips for Minimizing Energy Losses in Ducts
- Check your ducts for air leaks. First, look for sections that should be joined but have separated and then look for obvious holes.
- Duct mastic is the preferred material for sealing ductwork seams and joints. It is more durable than any available tape and generally easier for a do-it-yourself installation. Its only drawback is that it will not bridge gaps over ¼ inch. Such gaps must be first bridged with web-type drywall tape, or a good quality heat approved tape.
- If you use tape to seal your ducts, avoid cloth-backed, rubber adhesive duct tape — it tends to fail quickly. Instead, use mastic, butyl tape, foil tape, or other heat-approved tapes. Look for tape with the Underwriters Laboratories (UL) logo.
- Remember that insulating ducts in the basement will make the basement colder. If both the ducts and the basement walls are not insulated, consider insulating both. Water pipes and drains in unconditioned spaces could freeze and burst if the heat ducts are fully insulated because there would be no heat source to prevent the space from freezing in cold weather. However, using an electric heating tape wrap on the pipes can prevent this. Check with a professional contractor.
- Hire a professional to install both supply and return registers in the basement rooms after converting your basement to a living area.
- Be sure a well-sealed vapor barrier exists on the outside of the insulation on cooling ducts to prevent moisture condensation.
- If you have a fuel-burning furnace, stove, or other appliance or an attached garage, install a carbon monoxide (CO) monitor to alert you to harmful CO levels.
- Be sure to get professional help when doing ductwork. A qualified professional should always perform changes and repairs to a duct system.
Minimizing Energy Losses in Ducts at 2828 Vega, Houston, TX 77088

2828 Vega, Houston, TX 77088
Minimizing Energy Losses in Ducts
Minimizing energy losses in ducts by seeing if the ducts are poorly sealed or insulated. That could tell you why your energy bill in high. Your air ducts are one of the most important systems in your home, and if the ducts are poorly sealed or insulated, they are likely contributing to higher energy bills.
Your home’s duct system is a branching network of tubes in the walls, floors, and ceilings; it carries the air from your home’s furnace and central air conditioner to each room. Ducts are made of sheet metal, fiberglass, or other materials.
Ducts that leak heated air into unheated spaces can add hundreds of dollars a year to your heating and cooling bills, but you can reduce that loss by sealing and insulating your ducts. Insulating ducts in unconditioned spaces is usually very cost-effective. Existing ducts may also be blocked or may require simple upgrades.
Designing and Installing New Duct Systems
In new home construction or in retrofits, proper duct system design is critical. In recent years, energy-saving designs have sought to include ducts and heating systems in the conditioned space.
Efficient and well-designed duct systems distribute air properly throughout your home without leaking to keep all rooms at a comfortable temperature. The system should provide balanced supply and return flow to maintain a neutral pressure within the house.
Even well sealed and insulated ducts will leak and lose some heat, so many new energy-efficient homes place the duct system within the conditioned space of the home. The simplest way to accomplish this is to hide the ducts in dropped ceilings and in corners of rooms. Ducts can also be located in a sealed and insulated chase extending into the attic or built into raised floors. In both of these latter cases, care must be taken during construction to prevent contractors from using the duct chases for wiring or other utilities.
In either case, actual ducts must be used — chases and floor cavities should not be used as ducts. Regardless of where they are installed, ducts should be well sealed. Although ducts can be configured in a number of ways, the “trunk and branch” and “radial” supply duct configurations are most suitable for ducts located in conditioned spaces.
Air return duct systems can be configured in two ways: each room can have a return duct that sends air back to the heating and cooling equipment or return grills can be located in central locations on each floor. For the latter case, either grills must be installed to allow air to pass out of closed rooms, or short “jumper ducts” can be installed to connect the vent in one room with the next, allowing air to flow back to the central return grilles. Door undercuts help, but they are usually not sufficient for return airflow.
You can perform a simple check for adequate return air capacity by doing the following:
- Close all exterior doors and windows
- Close all interior room doors
- Turn on the central air handler
- “Crack” interior doors one by one and observe if the door closes or further opens “on its own.” (Whether it closes or opens will depend on the direction of the air handler-driven air flow.) Rooms served by air-moved doors have restricted return air flow and need pressure relief as described above.
Maintaining and Upgrading Existing Duct Systems
Sealing your ducts to prevent leaks is even more important if the ducts are located in an unconditioned area such as an attic or vented crawlspace. If the supply ducts are leaking, heated or cooled air can be forced out of unsealed joints and lost. In addition, unconditioned air can be drawn into return ducts through unsealed joints.
Although minor duct repairs are easy to make, qualified professionals should seal and insulate ducts in unconditioned spaces to ensure the use of appropriate sealing materials.
Aside from sealing your ducts, the simplest and most effective means of maintaining your air distribution system is to ensure that furniture and other objects are not blocking the airflow through your registers, and to vacuum the registers to remove any dust buildup.
Existing duct systems often suffer from design deficiencies in the return air system, and modifications by the homeowner (or just a tendency to keep doors closed) may contribute to these problems. Any rooms with a lack of sufficient return airflow may benefit from relatively simple upgrades, such as the installation of new return-air grilles, undercutting doors for return air, or installing a jumper duct.
Some rooms may also be hard to heat and cool because of inadequate supply ducts or grilles. If this is the case, you should first examine whether the problem is the room itself: fix any problems with insulation, air leakage, or inefficient windows first. If the problem persists, you may be able to increase the size of the supply duct or add an additional duct to provide the needed airflow to the room.
Minor Duct Repair Tips for Minimizing Energy Losses in Ducts
- Check your ducts for air leaks. First, look for sections that should be joined but have separated and then look for obvious holes.
- Duct mastic is the preferred material for sealing ductwork seams and joints. It is more durable than any available tape and generally easier for a do-it-yourself installation. Its only drawback is that it will not bridge gaps over ¼ inch. Such gaps must be first bridged with web-type drywall tape, or a good quality heat approved tape.
- If you use tape to seal your ducts, avoid cloth-backed, rubber adhesive duct tape — it tends to fail quickly. Instead, use mastic, butyl tape, foil tape, or other heat-approved tapes. Look for tape with the Underwriters Laboratories (UL) logo.
- Remember that insulating ducts in the basement will make the basement colder. If both the ducts and the basement walls are not insulated, consider insulating both. Water pipes and drains in unconditioned spaces could freeze and burst if the heat ducts are fully insulated because there would be no heat source to prevent the space from freezing in cold weather. However, using an electric heating tape wrap on the pipes can prevent this. Check with a professional contractor.
- Hire a professional to install both supply and return registers in the basement rooms after converting your basement to a living area.
- Be sure a well-sealed vapor barrier exists on the outside of the insulation on cooling ducts to prevent moisture condensation.
- If you have a fuel-burning furnace, stove, or other appliance or an attached garage, install a carbon monoxide (CO) monitor to alert you to harmful CO levels.
- Be sure to get professional help when doing ductwork. A qualified professional should always perform changes and repairs to a duct system.
Minimizing Energy Losses in Ducts at 2436 Harrington St, Houston, TX 77026
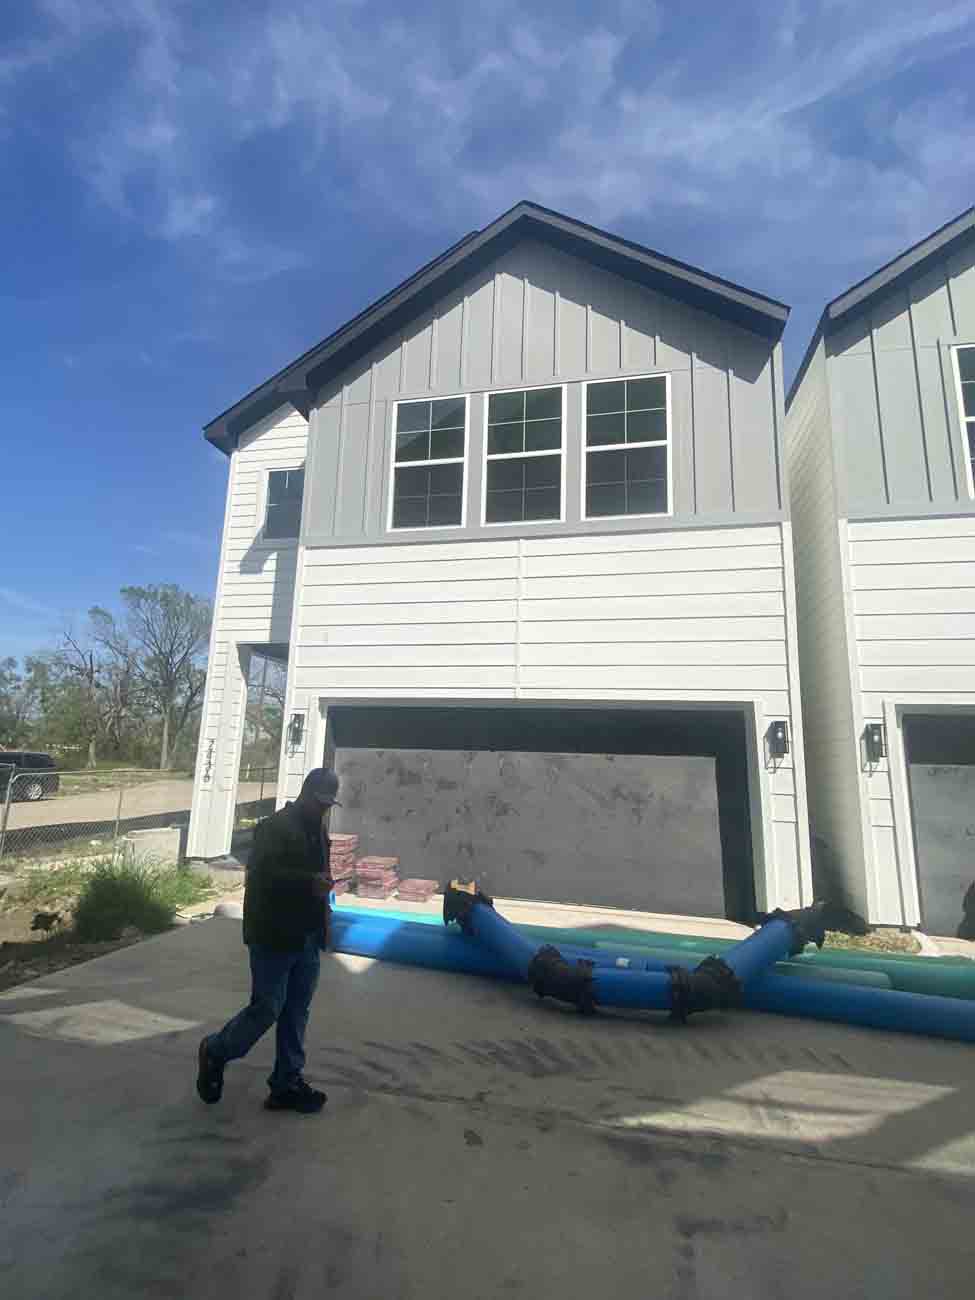
2436 Harrington St, Houston, TX 77026
Minimizing Energy Losses in Ducts
Minimizing energy losses in ducts by seeing if the ducts are poorly sealed or insulated. That could tell you why your energy bill in high. Your air ducts are one of the most important systems in your home, and if the ducts are poorly sealed or insulated, they are likely contributing to higher energy bills.
Your home’s duct system is a branching network of tubes in the walls, floors, and ceilings; it carries the air from your home’s furnace and central air conditioner to each room. Ducts are made of sheet metal, fiberglass, or other materials.
Ducts that leak heated air into unheated spaces can add hundreds of dollars a year to your heating and cooling bills, but you can reduce that loss by sealing and insulating your ducts. Insulating ducts in unconditioned spaces is usually very cost-effective. Existing ducts may also be blocked or may require simple upgrades.
Designing and Installing New Duct Systems
In new home construction or in retrofits, proper duct system design is critical. In recent years, energy-saving designs have sought to include ducts and heating systems in the conditioned space.
Efficient and well-designed duct systems distribute air properly throughout your home without leaking to keep all rooms at a comfortable temperature. The system should provide balanced supply and return flow to maintain a neutral pressure within the house.
Even well sealed and insulated ducts will leak and lose some heat, so many new energy-efficient homes place the duct system within the conditioned space of the home. The simplest way to accomplish this is to hide the ducts in dropped ceilings and in corners of rooms. Ducts can also be located in a sealed and insulated chase extending into the attic or built into raised floors. In both of these latter cases, care must be taken during construction to prevent contractors from using the duct chases for wiring or other utilities.
In either case, actual ducts must be used — chases and floor cavities should not be used as ducts. Regardless of where they are installed, ducts should be well sealed. Although ducts can be configured in a number of ways, the “trunk and branch” and “radial” supply duct configurations are most suitable for ducts located in conditioned spaces.
Air return duct systems can be configured in two ways: each room can have a return duct that sends air back to the heating and cooling equipment or return grills can be located in central locations on each floor. For the latter case, either grills must be installed to allow air to pass out of closed rooms, or short “jumper ducts” can be installed to connect the vent in one room with the next, allowing air to flow back to the central return grilles. Door undercuts help, but they are usually not sufficient for return airflow.
You can perform a simple check for adequate return air capacity by doing the following:
- Close all exterior doors and windows
- Close all interior room doors
- Turn on the central air handler
- “Crack” interior doors one by one and observe if the door closes or further opens “on its own.” (Whether it closes or opens will depend on the direction of the air handler-driven air flow.) Rooms served by air-moved doors have restricted return air flow and need pressure relief as described above.
Maintaining and Upgrading Existing Duct Systems
Sealing your ducts to prevent leaks is even more important if the ducts are located in an unconditioned area such as an attic or vented crawlspace. If the supply ducts are leaking, heated or cooled air can be forced out of unsealed joints and lost. In addition, unconditioned air can be drawn into return ducts through unsealed joints.
Although minor duct repairs are easy to make, qualified professionals should seal and insulate ducts in unconditioned spaces to ensure the use of appropriate sealing materials.
Aside from sealing your ducts, the simplest and most effective means of maintaining your air distribution system is to ensure that furniture and other objects are not blocking the airflow through your registers, and to vacuum the registers to remove any dust buildup.
Existing duct systems often suffer from design deficiencies in the return air system, and modifications by the homeowner (or just a tendency to keep doors closed) may contribute to these problems. Any rooms with a lack of sufficient return airflow may benefit from relatively simple upgrades, such as the installation of new return-air grilles, undercutting doors for return air, or installing a jumper duct.
Some rooms may also be hard to heat and cool because of inadequate supply ducts or grilles. If this is the case, you should first examine whether the problem is the room itself: fix any problems with insulation, air leakage, or inefficient windows first. If the problem persists, you may be able to increase the size of the supply duct or add an additional duct to provide the needed airflow to the room.
Minor Duct Repair Tips for Minimizing Energy Losses in Ducts
- Check your ducts for air leaks. First, look for sections that should be joined but have separated and then look for obvious holes.
- Duct mastic is the preferred material for sealing ductwork seams and joints. It is more durable than any available tape and generally easier for a do-it-yourself installation. Its only drawback is that it will not bridge gaps over ¼ inch. Such gaps must be first bridged with web-type drywall tape, or a good quality heat approved tape.
- If you use tape to seal your ducts, avoid cloth-backed, rubber adhesive duct tape — it tends to fail quickly. Instead, use mastic, butyl tape, foil tape, or other heat-approved tapes. Look for tape with the Underwriters Laboratories (UL) logo.
- Remember that insulating ducts in the basement will make the basement colder. If both the ducts and the basement walls are not insulated, consider insulating both. Water pipes and drains in unconditioned spaces could freeze and burst if the heat ducts are fully insulated because there would be no heat source to prevent the space from freezing in cold weather. However, using an electric heating tape wrap on the pipes can prevent this. Check with a professional contractor.
- Hire a professional to install both supply and return registers in the basement rooms after converting your basement to a living area.
- Be sure a well-sealed vapor barrier exists on the outside of the insulation on cooling ducts to prevent moisture condensation.
- If you have a fuel-burning furnace, stove, or other appliance or an attached garage, install a carbon monoxide (CO) monitor to alert you to harmful CO levels.
- Be sure to get professional help when doing ductwork. A qualified professional should always perform changes and repairs to a duct system.
Minimizing Energy Losses in Ducts at 3623 Sandy Forks Dr, Humble, TX 77339
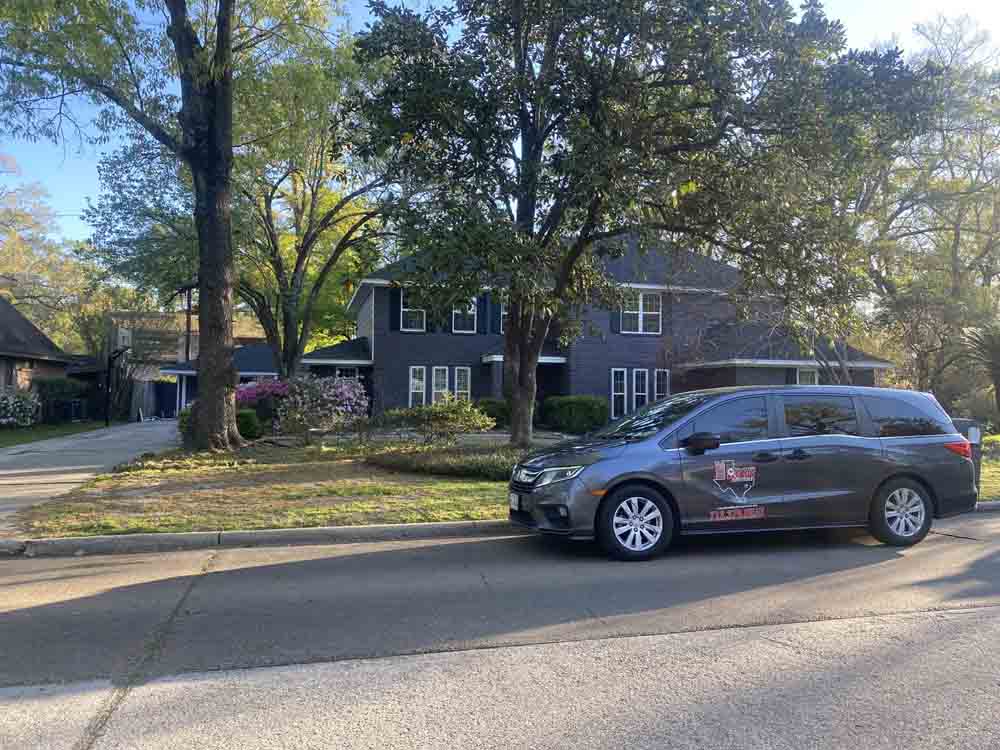
3623 Sandy Forks Dr, Humble, TX 77339
Minimizing Energy Losses in Ducts
Minimizing energy losses in ducts by seeing if the ducts are poorly sealed or insulated. That could tell you why your energy bill in high. Your air ducts are one of the most important systems in your home, and if the ducts are poorly sealed or insulated, they are likely contributing to higher energy bills.
Your home’s duct system is a branching network of tubes in the walls, floors, and ceilings; it carries the air from your home’s furnace and central air conditioner to each room. Ducts are made of sheet metal, fiberglass, or other materials.
Ducts that leak heated air into unheated spaces can add hundreds of dollars a year to your heating and cooling bills, but you can reduce that loss by sealing and insulating your ducts. Insulating ducts in unconditioned spaces is usually very cost-effective. Existing ducts may also be blocked or may require simple upgrades.
Designing and Installing New Duct Systems
In new home construction or in retrofits, proper duct system design is critical. In recent years, energy-saving designs have sought to include ducts and heating systems in the conditioned space.
Efficient and well-designed duct systems distribute air properly throughout your home without leaking to keep all rooms at a comfortable temperature. The system should provide balanced supply and return flow to maintain a neutral pressure within the house.
Even well sealed and insulated ducts will leak and lose some heat, so many new energy-efficient homes place the duct system within the conditioned space of the home. The simplest way to accomplish this is to hide the ducts in dropped ceilings and in corners of rooms. Ducts can also be located in a sealed and insulated chase extending into the attic or built into raised floors. In both of these latter cases, care must be taken during construction to prevent contractors from using the duct chases for wiring or other utilities.
In either case, actual ducts must be used — chases and floor cavities should not be used as ducts. Regardless of where they are installed, ducts should be well sealed. Although ducts can be configured in a number of ways, the “trunk and branch” and “radial” supply duct configurations are most suitable for ducts located in conditioned spaces.
Air return duct systems can be configured in two ways: each room can have a return duct that sends air back to the heating and cooling equipment or return grills can be located in central locations on each floor. For the latter case, either grills must be installed to allow air to pass out of closed rooms, or short “jumper ducts” can be installed to connect the vent in one room with the next, allowing air to flow back to the central return grilles. Door undercuts help, but they are usually not sufficient for return airflow.
You can perform a simple check for adequate return air capacity by doing the following:
- Close all exterior doors and windows
- Close all interior room doors
- Turn on the central air handler
- “Crack” interior doors one by one and observe if the door closes or further opens “on its own.” (Whether it closes or opens will depend on the direction of the air handler-driven air flow.) Rooms served by air-moved doors have restricted return air flow and need pressure relief as described above.
Maintaining and Upgrading Existing Duct Systems
Sealing your ducts to prevent leaks is even more important if the ducts are located in an unconditioned area such as an attic or vented crawlspace. If the supply ducts are leaking, heated or cooled air can be forced out of unsealed joints and lost. In addition, unconditioned air can be drawn into return ducts through unsealed joints.
Although minor duct repairs are easy to make, qualified professionals should seal and insulate ducts in unconditioned spaces to ensure the use of appropriate sealing materials.
Aside from sealing your ducts, the simplest and most effective means of maintaining your air distribution system is to ensure that furniture and other objects are not blocking the airflow through your registers, and to vacuum the registers to remove any dust buildup.
Existing duct systems often suffer from design deficiencies in the return air system, and modifications by the homeowner (or just a tendency to keep doors closed) may contribute to these problems. Any rooms with a lack of sufficient return airflow may benefit from relatively simple upgrades, such as the installation of new return-air grilles, undercutting doors for return air, or installing a jumper duct.
Some rooms may also be hard to heat and cool because of inadequate supply ducts or grilles. If this is the case, you should first examine whether the problem is the room itself: fix any problems with insulation, air leakage, or inefficient windows first. If the problem persists, you may be able to increase the size of the supply duct or add an additional duct to provide the needed airflow to the room.
Minor Duct Repair Tips for Minimizing Energy Losses in Ducts
- Check your ducts for air leaks. First, look for sections that should be joined but have separated and then look for obvious holes.
- Duct mastic is the preferred material for sealing ductwork seams and joints. It is more durable than any available tape and generally easier for a do-it-yourself installation. Its only drawback is that it will not bridge gaps over ¼ inch. Such gaps must be first bridged with web-type drywall tape, or a good quality heat approved tape.
- If you use tape to seal your ducts, avoid cloth-backed, rubber adhesive duct tape — it tends to fail quickly. Instead, use mastic, butyl tape, foil tape, or other heat-approved tapes. Look for tape with the Underwriters Laboratories (UL) logo.
- Remember that insulating ducts in the basement will make the basement colder. If both the ducts and the basement walls are not insulated, consider insulating both. Water pipes and drains in unconditioned spaces could freeze and burst if the heat ducts are fully insulated because there would be no heat source to prevent the space from freezing in cold weather. However, using an electric heating tape wrap on the pipes can prevent this. Check with a professional contractor.
- Hire a professional to install both supply and return registers in the basement rooms after converting your basement to a living area.
- Be sure a well-sealed vapor barrier exists on the outside of the insulation on cooling ducts to prevent moisture condensation.
- If you have a fuel-burning furnace, stove, or other appliance or an attached garage, install a carbon monoxide (CO) monitor to alert you to harmful CO levels.
- Be sure to get professional help when doing ductwork. A qualified professional should always perform changes and repairs to a duct system.
Minimizing Energy Losses in Ducts at 6210 Pecan Ln, Katy, TX 77493

6210 Pecan Ln, Katy, TX 77493
Minimizing Energy Losses in Ducts
Minimizing energy losses in ducts by seeing if the ducts are poorly sealed or insulated. That could tell you why your energy bill in high. Your air ducts are one of the most important systems in your home, and if the ducts are poorly sealed or insulated, they are likely contributing to higher energy bills.
Your home’s duct system is a branching network of tubes in the walls, floors, and ceilings; it carries the air from your home’s furnace and central air conditioner to each room. Ducts are made of sheet metal, fiberglass, or other materials.
Ducts that leak heated air into unheated spaces can add hundreds of dollars a year to your heating and cooling bills, but you can reduce that loss by sealing and insulating your ducts. Insulating ducts in unconditioned spaces is usually very cost-effective. Existing ducts may also be blocked or may require simple upgrades.
Designing and Installing New Duct Systems
In new home construction or in retrofits, proper duct system design is critical. In recent years, energy-saving designs have sought to include ducts and heating systems in the conditioned space.
Efficient and well-designed duct systems distribute air properly throughout your home without leaking to keep all rooms at a comfortable temperature. The system should provide balanced supply and return flow to maintain a neutral pressure within the house.
Even well sealed and insulated ducts will leak and lose some heat, so many new energy-efficient homes place the duct system within the conditioned space of the home. The simplest way to accomplish this is to hide the ducts in dropped ceilings and in corners of rooms. Ducts can also be located in a sealed and insulated chase extending into the attic or built into raised floors. In both of these latter cases, care must be taken during construction to prevent contractors from using the duct chases for wiring or other utilities.
In either case, actual ducts must be used — chases and floor cavities should not be used as ducts. Regardless of where they are installed, ducts should be well sealed. Although ducts can be configured in a number of ways, the “trunk and branch” and “radial” supply duct configurations are most suitable for ducts located in conditioned spaces.
Air return duct systems can be configured in two ways: each room can have a return duct that sends air back to the heating and cooling equipment or return grills can be located in central locations on each floor. For the latter case, either grills must be installed to allow air to pass out of closed rooms, or short “jumper ducts” can be installed to connect the vent in one room with the next, allowing air to flow back to the central return grilles. Door undercuts help, but they are usually not sufficient for return airflow.
You can perform a simple check for adequate return air capacity by doing the following:
- Close all exterior doors and windows
- Close all interior room doors
- Turn on the central air handler
- “Crack” interior doors one by one and observe if the door closes or further opens “on its own.” (Whether it closes or opens will depend on the direction of the air handler-driven air flow.) Rooms served by air-moved doors have restricted return air flow and need pressure relief as described above.
Maintaining and Upgrading Existing Duct Systems
Sealing your ducts to prevent leaks is even more important if the ducts are located in an unconditioned area such as an attic or vented crawlspace. If the supply ducts are leaking, heated or cooled air can be forced out of unsealed joints and lost. In addition, unconditioned air can be drawn into return ducts through unsealed joints.
Although minor duct repairs are easy to make, qualified professionals should seal and insulate ducts in unconditioned spaces to ensure the use of appropriate sealing materials.
Aside from sealing your ducts, the simplest and most effective means of maintaining your air distribution system is to ensure that furniture and other objects are not blocking the airflow through your registers, and to vacuum the registers to remove any dust buildup.
Existing duct systems often suffer from design deficiencies in the return air system, and modifications by the homeowner (or just a tendency to keep doors closed) may contribute to these problems. Any rooms with a lack of sufficient return airflow may benefit from relatively simple upgrades, such as the installation of new return-air grilles, undercutting doors for return air, or installing a jumper duct.
Some rooms may also be hard to heat and cool because of inadequate supply ducts or grilles. If this is the case, you should first examine whether the problem is the room itself: fix any problems with insulation, air leakage, or inefficient windows first. If the problem persists, you may be able to increase the size of the supply duct or add an additional duct to provide the needed airflow to the room.
Minor Duct Repair Tips for Minimizing Energy Losses in Ducts
- Check your ducts for air leaks. First, look for sections that should be joined but have separated and then look for obvious holes.
- Duct mastic is the preferred material for sealing ductwork seams and joints. It is more durable than any available tape and generally easier for a do-it-yourself installation. Its only drawback is that it will not bridge gaps over ¼ inch. Such gaps must be first bridged with web-type drywall tape, or a good quality heat approved tape.
- If you use tape to seal your ducts, avoid cloth-backed, rubber adhesive duct tape — it tends to fail quickly. Instead, use mastic, butyl tape, foil tape, or other heat-approved tapes. Look for tape with the Underwriters Laboratories (UL) logo.
- Remember that insulating ducts in the basement will make the basement colder. If both the ducts and the basement walls are not insulated, consider insulating both. Water pipes and drains in unconditioned spaces could freeze and burst if the heat ducts are fully insulated because there would be no heat source to prevent the space from freezing in cold weather. However, using an electric heating tape wrap on the pipes can prevent this. Check with a professional contractor.
- Hire a professional to install both supply and return registers in the basement rooms after converting your basement to a living area.
- Be sure a well-sealed vapor barrier exists on the outside of the insulation on cooling ducts to prevent moisture condensation.
- If you have a fuel-burning furnace, stove, or other appliance or an attached garage, install a carbon monoxide (CO) monitor to alert you to harmful CO levels.
- Be sure to get professional help when doing ductwork. A qualified professional should always perform changes and repairs to a duct system.
Minimizing Energy Losses in Ducts at 2109 Marnel Rd, Houston, TX 77055
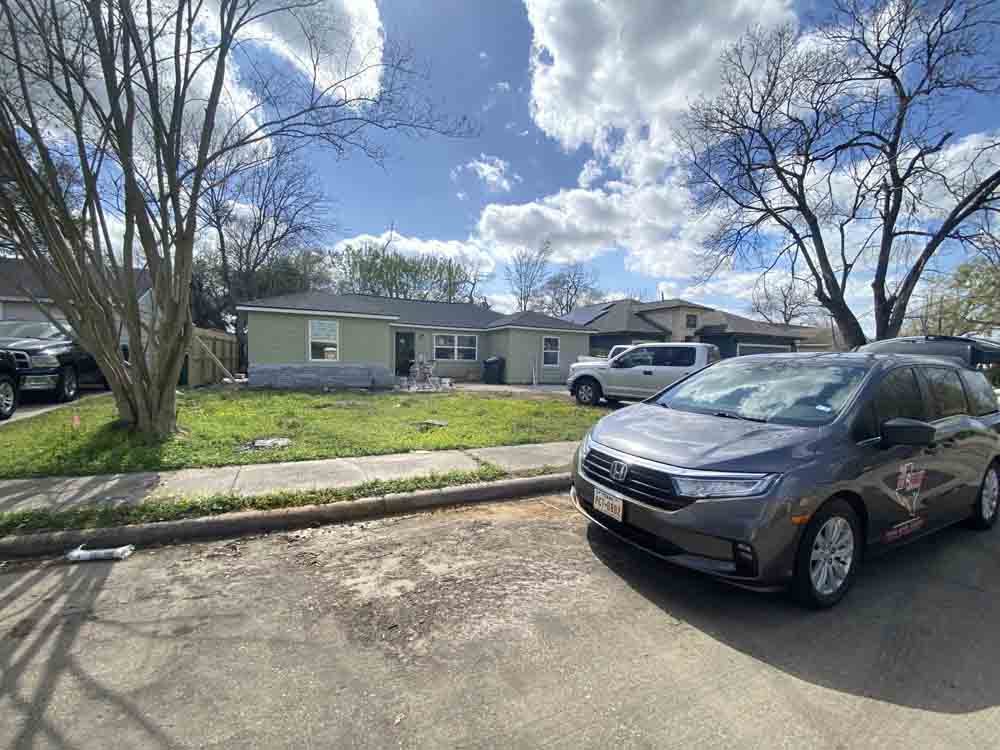
2110 Garvey Dr, Pasadena, TX 77506
Minimizing Energy Losses in Ducts
Minimizing energy losses in ducts by seeing if the ducts are poorly sealed or insulated. That could tell you why your energy bill in high. Your air ducts are one of the most important systems in your home, and if the ducts are poorly sealed or insulated, they are likely contributing to higher energy bills.
Your home’s duct system is a branching network of tubes in the walls, floors, and ceilings; it carries the air from your home’s furnace and central air conditioner to each room. Ducts are made of sheet metal, fiberglass, or other materials.
Ducts that leak heated air into unheated spaces can add hundreds of dollars a year to your heating and cooling bills, but you can reduce that loss by sealing and insulating your ducts. Insulating ducts in unconditioned spaces is usually very cost-effective. Existing ducts may also be blocked or may require simple upgrades.
Designing and Installing New Duct Systems
In new home construction or in retrofits, proper duct system design is critical. In recent years, energy-saving designs have sought to include ducts and heating systems in the conditioned space.
Efficient and well-designed duct systems distribute air properly throughout your home without leaking to keep all rooms at a comfortable temperature. The system should provide balanced supply and return flow to maintain a neutral pressure within the house.
Even well sealed and insulated ducts will leak and lose some heat, so many new energy-efficient homes place the duct system within the conditioned space of the home. The simplest way to accomplish this is to hide the ducts in dropped ceilings and in corners of rooms. Ducts can also be located in a sealed and insulated chase extending into the attic or built into raised floors. In both of these latter cases, care must be taken during construction to prevent contractors from using the duct chases for wiring or other utilities.
In either case, actual ducts must be used — chases and floor cavities should not be used as ducts. Regardless of where they are installed, ducts should be well sealed. Although ducts can be configured in a number of ways, the “trunk and branch” and “radial” supply duct configurations are most suitable for ducts located in conditioned spaces.
Air return duct systems can be configured in two ways: each room can have a return duct that sends air back to the heating and cooling equipment or return grills can be located in central locations on each floor. For the latter case, either grills must be installed to allow air to pass out of closed rooms, or short “jumper ducts” can be installed to connect the vent in one room with the next, allowing air to flow back to the central return grilles. Door undercuts help, but they are usually not sufficient for return airflow.
You can perform a simple check for adequate return air capacity by doing the following:
- Close all exterior doors and windows
- Close all interior room doors
- Turn on the central air handler
- “Crack” interior doors one by one and observe if the door closes or further opens “on its own.” (Whether it closes or opens will depend on the direction of the air handler-driven air flow.) Rooms served by air-moved doors have restricted return air flow and need pressure relief as described above.
Maintaining and Upgrading Existing Duct Systems
Sealing your ducts to prevent leaks is even more important if the ducts are located in an unconditioned area such as an attic or vented crawlspace. If the supply ducts are leaking, heated or cooled air can be forced out of unsealed joints and lost. In addition, unconditioned air can be drawn into return ducts through unsealed joints.
Although minor duct repairs are easy to make, qualified professionals should seal and insulate ducts in unconditioned spaces to ensure the use of appropriate sealing materials.
Aside from sealing your ducts, the simplest and most effective means of maintaining your air distribution system is to ensure that furniture and other objects are not blocking the airflow through your registers, and to vacuum the registers to remove any dust buildup.
Existing duct systems often suffer from design deficiencies in the return air system, and modifications by the homeowner (or just a tendency to keep doors closed) may contribute to these problems. Any rooms with a lack of sufficient return airflow may benefit from relatively simple upgrades, such as the installation of new return-air grilles, undercutting doors for return air, or installing a jumper duct.
Some rooms may also be hard to heat and cool because of inadequate supply ducts or grilles. If this is the case, you should first examine whether the problem is the room itself: fix any problems with insulation, air leakage, or inefficient windows first. If the problem persists, you may be able to increase the size of the supply duct or add an additional duct to provide the needed airflow to the room.
Minor Duct Repair Tips for Minimizing Energy Losses in Ducts
- Check your ducts for air leaks. First, look for sections that should be joined but have separated and then look for obvious holes.
- Duct mastic is the preferred material for sealing ductwork seams and joints. It is more durable than any available tape and generally easier for a do-it-yourself installation. Its only drawback is that it will not bridge gaps over ¼ inch. Such gaps must be first bridged with web-type drywall tape, or a good quality heat approved tape.
- If you use tape to seal your ducts, avoid cloth-backed, rubber adhesive duct tape — it tends to fail quickly. Instead, use mastic, butyl tape, foil tape, or other heat-approved tapes. Look for tape with the Underwriters Laboratories (UL) logo.
- Remember that insulating ducts in the basement will make the basement colder. If both the ducts and the basement walls are not insulated, consider insulating both. Water pipes and drains in unconditioned spaces could freeze and burst if the heat ducts are fully insulated because there would be no heat source to prevent the space from freezing in cold weather. However, using an electric heating tape wrap on the pipes can prevent this. Check with a professional contractor.
- Hire a professional to install both supply and return registers in the basement rooms after converting your basement to a living area.
- Be sure a well-sealed vapor barrier exists on the outside of the insulation on cooling ducts to prevent moisture condensation.
- If you have a fuel-burning furnace, stove, or other appliance or an attached garage, install a carbon monoxide (CO) monitor to alert you to harmful CO levels.
- Be sure to get professional help when doing ductwork. A qualified professional should always perform changes and repairs to a duct system.
Minimizing Energy Losses in Ducts at 4210 Bellfort Ave, Houston, TX 77051
4210 Bellfort Ave, Houston, TX 77051
Minimizing Energy Losses in Ducts
Minimizing energy losses in ducts by seeing if the ducts are poorly sealed or insulated. That could tell you why your energy bill in high. Your air ducts are one of the most important systems in your home, and if the ducts are poorly sealed or insulated, they are likely contributing to higher energy bills.
Your home’s duct system is a branching network of tubes in the walls, floors, and ceilings; it carries the air from your home’s furnace and central air conditioner to each room. Ducts are made of sheet metal, fiberglass, or other materials.
Ducts that leak heated air into unheated spaces can add hundreds of dollars a year to your heating and cooling bills, but you can reduce that loss by sealing and insulating your ducts. Insulating ducts in unconditioned spaces is usually very cost-effective. Existing ducts may also be blocked or may require simple upgrades.
Designing and Installing New Duct Systems
In new home construction or in retrofits, proper duct system design is critical. In recent years, energy-saving designs have sought to include ducts and heating systems in the conditioned space.
Efficient and well-designed duct systems distribute air properly throughout your home without leaking to keep all rooms at a comfortable temperature. The system should provide balanced supply and return flow to maintain a neutral pressure within the house.
Even well sealed and insulated ducts will leak and lose some heat, so many new energy-efficient homes place the duct system within the conditioned space of the home. The simplest way to accomplish this is to hide the ducts in dropped ceilings and in corners of rooms. Ducts can also be located in a sealed and insulated chase extending into the attic or built into raised floors. In both of these latter cases, care must be taken during construction to prevent contractors from using the duct chases for wiring or other utilities.
In either case, actual ducts must be used — chases and floor cavities should not be used as ducts. Regardless of where they are installed, ducts should be well sealed. Although ducts can be configured in a number of ways, the “trunk and branch” and “radial” supply duct configurations are most suitable for ducts located in conditioned spaces.
Air return duct systems can be configured in two ways: each room can have a return duct that sends air back to the heating and cooling equipment or return grills can be located in central locations on each floor. For the latter case, either grills must be installed to allow air to pass out of closed rooms, or short “jumper ducts” can be installed to connect the vent in one room with the next, allowing air to flow back to the central return grilles. Door undercuts help, but they are usually not sufficient for return airflow.
You can perform a simple check for adequate return air capacity by doing the following:
- Close all exterior doors and windows
- Close all interior room doors
- Turn on the central air handler
- “Crack” interior doors one by one and observe if the door closes or further opens “on its own.” (Whether it closes or opens will depend on the direction of the air handler-driven air flow.) Rooms served by air-moved doors have restricted return air flow and need pressure relief as described above.
Maintaining and Upgrading Existing Duct Systems
Sealing your ducts to prevent leaks is even more important if the ducts are located in an unconditioned area such as an attic or vented crawlspace. If the supply ducts are leaking, heated or cooled air can be forced out of unsealed joints and lost. In addition, unconditioned air can be drawn into return ducts through unsealed joints.
Although minor duct repairs are easy to make, qualified professionals should seal and insulate ducts in unconditioned spaces to ensure the use of appropriate sealing materials.
Aside from sealing your ducts, the simplest and most effective means of maintaining your air distribution system is to ensure that furniture and other objects are not blocking the airflow through your registers, and to vacuum the registers to remove any dust buildup.
Existing duct systems often suffer from design deficiencies in the return air system, and modifications by the homeowner (or just a tendency to keep doors closed) may contribute to these problems. Any rooms with a lack of sufficient return airflow may benefit from relatively simple upgrades, such as the installation of new return-air grilles, undercutting doors for return air, or installing a jumper duct.
Some rooms may also be hard to heat and cool because of inadequate supply ducts or grilles. If this is the case, you should first examine whether the problem is the room itself: fix any problems with insulation, air leakage, or inefficient windows first. If the problem persists, you may be able to increase the size of the supply duct or add an additional duct to provide the needed airflow to the room.
Minor Duct Repair Tips for Minimizing Energy Losses in Ducts
- Check your ducts for air leaks. First, look for sections that should be joined but have separated and then look for obvious holes.
- Duct mastic is the preferred material for sealing ductwork seams and joints. It is more durable than any available tape and generally easier for a do-it-yourself installation. Its only drawback is that it will not bridge gaps over ¼ inch. Such gaps must be first bridged with web-type drywall tape, or a good quality heat approved tape.
- If you use tape to seal your ducts, avoid cloth-backed, rubber adhesive duct tape — it tends to fail quickly. Instead, use mastic, butyl tape, foil tape, or other heat-approved tapes. Look for tape with the Underwriters Laboratories (UL) logo.
- Remember that insulating ducts in the basement will make the basement colder. If both the ducts and the basement walls are not insulated, consider insulating both. Water pipes and drains in unconditioned spaces could freeze and burst if the heat ducts are fully insulated because there would be no heat source to prevent the space from freezing in cold weather. However, using an electric heating tape wrap on the pipes can prevent this. Check with a professional contractor.
- Hire a professional to install both supply and return registers in the basement rooms after converting your basement to a living area.
- Be sure a well-sealed vapor barrier exists on the outside of the insulation on cooling ducts to prevent moisture condensation.
- If you have a fuel-burning furnace, stove, or other appliance or an attached garage, install a carbon monoxide (CO) monitor to alert you to harmful CO levels.
- Be sure to get professional help when doing ductwork. A qualified professional should always perform changes and repairs to a duct system.
Minimizing Energy Losses in Ducts at 622 E 9th St, Houston, TX 77007
622 E 9th St, Houston, TX 77007
Minimizing Energy Losses in Ducts
Minimizing energy losses in ducts by seeing if the ducts are poorly sealed or insulated. That could tell you why your energy bill in high. Your air ducts are one of the most important systems in your home, and if the ducts are poorly sealed or insulated, they are likely contributing to higher energy bills.
Your home’s duct system is a branching network of tubes in the walls, floors, and ceilings; it carries the air from your home’s furnace and central air conditioner to each room. Ducts are made of sheet metal, fiberglass, or other materials.
Ducts that leak heated air into unheated spaces can add hundreds of dollars a year to your heating and cooling bills, but you can reduce that loss by sealing and insulating your ducts. Insulating ducts in unconditioned spaces is usually very cost-effective. Existing ducts may also be blocked or may require simple upgrades.
Designing and Installing New Duct Systems
In new home construction or in retrofits, proper duct system design is critical. In recent years, energy-saving designs have sought to include ducts and heating systems in the conditioned space.
Efficient and well-designed duct systems distribute air properly throughout your home without leaking to keep all rooms at a comfortable temperature. The system should provide balanced supply and return flow to maintain a neutral pressure within the house.
Even well sealed and insulated ducts will leak and lose some heat, so many new energy-efficient homes place the duct system within the conditioned space of the home. The simplest way to accomplish this is to hide the ducts in dropped ceilings and in corners of rooms. Ducts can also be located in a sealed and insulated chase extending into the attic or built into raised floors. In both of these latter cases, care must be taken during construction to prevent contractors from using the duct chases for wiring or other utilities.
In either case, actual ducts must be used — chases and floor cavities should not be used as ducts. Regardless of where they are installed, ducts should be well sealed. Although ducts can be configured in a number of ways, the “trunk and branch” and “radial” supply duct configurations are most suitable for ducts located in conditioned spaces.
Air return duct systems can be configured in two ways: each room can have a return duct that sends air back to the heating and cooling equipment or return grills can be located in central locations on each floor. For the latter case, either grills must be installed to allow air to pass out of closed rooms, or short “jumper ducts” can be installed to connect the vent in one room with the next, allowing air to flow back to the central return grilles. Door undercuts help, but they are usually not sufficient for return airflow.
You can perform a simple check for adequate return air capacity by doing the following:
- Close all exterior doors and windows
- Close all interior room doors
- Turn on the central air handler
- “Crack” interior doors one by one and observe if the door closes or further opens “on its own.” (Whether it closes or opens will depend on the direction of the air handler-driven air flow.) Rooms served by air-moved doors have restricted return air flow and need pressure relief as described above.
Maintaining and Upgrading Existing Duct Systems
Sealing your ducts to prevent leaks is even more important if the ducts are located in an unconditioned area such as an attic or vented crawlspace. If the supply ducts are leaking, heated or cooled air can be forced out of unsealed joints and lost. In addition, unconditioned air can be drawn into return ducts through unsealed joints.
Although minor duct repairs are easy to make, qualified professionals should seal and insulate ducts in unconditioned spaces to ensure the use of appropriate sealing materials.
Aside from sealing your ducts, the simplest and most effective means of maintaining your air distribution system is to ensure that furniture and other objects are not blocking the airflow through your registers, and to vacuum the registers to remove any dust buildup.
Existing duct systems often suffer from design deficiencies in the return air system, and modifications by the homeowner (or just a tendency to keep doors closed) may contribute to these problems. Any rooms with a lack of sufficient return airflow may benefit from relatively simple upgrades, such as the installation of new return-air grilles, undercutting doors for return air, or installing a jumper duct.
Some rooms may also be hard to heat and cool because of inadequate supply ducts or grilles. If this is the case, you should first examine whether the problem is the room itself: fix any problems with insulation, air leakage, or inefficient windows first. If the problem persists, you may be able to increase the size of the supply duct or add an additional duct to provide the needed airflow to the room.
Minor Duct Repair Tips for Minimizing Energy Losses in Ducts
- Check your ducts for air leaks. First, look for sections that should be joined but have separated and then look for obvious holes.
- Duct mastic is the preferred material for sealing ductwork seams and joints. It is more durable than any available tape and generally easier for a do-it-yourself installation. Its only drawback is that it will not bridge gaps over ¼ inch. Such gaps must be first bridged with web-type drywall tape, or a good quality heat approved tape.
- If you use tape to seal your ducts, avoid cloth-backed, rubber adhesive duct tape — it tends to fail quickly. Instead, use mastic, butyl tape, foil tape, or other heat-approved tapes. Look for tape with the Underwriters Laboratories (UL) logo.
- Remember that insulating ducts in the basement will make the basement colder. If both the ducts and the basement walls are not insulated, consider insulating both. Water pipes and drains in unconditioned spaces could freeze and burst if the heat ducts are fully insulated because there would be no heat source to prevent the space from freezing in cold weather. However, using an electric heating tape wrap on the pipes can prevent this. Check with a professional contractor.
- Hire a professional to install both supply and return registers in the basement rooms after converting your basement to a living area.
- Be sure a well-sealed vapor barrier exists on the outside of the insulation on cooling ducts to prevent moisture condensation.
- If you have a fuel-burning furnace, stove, or other appliance or an attached garage, install a carbon monoxide (CO) monitor to alert you to harmful CO levels.
- Be sure to get professional help when doing ductwork. A qualified professional should always perform changes and repairs to a duct system.
How Blower Doors Work – 4202 Bellfort Ave Unit A
4202 Bellfort Ave, Houston, TX 77051
How Blower Doors Work – 4202 Bellfort Ave A
Third-party Energy Testing
A house’s air ducts are the most important systems. If these units are not properly sealed or insulated, they will inevitably lead to higher energy bills.
Blower Doors: What Are They and How Do They Work?
A blower door fan is a device used to measure air leakage in a home. Blower door tests are performed in homes to measure the amount of air leakage through cracks and gaps in the building envelope, essentially assessing how airtight a home is, which directly impacts energy efficiency, indoor comfort and air quality, identify areas where air is escaping and needs to be sealed; and making homeowners aware about prioritizing energy-saving improvements and reducing heating and cooling costs.
Air tightness and sealing is important, because air leakage can lead to a building’s energy efficiency being significantly impacted by substantial heat loss, which in return leads to other disadvantages such as higher energy bills, drafts and discomfort, and potential moisture issues. In the process, overall affecting indoor air quality, by allowing pollutants to enter the space. This is why it is imperative to search, identify and remedy air leaks.
Moisture or water vapor enters a home through various ways, which includes but not limited to air infiltration, diffusion through building material, leaks from the roof, plumbing leaks, flooding, human activities (bathing, cooking, dish washing, washing clothes), showering and some heating appliances.
Home Inspection Atascocita | Home Ready Inspections | Houston TX
Minimizing Energy Losses in Ducts at 4818 Wilmington St, Houston, TX 77033
4818 Wilmington St, Houston, TX 77033
Minimizing Energy Losses in Ducts
Minimizing energy losses in ducts by seeing if the ducts are poorly sealed or insulated. That could tell you why your energy bill in high. Your air ducts are one of the most important systems in your home, and if the ducts are poorly sealed or insulated, they are likely contributing to higher energy bills.
Your home’s duct system is a branching network of tubes in the walls, floors, and ceilings; it carries the air from your home’s furnace and central air conditioner to each room. Ducts are made of sheet metal, fiberglass, or other materials.
Ducts that leak heated air into unheated spaces can add hundreds of dollars a year to your heating and cooling bills, but you can reduce that loss by sealing and insulating your ducts. Insulating ducts in unconditioned spaces is usually very cost-effective. Existing ducts may also be blocked or may require simple upgrades.
Designing and Installing New Duct Systems
In new home construction or in retrofits, proper duct system design is critical. In recent years, energy-saving designs have sought to include ducts and heating systems in the conditioned space.
Efficient and well-designed duct systems distribute air properly throughout your home without leaking to keep all rooms at a comfortable temperature. The system should provide balanced supply and return flow to maintain a neutral pressure within the house.
Even well sealed and insulated ducts will leak and lose some heat, so many new energy-efficient homes place the duct system within the conditioned space of the home. The simplest way to accomplish this is to hide the ducts in dropped ceilings and in corners of rooms. Ducts can also be located in a sealed and insulated chase extending into the attic or built into raised floors. In both of these latter cases, care must be taken during construction to prevent contractors from using the duct chases for wiring or other utilities.
In either case, actual ducts must be used — chases and floor cavities should not be used as ducts. Regardless of where they are installed, ducts should be well sealed. Although ducts can be configured in a number of ways, the “trunk and branch” and “radial” supply duct configurations are most suitable for ducts located in conditioned spaces.
Air return duct systems can be configured in two ways: each room can have a return duct that sends air back to the heating and cooling equipment or return grills can be located in central locations on each floor. For the latter case, either grills must be installed to allow air to pass out of closed rooms, or short “jumper ducts” can be installed to connect the vent in one room with the next, allowing air to flow back to the central return grilles. Door undercuts help, but they are usually not sufficient for return airflow.
You can perform a simple check for adequate return air capacity by doing the following:
- Close all exterior doors and windows
- Close all interior room doors
- Turn on the central air handler
- “Crack” interior doors one by one and observe if the door closes or further opens “on its own.” (Whether it closes or opens will depend on the direction of the air handler-driven air flow.) Rooms served by air-moved doors have restricted return air flow and need pressure relief as described above.
Maintaining and Upgrading Existing Duct Systems
Sealing your ducts to prevent leaks is even more important if the ducts are located in an unconditioned area such as an attic or vented crawlspace. If the supply ducts are leaking, heated or cooled air can be forced out of unsealed joints and lost. In addition, unconditioned air can be drawn into return ducts through unsealed joints.
Although minor duct repairs are easy to make, qualified professionals should seal and insulate ducts in unconditioned spaces to ensure the use of appropriate sealing materials.
Aside from sealing your ducts, the simplest and most effective means of maintaining your air distribution system is to ensure that furniture and other objects are not blocking the airflow through your registers, and to vacuum the registers to remove any dust buildup.
Existing duct systems often suffer from design deficiencies in the return air system, and modifications by the homeowner (or just a tendency to keep doors closed) may contribute to these problems. Any rooms with a lack of sufficient return airflow may benefit from relatively simple upgrades, such as the installation of new return-air grilles, undercutting doors for return air, or installing a jumper duct.
Some rooms may also be hard to heat and cool because of inadequate supply ducts or grilles. If this is the case, you should first examine whether the problem is the room itself: fix any problems with insulation, air leakage, or inefficient windows first. If the problem persists, you may be able to increase the size of the supply duct or add an additional duct to provide the needed airflow to the room.
Minor Duct Repair Tips for Minimizing Energy Losses in Ducts
- Check your ducts for air leaks. First, look for sections that should be joined but have separated and then look for obvious holes.
- Duct mastic is the preferred material for sealing ductwork seams and joints. It is more durable than any available tape and generally easier for a do-it-yourself installation. Its only drawback is that it will not bridge gaps over ¼ inch. Such gaps must be first bridged with web-type drywall tape, or a good quality heat approved tape.
- If you use tape to seal your ducts, avoid cloth-backed, rubber adhesive duct tape — it tends to fail quickly. Instead, use mastic, butyl tape, foil tape, or other heat-approved tapes. Look for tape with the Underwriters Laboratories (UL) logo.
- Remember that insulating ducts in the basement will make the basement colder. If both the ducts and the basement walls are not insulated, consider insulating both. Water pipes and drains in unconditioned spaces could freeze and burst if the heat ducts are fully insulated because there would be no heat source to prevent the space from freezing in cold weather. However, using an electric heating tape wrap on the pipes can prevent this. Check with a professional contractor.
- Hire a professional to install both supply and return registers in the basement rooms after converting your basement to a living area.
- Be sure a well-sealed vapor barrier exists on the outside of the insulation on cooling ducts to prevent moisture condensation.
- If you have a fuel-burning furnace, stove, or other appliance or an attached garage, install a carbon monoxide (CO) monitor to alert you to harmful CO levels.
- Be sure to get professional help when doing ductwork. A qualified professional should always perform changes and repairs to a duct system.
931 Lamonte Ln, Houston, TX 77018 – Losses in Ducts

819 Dorothy St, Houston, TX 77008
931 Lamonte Ln, Houston, TX 77018 – Losses in Ducts
Minimizing energy losses in ducts is an important aspect of energy efficiency in HVAC (Heating, Ventilation, and Air Conditioning) systems. Ducts are used to distribute conditioned air throughout a building, and any energy losses during the distribution process can lead to increased energy consumption and reduced system performance. Here are some key measures to minimize energy losses in ducts:
1. Proper Duct Design: Ensure that ductwork is properly designed to minimize pressure losses. Use appropriately sized ducts, minimize the number of bends and transitions, and maintain a balanced airflow distribution. Consult industry guidelines or work with an HVAC professional to design an efficient duct system.
2. Sealing: Duct leakage is a major source of energy losses. Seal all joints, connections, and seams in the ductwork using approved sealing materials such as mastic or metal tape. Pay particular attention to connections at registers, grilles, and air-handling units.
3. Insulation: Insulate ducts that run through unconditioned spaces, such as attics, crawlspaces, or basements. Insulation helps to prevent heat transfer between the ductwork and the surrounding environment, reducing energy losses and improving system efficiency.
4. Duct Material: Consider using insulated ducts with low thermal conductivity. Insulated ducts minimize heat transfer through the duct walls, helping to maintain the desired temperature of the conditioned air as it travels through the system.
5. Avoiding Overlong Duct Runs: Minimize the length of duct runs as much as possible. Longer ducts result in increased friction losses, which can reduce airflow and energy efficiency. Optimize the layout and location of HVAC equipment to keep duct runs as short and direct as feasible.
6. Balancing and Adjusting Dampers: Balancing the airflow within the duct system ensures that each room receives the appropriate amount of conditioned air. Adjust dampers at branch points and in individual ducts to balance the airflow and avoid over-pressurizing or under-pressurizing certain areas.
7. Regular Maintenance: Conduct regular inspections of the ductwork to check for leaks, obstructions, or damage. Clean the ducts periodically to remove dust, debris, or any substances that could impede airflow.
8. Air Filters: Install high-quality air filters and regularly replace them according to the manufacturer’s recommendations. Clean air filters help maintain optimal airflow, reducing pressure drops and energy losses.
By implementing these measures, you can significantly minimize energy losses in ducts, improve the overall efficiency of your HVAC system, and reduce energy consumption. Consulting with a professional HVAC contractor or engineer can provide valuable insights specific to your building’s requirements and help optimize energy efficiency.
http://homereadyinspections.com/builders-hvac/
How Blower Doors Work – 5439 Darling St, Houston, TX 77007
5439 Darling St, Houston, TX 77007
How Blower Doors Work – 5439 Darling St, Houston, TX 77007
Third-party Energy Testing
Your air ducts are one of the most important systems in your home, and if the ducts are poorly sealed or insulated they are likely contributing to higher energy bills.
Blower Doors: What Are They and How Do They Work?
A blower door is a device used in energy testing to measure a building’s airtightness. It consists of a powerful fan mounted on a temporary frame that fits into a doorway or an exterior opening. During a blower door test, the fan creates a pressure difference between the inside and outside of the building. This pressure difference allows air leakage points to become apparent and measurable. The test helps identify areas of air infiltration or exfiltration, which can affect energy efficiency and indoor comfort.
The blower door test involves setting up the device, measuring the baseline pressure, and then either depressurizing or pressurizing the building using the fan. While the fan is running, the airflow rate is measured using instruments like a manometer or pressure gauge. This airflow measurement quantifies the amount of air leakage in the building. Smoke pencils or thermal imaging cameras can be used to locate specific air leakage points.
The blower door test can be conducted in both depressurization and pressurization modes, allowing for a comprehensive assessment of air leakage locations. Once the test is complete, the data is analyzed to determine the building’s airtightness and identify areas that need improvement. The results can be used to guide air sealing measures and improve energy efficiency.
Blower door tests are crucial in identifying air leakage points, reducing energy loss, improving indoor air quality, and enhancing the overall performance and comfort of a building.
Home Inspection Atascocita | Home Ready Inspections | Houston TX
Minimizing Energy Losses in Ducts at 6710 Utah St, Houston, TX 77091
6710 Utah St, Houston, TX 77091
Minimizing Energy Losses in Ducts
Minimizing energy losses in ducts by seeing if the ducts are poorly sealed or insulated. That could tell you why your energy bill in high. Your air ducts are one of the most important systems in your home, and if the ducts are poorly sealed or insulated, they are likely contributing to higher energy bills.
Your home’s duct system is a branching network of tubes in the walls, floors, and ceilings; it carries the air from your home’s furnace and central air conditioner to each room. Ducts are made of sheet metal, fiberglass, or other materials.
Ducts that leak heated air into unheated spaces can add hundreds of dollars a year to your heating and cooling bills, but you can reduce that loss by sealing and insulating your ducts. Insulating ducts in unconditioned spaces is usually very cost-effective. Existing ducts may also be blocked or may require simple upgrades.
Designing and Installing New Duct Systems
In new home construction or in retrofits, proper duct system design is critical. In recent years, energy-saving designs have sought to include ducts and heating systems in the conditioned space.
Efficient and well-designed duct systems distribute air properly throughout your home without leaking to keep all rooms at a comfortable temperature. The system should provide balanced supply and return flow to maintain a neutral pressure within the house.
Even well sealed and insulated ducts will leak and lose some heat, so many new energy-efficient homes place the duct system within the conditioned space of the home. The simplest way to accomplish this is to hide the ducts in dropped ceilings and in corners of rooms. Ducts can also be located in a sealed and insulated chase extending into the attic or built into raised floors. In both of these latter cases, care must be taken during construction to prevent contractors from using the duct chases for wiring or other utilities.
In either case, actual ducts must be used — chases and floor cavities should not be used as ducts. Regardless of where they are installed, ducts should be well sealed. Although ducts can be configured in a number of ways, the “trunk and branch” and “radial” supply duct configurations are most suitable for ducts located in conditioned spaces.
Air return duct systems can be configured in two ways: each room can have a return duct that sends air back to the heating and cooling equipment or return grills can be located in central locations on each floor. For the latter case, either grills must be installed to allow air to pass out of closed rooms, or short “jumper ducts” can be installed to connect the vent in one room with the next, allowing air to flow back to the central return grilles. Door undercuts help, but they are usually not sufficient for return airflow.
You can perform a simple check for adequate return air capacity by doing the following:
- Close all exterior doors and windows
- Close all interior room doors
- Turn on the central air handler
- “Crack” interior doors one by one and observe if the door closes or further opens “on its own.” (Whether it closes or opens will depend on the direction of the air handler-driven air flow.) Rooms served by air-moved doors have restricted return air flow and need pressure relief as described above.
Maintaining and Upgrading Existing Duct Systems
Sealing your ducts to prevent leaks is even more important if the ducts are located in an unconditioned area such as an attic or vented crawlspace. If the supply ducts are leaking, heated or cooled air can be forced out of unsealed joints and lost. In addition, unconditioned air can be drawn into return ducts through unsealed joints.
Although minor duct repairs are easy to make, qualified professionals should seal and insulate ducts in unconditioned spaces to ensure the use of appropriate sealing materials.
Aside from sealing your ducts, the simplest and most effective means of maintaining your air distribution system is to ensure that furniture and other objects are not blocking the airflow through your registers, and to vacuum the registers to remove any dust buildup.
Existing duct systems often suffer from design deficiencies in the return air system, and modifications by the homeowner (or just a tendency to keep doors closed) may contribute to these problems. Any rooms with a lack of sufficient return airflow may benefit from relatively simple upgrades, such as the installation of new return-air grilles, undercutting doors for return air, or installing a jumper duct.
Some rooms may also be hard to heat and cool because of inadequate supply ducts or grilles. If this is the case, you should first examine whether the problem is the room itself: fix any problems with insulation, air leakage, or inefficient windows first. If the problem persists, you may be able to increase the size of the supply duct or add an additional duct to provide the needed airflow to the room.
Minor Duct Repair Tips for Minimizing Energy Losses in Ducts
- Check your ducts for air leaks. First, look for sections that should be joined but have separated and then look for obvious holes.
- Duct mastic is the preferred material for sealing ductwork seams and joints. It is more durable than any available tape and generally easier for a do-it-yourself installation. Its only drawback is that it will not bridge gaps over ¼ inch. Such gaps must be first bridged with web-type drywall tape, or a good quality heat approved tape.
- If you use tape to seal your ducts, avoid cloth-backed, rubber adhesive duct tape — it tends to fail quickly. Instead, use mastic, butyl tape, foil tape, or other heat-approved tapes. Look for tape with the Underwriters Laboratories (UL) logo.
- Remember that insulating ducts in the basement will make the basement colder. If both the ducts and the basement walls are not insulated, consider insulating both. Water pipes and drains in unconditioned spaces could freeze and burst if the heat ducts are fully insulated because there would be no heat source to prevent the space from freezing in cold weather. However, using an electric heating tape wrap on the pipes can prevent this. Check with a professional contractor.
- Hire a professional to install both supply and return registers in the basement rooms after converting your basement to a living area.
- Be sure a well-sealed vapor barrier exists on the outside of the insulation on cooling ducts to prevent moisture condensation.
- If you have a fuel-burning furnace, stove, or other appliance or an attached garage, install a carbon monoxide (CO) monitor to alert you to harmful CO levels.
- Be sure to get professional help when doing ductwork. A qualified professional should always perform changes and repairs to a duct system.