Manual J Load Calculations: Why Proper HVAC Sizing Matters
When it comes to heating and cooling a home, bigger is not better. One of the most common (and costly) mistakes in residential construction is installing an HVAC system that isn’t properly sized for the home. That’s where a Manual J Load Calculation comes in.
At Home Ready Inspections, we provide accurate, code-compliant Manual J calculations to ensure your HVAC system is sized correctly for comfort, efficiency, and long-term performance.
What Is a Manual J Load Calculation?
A Manual J is an industry-standard HVAC load calculation developed by ACCA (Air Conditioning Contractors of America). It determines the exact heating and cooling needs of a home based on real data—not estimates.
A proper Manual J considers:
-
Home square footage and layout
-
Insulation levels and building envelope
-
Window sizes, types, and orientations
-
Ceiling heights and construction materials
-
Air infiltration and ventilation
-
Local climate data (Houston-specific conditions)
The result is a precise calculation of how much heating and cooling your home actually needs.
Why Manual J Is Critical
Skipping or guessing HVAC sizing can lead to serious issues, including:
❌ Uneven temperatures and comfort problems
❌ Higher energy bills
❌ Short-cycling equipment
❌ Excess humidity and poor indoor air quality
❌ Reduced HVAC lifespan
A properly performed Manual J helps avoid all of these problems.
When Is a Manual J Required?
Manual J calculations are commonly required for:
-
New construction homes
-
HVAC system replacements
-
City of Houston permitting
-
IECC & energy code compliance
-
ENERGY STAR & high-performance homes
-
Manual D (duct design) and Manual S (equipment selection)
If you’re pulling permits or upgrading HVAC equipment, chances are a Manual J is required—or strongly recommended.
Why Choose Home Ready Inspections?
At Home Ready Inspections, our Manual J calculations are:
✔ Performed by experienced professionals
✔ Based on ACCA and IECC standards
✔ Accepted by municipalities and plan reviewers
✔ Builder- and homeowner-friendly
✔ Delivered quickly and accurately
We don’t guess—and we don’t use rule-of-thumb sizing.
Serving Houston and Surrounding Areas
We proudly provide Manual J Load Calculations throughout Houston and the surrounding areas, supporting homeowners, builders, HVAC contractors, and developers.
Need a Manual J Calculation?
📞 Call us today: 832-661-6154 or 713-370-4328
📧 Email: info@homereadyinspections.com
🌐 Visit: www.homereadyinspections.com
Let Home Ready Inspections help you design an HVAC system that’s sized right—from day one.
BLOWER DOOR AND DUCT TEST PROVIDED
Need an inspection? Looking for a City of Houston CE-1302 Form? Call us today to have your blower door and duct test!
CALL US TODAY TO SCHEDULE!
CALL NOW! 713-370-4328 OR 832-661-6154
ADDITIONAL SERVICES:


What to Expect From an Energy Inspection in Austin, Texas
If your home feels uneven from room to room, your energy bills keep climbing, or you’re planning upgrades like new insulation, windows, or HVAC equipment, an energy inspection is one of the best ways to get real answers. In Austin—where long cooling seasons and humidity can stress HVAC systems—an energy inspection helps identify where your home is losing comfort and wasting money.
What Is an Energy Inspection?
An energy inspection evaluates how efficiently your home uses heating and cooling. Instead of guessing, it uses measured data and visual verification to pinpoint where air leaks, insulation gaps, and duct issues are affecting performance.
A proper energy inspection typically focuses on three big areas:
-
Air leakage (building envelope)
-
Insulation levels and installation quality
-
Duct system performance and leakage
What’s Included in an Austin Energy Inspection?
1) Blower Door Testing (Air Leakage Test)
A blower door test uses a calibrated fan installed in an exterior doorway to depressurize the home and measure how much outside air is leaking in through gaps and cracks. This test helps identify:
-
Leaky attic hatches and recessed lights
-
Poorly sealed penetrations (plumbing/electrical)
-
Drafty doors and window openings
-
Leaks at top plates and wall-to-ceiling connections
Why it matters in Austin: Keeping hot, humid air out is key to comfort and humidity control—especially in summer.
2) Insulation Review (Attic + Wall Indicators)
Insulation isn’t just about “how much,” it’s also about “how well it’s installed.” An insulation review typically checks:
-
Insulation depth and coverage
-
Compression, voids, or missing sections
-
Wind washing and attic bypasses
-
Proper insulation contact around can lights and penetrations (when applicable)
What Austin homeowners often find: Insulation may be present but not performing due to gaps, uneven coverage, or poor air sealing underneath it.
3) Duct Performance (Duct Leakage + Distribution)
Your duct system is the highway for conditioned air. If it leaks or is poorly balanced, you can lose comfort and efficiency even with a newer HVAC system. Duct evaluation may include:
-
Visible inspection of duct runs (attic/crawlspace)
-
Checking return air pathways and restrictive returns
-
Measuring leakage (duct blaster testing when required or requested)
-
Identifying disconnected, crushed, or poorly sealed ducts
Common symptoms of duct issues:
-
Some rooms never cool or heat properly
-
High bills even after HVAC replacement
-
Dusty rooms or musty odors
-
HVAC runs longer than expected
What You’ll Receive After the Inspection
A professional energy inspection should leave you with clear, actionable next steps. Expect:
-
A summary of key issues found (air leaks, insulation, duct concerns)
-
Test results (like blower door numbers and/or duct leakage results if performed)
-
Photos and notes to document problem areas
-
Priority recommendations ranked by “biggest impact first”
When Should You Get an Energy Inspection in Austin?
This service is especially helpful if you:
-
Recently bought a home and want to reduce long-term costs
-
Have persistent comfort or humidity problems
-
Are planning an HVAC replacement (so you don’t oversize equipment)
-
Are remodeling (windows, additions, ductwork, insulation changes)
-
Want to improve overall efficiency before summer
Why Energy Inspections Save Money Long-Term
Many homeowners spend money on upgrades in the wrong order—like replacing HVAC equipment before fixing leakage and duct problems. An energy inspection helps you:
-
Reduce wasted cooling/heating
-
Improve comfort and indoor air quality
-
Prevent oversizing HVAC systems
-
Extend equipment life by reducing runtime strain
Bottom Line
An energy inspection in Austin provides a full-picture look at how your home performs—typically including blower door testing, insulation review, and duct performance evaluation. The goal is simple: identify energy loss, improve comfort, and create a plan for long-term savings.
BLOWER DOOR AND DUCT TEST PROVIDED
Need an inspection? Looking for a City of Houston CE-1302 Form? Call us today to have your blower door and duct test!
CALL US TODAY TO SCHEDULE!
CALL NOW! 713-370-4328 OR 832-661-6154
ADDITIONAL SERVICES:
SERVICES WE OFFER IN TEXAS
CALL NOW! 713-370-4328 OR 832-661-6154
CALL NOW! 713-370-4328 OR 832-661-6154
ADDITIONAL SERVICES:
Energy & Code Compliance
IECC 3rd-Party Inspections
Blower Door Testing
Duct Leakage / Duct Blaster Testing
Manual J • D • S HVAC Load Calculations
ENERGY STAR & HERS Services
IC3 / REScheck / COMcheck / RemRate Reporting
CALL NOW! 713-370-4328 OR 832-661-6154
HVAC & Performance
HVAC Inspections
Commercial Air Balancing (TAB)
Building Envelope & Insulation Inspections
CALL NOW! 713-370-4328 OR 832-661-6154
Consulting & Specialty
Expert Witness
Project Management
Remediation Management
Building Consulting
Ready to schedule? Call or text Home Ready Inspections to book service or request a quote.
CALL NOW! 713-370-4328 OR 832-661-6154
Home Inspection Atascocita | Home Ready Inspections | Houston TX
What to Expect From an Energy Inspection in Austin, Texas
If your home feels uneven from room to room, your energy bills keep climbing, or you’re planning upgrades like new insulation, windows, or HVAC equipment, an energy inspection is one of the best ways to get real answers. In Austin—where long cooling seasons and humidity can stress HVAC systems—an energy inspection helps identify where your home is losing comfort and wasting money.
What Is an Energy Inspection?
An energy inspection evaluates how efficiently your home uses heating and cooling. Instead of guessing, it uses measured data and visual verification to pinpoint where air leaks, insulation gaps, and duct issues are affecting performance.
A proper energy inspection typically focuses on three big areas:
-
Air leakage (building envelope)
-
Insulation levels and installation quality
-
Duct system performance and leakage
What’s Included in an Austin Energy Inspection?
1) Blower Door Testing (Air Leakage Test)
A blower door test uses a calibrated fan installed in an exterior doorway to depressurize the home and measure how much outside air is leaking in through gaps and cracks. This test helps identify:
-
Leaky attic hatches and recessed lights
-
Poorly sealed penetrations (plumbing/electrical)
-
Drafty doors and window openings
-
Leaks at top plates and wall-to-ceiling connections
Why it matters in Austin: Keeping hot, humid air out is key to comfort and humidity control—especially in summer.
2) Insulation Review (Attic + Wall Indicators)
Insulation isn’t just about “how much,” it’s also about “how well it’s installed.” An insulation review typically checks:
-
Insulation depth and coverage
-
Compression, voids, or missing sections
-
Wind washing and attic bypasses
-
Proper insulation contact around can lights and penetrations (when applicable)
What Austin homeowners often find: Insulation may be present but not performing due to gaps, uneven coverage, or poor air sealing underneath it.
3) Duct Performance (Duct Leakage + Distribution)
Your duct system is the highway for conditioned air. If it leaks or is poorly balanced, you can lose comfort and efficiency even with a newer HVAC system. Duct evaluation may include:
-
Visible inspection of duct runs (attic/crawlspace)
-
Checking return air pathways and restrictive returns
-
Measuring leakage (duct blaster testing when required or requested)
-
Identifying disconnected, crushed, or poorly sealed ducts
Common symptoms of duct issues:
-
Some rooms never cool or heat properly
-
High bills even after HVAC replacement
-
Dusty rooms or musty odors
-
HVAC runs longer than expected
What You’ll Receive After the Inspection
A professional energy inspection should leave you with clear, actionable next steps. Expect:
-
A summary of key issues found (air leaks, insulation, duct concerns)
-
Test results (like blower door numbers and/or duct leakage results if performed)
-
Photos and notes to document problem areas
-
Priority recommendations ranked by “biggest impact first”
When Should You Get an Energy Inspection in Austin?
This service is especially helpful if you:
-
Recently bought a home and want to reduce long-term costs
-
Have persistent comfort or humidity problems
-
Are planning an HVAC replacement (so you don’t oversize equipment)
-
Are remodeling (windows, additions, ductwork, insulation changes)
-
Want to improve overall efficiency before summer
Why Energy Inspections Save Money Long-Term
Many homeowners spend money on upgrades in the wrong order—like replacing HVAC equipment before fixing leakage and duct problems. An energy inspection helps you:
-
Reduce wasted cooling/heating
-
Improve comfort and indoor air quality
-
Prevent oversizing HVAC systems
-
Extend equipment life by reducing runtime strain
Bottom Line
An energy inspection in Austin provides a full-picture look at how your home performs—typically including blower door testing, insulation review, and duct performance evaluation. The goal is simple: identify energy loss, improve comfort, and create a plan for long-term savings.
Blower Door Duct Leakage Austin TX
Commercial Air Balancing at Fuel Max #108, 1103 E Hufsmith Rd, Tomball, TX 77375

Air Balancing at 1103 E Hufsmith Rd, Tomball, TX 77375
Why It Matters, What to Expect, and When to Schedule It
If your commercial building has rooms that are always too hot, too cold, or hard to control, the issue isn’t always the equipment—it’s often the airflow. Even a brand-new HVAC system can struggle if the air distribution isn’t adjusted to match the design. That’s where Commercial Air Balancing, also called Testing, Adjusting, and Balancing (TAB), makes a measurable difference.
At Home Ready Inspections, we provide commercial air balancing services across Houston, Dallas, Austin, San Antonio, Corpus Christi, and surrounding areas to help buildings operate the way they were intended—comfortable, efficient, and compliant.
What Is Commercial Air Balancing (TAB)?
Commercial Air Balancing is the process of measuring and adjusting the airflow in an HVAC system so each space receives the correct amount of conditioned air. TAB typically involves:
-
Measuring airflow (CFM) at supply, return, and exhaust points
-
Verifying fan performance and static pressure
-
Adjusting dampers, registers, diffusers, and VAV boxes (as applicable)
-
Confirming ventilation and exhaust rates where required
-
Documenting final values in a report for owners, contractors, and commissioning teams
The goal is simple: make the system match the mechanical design and the comfort needs of the building.
Why Air Balancing Is Important for Commercial Buildings
1) Comfort problems usually start with airflow
Uneven temperatures, drafts, and hot/cold complaints are commonly caused by:
-
Incorrect diffuser settings
-
Poorly adjusted VAV boxes
-
Duct leakage or restrictions
-
Improper fan speed/static pressure
-
Out-of-range ventilation rates
Air balancing targets these issues at the distribution level—where comfort is won or lost.
2) Proper airflow supports indoor air quality (IAQ)
Commercial HVAC systems don’t just heat and cool—they ventilate. TAB helps confirm that:
-
Outdoor air is being delivered as designed
-
Exhaust systems are performing correctly (restrooms, kitchens, labs, etc.)
-
Pressurization relationships are appropriate (corridors, offices, specialty spaces)
3) It protects your energy costs
When airflow is off, systems compensate by running longer or harder:
-
Fans work against unnecessary static pressure
-
Over-conditioning happens in some zones while others struggle
-
Reheat and cooling may “fight” each other
TAB helps reduce that waste by aligning performance with design.
4) It helps you pass commissioning and close out projects faster
Many projects require TAB reporting for:
-
Commissioning (Cx) teams
-
Owner acceptance
-
LEED/efficiency programs (when applicable)
-
Contract closeout and warranty documentation
A clean TAB report helps prevent delays and last-minute rework.
When Should You Schedule Commercial Air Balancing?
A good rule: TAB should happen after the system is installed and operating, but before final turnover. The best timing is usually when:
-
Equipment startup is complete
-
Controls are functioning and sequences are in place
-
Filters are installed and the building is reasonably clean
-
Ceiling tiles are in (or the system is in its final configuration)
-
Major punch items that affect airflow are resolved
Too early and readings will change as the project finishes. Too late and you’ll be balancing around occupant complaints and change orders.
Signs Your Building Needs Air Balancing
Even if your building isn’t new, TAB can solve recurring HVAC issues like:
-
Hot/cold spots or rooms that never match setpoint
-
High humidity in some zones
-
Excessive noise at diffusers or returns
-
Doors that slam or won’t close (pressure imbalance)
-
Persistent comfort complaints from tenants or staff
-
Energy bills that don’t match expectations
If you’re hearing “this area is always uncomfortable,” TAB is often the best next step.
What’s Included in Our Commercial TAB Service
While each building is different, commercial air balancing typically includes:
-
Airflow measurements (CFM) at diffusers/registers/grilles
-
Verification and adjustment of supply/return/exhaust
-
Fan airflow and static pressure checks
-
Basic documentation of conditions and final balanced results
-
A clear, organized TAB report for your project file
If the project requires coordination with commissioning or the mechanical contractor, we can work alongside your team to align deliverables and timelines.
Serving Houston, Dallas, Austin, San Antonio, Corpus Christi & Beyond
Texas buildings deal with heat, humidity, and long cooling seasons, so airflow accuracy is critical—especially in offices, retail, multi-family common areas, clinics, and light industrial spaces.
We serve:
-
Houston & surrounding areas
-
Dallas–Fort Worth & surrounding areas
-
Austin & surrounding areas
-
San Antonio & surrounding areas
-
Corpus Christi & Coastal Bend & surrounding areas
Get a Quote for Commercial Air Balancing (TAB)
If you need Commercial Air Balancing for a new build, renovation, or an existing building with comfort issues, we can help.
To quote quickly, send:
-
Project address + building type
-
Mechanical plans (if available)
-
Equipment schedule and controls description (if available)
-
Timeline (target turnover / commissioning dates)
Contact Home Ready Inspections today to schedule TAB service and get your HVAC performance dialed in.
How Blower Doors Work – 3720 Inwood Dr, Houston, TX 77019

3720 Inwood Dr, Houston, TX 77019

3720 Inwood Dr, Houston, TX 77019
How Blower Doors Work – 3720 Inwood Dr, Houston, TX 77019
Third-party Energy Testing
Your air ducts are one of the most important systems in your home, and if the ducts are poorly sealed or insulated they are likely contributing to higher energy bills.
Blower Doors: What Are They and How Do They Work?
A blower door is a device used in energy testing to measure a building’s airtightness. It consists of a powerful fan mounted on a temporary frame that fits into a doorway or an exterior opening. During a blower door test, the fan creates a pressure difference between the inside and outside of the building. This pressure difference allows air leakage points to become apparent and measurable. The test helps identify areas of air infiltration or exfiltration, which can affect energy efficiency and indoor comfort.
The blower door test involves setting up the device, measuring the baseline pressure, and then either depressurizing or pressurizing the building using the fan. While the fan is running, the airflow rate is measured using instruments like a manometer or pressure gauge. This airflow measurement quantifies the amount of air leakage in the building. Smoke pencils or thermal imaging cameras can be used to locate specific air leakage points.
The blower door test can be conducted in both depressurization and pressurization modes, allowing for a comprehensive assessment of air leakage locations. Once the test is complete, the data is analyzed to determine the building’s airtightness and identify areas that need improvement. The results can be used to guide air sealing measures and improve energy efficiency.
Blower door tests are crucial in identifying air leakage points, reducing energy loss, improving indoor air quality, and enhancing the overall performance and comfort of a building.
Home Inspection Atascocita | Home Ready Inspections | Houston TX
Why a Manual J, D & S Is Critical for Homes in Galveston 🌊🏠
Building or remodeling a home in Galveston comes with unique coastal challenges—and that’s exactly why a Manual J, D & S is not optional, it’s essential.
Here’s why it matters:
🌡️ High Heat & Extreme Humidity
Galveston’s coastal climate means intense humidity and long cooling seasons. A Manual J accurately calculates heating and cooling loads so your HVAC system can control both temperature and moisture, preventing mold, musty odors, and discomfort.
💨 Proper Airflow for Comfort
A Manual D ensures ductwork is correctly sized and laid out. Poor duct design leads to hot and cold spots, weak airflow, higher energy bills, and unnecessary strain on your system—especially common in coastal homes.
⚙️ Correct Equipment Selection
A Manual S matches the HVAC equipment to the calculated loads. Oversized systems short-cycle, fail to dehumidify properly, and wear out faster. Undersized systems struggle nonstop in the Galveston heat.
🏗️ Code Compliance & Permitting
Most jurisdictions require Manual J, D & S reports for permits and inspections. Having them done correctly avoids delays, failed inspections, and costly redesigns.
💰 Long-Term Savings & Durability
Properly designed HVAC systems last longer, run more efficiently, and reduce monthly energy costs—critical in salt-air environments that already stress mechanical equipment.
Bottom line:
In Galveston, a Manual J, D & S isn’t just paperwork—it’s the foundation of a comfortable, efficient, and durable home.
If you’re building or upgrading near the coast, make sure your HVAC system is engineered for Galveston conditions, not guessed.
Minimizing Energy Losses in Ducts at 1417 Waseca St, Houston, TX 77055
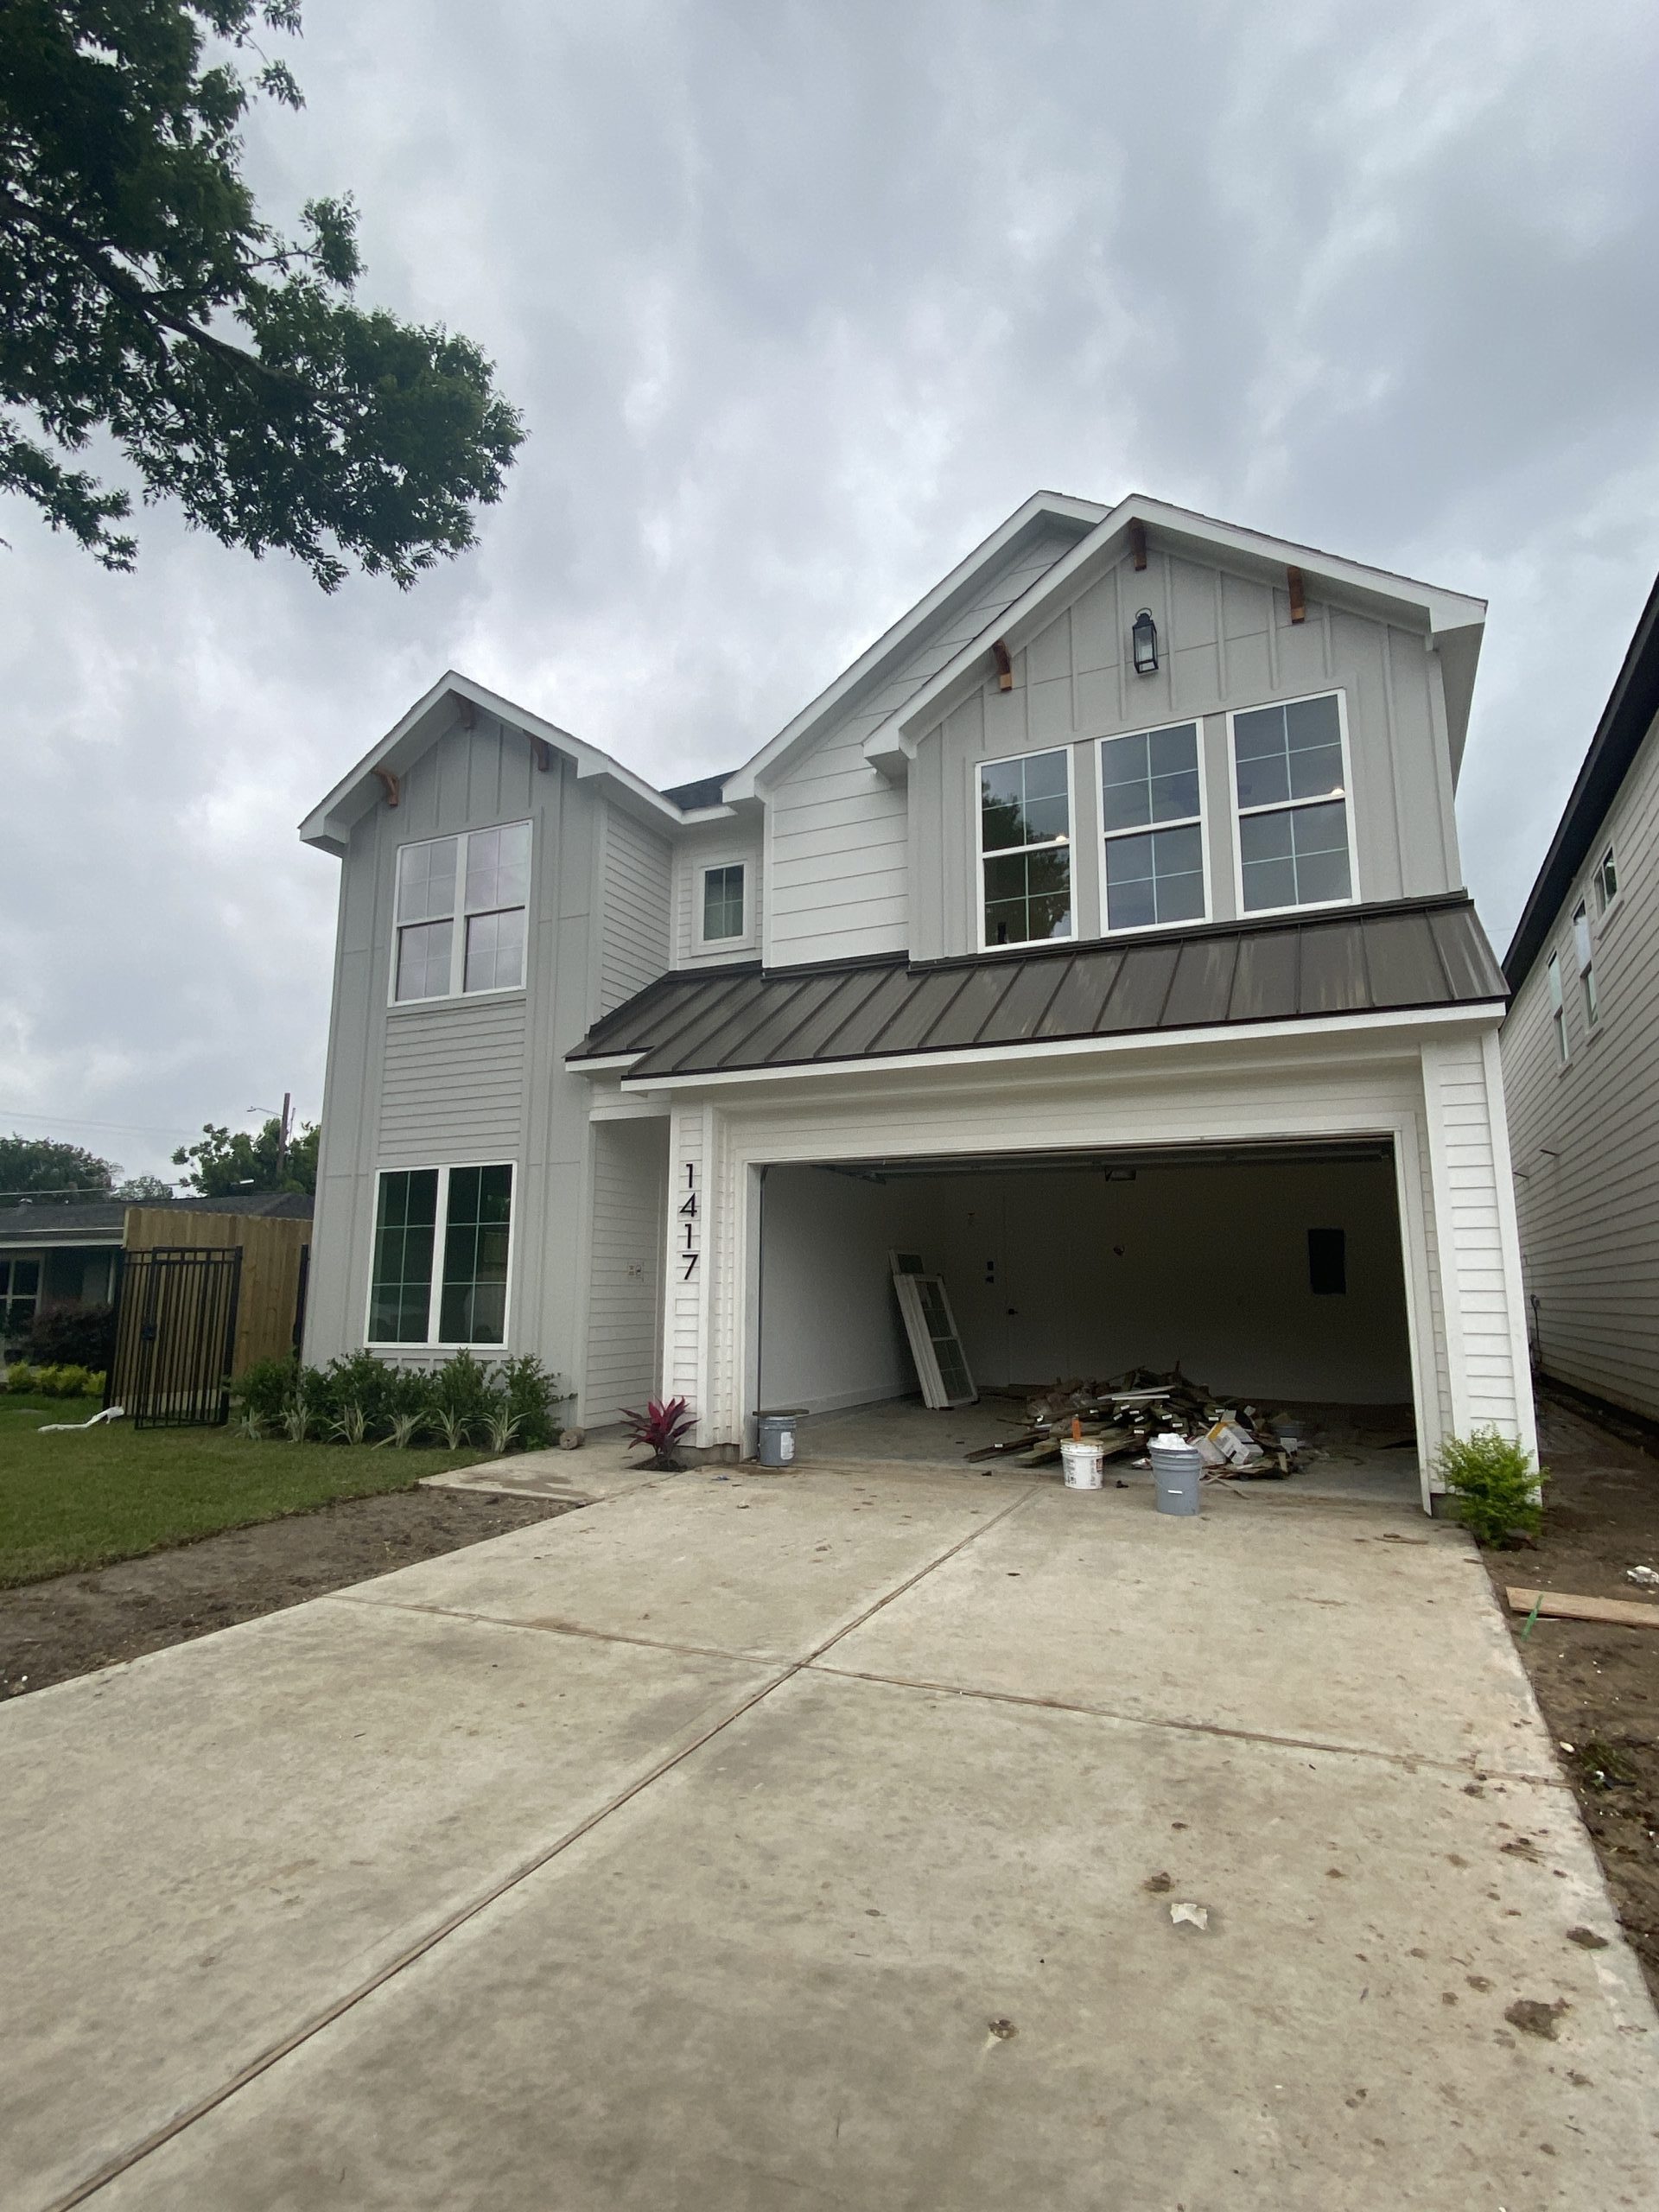
1417 Waseca St, Houston, TX 77055
Minimizing Energy Losses in Ducts
Minimizing energy losses in ducts by seeing if the ducts are poorly sealed or insulated. That could tell you why your energy bill in high. Your air ducts are one of the most important systems in your home, and if the ducts are poorly sealed or insulated, they are likely contributing to higher energy bills.
Your home’s duct system is a branching network of tubes in the walls, floors, and ceilings; it carries the air from your home’s furnace and central air conditioner to each room. Ducts are made of sheet metal, fiberglass, or other materials.
Ducts that leak heated air into unheated spaces can add hundreds of dollars a year to your heating and cooling bills, but you can reduce that loss by sealing and insulating your ducts. Insulating ducts in unconditioned spaces is usually very cost-effective. Existing ducts may also be blocked or may require simple upgrades.
Designing and Installing New Duct Systems
In new home construction or in retrofits, proper duct system design is critical. In recent years, energy-saving designs have sought to include ducts and heating systems in the conditioned space.
Efficient and well-designed duct systems distribute air properly throughout your home without leaking to keep all rooms at a comfortable temperature. The system should provide balanced supply and return flow to maintain a neutral pressure within the house.
Even well sealed and insulated ducts will leak and lose some heat, so many new energy-efficient homes place the duct system within the conditioned space of the home. The simplest way to accomplish this is to hide the ducts in dropped ceilings and in corners of rooms. Ducts can also be located in a sealed and insulated chase extending into the attic or built into raised floors. In both of these latter cases, care must be taken during construction to prevent contractors from using the duct chases for wiring or other utilities.
In either case, actual ducts must be used — chases and floor cavities should not be used as ducts. Regardless of where they are installed, ducts should be well sealed. Although ducts can be configured in a number of ways, the “trunk and branch” and “radial” supply duct configurations are most suitable for ducts located in conditioned spaces.
Air return duct systems can be configured in two ways: each room can have a return duct that sends air back to the heating and cooling equipment or return grills can be located in central locations on each floor. For the latter case, either grills must be installed to allow air to pass out of closed rooms, or short “jumper ducts” can be installed to connect the vent in one room with the next, allowing air to flow back to the central return grilles. Door undercuts help, but they are usually not sufficient for return airflow.
You can perform a simple check for adequate return air capacity by doing the following:
- Close all exterior doors and windows
- Close all interior room doors
- Turn on the central air handler
- “Crack” interior doors one by one and observe if the door closes or further opens “on its own.” (Whether it closes or opens will depend on the direction of the air handler-driven air flow.) Rooms served by air-moved doors have restricted return air flow and need pressure relief as described above.
Maintaining and Upgrading Existing Duct Systems
Sealing your ducts to prevent leaks is even more important if the ducts are located in an unconditioned area such as an attic or vented crawlspace. If the supply ducts are leaking, heated or cooled air can be forced out of unsealed joints and lost. In addition, unconditioned air can be drawn into return ducts through unsealed joints.
Although minor duct repairs are easy to make, qualified professionals should seal and insulate ducts in unconditioned spaces to ensure the use of appropriate sealing materials.
Aside from sealing your ducts, the simplest and most effective means of maintaining your air distribution system is to ensure that furniture and other objects are not blocking the airflow through your registers, and to vacuum the registers to remove any dust buildup.
Existing duct systems often suffer from design deficiencies in the return air system, and modifications by the homeowner (or just a tendency to keep doors closed) may contribute to these problems. Any rooms with a lack of sufficient return airflow may benefit from relatively simple upgrades, such as the installation of new return-air grilles, undercutting doors for return air, or installing a jumper duct.
Some rooms may also be hard to heat and cool because of inadequate supply ducts or grilles. If this is the case, you should first examine whether the problem is the room itself: fix any problems with insulation, air leakage, or inefficient windows first. If the problem persists, you may be able to increase the size of the supply duct or add an additional duct to provide the needed airflow to the room.
Minor Duct Repair Tips for Minimizing Energy Losses in Ducts
- Check your ducts for air leaks. First, look for sections that should be joined but have separated and then look for obvious holes.
- Duct mastic is the preferred material for sealing ductwork seams and joints. It is more durable than any available tape and generally easier for a do-it-yourself installation. Its only drawback is that it will not bridge gaps over ¼ inch. Such gaps must be first bridged with web-type drywall tape, or a good quality heat approved tape.
- If you use tape to seal your ducts, avoid cloth-backed, rubber adhesive duct tape — it tends to fail quickly. Instead, use mastic, butyl tape, foil tape, or other heat-approved tapes. Look for tape with the Underwriters Laboratories (UL) logo.
- Remember that insulating ducts in the basement will make the basement colder. If both the ducts and the basement walls are not insulated, consider insulating both. Water pipes and drains in unconditioned spaces could freeze and burst if the heat ducts are fully insulated because there would be no heat source to prevent the space from freezing in cold weather. However, using an electric heating tape wrap on the pipes can prevent this. Check with a professional contractor.
- Hire a professional to install both supply and return registers in the basement rooms after converting your basement to a living area.
- Be sure a well-sealed vapor barrier exists on the outside of the insulation on cooling ducts to prevent moisture condensation.
- If you have a fuel-burning furnace, stove, or other appliance or an attached garage, install a carbon monoxide (CO) monitor to alert you to harmful CO levels.
- Be sure to get professional help when doing ductwork. A qualified professional should always perform changes and repairs to a duct system.
Let’s Talk Manual J’s
What Is a Manual J Load Calculation?
A Manual J is an industry-standard heating and cooling load calculation developed by ACCA (Air Conditioning Contractors of America). It determines exactly how much heating and cooling a home needs—not a guess, not a rule of thumb.
A proper Manual J considers:
-
Home square footage and layout
-
Ceiling heights and insulation levels
-
Window size, type, and orientation
-
Air infiltration and leakage
-
Local climate data (Houston heat & humidity)
-
Occupancy and internal heat gains
This data ensures your HVAC system is not oversized or undersized.
Why Manual J Is Required in Houston & Texas
In Houston and most Texas jurisdictions, Manual J calculations are required for:
-
New construction homes
-
HVAC system replacements
-
Permit applications
-
ENERGY STAR homes
-
IECC compliance
Oversized systems cycle too fast, fail to remove humidity, and waste energy. Undersized systems struggle to keep up—especially during Houston summers.
A code-compliant Manual J protects homeowners, builders, and contractors.
Common Problems Caused by Skipping Manual J
Many comfort complaints trace back to improper load calculations:
-
Hot or cold rooms
-
High energy bills
-
Short-cycling equipment
-
Poor humidity control
-
Failed inspections
-
Voided manufacturer warranties
If your HVAC contractor sized equipment based only on square footage, chances are the system is wrong.
Manual J vs Manual S vs Manual D (Quick Breakdown)
-
Manual J – Calculates heating & cooling loads (Check out the Manual J below we did for 4608 Pine St, Bellaire, TX 77401)
-
Manual S – Selects the correct HVAC equipment
-
Manual D – Designs proper ductwork
At Home Ready Inspections, we can provide Manual J, S, and D reports as needed for full system compliance.
Why Choose Home Ready Inspections for Manual J in Houston?
We specialize in energy-code compliance and HVAC load calculations, not just inspections.
✔ Texas-licensed professionals
✔ Houston-specific climate modeling
✔ IECC & ENERGY STAR compliant
✔ Accepted by builders, cities, and plan reviewers
✔ Fast turnaround for permits
✔ Builder & homeowner friendly reports
We regularly work with builders, HVAC contractors, engineers, and homeowners across Houston, Dallas, Austin, and surrounding areas.
When Do You Need a Manual J?
You should get a Manual J if you are:
-
-
Building a new home
-
Replacing an HVAC system
-
Applying for permits
-
Failing city inspections
-
Experiencing comfort issues
-
-
Building an ENERGY STAR home
If you’re unsure, we’re happy to review your project and advise.
Schedule Your Manual J Load Calculation Today
Don’t guess your HVAC sizing. Get it done right, the first time.
📞 713-370-4328
📞 832-661-6154
🌐 HomeReadyInspections.com
Serving Houston, TX and surrounding areas.

Building a Strong Referral Network: A Guide for HVAC Contractors
In today’s competitive HVAC market, sustainable growth is rarely driven by advertising alone. One of the most effective and reliable ways to grow a service-based business is through referrals. A strong referral network builds trust, shortens the sales cycle, and consistently delivers higher-quality clients.
For HVAC contractors, developing and maintaining referral relationships should be treated as a core business strategy—not an afterthought. Below are proven, practical ways to build a referral network that supports long-term growth.
Partner with Complementary Trades
Collaborating with other construction and service trades is one of the most effective ways to expand your referral reach. Electricians, plumbers, home builders, remodelers, and property managers often work with clients who require HVAC services at various stages of a project.
Best practice: Establish relationships with reputable trades in your market and create a mutual referral arrangement. When trust is built and expectations are clear, these partnerships can become a consistent source of qualified leads.
Example: Home builders frequently need HVAC contractors for new construction, while electricians and plumbers often encounter HVAC needs during renovations or repairs.
Leverage Satisfied Customers
Satisfied customers are a powerful referral source. When clients have a positive experience, they are far more likely to recommend your services to others—especially when prompted in a professional manner.
Request online reviews: After completing a project, follow up with clients and request a review on platforms such as Google or Yelp. Providing a direct link increases response rates and makes the process easy for the customer.
Encourage referrals: Consider offering a referral incentive, such as a service discount or credit toward future work. Incentives reinforce positive behavior while maintaining professionalism.
Example:
“Refer a friend and receive 10% off your next HVAC service.”
Create Industry Referral Incentives
Referral programs can be equally effective when extended to industry professionals such as realtors, builders, property managers, and general contractors. These professionals are frequently asked to recommend HVAC providers and can become valuable long-term referral partners.
Implementation tip: Develop a clear and transparent referral program outlining how referrals are tracked and how incentives are awarded. Simplicity and consistency are key to long-term success.
Example:
“For each successful HVAC referral, we provide a referral incentive as a thank-you for your partnership.”
Strengthen Your Digital Presence
A professional online presence plays a critical role in supporting referral growth. Referrals often validate a contractor’s name online before making contact, making digital credibility essential.
Social media: Encourage customers to mention or tag your business when sharing their experience. Periodic referral or review campaigns can also increase visibility.
Online reviews: Consistent, positive reviews build trust with prospective clients. Highlighting strong reviews on your website reinforces credibility and professionalism.
Network Within the HVAC Industry
Industry conferences, trade shows, and professional events provide valuable opportunities to connect with peers, suppliers, and potential referral partners. Maintaining visibility within the industry helps position your business as established and dependable.
Well-known HVAC industry events include national expos, educational conferences, and local trade association meetings. Participation demonstrates commitment to professional growth and industry standards.
Track and Measure Referral Performance
Tracking referral sources is essential to understanding what drives your business growth. Without measurement, it is difficult to identify which referral channels are delivering the best return.
Use tracking tools: CRM platforms or internal tracking systems can help identify where leads originate and ensure timely follow-up.
Refine your strategy: Focus on referral sources that consistently generate quality leads and invest in strengthening those relationships over time.
Manual J Load Calculations: Why Proper HVAC Sizing Matters
When it comes to heating and cooling a home, bigger is not better. One of the most common (and costly) mistakes in residential construction is installing an HVAC system that isn’t properly sized for the home. That’s where a Manual J Load Calculation comes in.
At Home Ready Inspections, we provide accurate, code-compliant Manual J calculations to ensure your HVAC system is sized correctly for comfort, efficiency, and long-term performance.
What Is a Manual J Load Calculation?
A Manual J is an industry-standard HVAC load calculation developed by ACCA (Air Conditioning Contractors of America). It determines the exact heating and cooling needs of a home based on real data—not estimates.
A proper Manual J considers:
-
Home square footage and layout
-
Insulation levels and building envelope
-
Window sizes, types, and orientations
-
Ceiling heights and construction materials
-
Air infiltration and ventilation
-
Local climate data (Houston-specific conditions)
The result is a precise calculation of how much heating and cooling your home actually needs.
Why Manual J Is Critical
Skipping or guessing HVAC sizing can lead to serious issues, including:
❌ Uneven temperatures and comfort problems
❌ Higher energy bills
❌ Short-cycling equipment
❌ Excess humidity and poor indoor air quality
❌ Reduced HVAC lifespan
A properly performed Manual J helps avoid all of these problems.
When Is a Manual J Required?
Manual J calculations are commonly required for:
-
New construction homes
-
HVAC system replacements
-
City of Houston permitting
-
IECC & energy code compliance
-
ENERGY STAR & high-performance homes
-
Manual D (duct design) and Manual S (equipment selection)
If you’re pulling permits or upgrading HVAC equipment, chances are a Manual J is required—or strongly recommended.
Why Choose Home Ready Inspections?
At Home Ready Inspections, our Manual J calculations are:
✔ Performed by experienced professionals
✔ Based on ACCA and IECC standards
✔ Accepted by municipalities and plan reviewers
✔ Builder- and homeowner-friendly
✔ Delivered quickly and accurately
We don’t guess—and we don’t use rule-of-thumb sizing.
Serving Houston and Surrounding Areas
We proudly provide Manual J Load Calculations throughout Houston and the surrounding areas, supporting homeowners, builders, HVAC contractors, and developers.
Need a Manual J Calculation?
📞 Call us today: 832-661-6154 or 713-370-4328
📧 Email: info@homereadyinspections.com
🌐 Visit: www.homereadyinspections.com
Let Home Ready Inspections help you design an HVAC system that’s sized right—from day one.
Top Energy Problems Found in Houston Homes (and How to Fix Them)
 Energy audits in Houston frequently reveal the same problems—issues that quietly drive up monthly bills and reduce comfort. If you’re wondering what an auditor will likely uncover in your home, here are the top three culprits.
- Air Leakage (20–30% of air lost)
Leaky windows, doors, and wall gaps allow conditioned air to escape.
- Fix: Caulking, weatherstripping, and sealing attic penetrations.
- Poor Insulation in Attics (65% of homes under-insulated)
Insufficient insulation means your HVAC works overtime.
- Fix: Add insulation to meet recommended R-values for Houston’s climate zone.
- Inefficient HVAC Systems (operating at 60–75% efficiency)
Older or unmaintained units waste energy and struggle in high humidity.
- Fix: Regular tune-ups, duct sealing, or replacement with ENERGY STAR models.
How Home Ready Inspections Can Help
- Conducts blower door and duct leakage tests to pinpoint air loss
- Offers professional recommendations on insulation and HVAC improvements
- Provides same-day reporting so you can start repairs immediately
- Works with contractors and builders for seamless follow-through
Tips for Homeowners
- Start with low-cost fixes like weatherstripping
- Upgrade insulation before considering HVAC replacement
- Use energy rebates to reduce out-of-pocket costs
Don’t let hidden problems drain your wallet. Schedule a blower door or duct test with Home Ready Inspections and uncover the top energy leaks in your home today.
Minimizing Energy Losses in Ducts at 8311 Venus St, Houston, TX 77088
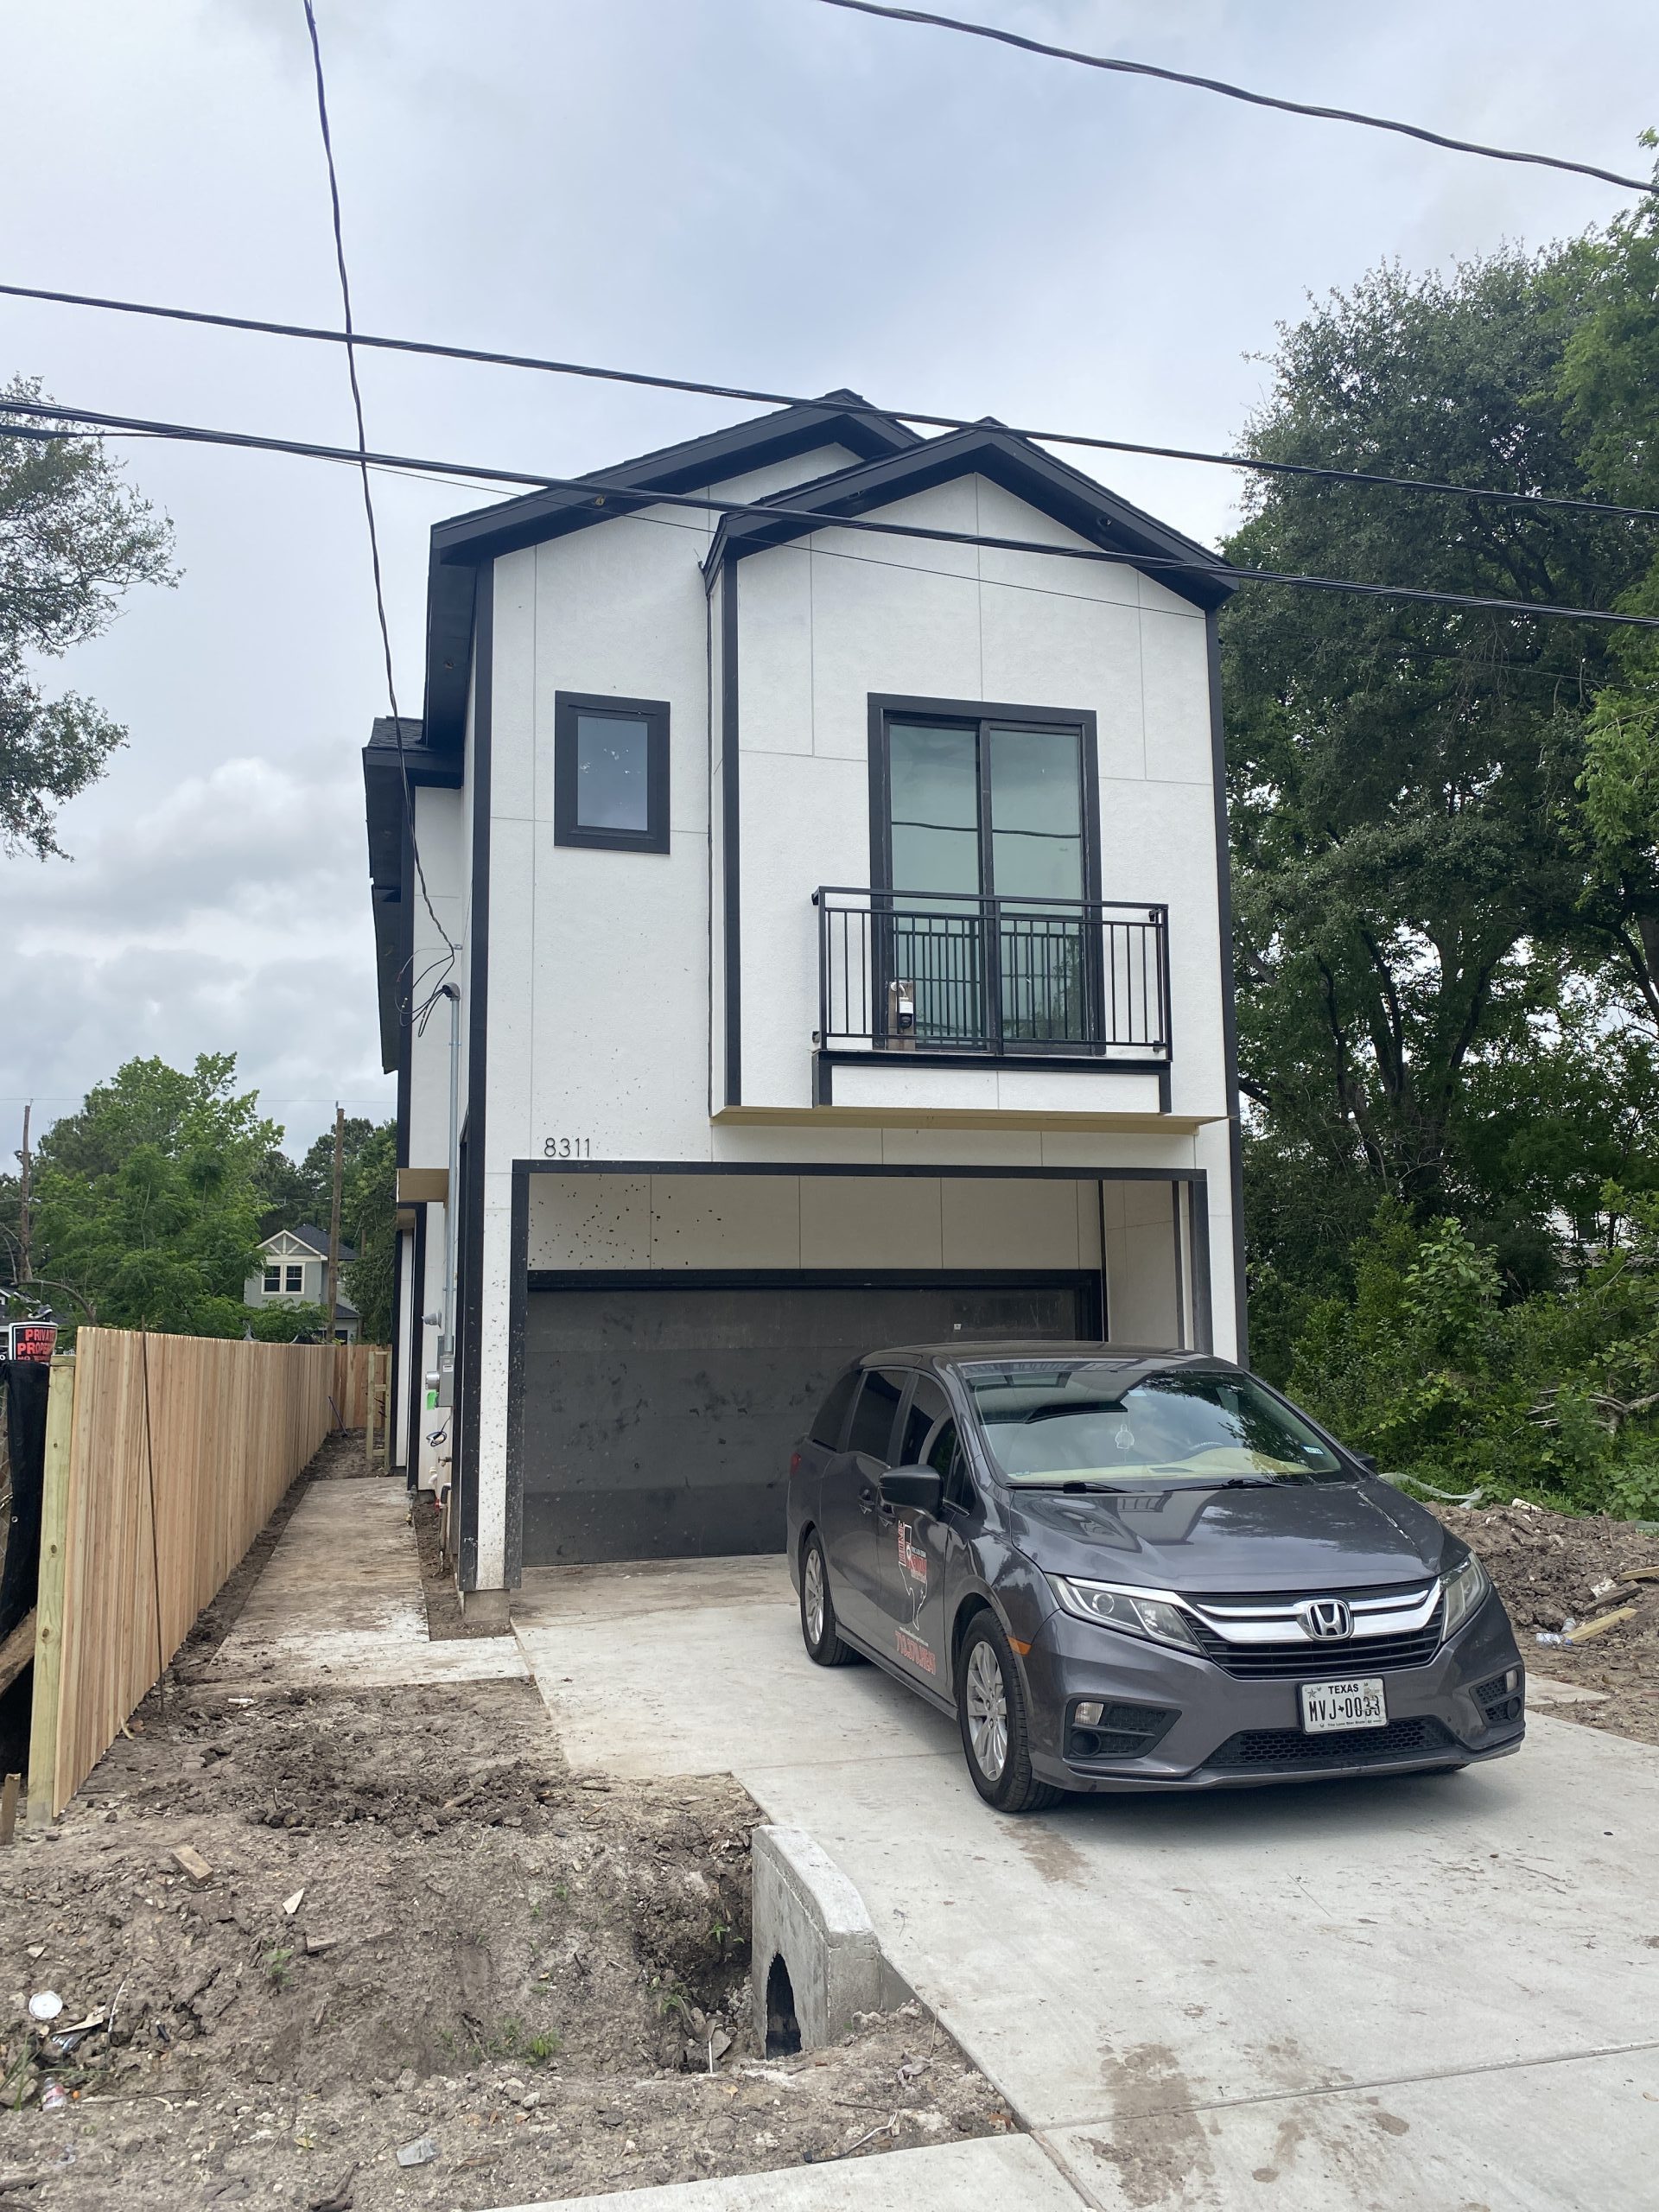
8311 Venus St, Houston, TX 77088
Minimizing Energy Losses in Ducts
Minimizing energy losses in ducts by seeing if the ducts are poorly sealed or insulated. That could tell you why your energy bill in high. Your air ducts are one of the most important systems in your home, and if the ducts are poorly sealed or insulated, they are likely contributing to higher energy bills.
Your home’s duct system is a branching network of tubes in the walls, floors, and ceilings; it carries the air from your home’s furnace and central air conditioner to each room. Ducts are made of sheet metal, fiberglass, or other materials.
Ducts that leak heated air into unheated spaces can add hundreds of dollars a year to your heating and cooling bills, but you can reduce that loss by sealing and insulating your ducts. Insulating ducts in unconditioned spaces is usually very cost-effective. Existing ducts may also be blocked or may require simple upgrades.
Designing and Installing New Duct Systems
In new home construction or in retrofits, proper duct system design is critical. In recent years, energy-saving designs have sought to include ducts and heating systems in the conditioned space.
Efficient and well-designed duct systems distribute air properly throughout your home without leaking to keep all rooms at a comfortable temperature. The system should provide balanced supply and return flow to maintain a neutral pressure within the house.
Even well sealed and insulated ducts will leak and lose some heat, so many new energy-efficient homes place the duct system within the conditioned space of the home. The simplest way to accomplish this is to hide the ducts in dropped ceilings and in corners of rooms. Ducts can also be located in a sealed and insulated chase extending into the attic or built into raised floors. In both of these latter cases, care must be taken during construction to prevent contractors from using the duct chases for wiring or other utilities.
In either case, actual ducts must be used — chases and floor cavities should not be used as ducts. Regardless of where they are installed, ducts should be well sealed. Although ducts can be configured in a number of ways, the “trunk and branch” and “radial” supply duct configurations are most suitable for ducts located in conditioned spaces.
Air return duct systems can be configured in two ways: each room can have a return duct that sends air back to the heating and cooling equipment or return grills can be located in central locations on each floor. For the latter case, either grills must be installed to allow air to pass out of closed rooms, or short “jumper ducts” can be installed to connect the vent in one room with the next, allowing air to flow back to the central return grilles. Door undercuts help, but they are usually not sufficient for return airflow.
You can perform a simple check for adequate return air capacity by doing the following:
- Close all exterior doors and windows
- Close all interior room doors
- Turn on the central air handler
- “Crack” interior doors one by one and observe if the door closes or further opens “on its own.” (Whether it closes or opens will depend on the direction of the air handler-driven air flow.) Rooms served by air-moved doors have restricted return air flow and need pressure relief as described above.
Maintaining and Upgrading Existing Duct Systems
Sealing your ducts to prevent leaks is even more important if the ducts are located in an unconditioned area such as an attic or vented crawlspace. If the supply ducts are leaking, heated or cooled air can be forced out of unsealed joints and lost. In addition, unconditioned air can be drawn into return ducts through unsealed joints.
Although minor duct repairs are easy to make, qualified professionals should seal and insulate ducts in unconditioned spaces to ensure the use of appropriate sealing materials.
Aside from sealing your ducts, the simplest and most effective means of maintaining your air distribution system is to ensure that furniture and other objects are not blocking the airflow through your registers, and to vacuum the registers to remove any dust buildup.
Existing duct systems often suffer from design deficiencies in the return air system, and modifications by the homeowner (or just a tendency to keep doors closed) may contribute to these problems. Any rooms with a lack of sufficient return airflow may benefit from relatively simple upgrades, such as the installation of new return-air grilles, undercutting doors for return air, or installing a jumper duct.
Some rooms may also be hard to heat and cool because of inadequate supply ducts or grilles. If this is the case, you should first examine whether the problem is the room itself: fix any problems with insulation, air leakage, or inefficient windows first. If the problem persists, you may be able to increase the size of the supply duct or add an additional duct to provide the needed airflow to the room.
Minor Duct Repair Tips for Minimizing Energy Losses in Ducts
- Check your ducts for air leaks. First, look for sections that should be joined but have separated and then look for obvious holes.
- Duct mastic is the preferred material for sealing ductwork seams and joints. It is more durable than any available tape and generally easier for a do-it-yourself installation. Its only drawback is that it will not bridge gaps over ¼ inch. Such gaps must be first bridged with web-type drywall tape, or a good quality heat approved tape.
- If you use tape to seal your ducts, avoid cloth-backed, rubber adhesive duct tape — it tends to fail quickly. Instead, use mastic, butyl tape, foil tape, or other heat-approved tapes. Look for tape with the Underwriters Laboratories (UL) logo.
- Remember that insulating ducts in the basement will make the basement colder. If both the ducts and the basement walls are not insulated, consider insulating both. Water pipes and drains in unconditioned spaces could freeze and burst if the heat ducts are fully insulated because there would be no heat source to prevent the space from freezing in cold weather. However, using an electric heating tape wrap on the pipes can prevent this. Check with a professional contractor.
- Hire a professional to install both supply and return registers in the basement rooms after converting your basement to a living area.
- Be sure a well-sealed vapor barrier exists on the outside of the insulation on cooling ducts to prevent moisture condensation.
- If you have a fuel-burning furnace, stove, or other appliance or an attached garage, install a carbon monoxide (CO) monitor to alert you to harmful CO levels.
- Be sure to get professional help when doing ductwork. A qualified professional should always perform changes and repairs to a duct system.
Energy Efficiency in Action: Real Results from Houston’s Duct Blaster Tests
Introduction:
How do you know if your home’s ductwork is efficient? A duct blaster test is one of the best ways to measure air leaks and system performance. Home Ready Inspections offers professional duct testing services, providing real, actionable results to improve your home’s energy efficiency.
What Is a Duct Blaster Test?
A duct blaster test measures the airtightness of a home’s ductwork by pressurizing the system and measuring the air leakage. This is essential for identifying inefficiencies and ensuring that your home’s HVAC system is working as it should.
Why It Matters:
Inefficient ducts can lead to energy loss, higher utility bills, and poor indoor air quality. A duct blaster test helps identify problem areas so that they can be repaired before they cause bigger issues.
Case Study:
Recently, we conducted a duct blaster test at a home at 3707 Mossycup Drive in Houston. The test revealed significant air leakage in the attic space, which was quickly addressed to improve the home’s energy performance and comfort.
Conclusion:
If you’re concerned about your home’s ductwork, schedule a duct blaster test with Home Ready Inspections. We’ll help you identify and fix inefficiencies, saving you money in the long run.
Home Inspections Made Easy: What to Expect and Why to Be Present

Are you preparing for a home inspection? At Home Ready Inspections, we want to make the process smooth and transparent for you. Here’s a quick guide to what you can expect during an inspection and why it’s beneficial for you to be present.
What Happens During an Inspection:
Home Ready Inspections checks various elements of your home’s energy performance, including insulation, HVAC efficiency, air leaks, and moisture control. We conduct blower door tests, inspect ductwork, and perform infrared scans to uncover any potential issues.
Why You Should Be There:
Being present during the inspection allows you to ask questions, understand the findings firsthand, and learn about opportunities to improve energy efficiency. It’s an educational experience that can help you maintain a more comfortable and cost-effective home.
Home inspections don’t have to be stressful. With Home Ready Inspections, you get clear, actionable insights into your home’s performance. Schedule your next inspection today and be part of the process!
Unlock the 45L Home Tax Credit: What Houston Builders Need to Know

Did you know that Houston builders can qualify for a 45L tax credit by making homes more energy-efficient? The 45L tax credit offers significant financial incentives for meeting certain energy efficiency criteria. Here’s how Home Ready Inspections can help you unlock this valuable tax benefit.
What is the 45L Tax Credit?
The 45L tax credit provides builders with a $2,000 credit for each new home that meets the ENERGY STAR standard or passes a rigorous energy efficiency inspection. Home Ready Inspections is a certified ENERGY STAR verifier and can perform the necessary inspections to ensure your homes qualify for this tax credit.
How Home Ready Inspections Helps Builders Qualify:
To take advantage of the 45L tax credit, homes must meet specific energy efficiency standards, such as superior insulation, windows, and HVAC systems. Home Ready Inspections conducts thorough inspections, including blower door tests and duct leakage tests, to confirm compliance with energy code requirements.
Maximize your profits by qualifying for the 45L tax credit with the help of Home Ready Inspections. Contact us today to learn how we can assist you in meeting the requirements for this valuable incentive.
Why Houston Builders Trust Home Ready for Third‑Party Energy Inspections

As the demand for energy-efficient homes grows in Houston, builders need reliable, certified professionals to ensure that their properties meet the latest energy standards. Home Ready Inspections stands out as one of the top providers of third-party energy testing, including blower door and HVAC duct testing. Here’s why Houston builders choose us for their energy inspection needs.
Why Third-Party Energy Inspections Matter:
Energy code compliance is no longer optional—it’s a requirement for new homes. The City of Houston mandates third-party testing to confirm homes meet specific energy efficiency standards. Builders often turn to Home Ready Inspections to ensure their projects pass these tests the first time.
Our Expertise:
As a City of Houston‑registered testing provider, Home Ready Inspections offers same-day energy inspections, ensuring projects stay on schedule without delays. Our team uses the latest equipment, like blower door tests and duct leakage testing, to ensure every home’s envelope is sealed tightly and energy-efficient.
For builders who need dependable energy inspections, Home Ready Inspections provides unmatched expertise and reliability. Contact us today to schedule your third-party energy test and keep your projects moving forward.
A Builder’s Guide: Navigating REScheck, Manual J/D, and ENERGY STAR with Confidence 77028

As building codes become more stringent, navigating compliance for energy efficiency can be a challenge. Whether you’re working with REScheck, conducting Manual J/D sizing, or obtaining ENERGY STAR certification, Home Ready Inspections offers expert guidance every step of the way.
Understanding REScheck and Energy Compliance:
REScheck is a software tool that helps builders demonstrate compliance with energy codes. By analyzing the home’s design, it calculates the home’s energy efficiency. Home Ready Inspections can help you navigate REScheck to ensure that your project meets or exceeds the 2021 IECC standards.
Manual J/D Sizing and HVAC Performance:
Manual J and D are key calculations in designing HVAC systems that work efficiently. Manual J ensures your system’s size matches the home’s energy needs, while Manual D addresses proper ductwork. Home Ready Inspections works directly with HVAC contractors to ensure precise calculations and efficient system installations.
Achieving ENERGY STAR certification means a home is not just energy-efficient but also meets stringent environmental standards. Our team at Home Ready Inspections can guide you through the certification process, ensuring all elements are up to code and that you can offer buyers a green, sustainable home.
Navigating energy codes can be complicated, but with the help of Home Ready Inspections, builders can confidently meet energy efficiency standards. Reach out to us for professional support with REScheck, Manual J/D sizing, and ENERGY STAR certification.
Minimizing Energy Losses in Ducts at 3638 Jipsie Ln, Houston, TX 77051
3638 Jipsie Ln, Houston, TX 77051
Minimizing Energy Losses in Ducts
Minimizing energy losses in ducts by seeing if the ducts are poorly sealed or insulated. That could tell you why your energy bill in high. Your air ducts are one of the most important systems in your home, and if the ducts are poorly sealed or insulated, they are likely contributing to higher energy bills.
Your home’s duct system is a branching network of tubes in the walls, floors, and ceilings; it carries the air from your home’s furnace and central air conditioner to each room. Ducts are made of sheet metal, fiberglass, or other materials.
Ducts that leak heated air into unheated spaces can add hundreds of dollars a year to your heating and cooling bills, but you can reduce that loss by sealing and insulating your ducts. Insulating ducts in unconditioned spaces is usually very cost-effective. Existing ducts may also be blocked or may require simple upgrades.
Designing and Installing New Duct Systems
In new home construction or in retrofits, proper duct system design is critical. In recent years, energy-saving designs have sought to include ducts and heating systems in the conditioned space.
Efficient and well-designed duct systems distribute air properly throughout your home without leaking to keep all rooms at a comfortable temperature. The system should provide balanced supply and return flow to maintain a neutral pressure within the house.
Even well sealed and insulated ducts will leak and lose some heat, so many new energy-efficient homes place the duct system within the conditioned space of the home. The simplest way to accomplish this is to hide the ducts in dropped ceilings and in corners of rooms. Ducts can also be located in a sealed and insulated chase extending into the attic or built into raised floors. In both of these latter cases, care must be taken during construction to prevent contractors from using the duct chases for wiring or other utilities.
In either case, actual ducts must be used — chases and floor cavities should not be used as ducts. Regardless of where they are installed, ducts should be well sealed. Although ducts can be configured in a number of ways, the “trunk and branch” and “radial” supply duct configurations are most suitable for ducts located in conditioned spaces.
Air return duct systems can be configured in two ways: each room can have a return duct that sends air back to the heating and cooling equipment or return grills can be located in central locations on each floor. For the latter case, either grills must be installed to allow air to pass out of closed rooms, or short “jumper ducts” can be installed to connect the vent in one room with the next, allowing air to flow back to the central return grilles. Door undercuts help, but they are usually not sufficient for return airflow.
You can perform a simple check for adequate return air capacity by doing the following:
- Close all exterior doors and windows
- Close all interior room doors
- Turn on the central air handler
- “Crack” interior doors one by one and observe if the door closes or further opens “on its own.” (Whether it closes or opens will depend on the direction of the air handler-driven air flow.) Rooms served by air-moved doors have restricted return air flow and need pressure relief as described above.
Maintaining and Upgrading Existing Duct Systems
Sealing your ducts to prevent leaks is even more important if the ducts are located in an unconditioned area such as an attic or vented crawlspace. If the supply ducts are leaking, heated or cooled air can be forced out of unsealed joints and lost. In addition, unconditioned air can be drawn into return ducts through unsealed joints.
Although minor duct repairs are easy to make, qualified professionals should seal and insulate ducts in unconditioned spaces to ensure the use of appropriate sealing materials.
Aside from sealing your ducts, the simplest and most effective means of maintaining your air distribution system is to ensure that furniture and other objects are not blocking the airflow through your registers, and to vacuum the registers to remove any dust buildup.
Existing duct systems often suffer from design deficiencies in the return air system, and modifications by the homeowner (or just a tendency to keep doors closed) may contribute to these problems. Any rooms with a lack of sufficient return airflow may benefit from relatively simple upgrades, such as the installation of new return-air grilles, undercutting doors for return air, or installing a jumper duct.
Some rooms may also be hard to heat and cool because of inadequate supply ducts or grilles. If this is the case, you should first examine whether the problem is the room itself: fix any problems with insulation, air leakage, or inefficient windows first. If the problem persists, you may be able to increase the size of the supply duct or add an additional duct to provide the needed airflow to the room.
Minor Duct Repair Tips for Minimizing Energy Losses in Ducts
- Check your ducts for air leaks. First, look for sections that should be joined but have separated and then look for obvious holes.
- Duct mastic is the preferred material for sealing ductwork seams and joints. It is more durable than any available tape and generally easier for a do-it-yourself installation. Its only drawback is that it will not bridge gaps over ¼ inch. Such gaps must be first bridged with web-type drywall tape, or a good quality heat approved tape.
- If you use tape to seal your ducts, avoid cloth-backed, rubber adhesive duct tape — it tends to fail quickly. Instead, use mastic, butyl tape, foil tape, or other heat-approved tapes. Look for tape with the Underwriters Laboratories (UL) logo.
- Remember that insulating ducts in the basement will make the basement colder. If both the ducts and the basement walls are not insulated, consider insulating both. Water pipes and drains in unconditioned spaces could freeze and burst if the heat ducts are fully insulated because there would be no heat source to prevent the space from freezing in cold weather. However, using an electric heating tape wrap on the pipes can prevent this. Check with a professional contractor.
- Hire a professional to install both supply and return registers in the basement rooms after converting your basement to a living area.
- Be sure a well-sealed vapor barrier exists on the outside of the insulation on cooling ducts to prevent moisture condensation.
- If you have a fuel-burning furnace, stove, or other appliance or an attached garage, install a carbon monoxide (CO) monitor to alert you to harmful CO levels.
- Be sure to get professional help when doing ductwork. A qualified professional should always perform changes and repairs to a duct system.
Minimizing Energy Losses in Ducts at 4814 Wilmington St, Houston TX 77033
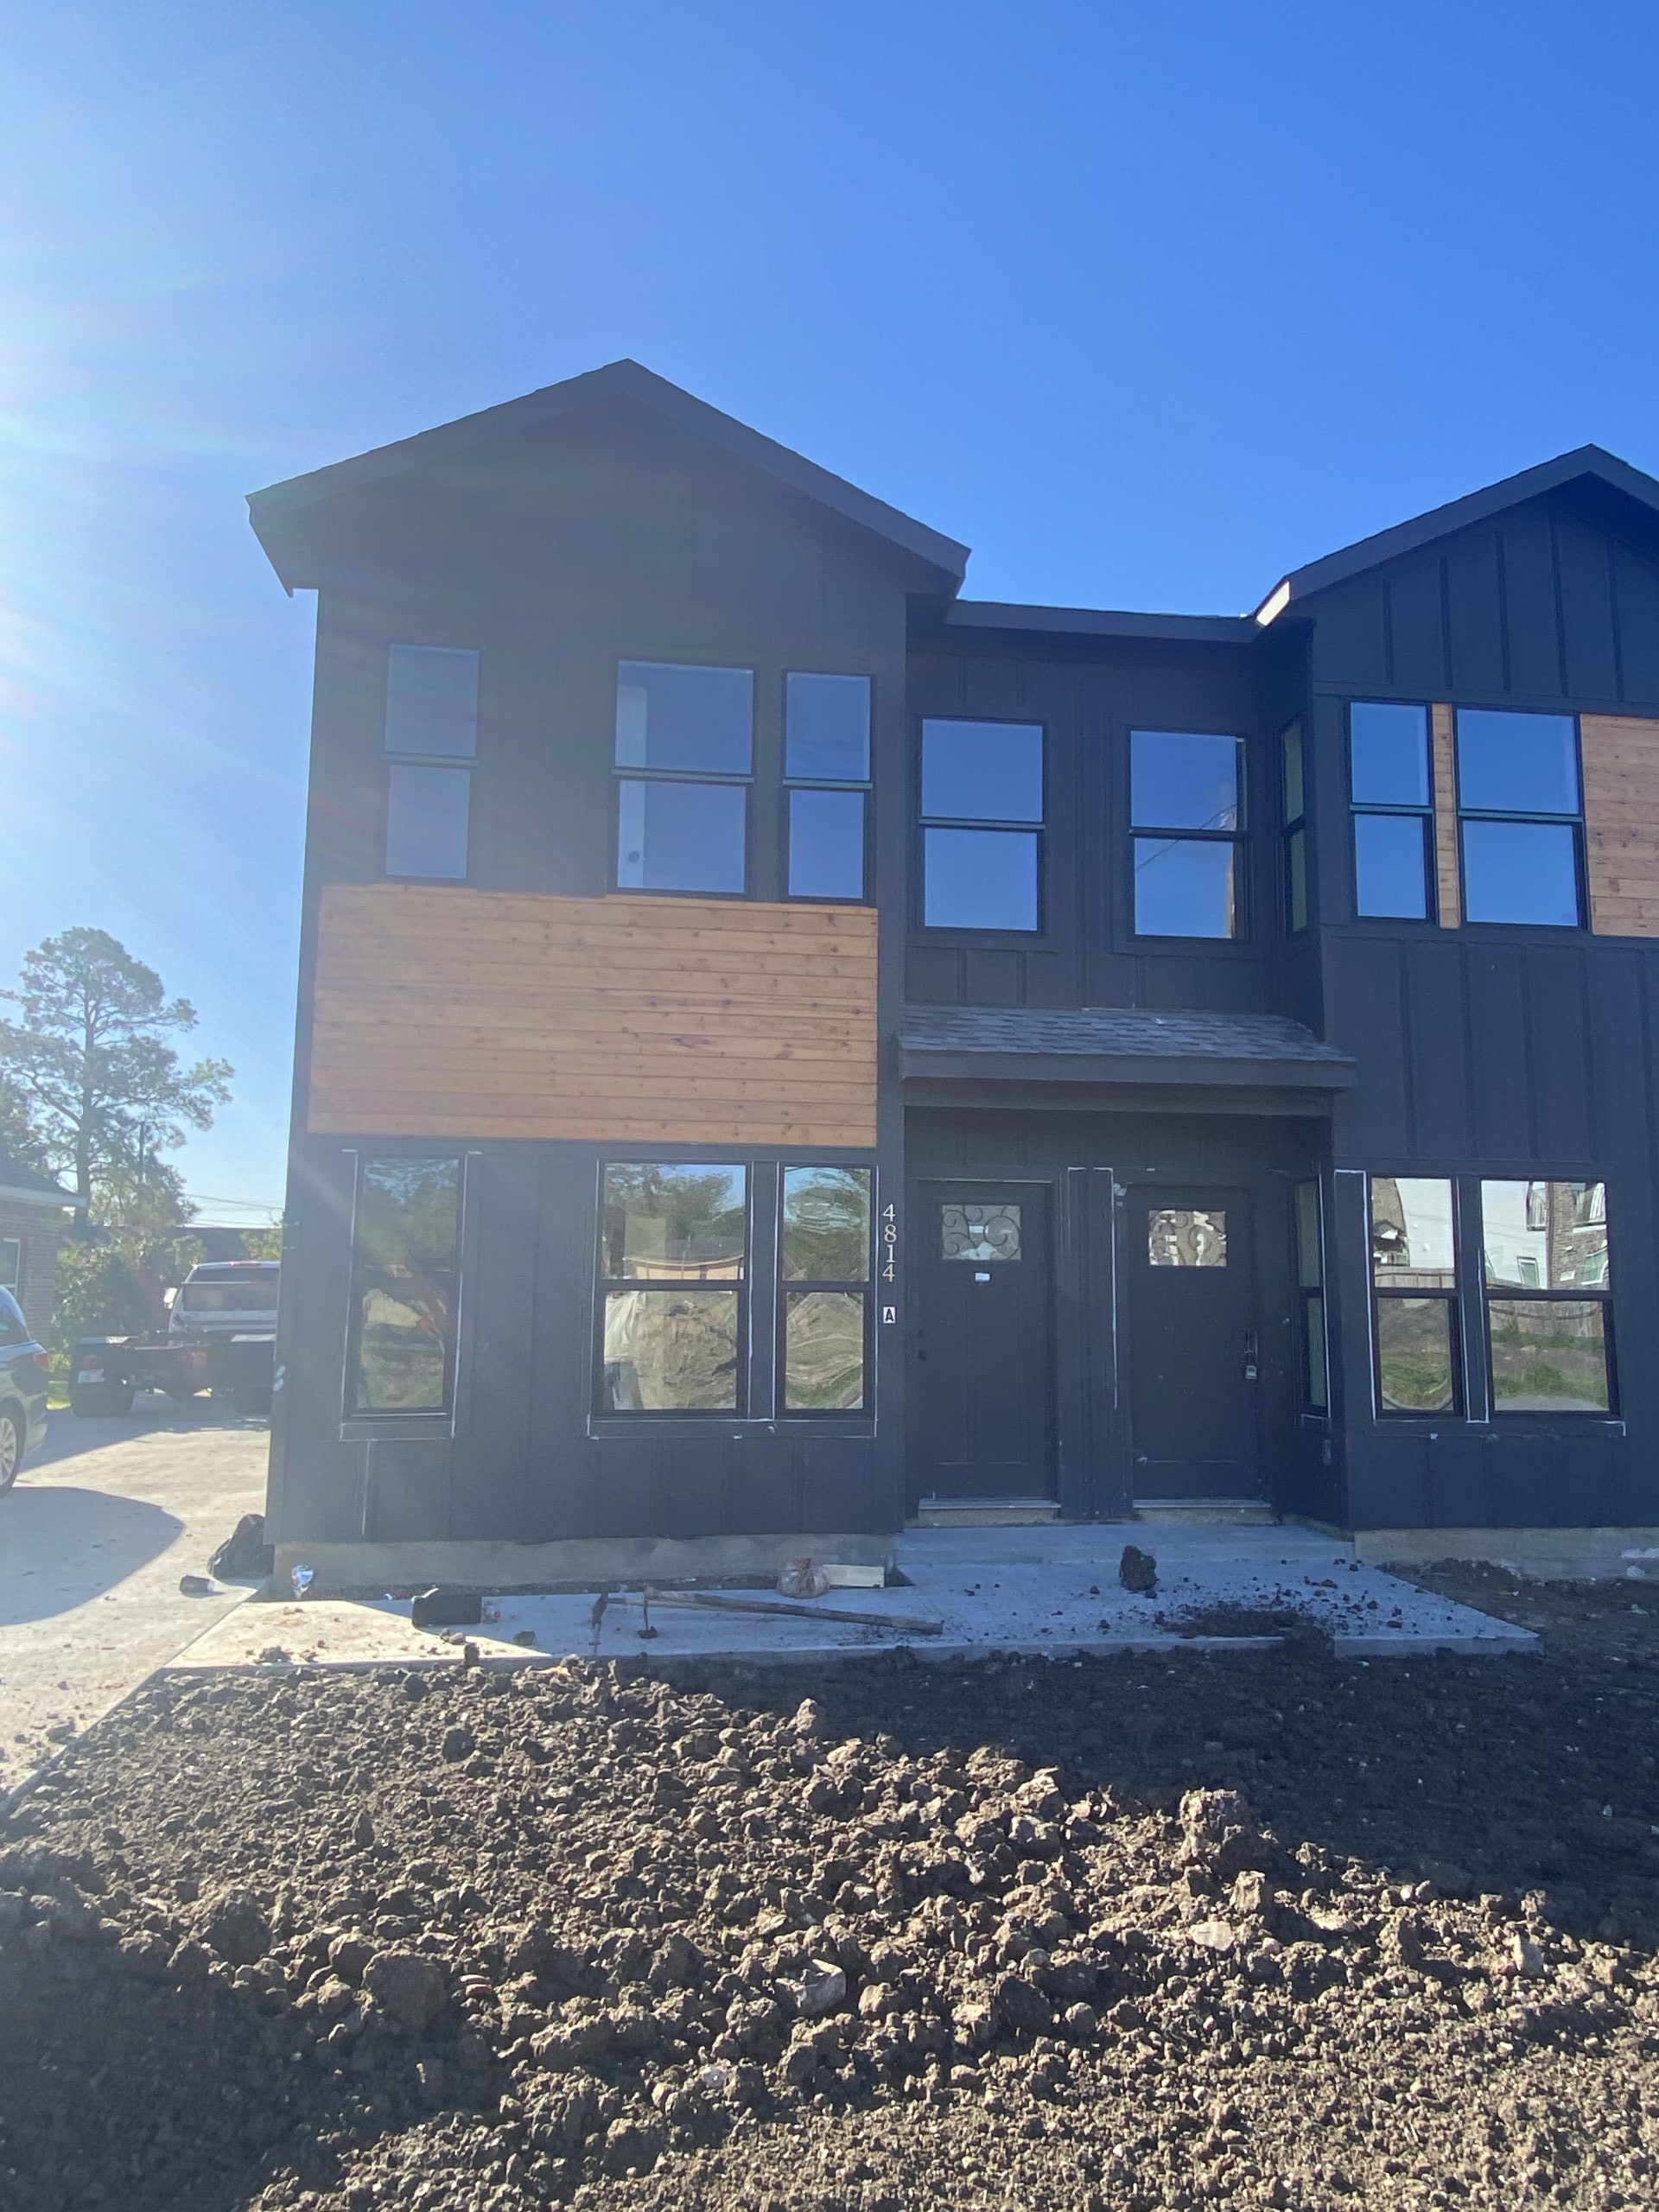
4814 Wilmington St, Houston TX 77033
Minimizing Energy Losses in Ducts
Minimizing energy losses in ducts by seeing if the ducts are poorly sealed or insulated. That could tell you why your energy bill in high. Your air ducts are one of the most important systems in your home, and if the ducts are poorly sealed or insulated, they are likely contributing to higher energy bills.
Your home’s duct system is a branching network of tubes in the walls, floors, and ceilings; it carries the air from your home’s furnace and central air conditioner to each room. Ducts are made of sheet metal, fiberglass, or other materials.
Ducts that leak heated air into unheated spaces can add hundreds of dollars a year to your heating and cooling bills, but you can reduce that loss by sealing and insulating your ducts. Insulating ducts in unconditioned spaces is usually very cost-effective. Existing ducts may also be blocked or may require simple upgrades.
Designing and Installing New Duct Systems
In new home construction or in retrofits, proper duct system design is critical. In recent years, energy-saving designs have sought to include ducts and heating systems in the conditioned space.
Efficient and well-designed duct systems distribute air properly throughout your home without leaking to keep all rooms at a comfortable temperature. The system should provide balanced supply and return flow to maintain a neutral pressure within the house.
Even well sealed and insulated ducts will leak and lose some heat, so many new energy-efficient homes place the duct system within the conditioned space of the home. The simplest way to accomplish this is to hide the ducts in dropped ceilings and in corners of rooms. Ducts can also be located in a sealed and insulated chase extending into the attic or built into raised floors. In both of these latter cases, care must be taken during construction to prevent contractors from using the duct chases for wiring or other utilities.
In either case, actual ducts must be used — chases and floor cavities should not be used as ducts. Regardless of where they are installed, ducts should be well sealed. Although ducts can be configured in a number of ways, the “trunk and branch” and “radial” supply duct configurations are most suitable for ducts located in conditioned spaces.
Air return duct systems can be configured in two ways: each room can have a return duct that sends air back to the heating and cooling equipment or return grills can be located in central locations on each floor. For the latter case, either grills must be installed to allow air to pass out of closed rooms, or short “jumper ducts” can be installed to connect the vent in one room with the next, allowing air to flow back to the central return grilles. Door undercuts help, but they are usually not sufficient for return airflow.
You can perform a simple check for adequate return air capacity by doing the following:
- Close all exterior doors and windows
- Close all interior room doors
- Turn on the central air handler
- “Crack” interior doors one by one and observe if the door closes or further opens “on its own.” (Whether it closes or opens will depend on the direction of the air handler-driven air flow.) Rooms served by air-moved doors have restricted return air flow and need pressure relief as described above.
Maintaining and Upgrading Existing Duct Systems
Sealing your ducts to prevent leaks is even more important if the ducts are located in an unconditioned area such as an attic or vented crawlspace. If the supply ducts are leaking, heated or cooled air can be forced out of unsealed joints and lost. In addition, unconditioned air can be drawn into return ducts through unsealed joints.
Although minor duct repairs are easy to make, qualified professionals should seal and insulate ducts in unconditioned spaces to ensure the use of appropriate sealing materials.
Aside from sealing your ducts, the simplest and most effective means of maintaining your air distribution system is to ensure that furniture and other objects are not blocking the airflow through your registers, and to vacuum the registers to remove any dust buildup.
Existing duct systems often suffer from design deficiencies in the return air system, and modifications by the homeowner (or just a tendency to keep doors closed) may contribute to these problems. Any rooms with a lack of sufficient return airflow may benefit from relatively simple upgrades, such as the installation of new return-air grilles, undercutting doors for return air, or installing a jumper duct.
Some rooms may also be hard to heat and cool because of inadequate supply ducts or grilles. If this is the case, you should first examine whether the problem is the room itself: fix any problems with insulation, air leakage, or inefficient windows first. If the problem persists, you may be able to increase the size of the supply duct or add an additional duct to provide the needed airflow to the room.
Minor Duct Repair Tips for Minimizing Energy Losses in Ducts
- Check your ducts for air leaks. First, look for sections that should be joined but have separated and then look for obvious holes.
- Duct mastic is the preferred material for sealing ductwork seams and joints. It is more durable than any available tape and generally easier for a do-it-yourself installation. Its only drawback is that it will not bridge gaps over ¼ inch. Such gaps must be first bridged with web-type drywall tape, or a good quality heat approved tape.
- If you use tape to seal your ducts, avoid cloth-backed, rubber adhesive duct tape — it tends to fail quickly. Instead, use mastic, butyl tape, foil tape, or other heat-approved tapes. Look for tape with the Underwriters Laboratories (UL) logo.
- Remember that insulating ducts in the basement will make the basement colder. If both the ducts and the basement walls are not insulated, consider insulating both. Water pipes and drains in unconditioned spaces could freeze and burst if the heat ducts are fully insulated because there would be no heat source to prevent the space from freezing in cold weather. However, using an electric heating tape wrap on the pipes can prevent this. Check with a professional contractor.
- Hire a professional to install both supply and return registers in the basement rooms after converting your basement to a living area.
- Be sure a well-sealed vapor barrier exists on the outside of the insulation on cooling ducts to prevent moisture condensation.
- If you have a fuel-burning furnace, stove, or other appliance or an attached garage, install a carbon monoxide (CO) monitor to alert you to harmful CO levels.
- Be sure to get professional help when doing ductwork. A qualified professional should always perform changes and repairs to a duct system.
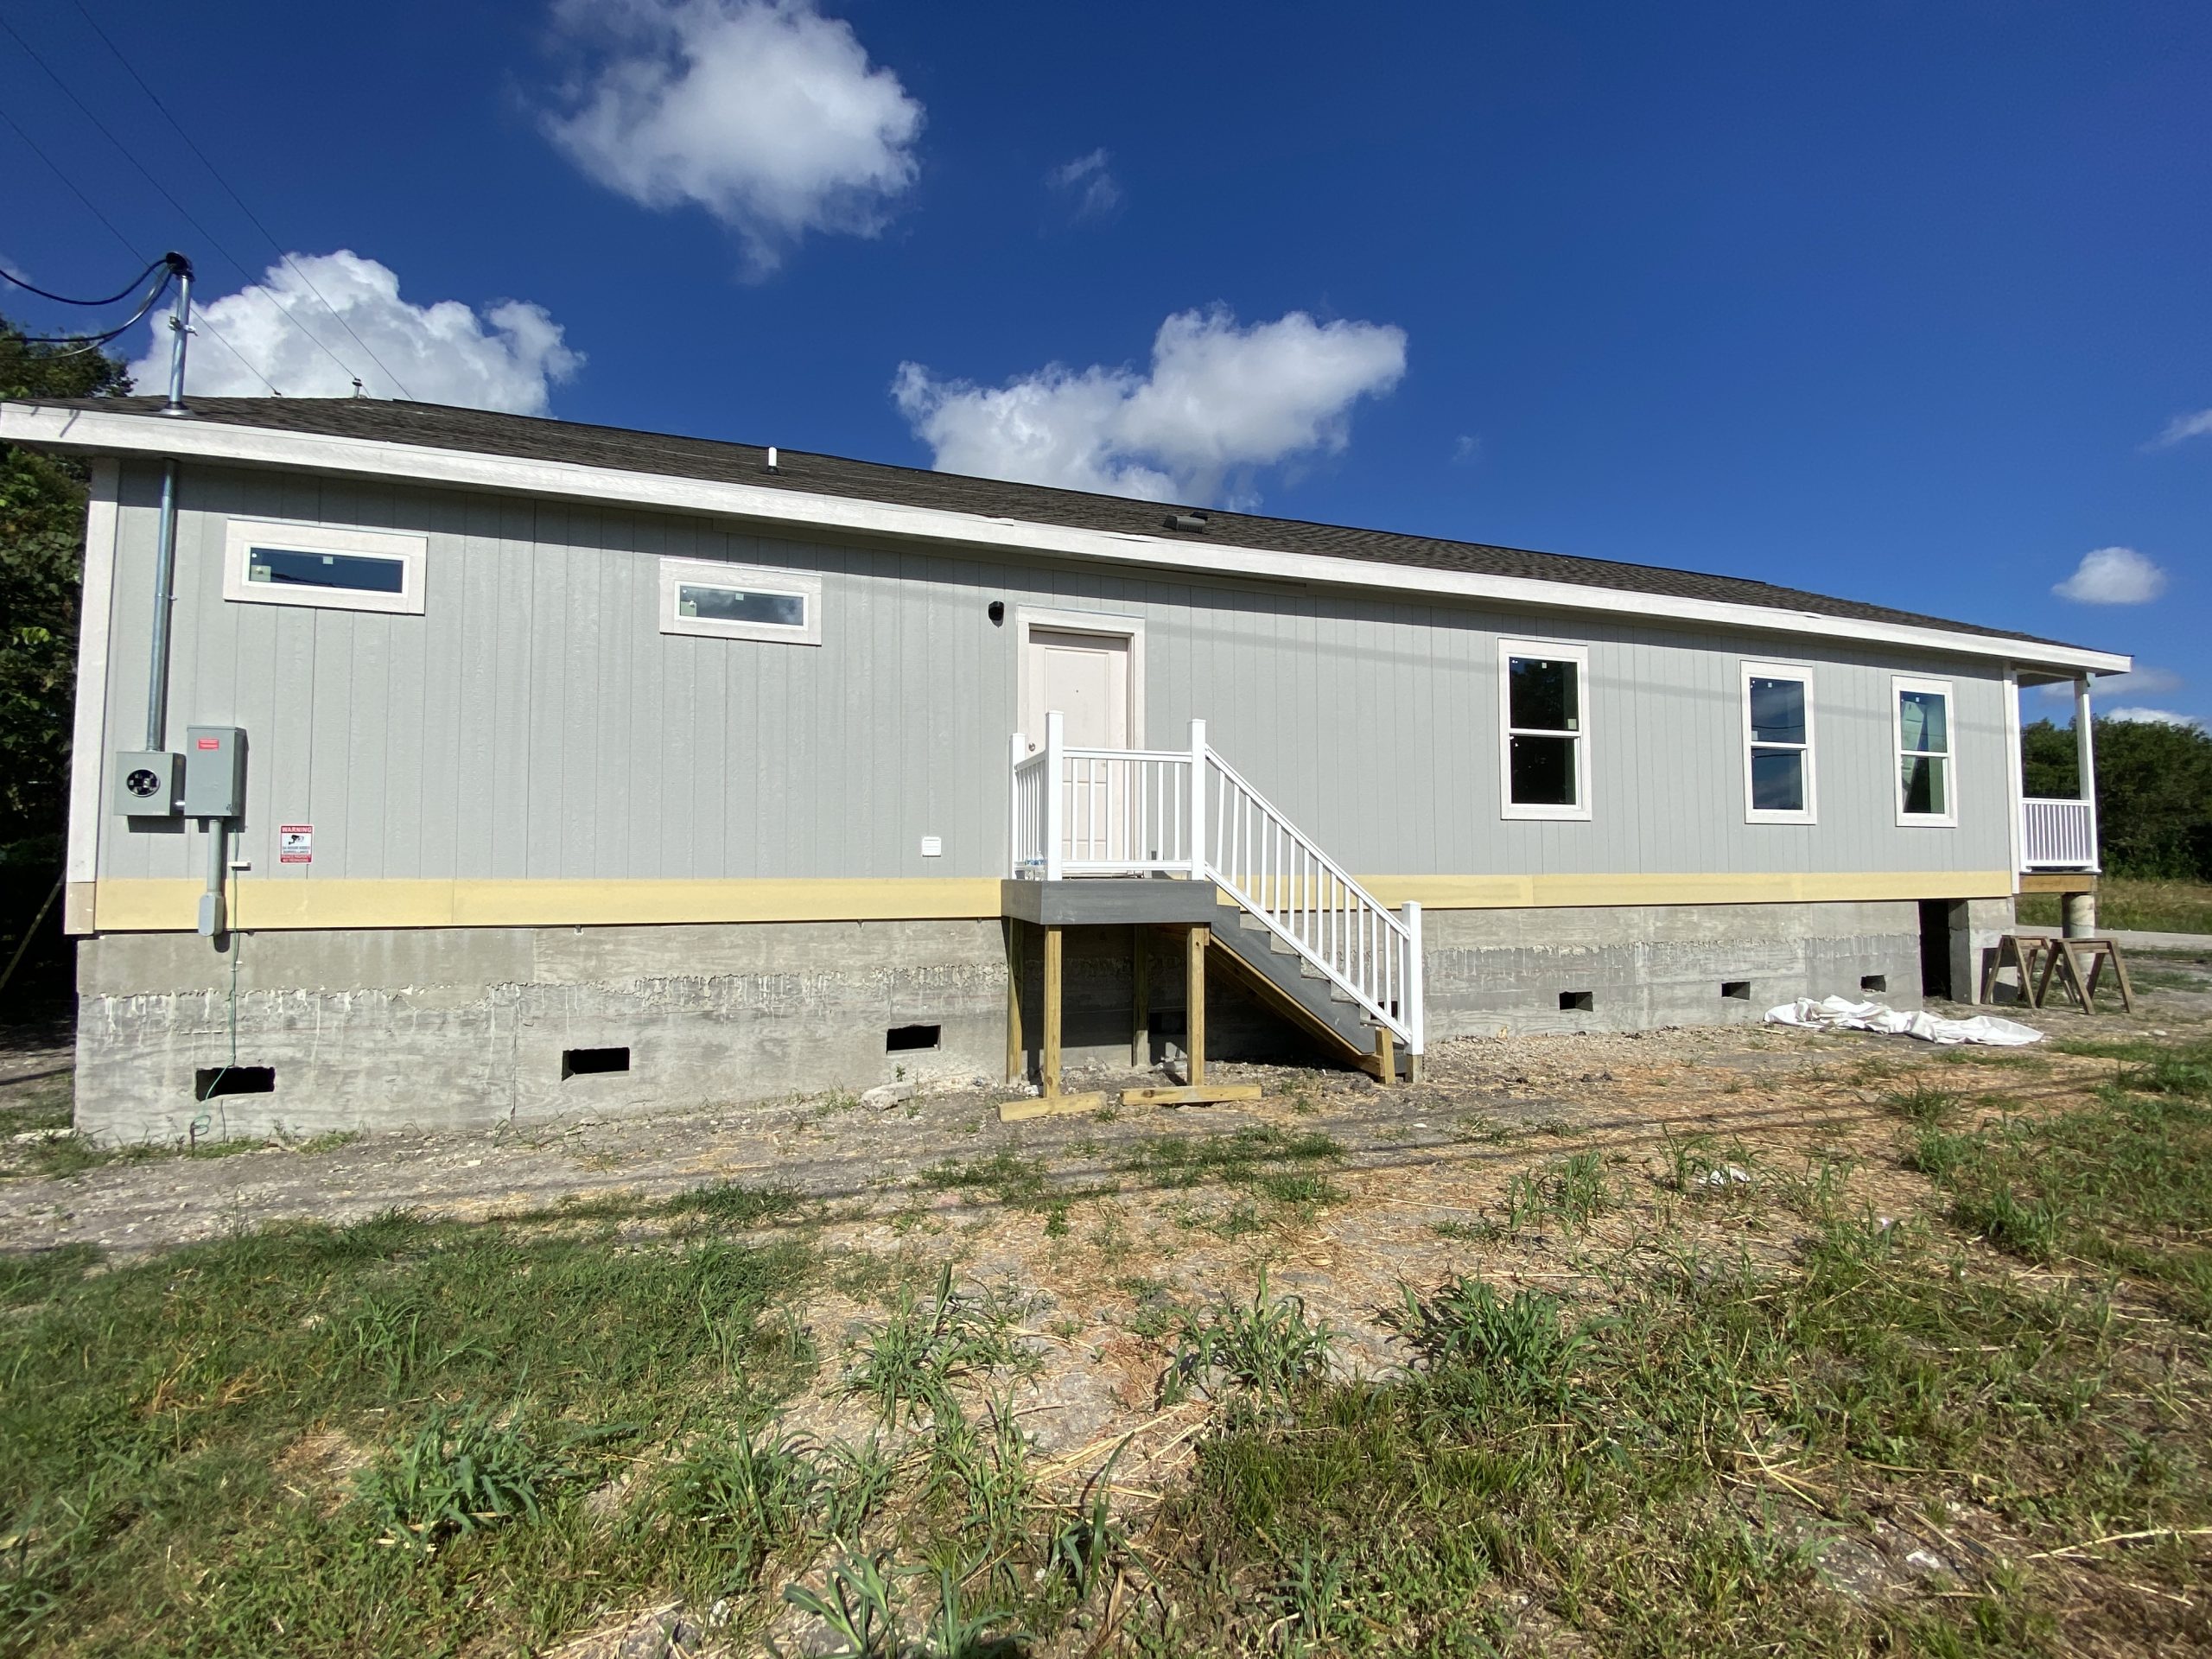
Minimizing Energy Losses in Ducts at 2 Southern Cross, Galveston, TX 77554
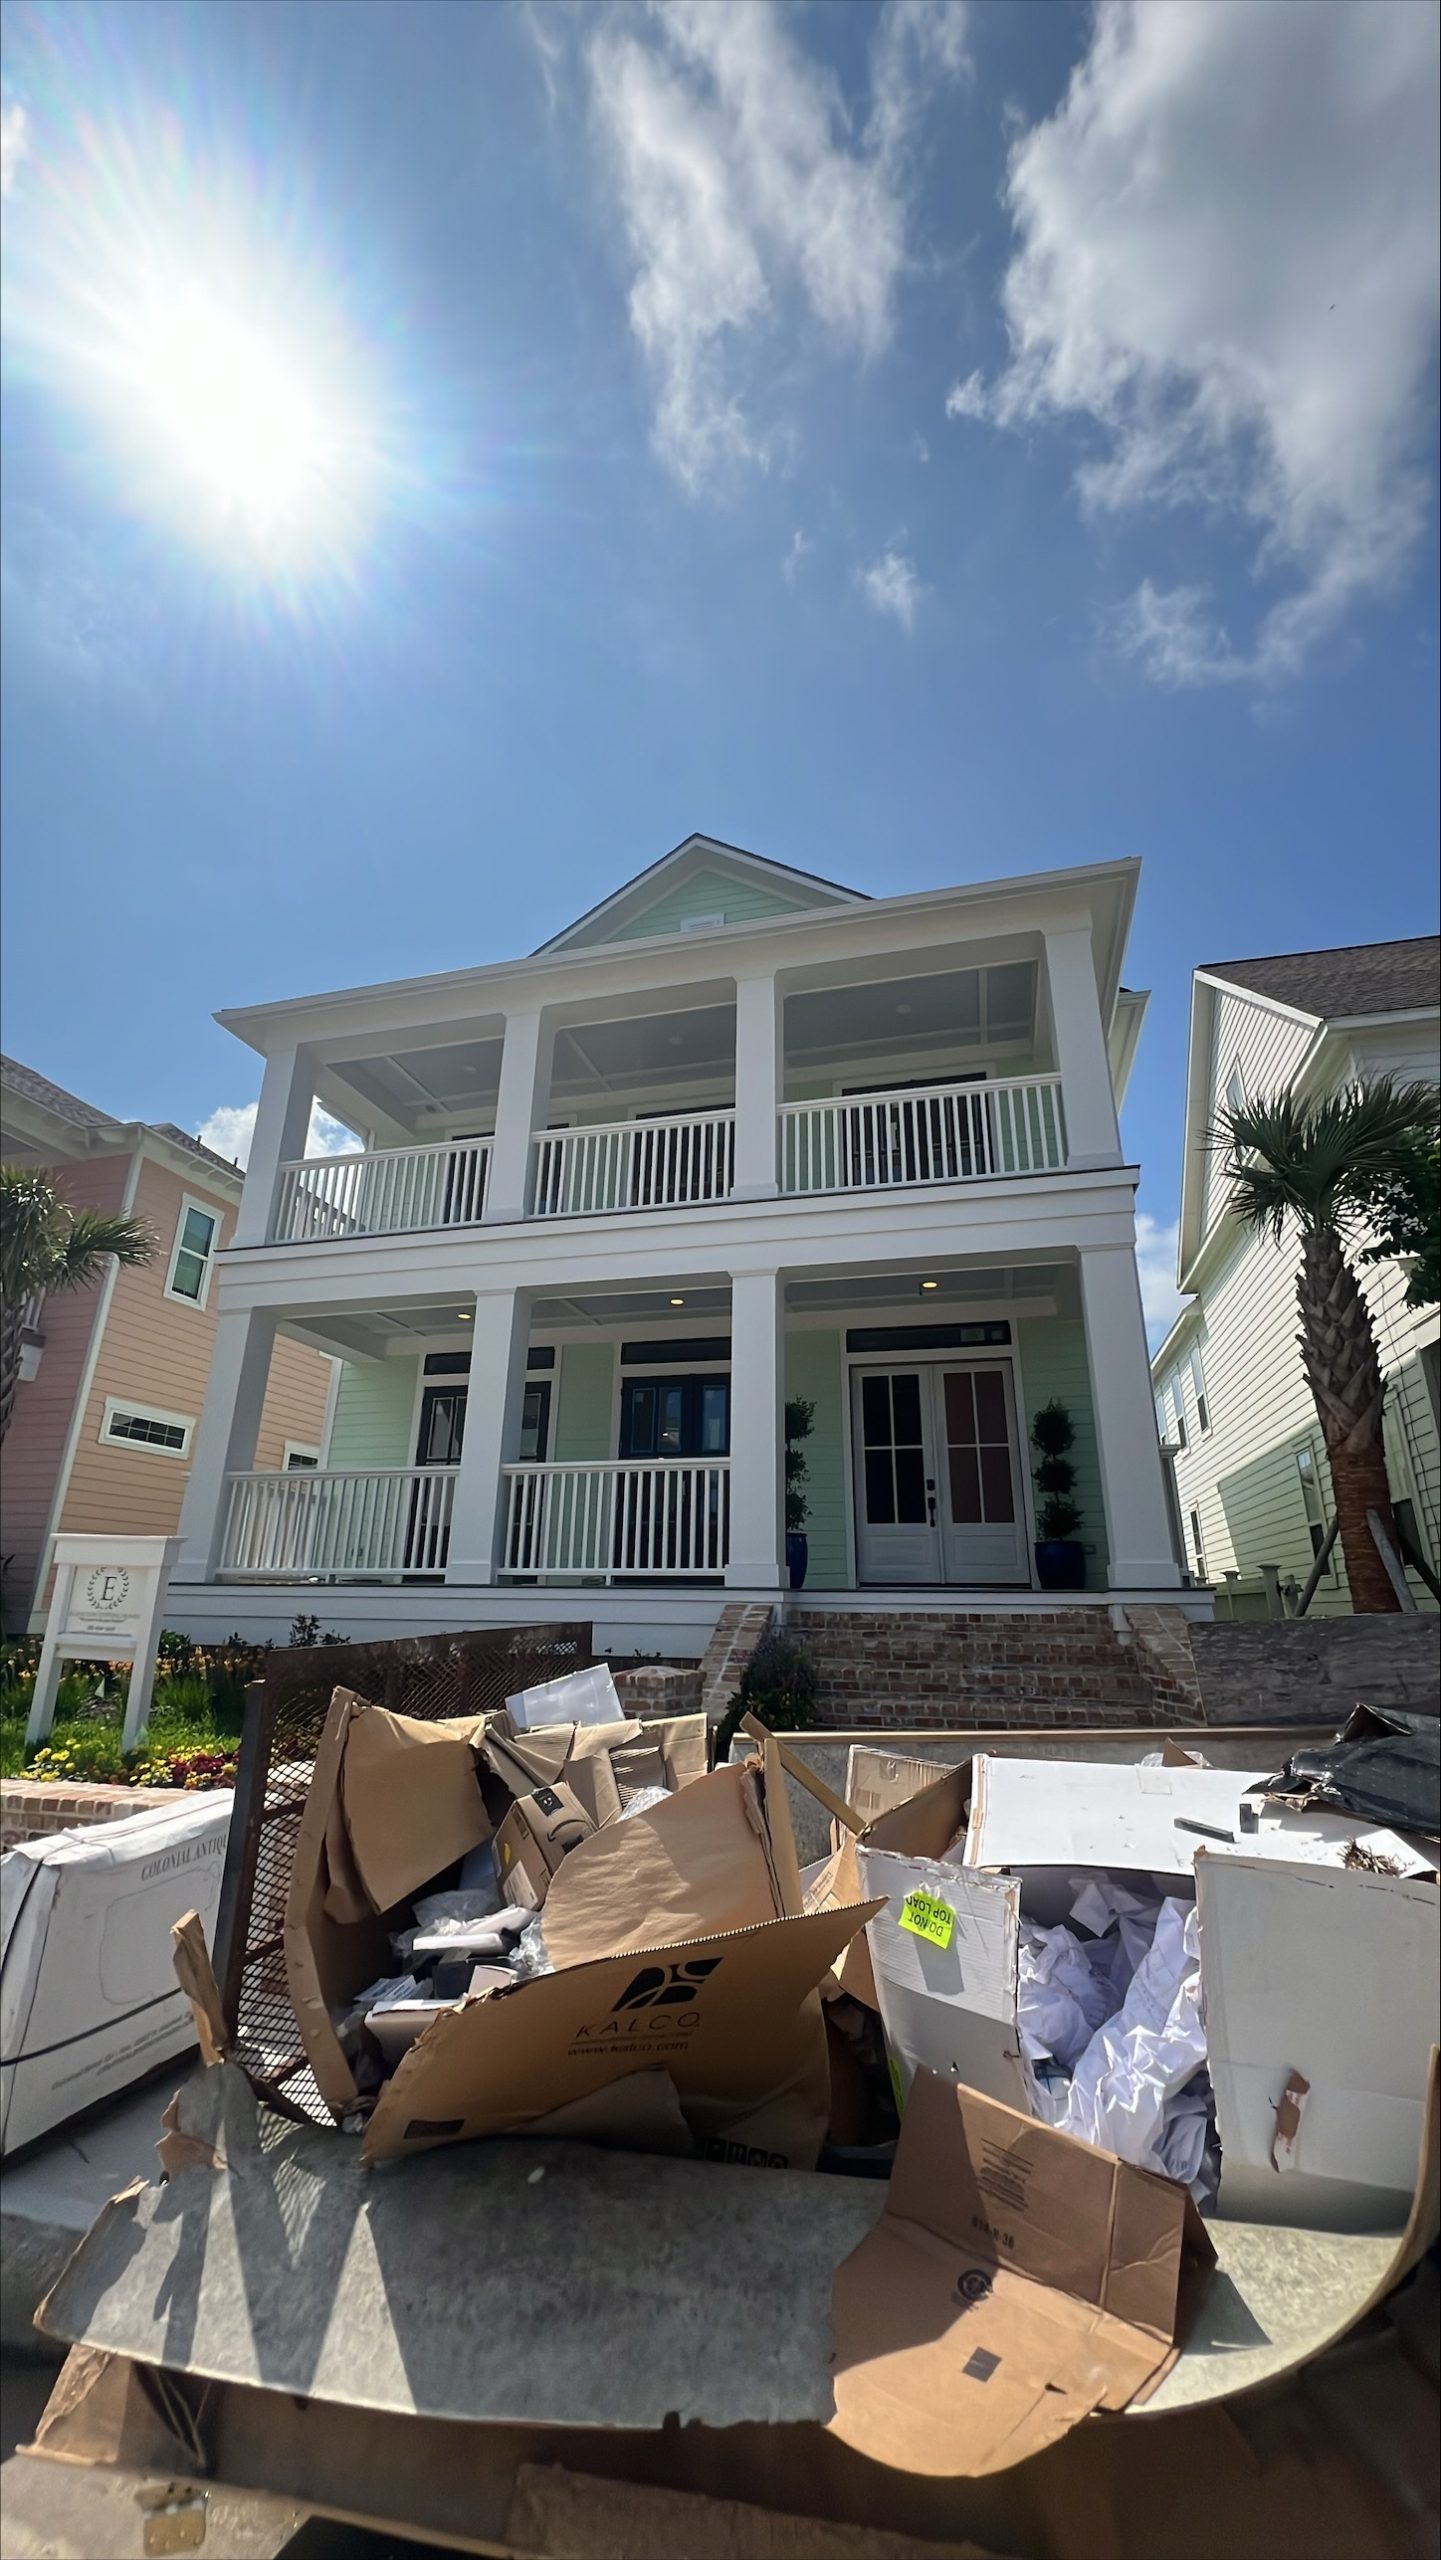
2 Southern Cross, Galveston, TX 77554
Minimizing Energy Losses in Ducts
Minimizing energy losses in ducts by seeing if the ducts are poorly sealed or insulated. That could tell you why your energy bill in high. Your air ducts are one of the most important systems in your home, and if the ducts are poorly sealed or insulated, they are likely contributing to higher energy bills.
Your home’s duct system is a branching network of tubes in the walls, floors, and ceilings; it carries the air from your home’s furnace and central air conditioner to each room. Ducts are made of sheet metal, fiberglass, or other materials.
Ducts that leak heated air into unheated spaces can add hundreds of dollars a year to your heating and cooling bills, but you can reduce that loss by sealing and insulating your ducts. Insulating ducts in unconditioned spaces is usually very cost-effective. Existing ducts may also be blocked or may require simple upgrades.
Designing and Installing New Duct Systems
In new home construction or in retrofits, proper duct system design is critical. In recent years, energy-saving designs have sought to include ducts and heating systems in the conditioned space.
Efficient and well-designed duct systems distribute air properly throughout your home without leaking to keep all rooms at a comfortable temperature. The system should provide balanced supply and return flow to maintain a neutral pressure within the house.
Even well sealed and insulated ducts will leak and lose some heat, so many new energy-efficient homes place the duct system within the conditioned space of the home. The simplest way to accomplish this is to hide the ducts in dropped ceilings and in corners of rooms. Ducts can also be located in a sealed and insulated chase extending into the attic or built into raised floors. In both of these latter cases, care must be taken during construction to prevent contractors from using the duct chases for wiring or other utilities.
In either case, actual ducts must be used — chases and floor cavities should not be used as ducts. Regardless of where they are installed, ducts should be well sealed. Although ducts can be configured in a number of ways, the “trunk and branch” and “radial” supply duct configurations are most suitable for ducts located in conditioned spaces.
Air return duct systems can be configured in two ways: each room can have a return duct that sends air back to the heating and cooling equipment or return grills can be located in central locations on each floor. For the latter case, either grills must be installed to allow air to pass out of closed rooms, or short “jumper ducts” can be installed to connect the vent in one room with the next, allowing air to flow back to the central return grilles. Door undercuts help, but they are usually not sufficient for return airflow.
You can perform a simple check for adequate return air capacity by doing the following:
- Close all exterior doors and windows
- Close all interior room doors
- Turn on the central air handler
- “Crack” interior doors one by one and observe if the door closes or further opens “on its own.” (Whether it closes or opens will depend on the direction of the air handler-driven air flow.) Rooms served by air-moved doors have restricted return air flow and need pressure relief as described above.
Maintaining and Upgrading Existing Duct Systems
Sealing your ducts to prevent leaks is even more important if the ducts are located in an unconditioned area such as an attic or vented crawlspace. If the supply ducts are leaking, heated or cooled air can be forced out of unsealed joints and lost. In addition, unconditioned air can be drawn into return ducts through unsealed joints.
Although minor duct repairs are easy to make, qualified professionals should seal and insulate ducts in unconditioned spaces to ensure the use of appropriate sealing materials.
Aside from sealing your ducts, the simplest and most effective means of maintaining your air distribution system is to ensure that furniture and other objects are not blocking the airflow through your registers, and to vacuum the registers to remove any dust buildup.
Existing duct systems often suffer from design deficiencies in the return air system, and modifications by the homeowner (or just a tendency to keep doors closed) may contribute to these problems. Any rooms with a lack of sufficient return airflow may benefit from relatively simple upgrades, such as the installation of new return-air grilles, undercutting doors for return air, or installing a jumper duct.
Some rooms may also be hard to heat and cool because of inadequate supply ducts or grilles. If this is the case, you should first examine whether the problem is the room itself: fix any problems with insulation, air leakage, or inefficient windows first. If the problem persists, you may be able to increase the size of the supply duct or add an additional duct to provide the needed airflow to the room.
Minor Duct Repair Tips for Minimizing Energy Losses in Ducts
- Check your ducts for air leaks. First, look for sections that should be joined but have separated and then look for obvious holes.
- Duct mastic is the preferred material for sealing ductwork seams and joints. It is more durable than any available tape and generally easier for a do-it-yourself installation. Its only drawback is that it will not bridge gaps over ¼ inch. Such gaps must be first bridged with web-type drywall tape, or a good quality heat approved tape.
- If you use tape to seal your ducts, avoid cloth-backed, rubber adhesive duct tape — it tends to fail quickly. Instead, use mastic, butyl tape, foil tape, or other heat-approved tapes. Look for tape with the Underwriters Laboratories (UL) logo.
- Remember that insulating ducts in the basement will make the basement colder. If both the ducts and the basement walls are not insulated, consider insulating both. Water pipes and drains in unconditioned spaces could freeze and burst if the heat ducts are fully insulated because there would be no heat source to prevent the space from freezing in cold weather. However, using an electric heating tape wrap on the pipes can prevent this. Check with a professional contractor.
- Hire a professional to install both supply and return registers in the basement rooms after converting your basement to a living area.
- Be sure a well-sealed vapor barrier exists on the outside of the insulation on cooling ducts to prevent moisture condensation.
- If you have a fuel-burning furnace, stove, or other appliance or an attached garage, install a carbon monoxide (CO) monitor to alert you to harmful CO levels.
- Be sure to get professional help when doing ductwork. A qualified professional should always perform changes and repairs to a duct system.
2021 IECC Insulation Inspection in the city of 11923 N Hoa Sen Cir, Houston, TX 77072

11923 N Hoa Sen Cir, Houston, TX 77072
2021 IECC Insulation Inspection
A 2021 IECC insulation inspection is a thorough assessment of insulation materials and their installation within a building or structure. The primary purpose of this inspection is to ensure that insulation is installed correctly, effectively, and in compliance with relevant building codes and standards. Here’s a more detailed overview:
Purpose of the 2021 IECC Insulation Inspection
- Energy Efficiency Verification:
- An insulation inspection helps confirm that the insulation is performing as intended. Proper insulation reduces heat transfer, contributing to energy savings and lower utility bills.
- Quality Assurance:
- Inspectors assess the quality of the insulation materials used, ensuring they meet specifications and are suitable for the specific application. This includes checking for damage, degradation, or improper installation that could compromise performance.
- Compliance with Codes and Standards:
- Building codes often specify minimum insulation levels and installation practices. An inspection verifies compliance with these regulations, which is crucial for safety and energy efficiency.
- Identification of Issues:
- The inspection can reveal problems such as gaps, voids, or compression in insulation that might hinder its effectiveness. Identifying these issues early can prevent future problems, such as higher energy costs or mold growth due to moisture accumulation.
- Moisture and Air Leakage Assessment:
- Inspections often include evaluations for air leaks and moisture issues. Proper insulation must be complemented by effective air sealing and moisture management to optimize performance and protect the building structure.
- Enhanced Comfort:
- By ensuring that insulation is installed correctly, inspectors contribute to improved thermal comfort for occupants, reducing drafts and temperature fluctuations within the space.
- Health and Safety Considerations:
- Certain insulation materials can pose health risks if not handled or installed correctly. Inspections help ensure that materials like fiberglass or spray foam are used safely and in accordance with health guidelines.
Components of an Insulation Inspection
- Visual Assessment: Inspectors visually evaluate accessible areas for visible signs of insulation integrity, including coverage, material condition, and installation quality.
- Measurement: Inspectors may measure insulation thickness and density to ensure it meets the specified R-values (thermal resistance).
- Thermal Imaging: Some inspectors use infrared cameras to identify heat loss areas, helping pinpoint insufficient insulation or air leaks.
- Moisture Testing: Tools may be employed to assess moisture levels within insulation materials, identifying potential risks of mold or decay.
Overall, insulation inspections are essential for ensuring the effectiveness, safety, and longevity of insulation systems in buildings. By identifying and addressing issues early, these inspections help optimize energy performance and enhance the overall comfort and safety of indoor environments.
8105 Laura Koppe Rd, Houston, TX 77028 – Losses in Ducts
8105 Laura Koppe Rd, Houston, TX 77028
Losses in Ducts
Minimizing energy losses in ducts is an important aspect of energy efficiency in HVAC (Heating, Ventilation, and Air Conditioning) systems. Ducts are used to distribute conditioned air throughout a building, and any energy losses during the distribution process can lead to increased energy consumption and reduced system performance. Here are some key measures to minimize energy losses in ducts:
1. Proper Duct Design: Ensure that ductwork is properly designed to minimize pressure losses. Use appropriately sized ducts, minimize the number of bends and transitions, and maintain a balanced airflow distribution. Consult industry guidelines or work with an HVAC professional to design an efficient duct system.
2. Sealing: Duct leakage is a major source of energy losses. Seal all joints, connections, and seams in the ductwork using approved sealing materials such as mastic or metal tape. Pay particular attention to connections at registers, grilles, and air-handling units.
3. Insulation: Insulate ducts that run through unconditioned spaces, such as attics, crawlspaces, or basements. Insulation helps to prevent heat transfer between the ductwork and the surrounding environment, reducing energy losses and improving system efficiency.
4. Duct Material: Consider using insulated ducts with low thermal conductivity. Insulated ducts minimize heat transfer through the duct walls, helping to maintain the desired temperature of the conditioned air as it travels through the system.
5. Avoiding Overlong Duct Runs: Minimize the length of duct runs as much as possible. Longer ducts result in increased friction losses, which can reduce airflow and energy efficiency. Optimize the layout and location of HVAC equipment to keep duct runs as short and direct as feasible.
6. Balancing and Adjusting Dampers: Balancing the airflow within the duct system ensures that each room receives the appropriate amount of conditioned air. Adjust dampers at branch points and in individual ducts to balance the airflow and avoid over-pressurizing or under-pressurizing certain areas.
7. Regular Maintenance: Conduct regular inspections of the ductwork to check for leaks, obstructions, or damage. Clean the ducts periodically to remove dust, debris, or any substances that could impede airflow.
8. Air Filters: Install high-quality air filters and regularly replace them according to the manufacturer’s recommendations. Clean air filters help maintain optimal airflow, reducing pressure drops and energy losses.
By implementing these measures, you can significantly minimize energy losses in ducts, improve the overall efficiency of your HVAC system, and reduce energy consumption. Consulting with a professional HVAC contractor or engineer can provide valuable insights specific to your building’s requirements and help optimize energy efficiency.
https://homereadyinspections.com/builders-hvac/
Minimizing Energy Losses in Ducts at 927 Vivian Ave, Pasadena, TX 77506
927 Vivian Ave, Pasadena, TX 77506
Minimizing Energy Losses in Ducts
Minimizing energy losses in ducts by seeing if the ducts are poorly sealed or insulated. That could tell you why your energy bill in high. Your air ducts are one of the most important systems in your home, and if the ducts are poorly sealed or insulated, they are likely contributing to higher energy bills.
Your home’s duct system is a branching network of tubes in the walls, floors, and ceilings; it carries the air from your home’s furnace and central air conditioner to each room. Ducts are made of sheet metal, fiberglass, or other materials.
Ducts that leak heated air into unheated spaces can add hundreds of dollars a year to your heating and cooling bills, but you can reduce that loss by sealing and insulating your ducts. Insulating ducts in unconditioned spaces is usually very cost-effective. Existing ducts may also be blocked or may require simple upgrades.
Designing and Installing New Duct Systems
In new home construction or in retrofits, proper duct system design is critical. In recent years, energy-saving designs have sought to include ducts and heating systems in the conditioned space.
Efficient and well-designed duct systems distribute air properly throughout your home without leaking to keep all rooms at a comfortable temperature. The system should provide balanced supply and return flow to maintain a neutral pressure within the house.
Even well sealed and insulated ducts will leak and lose some heat, so many new energy-efficient homes place the duct system within the conditioned space of the home. The simplest way to accomplish this is to hide the ducts in dropped ceilings and in corners of rooms. Ducts can also be located in a sealed and insulated chase extending into the attic or built into raised floors. In both of these latter cases, care must be taken during construction to prevent contractors from using the duct chases for wiring or other utilities.
In either case, actual ducts must be used — chases and floor cavities should not be used as ducts. Regardless of where they are installed, ducts should be well sealed. Although ducts can be configured in a number of ways, the “trunk and branch” and “radial” supply duct configurations are most suitable for ducts located in conditioned spaces.
Air return duct systems can be configured in two ways: each room can have a return duct that sends air back to the heating and cooling equipment or return grills can be located in central locations on each floor. For the latter case, either grills must be installed to allow air to pass out of closed rooms, or short “jumper ducts” can be installed to connect the vent in one room with the next, allowing air to flow back to the central return grilles. Door undercuts help, but they are usually not sufficient for return airflow.
You can perform a simple check for adequate return air capacity by doing the following:
- Close all exterior doors and windows
- Close all interior room doors
- Turn on the central air handler
- “Crack” interior doors one by one and observe if the door closes or further opens “on its own.” (Whether it closes or opens will depend on the direction of the air handler-driven air flow.) Rooms served by air-moved doors have restricted return air flow and need pressure relief as described above.
Maintaining and Upgrading Existing Duct Systems
Sealing your ducts to prevent leaks is even more important if the ducts are located in an unconditioned area such as an attic or vented crawlspace. If the supply ducts are leaking, heated or cooled air can be forced out of unsealed joints and lost. In addition, unconditioned air can be drawn into return ducts through unsealed joints.
Although minor duct repairs are easy to make, qualified professionals should seal and insulate ducts in unconditioned spaces to ensure the use of appropriate sealing materials.
Aside from sealing your ducts, the simplest and most effective means of maintaining your air distribution system is to ensure that furniture and other objects are not blocking the airflow through your registers, and to vacuum the registers to remove any dust buildup.
Existing duct systems often suffer from design deficiencies in the return air system, and modifications by the homeowner (or just a tendency to keep doors closed) may contribute to these problems. Any rooms with a lack of sufficient return airflow may benefit from relatively simple upgrades, such as the installation of new return-air grilles, undercutting doors for return air, or installing a jumper duct.
Some rooms may also be hard to heat and cool because of inadequate supply ducts or grilles. If this is the case, you should first examine whether the problem is the room itself: fix any problems with insulation, air leakage, or inefficient windows first. If the problem persists, you may be able to increase the size of the supply duct or add an additional duct to provide the needed airflow to the room.
Minor Duct Repair Tips for Minimizing Energy Losses in Ducts
- Check your ducts for air leaks. First, look for sections that should be joined but have separated and then look for obvious holes.
- Duct mastic is the preferred material for sealing ductwork seams and joints. It is more durable than any available tape and generally easier for a do-it-yourself installation. Its only drawback is that it will not bridge gaps over ¼ inch. Such gaps must be first bridged with web-type drywall tape, or a good quality heat approved tape.
- If you use tape to seal your ducts, avoid cloth-backed, rubber adhesive duct tape — it tends to fail quickly. Instead, use mastic, butyl tape, foil tape, or other heat-approved tapes. Look for tape with the Underwriters Laboratories (UL) logo.
- Remember that insulating ducts in the basement will make the basement colder. If both the ducts and the basement walls are not insulated, consider insulating both. Water pipes and drains in unconditioned spaces could freeze and burst if the heat ducts are fully insulated because there would be no heat source to prevent the space from freezing in cold weather. However, using an electric heating tape wrap on the pipes can prevent this. Check with a professional contractor.
- Hire a professional to install both supply and return registers in the basement rooms after converting your basement to a living area.
- Be sure a well-sealed vapor barrier exists on the outside of the insulation on cooling ducts to prevent moisture condensation.
- If you have a fuel-burning furnace, stove, or other appliance or an attached garage, install a carbon monoxide (CO) monitor to alert you to harmful CO levels.
- Be sure to get professional help when doing ductwork. A qualified professional should always perform changes and repairs to a duct system.
How Blower Doors Work – 6810 Hartland St, Houston, TX 77055
6810 Hartland St, Houston, TX 77055
How Blower Doors Work – 6810 Hartland St, Houston, TX 77055
Third-party Energy Testing
Your air ducts are one of the most important systems in your home, and if the ducts are poorly sealed or insulated they are likely contributing to higher energy bills.
Blower Doors: What Are They and How Do They Work?
A blower door is a device used in energy testing to measure a building’s airtightness. It consists of a powerful fan mounted on a temporary frame that fits into a doorway or an exterior opening. During a blower door test, the fan creates a pressure difference between the inside and outside of the building. This pressure difference allows air leakage points to become apparent and measurable. The test helps identify areas of air infiltration or exfiltration, which can affect energy efficiency and indoor comfort.
The blower door test involves setting up the device, measuring the baseline pressure, and then either depressurizing or pressurizing the building using the fan. While the fan is running, the airflow rate is measured using instruments like a manometer or pressure gauge. This airflow measurement quantifies the amount of air leakage in the building. Smoke pencils or thermal imaging cameras can be used to locate specific air leakage points.
The blower door test can be conducted in both depressurization and pressurization modes, allowing for a comprehensive assessment of air leakage locations. Once the test is complete, the data is analyzed to determine the building’s airtightness and identify areas that need improvement. The results can be used to guide air sealing measures and improve energy efficiency.
Blower door tests are crucial in identifying air leakage points, reducing energy loss, improving indoor air quality, and enhancing the overall performance and comfort of a building.
Home Inspection Atascocita | Home Ready Inspections | Houston TX
Minimizing Energy Losses in Ducts at 1417 Waseca St, Houston, TX 77055
1417 Waseca St, Houston, TX 77055
Minimizing Energy Losses in Ducts
Minimizing energy losses in ducts by seeing if the ducts are poorly sealed or insulated. That could tell you why your energy bill in high. Your air ducts are one of the most important systems in your home, and if the ducts are poorly sealed or insulated, they are likely contributing to higher energy bills.
Your home’s duct system is a branching network of tubes in the walls, floors, and ceilings; it carries the air from your home’s furnace and central air conditioner to each room. Ducts are made of sheet metal, fiberglass, or other materials.
Ducts that leak heated air into unheated spaces can add hundreds of dollars a year to your heating and cooling bills, but you can reduce that loss by sealing and insulating your ducts. Insulating ducts in unconditioned spaces is usually very cost-effective. Existing ducts may also be blocked or may require simple upgrades.
Designing and Installing New Duct Systems
In new home construction or in retrofits, proper duct system design is critical. In recent years, energy-saving designs have sought to include ducts and heating systems in the conditioned space.
Efficient and well-designed duct systems distribute air properly throughout your home without leaking to keep all rooms at a comfortable temperature. The system should provide balanced supply and return flow to maintain a neutral pressure within the house.
Even well sealed and insulated ducts will leak and lose some heat, so many new energy-efficient homes place the duct system within the conditioned space of the home. The simplest way to accomplish this is to hide the ducts in dropped ceilings and in corners of rooms. Ducts can also be located in a sealed and insulated chase extending into the attic or built into raised floors. In both of these latter cases, care must be taken during construction to prevent contractors from using the duct chases for wiring or other utilities.
In either case, actual ducts must be used — chases and floor cavities should not be used as ducts. Regardless of where they are installed, ducts should be well sealed. Although ducts can be configured in a number of ways, the “trunk and branch” and “radial” supply duct configurations are most suitable for ducts located in conditioned spaces.
Air return duct systems can be configured in two ways: each room can have a return duct that sends air back to the heating and cooling equipment or return grills can be located in central locations on each floor. For the latter case, either grills must be installed to allow air to pass out of closed rooms, or short “jumper ducts” can be installed to connect the vent in one room with the next, allowing air to flow back to the central return grilles. Door undercuts help, but they are usually not sufficient for return airflow.
You can perform a simple check for adequate return air capacity by doing the following:
- Close all exterior doors and windows
- Close all interior room doors
- Turn on the central air handler
- “Crack” interior doors one by one and observe if the door closes or further opens “on its own.” (Whether it closes or opens will depend on the direction of the air handler-driven air flow.) Rooms served by air-moved doors have restricted return air flow and need pressure relief as described above.
Maintaining and Upgrading Existing Duct Systems
Sealing your ducts to prevent leaks is even more important if the ducts are located in an unconditioned area such as an attic or vented crawlspace. If the supply ducts are leaking, heated or cooled air can be forced out of unsealed joints and lost. In addition, unconditioned air can be drawn into return ducts through unsealed joints.
Although minor duct repairs are easy to make, qualified professionals should seal and insulate ducts in unconditioned spaces to ensure the use of appropriate sealing materials.
Aside from sealing your ducts, the simplest and most effective means of maintaining your air distribution system is to ensure that furniture and other objects are not blocking the airflow through your registers, and to vacuum the registers to remove any dust buildup.
Existing duct systems often suffer from design deficiencies in the return air system, and modifications by the homeowner (or just a tendency to keep doors closed) may contribute to these problems. Any rooms with a lack of sufficient return airflow may benefit from relatively simple upgrades, such as the installation of new return-air grilles, undercutting doors for return air, or installing a jumper duct.
Some rooms may also be hard to heat and cool because of inadequate supply ducts or grilles. If this is the case, you should first examine whether the problem is the room itself: fix any problems with insulation, air leakage, or inefficient windows first. If the problem persists, you may be able to increase the size of the supply duct or add an additional duct to provide the needed airflow to the room.
Minor Duct Repair Tips for Minimizing Energy Losses in Ducts
- Check your ducts for air leaks. First, look for sections that should be joined but have separated and then look for obvious holes.
- Duct mastic is the preferred material for sealing ductwork seams and joints. It is more durable than any available tape and generally easier for a do-it-yourself installation. Its only drawback is that it will not bridge gaps over ¼ inch. Such gaps must be first bridged with web-type drywall tape, or a good quality heat approved tape.
- If you use tape to seal your ducts, avoid cloth-backed, rubber adhesive duct tape — it tends to fail quickly. Instead, use mastic, butyl tape, foil tape, or other heat-approved tapes. Look for tape with the Underwriters Laboratories (UL) logo.
- Remember that insulating ducts in the basement will make the basement colder. If both the ducts and the basement walls are not insulated, consider insulating both. Water pipes and drains in unconditioned spaces could freeze and burst if the heat ducts are fully insulated because there would be no heat source to prevent the space from freezing in cold weather. However, using an electric heating tape wrap on the pipes can prevent this. Check with a professional contractor.
- Hire a professional to install both supply and return registers in the basement rooms after converting your basement to a living area.
- Be sure a well-sealed vapor barrier exists on the outside of the insulation on cooling ducts to prevent moisture condensation.
- If you have a fuel-burning furnace, stove, or other appliance or an attached garage, install a carbon monoxide (CO) monitor to alert you to harmful CO levels.
- Be sure to get professional help when doing ductwork. A qualified professional should always perform changes and repairs to a duct system.
5619 Southbrook Dr, Houston, TX 77033 – Losses in Ducts
5619 Southbrook Dr, Houston, TX 77033
5619 Southbrook Dr, Houston, TX 77033 – Losses in Ducts
Minimizing energy losses in ducts is an important aspect of energy efficiency in HVAC (Heating, Ventilation, and Air Conditioning) systems. Ducts are used to distribute conditioned air throughout a building, and any energy losses during the distribution process can lead to increased energy consumption and reduced system performance. Here are some key measures to minimize energy losses in ducts:
1. Proper Duct Design: Ensure that ductwork is properly designed to minimize pressure losses. Use appropriately sized ducts, minimize the number of bends and transitions, and maintain a balanced airflow distribution. Consult industry guidelines or work with an HVAC professional to design an efficient duct system.
2. Sealing: Duct leakage is a major source of energy losses. Seal all joints, connections, and seams in the ductwork using approved sealing materials such as mastic or metal tape. Pay particular attention to connections at registers, grilles, and air-handling units.
3. Insulation: Insulate ducts that run through unconditioned spaces, such as attics, crawlspaces, or basements. Insulation helps to prevent heat transfer between the ductwork and the surrounding environment, reducing energy losses and improving system efficiency.
4. Duct Material: Consider using insulated ducts with low thermal conductivity. Insulated ducts minimize heat transfer through the duct walls, helping to maintain the desired temperature of the conditioned air as it travels through the system.
5. Avoiding Overlong Duct Runs: Minimize the length of duct runs as much as possible. Longer ducts result in increased friction losses, which can reduce airflow and energy efficiency. Optimize the layout and location of HVAC equipment to keep duct runs as short and direct as feasible.
6. Balancing and Adjusting Dampers: Balancing the airflow within the duct system ensures that each room receives the appropriate amount of conditioned air. Adjust dampers at branch points and in individual ducts to balance the airflow and avoid over-pressurizing or under-pressurizing certain areas.
7. Regular Maintenance: Conduct regular inspections of the ductwork to check for leaks, obstructions, or damage. Clean the ducts periodically to remove dust, debris, or any substances that could impede airflow.
8. Air Filters: Install high-quality air filters and regularly replace them according to the manufacturer’s recommendations. Clean air filters help maintain optimal airflow, reducing pressure drops and energy losses.
By implementing these measures, you can significantly minimize energy losses in ducts, improve the overall efficiency of your HVAC system, and reduce energy consumption. Consulting with a professional HVAC contractor or engineer can provide valuable insights specific to your building’s requirements and help optimize energy efficiency.
https://homereadyinspections.com/builders-hvac/
How Blower Doors Work – 1419 Waseca St, Houston, TX 77055
1419 Waseca St, Houston, TX 77055
How Blower Doors Work – 1419 Waseca St, Houston, TX 77055
Third-party Energy Testing
Your air ducts are one of the most important systems in your home, and if the ducts are poorly sealed or insulated they are likely contributing to higher energy bills.
Blower Doors: What Are They and How Do They Work?
A blower door is a device used in energy testing to measure a building’s airtightness. It consists of a powerful fan mounted on a temporary frame that fits into a doorway or an exterior opening. During a blower door test, the fan creates a pressure difference between the inside and outside of the building. This pressure difference allows air leakage points to become apparent and measurable. The test helps identify areas of air infiltration or exfiltration, which can affect energy efficiency and indoor comfort.
The blower door test involves setting up the device, measuring the baseline pressure, and then either depressurizing or pressurizing the building using the fan. While the fan is running, the airflow rate is measured using instruments like a manometer or pressure gauge. This airflow measurement quantifies the amount of air leakage in the building. Smoke pencils or thermal imaging cameras can be used to locate specific air leakage points.
The blower door test can be conducted in both depressurization and pressurization modes, allowing for a comprehensive assessment of air leakage locations. Once the test is complete, the data is analyzed to determine the building’s airtightness and identify areas that need improvement. The results can be used to guide air sealing measures and improve energy efficiency.
Blower door tests are crucial in identifying air leakage points, reducing energy loss, improving indoor air quality, and enhancing the overall performance and comfort of a building.
Home Inspection Atascocita | Home Ready Inspections | Houston TX
Minimizing Energy Losses in Ducts at 7229 Tierwester St, Houston, TX 77021

7229 Tierwester St, Houston, TX 77021
Minimizing Energy Losses in Ducts
Minimizing energy losses in ducts by seeing if the ducts are poorly sealed or insulated. That could tell you why your energy bill in high. Your air ducts are one of the most important systems in your home, and if the ducts are poorly sealed or insulated, they are likely contributing to higher energy bills.
Your home’s duct system is a branching network of tubes in the walls, floors, and ceilings; it carries the air from your home’s furnace and central air conditioner to each room. Ducts are made of sheet metal, fiberglass, or other materials.
Ducts that leak heated air into unheated spaces can add hundreds of dollars a year to your heating and cooling bills, but you can reduce that loss by sealing and insulating your ducts. Insulating ducts in unconditioned spaces is usually very cost-effective. Existing ducts may also be blocked or may require simple upgrades.
Designing and Installing New Duct Systems
In new home construction or in retrofits, proper duct system design is critical. In recent years, energy-saving designs have sought to include ducts and heating systems in the conditioned space.
Efficient and well-designed duct systems distribute air properly throughout your home without leaking to keep all rooms at a comfortable temperature. The system should provide balanced supply and return flow to maintain a neutral pressure within the house.
Even well sealed and insulated ducts will leak and lose some heat, so many new energy-efficient homes place the duct system within the conditioned space of the home. The simplest way to accomplish this is to hide the ducts in dropped ceilings and in corners of rooms. Ducts can also be located in a sealed and insulated chase extending into the attic or built into raised floors. In both of these latter cases, care must be taken during construction to prevent contractors from using the duct chases for wiring or other utilities.
In either case, actual ducts must be used — chases and floor cavities should not be used as ducts. Regardless of where they are installed, ducts should be well sealed. Although ducts can be configured in a number of ways, the “trunk and branch” and “radial” supply duct configurations are most suitable for ducts located in conditioned spaces.
Air return duct systems can be configured in two ways: each room can have a return duct that sends air back to the heating and cooling equipment or return grills can be located in central locations on each floor. For the latter case, either grills must be installed to allow air to pass out of closed rooms, or short “jumper ducts” can be installed to connect the vent in one room with the next, allowing air to flow back to the central return grilles. Door undercuts help, but they are usually not sufficient for return airflow.
You can perform a simple check for adequate return air capacity by doing the following:
- Close all exterior doors and windows
- Close all interior room doors
- Turn on the central air handler
- “Crack” interior doors one by one and observe if the door closes or further opens “on its own.” (Whether it closes or opens will depend on the direction of the air handler-driven air flow.) Rooms served by air-moved doors have restricted return air flow and need pressure relief as described above.
Maintaining and Upgrading Existing Duct Systems
Sealing your ducts to prevent leaks is even more important if the ducts are located in an unconditioned area such as an attic or vented crawlspace. If the supply ducts are leaking, heated or cooled air can be forced out of unsealed joints and lost. In addition, unconditioned air can be drawn into return ducts through unsealed joints.
Although minor duct repairs are easy to make, qualified professionals should seal and insulate ducts in unconditioned spaces to ensure the use of appropriate sealing materials.
Aside from sealing your ducts, the simplest and most effective means of maintaining your air distribution system is to ensure that furniture and other objects are not blocking the airflow through your registers, and to vacuum the registers to remove any dust buildup.
Existing duct systems often suffer from design deficiencies in the return air system, and modifications by the homeowner (or just a tendency to keep doors closed) may contribute to these problems. Any rooms with a lack of sufficient return airflow may benefit from relatively simple upgrades, such as the installation of new return-air grilles, undercutting doors for return air, or installing a jumper duct.
Some rooms may also be hard to heat and cool because of inadequate supply ducts or grilles. If this is the case, you should first examine whether the problem is the room itself: fix any problems with insulation, air leakage, or inefficient windows first. If the problem persists, you may be able to increase the size of the supply duct or add an additional duct to provide the needed airflow to the room.
Minor Duct Repair Tips for Minimizing Energy Losses in Ducts
- Check your ducts for air leaks. First, look for sections that should be joined but have separated and then look for obvious holes.
- Duct mastic is the preferred material for sealing ductwork seams and joints. It is more durable than any available tape and generally easier for a do-it-yourself installation. Its only drawback is that it will not bridge gaps over ¼ inch. Such gaps must be first bridged with web-type drywall tape, or a good quality heat approved tape.
- If you use tape to seal your ducts, avoid cloth-backed, rubber adhesive duct tape — it tends to fail quickly. Instead, use mastic, butyl tape, foil tape, or other heat-approved tapes. Look for tape with the Underwriters Laboratories (UL) logo.
- Remember that insulating ducts in the basement will make the basement colder. If both the ducts and the basement walls are not insulated, consider insulating both. Water pipes and drains in unconditioned spaces could freeze and burst if the heat ducts are fully insulated because there would be no heat source to prevent the space from freezing in cold weather. However, using an electric heating tape wrap on the pipes can prevent this. Check with a professional contractor.
- Hire a professional to install both supply and return registers in the basement rooms after converting your basement to a living area.
- Be sure a well-sealed vapor barrier exists on the outside of the insulation on cooling ducts to prevent moisture condensation.
- If you have a fuel-burning furnace, stove, or other appliance or an attached garage, install a carbon monoxide (CO) monitor to alert you to harmful CO levels.
- Be sure to get professional help when doing ductwork. A qualified professional should always perform changes and repairs to a duct system.
2021 IECC Insulation Inspection in the city of Houston, TX 77021
2021 IECC Insulation Inspection
7229 Tierwester St, Houston, TX 77021
A 2021 IECC insulation inspection is a thorough assessment of insulation materials and their installation within a building or structure. The primary purpose of this inspection is to ensure that insulation is installed correctly, effectively, and in compliance with relevant building codes and standards. Here’s a more detailed overview:
Purpose of the 2021 IECC Insulation Inspection
- Energy Efficiency Verification:
- An insulation inspection helps confirm that the insulation is performing as intended. Proper insulation reduces heat transfer, contributing to energy savings and lower utility bills.
- Quality Assurance:
- Inspectors assess the quality of the insulation materials used, ensuring they meet specifications and are suitable for the specific application. This includes checking for damage, degradation, or improper installation that could compromise performance.
- Compliance with Codes and Standards:
- Building codes often specify minimum insulation levels and installation practices. An inspection verifies compliance with these regulations, which is crucial for safety and energy efficiency.
- Identification of Issues:
- The inspection can reveal problems such as gaps, voids, or compression in insulation that might hinder its effectiveness. Identifying these issues early can prevent future problems, such as higher energy costs or mold growth due to moisture accumulation.
- Moisture and Air Leakage Assessment:
- Inspections often include evaluations for air leaks and moisture issues. Proper insulation must be complemented by effective air sealing and moisture management to optimize performance and protect the building structure.
- Enhanced Comfort:
- By ensuring that insulation is installed correctly, inspectors contribute to improved thermal comfort for occupants, reducing drafts and temperature fluctuations within the space.
- Health and Safety Considerations:
- Certain insulation materials can pose health risks if not handled or installed correctly. Inspections help ensure that materials like fiberglass or spray foam are used safely and in accordance with health guidelines.
Components of an Insulation Inspection
- Visual Assessment: Inspectors visually evaluate accessible areas for visible signs of insulation integrity, including coverage, material condition, and installation quality.
- Measurement: Inspectors may measure insulation thickness and density to ensure it meets the specified R-values (thermal resistance).
- Thermal Imaging: Some inspectors use infrared cameras to identify heat loss areas, helping pinpoint insufficient insulation or air leaks.
- Moisture Testing: Tools may be employed to assess moisture levels within insulation materials, identifying potential risks of mold or decay.
Overall, insulation inspections are essential for ensuring the effectiveness, safety, and longevity of insulation systems in buildings. By identifying and addressing issues early, these inspections help optimize energy performance and enhance the overall comfort and safety of indoor environments.
Troubleshooting an HVAC System – 7229 Tierwester St, Houston, TX 77021
Troubleshooting an HVAC System – How a Blower Door and Duct Test Can Help

7229 Tierwester St, Houston, TX 77021
Troubleshooting an HVAC System – 7229 Tierwester St, Houston, TX 77021
If you’re grappling with HVAC issues in your home—whether it’s inconsistent temperatures, high energy bills, or poor air quality—consider turning to two powerful diagnostic tools: the blower door test and the duct test. These tests can provide crucial insights into what’s going wrong and guide you towards effective solutions. Here’s a closer look at how each test works and how they can aid in troubleshooting your HVAC system.
What is a Blower Door Test?
A blower door test is a diagnostic tool used to measure the airtightness of a building. During the test, a powerful fan is mounted into an exterior door frame, and the home is pressurized or depressurized to identify leaks and assess how much air is escaping or entering the building. This test helps pinpoint areas where your home may be losing or gaining air, which directly impacts the efficiency of your HVAC system.
How It Helps Troubleshoot HVAC Issues:
Identifying Air Leaks: The blower door test reveals air leaks around windows, doors, walls, and ceilings. Leaks can cause your HVAC system to work harder than necessary, leading to higher energy bills and inconsistent indoor temperatures. By sealing these leaks, you can improve system efficiency and comfort.
Improving Insulation: If your home has inadequate insulation, the blower door test can help identify these gaps. Proper insulation ensures that the conditioned air from your HVAC system stays inside, reducing the workload on your system and improving energy efficiency.
Enhancing Comfort: Air leaks can lead to uneven temperatures and drafts. By fixing the identified leaks, you can achieve more consistent temperatures throughout your home, enhancing overall comfort.
What is a Duct Test?
A duct test evaluates the efficiency and integrity of your ductwork system. During this test, a special device measures the amount of air leaking from the ducts and assesses their overall performance. This is crucial because leaks and inefficiencies in the duct system can significantly impact HVAC performance.
How It Helps Troubleshoot HVAC Issues:
Locating Leaks: Duct leaks can cause a significant loss of conditioned air, which means your HVAC system has to work harder to maintain the desired temperature. A duct test helps pinpoint these leaks so they can be repaired, improving the overall efficiency of your system.
Assessing Duct Insulation: Proper insulation of ductwork is essential for maintaining temperature control and energy efficiency. A duct test can reveal areas where insulation is missing or inadequate, allowing you to address these issues and prevent energy loss.
Optimizing Airflow: Ductwork that is improperly sized, blocked, or poorly designed can restrict airflow and reduce the efficiency of your HVAC system. A duct test can identify airflow issues and help you make necessary adjustments to ensure that air is distributed evenly throughout your home.
Combining Both Tests for Comprehensive Troubleshooting
When troubleshooting an HVAC system, combining both the blower door test and the duct test can provide a comprehensive picture of your home’s performance. Here’s how they work together:
Holistic View: The blower door test identifies general air leakage in the building envelope, while the duct test focuses specifically on the ductwork. Together, they offer a complete view of where energy loss is occurring.
Targeted Solutions: By understanding both the building envelope and duct system’s performance, you can implement targeted solutions. For example, sealing air leaks and repairing duct leaks can lead to significant improvements in HVAC efficiency and comfort.
Cost Savings: Addressing the issues identified by these tests can lead to substantial cost savings on energy bills. A well-sealed home with efficient ductwork allows your HVAC system to operate more effectively, reducing the need for frequent repairs and extending the life of your equipment.
If you’re facing HVAC challenges, a blower door test and a duct test can be invaluable tools in diagnosing and solving the problem. By identifying air leaks, improving insulation, and optimizing ductwork, these tests can help enhance your home’s energy efficiency, comfort, and overall HVAC performance. For the best results, consider working with a professional who can accurately perform these tests and recommend effective solutions tailored to your home’s specific needs.
Taking these steps not only improves your HVAC system’s efficiency but also contributes to a more comfortable and energy-efficient living environment.
Visit our site https://homereadyinspections.com/
Minimizing Energy Losses in Ducts at 7708 S Howton St, Houston, TX 77028
7708 S Howton St, Houston, TX 77028
Minimizing Energy Losses in Ducts
Minimizing energy losses in ducts by seeing if the ducts are poorly sealed or insulated. That could tell you why your energy bill in high. Your air ducts are one of the most important systems in your home, and if the ducts are poorly sealed or insulated, they are likely contributing to higher energy bills.
Your home’s duct system is a branching network of tubes in the walls, floors, and ceilings; it carries the air from your home’s furnace and central air conditioner to each room. Ducts are made of sheet metal, fiberglass, or other materials.
Ducts that leak heated air into unheated spaces can add hundreds of dollars a year to your heating and cooling bills, but you can reduce that loss by sealing and insulating your ducts. Insulating ducts in unconditioned spaces is usually very cost-effective. Existing ducts may also be blocked or may require simple upgrades.
Designing and Installing New Duct Systems
In new home construction or in retrofits, proper duct system design is critical. In recent years, energy-saving designs have sought to include ducts and heating systems in the conditioned space.
Efficient and well-designed duct systems distribute air properly throughout your home without leaking to keep all rooms at a comfortable temperature. The system should provide balanced supply and return flow to maintain a neutral pressure within the house.
Even well sealed and insulated ducts will leak and lose some heat, so many new energy-efficient homes place the duct system within the conditioned space of the home. The simplest way to accomplish this is to hide the ducts in dropped ceilings and in corners of rooms. Ducts can also be located in a sealed and insulated chase extending into the attic or built into raised floors. In both of these latter cases, care must be taken during construction to prevent contractors from using the duct chases for wiring or other utilities.
In either case, actual ducts must be used — chases and floor cavities should not be used as ducts. Regardless of where they are installed, ducts should be well sealed. Although ducts can be configured in a number of ways, the “trunk and branch” and “radial” supply duct configurations are most suitable for ducts located in conditioned spaces.
Air return duct systems can be configured in two ways: each room can have a return duct that sends air back to the heating and cooling equipment or return grills can be located in central locations on each floor. For the latter case, either grills must be installed to allow air to pass out of closed rooms, or short “jumper ducts” can be installed to connect the vent in one room with the next, allowing air to flow back to the central return grilles. Door undercuts help, but they are usually not sufficient for return airflow.
You can perform a simple check for adequate return air capacity by doing the following:
- Close all exterior doors and windows
- Close all interior room doors
- Turn on the central air handler
- “Crack” interior doors one by one and observe if the door closes or further opens “on its own.” (Whether it closes or opens will depend on the direction of the air handler-driven air flow.) Rooms served by air-moved doors have restricted return air flow and need pressure relief as described above.
Maintaining and Upgrading Existing Duct Systems
Sealing your ducts to prevent leaks is even more important if the ducts are located in an unconditioned area such as an attic or vented crawlspace. If the supply ducts are leaking, heated or cooled air can be forced out of unsealed joints and lost. In addition, unconditioned air can be drawn into return ducts through unsealed joints.
Although minor duct repairs are easy to make, qualified professionals should seal and insulate ducts in unconditioned spaces to ensure the use of appropriate sealing materials.
Aside from sealing your ducts, the simplest and most effective means of maintaining your air distribution system is to ensure that furniture and other objects are not blocking the airflow through your registers, and to vacuum the registers to remove any dust buildup.
Existing duct systems often suffer from design deficiencies in the return air system, and modifications by the homeowner (or just a tendency to keep doors closed) may contribute to these problems. Any rooms with a lack of sufficient return airflow may benefit from relatively simple upgrades, such as the installation of new return-air grilles, undercutting doors for return air, or installing a jumper duct.
Some rooms may also be hard to heat and cool because of inadequate supply ducts or grilles. If this is the case, you should first examine whether the problem is the room itself: fix any problems with insulation, air leakage, or inefficient windows first. If the problem persists, you may be able to increase the size of the supply duct or add an additional duct to provide the needed airflow to the room.
Minor Duct Repair Tips for Minimizing Energy Losses in Ducts
- Check your ducts for air leaks. First, look for sections that should be joined but have separated and then look for obvious holes.
- Duct mastic is the preferred material for sealing ductwork seams and joints. It is more durable than any available tape and generally easier for a do-it-yourself installation. Its only drawback is that it will not bridge gaps over ¼ inch. Such gaps must be first bridged with web-type drywall tape, or a good quality heat approved tape.
- If you use tape to seal your ducts, avoid cloth-backed, rubber adhesive duct tape — it tends to fail quickly. Instead, use mastic, butyl tape, foil tape, or other heat-approved tapes. Look for tape with the Underwriters Laboratories (UL) logo.
- Remember that insulating ducts in the basement will make the basement colder. If both the ducts and the basement walls are not insulated, consider insulating both. Water pipes and drains in unconditioned spaces could freeze and burst if the heat ducts are fully insulated because there would be no heat source to prevent the space from freezing in cold weather. However, using an electric heating tape wrap on the pipes can prevent this. Check with a professional contractor.
- Hire a professional to install both supply and return registers in the basement rooms after converting your basement to a living area.
- Be sure a well-sealed vapor barrier exists on the outside of the insulation on cooling ducts to prevent moisture condensation.
- If you have a fuel-burning furnace, stove, or other appliance or an attached garage, install a carbon monoxide (CO) monitor to alert you to harmful CO levels.
- Be sure to get professional help when doing ductwork. A qualified professional should always perform changes and repairs to a duct system.
Minimizing Energy Losses in Ducts at 4911 Marietta Ln, Houston, TX 77021
4911 Marietta Ln, Houston, TX 77021
Minimizing Energy Losses in Ducts
Minimizing energy losses in ducts by seeing if the ducts are poorly sealed or insulated. That could tell you why your energy bill in high. Your air ducts are one of the most important systems in your home, and if the ducts are poorly sealed or insulated, they are likely contributing to higher energy bills.
Your home’s duct system is a branching network of tubes in the walls, floors, and ceilings; it carries the air from your home’s furnace and central air conditioner to each room. Ducts are made of sheet metal, fiberglass, or other materials.
Ducts that leak heated air into unheated spaces can add hundreds of dollars a year to your heating and cooling bills, but you can reduce that loss by sealing and insulating your ducts. Insulating ducts in unconditioned spaces is usually very cost-effective. Existing ducts may also be blocked or may require simple upgrades.
Designing and Installing New Duct Systems
In new home construction or in retrofits, proper duct system design is critical. In recent years, energy-saving designs have sought to include ducts and heating systems in the conditioned space.
Efficient and well-designed duct systems distribute air properly throughout your home without leaking to keep all rooms at a comfortable temperature. The system should provide balanced supply and return flow to maintain a neutral pressure within the house.
Even well sealed and insulated ducts will leak and lose some heat, so many new energy-efficient homes place the duct system within the conditioned space of the home. The simplest way to accomplish this is to hide the ducts in dropped ceilings and in corners of rooms. Ducts can also be located in a sealed and insulated chase extending into the attic or built into raised floors. In both of these latter cases, care must be taken during construction to prevent contractors from using the duct chases for wiring or other utilities.
In either case, actual ducts must be used — chases and floor cavities should not be used as ducts. Regardless of where they are installed, ducts should be well sealed. Although ducts can be configured in a number of ways, the “trunk and branch” and “radial” supply duct configurations are most suitable for ducts located in conditioned spaces.
Air return duct systems can be configured in two ways: each room can have a return duct that sends air back to the heating and cooling equipment or return grills can be located in central locations on each floor. For the latter case, either grills must be installed to allow air to pass out of closed rooms, or short “jumper ducts” can be installed to connect the vent in one room with the next, allowing air to flow back to the central return grilles. Door undercuts help, but they are usually not sufficient for return airflow.
You can perform a simple check for adequate return air capacity by doing the following:
- Close all exterior doors and windows
- Close all interior room doors
- Turn on the central air handler
- “Crack” interior doors one by one and observe if the door closes or further opens “on its own.” (Whether it closes or opens will depend on the direction of the air handler-driven air flow.) Rooms served by air-moved doors have restricted return air flow and need pressure relief as described above.
Maintaining and Upgrading Existing Duct Systems
Sealing your ducts to prevent leaks is even more important if the ducts are located in an unconditioned area such as an attic or vented crawlspace. If the supply ducts are leaking, heated or cooled air can be forced out of unsealed joints and lost. In addition, unconditioned air can be drawn into return ducts through unsealed joints.
Although minor duct repairs are easy to make, qualified professionals should seal and insulate ducts in unconditioned spaces to ensure the use of appropriate sealing materials.
Aside from sealing your ducts, the simplest and most effective means of maintaining your air distribution system is to ensure that furniture and other objects are not blocking the airflow through your registers, and to vacuum the registers to remove any dust buildup.
Existing duct systems often suffer from design deficiencies in the return air system, and modifications by the homeowner (or just a tendency to keep doors closed) may contribute to these problems. Any rooms with a lack of sufficient return airflow may benefit from relatively simple upgrades, such as the installation of new return-air grilles, undercutting doors for return air, or installing a jumper duct.
Some rooms may also be hard to heat and cool because of inadequate supply ducts or grilles. If this is the case, you should first examine whether the problem is the room itself: fix any problems with insulation, air leakage, or inefficient windows first. If the problem persists, you may be able to increase the size of the supply duct or add an additional duct to provide the needed airflow to the room.
Minor Duct Repair Tips for Minimizing Energy Losses in Ducts
- Check your ducts for air leaks. First, look for sections that should be joined but have separated and then look for obvious holes.
- Duct mastic is the preferred material for sealing ductwork seams and joints. It is more durable than any available tape and generally easier for a do-it-yourself installation. Its only drawback is that it will not bridge gaps over ¼ inch. Such gaps must be first bridged with web-type drywall tape, or a good quality heat approved tape.
- If you use tape to seal your ducts, avoid cloth-backed, rubber adhesive duct tape — it tends to fail quickly. Instead, use mastic, butyl tape, foil tape, or other heat-approved tapes. Look for tape with the Underwriters Laboratories (UL) logo.
- Remember that insulating ducts in the basement will make the basement colder. If both the ducts and the basement walls are not insulated, consider insulating both. Water pipes and drains in unconditioned spaces could freeze and burst if the heat ducts are fully insulated because there would be no heat source to prevent the space from freezing in cold weather. However, using an electric heating tape wrap on the pipes can prevent this. Check with a professional contractor.
- Hire a professional to install both supply and return registers in the basement rooms after converting your basement to a living area.
- Be sure a well-sealed vapor barrier exists on the outside of the insulation on cooling ducts to prevent moisture condensation.
- If you have a fuel-burning furnace, stove, or other appliance or an attached garage, install a carbon monoxide (CO) monitor to alert you to harmful CO levels.
- Be sure to get professional help when doing ductwork. A qualified professional should always perform changes and repairs to a duct system.
Minimizing Energy Losses in Ducts at 1516 22nd St, Galveston, TX 77550
1516 22nd St, Galveston, TX 77550
Minimizing Energy Losses in Ducts
Minimizing energy losses in ducts by seeing if the ducts are poorly sealed or insulated. That could tell you why your energy bill in high. Your air ducts are one of the most important systems in your home, and if the ducts are poorly sealed or insulated, they are likely contributing to higher energy bills.
Your home’s duct system is a branching network of tubes in the walls, floors, and ceilings; it carries the air from your home’s furnace and central air conditioner to each room. Ducts are made of sheet metal, fiberglass, or other materials.
Ducts that leak heated air into unheated spaces can add hundreds of dollars a year to your heating and cooling bills, but you can reduce that loss by sealing and insulating your ducts. Insulating ducts in unconditioned spaces is usually very cost-effective. Existing ducts may also be blocked or may require simple upgrades.
Designing and Installing New Duct Systems
In new home construction or in retrofits, proper duct system design is critical. In recent years, energy-saving designs have sought to include ducts and heating systems in the conditioned space.
Efficient and well-designed duct systems distribute air properly throughout your home without leaking to keep all rooms at a comfortable temperature. The system should provide balanced supply and return flow to maintain a neutral pressure within the house.
Even well sealed and insulated ducts will leak and lose some heat, so many new energy-efficient homes place the duct system within the conditioned space of the home. The simplest way to accomplish this is to hide the ducts in dropped ceilings and in corners of rooms. Ducts can also be located in a sealed and insulated chase extending into the attic or built into raised floors. In both of these latter cases, care must be taken during construction to prevent contractors from using the duct chases for wiring or other utilities.
In either case, actual ducts must be used — chases and floor cavities should not be used as ducts. Regardless of where they are installed, ducts should be well sealed. Although ducts can be configured in a number of ways, the “trunk and branch” and “radial” supply duct configurations are most suitable for ducts located in conditioned spaces.
Air return duct systems can be configured in two ways: each room can have a return duct that sends air back to the heating and cooling equipment or return grills can be located in central locations on each floor. For the latter case, either grills must be installed to allow air to pass out of closed rooms, or short “jumper ducts” can be installed to connect the vent in one room with the next, allowing air to flow back to the central return grilles. Door undercuts help, but they are usually not sufficient for return airflow.
You can perform a simple check for adequate return air capacity by doing the following:
- Close all exterior doors and windows
- Close all interior room doors
- Turn on the central air handler
- “Crack” interior doors one by one and observe if the door closes or further opens “on its own.” (Whether it closes or opens will depend on the direction of the air handler-driven air flow.) Rooms served by air-moved doors have restricted return air flow and need pressure relief as described above.
Maintaining and Upgrading Existing Duct Systems
Sealing your ducts to prevent leaks is even more important if the ducts are located in an unconditioned area such as an attic or vented crawlspace. If the supply ducts are leaking, heated or cooled air can be forced out of unsealed joints and lost. In addition, unconditioned air can be drawn into return ducts through unsealed joints.
Although minor duct repairs are easy to make, qualified professionals should seal and insulate ducts in unconditioned spaces to ensure the use of appropriate sealing materials.
Aside from sealing your ducts, the simplest and most effective means of maintaining your air distribution system is to ensure that furniture and other objects are not blocking the airflow through your registers, and to vacuum the registers to remove any dust buildup.
Existing duct systems often suffer from design deficiencies in the return air system, and modifications by the homeowner (or just a tendency to keep doors closed) may contribute to these problems. Any rooms with a lack of sufficient return airflow may benefit from relatively simple upgrades, such as the installation of new return-air grilles, undercutting doors for return air, or installing a jumper duct.
Some rooms may also be hard to heat and cool because of inadequate supply ducts or grilles. If this is the case, you should first examine whether the problem is the room itself: fix any problems with insulation, air leakage, or inefficient windows first. If the problem persists, you may be able to increase the size of the supply duct or add an additional duct to provide the needed airflow to the room.
Minor Duct Repair Tips for Minimizing Energy Losses in Ducts
- Check your ducts for air leaks. First, look for sections that should be joined but have separated and then look for obvious holes.
- Duct mastic is the preferred material for sealing ductwork seams and joints. It is more durable than any available tape and generally easier for a do-it-yourself installation. Its only drawback is that it will not bridge gaps over ¼ inch. Such gaps must be first bridged with web-type drywall tape, or a good quality heat approved tape.
- If you use tape to seal your ducts, avoid cloth-backed, rubber adhesive duct tape — it tends to fail quickly. Instead, use mastic, butyl tape, foil tape, or other heat-approved tapes. Look for tape with the Underwriters Laboratories (UL) logo.
- Remember that insulating ducts in the basement will make the basement colder. If both the ducts and the basement walls are not insulated, consider insulating both. Water pipes and drains in unconditioned spaces could freeze and burst if the heat ducts are fully insulated because there would be no heat source to prevent the space from freezing in cold weather. However, using an electric heating tape wrap on the pipes can prevent this. Check with a professional contractor.
- Hire a professional to install both supply and return registers in the basement rooms after converting your basement to a living area.
- Be sure a well-sealed vapor barrier exists on the outside of the insulation on cooling ducts to prevent moisture condensation.
- If you have a fuel-burning furnace, stove, or other appliance or an attached garage, install a carbon monoxide (CO) monitor to alert you to harmful CO levels.
- Be sure to get professional help when doing ductwork. A qualified professional should always perform changes and repairs to a duct system.
Minimizing Energy Losses in Ducts at 801 Avenue K, Galveston, TX 77550
801 Avenue K, Galveston, TX 77550
Minimizing Energy Losses in Ducts
Minimizing energy losses in ducts by seeing if the ducts are poorly sealed or insulated. That could tell you why your energy bill in high. Your air ducts are one of the most important systems in your home, and if the ducts are poorly sealed or insulated, they are likely contributing to higher energy bills.
Your home’s duct system is a branching network of tubes in the walls, floors, and ceilings; it carries the air from your home’s furnace and central air conditioner to each room. Ducts are made of sheet metal, fiberglass, or other materials.
Ducts that leak heated air into unheated spaces can add hundreds of dollars a year to your heating and cooling bills, but you can reduce that loss by sealing and insulating your ducts. Insulating ducts in unconditioned spaces is usually very cost-effective. Existing ducts may also be blocked or may require simple upgrades.
Designing and Installing New Duct Systems
In new home construction or in retrofits, proper duct system design is critical. In recent years, energy-saving designs have sought to include ducts and heating systems in the conditioned space.
Efficient and well-designed duct systems distribute air properly throughout your home without leaking to keep all rooms at a comfortable temperature. The system should provide balanced supply and return flow to maintain a neutral pressure within the house.
Even well sealed and insulated ducts will leak and lose some heat, so many new energy-efficient homes place the duct system within the conditioned space of the home. The simplest way to accomplish this is to hide the ducts in dropped ceilings and in corners of rooms. Ducts can also be located in a sealed and insulated chase extending into the attic or built into raised floors. In both of these latter cases, care must be taken during construction to prevent contractors from using the duct chases for wiring or other utilities.
In either case, actual ducts must be used — chases and floor cavities should not be used as ducts. Regardless of where they are installed, ducts should be well sealed. Although ducts can be configured in a number of ways, the “trunk and branch” and “radial” supply duct configurations are most suitable for ducts located in conditioned spaces.
Air return duct systems can be configured in two ways: each room can have a return duct that sends air back to the heating and cooling equipment or return grills can be located in central locations on each floor. For the latter case, either grills must be installed to allow air to pass out of closed rooms, or short “jumper ducts” can be installed to connect the vent in one room with the next, allowing air to flow back to the central return grilles. Door undercuts help, but they are usually not sufficient for return airflow.
You can perform a simple check for adequate return air capacity by doing the following:
- Close all exterior doors and windows
- Close all interior room doors
- Turn on the central air handler
- “Crack” interior doors one by one and observe if the door closes or further opens “on its own.” (Whether it closes or opens will depend on the direction of the air handler-driven air flow.) Rooms served by air-moved doors have restricted return air flow and need pressure relief as described above.
Maintaining and Upgrading Existing Duct Systems
Sealing your ducts to prevent leaks is even more important if the ducts are located in an unconditioned area such as an attic or vented crawlspace. If the supply ducts are leaking, heated or cooled air can be forced out of unsealed joints and lost. In addition, unconditioned air can be drawn into return ducts through unsealed joints.
Although minor duct repairs are easy to make, qualified professionals should seal and insulate ducts in unconditioned spaces to ensure the use of appropriate sealing materials.
Aside from sealing your ducts, the simplest and most effective means of maintaining your air distribution system is to ensure that furniture and other objects are not blocking the airflow through your registers, and to vacuum the registers to remove any dust buildup.
Existing duct systems often suffer from design deficiencies in the return air system, and modifications by the homeowner (or just a tendency to keep doors closed) may contribute to these problems. Any rooms with a lack of sufficient return airflow may benefit from relatively simple upgrades, such as the installation of new return-air grilles, undercutting doors for return air, or installing a jumper duct.
Some rooms may also be hard to heat and cool because of inadequate supply ducts or grilles. If this is the case, you should first examine whether the problem is the room itself: fix any problems with insulation, air leakage, or inefficient windows first. If the problem persists, you may be able to increase the size of the supply duct or add an additional duct to provide the needed airflow to the room.
Minor Duct Repair Tips for Minimizing Energy Losses in Ducts
- Check your ducts for air leaks. First, look for sections that should be joined but have separated and then look for obvious holes.
- Duct mastic is the preferred material for sealing ductwork seams and joints. It is more durable than any available tape and generally easier for a do-it-yourself installation. Its only drawback is that it will not bridge gaps over ¼ inch. Such gaps must be first bridged with web-type drywall tape, or a good quality heat approved tape.
- If you use tape to seal your ducts, avoid cloth-backed, rubber adhesive duct tape — it tends to fail quickly. Instead, use mastic, butyl tape, foil tape, or other heat-approved tapes. Look for tape with the Underwriters Laboratories (UL) logo.
- Remember that insulating ducts in the basement will make the basement colder. If both the ducts and the basement walls are not insulated, consider insulating both. Water pipes and drains in unconditioned spaces could freeze and burst if the heat ducts are fully insulated because there would be no heat source to prevent the space from freezing in cold weather. However, using an electric heating tape wrap on the pipes can prevent this. Check with a professional contractor.
- Hire a professional to install both supply and return registers in the basement rooms after converting your basement to a living area.
- Be sure a well-sealed vapor barrier exists on the outside of the insulation on cooling ducts to prevent moisture condensation.
- If you have a fuel-burning furnace, stove, or other appliance or an attached garage, install a carbon monoxide (CO) monitor to alert you to harmful CO levels.
- Be sure to get professional help when doing ductwork. A qualified professional should always perform changes and repairs to a duct system.
Energy Star – 45L Tax Credits for Zero Energy Ready Homes
3092 Camden Park Ln, League City, TX 77573
45L Tax Credits for Zero Energy Ready Homes
Disclaimer: (Energy Star) This webpage provides an overview of the DOE Zero Energy Ready Home program and how it relates to the New Energy Efficient Home Tax Credit found in section 45L of the Internal Revenue Code. The information provided here does not constitute professional tax advice or other professional financial guidance. It should not be used as the only source of information when making decisions regarding design, purchasing, investments, or the tax implications of new home construction, or when executing other binding agreements. In the event that there is conflict between information provided on this webpage and guidance or notices published by IRS, the information published by IRS shall take precedence
The Updated Section 45L
The Inflation Reduction Act of 2022 (IRA) amended Internal Revenue Code Section 45L to provide taxpayers with a tax credit for eligible new or substantially reconstructed homes that meet applicable ENERGY STAR home program or DOE Zero Energy Ready Home (ZERH) program requirements. The new 45L provisions include two tiers of credits, with the higher credits for eligible homes and dwelling units certified to applicable ZERH program requirements. The 45L credit is $5,000 for single family and manufactured homes eligible to participate in the EPA’s ENERGY STAR Residential New Construction Program or the ENERGY STAR Manufactured New Homes Program, respectively, and which are certified to applicable ZERH program requirements. The 45L credit is $1,000 for dwelling units that are part of a building eligible to participate in the ENERGY STAR Multifamily New Construction Program, and which are certified to applicable ZERH program requirements, unless the project meets prevailing wage requirements, in which case the 45L credit is $5,000 per dwelling unit. These new 45L rules apply to qualified energy efficient homes acquired after December 31, 2022, and before January 1, 2033, for use as a residence during the taxable year. DOE continues to coordinate with the Internal Revenue Service (IRS) regarding forthcoming IRS 45L guidance.
DOE Zero Energy Ready Home (ZERH) Program Applicability for 45L Tax Credit, by Calendar Year
ZERH program requirements vary by housing sector. To improve the usability of the program requirements and the certification process for different sectors, DOE is developing and maintaining program requirements documents for each major housing sector. DOE anticipates updating these documents over the coming years, with new editions of the requirements referred to as versions.
The three housing sector tables below indicate DOE’s anticipated version release schedule for the ZERH program. The certification requirements for each housing sector are included below with links to detailed requirements documents (PDF) for each program version. IRS guidance will establish when a dwelling unit needs to be certified to the version in effect for that housing sector as listed below to qualify for the ZERH provisions of 45L tax credit. The tables list all current and planned versions through 2025, by Calendar Year (January 1-December 31). In conjunction with IRS, DOE will provide additional information on any planned ZERH program changes beyond 2025 on future dates to be determined. Note, for certain future planned versions the requirements documents are still under development.
https://www.energy.gov/eere/buildings/45l-tax-credits-zero-energy-ready-homes
Minimizing Energy Losses in Ducts at 11514 Spottswood Dr, Houston, TX 77016
11514 Spottswood Dr, Houston, TX 77016
Minimizing Energy Losses in Ducts
Minimizing energy losses in ducts by seeing if the ducts are poorly sealed or insulated. That could tell you why your energy bill in high. Your air ducts are one of the most important systems in your home, and if the ducts are poorly sealed or insulated, they are likely contributing to higher energy bills.
Your home’s duct system is a branching network of tubes in the walls, floors, and ceilings; it carries the air from your home’s furnace and central air conditioner to each room. Ducts are made of sheet metal, fiberglass, or other materials.
Ducts that leak heated air into unheated spaces can add hundreds of dollars a year to your heating and cooling bills, but you can reduce that loss by sealing and insulating your ducts. Insulating ducts in unconditioned spaces is usually very cost-effective. Existing ducts may also be blocked or may require simple upgrades.
Designing and Installing New Duct Systems
In new home construction or in retrofits, proper duct system design is critical. In recent years, energy-saving designs have sought to include ducts and heating systems in the conditioned space.
Efficient and well-designed duct systems distribute air properly throughout your home without leaking to keep all rooms at a comfortable temperature. The system should provide balanced supply and return flow to maintain a neutral pressure within the house.
Even well sealed and insulated ducts will leak and lose some heat, so many new energy-efficient homes place the duct system within the conditioned space of the home. The simplest way to accomplish this is to hide the ducts in dropped ceilings and in corners of rooms. Ducts can also be located in a sealed and insulated chase extending into the attic or built into raised floors. In both of these latter cases, care must be taken during construction to prevent contractors from using the duct chases for wiring or other utilities.
In either case, actual ducts must be used — chases and floor cavities should not be used as ducts. Regardless of where they are installed, ducts should be well sealed. Although ducts can be configured in a number of ways, the “trunk and branch” and “radial” supply duct configurations are most suitable for ducts located in conditioned spaces.
Air return duct systems can be configured in two ways: each room can have a return duct that sends air back to the heating and cooling equipment or return grills can be located in central locations on each floor. For the latter case, either grills must be installed to allow air to pass out of closed rooms, or short “jumper ducts” can be installed to connect the vent in one room with the next, allowing air to flow back to the central return grilles. Door undercuts help, but they are usually not sufficient for return airflow.
You can perform a simple check for adequate return air capacity by doing the following:
- Close all exterior doors and windows
- Close all interior room doors
- Turn on the central air handler
- “Crack” interior doors one by one and observe if the door closes or further opens “on its own.” (Whether it closes or opens will depend on the direction of the air handler-driven air flow.) Rooms served by air-moved doors have restricted return air flow and need pressure relief as described above.
Maintaining and Upgrading Existing Duct Systems
Sealing your ducts to prevent leaks is even more important if the ducts are located in an unconditioned area such as an attic or vented crawlspace. If the supply ducts are leaking, heated or cooled air can be forced out of unsealed joints and lost. In addition, unconditioned air can be drawn into return ducts through unsealed joints.
Although minor duct repairs are easy to make, qualified professionals should seal and insulate ducts in unconditioned spaces to ensure the use of appropriate sealing materials.
Aside from sealing your ducts, the simplest and most effective means of maintaining your air distribution system is to ensure that furniture and other objects are not blocking the airflow through your registers, and to vacuum the registers to remove any dust buildup.
Existing duct systems often suffer from design deficiencies in the return air system, and modifications by the homeowner (or just a tendency to keep doors closed) may contribute to these problems. Any rooms with a lack of sufficient return airflow may benefit from relatively simple upgrades, such as the installation of new return-air grilles, undercutting doors for return air, or installing a jumper duct.
Some rooms may also be hard to heat and cool because of inadequate supply ducts or grilles. If this is the case, you should first examine whether the problem is the room itself: fix any problems with insulation, air leakage, or inefficient windows first. If the problem persists, you may be able to increase the size of the supply duct or add an additional duct to provide the needed airflow to the room.
Minor Duct Repair Tips for Minimizing Energy Losses in Ducts
- Check your ducts for air leaks. First, look for sections that should be joined but have separated and then look for obvious holes.
- Duct mastic is the preferred material for sealing ductwork seams and joints. It is more durable than any available tape and generally easier for a do-it-yourself installation. Its only drawback is that it will not bridge gaps over ¼ inch. Such gaps must be first bridged with web-type drywall tape, or a good quality heat approved tape.
- If you use tape to seal your ducts, avoid cloth-backed, rubber adhesive duct tape — it tends to fail quickly. Instead, use mastic, butyl tape, foil tape, or other heat-approved tapes. Look for tape with the Underwriters Laboratories (UL) logo.
- Remember that insulating ducts in the basement will make the basement colder. If both the ducts and the basement walls are not insulated, consider insulating both. Water pipes and drains in unconditioned spaces could freeze and burst if the heat ducts are fully insulated because there would be no heat source to prevent the space from freezing in cold weather. However, using an electric heating tape wrap on the pipes can prevent this. Check with a professional contractor.
- Hire a professional to install both supply and return registers in the basement rooms after converting your basement to a living area.
- Be sure a well-sealed vapor barrier exists on the outside of the insulation on cooling ducts to prevent moisture condensation.
- If you have a fuel-burning furnace, stove, or other appliance or an attached garage, install a carbon monoxide (CO) monitor to alert you to harmful CO levels.
- Be sure to get professional help when doing ductwork. A qualified professional should always perform changes and repairs to a duct system.
Minimizing Energy Losses in Ducts at 3909 Dixie Farm Rd, Pearland, TX 77581
Minimizing Energy Losses in Ducts
Minimizing energy losses in ducts by seeing if the ducts are poorly sealed or insulated. That could tell you why your energy bill in high. Your air ducts are one of the most important systems in your home, and if the ducts are poorly sealed or insulated, they are likely contributing to higher energy bills.
Your home’s duct system is a branching network of tubes in the walls, floors, and ceilings; it carries the air from your home’s furnace and central air conditioner to each room. Ducts are made of sheet metal, fiberglass, or other materials.
Ducts that leak heated air into unheated spaces can add hundreds of dollars a year to your heating and cooling bills, but you can reduce that loss by sealing and insulating your ducts. Insulating ducts in unconditioned spaces is usually very cost-effective. Existing ducts may also be blocked or may require simple upgrades.
Designing and Installing New Duct Systems
In new home construction or in retrofits, proper duct system design is critical. In recent years, energy-saving designs have sought to include ducts and heating systems in the conditioned space.
Efficient and well-designed duct systems distribute air properly throughout your home without leaking to keep all rooms at a comfortable temperature. The system should provide balanced supply and return flow to maintain a neutral pressure within the house.
Even well sealed and insulated ducts will leak and lose some heat, so many new energy-efficient homes place the duct system within the conditioned space of the home. The simplest way to accomplish this is to hide the ducts in dropped ceilings and in corners of rooms. Ducts can also be located in a sealed and insulated chase extending into the attic or built into raised floors. In both of these latter cases, care must be taken during construction to prevent contractors from using the duct chases for wiring or other utilities.
In either case, actual ducts must be used — chases and floor cavities should not be used as ducts. Regardless of where they are installed, ducts should be well sealed. Although ducts can be configured in a number of ways, the “trunk and branch” and “radial” supply duct configurations are most suitable for ducts located in conditioned spaces.
Air return duct systems can be configured in two ways: each room can have a return duct that sends air back to the heating and cooling equipment or return grills can be located in central locations on each floor. For the latter case, either grills must be installed to allow air to pass out of closed rooms, or short “jumper ducts” can be installed to connect the vent in one room with the next, allowing air to flow back to the central return grilles. Door undercuts help, but they are usually not sufficient for return airflow.
You can perform a simple check for adequate return air capacity by doing the following:
- Close all exterior doors and windows
- Close all interior room doors
- Turn on the central air handler
- “Crack” interior doors one by one and observe if the door closes or further opens “on its own.” (Whether it closes or opens will depend on the direction of the air handler-driven air flow.) Rooms served by air-moved doors have restricted return air flow and need pressure relief as described above.
Maintaining and Upgrading Existing Duct Systems
Sealing your ducts to prevent leaks is even more important if the ducts are located in an unconditioned area such as an attic or vented crawlspace. If the supply ducts are leaking, heated or cooled air can be forced out of unsealed joints and lost. In addition, unconditioned air can be drawn into return ducts through unsealed joints.
Although minor duct repairs are easy to make, qualified professionals should seal and insulate ducts in unconditioned spaces to ensure the use of appropriate sealing materials.
Aside from sealing your ducts, the simplest and most effective means of maintaining your air distribution system is to ensure that furniture and other objects are not blocking the airflow through your registers, and to vacuum the registers to remove any dust buildup.
Existing duct systems often suffer from design deficiencies in the return air system, and modifications by the homeowner (or just a tendency to keep doors closed) may contribute to these problems. Any rooms with a lack of sufficient return airflow may benefit from relatively simple upgrades, such as the installation of new return-air grilles, undercutting doors for return air, or installing a jumper duct.
Some rooms may also be hard to heat and cool because of inadequate supply ducts or grilles. If this is the case, you should first examine whether the problem is the room itself: fix any problems with insulation, air leakage, or inefficient windows first. If the problem persists, you may be able to increase the size of the supply duct or add an additional duct to provide the needed airflow to the room.
Minor Duct Repair Tips for Minimizing Energy Losses in Ducts
- Check your ducts for air leaks. First, look for sections that should be joined but have separated and then look for obvious holes.
- Duct mastic is the preferred material for sealing ductwork seams and joints. It is more durable than any available tape and generally easier for a do-it-yourself installation. Its only drawback is that it will not bridge gaps over ¼ inch. Such gaps must be first bridged with web-type drywall tape, or a good quality heat approved tape.
- If you use tape to seal your ducts, avoid cloth-backed, rubber adhesive duct tape — it tends to fail quickly. Instead, use mastic, butyl tape, foil tape, or other heat-approved tapes. Look for tape with the Underwriters Laboratories (UL) logo.
- Remember that insulating ducts in the basement will make the basement colder. If both the ducts and the basement walls are not insulated, consider insulating both. Water pipes and drains in unconditioned spaces could freeze and burst if the heat ducts are fully insulated because there would be no heat source to prevent the space from freezing in cold weather. However, using an electric heating tape wrap on the pipes can prevent this. Check with a professional contractor.
- Hire a professional to install both supply and return registers in the basement rooms after converting your basement to a living area.
- Be sure a well-sealed vapor barrier exists on the outside of the insulation on cooling ducts to prevent moisture condensation.
- If you have a fuel-burning furnace, stove, or other appliance or an attached garage, install a carbon monoxide (CO) monitor to alert you to harmful CO levels.
- Be sure to get professional help when doing ductwork. A qualified professional should always perform changes and repairs to a duct system.
Minimizing Energy Losses in Ducts at 811 E 39th St, Houston, TX 77022
811 E 39th St, Houston, TX 77022
Minimizing Energy Losses in Ducts
Minimizing energy losses in ducts by seeing if the ducts are poorly sealed or insulated. That could tell you why your energy bill in high. Your air ducts are one of the most important systems in your home, and if the ducts are poorly sealed or insulated, they are likely contributing to higher energy bills.
Your home’s duct system is a branching network of tubes in the walls, floors, and ceilings; it carries the air from your home’s furnace and central air conditioner to each room. Ducts are made of sheet metal, fiberglass, or other materials.
Ducts that leak heated air into unheated spaces can add hundreds of dollars a year to your heating and cooling bills, but you can reduce that loss by sealing and insulating your ducts. Insulating ducts in unconditioned spaces is usually very cost-effective. Existing ducts may also be blocked or may require simple upgrades.
Designing and Installing New Duct Systems
In new home construction or in retrofits, proper duct system design is critical. In recent years, energy-saving designs have sought to include ducts and heating systems in the conditioned space.
Efficient and well-designed duct systems distribute air properly throughout your home without leaking to keep all rooms at a comfortable temperature. The system should provide balanced supply and return flow to maintain a neutral pressure within the house.
Even well sealed and insulated ducts will leak and lose some heat, so many new energy-efficient homes place the duct system within the conditioned space of the home. The simplest way to accomplish this is to hide the ducts in dropped ceilings and in corners of rooms. Ducts can also be located in a sealed and insulated chase extending into the attic or built into raised floors. In both of these latter cases, care must be taken during construction to prevent contractors from using the duct chases for wiring or other utilities.
In either case, actual ducts must be used — chases and floor cavities should not be used as ducts. Regardless of where they are installed, ducts should be well sealed. Although ducts can be configured in a number of ways, the “trunk and branch” and “radial” supply duct configurations are most suitable for ducts located in conditioned spaces.
Air return duct systems can be configured in two ways: each room can have a return duct that sends air back to the heating and cooling equipment or return grills can be located in central locations on each floor. For the latter case, either grills must be installed to allow air to pass out of closed rooms, or short “jumper ducts” can be installed to connect the vent in one room with the next, allowing air to flow back to the central return grilles. Door undercuts help, but they are usually not sufficient for return airflow.
You can perform a simple check for adequate return air capacity by doing the following:
- Close all exterior doors and windows
- Close all interior room doors
- Turn on the central air handler
- “Crack” interior doors one by one and observe if the door closes or further opens “on its own.” (Whether it closes or opens will depend on the direction of the air handler-driven air flow.) Rooms served by air-moved doors have restricted return air flow and need pressure relief as described above.
Maintaining and Upgrading Existing Duct Systems
Sealing your ducts to prevent leaks is even more important if the ducts are located in an unconditioned area such as an attic or vented crawlspace. If the supply ducts are leaking, heated or cooled air can be forced out of unsealed joints and lost. In addition, unconditioned air can be drawn into return ducts through unsealed joints.
Although minor duct repairs are easy to make, qualified professionals should seal and insulate ducts in unconditioned spaces to ensure the use of appropriate sealing materials.
Aside from sealing your ducts, the simplest and most effective means of maintaining your air distribution system is to ensure that furniture and other objects are not blocking the airflow through your registers, and to vacuum the registers to remove any dust buildup.
Existing duct systems often suffer from design deficiencies in the return air system, and modifications by the homeowner (or just a tendency to keep doors closed) may contribute to these problems. Any rooms with a lack of sufficient return airflow may benefit from relatively simple upgrades, such as the installation of new return-air grilles, undercutting doors for return air, or installing a jumper duct.
Some rooms may also be hard to heat and cool because of inadequate supply ducts or grilles. If this is the case, you should first examine whether the problem is the room itself: fix any problems with insulation, air leakage, or inefficient windows first. If the problem persists, you may be able to increase the size of the supply duct or add an additional duct to provide the needed airflow to the room.
Minor Duct Repair Tips for Minimizing Energy Losses in Ducts
- Check your ducts for air leaks. First, look for sections that should be joined but have separated and then look for obvious holes.
- Duct mastic is the preferred material for sealing ductwork seams and joints. It is more durable than any available tape and generally easier for a do-it-yourself installation. Its only drawback is that it will not bridge gaps over ¼ inch. Such gaps must be first bridged with web-type drywall tape, or a good quality heat approved tape.
- If you use tape to seal your ducts, avoid cloth-backed, rubber adhesive duct tape — it tends to fail quickly. Instead, use mastic, butyl tape, foil tape, or other heat-approved tapes. Look for tape with the Underwriters Laboratories (UL) logo.
- Remember that insulating ducts in the basement will make the basement colder. If both the ducts and the basement walls are not insulated, consider insulating both. Water pipes and drains in unconditioned spaces could freeze and burst if the heat ducts are fully insulated because there would be no heat source to prevent the space from freezing in cold weather. However, using an electric heating tape wrap on the pipes can prevent this. Check with a professional contractor.
- Hire a professional to install both supply and return registers in the basement rooms after converting your basement to a living area.
- Be sure a well-sealed vapor barrier exists on the outside of the insulation on cooling ducts to prevent moisture condensation.
- If you have a fuel-burning furnace, stove, or other appliance or an attached garage, install a carbon monoxide (CO) monitor to alert you to harmful CO levels.
- Be sure to get professional help when doing ductwork. A qualified professional should always perform changes and repairs to a duct system.
2021 IECC Insulation Inspection in the city of 4008 Sunflower St, Houston, TX 77051
4008 Sunflower St, Houston, TX 77051
2021 IECC Insulation Inspection
A 2021 IECC insulation inspection is a thorough assessment of insulation materials and their installation within a building or structure. The primary purpose of this inspection is to ensure that insulation is installed correctly, effectively, and in compliance with relevant building codes and standards. Here’s a more detailed overview:
Purpose of the 2021 IECC Insulation Inspection
- Energy Efficiency Verification:
- An insulation inspection helps confirm that the insulation is performing as intended. Proper insulation reduces heat transfer, contributing to energy savings and lower utility bills.
- Quality Assurance:
- Inspectors assess the quality of the insulation materials used, ensuring they meet specifications and are suitable for the specific application. This includes checking for damage, degradation, or improper installation that could compromise performance.
- Compliance with Codes and Standards:
- Building codes often specify minimum insulation levels and installation practices. An inspection verifies compliance with these regulations, which is crucial for safety and energy efficiency.
- Identification of Issues:
- The inspection can reveal problems such as gaps, voids, or compression in insulation that might hinder its effectiveness. Identifying these issues early can prevent future problems, such as higher energy costs or mold growth due to moisture accumulation.
- Moisture and Air Leakage Assessment:
- Inspections often include evaluations for air leaks and moisture issues. Proper insulation must be complemented by effective air sealing and moisture management to optimize performance and protect the building structure.
- Enhanced Comfort:
- By ensuring that insulation is installed correctly, inspectors contribute to improved thermal comfort for occupants, reducing drafts and temperature fluctuations within the space.
- Health and Safety Considerations:
- Certain insulation materials can pose health risks if not handled or installed correctly. Inspections help ensure that materials like fiberglass or spray foam are used safely and in accordance with health guidelines.
Components of an Insulation Inspection
- Visual Assessment: Inspectors visually evaluate accessible areas for visible signs of insulation integrity, including coverage, material condition, and installation quality.
- Measurement: Inspectors may measure insulation thickness and density to ensure it meets the specified R-values (thermal resistance).
- Thermal Imaging: Some inspectors use infrared cameras to identify heat loss areas, helping pinpoint insufficient insulation or air leaks.
- Moisture Testing: Tools may be employed to assess moisture levels within insulation materials, identifying potential risks of mold or decay.
Overall, insulation inspections are essential for ensuring the effectiveness, safety, and longevity of insulation systems in buildings. By identifying and addressing issues early, these inspections help optimize energy performance and enhance the overall comfort and safety of indoor environments.
32412 Gordon Side Rd, Fulshear, TX 77441 – Losses in Ducts
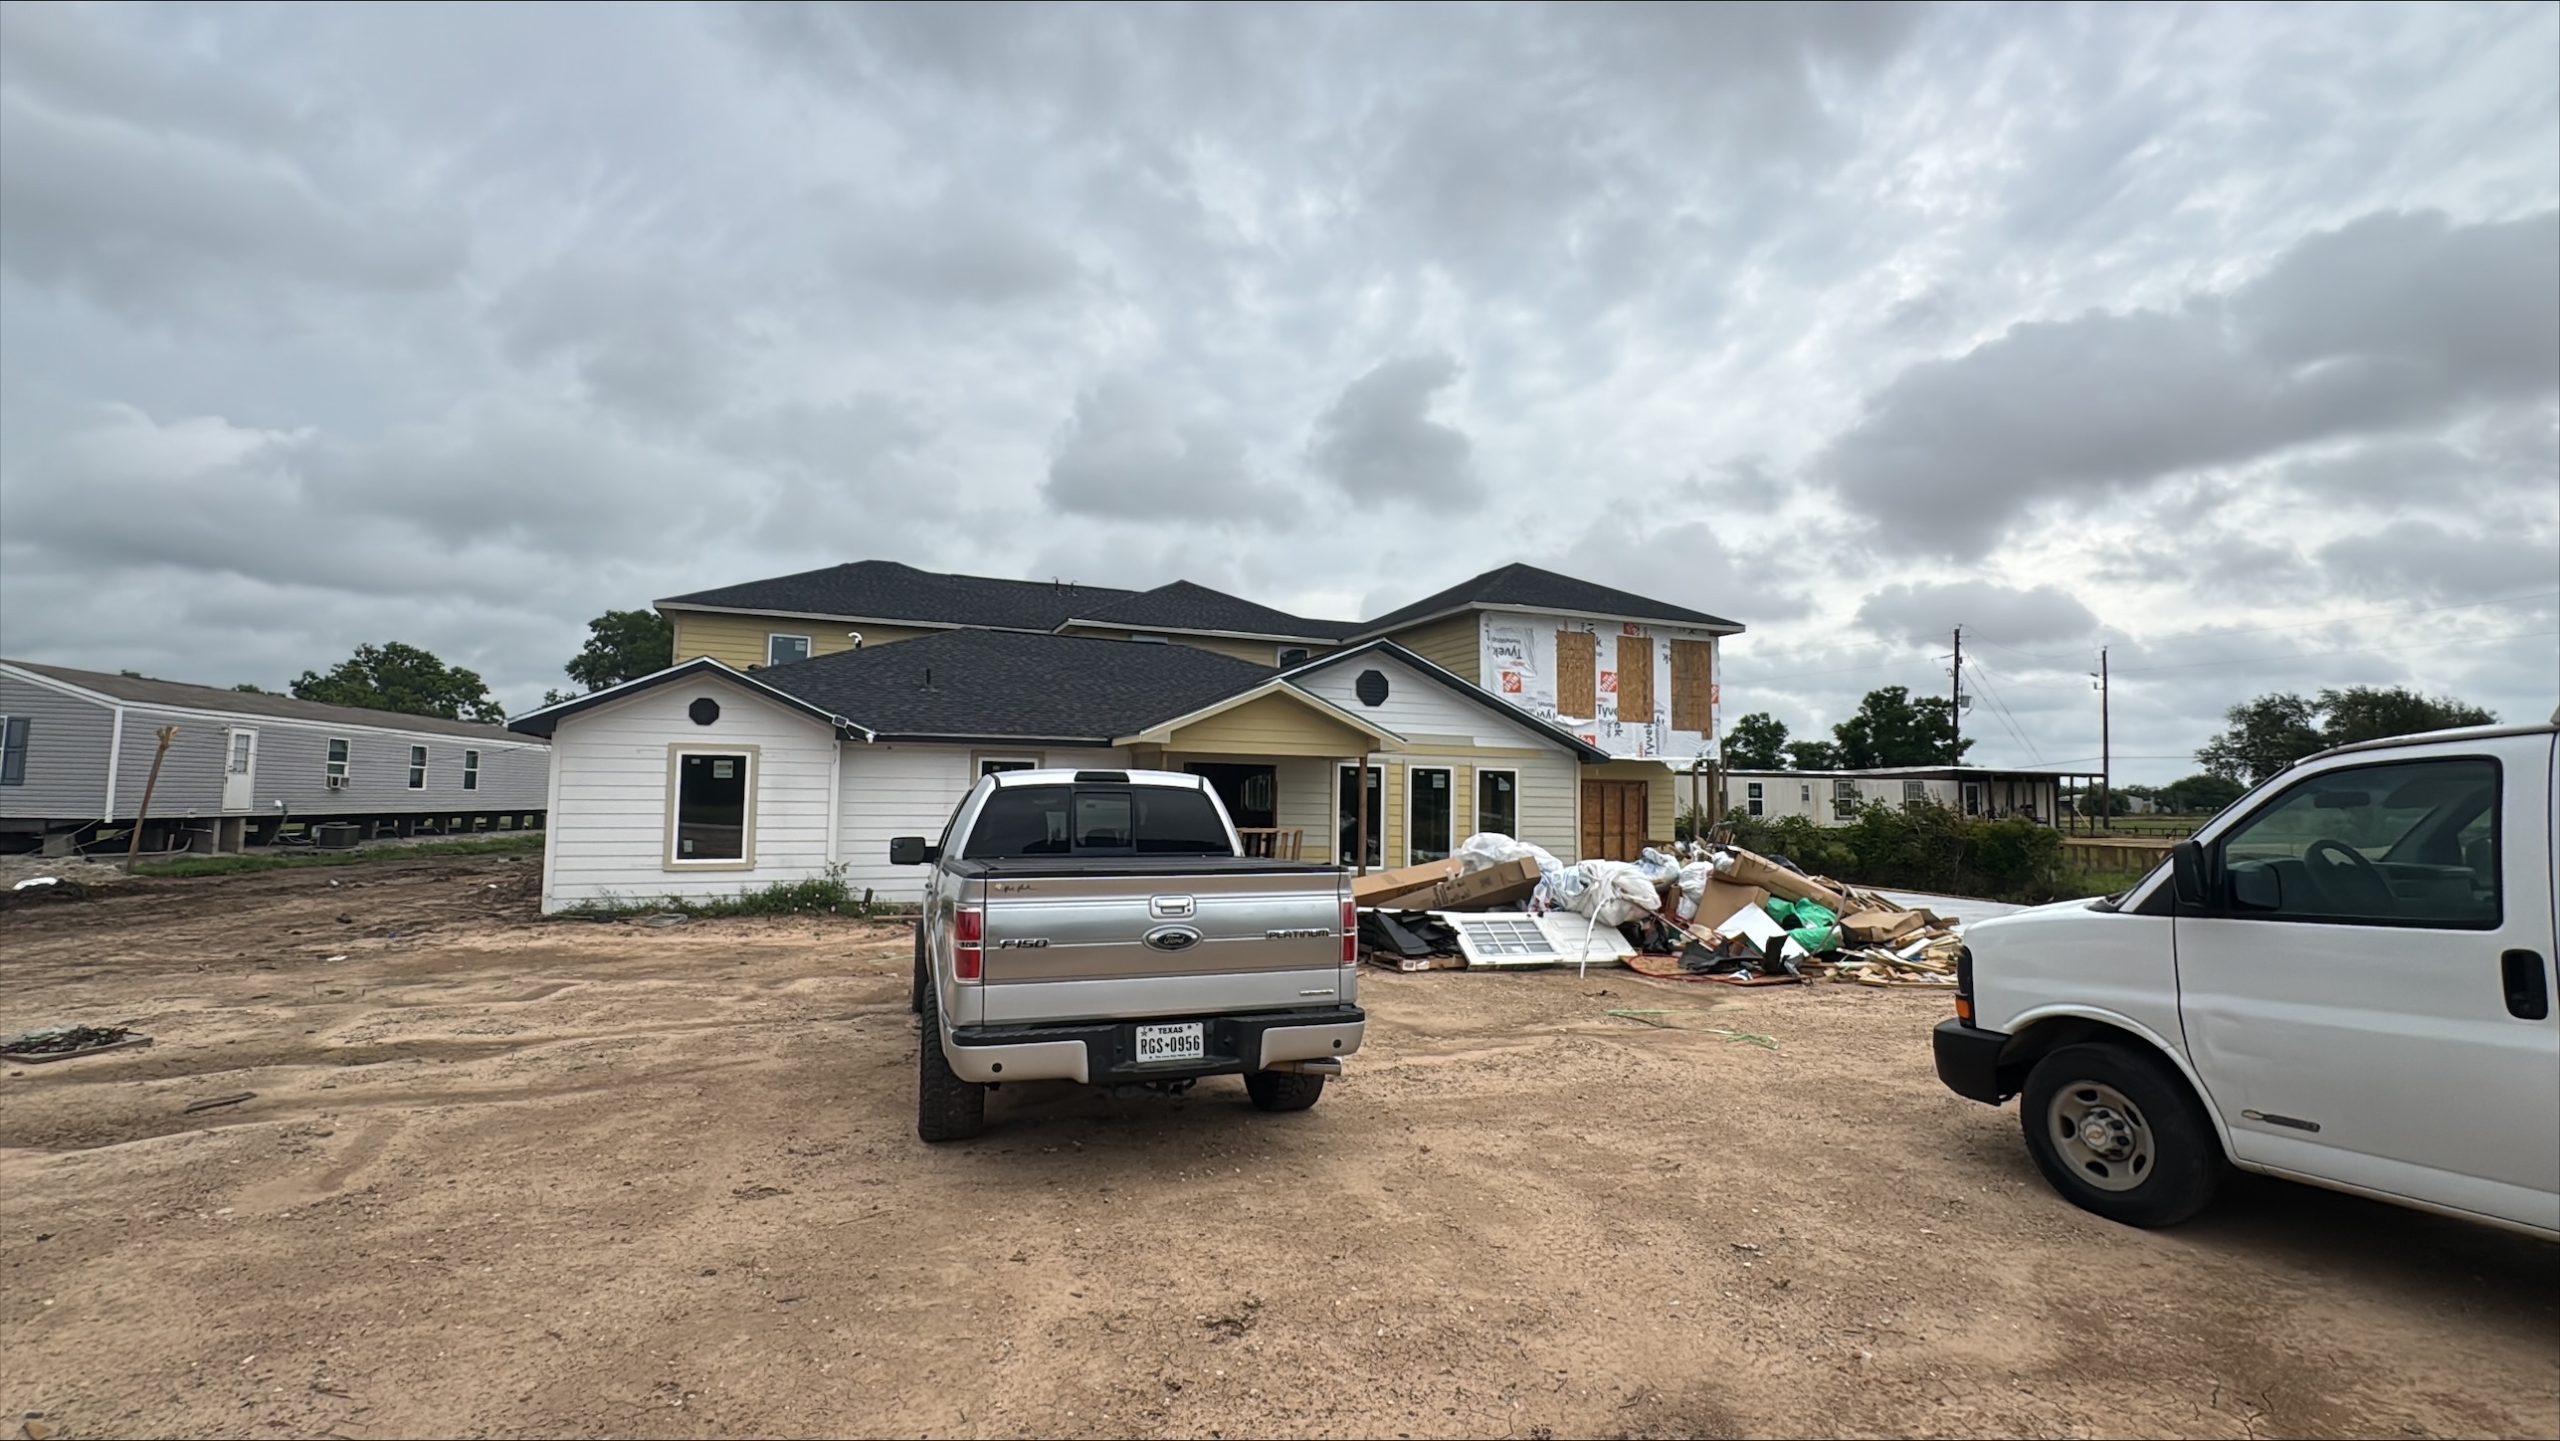
32412 Gordon Side Rd, Fulshear, TX 77441
Losses in Ducts
Minimizing energy losses in ducts is an important aspect of energy efficiency in HVAC (Heating, Ventilation, and Air Conditioning) systems. Ducts are used to distribute conditioned air throughout a building, and any energy losses during the distribution process can lead to increased energy consumption and reduced system performance. Here are some key measures to minimize energy losses in ducts:
1. Proper Duct Design: Ensure that ductwork is properly designed to minimize pressure losses. Use appropriately sized ducts, minimize the number of bends and transitions, and maintain a balanced airflow distribution. Consult industry guidelines or work with an HVAC professional to design an efficient duct system.
2. Sealing: Duct leakage is a major source of energy losses. Seal all joints, connections, and seams in the ductwork using approved sealing materials such as mastic or metal tape. Pay particular attention to connections at registers, grilles, and air-handling units.
3. Insulation: Insulate ducts that run through unconditioned spaces, such as attics, crawlspaces, or basements. Insulation helps to prevent heat transfer between the ductwork and the surrounding environment, reducing energy losses and improving system efficiency.
4. Duct Material: Consider using insulated ducts with low thermal conductivity. Insulated ducts minimize heat transfer through the duct walls, helping to maintain the desired temperature of the conditioned air as it travels through the system.
5. Avoiding Overlong Duct Runs: Minimize the length of duct runs as much as possible. Longer ducts result in increased friction losses, which can reduce airflow and energy efficiency. Optimize the layout and location of HVAC equipment to keep duct runs as short and direct as feasible.
6. Balancing and Adjusting Dampers: Balancing the airflow within the duct system ensures that each room receives the appropriate amount of conditioned air. Adjust dampers at branch points and in individual ducts to balance the airflow and avoid over-pressurizing or under-pressurizing certain areas.
7. Regular Maintenance: Conduct regular inspections of the ductwork to check for leaks, obstructions, or damage. Clean the ducts periodically to remove dust, debris, or any substances that could impede airflow.
8. Air Filters: Install high-quality air filters and regularly replace them according to the manufacturer’s recommendations. Clean air filters help maintain optimal airflow, reducing pressure drops and energy losses.
By implementing these measures, you can significantly minimize energy losses in ducts, improve the overall efficiency of your HVAC system, and reduce energy consumption. Consulting with a professional HVAC contractor or engineer can provide valuable insights specific to your building’s requirements and help optimize energy efficiency.
https://homereadyinspections.com/builders-hvac/
6730 Kittridge St, Houston, TX 77028 – Losses in Ducts

6730 Kittridge St, Houston, TX 77028
Losses in Ducts
Minimizing energy losses in ducts is an important aspect of energy efficiency in HVAC (Heating, Ventilation, and Air Conditioning) systems. Ducts are used to distribute conditioned air throughout a building, and any energy losses during the distribution process can lead to increased energy consumption and reduced system performance. Here are some key measures to minimize energy losses in ducts:
1. Proper Duct Design: Ensure that ductwork is properly designed to minimize pressure losses. Use appropriately sized ducts, minimize the number of bends and transitions, and maintain a balanced airflow distribution. Consult industry guidelines or work with an HVAC professional to design an efficient duct system.
2. Sealing: Duct leakage is a major source of energy losses. Seal all joints, connections, and seams in the ductwork using approved sealing materials such as mastic or metal tape. Pay particular attention to connections at registers, grilles, and air-handling units.
3. Insulation: Insulate ducts that run through unconditioned spaces, such as attics, crawlspaces, or basements. Insulation helps to prevent heat transfer between the ductwork and the surrounding environment, reducing energy losses and improving system efficiency.
4. Duct Material: Consider using insulated ducts with low thermal conductivity. Insulated ducts minimize heat transfer through the duct walls, helping to maintain the desired temperature of the conditioned air as it travels through the system.
5. Avoiding Overlong Duct Runs: Minimize the length of duct runs as much as possible. Longer ducts result in increased friction losses, which can reduce airflow and energy efficiency. Optimize the layout and location of HVAC equipment to keep duct runs as short and direct as feasible.
6. Balancing and Adjusting Dampers: Balancing the airflow within the duct system ensures that each room receives the appropriate amount of conditioned air. Adjust dampers at branch points and in individual ducts to balance the airflow and avoid over-pressurizing or under-pressurizing certain areas.
7. Regular Maintenance: Conduct regular inspections of the ductwork to check for leaks, obstructions, or damage. Clean the ducts periodically to remove dust, debris, or any substances that could impede airflow.
8. Air Filters: Install high-quality air filters and regularly replace them according to the manufacturer’s recommendations. Clean air filters help maintain optimal airflow, reducing pressure drops and energy losses.
By implementing these measures, you can significantly minimize energy losses in ducts, improve the overall efficiency of your HVAC system, and reduce energy consumption. Consulting with a professional HVAC contractor or engineer can provide valuable insights specific to your building’s requirements and help optimize energy efficiency.
https://homereadyinspections.com/builders-hvac/
Minimizing Energy Losses in Ducts at 8311 Venus St, Houston, TX 77088
8311 Venus St, Houston, TX 77088
Minimizing Energy Losses in Ducts
Minimizing energy losses in ducts by seeing if the ducts are poorly sealed or insulated. That could tell you why your energy bill in high. Your air ducts are one of the most important systems in your home, and if the ducts are poorly sealed or insulated, they are likely contributing to higher energy bills.
Your home’s duct system is a branching network of tubes in the walls, floors, and ceilings; it carries the air from your home’s furnace and central air conditioner to each room. Ducts are made of sheet metal, fiberglass, or other materials.
Ducts that leak heated air into unheated spaces can add hundreds of dollars a year to your heating and cooling bills, but you can reduce that loss by sealing and insulating your ducts. Insulating ducts in unconditioned spaces is usually very cost-effective. Existing ducts may also be blocked or may require simple upgrades.
Designing and Installing New Duct Systems
In new home construction or in retrofits, proper duct system design is critical. In recent years, energy-saving designs have sought to include ducts and heating systems in the conditioned space.
Efficient and well-designed duct systems distribute air properly throughout your home without leaking to keep all rooms at a comfortable temperature. The system should provide balanced supply and return flow to maintain a neutral pressure within the house.
Even well sealed and insulated ducts will leak and lose some heat, so many new energy-efficient homes place the duct system within the conditioned space of the home. The simplest way to accomplish this is to hide the ducts in dropped ceilings and in corners of rooms. Ducts can also be located in a sealed and insulated chase extending into the attic or built into raised floors. In both of these latter cases, care must be taken during construction to prevent contractors from using the duct chases for wiring or other utilities.
In either case, actual ducts must be used — chases and floor cavities should not be used as ducts. Regardless of where they are installed, ducts should be well sealed. Although ducts can be configured in a number of ways, the “trunk and branch” and “radial” supply duct configurations are most suitable for ducts located in conditioned spaces.
Air return duct systems can be configured in two ways: each room can have a return duct that sends air back to the heating and cooling equipment or return grills can be located in central locations on each floor. For the latter case, either grills must be installed to allow air to pass out of closed rooms, or short “jumper ducts” can be installed to connect the vent in one room with the next, allowing air to flow back to the central return grilles. Door undercuts help, but they are usually not sufficient for return airflow.
You can perform a simple check for adequate return air capacity by doing the following:
- Close all exterior doors and windows
- Close all interior room doors
- Turn on the central air handler
- “Crack” interior doors one by one and observe if the door closes or further opens “on its own.” (Whether it closes or opens will depend on the direction of the air handler-driven air flow.) Rooms served by air-moved doors have restricted return air flow and need pressure relief as described above.
Maintaining and Upgrading Existing Duct Systems
Sealing your ducts to prevent leaks is even more important if the ducts are located in an unconditioned area such as an attic or vented crawlspace. If the supply ducts are leaking, heated or cooled air can be forced out of unsealed joints and lost. In addition, unconditioned air can be drawn into return ducts through unsealed joints.
Although minor duct repairs are easy to make, qualified professionals should seal and insulate ducts in unconditioned spaces to ensure the use of appropriate sealing materials.
Aside from sealing your ducts, the simplest and most effective means of maintaining your air distribution system is to ensure that furniture and other objects are not blocking the airflow through your registers, and to vacuum the registers to remove any dust buildup.
Existing duct systems often suffer from design deficiencies in the return air system, and modifications by the homeowner (or just a tendency to keep doors closed) may contribute to these problems. Any rooms with a lack of sufficient return airflow may benefit from relatively simple upgrades, such as the installation of new return-air grilles, undercutting doors for return air, or installing a jumper duct.
Some rooms may also be hard to heat and cool because of inadequate supply ducts or grilles. If this is the case, you should first examine whether the problem is the room itself: fix any problems with insulation, air leakage, or inefficient windows first. If the problem persists, you may be able to increase the size of the supply duct or add an additional duct to provide the needed airflow to the room.
Minor Duct Repair Tips for Minimizing Energy Losses in Ducts
- Check your ducts for air leaks. First, look for sections that should be joined but have separated and then look for obvious holes.
- Duct mastic is the preferred material for sealing ductwork seams and joints. It is more durable than any available tape and generally easier for a do-it-yourself installation. Its only drawback is that it will not bridge gaps over ¼ inch. Such gaps must be first bridged with web-type drywall tape, or a good quality heat approved tape.
- If you use tape to seal your ducts, avoid cloth-backed, rubber adhesive duct tape — it tends to fail quickly. Instead, use mastic, butyl tape, foil tape, or other heat-approved tapes. Look for tape with the Underwriters Laboratories (UL) logo.
- Remember that insulating ducts in the basement will make the basement colder. If both the ducts and the basement walls are not insulated, consider insulating both. Water pipes and drains in unconditioned spaces could freeze and burst if the heat ducts are fully insulated because there would be no heat source to prevent the space from freezing in cold weather. However, using an electric heating tape wrap on the pipes can prevent this. Check with a professional contractor.
- Hire a professional to install both supply and return registers in the basement rooms after converting your basement to a living area.
- Be sure a well-sealed vapor barrier exists on the outside of the insulation on cooling ducts to prevent moisture condensation.
- If you have a fuel-burning furnace, stove, or other appliance or an attached garage, install a carbon monoxide (CO) monitor to alert you to harmful CO levels.
- Be sure to get professional help when doing ductwork. A qualified professional should always perform changes and repairs to a duct system.
How Blower Doors Work – 6727 Utah St, Houston, TX 77091
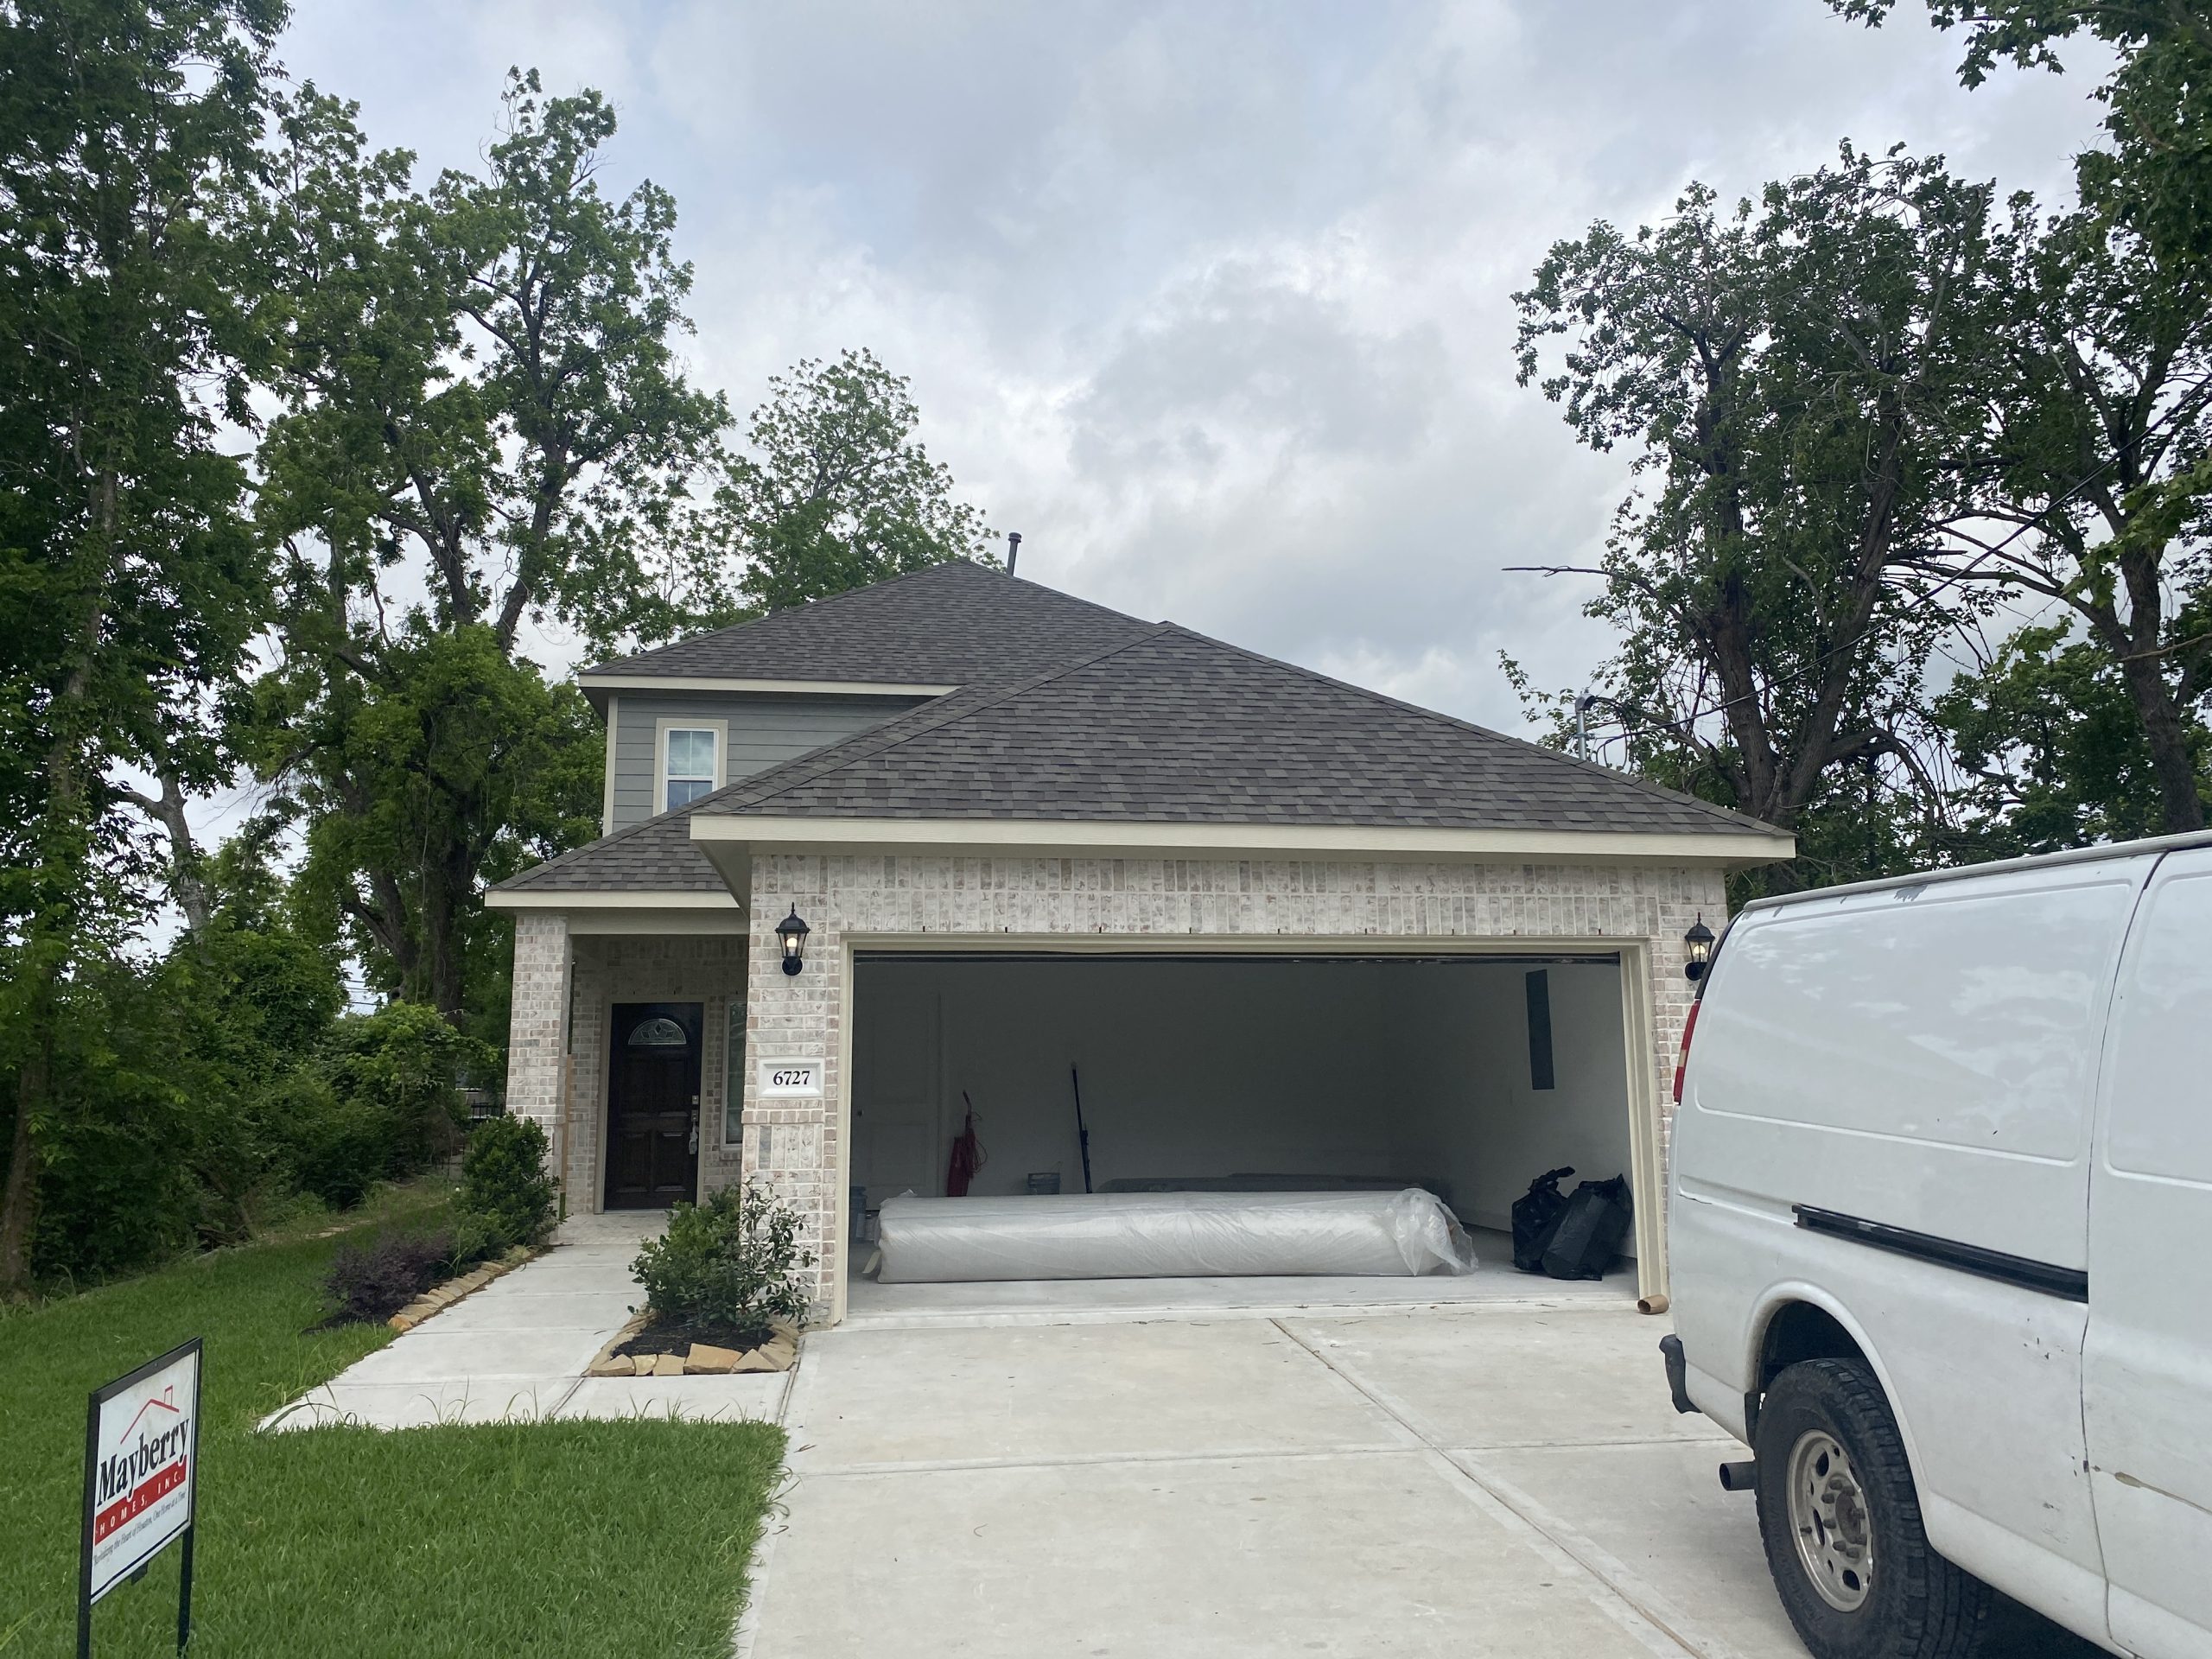
6727 Utah St, Houston, TX 77091
How Blower Doors Work – 6727 Utah St, Houston, TX 77091
Third-party Energy Testing
Your air ducts are one of the most important systems in your home, and if the ducts are poorly sealed or insulated they are likely contributing to higher energy bills.
Blower Doors: What Are They and How Do They Work?
A blower door is a device used in energy testing to measure a building’s airtightness. It consists of a powerful fan mounted on a temporary frame that fits into a doorway or an exterior opening. During a blower door test, the fan creates a pressure difference between the inside and outside of the building. This pressure difference allows air leakage points to become apparent and measurable. The test helps identify areas of air infiltration or exfiltration, which can affect energy efficiency and indoor comfort.
The blower door test involves setting up the device, measuring the baseline pressure, and then either depressurizing or pressurizing the building using the fan. While the fan is running, the airflow rate is measured using instruments like a manometer or pressure gauge. This airflow measurement quantifies the amount of air leakage in the building. Smoke pencils or thermal imaging cameras can be used to locate specific air leakage points.
The blower door test can be conducted in both depressurization and pressurization modes, allowing for a comprehensive assessment of air leakage locations. Once the test is complete, the data is analyzed to determine the building’s airtightness and identify areas that need improvement. The results can be used to guide air sealing measures and improve energy efficiency.
Blower door tests are crucial in identifying air leakage points, reducing energy loss, improving indoor air quality, and enhancing the overall performance and comfort of a building.
Home Inspection Atascocita | Home Ready Inspections | Houston TX
Minimizing Energy Losses in Ducts at 4407 Langtry Ln, Houston, TX 77041
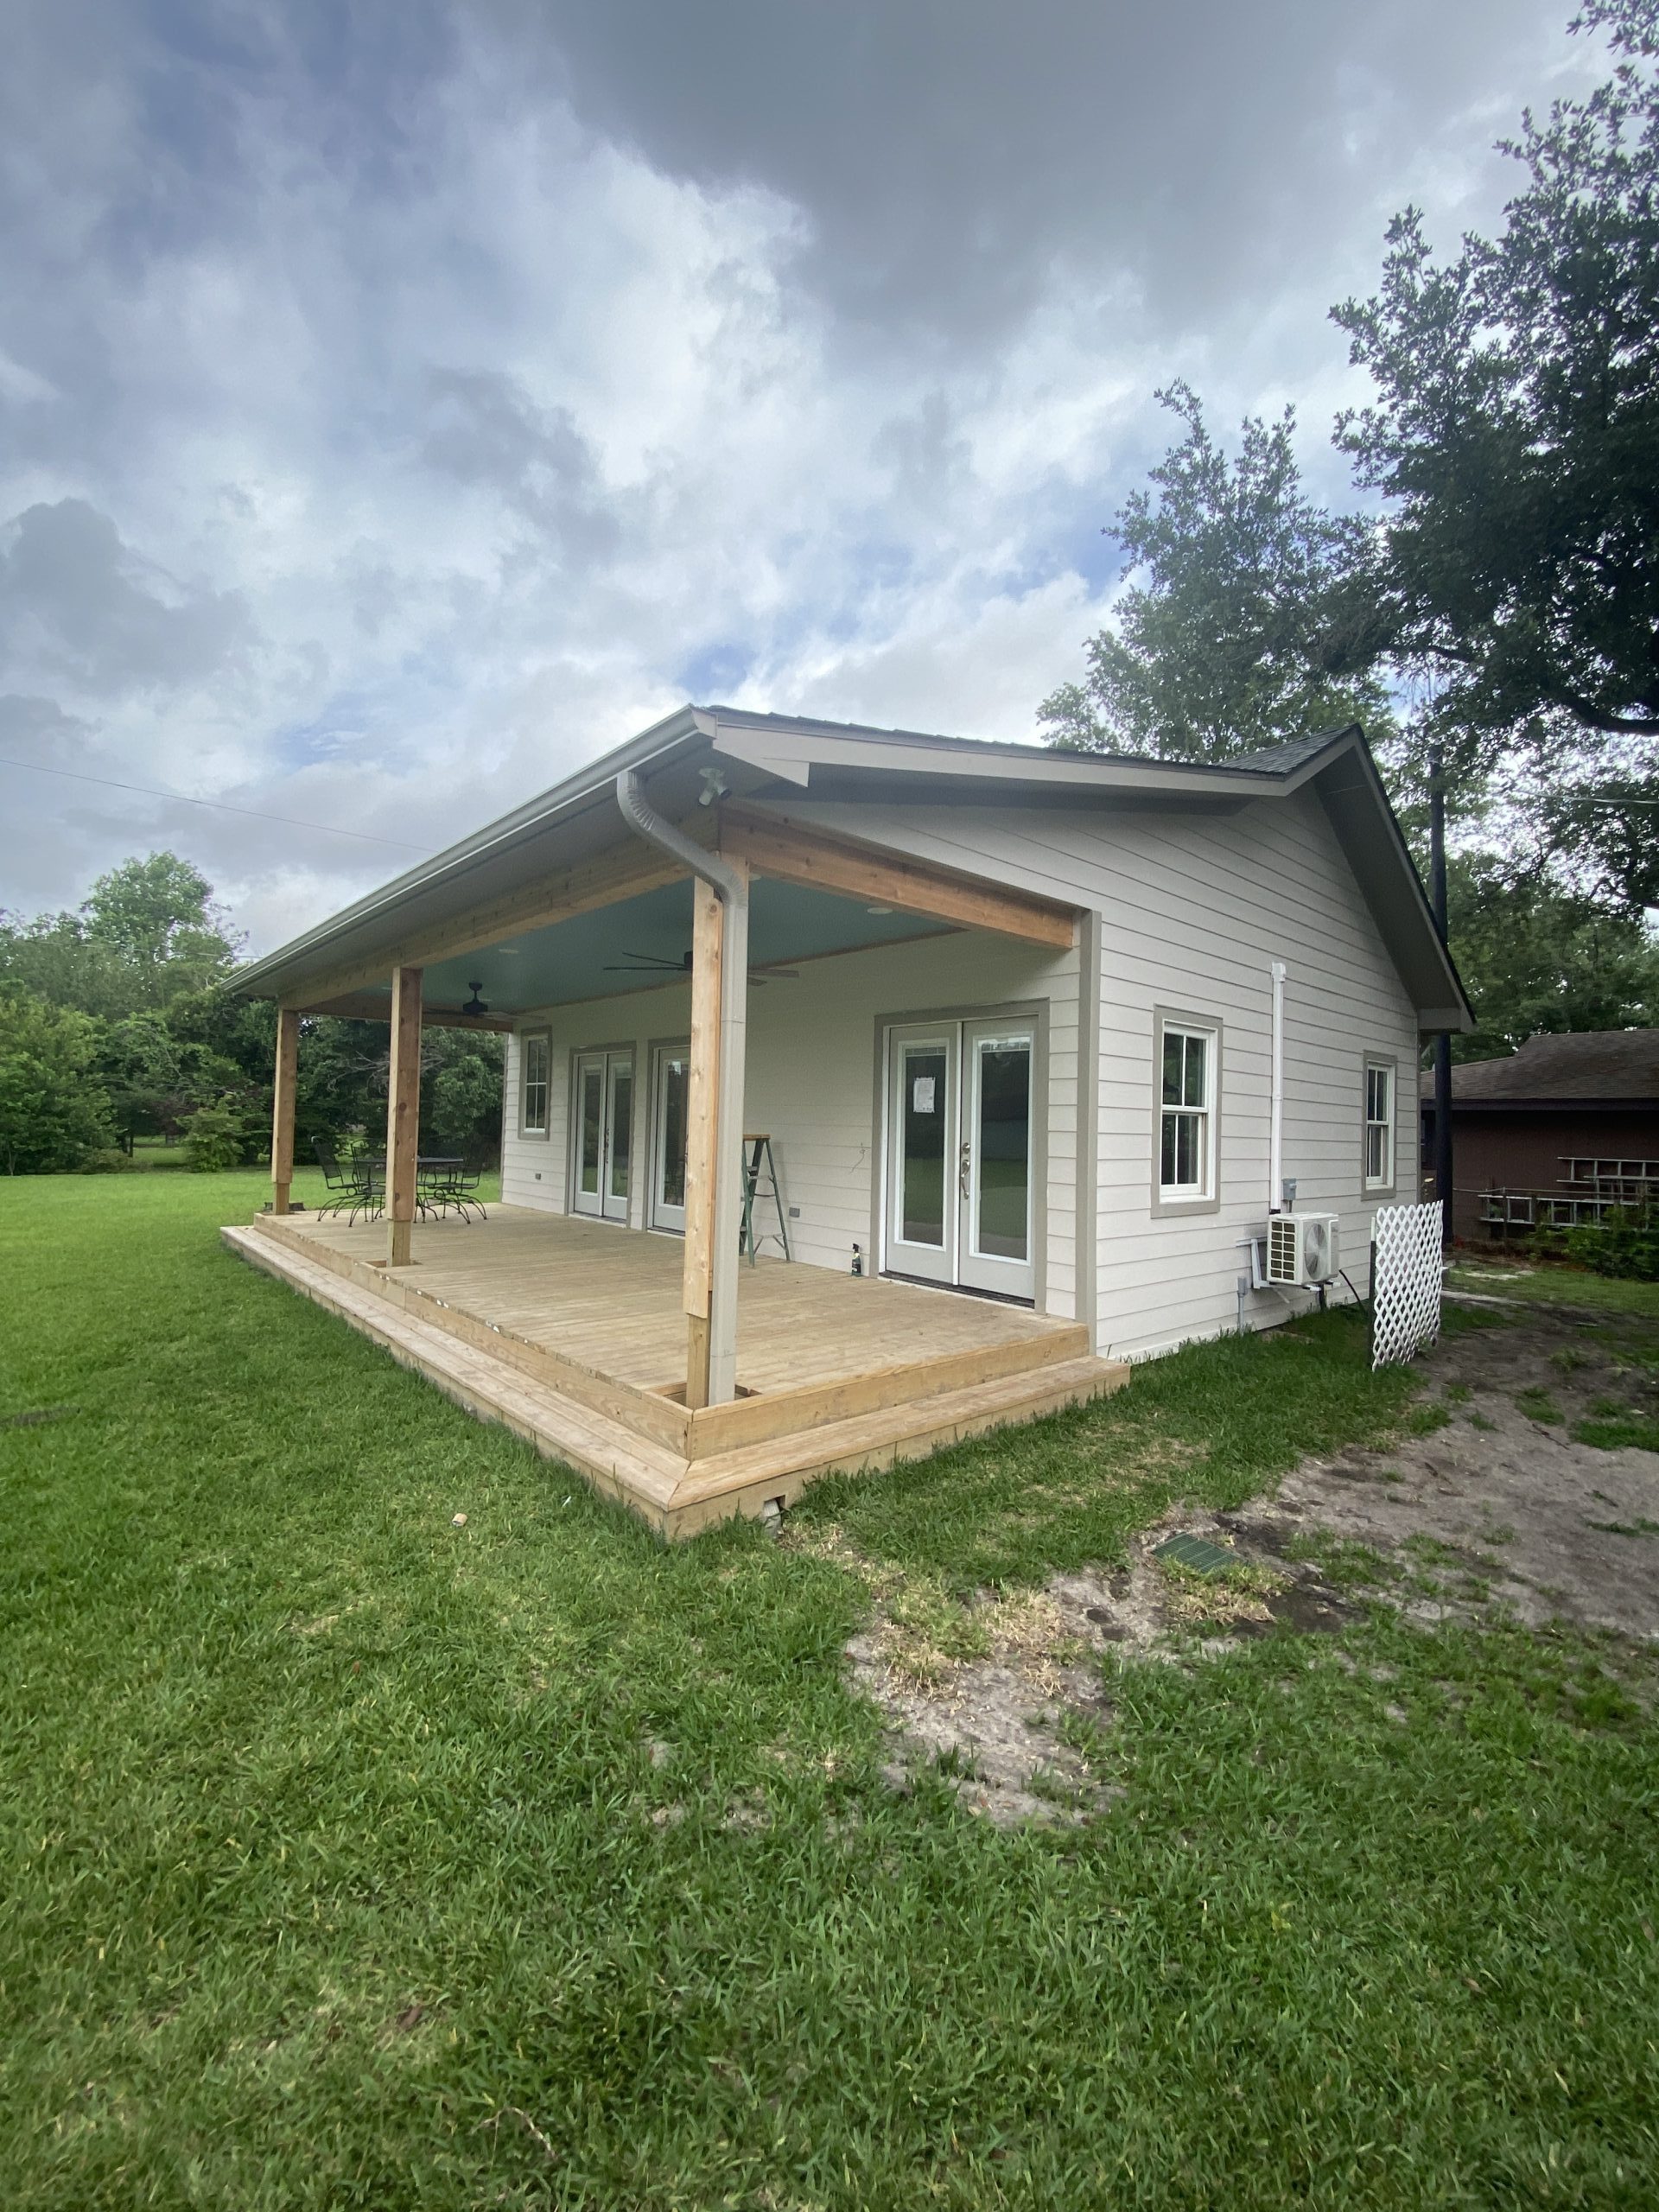
4407 Langtry Ln, Houston, TX 77041
Minimizing Energy Losses in Ducts
Minimizing energy losses in ducts by seeing if the ducts are poorly sealed or insulated. That could tell you why your energy bill in high. Your air ducts are one of the most important systems in your home, and if the ducts are poorly sealed or insulated, they are likely contributing to higher energy bills.
Your home’s duct system is a branching network of tubes in the walls, floors, and ceilings; it carries the air from your home’s furnace and central air conditioner to each room. Ducts are made of sheet metal, fiberglass, or other materials.
Ducts that leak heated air into unheated spaces can add hundreds of dollars a year to your heating and cooling bills, but you can reduce that loss by sealing and insulating your ducts. Insulating ducts in unconditioned spaces is usually very cost-effective. Existing ducts may also be blocked or may require simple upgrades.
Designing and Installing New Duct Systems
In new home construction or in retrofits, proper duct system design is critical. In recent years, energy-saving designs have sought to include ducts and heating systems in the conditioned space.
Efficient and well-designed duct systems distribute air properly throughout your home without leaking to keep all rooms at a comfortable temperature. The system should provide balanced supply and return flow to maintain a neutral pressure within the house.
Even well sealed and insulated ducts will leak and lose some heat, so many new energy-efficient homes place the duct system within the conditioned space of the home. The simplest way to accomplish this is to hide the ducts in dropped ceilings and in corners of rooms. Ducts can also be located in a sealed and insulated chase extending into the attic or built into raised floors. In both of these latter cases, care must be taken during construction to prevent contractors from using the duct chases for wiring or other utilities.
In either case, actual ducts must be used — chases and floor cavities should not be used as ducts. Regardless of where they are installed, ducts should be well sealed. Although ducts can be configured in a number of ways, the “trunk and branch” and “radial” supply duct configurations are most suitable for ducts located in conditioned spaces.
Air return duct systems can be configured in two ways: each room can have a return duct that sends air back to the heating and cooling equipment or return grills can be located in central locations on each floor. For the latter case, either grills must be installed to allow air to pass out of closed rooms, or short “jumper ducts” can be installed to connect the vent in one room with the next, allowing air to flow back to the central return grilles. Door undercuts help, but they are usually not sufficient for return airflow.
You can perform a simple check for adequate return air capacity by doing the following:
- Close all exterior doors and windows
- Close all interior room doors
- Turn on the central air handler
- “Crack” interior doors one by one and observe if the door closes or further opens “on its own.” (Whether it closes or opens will depend on the direction of the air handler-driven air flow.) Rooms served by air-moved doors have restricted return air flow and need pressure relief as described above.
Maintaining and Upgrading Existing Duct Systems
Sealing your ducts to prevent leaks is even more important if the ducts are located in an unconditioned area such as an attic or vented crawlspace. If the supply ducts are leaking, heated or cooled air can be forced out of unsealed joints and lost. In addition, unconditioned air can be drawn into return ducts through unsealed joints.
Although minor duct repairs are easy to make, qualified professionals should seal and insulate ducts in unconditioned spaces to ensure the use of appropriate sealing materials.
Aside from sealing your ducts, the simplest and most effective means of maintaining your air distribution system is to ensure that furniture and other objects are not blocking the airflow through your registers, and to vacuum the registers to remove any dust buildup.
Existing duct systems often suffer from design deficiencies in the return air system, and modifications by the homeowner (or just a tendency to keep doors closed) may contribute to these problems. Any rooms with a lack of sufficient return airflow may benefit from relatively simple upgrades, such as the installation of new return-air grilles, undercutting doors for return air, or installing a jumper duct.
Some rooms may also be hard to heat and cool because of inadequate supply ducts or grilles. If this is the case, you should first examine whether the problem is the room itself: fix any problems with insulation, air leakage, or inefficient windows first. If the problem persists, you may be able to increase the size of the supply duct or add an additional duct to provide the needed airflow to the room.
Minor Duct Repair Tips for Minimizing Energy Losses in Ducts
- Check your ducts for air leaks. First, look for sections that should be joined but have separated and then look for obvious holes.
- Duct mastic is the preferred material for sealing ductwork seams and joints. It is more durable than any available tape and generally easier for a do-it-yourself installation. Its only drawback is that it will not bridge gaps over ¼ inch. Such gaps must be first bridged with web-type drywall tape, or a good quality heat approved tape.
- If you use tape to seal your ducts, avoid cloth-backed, rubber adhesive duct tape — it tends to fail quickly. Instead, use mastic, butyl tape, foil tape, or other heat-approved tapes. Look for tape with the Underwriters Laboratories (UL) logo.
- Remember that insulating ducts in the basement will make the basement colder. If both the ducts and the basement walls are not insulated, consider insulating both. Water pipes and drains in unconditioned spaces could freeze and burst if the heat ducts are fully insulated because there would be no heat source to prevent the space from freezing in cold weather. However, using an electric heating tape wrap on the pipes can prevent this. Check with a professional contractor.
- Hire a professional to install both supply and return registers in the basement rooms after converting your basement to a living area.
- Be sure a well-sealed vapor barrier exists on the outside of the insulation on cooling ducts to prevent moisture condensation.
- If you have a fuel-burning furnace, stove, or other appliance or an attached garage, install a carbon monoxide (CO) monitor to alert you to harmful CO levels.
- Be sure to get professional help when doing ductwork. A qualified professional should always perform changes and repairs to a duct system.
4610 Providence St, Houston, TX 77020 – Losses in Ducts
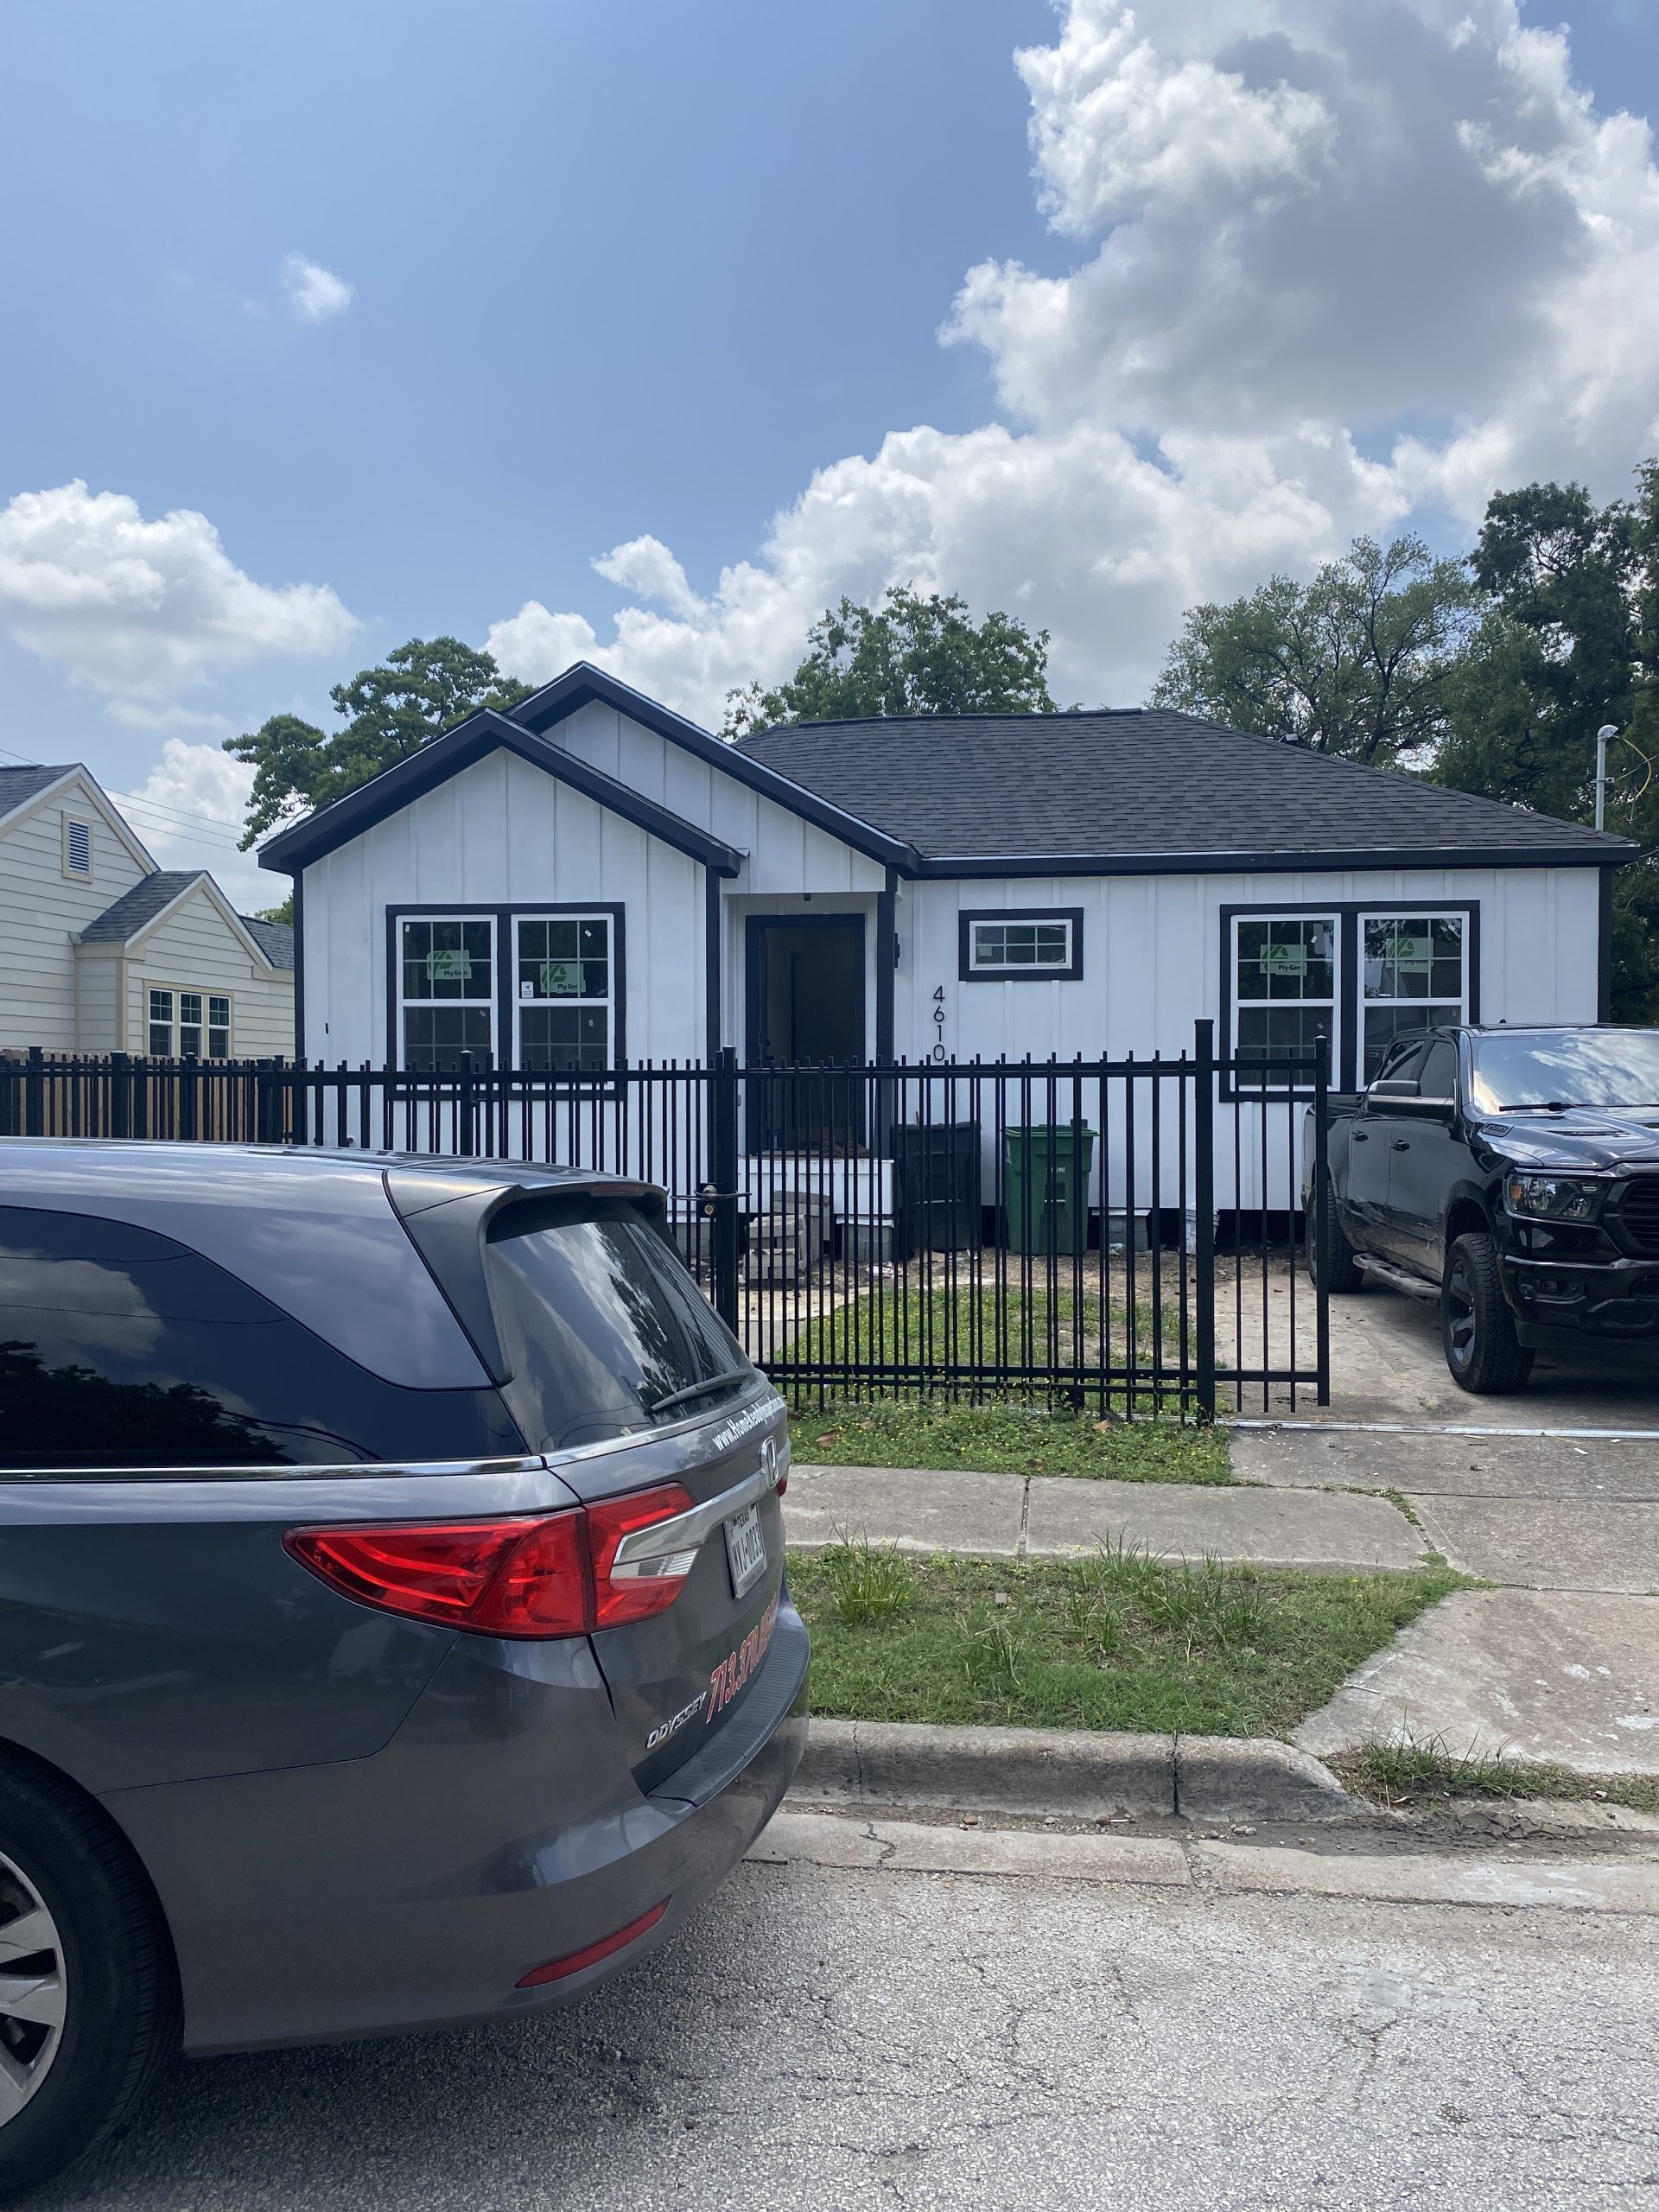
4610 Providence St, Houston, TX 77020
4610 Providence St, Houston, TX 77020 – Losses in Ducts
Minimizing energy losses in ducts is an important aspect of energy efficiency in HVAC (Heating, Ventilation, and Air Conditioning) systems. Ducts are used to distribute conditioned air throughout a building, and any energy losses during the distribution process can lead to increased energy consumption and reduced system performance. Here are some key measures to minimize energy losses in ducts:
1. Proper Duct Design: Ensure that ductwork is properly designed to minimize pressure losses. Use appropriately sized ducts, minimize the number of bends and transitions, and maintain a balanced airflow distribution. Consult industry guidelines or work with an HVAC professional to design an efficient duct system.
2. Sealing: Duct leakage is a major source of energy losses. Seal all joints, connections, and seams in the ductwork using approved sealing materials such as mastic or metal tape. Pay particular attention to connections at registers, grilles, and air-handling units.
3. Insulation: Insulate ducts that run through unconditioned spaces, such as attics, crawlspaces, or basements. Insulation helps to prevent heat transfer between the ductwork and the surrounding environment, reducing energy losses and improving system efficiency.
4. Duct Material: Consider using insulated ducts with low thermal conductivity. Insulated ducts minimize heat transfer through the duct walls, helping to maintain the desired temperature of the conditioned air as it travels through the system.
5. Avoiding Overlong Duct Runs: Minimize the length of duct runs as much as possible. Longer ducts result in increased friction losses, which can reduce airflow and energy efficiency. Optimize the layout and location of HVAC equipment to keep duct runs as short and direct as feasible.
6. Balancing and Adjusting Dampers: Balancing the airflow within the duct system ensures that each room receives the appropriate amount of conditioned air. Adjust dampers at branch points and in individual ducts to balance the airflow and avoid over-pressurizing or under-pressurizing certain areas.
7. Regular Maintenance: Conduct regular inspections of the ductwork to check for leaks, obstructions, or damage. Clean the ducts periodically to remove dust, debris, or any substances that could impede airflow.
8. Air Filters: Install high-quality air filters and regularly replace them according to the manufacturer’s recommendations. Clean air filters help maintain optimal airflow, reducing pressure drops and energy losses.
By implementing these measures, you can significantly minimize energy losses in ducts, improve the overall efficiency of your HVAC system, and reduce energy consumption. Consulting with a professional HVAC contractor or engineer can provide valuable insights specific to your building’s requirements and help optimize energy efficiency.
https://homereadyinspections.com/builders-hvac/
How Blower Doors Work – 5602 Dumfries Dr, Houston, TX 77096
5602 Dumfries Dr, Houston, TX 77096
How Blower Doors Work – 5602 Dumfries Dr, Houston, TX 77096
Third-party Energy Testing
Your air ducts are one of the most important systems in your home, and if the ducts are poorly sealed or insulated they are likely contributing to higher energy bills.
Blower Doors: What Are They and How Do They Work?
A blower door is a device used in energy testing to measure a building’s airtightness. It consists of a powerful fan mounted on a temporary frame that fits into a doorway or an exterior opening. During a blower door test, the fan creates a pressure difference between the inside and outside of the building. This pressure difference allows air leakage points to become apparent and measurable. The test helps identify areas of air infiltration or exfiltration, which can affect energy efficiency and indoor comfort.
The blower door test involves setting up the device, measuring the baseline pressure, and then either depressurizing or pressurizing the building using the fan. While the fan is running, the airflow rate is measured using instruments like a manometer or pressure gauge. This airflow measurement quantifies the amount of air leakage in the building. Smoke pencils or thermal imaging cameras can be used to locate specific air leakage points.
The blower door test can be conducted in both depressurization and pressurization modes, allowing for a comprehensive assessment of air leakage locations. Once the test is complete, the data is analyzed to determine the building’s airtightness and identify areas that need improvement. The results can be used to guide air sealing measures and improve energy efficiency.
Blower door tests are crucial in identifying air leakage points, reducing energy loss, improving indoor air quality, and enhancing the overall performance and comfort of a building.
Home Inspection Atascocita | Home Ready Inspections | Houston TX