
2518 33rd Ave N, Texas City, TX 77590 – Minimizing Energy Losses in Ducts
2518 33rd Ave N, Texas City, TX 77590 – Minimizing Energy Losses in Ducts
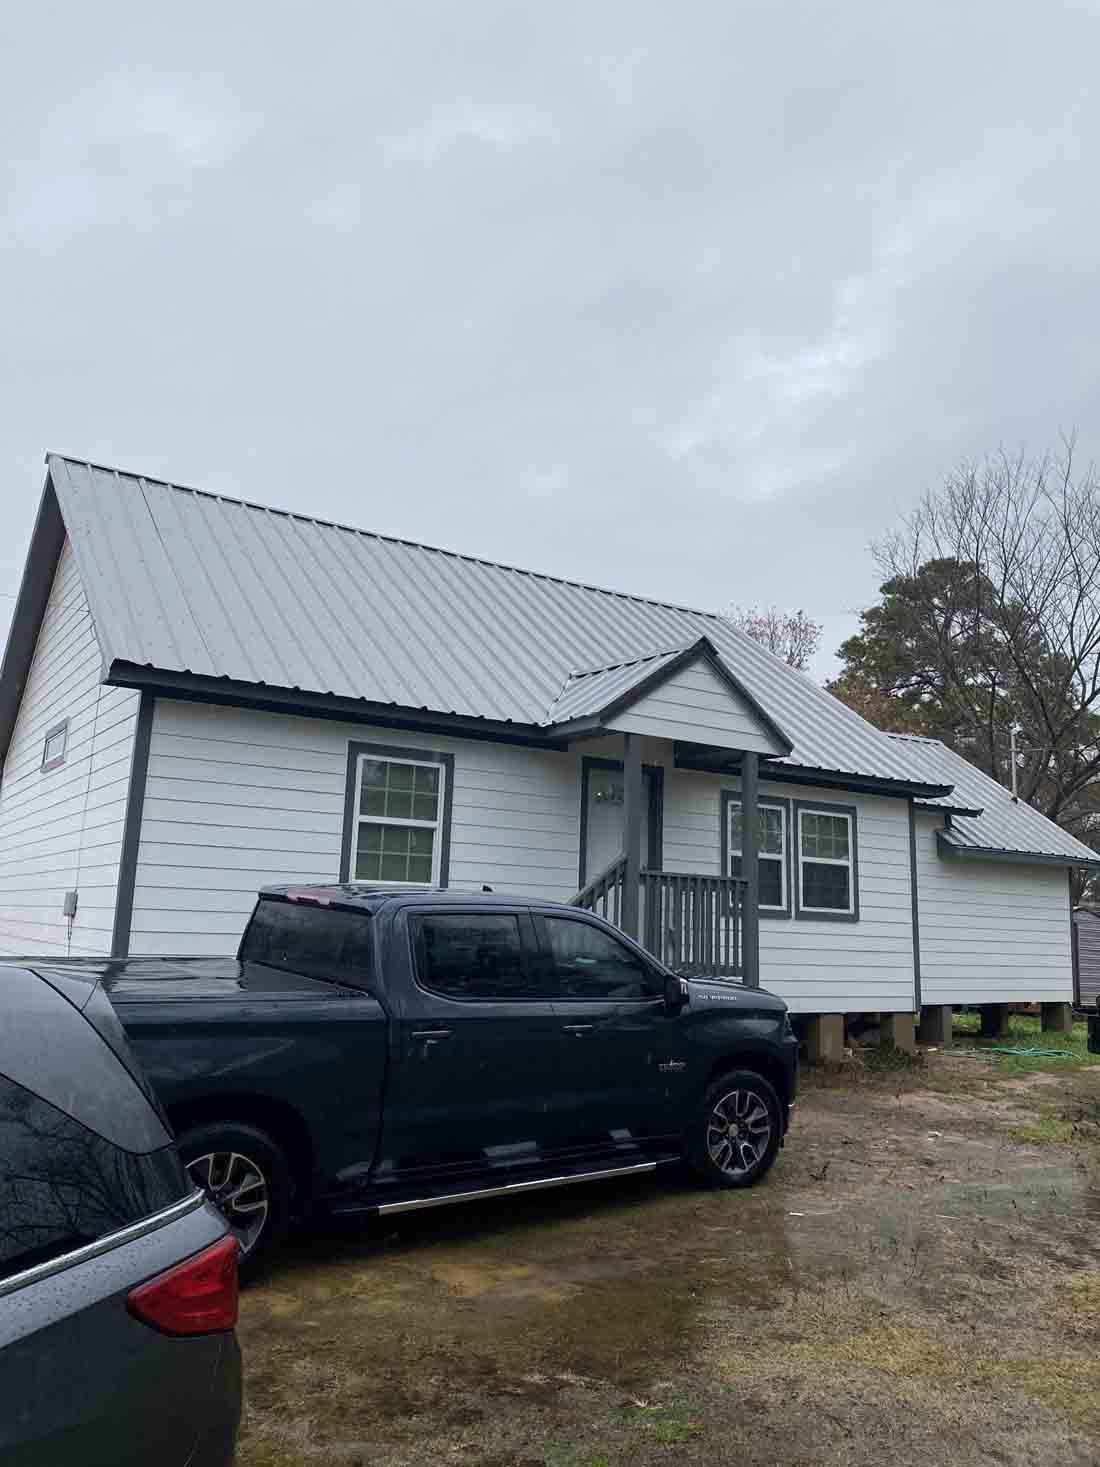
2518 33rd Ave N, Texas City, TX 77590
Third-party Energy Testing
Your air ducts are one of the most important systems in your home, and if the ducts are poorly sealed or insulated they are likely contributing to higher energy bills.
Blower Doors: What Are They and How Do They Work?
A blower door is a device used in energy testing to measure a building’s airtightness. It consists of a powerful fan mounted on a temporary frame that fits into a doorway or an exterior opening. During a blower door test, the fan creates a pressure difference between the inside and outside of the building. This pressure difference allows air leakage points to become apparent and measurable. The test helps identify areas of air infiltration or exfiltration, which can affect energy efficiency and indoor comfort.
The blower door test involves setting up the device, measuring the baseline pressure, and then either depressurizing or pressurizing the building using the fan. While the fan is running, the airflow rate is measured using instruments like a manometer or pressure gauge. This airflow measurement quantifies the amount of air leakage in the building. Smoke pencils or thermal imaging cameras can be used to locate specific air leakage points.
The blower door test can be conducted in both depressurization and pressurization modes, allowing for a comprehensive assessment of air leakage locations. Once the test is complete, the data is analyzed to determine the building’s airtightness and identify areas that need improvement. The results can be used to guide air sealing measures and improve energy efficiency.
Blower door tests are crucial in identifying air leakage points, reducing energy loss, improving indoor air quality, and enhancing the overall performance and comfort of a building.
Home Inspection Atascocita | Home Ready Inspections | Houston TX
Minimizing Energy Losses in Ducts at 7522 Sandle St, Houston, TX 77088
7522 Sandle St, Houston, TX 77088
Minimizing Energy Losses in Ducts
Minimizing energy losses in ducts by seeing if the ducts are poorly sealed or insulated. That could tell you why your energy bill in high. Your air ducts are one of the most important systems in your home, and if the ducts are poorly sealed or insulated, they are likely contributing to higher energy bills.
Your home’s duct system is a branching network of tubes in the walls, floors, and ceilings; it carries the air from your home’s furnace and central air conditioner to each room. Ducts are made of sheet metal, fiberglass, or other materials.
Ducts that leak heated air into unheated spaces can add hundreds of dollars a year to your heating and cooling bills, but you can reduce that loss by sealing and insulating your ducts. Insulating ducts in unconditioned spaces is usually very cost-effective. Existing ducts may also be blocked or may require simple upgrades.
Designing and Installing New Duct Systems
In new home construction or in retrofits, proper duct system design is critical. In recent years, energy-saving designs have sought to include ducts and heating systems in the conditioned space.
Efficient and well-designed duct systems distribute air properly throughout your home without leaking to keep all rooms at a comfortable temperature. The system should provide balanced supply and return flow to maintain a neutral pressure within the house.
Even well sealed and insulated ducts will leak and lose some heat, so many new energy-efficient homes place the duct system within the conditioned space of the home. The simplest way to accomplish this is to hide the ducts in dropped ceilings and in corners of rooms. Ducts can also be located in a sealed and insulated chase extending into the attic or built into raised floors. In both of these latter cases, care must be taken during construction to prevent contractors from using the duct chases for wiring or other utilities.
In either case, actual ducts must be used — chases and floor cavities should not be used as ducts. Regardless of where they are installed, ducts should be well sealed. Although ducts can be configured in a number of ways, the “trunk and branch” and “radial” supply duct configurations are most suitable for ducts located in conditioned spaces.
Air return duct systems can be configured in two ways: each room can have a return duct that sends air back to the heating and cooling equipment or return grills can be located in central locations on each floor. For the latter case, either grills must be installed to allow air to pass out of closed rooms, or short “jumper ducts” can be installed to connect the vent in one room with the next, allowing air to flow back to the central return grilles. Door undercuts help, but they are usually not sufficient for return airflow.
You can perform a simple check for adequate return air capacity by doing the following:
- Close all exterior doors and windows
- Close all interior room doors
- Turn on the central air handler
- “Crack” interior doors one by one and observe if the door closes or further opens “on its own.” (Whether it closes or opens will depend on the direction of the air handler-driven air flow.) Rooms served by air-moved doors have restricted return air flow and need pressure relief as described above.
Maintaining and Upgrading Existing Duct Systems
Sealing your ducts to prevent leaks is even more important if the ducts are located in an unconditioned area such as an attic or vented crawlspace. If the supply ducts are leaking, heated or cooled air can be forced out of unsealed joints and lost. In addition, unconditioned air can be drawn into return ducts through unsealed joints.
Although minor duct repairs are easy to make, qualified professionals should seal and insulate ducts in unconditioned spaces to ensure the use of appropriate sealing materials.
Aside from sealing your ducts, the simplest and most effective means of maintaining your air distribution system is to ensure that furniture and other objects are not blocking the airflow through your registers, and to vacuum the registers to remove any dust buildup.
Existing duct systems often suffer from design deficiencies in the return air system, and modifications by the homeowner (or just a tendency to keep doors closed) may contribute to these problems. Any rooms with a lack of sufficient return airflow may benefit from relatively simple upgrades, such as the installation of new return-air grilles, undercutting doors for return air, or installing a jumper duct.
Some rooms may also be hard to heat and cool because of inadequate supply ducts or grilles. If this is the case, you should first examine whether the problem is the room itself: fix any problems with insulation, air leakage, or inefficient windows first. If the problem persists, you may be able to increase the size of the supply duct or add an additional duct to provide the needed airflow to the room.
Minor Duct Repair Tips for Minimizing Energy Losses in Ducts
- Check your ducts for air leaks. First, look for sections that should be joined but have separated and then look for obvious holes.
- Duct mastic is the preferred material for sealing ductwork seams and joints. It is more durable than any available tape and generally easier for a do-it-yourself installation. Its only drawback is that it will not bridge gaps over ¼ inch. Such gaps must be first bridged with web-type drywall tape, or a good quality heat approved tape.
- If you use tape to seal your ducts, avoid cloth-backed, rubber adhesive duct tape — it tends to fail quickly. Instead, use mastic, butyl tape, foil tape, or other heat-approved tapes. Look for tape with the Underwriters Laboratories (UL) logo.
- Remember that insulating ducts in the basement will make the basement colder. If both the ducts and the basement walls are not insulated, consider insulating both. Water pipes and drains in unconditioned spaces could freeze and burst if the heat ducts are fully insulated because there would be no heat source to prevent the space from freezing in cold weather. However, using an electric heating tape wrap on the pipes can prevent this. Check with a professional contractor.
- Hire a professional to install both supply and return registers in the basement rooms after converting your basement to a living area.
- Be sure a well-sealed vapor barrier exists on the outside of the insulation on cooling ducts to prevent moisture condensation.
- If you have a fuel-burning furnace, stove, or other appliance or an attached garage, install a carbon monoxide (CO) monitor to alert you to harmful CO levels.
- Be sure to get professional help when doing ductwork. A qualified professional should always perform changes and repairs to a duct system.
Minimizing Energy Losses in Ducts at 7522 Sandle St, Houston, TX 77088

7522 Sandle St, Houston, TX 77088
Minimizing Energy Losses in Ducts
Minimizing energy losses in ducts by seeing if the ducts are poorly sealed or insulated. That could tell you why your energy bill in high. Your air ducts are one of the most important systems in your home, and if the ducts are poorly sealed or insulated, they are likely contributing to higher energy bills.
Your home’s duct system is a branching network of tubes in the walls, floors, and ceilings; it carries the air from your home’s furnace and central air conditioner to each room. Ducts are made of sheet metal, fiberglass, or other materials.
Ducts that leak heated air into unheated spaces can add hundreds of dollars a year to your heating and cooling bills, but you can reduce that loss by sealing and insulating your ducts. Insulating ducts in unconditioned spaces is usually very cost-effective. Existing ducts may also be blocked or may require simple upgrades.
Designing and Installing New Duct Systems
In new home construction or in retrofits, proper duct system design is critical. In recent years, energy-saving designs have sought to include ducts and heating systems in the conditioned space.
Efficient and well-designed duct systems distribute air properly throughout your home without leaking to keep all rooms at a comfortable temperature. The system should provide balanced supply and return flow to maintain a neutral pressure within the house.
Even well sealed and insulated ducts will leak and lose some heat, so many new energy-efficient homes place the duct system within the conditioned space of the home. The simplest way to accomplish this is to hide the ducts in dropped ceilings and in corners of rooms. Ducts can also be located in a sealed and insulated chase extending into the attic or built into raised floors. In both of these latter cases, care must be taken during construction to prevent contractors from using the duct chases for wiring or other utilities.
In either case, actual ducts must be used — chases and floor cavities should not be used as ducts. Regardless of where they are installed, ducts should be well sealed. Although ducts can be configured in a number of ways, the “trunk and branch” and “radial” supply duct configurations are most suitable for ducts located in conditioned spaces.
Air return duct systems can be configured in two ways: each room can have a return duct that sends air back to the heating and cooling equipment or return grills can be located in central locations on each floor. For the latter case, either grills must be installed to allow air to pass out of closed rooms, or short “jumper ducts” can be installed to connect the vent in one room with the next, allowing air to flow back to the central return grilles. Door undercuts help, but they are usually not sufficient for return airflow.
You can perform a simple check for adequate return air capacity by doing the following:
- Close all exterior doors and windows
- Close all interior room doors
- Turn on the central air handler
- “Crack” interior doors one by one and observe if the door closes or further opens “on its own.” (Whether it closes or opens will depend on the direction of the air handler-driven air flow.) Rooms served by air-moved doors have restricted return air flow and need pressure relief as described above.
Maintaining and Upgrading Existing Duct Systems
Sealing your ducts to prevent leaks is even more important if the ducts are located in an unconditioned area such as an attic or vented crawlspace. If the supply ducts are leaking, heated or cooled air can be forced out of unsealed joints and lost. In addition, unconditioned air can be drawn into return ducts through unsealed joints.
Although minor duct repairs are easy to make, qualified professionals should seal and insulate ducts in unconditioned spaces to ensure the use of appropriate sealing materials.
Aside from sealing your ducts, the simplest and most effective means of maintaining your air distribution system is to ensure that furniture and other objects are not blocking the airflow through your registers, and to vacuum the registers to remove any dust buildup.
Existing duct systems often suffer from design deficiencies in the return air system, and modifications by the homeowner (or just a tendency to keep doors closed) may contribute to these problems. Any rooms with a lack of sufficient return airflow may benefit from relatively simple upgrades, such as the installation of new return-air grilles, undercutting doors for return air, or installing a jumper duct.
Some rooms may also be hard to heat and cool because of inadequate supply ducts or grilles. If this is the case, you should first examine whether the problem is the room itself: fix any problems with insulation, air leakage, or inefficient windows first. If the problem persists, you may be able to increase the size of the supply duct or add an additional duct to provide the needed airflow to the room.
Minor Duct Repair Tips for Minimizing Energy Losses in Ducts
- Check your ducts for air leaks. First, look for sections that should be joined but have separated and then look for obvious holes.
- Duct mastic is the preferred material for sealing ductwork seams and joints. It is more durable than any available tape and generally easier for a do-it-yourself installation. Its only drawback is that it will not bridge gaps over ¼ inch. Such gaps must be first bridged with web-type drywall tape, or a good quality heat approved tape.
- If you use tape to seal your ducts, avoid cloth-backed, rubber adhesive duct tape — it tends to fail quickly. Instead, use mastic, butyl tape, foil tape, or other heat-approved tapes. Look for tape with the Underwriters Laboratories (UL) logo.
- Remember that insulating ducts in the basement will make the basement colder. If both the ducts and the basement walls are not insulated, consider insulating both. Water pipes and drains in unconditioned spaces could freeze and burst if the heat ducts are fully insulated because there would be no heat source to prevent the space from freezing in cold weather. However, using an electric heating tape wrap on the pipes can prevent this. Check with a professional contractor.
- Hire a professional to install both supply and return registers in the basement rooms after converting your basement to a living area.
- Be sure a well-sealed vapor barrier exists on the outside of the insulation on cooling ducts to prevent moisture condensation.
- If you have a fuel-burning furnace, stove, or other appliance or an attached garage, install a carbon monoxide (CO) monitor to alert you to harmful CO levels.
- Be sure to get professional help when doing ductwork. A qualified professional should always perform changes and repairs to a duct system.
Minimizing Energy Losses in Ducts at 235 E 37th St, Houston, TX 77018
235 E 37th St, Houston, TX 77018
Minimizing Energy Losses in Ducts
Minimizing energy losses in ducts by seeing if the ducts are poorly sealed or insulated. That could tell you why your energy bill in high. Your air ducts are one of the most important systems in your home, and if the ducts are poorly sealed or insulated, they are likely contributing to higher energy bills.
Your home’s duct system is a branching network of tubes in the walls, floors, and ceilings; it carries the air from your home’s furnace and central air conditioner to each room. Ducts are made of sheet metal, fiberglass, or other materials.
Ducts that leak heated air into unheated spaces can add hundreds of dollars a year to your heating and cooling bills, but you can reduce that loss by sealing and insulating your ducts. Insulating ducts in unconditioned spaces is usually very cost-effective. Existing ducts may also be blocked or may require simple upgrades.
Designing and Installing New Duct Systems
In new home construction or in retrofits, proper duct system design is critical. In recent years, energy-saving designs have sought to include ducts and heating systems in the conditioned space.
Efficient and well-designed duct systems distribute air properly throughout your home without leaking to keep all rooms at a comfortable temperature. The system should provide balanced supply and return flow to maintain a neutral pressure within the house.
Even well sealed and insulated ducts will leak and lose some heat, so many new energy-efficient homes place the duct system within the conditioned space of the home. The simplest way to accomplish this is to hide the ducts in dropped ceilings and in corners of rooms. Ducts can also be located in a sealed and insulated chase extending into the attic or built into raised floors. In both of these latter cases, care must be taken during construction to prevent contractors from using the duct chases for wiring or other utilities.
In either case, actual ducts must be used — chases and floor cavities should not be used as ducts. Regardless of where they are installed, ducts should be well sealed. Although ducts can be configured in a number of ways, the “trunk and branch” and “radial” supply duct configurations are most suitable for ducts located in conditioned spaces.
Air return duct systems can be configured in two ways: each room can have a return duct that sends air back to the heating and cooling equipment or return grills can be located in central locations on each floor. For the latter case, either grills must be installed to allow air to pass out of closed rooms, or short “jumper ducts” can be installed to connect the vent in one room with the next, allowing air to flow back to the central return grilles. Door undercuts help, but they are usually not sufficient for return airflow.
You can perform a simple check for adequate return air capacity by doing the following:
- Close all exterior doors and windows
- Close all interior room doors
- Turn on the central air handler
- “Crack” interior doors one by one and observe if the door closes or further opens “on its own.” (Whether it closes or opens will depend on the direction of the air handler-driven air flow.) Rooms served by air-moved doors have restricted return air flow and need pressure relief as described above.
Maintaining and Upgrading Existing Duct Systems
Sealing your ducts to prevent leaks is even more important if the ducts are located in an unconditioned area such as an attic or vented crawlspace. If the supply ducts are leaking, heated or cooled air can be forced out of unsealed joints and lost. In addition, unconditioned air can be drawn into return ducts through unsealed joints.
Although minor duct repairs are easy to make, qualified professionals should seal and insulate ducts in unconditioned spaces to ensure the use of appropriate sealing materials.
Aside from sealing your ducts, the simplest and most effective means of maintaining your air distribution system is to ensure that furniture and other objects are not blocking the airflow through your registers, and to vacuum the registers to remove any dust buildup.
Existing duct systems often suffer from design deficiencies in the return air system, and modifications by the homeowner (or just a tendency to keep doors closed) may contribute to these problems. Any rooms with a lack of sufficient return airflow may benefit from relatively simple upgrades, such as the installation of new return-air grilles, undercutting doors for return air, or installing a jumper duct.
Some rooms may also be hard to heat and cool because of inadequate supply ducts or grilles. If this is the case, you should first examine whether the problem is the room itself: fix any problems with insulation, air leakage, or inefficient windows first. If the problem persists, you may be able to increase the size of the supply duct or add an additional duct to provide the needed airflow to the room.
Minor Duct Repair Tips for Minimizing Energy Losses in Ducts
- Check your ducts for air leaks. First, look for sections that should be joined but have separated and then look for obvious holes.
- Duct mastic is the preferred material for sealing ductwork seams and joints. It is more durable than any available tape and generally easier for a do-it-yourself installation. Its only drawback is that it will not bridge gaps over ¼ inch. Such gaps must be first bridged with web-type drywall tape, or a good quality heat approved tape.
- If you use tape to seal your ducts, avoid cloth-backed, rubber adhesive duct tape — it tends to fail quickly. Instead, use mastic, butyl tape, foil tape, or other heat-approved tapes. Look for tape with the Underwriters Laboratories (UL) logo.
- Remember that insulating ducts in the basement will make the basement colder. If both the ducts and the basement walls are not insulated, consider insulating both. Water pipes and drains in unconditioned spaces could freeze and burst if the heat ducts are fully insulated because there would be no heat source to prevent the space from freezing in cold weather. However, using an electric heating tape wrap on the pipes can prevent this. Check with a professional contractor.
- Hire a professional to install both supply and return registers in the basement rooms after converting your basement to a living area.
- Be sure a well-sealed vapor barrier exists on the outside of the insulation on cooling ducts to prevent moisture condensation.
- If you have a fuel-burning furnace, stove, or other appliance or an attached garage, install a carbon monoxide (CO) monitor to alert you to harmful CO levels.
- Be sure to get professional help when doing ductwork. A qualified professional should always perform changes and repairs to a duct system.
905 Quitman St, Houston, TX 77009 – Minimizing Energy Losses in Ducts
905 Quitman St, Houston, TX 77009
Minimizing Energy Losses in Ducts
Minimizing energy losses in ducts is an important aspect of energy efficiency in HVAC (Heating, Ventilation, and Air Conditioning) systems. Ducts are used to distribute conditioned air throughout a building, and any energy losses during the distribution process can lead to increased energy consumption and reduced system performance. Here are some key measures to minimize energy losses in ducts:
1. Proper Duct Design: Ensure that ductwork is properly designed to minimize pressure losses. Use appropriately sized ducts, minimize the number of bends and transitions, and maintain a balanced airflow distribution. Consult industry guidelines or work with an HVAC professional to design an efficient duct system.
2. Sealing: Duct leakage is a major source of energy losses. Seal all joints, connections, and seams in the ductwork using approved sealing materials such as mastic or metal tape. Pay particular attention to connections at registers, grilles, and air-handling units.
3. Insulation: Insulate ducts that run through unconditioned spaces, such as attics, crawlspaces, or basements. Insulation helps to prevent heat transfer between the ductwork and the surrounding environment, reducing energy losses and improving system efficiency.
4. Duct Material: Consider using insulated ducts with low thermal conductivity. Insulated ducts minimize heat transfer through the duct walls, helping to maintain the desired temperature of the conditioned air as it travels through the system.
5. Avoiding Overlong Duct Runs: Minimize the length of duct runs as much as possible. Longer ducts result in increased friction losses, which can reduce airflow and energy efficiency. Optimize the layout and location of HVAC equipment to keep duct runs as short and direct as feasible.
6. Balancing and Adjusting Dampers: Balancing the airflow within the duct system ensures that each room receives the appropriate amount of conditioned air. Adjust dampers at branch points and in individual ducts to balance the airflow and avoid over-pressurizing or under-pressurizing certain areas.
7. Regular Maintenance: Conduct regular inspections of the ductwork to check for leaks, obstructions, or damage. Clean the ducts periodically to remove dust, debris, or any substances that could impede airflow.
8. Air Filters: Install high-quality air filters and regularly replace them according to the manufacturer’s recommendations. Clean air filters help maintain optimal airflow, reducing pressure drops and energy losses.
By implementing these measures, you can significantly minimize energy losses in ducts, improve the overall efficiency of your HVAC system, and reduce energy consumption. Consulting with a professional HVAC contractor or engineer can provide valuable insights specific to your building’s requirements and help optimize energy efficiency.
https://homereadyinspections.com/builders-hvac/
14122 W Airport Blvd, Sugar Land, TX 77498 – Minimizing Energy Losses in Ducts
14122 W Airport Blvd, Sugar Land, TX 77498
Minimizing Energy Losses in Ducts
Minimizing energy losses in ducts is an important aspect of energy efficiency in HVAC (Heating, Ventilation, and Air Conditioning) systems. Ducts are used to distribute conditioned air throughout a building, and any energy losses during the distribution process can lead to increased energy consumption and reduced system performance. Here are some key measures to minimize energy losses in ducts:
1. Proper Duct Design: Ensure that ductwork is properly designed to minimize pressure losses. Use appropriately sized ducts, minimize the number of bends and transitions, and maintain a balanced airflow distribution. Consult industry guidelines or work with an HVAC professional to design an efficient duct system.
2. Sealing: Duct leakage is a major source of energy losses. Seal all joints, connections, and seams in the ductwork using approved sealing materials such as mastic or metal tape. Pay particular attention to connections at registers, grilles, and air-handling units.
3. Insulation: Insulate ducts that run through unconditioned spaces, such as attics, crawlspaces, or basements. Insulation helps to prevent heat transfer between the ductwork and the surrounding environment, reducing energy losses and improving system efficiency.
4. Duct Material: Consider using insulated ducts with low thermal conductivity. Insulated ducts minimize heat transfer through the duct walls, helping to maintain the desired temperature of the conditioned air as it travels through the system.
5. Avoiding Overlong Duct Runs: Minimize the length of duct runs as much as possible. Longer ducts result in increased friction losses, which can reduce airflow and energy efficiency. Optimize the layout and location of HVAC equipment to keep duct runs as short and direct as feasible.
6. Balancing and Adjusting Dampers: Balancing the airflow within the duct system ensures that each room receives the appropriate amount of conditioned air. Adjust dampers at branch points and in individual ducts to balance the airflow and avoid over-pressurizing or under-pressurizing certain areas.
7. Regular Maintenance: Conduct regular inspections of the ductwork to check for leaks, obstructions, or damage. Clean the ducts periodically to remove dust, debris, or any substances that could impede airflow.
8. Air Filters: Install high-quality air filters and regularly replace them according to the manufacturer’s recommendations. Clean air filters help maintain optimal airflow, reducing pressure drops and energy losses.
By implementing these measures, you can significantly minimize energy losses in ducts, improve the overall efficiency of your HVAC system, and reduce energy consumption. Consulting with a professional HVAC contractor or engineer can provide valuable insights specific to your building’s requirements and help optimize energy efficiency.
https://homereadyinspections.com/builders-hvac/
8521 Brandon St, Houston, TX 77051 – Minimizing Energy Losses in Ducts
8521 Brandon St, Houston, TX 77051
Minimizing Energy Losses in Ducts
Minimizing energy losses in ducts is an important aspect of energy efficiency in HVAC (Heating, Ventilation, and Air Conditioning) systems. Ducts are used to distribute conditioned air throughout a building, and any energy losses during the distribution process can lead to increased energy consumption and reduced system performance. Here are some key measures to minimize energy losses in ducts:
1. Proper Duct Design: Ensure that ductwork is properly designed to minimize pressure losses. Use appropriately sized ducts, minimize the number of bends and transitions, and maintain a balanced airflow distribution. Consult industry guidelines or work with an HVAC professional to design an efficient duct system.
2. Sealing: Duct leakage is a major source of energy losses. Seal all joints, connections, and seams in the ductwork using approved sealing materials such as mastic or metal tape. Pay particular attention to connections at registers, grilles, and air-handling units.
3. Insulation: Insulate ducts that run through unconditioned spaces, such as attics, crawlspaces, or basements. Insulation helps to prevent heat transfer between the ductwork and the surrounding environment, reducing energy losses and improving system efficiency.
4. Duct Material: Consider using insulated ducts with low thermal conductivity. Insulated ducts minimize heat transfer through the duct walls, helping to maintain the desired temperature of the conditioned air as it travels through the system.
5. Avoiding Overlong Duct Runs: Minimize the length of duct runs as much as possible. Longer ducts result in increased friction losses, which can reduce airflow and energy efficiency. Optimize the layout and location of HVAC equipment to keep duct runs as short and direct as feasible.
6. Balancing and Adjusting Dampers: Balancing the airflow within the duct system ensures that each room receives the appropriate amount of conditioned air. Adjust dampers at branch points and in individual ducts to balance the airflow and avoid over-pressurizing or under-pressurizing certain areas.
7. Regular Maintenance: Conduct regular inspections of the ductwork to check for leaks, obstructions, or damage. Clean the ducts periodically to remove dust, debris, or any substances that could impede airflow.
8. Air Filters: Install high-quality air filters and regularly replace them according to the manufacturer’s recommendations. Clean air filters help maintain optimal airflow, reducing pressure drops and energy losses.
By implementing these measures, you can significantly minimize energy losses in ducts, improve the overall efficiency of your HVAC system, and reduce energy consumption. Consulting with a professional HVAC contractor or engineer can provide valuable insights specific to your building’s requirements and help optimize energy efficiency.
https://homereadyinspections.com/builders-hvac/
6635 Rowell Ct, Missouri City, TX 77489 – Minimizing Energy Losses in Ducts
6635 Rowell Ct, Missouri City, TX 77489 – Minimizing Energy Losses in Ducts
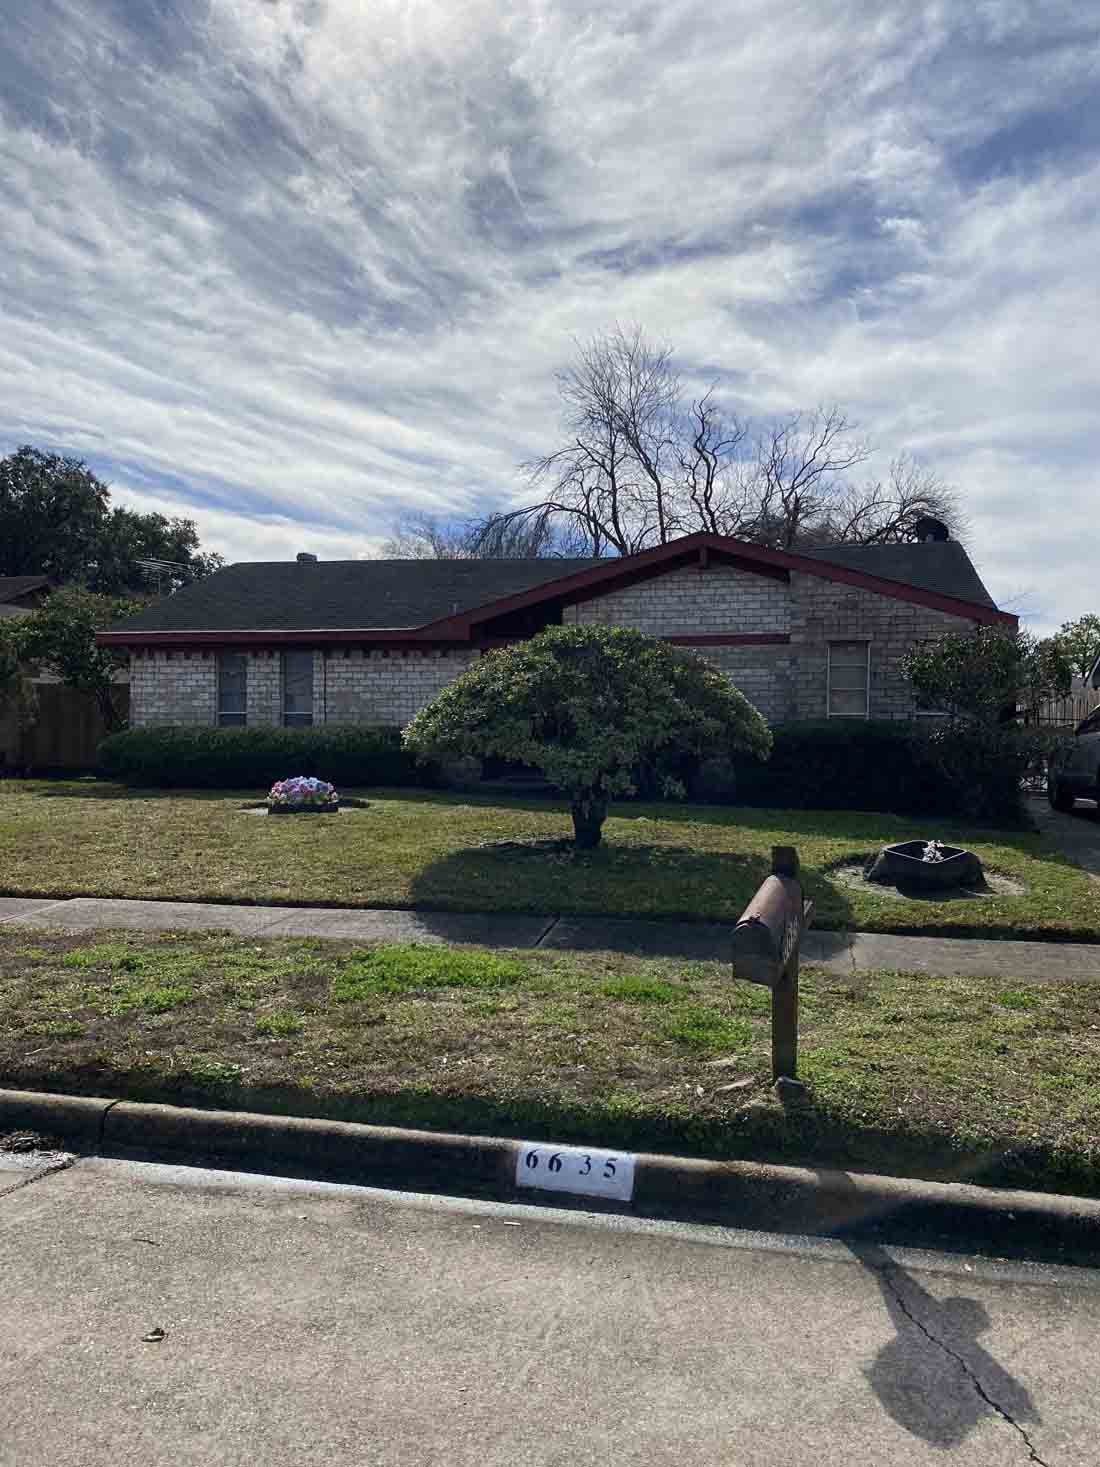
6635 Rowell Ct, Missouri City, TX 77489
Third-party Energy Testing
Your air ducts are one of the most important systems in your home, and if the ducts are poorly sealed or insulated they are likely contributing to higher energy bills.
Blower Doors: What Are They and How Do They Work?
A blower door is a device used in energy testing to measure a building’s airtightness. It consists of a powerful fan mounted on a temporary frame that fits into a doorway or an exterior opening. During a blower door test, the fan creates a pressure difference between the inside and outside of the building. This pressure difference allows air leakage points to become apparent and measurable. The test helps identify areas of air infiltration or exfiltration, which can affect energy efficiency and indoor comfort.
The blower door test involves setting up the device, measuring the baseline pressure, and then either depressurizing or pressurizing the building using the fan. While the fan is running, the airflow rate is measured using instruments like a manometer or pressure gauge. This airflow measurement quantifies the amount of air leakage in the building. Smoke pencils or thermal imaging cameras can be used to locate specific air leakage points.
The blower door test can be conducted in both depressurization and pressurization modes, allowing for a comprehensive assessment of air leakage locations. Once the test is complete, the data is analyzed to determine the building’s airtightness and identify areas that need improvement. The results can be used to guide air sealing measures and improve energy efficiency.
Blower door tests are crucial in identifying air leakage points, reducing energy loss, improving indoor air quality, and enhancing the overall performance and comfort of a building.
Home Inspection Atascocita | Home Ready Inspections | Houston TX
15215 Penn Hills Ln, Houston, TX 77062 – Minimizing Energy Losses in Duct
15215 Penn Hills Ln, Houston, TX 77062
Houston, TX, 77062 – Minimizing Energy Losses in Duct
Third-party Energy Testing
Your air ducts are one of the most important systems in your home, and if the ducts are poorly sealed or insulated they are likely contributing to higher energy bills.
Blower Doors: What Are They and How Do They Work?
A blower door is a device used in energy testing to measure a building’s airtightness. It consists of a powerful fan mounted on a temporary frame that fits into a doorway or an exterior opening. During a blower door test, the fan creates a pressure difference between the inside and outside of the building. This pressure difference allows air leakage points to become apparent and measurable. The test helps identify areas of air infiltration or exfiltration, which can affect energy efficiency and indoor comfort.
The blower door test involves setting up the device, measuring the baseline pressure, and then either depressurizing or pressurizing the building using the fan. While the fan is running, the airflow rate is measured using instruments like a manometer or pressure gauge. This airflow measurement quantifies the amount of air leakage in the building. Smoke pencils or thermal imaging cameras can be used to locate specific air leakage points.
The blower door test can be conducted in both depressurization and pressurization modes, allowing for a comprehensive assessment of air leakage locations. Once the test is complete, the data is analyzed to determine the building’s airtightness and identify areas that need improvement. The results can be used to guide air sealing measures and improve energy efficiency.
Blower door tests are crucial in identifying air leakage points, reducing energy loss, improving indoor air quality, and enhancing the overall performance and comfort of a building.
Home Inspection Atascocita | Home Ready Inspections | Houston TX
Energy Star – 45L Tax Credits for Zero Energy Ready Homes
4308 Alice St, Houston, TX 77021
45L Tax Credits for Zero Energy Ready Homes
Disclaimer: (Energy Star) This webpage provides an overview of the DOE Zero Energy Ready Home program and how it relates to the New Energy Efficient Home Tax Credit found in section 45L of the Internal Revenue Code. The information provided here does not constitute professional tax advice or other professional financial guidance. It should not be used as the only source of information when making decisions regarding design, purchasing, investments, or the tax implications of new home construction, or when executing other binding agreements. In the event that there is conflict between information provided on this webpage and guidance or notices published by IRS, the information published by IRS shall take precedence
The Updated Section 45L
The Inflation Reduction Act of 2022 (IRA) amended Internal Revenue Code Section 45L to provide taxpayers with a tax credit for eligible new or substantially reconstructed homes that meet applicable ENERGY STAR home program or DOE Zero Energy Ready Home (ZERH) program requirements. The new 45L provisions include two tiers of credits, with the higher credits for eligible homes and dwelling units certified to applicable ZERH program requirements. The 45L credit is $5,000 for single family and manufactured homes eligible to participate in the EPA’s ENERGY STAR Residential New Construction Program or the ENERGY STAR Manufactured New Homes Program, respectively, and which are certified to applicable ZERH program requirements. The 45L credit is $1,000 for dwelling units that are part of a building eligible to participate in the ENERGY STAR Multifamily New Construction Program, and which are certified to applicable ZERH program requirements, unless the project meets prevailing wage requirements, in which case the 45L credit is $5,000 per dwelling unit. These new 45L rules apply to qualified energy efficient homes acquired after December 31, 2022, and before January 1, 2033, for use as a residence during the taxable year. DOE continues to coordinate with the Internal Revenue Service (IRS) regarding forthcoming IRS 45L guidance.
DOE Zero Energy Ready Home (ZERH) Program Applicability for 45L Tax Credit, by Calendar Year
ZERH program requirements vary by housing sector. To improve the usability of the program requirements and the certification process for different sectors, DOE is developing and maintaining program requirements documents for each major housing sector. DOE anticipates updating these documents over the coming years, with new editions of the requirements referred to as versions.
The three housing sector tables below indicate DOE’s anticipated version release schedule for the ZERH program. The certification requirements for each housing sector are included below with links to detailed requirements documents (PDF) for each program version. IRS guidance will establish when a dwelling unit needs to be certified to the version in effect for that housing sector as listed below to qualify for the ZERH provisions of 45L tax credit. The tables list all current and planned versions through 2025, by Calendar Year (January 1-December 31). In conjunction with IRS, DOE will provide additional information on any planned ZERH program changes beyond 2025 on future dates to be determined. Note, for certain future planned versions the requirements documents are still under development.
https://www.energy.gov/eere/buildings/45l-tax-credits-zero-energy-ready-homes
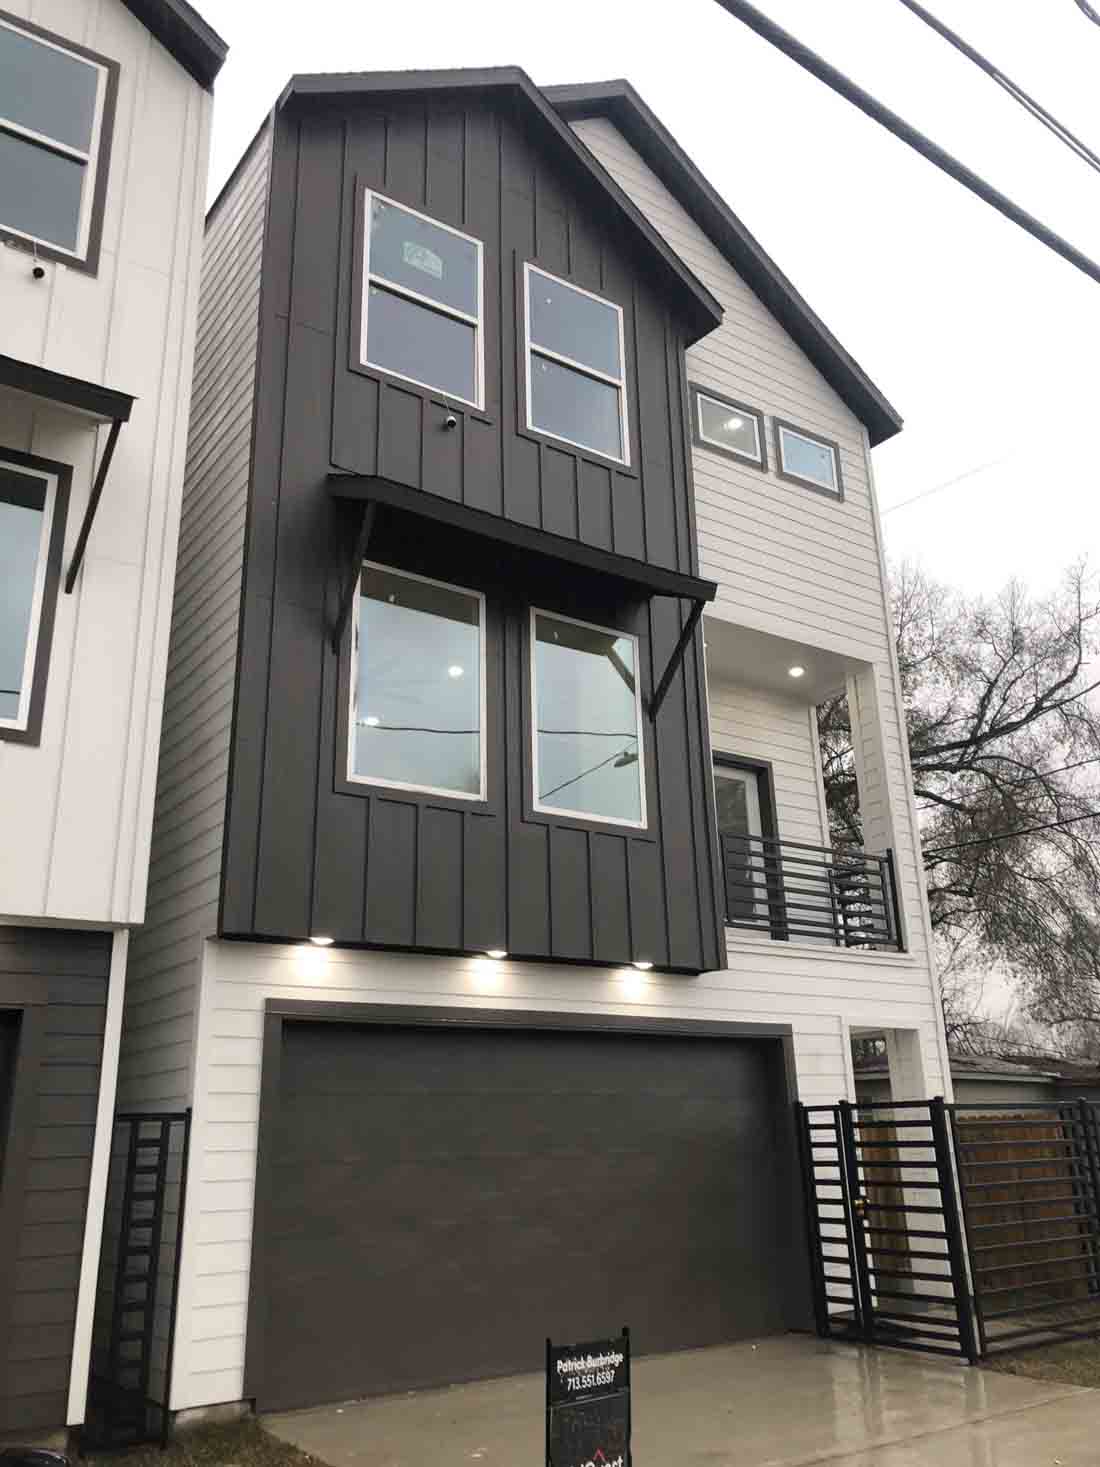
Minimizing Energy Losses in Ducts at 3533 Mt Pleasant St, Houston, TX 77021
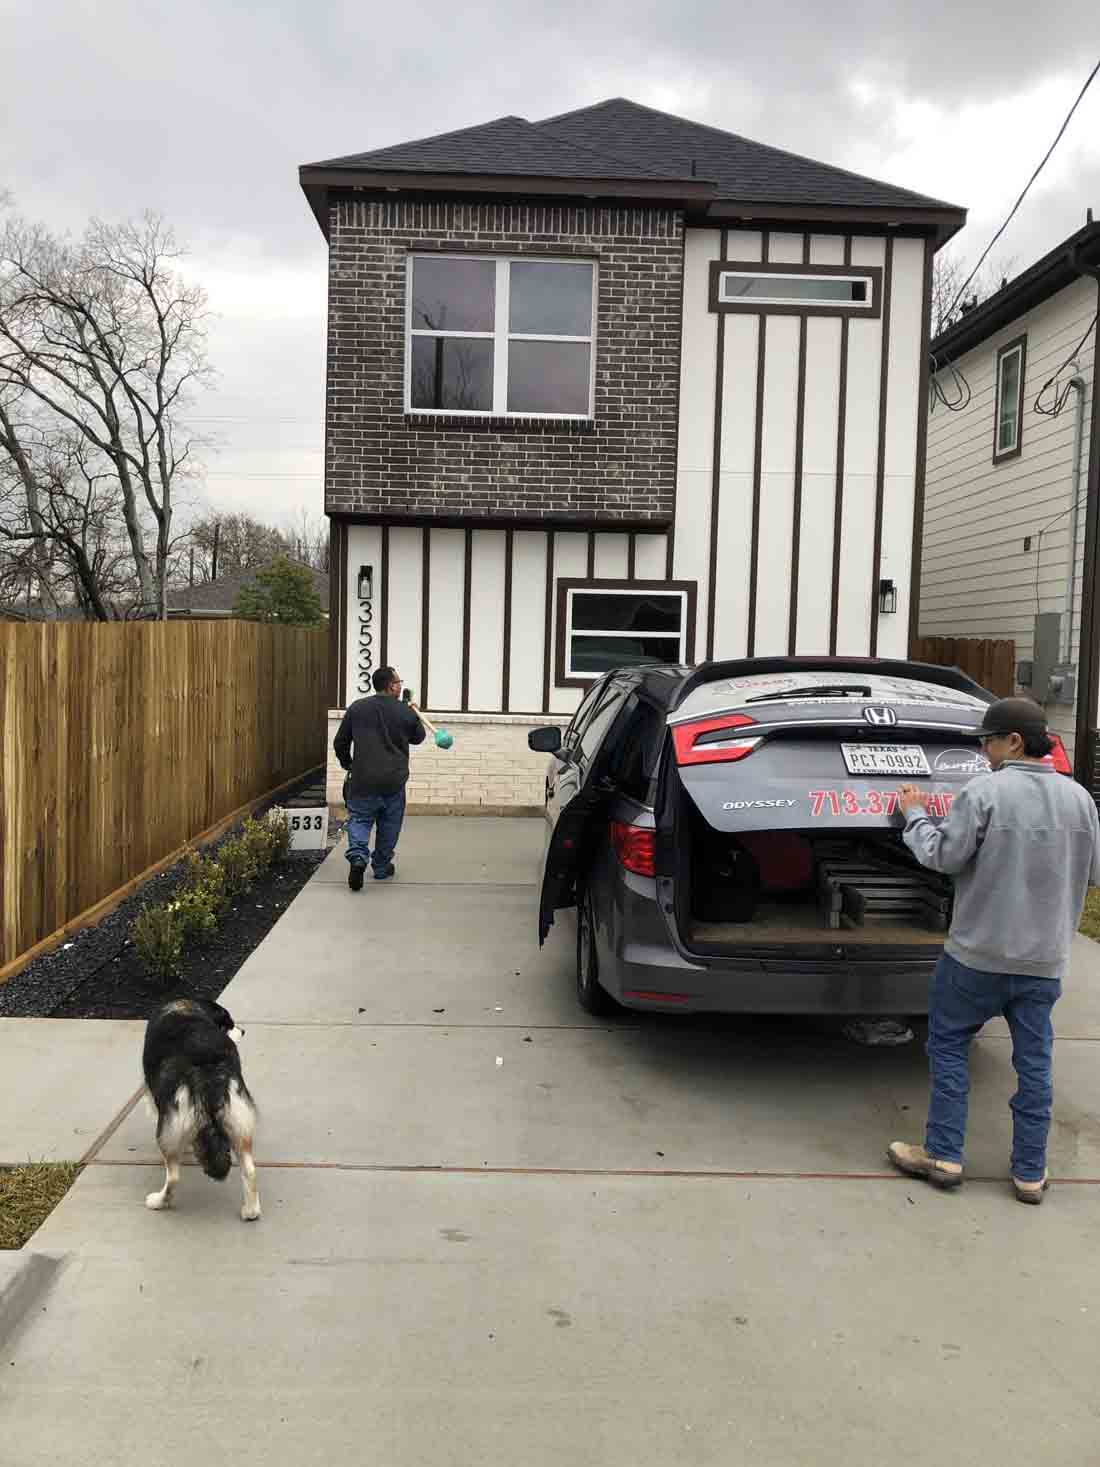
3533 Mt Pleasant St, Houston, TX 77021
Minimizing Energy Losses in Ducts
Minimizing energy losses in ducts by seeing if the ducts are poorly sealed or insulated. That could tell you why your energy bill in high. Your air ducts are one of the most important systems in your home, and if the ducts are poorly sealed or insulated, they are likely contributing to higher energy bills.
Your home’s duct system is a branching network of tubes in the walls, floors, and ceilings; it carries the air from your home’s furnace and central air conditioner to each room. Ducts are made of sheet metal, fiberglass, or other materials.
Ducts that leak heated air into unheated spaces can add hundreds of dollars a year to your heating and cooling bills, but you can reduce that loss by sealing and insulating your ducts. Insulating ducts in unconditioned spaces is usually very cost-effective. Existing ducts may also be blocked or may require simple upgrades.
Designing and Installing New Duct Systems
In new home construction or in retrofits, proper duct system design is critical. In recent years, energy-saving designs have sought to include ducts and heating systems in the conditioned space.
Efficient and well-designed duct systems distribute air properly throughout your home without leaking to keep all rooms at a comfortable temperature. The system should provide balanced supply and return flow to maintain a neutral pressure within the house.
Even well sealed and insulated ducts will leak and lose some heat, so many new energy-efficient homes place the duct system within the conditioned space of the home. The simplest way to accomplish this is to hide the ducts in dropped ceilings and in corners of rooms. Ducts can also be located in a sealed and insulated chase extending into the attic or built into raised floors. In both of these latter cases, care must be taken during construction to prevent contractors from using the duct chases for wiring or other utilities.
In either case, actual ducts must be used — chases and floor cavities should not be used as ducts. Regardless of where they are installed, ducts should be well sealed. Although ducts can be configured in a number of ways, the “trunk and branch” and “radial” supply duct configurations are most suitable for ducts located in conditioned spaces.
Air return duct systems can be configured in two ways: each room can have a return duct that sends air back to the heating and cooling equipment or return grills can be located in central locations on each floor. For the latter case, either grills must be installed to allow air to pass out of closed rooms, or short “jumper ducts” can be installed to connect the vent in one room with the next, allowing air to flow back to the central return grilles. Door undercuts help, but they are usually not sufficient for return airflow.
You can perform a simple check for adequate return air capacity by doing the following:
- Close all exterior doors and windows
- Close all interior room doors
- Turn on the central air handler
- “Crack” interior doors one by one and observe if the door closes or further opens “on its own.” (Whether it closes or opens will depend on the direction of the air handler-driven air flow.) Rooms served by air-moved doors have restricted return air flow and need pressure relief as described above.
Maintaining and Upgrading Existing Duct Systems
Sealing your ducts to prevent leaks is even more important if the ducts are located in an unconditioned area such as an attic or vented crawlspace. If the supply ducts are leaking, heated or cooled air can be forced out of unsealed joints and lost. In addition, unconditioned air can be drawn into return ducts through unsealed joints.
Although minor duct repairs are easy to make, qualified professionals should seal and insulate ducts in unconditioned spaces to ensure the use of appropriate sealing materials.
Aside from sealing your ducts, the simplest and most effective means of maintaining your air distribution system is to ensure that furniture and other objects are not blocking the airflow through your registers, and to vacuum the registers to remove any dust buildup.
Existing duct systems often suffer from design deficiencies in the return air system, and modifications by the homeowner (or just a tendency to keep doors closed) may contribute to these problems. Any rooms with a lack of sufficient return airflow may benefit from relatively simple upgrades, such as the installation of new return-air grilles, undercutting doors for return air, or installing a jumper duct.
Some rooms may also be hard to heat and cool because of inadequate supply ducts or grilles. If this is the case, you should first examine whether the problem is the room itself: fix any problems with insulation, air leakage, or inefficient windows first. If the problem persists, you may be able to increase the size of the supply duct or add an additional duct to provide the needed airflow to the room.
Minor Duct Repair Tips for Minimizing Energy Losses in Ducts
- Check your ducts for air leaks. First, look for sections that should be joined but have separated and then look for obvious holes.
- Duct mastic is the preferred material for sealing ductwork seams and joints. It is more durable than any available tape and generally easier for a do-it-yourself installation. Its only drawback is that it will not bridge gaps over ¼ inch. Such gaps must be first bridged with web-type drywall tape, or a good quality heat approved tape.
- If you use tape to seal your ducts, avoid cloth-backed, rubber adhesive duct tape — it tends to fail quickly. Instead, use mastic, butyl tape, foil tape, or other heat-approved tapes. Look for tape with the Underwriters Laboratories (UL) logo.
- Remember that insulating ducts in the basement will make the basement colder. If both the ducts and the basement walls are not insulated, consider insulating both. Water pipes and drains in unconditioned spaces could freeze and burst if the heat ducts are fully insulated because there would be no heat source to prevent the space from freezing in cold weather. However, using an electric heating tape wrap on the pipes can prevent this. Check with a professional contractor.
- Hire a professional to install both supply and return registers in the basement rooms after converting your basement to a living area.
- Be sure a well-sealed vapor barrier exists on the outside of the insulation on cooling ducts to prevent moisture condensation.
- If you have a fuel-burning furnace, stove, or other appliance or an attached garage, install a carbon monoxide (CO) monitor to alert you to harmful CO levels.
- Be sure to get professional help when doing ductwork. A qualified professional should always perform changes and repairs to a duct system.
Minimizing Energy Losses in Ducts at 4018 Hutchins St, Houston, TX 77004
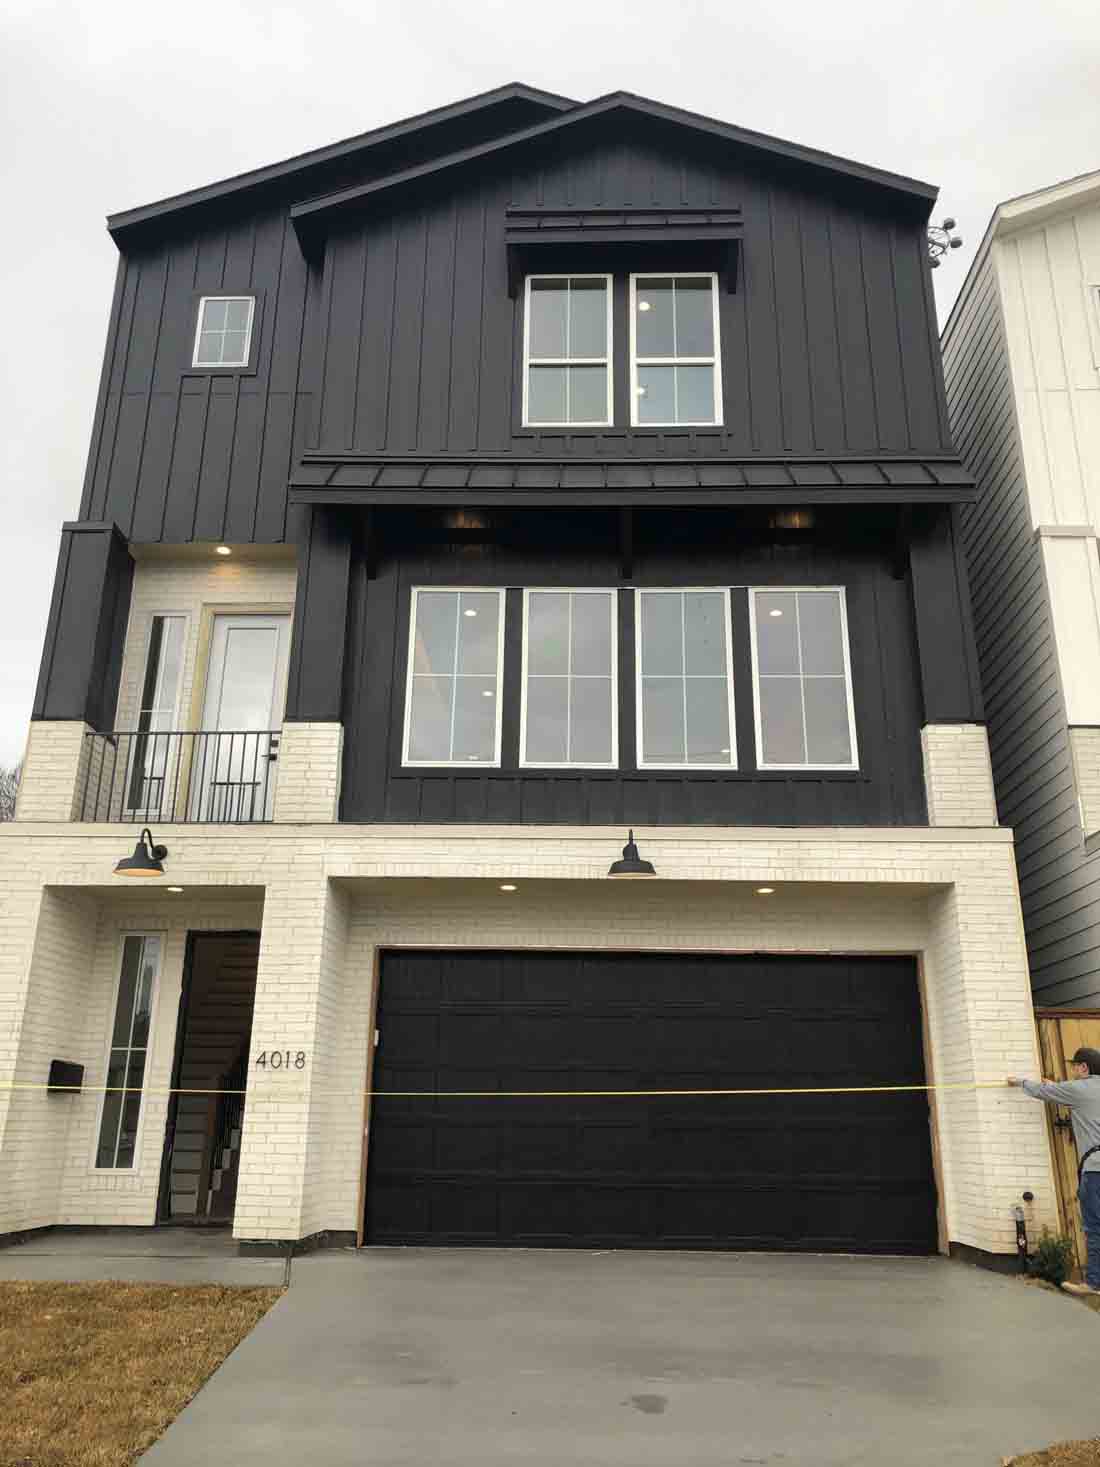
4018 Hutchins St, Houston, TX 77004
Minimizing Energy Losses in Ducts
Minimizing energy losses in ducts by seeing if the ducts are poorly sealed or insulated. That could tell you why your energy bill in high. Your air ducts are one of the most important systems in your home, and if the ducts are poorly sealed or insulated, they are likely contributing to higher energy bills.
Your home’s duct system is a branching network of tubes in the walls, floors, and ceilings; it carries the air from your home’s furnace and central air conditioner to each room. Ducts are made of sheet metal, fiberglass, or other materials.
Ducts that leak heated air into unheated spaces can add hundreds of dollars a year to your heating and cooling bills, but you can reduce that loss by sealing and insulating your ducts. Insulating ducts in unconditioned spaces is usually very cost-effective. Existing ducts may also be blocked or may require simple upgrades.
Designing and Installing New Duct Systems
In new home construction or in retrofits, proper duct system design is critical. In recent years, energy-saving designs have sought to include ducts and heating systems in the conditioned space.
Efficient and well-designed duct systems distribute air properly throughout your home without leaking to keep all rooms at a comfortable temperature. The system should provide balanced supply and return flow to maintain a neutral pressure within the house.
Even well sealed and insulated ducts will leak and lose some heat, so many new energy-efficient homes place the duct system within the conditioned space of the home. The simplest way to accomplish this is to hide the ducts in dropped ceilings and in corners of rooms. Ducts can also be located in a sealed and insulated chase extending into the attic or built into raised floors. In both of these latter cases, care must be taken during construction to prevent contractors from using the duct chases for wiring or other utilities.
In either case, actual ducts must be used — chases and floor cavities should not be used as ducts. Regardless of where they are installed, ducts should be well sealed. Although ducts can be configured in a number of ways, the “trunk and branch” and “radial” supply duct configurations are most suitable for ducts located in conditioned spaces.
Air return duct systems can be configured in two ways: each room can have a return duct that sends air back to the heating and cooling equipment or return grills can be located in central locations on each floor. For the latter case, either grills must be installed to allow air to pass out of closed rooms, or short “jumper ducts” can be installed to connect the vent in one room with the next, allowing air to flow back to the central return grilles. Door undercuts help, but they are usually not sufficient for return airflow.
You can perform a simple check for adequate return air capacity by doing the following:
- Close all exterior doors and windows
- Close all interior room doors
- Turn on the central air handler
- “Crack” interior doors one by one and observe if the door closes or further opens “on its own.” (Whether it closes or opens will depend on the direction of the air handler-driven air flow.) Rooms served by air-moved doors have restricted return air flow and need pressure relief as described above.
Maintaining and Upgrading Existing Duct Systems
Sealing your ducts to prevent leaks is even more important if the ducts are located in an unconditioned area such as an attic or vented crawlspace. If the supply ducts are leaking, heated or cooled air can be forced out of unsealed joints and lost. In addition, unconditioned air can be drawn into return ducts through unsealed joints.
Although minor duct repairs are easy to make, qualified professionals should seal and insulate ducts in unconditioned spaces to ensure the use of appropriate sealing materials.
Aside from sealing your ducts, the simplest and most effective means of maintaining your air distribution system is to ensure that furniture and other objects are not blocking the airflow through your registers, and to vacuum the registers to remove any dust buildup.
Existing duct systems often suffer from design deficiencies in the return air system, and modifications by the homeowner (or just a tendency to keep doors closed) may contribute to these problems. Any rooms with a lack of sufficient return airflow may benefit from relatively simple upgrades, such as the installation of new return-air grilles, undercutting doors for return air, or installing a jumper duct.
Some rooms may also be hard to heat and cool because of inadequate supply ducts or grilles. If this is the case, you should first examine whether the problem is the room itself: fix any problems with insulation, air leakage, or inefficient windows first. If the problem persists, you may be able to increase the size of the supply duct or add an additional duct to provide the needed airflow to the room.
Minor Duct Repair Tips for Minimizing Energy Losses in Ducts
- Check your ducts for air leaks. First, look for sections that should be joined but have separated and then look for obvious holes.
- Duct mastic is the preferred material for sealing ductwork seams and joints. It is more durable than any available tape and generally easier for a do-it-yourself installation. Its only drawback is that it will not bridge gaps over ¼ inch. Such gaps must be first bridged with web-type drywall tape, or a good quality heat approved tape.
- If you use tape to seal your ducts, avoid cloth-backed, rubber adhesive duct tape — it tends to fail quickly. Instead, use mastic, butyl tape, foil tape, or other heat-approved tapes. Look for tape with the Underwriters Laboratories (UL) logo.
- Remember that insulating ducts in the basement will make the basement colder. If both the ducts and the basement walls are not insulated, consider insulating both. Water pipes and drains in unconditioned spaces could freeze and burst if the heat ducts are fully insulated because there would be no heat source to prevent the space from freezing in cold weather. However, using an electric heating tape wrap on the pipes can prevent this. Check with a professional contractor.
- Hire a professional to install both supply and return registers in the basement rooms after converting your basement to a living area.
- Be sure a well-sealed vapor barrier exists on the outside of the insulation on cooling ducts to prevent moisture condensation.
- If you have a fuel-burning furnace, stove, or other appliance or an attached garage, install a carbon monoxide (CO) monitor to alert you to harmful CO levels.
- Be sure to get professional help when doing ductwork. A qualified professional should always perform changes and repairs to a duct system.
Energy Star – 45L Tax Credits for Zero Energy Ready Homes
7322 TouchStone St, Houston, TX 77028
45L Tax Credits for Zero Energy Ready Homes
Disclaimer: (Energy Star) This webpage provides an overview of the DOE Zero Energy Ready Home program and how it relates to the New Energy Efficient Home Tax Credit found in section 45L of the Internal Revenue Code. The information provided here does not constitute professional tax advice or other professional financial guidance. It should not be used as the only source of information when making decisions regarding design, purchasing, investments, or the tax implications of new home construction, or when executing other binding agreements. In the event that there is conflict between information provided on this webpage and guidance or notices published by IRS, the information published by IRS shall take precedence
The Updated Section 45L
The Inflation Reduction Act of 2022 (IRA) amended Internal Revenue Code Section 45L to provide taxpayers with a tax credit for eligible new or substantially reconstructed homes that meet applicable ENERGY STAR home program or DOE Zero Energy Ready Home (ZERH) program requirements. The new 45L provisions include two tiers of credits, with the higher credits for eligible homes and dwelling units certified to applicable ZERH program requirements. The 45L credit is $5,000 for single family and manufactured homes eligible to participate in the EPA’s ENERGY STAR Residential New Construction Program or the ENERGY STAR Manufactured New Homes Program, respectively, and which are certified to applicable ZERH program requirements. The 45L credit is $1,000 for dwelling units that are part of a building eligible to participate in the ENERGY STAR Multifamily New Construction Program, and which are certified to applicable ZERH program requirements, unless the project meets prevailing wage requirements, in which case the 45L credit is $5,000 per dwelling unit. These new 45L rules apply to qualified energy efficient homes acquired after December 31, 2022, and before January 1, 2033, for use as a residence during the taxable year. DOE continues to coordinate with the Internal Revenue Service (IRS) regarding forthcoming IRS 45L guidance.
DOE Zero Energy Ready Home (ZERH) Program Applicability for 45L Tax Credit, by Calendar Year
ZERH program requirements vary by housing sector. To improve the usability of the program requirements and the certification process for different sectors, DOE is developing and maintaining program requirements documents for each major housing sector. DOE anticipates updating these documents over the coming years, with new editions of the requirements referred to as versions.
The three housing sector tables below indicate DOE’s anticipated version release schedule for the ZERH program. The certification requirements for each housing sector are included below with links to detailed requirements documents (PDF) for each program version. IRS guidance will establish when a dwelling unit needs to be certified to the version in effect for that housing sector as listed below to qualify for the ZERH provisions of 45L tax credit. The tables list all current and planned versions through 2025, by Calendar Year (January 1-December 31). In conjunction with IRS, DOE will provide additional information on any planned ZERH program changes beyond 2025 on future dates to be determined. Note, for certain future planned versions the requirements documents are still under development.
https://www.energy.gov/eere/buildings/45l-tax-credits-zero-energy-ready-homes
Energy Star – 45L Tax Credits for Zero Energy Ready Homes
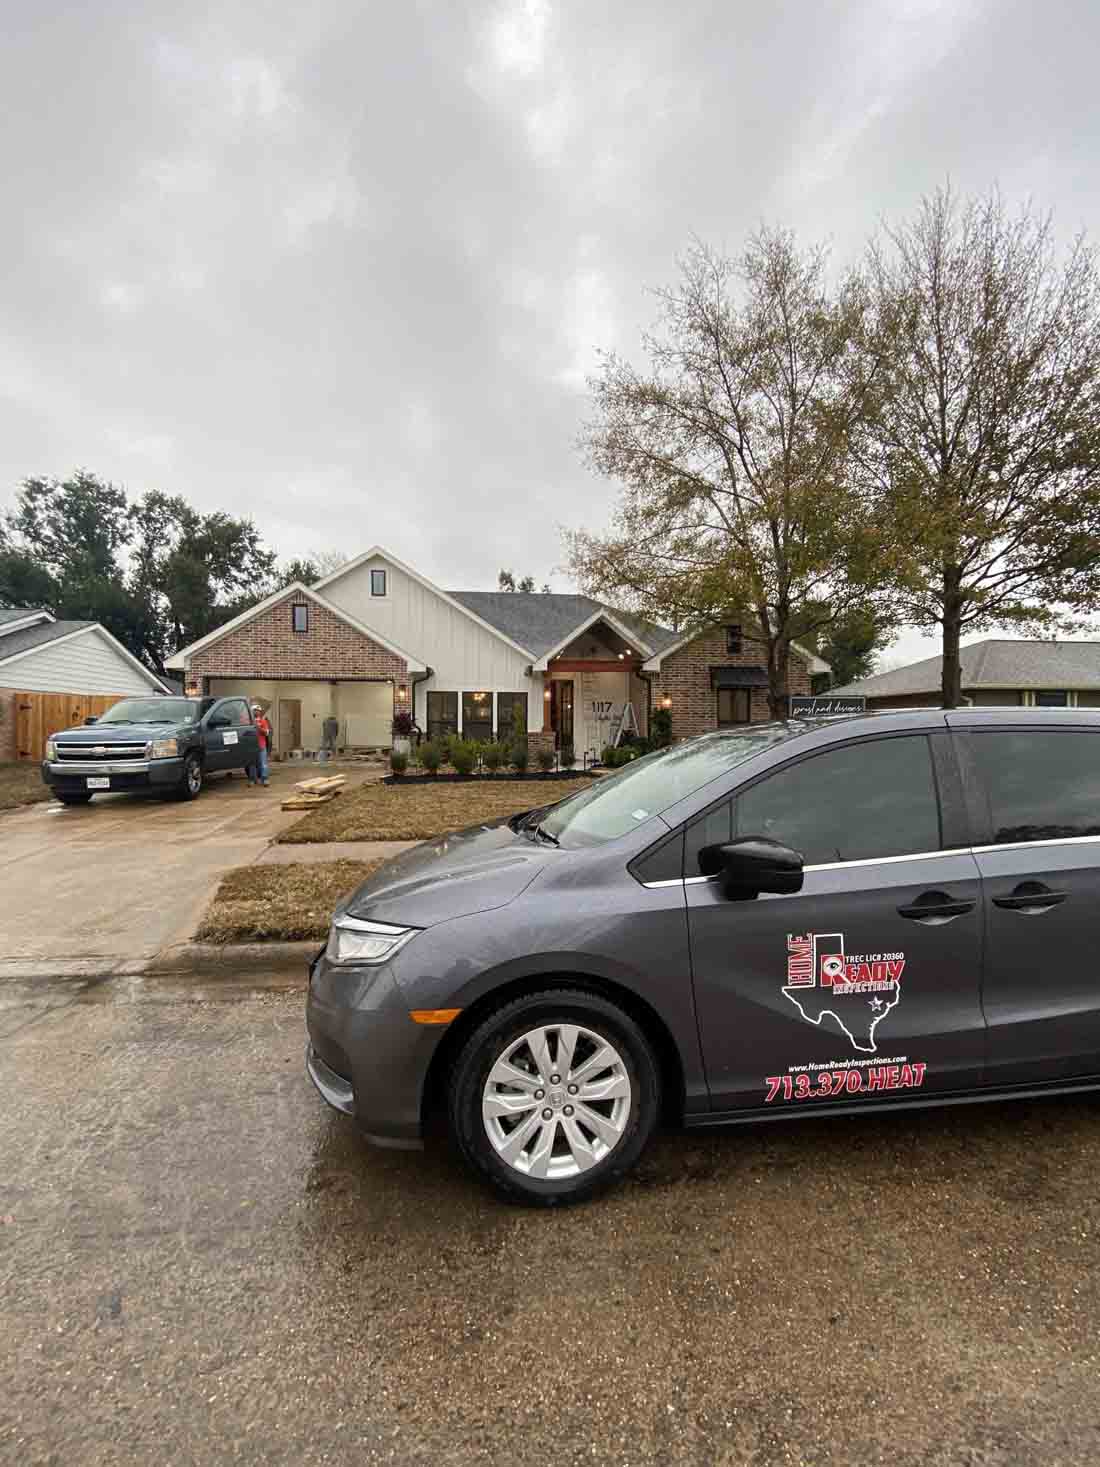
1117 Phyllis St, Deer Park, TX 77536
45L Tax Credits for Zero Energy Ready Homes
Disclaimer: (Energy Star) This webpage provides an overview of the DOE Zero Energy Ready Home program and how it relates to the New Energy Efficient Home Tax Credit found in section 45L of the Internal Revenue Code. The information provided here does not constitute professional tax advice or other professional financial guidance. It should not be used as the only source of information when making decisions regarding design, purchasing, investments, or the tax implications of new home construction, or when executing other binding agreements. In the event that there is conflict between information provided on this webpage and guidance or notices published by IRS, the information published by IRS shall take precedence
The Updated Section 45L
The Inflation Reduction Act of 2022 (IRA) amended Internal Revenue Code Section 45L to provide taxpayers with a tax credit for eligible new or substantially reconstructed homes that meet applicable ENERGY STAR home program or DOE Zero Energy Ready Home (ZERH) program requirements. The new 45L provisions include two tiers of credits, with the higher credits for eligible homes and dwelling units certified to applicable ZERH program requirements. The 45L credit is $5,000 for single family and manufactured homes eligible to participate in the EPA’s ENERGY STAR Residential New Construction Program or the ENERGY STAR Manufactured New Homes Program, respectively, and which are certified to applicable ZERH program requirements. The 45L credit is $1,000 for dwelling units that are part of a building eligible to participate in the ENERGY STAR Multifamily New Construction Program, and which are certified to applicable ZERH program requirements, unless the project meets prevailing wage requirements, in which case the 45L credit is $5,000 per dwelling unit. These new 45L rules apply to qualified energy efficient homes acquired after December 31, 2022, and before January 1, 2033, for use as a residence during the taxable year. DOE continues to coordinate with the Internal Revenue Service (IRS) regarding forthcoming IRS 45L guidance.
DOE Zero Energy Ready Home (ZERH) Program Applicability for 45L Tax Credit, by Calendar Year
ZERH program requirements vary by housing sector. To improve the usability of the program requirements and the certification process for different sectors, DOE is developing and maintaining program requirements documents for each major housing sector. DOE anticipates updating these documents over the coming years, with new editions of the requirements referred to as versions.
The three housing sector tables below indicate DOE’s anticipated version release schedule for the ZERH program. The certification requirements for each housing sector are included below with links to detailed requirements documents (PDF) for each program version. IRS guidance will establish when a dwelling unit needs to be certified to the version in effect for that housing sector as listed below to qualify for the ZERH provisions of 45L tax credit. The tables list all current and planned versions through 2025, by Calendar Year (January 1-December 31). In conjunction with IRS, DOE will provide additional information on any planned ZERH program changes beyond 2025 on future dates to be determined. Note, for certain future planned versions the requirements documents are still under development.
https://www.energy.gov/eere/buildings/45l-tax-credits-zero-energy-ready-homes
Minimizing Energy Losses in Ducts at 2406 Truxillo St, Houston TX 77004
2406 Truxillo St, Houston TX 77004
Minimizing Energy Losses in Ducts
Minimizing energy losses in ducts by seeing if the ducts are poorly sealed or insulated. That could tell you why your energy bill in high. Your air ducts are one of the most important systems in your home, and if the ducts are poorly sealed or insulated, they are likely contributing to higher energy bills.
Your home’s duct system is a branching network of tubes in the walls, floors, and ceilings; it carries the air from your home’s furnace and central air conditioner to each room. Ducts are made of sheet metal, fiberglass, or other materials.
Ducts that leak heated air into unheated spaces can add hundreds of dollars a year to your heating and cooling bills, but you can reduce that loss by sealing and insulating your ducts. Insulating ducts in unconditioned spaces is usually very cost-effective. Existing ducts may also be blocked or may require simple upgrades.
Designing and Installing New Duct Systems
In new home construction or in retrofits, proper duct system design is critical. In recent years, energy-saving designs have sought to include ducts and heating systems in the conditioned space.
Efficient and well-designed duct systems distribute air properly throughout your home without leaking to keep all rooms at a comfortable temperature. The system should provide balanced supply and return flow to maintain a neutral pressure within the house.
Even well sealed and insulated ducts will leak and lose some heat, so many new energy-efficient homes place the duct system within the conditioned space of the home. The simplest way to accomplish this is to hide the ducts in dropped ceilings and in corners of rooms. Ducts can also be located in a sealed and insulated chase extending into the attic or built into raised floors. In both of these latter cases, care must be taken during construction to prevent contractors from using the duct chases for wiring or other utilities.
In either case, actual ducts must be used — chases and floor cavities should not be used as ducts. Regardless of where they are installed, ducts should be well sealed. Although ducts can be configured in a number of ways, the “trunk and branch” and “radial” supply duct configurations are most suitable for ducts located in conditioned spaces.
Air return duct systems can be configured in two ways: each room can have a return duct that sends air back to the heating and cooling equipment or return grills can be located in central locations on each floor. For the latter case, either grills must be installed to allow air to pass out of closed rooms, or short “jumper ducts” can be installed to connect the vent in one room with the next, allowing air to flow back to the central return grilles. Door undercuts help, but they are usually not sufficient for return airflow.
You can perform a simple check for adequate return air capacity by doing the following:
- Close all exterior doors and windows
- Close all interior room doors
- Turn on the central air handler
- “Crack” interior doors one by one and observe if the door closes or further opens “on its own.” (Whether it closes or opens will depend on the direction of the air handler-driven air flow.) Rooms served by air-moved doors have restricted return air flow and need pressure relief as described above.
Maintaining and Upgrading Existing Duct Systems
Sealing your ducts to prevent leaks is even more important if the ducts are located in an unconditioned area such as an attic or vented crawlspace. If the supply ducts are leaking, heated or cooled air can be forced out of unsealed joints and lost. In addition, unconditioned air can be drawn into return ducts through unsealed joints.
Although minor duct repairs are easy to make, qualified professionals should seal and insulate ducts in unconditioned spaces to ensure the use of appropriate sealing materials.
Aside from sealing your ducts, the simplest and most effective means of maintaining your air distribution system is to ensure that furniture and other objects are not blocking the airflow through your registers, and to vacuum the registers to remove any dust buildup.
Existing duct systems often suffer from design deficiencies in the return air system, and modifications by the homeowner (or just a tendency to keep doors closed) may contribute to these problems. Any rooms with a lack of sufficient return airflow may benefit from relatively simple upgrades, such as the installation of new return-air grilles, undercutting doors for return air, or installing a jumper duct.
Some rooms may also be hard to heat and cool because of inadequate supply ducts or grilles. If this is the case, you should first examine whether the problem is the room itself: fix any problems with insulation, air leakage, or inefficient windows first. If the problem persists, you may be able to increase the size of the supply duct or add an additional duct to provide the needed airflow to the room.
Minor Duct Repair Tips for Minimizing Energy Losses in Ducts
- Check your ducts for air leaks. First, look for sections that should be joined but have separated and then look for obvious holes.
- Duct mastic is the preferred material for sealing ductwork seams and joints. It is more durable than any available tape and generally easier for a do-it-yourself installation. Its only drawback is that it will not bridge gaps over ¼ inch. Such gaps must be first bridged with web-type drywall tape, or a good quality heat approved tape.
- If you use tape to seal your ducts, avoid cloth-backed, rubber adhesive duct tape — it tends to fail quickly. Instead, use mastic, butyl tape, foil tape, or other heat-approved tapes. Look for tape with the Underwriters Laboratories (UL) logo.
- Remember that insulating ducts in the basement will make the basement colder. If both the ducts and the basement walls are not insulated, consider insulating both. Water pipes and drains in unconditioned spaces could freeze and burst if the heat ducts are fully insulated because there would be no heat source to prevent the space from freezing in cold weather. However, using an electric heating tape wrap on the pipes can prevent this. Check with a professional contractor.
- Hire a professional to install both supply and return registers in the basement rooms after converting your basement to a living area.
- Be sure a well-sealed vapor barrier exists on the outside of the insulation on cooling ducts to prevent moisture condensation.
- If you have a fuel-burning furnace, stove, or other appliance or an attached garage, install a carbon monoxide (CO) monitor to alert you to harmful CO levels.
- Be sure to get professional help when doing ductwork. A qualified professional should always perform changes and repairs to a duct system.
2706 Sledge St, Houston, TX 77009 – Minimizing Energy Losses in Ducts
2706 Sledge St, Houston, TX 77009
Minimizing Energy Losses in Ducts
Minimizing energy losses in ducts is an important aspect of energy efficiency in HVAC (Heating, Ventilation, and Air Conditioning) systems. Ducts are used to distribute conditioned air throughout a building, and any energy losses during the distribution process can lead to increased energy consumption and reduced system performance. Here are some key measures to minimize energy losses in ducts:
1. Proper Duct Design: Ensure that ductwork is properly designed to minimize pressure losses. Use appropriately sized ducts, minimize the number of bends and transitions, and maintain a balanced airflow distribution. Consult industry guidelines or work with an HVAC professional to design an efficient duct system.
2. Sealing: Duct leakage is a major source of energy losses. Seal all joints, connections, and seams in the ductwork using approved sealing materials such as mastic or metal tape. Pay particular attention to connections at registers, grilles, and air-handling units.
3. Insulation: Insulate ducts that run through unconditioned spaces, such as attics, crawlspaces, or basements. Insulation helps to prevent heat transfer between the ductwork and the surrounding environment, reducing energy losses and improving system efficiency.
4. Duct Material: Consider using insulated ducts with low thermal conductivity. Insulated ducts minimize heat transfer through the duct walls, helping to maintain the desired temperature of the conditioned air as it travels through the system.
5. Avoiding Overlong Duct Runs: Minimize the length of duct runs as much as possible. Longer ducts result in increased friction losses, which can reduce airflow and energy efficiency. Optimize the layout and location of HVAC equipment to keep duct runs as short and direct as feasible.
6. Balancing and Adjusting Dampers: Balancing the airflow within the duct system ensures that each room receives the appropriate amount of conditioned air. Adjust dampers at branch points and in individual ducts to balance the airflow and avoid over-pressurizing or under-pressurizing certain areas.
7. Regular Maintenance: Conduct regular inspections of the ductwork to check for leaks, obstructions, or damage. Clean the ducts periodically to remove dust, debris, or any substances that could impede airflow.
8. Air Filters: Install high-quality air filters and regularly replace them according to the manufacturer’s recommendations. Clean air filters help maintain optimal airflow, reducing pressure drops and energy losses.
By implementing these measures, you can significantly minimize energy losses in ducts, improve the overall efficiency of your HVAC system, and reduce energy consumption. Consulting with a professional HVAC contractor or engineer can provide valuable insights specific to your building’s requirements and help optimize energy efficiency.
https://homereadyinspections.com/builders-hvac/
20804 Opal St, Prairie View, TX 77484 – Minimizing Energy Losses in Ducts
20804 Opal St, Prairie View, TX 77484
Minimizing Energy Losses in Ducts
Minimizing energy losses in ducts is an important aspect of energy efficiency in HVAC (Heating, Ventilation, and Air Conditioning) systems. Ducts are used to distribute conditioned air throughout a building, and any energy losses during the distribution process can lead to increased energy consumption and reduced system performance. Here are some key measures to minimize energy losses in ducts:
1. Proper Duct Design: Ensure that ductwork is properly designed to minimize pressure losses. Use appropriately sized ducts, minimize the number of bends and transitions, and maintain a balanced airflow distribution. Consult industry guidelines or work with an HVAC professional to design an efficient duct system.
2. Sealing: Duct leakage is a major source of energy losses. Seal all joints, connections, and seams in the ductwork using approved sealing materials such as mastic or metal tape. Pay particular attention to connections at registers, grilles, and air-handling units.
3. Insulation: Insulate ducts that run through unconditioned spaces, such as attics, crawlspaces, or basements. Insulation helps to prevent heat transfer between the ductwork and the surrounding environment, reducing energy losses and improving system efficiency.
4. Duct Material: Consider using insulated ducts with low thermal conductivity. Insulated ducts minimize heat transfer through the duct walls, helping to maintain the desired temperature of the conditioned air as it travels through the system.
5. Avoiding Overlong Duct Runs: Minimize the length of duct runs as much as possible. Longer ducts result in increased friction losses, which can reduce airflow and energy efficiency. Optimize the layout and location of HVAC equipment to keep duct runs as short and direct as feasible.
6. Balancing and Adjusting Dampers: Balancing the airflow within the duct system ensures that each room receives the appropriate amount of conditioned air. Adjust dampers at branch points and in individual ducts to balance the airflow and avoid over-pressurizing or under-pressurizing certain areas.
7. Regular Maintenance: Conduct regular inspections of the ductwork to check for leaks, obstructions, or damage. Clean the ducts periodically to remove dust, debris, or any substances that could impede airflow.
8. Air Filters: Install high-quality air filters and regularly replace them according to the manufacturer’s recommendations. Clean air filters help maintain optimal airflow, reducing pressure drops and energy losses.
By implementing these measures, you can significantly minimize energy losses in ducts, improve the overall efficiency of your HVAC system, and reduce energy consumption. Consulting with a professional HVAC contractor or engineer can provide valuable insights specific to your building’s requirements and help optimize energy efficiency.
https://homereadyinspections.com/builders-hvac/
6552 Calder St, Houston, TX 77007 – Minimizing Energy Losses in Ducts
6552 Calder St, Houston, TX 77007
Minimizing Energy Losses in Ducts
Minimizing energy losses in ducts is an important aspect of energy efficiency in HVAC (Heating, Ventilation, and Air Conditioning) systems. Ducts are used to distribute conditioned air throughout a building, and any energy losses during the distribution process can lead to increased energy consumption and reduced system performance. Here are some key measures to minimize energy losses in ducts:
1. Proper Duct Design: Ensure that ductwork is properly designed to minimize pressure losses. Use appropriately sized ducts, minimize the number of bends and transitions, and maintain a balanced airflow distribution. Consult industry guidelines or work with an HVAC professional to design an efficient duct system.
2. Sealing: Duct leakage is a major source of energy losses. Seal all joints, connections, and seams in the ductwork using approved sealing materials such as mastic or metal tape. Pay particular attention to connections at registers, grilles, and air-handling units.
3. Insulation: Insulate ducts that run through unconditioned spaces, such as attics, crawlspaces, or basements. Insulation helps to prevent heat transfer between the ductwork and the surrounding environment, reducing energy losses and improving system efficiency.
4. Duct Material: Consider using insulated ducts with low thermal conductivity. Insulated ducts minimize heat transfer through the duct walls, helping to maintain the desired temperature of the conditioned air as it travels through the system.
5. Avoiding Overlong Duct Runs: Minimize the length of duct runs as much as possible. Longer ducts result in increased friction losses, which can reduce airflow and energy efficiency. Optimize the layout and location of HVAC equipment to keep duct runs as short and direct as feasible.
6. Balancing and Adjusting Dampers: Balancing the airflow within the duct system ensures that each room receives the appropriate amount of conditioned air. Adjust dampers at branch points and in individual ducts to balance the airflow and avoid over-pressurizing or under-pressurizing certain areas.
7. Regular Maintenance: Conduct regular inspections of the ductwork to check for leaks, obstructions, or damage. Clean the ducts periodically to remove dust, debris, or any substances that could impede airflow.
8. Air Filters: Install high-quality air filters and regularly replace them according to the manufacturer’s recommendations. Clean air filters help maintain optimal airflow, reducing pressure drops and energy losses.
By implementing these measures, you can significantly minimize energy losses in ducts, improve the overall efficiency of your HVAC system, and reduce energy consumption. Consulting with a professional HVAC contractor or engineer can provide valuable insights specific to your building’s requirements and help optimize energy efficiency.
https://homereadyinspections.com/builders-hvac/
Energy Star – 45L Tax Credits for Zero Energy Ready Homes
412 Neyland St, Houston, TX 77022
45L Tax Credits for Zero Energy Ready Homes
Disclaimer: (Energy Star) This webpage provides an overview of the DOE Zero Energy Ready Home program and how it relates to the New Energy Efficient Home Tax Credit found in section 45L of the Internal Revenue Code. The information provided here does not constitute professional tax advice or other professional financial guidance. It should not be used as the only source of information when making decisions regarding design, purchasing, investments, or the tax implications of new home construction, or when executing other binding agreements. In the event that there is conflict between information provided on this webpage and guidance or notices published by IRS, the information published by IRS shall take precedence
The Updated Section 45L
The Inflation Reduction Act of 2022 (IRA) amended Internal Revenue Code Section 45L to provide taxpayers with a tax credit for eligible new or substantially reconstructed homes that meet applicable ENERGY STAR home program or DOE Zero Energy Ready Home (ZERH) program requirements. The new 45L provisions include two tiers of credits, with the higher credits for eligible homes and dwelling units certified to applicable ZERH program requirements. The 45L credit is $5,000 for single family and manufactured homes eligible to participate in the EPA’s ENERGY STAR Residential New Construction Program or the ENERGY STAR Manufactured New Homes Program, respectively, and which are certified to applicable ZERH program requirements. The 45L credit is $1,000 for dwelling units that are part of a building eligible to participate in the ENERGY STAR Multifamily New Construction Program, and which are certified to applicable ZERH program requirements, unless the project meets prevailing wage requirements, in which case the 45L credit is $5,000 per dwelling unit. These new 45L rules apply to qualified energy efficient homes acquired after December 31, 2022, and before January 1, 2033, for use as a residence during the taxable year. DOE continues to coordinate with the Internal Revenue Service (IRS) regarding forthcoming IRS 45L guidance.
DOE Zero Energy Ready Home (ZERH) Program Applicability for 45L Tax Credit, by Calendar Year
ZERH program requirements vary by housing sector. To improve the usability of the program requirements and the certification process for different sectors, DOE is developing and maintaining program requirements documents for each major housing sector. DOE anticipates updating these documents over the coming years, with new editions of the requirements referred to as versions.
The three housing sector tables below indicate DOE’s anticipated version release schedule for the ZERH program. The certification requirements for each housing sector are included below with links to detailed requirements documents (PDF) for each program version. IRS guidance will establish when a dwelling unit needs to be certified to the version in effect for that housing sector as listed below to qualify for the ZERH provisions of 45L tax credit. The tables list all current and planned versions through 2025, by Calendar Year (January 1-December 31). In conjunction with IRS, DOE will provide additional information on any planned ZERH program changes beyond 2025 on future dates to be determined. Note, for certain future planned versions the requirements documents are still under development.
https://www.energy.gov/eere/buildings/45l-tax-credits-zero-energy-ready-homes
819 Woodcrest Dr, Houston, TX 77018 – Minimizing Energy Losses in Ducts
819 Woodcrest Dr, Houston, TX 77018 – Minimizing Energy Losses in Ducts
819 Woodcrest Dr, Houston, TX 77018
Third-party Energy Testing
Your air ducts are one of the most important systems in your home, and if the ducts are poorly sealed or insulated they are likely contributing to higher energy bills.
Blower Doors: What Are They and How Do They Work?
A blower door is a device used in energy testing to measure a building’s airtightness. It consists of a powerful fan mounted on a temporary frame that fits into a doorway or an exterior opening. During a blower door test, the fan creates a pressure difference between the inside and outside of the building. This pressure difference allows air leakage points to become apparent and measurable. The test helps identify areas of air infiltration or exfiltration, which can affect energy efficiency and indoor comfort.
The blower door test involves setting up the device, measuring the baseline pressure, and then either depressurizing or pressurizing the building using the fan. While the fan is running, the airflow rate is measured using instruments like a manometer or pressure gauge. This airflow measurement quantifies the amount of air leakage in the building. Smoke pencils or thermal imaging cameras can be used to locate specific air leakage points.
The blower door test can be conducted in both depressurization and pressurization modes, allowing for a comprehensive assessment of air leakage locations. Once the test is complete, the data is analyzed to determine the building’s airtightness and identify areas that need improvement. The results can be used to guide air sealing measures and improve energy efficiency.
Blower door tests are crucial in identifying air leakage points, reducing energy loss, improving indoor air quality, and enhancing the overall performance and comfort of a building.
Home Inspection Atascocita | Home Ready Inspections | Houston TX
778 W Tidwell Rd, Houston, TX 77091 – Minimizing Energy Losses in Ducts
778 W Tidwell Rd, Houston, TX 77091 – Minimizing Energy Losses in Ducts
778 W Tidwell Rd, Houston, TX 77091
Third-party Energy Testing
Your air ducts are one of the most important systems in your home, and if the ducts are poorly sealed or insulated they are likely contributing to higher energy bills.
Blower Doors: What Are They and How Do They Work?
A blower door is a device used in energy testing to measure a building’s airtightness. It consists of a powerful fan mounted on a temporary frame that fits into a doorway or an exterior opening. During a blower door test, the fan creates a pressure difference between the inside and outside of the building. This pressure difference allows air leakage points to become apparent and measurable. The test helps identify areas of air infiltration or exfiltration, which can affect energy efficiency and indoor comfort.
The blower door test involves setting up the device, measuring the baseline pressure, and then either depressurizing or pressurizing the building using the fan. While the fan is running, the airflow rate is measured using instruments like a manometer or pressure gauge. This airflow measurement quantifies the amount of air leakage in the building. Smoke pencils or thermal imaging cameras can be used to locate specific air leakage points.
The blower door test can be conducted in both depressurization and pressurization modes, allowing for a comprehensive assessment of air leakage locations. Once the test is complete, the data is analyzed to determine the building’s airtightness and identify areas that need improvement. The results can be used to guide air sealing measures and improve energy efficiency.
Blower door tests are crucial in identifying air leakage points, reducing energy loss, improving indoor air quality, and enhancing the overall performance and comfort of a building.
Home Inspection Atascocita | Home Ready Inspections | Houston TX
Minimizing Energy Losses in Ducts at 8134 Swiftwater Ln, Houston, TX 77075
8134 Swiftwater Ln, Houston, TX 77075
Minimizing Energy Losses in Ducts
Minimizing energy losses in ducts by seeing if the ducts are poorly sealed or insulated. That could tell you why your energy bill in high. Your air ducts are one of the most important systems in your home, and if the ducts are poorly sealed or insulated, they are likely contributing to higher energy bills.
Your home’s duct system is a branching network of tubes in the walls, floors, and ceilings; it carries the air from your home’s furnace and central air conditioner to each room. Ducts are made of sheet metal, fiberglass, or other materials.
Ducts that leak heated air into unheated spaces can add hundreds of dollars a year to your heating and cooling bills, but you can reduce that loss by sealing and insulating your ducts. Insulating ducts in unconditioned spaces is usually very cost-effective. Existing ducts may also be blocked or may require simple upgrades.
Designing and Installing New Duct Systems
In new home construction or in retrofits, proper duct system design is critical. In recent years, energy-saving designs have sought to include ducts and heating systems in the conditioned space.
Efficient and well-designed duct systems distribute air properly throughout your home without leaking to keep all rooms at a comfortable temperature. The system should provide balanced supply and return flow to maintain a neutral pressure within the house.
Even well sealed and insulated ducts will leak and lose some heat, so many new energy-efficient homes place the duct system within the conditioned space of the home. The simplest way to accomplish this is to hide the ducts in dropped ceilings and in corners of rooms. Ducts can also be located in a sealed and insulated chase extending into the attic or built into raised floors. In both of these latter cases, care must be taken during construction to prevent contractors from using the duct chases for wiring or other utilities.
In either case, actual ducts must be used — chases and floor cavities should not be used as ducts. Regardless of where they are installed, ducts should be well sealed. Although ducts can be configured in a number of ways, the “trunk and branch” and “radial” supply duct configurations are most suitable for ducts located in conditioned spaces.
Air return duct systems can be configured in two ways: each room can have a return duct that sends air back to the heating and cooling equipment or return grills can be located in central locations on each floor. For the latter case, either grills must be installed to allow air to pass out of closed rooms, or short “jumper ducts” can be installed to connect the vent in one room with the next, allowing air to flow back to the central return grilles. Door undercuts help, but they are usually not sufficient for return airflow.
You can perform a simple check for adequate return air capacity by doing the following:
- Close all exterior doors and windows
- Close all interior room doors
- Turn on the central air handler
- “Crack” interior doors one by one and observe if the door closes or further opens “on its own.” (Whether it closes or opens will depend on the direction of the air handler-driven air flow.) Rooms served by air-moved doors have restricted return air flow and need pressure relief as described above.
Maintaining and Upgrading Existing Duct Systems
Sealing your ducts to prevent leaks is even more important if the ducts are located in an unconditioned area such as an attic or vented crawlspace. If the supply ducts are leaking, heated or cooled air can be forced out of unsealed joints and lost. In addition, unconditioned air can be drawn into return ducts through unsealed joints.
Although minor duct repairs are easy to make, qualified professionals should seal and insulate ducts in unconditioned spaces to ensure the use of appropriate sealing materials.
Aside from sealing your ducts, the simplest and most effective means of maintaining your air distribution system is to ensure that furniture and other objects are not blocking the airflow through your registers, and to vacuum the registers to remove any dust buildup.
Existing duct systems often suffer from design deficiencies in the return air system, and modifications by the homeowner (or just a tendency to keep doors closed) may contribute to these problems. Any rooms with a lack of sufficient return airflow may benefit from relatively simple upgrades, such as the installation of new return-air grilles, undercutting doors for return air, or installing a jumper duct.
Some rooms may also be hard to heat and cool because of inadequate supply ducts or grilles. If this is the case, you should first examine whether the problem is the room itself: fix any problems with insulation, air leakage, or inefficient windows first. If the problem persists, you may be able to increase the size of the supply duct or add an additional duct to provide the needed airflow to the room.
Minor Duct Repair Tips for Minimizing Energy Losses in Ducts
- Check your ducts for air leaks. First, look for sections that should be joined but have separated and then look for obvious holes.
- Duct mastic is the preferred material for sealing ductwork seams and joints. It is more durable than any available tape and generally easier for a do-it-yourself installation. Its only drawback is that it will not bridge gaps over ¼ inch. Such gaps must be first bridged with web-type drywall tape, or a good quality heat approved tape.
- If you use tape to seal your ducts, avoid cloth-backed, rubber adhesive duct tape — it tends to fail quickly. Instead, use mastic, butyl tape, foil tape, or other heat-approved tapes. Look for tape with the Underwriters Laboratories (UL) logo.
- Remember that insulating ducts in the basement will make the basement colder. If both the ducts and the basement walls are not insulated, consider insulating both. Water pipes and drains in unconditioned spaces could freeze and burst if the heat ducts are fully insulated because there would be no heat source to prevent the space from freezing in cold weather. However, using an electric heating tape wrap on the pipes can prevent this. Check with a professional contractor.
- Hire a professional to install both supply and return registers in the basement rooms after converting your basement to a living area.
- Be sure a well-sealed vapor barrier exists on the outside of the insulation on cooling ducts to prevent moisture condensation.
- If you have a fuel-burning furnace, stove, or other appliance or an attached garage, install a carbon monoxide (CO) monitor to alert you to harmful CO levels.
- Be sure to get professional help when doing ductwork. A qualified professional should always perform changes and repairs to a duct system.
Minimizing Energy Losses in Ducts at 9835 Tiltree St, Houston, TX 77075

9835 Tiltree St, Houston, TX 77075
Minimizing Energy Losses in Ducts
Minimizing energy losses in ducts by seeing if the ducts are poorly sealed or insulated. That could tell you why your energy bill in high. Your air ducts are one of the most important systems in your home, and if the ducts are poorly sealed or insulated, they are likely contributing to higher energy bills.
Your home’s duct system is a branching network of tubes in the walls, floors, and ceilings; it carries the air from your home’s furnace and central air conditioner to each room. Ducts are made of sheet metal, fiberglass, or other materials.
Ducts that leak heated air into unheated spaces can add hundreds of dollars a year to your heating and cooling bills, but you can reduce that loss by sealing and insulating your ducts. Insulating ducts in unconditioned spaces is usually very cost-effective. Existing ducts may also be blocked or may require simple upgrades.
Designing and Installing New Duct Systems
In new home construction or in retrofits, proper duct system design is critical. In recent years, energy-saving designs have sought to include ducts and heating systems in the conditioned space.
Efficient and well-designed duct systems distribute air properly throughout your home without leaking to keep all rooms at a comfortable temperature. The system should provide balanced supply and return flow to maintain a neutral pressure within the house.
Even well sealed and insulated ducts will leak and lose some heat, so many new energy-efficient homes place the duct system within the conditioned space of the home. The simplest way to accomplish this is to hide the ducts in dropped ceilings and in corners of rooms. Ducts can also be located in a sealed and insulated chase extending into the attic or built into raised floors. In both of these latter cases, care must be taken during construction to prevent contractors from using the duct chases for wiring or other utilities.
In either case, actual ducts must be used — chases and floor cavities should not be used as ducts. Regardless of where they are installed, ducts should be well sealed. Although ducts can be configured in a number of ways, the “trunk and branch” and “radial” supply duct configurations are most suitable for ducts located in conditioned spaces.
Air return duct systems can be configured in two ways: each room can have a return duct that sends air back to the heating and cooling equipment or return grills can be located in central locations on each floor. For the latter case, either grills must be installed to allow air to pass out of closed rooms, or short “jumper ducts” can be installed to connect the vent in one room with the next, allowing air to flow back to the central return grilles. Door undercuts help, but they are usually not sufficient for return airflow.
You can perform a simple check for adequate return air capacity by doing the following:
- Close all exterior doors and windows
- Close all interior room doors
- Turn on the central air handler
- “Crack” interior doors one by one and observe if the door closes or further opens “on its own.” (Whether it closes or opens will depend on the direction of the air handler-driven air flow.) Rooms served by air-moved doors have restricted return air flow and need pressure relief as described above.
Maintaining and Upgrading Existing Duct Systems
Sealing your ducts to prevent leaks is even more important if the ducts are located in an unconditioned area such as an attic or vented crawlspace. If the supply ducts are leaking, heated or cooled air can be forced out of unsealed joints and lost. In addition, unconditioned air can be drawn into return ducts through unsealed joints.
Although minor duct repairs are easy to make, qualified professionals should seal and insulate ducts in unconditioned spaces to ensure the use of appropriate sealing materials.
Aside from sealing your ducts, the simplest and most effective means of maintaining your air distribution system is to ensure that furniture and other objects are not blocking the airflow through your registers, and to vacuum the registers to remove any dust buildup.
Existing duct systems often suffer from design deficiencies in the return air system, and modifications by the homeowner (or just a tendency to keep doors closed) may contribute to these problems. Any rooms with a lack of sufficient return airflow may benefit from relatively simple upgrades, such as the installation of new return-air grilles, undercutting doors for return air, or installing a jumper duct.
Some rooms may also be hard to heat and cool because of inadequate supply ducts or grilles. If this is the case, you should first examine whether the problem is the room itself: fix any problems with insulation, air leakage, or inefficient windows first. If the problem persists, you may be able to increase the size of the supply duct or add an additional duct to provide the needed airflow to the room.
Minor Duct Repair Tips for Minimizing Energy Losses in Ducts
- Check your ducts for air leaks. First, look for sections that should be joined but have separated and then look for obvious holes.
- Duct mastic is the preferred material for sealing ductwork seams and joints. It is more durable than any available tape and generally easier for a do-it-yourself installation. Its only drawback is that it will not bridge gaps over ¼ inch. Such gaps must be first bridged with web-type drywall tape, or a good quality heat approved tape.
- If you use tape to seal your ducts, avoid cloth-backed, rubber adhesive duct tape — it tends to fail quickly. Instead, use mastic, butyl tape, foil tape, or other heat-approved tapes. Look for tape with the Underwriters Laboratories (UL) logo.
- Remember that insulating ducts in the basement will make the basement colder. If both the ducts and the basement walls are not insulated, consider insulating both. Water pipes and drains in unconditioned spaces could freeze and burst if the heat ducts are fully insulated because there would be no heat source to prevent the space from freezing in cold weather. However, using an electric heating tape wrap on the pipes can prevent this. Check with a professional contractor.
- Hire a professional to install both supply and return registers in the basement rooms after converting your basement to a living area.
- Be sure a well-sealed vapor barrier exists on the outside of the insulation on cooling ducts to prevent moisture condensation.
- If you have a fuel-burning furnace, stove, or other appliance or an attached garage, install a carbon monoxide (CO) monitor to alert you to harmful CO levels.
- Be sure to get professional help when doing ductwork. A qualified professional should always perform changes and repairs to a duct system.
Minimizing Energy Losses in Ducts at 25947 Bay Breeze Dr, Galveston, TX 77554

25947 Bay Breeze Dr, Galveston, TX 77554
Minimizing Energy Losses in Ducts
Minimizing energy losses in ducts by seeing if the ducts are poorly sealed or insulated. That could tell you why your energy bill in high. Your air ducts are one of the most important systems in your home, and if the ducts are poorly sealed or insulated, they are likely contributing to higher energy bills.
Your home’s duct system is a branching network of tubes in the walls, floors, and ceilings; it carries the air from your home’s furnace and central air conditioner to each room. Ducts are made of sheet metal, fiberglass, or other materials.
Ducts that leak heated air into unheated spaces can add hundreds of dollars a year to your heating and cooling bills, but you can reduce that loss by sealing and insulating your ducts. Insulating ducts in unconditioned spaces is usually very cost-effective. Existing ducts may also be blocked or may require simple upgrades.
Designing and Installing New Duct Systems
In new home construction or in retrofits, proper duct system design is critical. In recent years, energy-saving designs have sought to include ducts and heating systems in the conditioned space.
Efficient and well-designed duct systems distribute air properly throughout your home without leaking to keep all rooms at a comfortable temperature. The system should provide balanced supply and return flow to maintain a neutral pressure within the house.
Even well sealed and insulated ducts will leak and lose some heat, so many new energy-efficient homes place the duct system within the conditioned space of the home. The simplest way to accomplish this is to hide the ducts in dropped ceilings and in corners of rooms. Ducts can also be located in a sealed and insulated chase extending into the attic or built into raised floors. In both of these latter cases, care must be taken during construction to prevent contractors from using the duct chases for wiring or other utilities.
In either case, actual ducts must be used — chases and floor cavities should not be used as ducts. Regardless of where they are installed, ducts should be well sealed. Although ducts can be configured in a number of ways, the “trunk and branch” and “radial” supply duct configurations are most suitable for ducts located in conditioned spaces.
Air return duct systems can be configured in two ways: each room can have a return duct that sends air back to the heating and cooling equipment or return grills can be located in central locations on each floor. For the latter case, either grills must be installed to allow air to pass out of closed rooms, or short “jumper ducts” can be installed to connect the vent in one room with the next, allowing air to flow back to the central return grilles. Door undercuts help, but they are usually not sufficient for return airflow.
You can perform a simple check for adequate return air capacity by doing the following:
- Close all exterior doors and windows
- Close all interior room doors
- Turn on the central air handler
- “Crack” interior doors one by one and observe if the door closes or further opens “on its own.” (Whether it closes or opens will depend on the direction of the air handler-driven air flow.) Rooms served by air-moved doors have restricted return air flow and need pressure relief as described above.
Maintaining and Upgrading Existing Duct Systems
Sealing your ducts to prevent leaks is even more important if the ducts are located in an unconditioned area such as an attic or vented crawlspace. If the supply ducts are leaking, heated or cooled air can be forced out of unsealed joints and lost. In addition, unconditioned air can be drawn into return ducts through unsealed joints.
Although minor duct repairs are easy to make, qualified professionals should seal and insulate ducts in unconditioned spaces to ensure the use of appropriate sealing materials.
Aside from sealing your ducts, the simplest and most effective means of maintaining your air distribution system is to ensure that furniture and other objects are not blocking the airflow through your registers, and to vacuum the registers to remove any dust buildup.
Existing duct systems often suffer from design deficiencies in the return air system, and modifications by the homeowner (or just a tendency to keep doors closed) may contribute to these problems. Any rooms with a lack of sufficient return airflow may benefit from relatively simple upgrades, such as the installation of new return-air grilles, undercutting doors for return air, or installing a jumper duct.
Some rooms may also be hard to heat and cool because of inadequate supply ducts or grilles. If this is the case, you should first examine whether the problem is the room itself: fix any problems with insulation, air leakage, or inefficient windows first. If the problem persists, you may be able to increase the size of the supply duct or add an additional duct to provide the needed airflow to the room.
Minor Duct Repair Tips for Minimizing Energy Losses in Ducts
- Check your ducts for air leaks. First, look for sections that should be joined but have separated and then look for obvious holes.
- Duct mastic is the preferred material for sealing ductwork seams and joints. It is more durable than any available tape and generally easier for a do-it-yourself installation. Its only drawback is that it will not bridge gaps over ¼ inch. Such gaps must be first bridged with web-type drywall tape, or a good quality heat approved tape.
- If you use tape to seal your ducts, avoid cloth-backed, rubber adhesive duct tape — it tends to fail quickly. Instead, use mastic, butyl tape, foil tape, or other heat-approved tapes. Look for tape with the Underwriters Laboratories (UL) logo.
- Remember that insulating ducts in the basement will make the basement colder. If both the ducts and the basement walls are not insulated, consider insulating both. Water pipes and drains in unconditioned spaces could freeze and burst if the heat ducts are fully insulated because there would be no heat source to prevent the space from freezing in cold weather. However, using an electric heating tape wrap on the pipes can prevent this. Check with a professional contractor.
- Hire a professional to install both supply and return registers in the basement rooms after converting your basement to a living area.
- Be sure a well-sealed vapor barrier exists on the outside of the insulation on cooling ducts to prevent moisture condensation.
- If you have a fuel-burning furnace, stove, or other appliance or an attached garage, install a carbon monoxide (CO) monitor to alert you to harmful CO levels.
- Be sure to get professional help when doing ductwork. A qualified professional should always perform changes and repairs to a duct system.
11514 Courtshire Dr, Houston, TX 77076 – Minimizing Energy Losses in Ducts
11514 Courtshire Dr, Houston, TX 77076
Minimizing Energy Losses in Ducts
Minimizing energy losses in ducts is an important aspect of energy efficiency in HVAC (Heating, Ventilation, and Air Conditioning) systems. Ducts are used to distribute conditioned air throughout a building, and any energy losses during the distribution process can lead to increased energy consumption and reduced system performance. Here are some key measures to minimize energy losses in ducts:
1. Proper Duct Design: Ensure that ductwork is properly designed to minimize pressure losses. Use appropriately sized ducts, minimize the number of bends and transitions, and maintain a balanced airflow distribution. Consult industry guidelines or work with an HVAC professional to design an efficient duct system.
2. Sealing: Duct leakage is a major source of energy losses. Seal all joints, connections, and seams in the ductwork using approved sealing materials such as mastic or metal tape. Pay particular attention to connections at registers, grilles, and air-handling units.
3. Insulation: Insulate ducts that run through unconditioned spaces, such as attics, crawlspaces, or basements. Insulation helps to prevent heat transfer between the ductwork and the surrounding environment, reducing energy losses and improving system efficiency.
4. Duct Material: Consider using insulated ducts with low thermal conductivity. Insulated ducts minimize heat transfer through the duct walls, helping to maintain the desired temperature of the conditioned air as it travels through the system.
5. Avoiding Overlong Duct Runs: Minimize the length of duct runs as much as possible. Longer ducts result in increased friction losses, which can reduce airflow and energy efficiency. Optimize the layout and location of HVAC equipment to keep duct runs as short and direct as feasible.
6. Balancing and Adjusting Dampers: Balancing the airflow within the duct system ensures that each room receives the appropriate amount of conditioned air. Adjust dampers at branch points and in individual ducts to balance the airflow and avoid over-pressurizing or under-pressurizing certain areas.
7. Regular Maintenance: Conduct regular inspections of the ductwork to check for leaks, obstructions, or damage. Clean the ducts periodically to remove dust, debris, or any substances that could impede airflow.
8. Air Filters: Install high-quality air filters and regularly replace them according to the manufacturer’s recommendations. Clean air filters help maintain optimal airflow, reducing pressure drops and energy losses.
By implementing these measures, you can significantly minimize energy losses in ducts, improve the overall efficiency of your HVAC system, and reduce energy consumption. Consulting with a professional HVAC contractor or engineer can provide valuable insights specific to your building’s requirements and help optimize energy efficiency.
https://homereadyinspections.com/builders-hvac/
2121 Naomi St, Houston, TX 77051 – Minimizing Energy Losses in Ducts
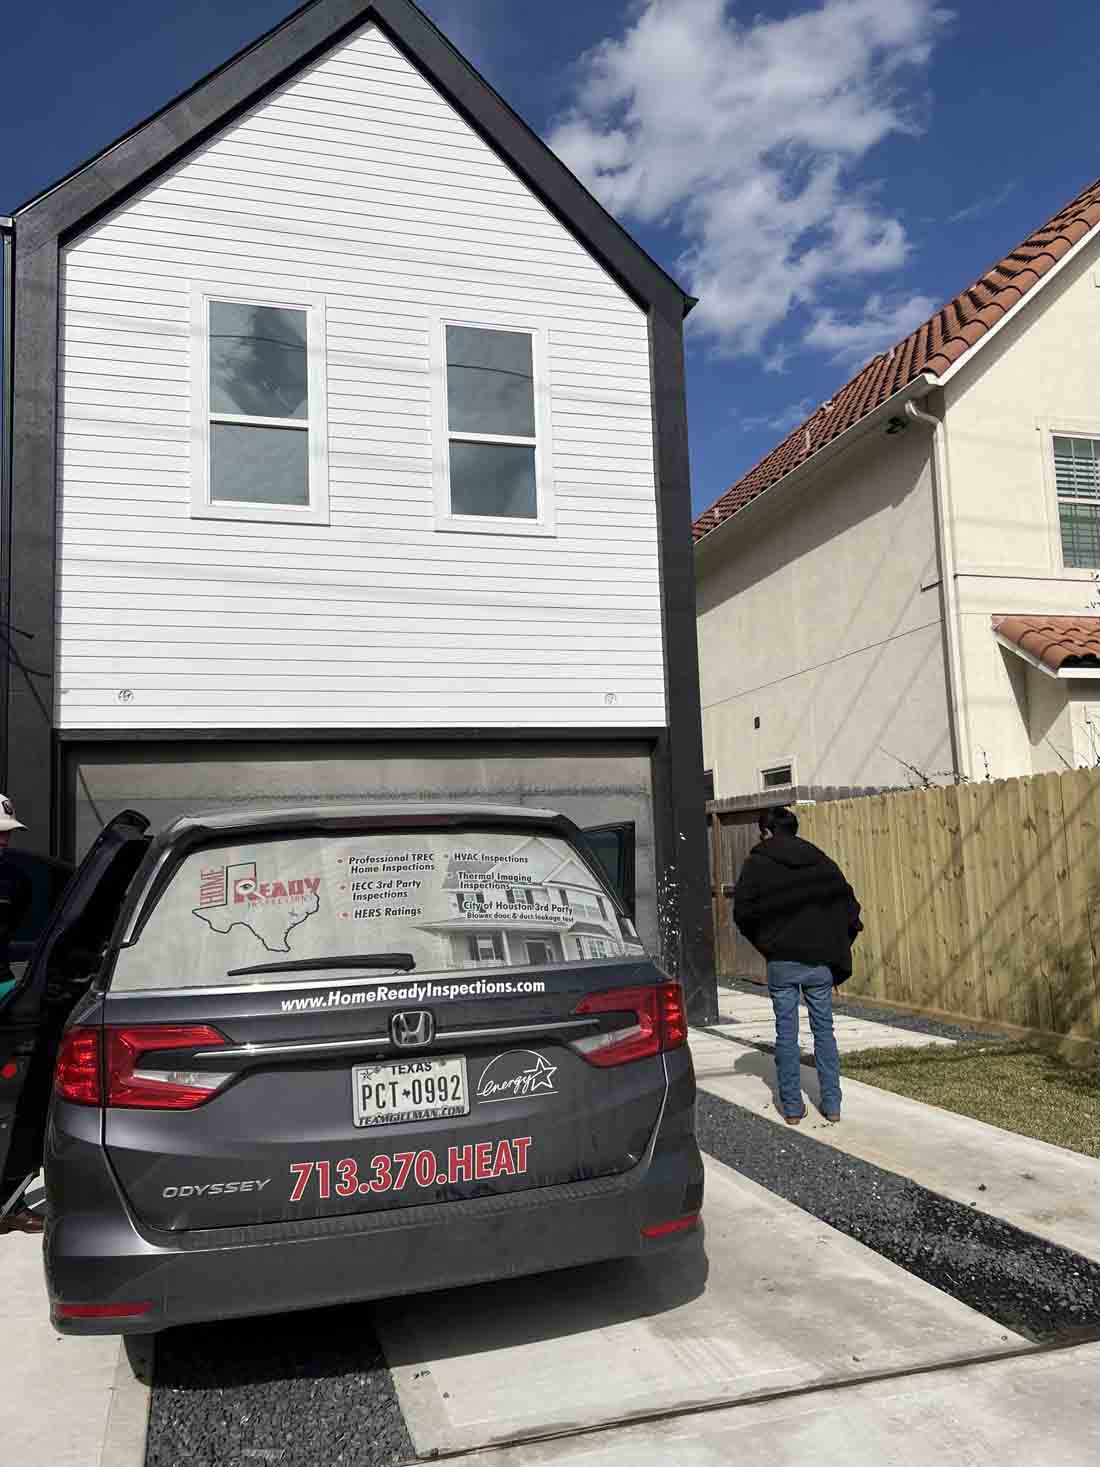 Minimizing Energy Losses in Ducts
Minimizing energy losses in ducts is an important aspect of energy efficiency in HVAC (Heating, Ventilation, and Air Conditioning) systems. Ducts are used to distribute conditioned air throughout a building, and any energy losses during the distribution process can lead to increased energy consumption and reduced system performance. Here are some key measures to minimize energy losses in ducts:
1. Proper Duct Design: Ensure that ductwork is properly designed to minimize pressure losses. Use appropriately sized ducts, minimize the number of bends and transitions, and maintain a balanced airflow distribution. Consult industry guidelines or work with an HVAC professional to design an efficient duct system.
2. Sealing: Duct leakage is a major source of energy losses. Seal all joints, connections, and seams in the ductwork using approved sealing materials such as mastic or metal tape. Pay particular attention to connections at registers, grilles, and air-handling units.
3. Insulation: Insulate ducts that run through unconditioned spaces, such as attics, crawlspaces, or basements. Insulation helps to prevent heat transfer between the ductwork and the surrounding environment, reducing energy losses and improving system efficiency.
4. Duct Material: Consider using insulated ducts with low thermal conductivity. Insulated ducts minimize heat transfer through the duct walls, helping to maintain the desired temperature of the conditioned air as it travels through the system.
5. Avoiding Overlong Duct Runs: Minimize the length of duct runs as much as possible. Longer ducts result in increased friction losses, which can reduce airflow and energy efficiency. Optimize the layout and location of HVAC equipment to keep duct runs as short and direct as feasible.
6. Balancing and Adjusting Dampers: Balancing the airflow within the duct system ensures that each room receives the appropriate amount of conditioned air. Adjust dampers at branch points and in individual ducts to balance the airflow and avoid over-pressurizing or under-pressurizing certain areas.
7. Regular Maintenance: Conduct regular inspections of the ductwork to check for leaks, obstructions, or damage. Clean the ducts periodically to remove dust, debris, or any substances that could impede airflow.
8. Air Filters: Install high-quality air filters and regularly replace them according to the manufacturer’s recommendations. Clean air filters help maintain optimal airflow, reducing pressure drops and energy losses.
By implementing these measures, you can significantly minimize energy losses in ducts, improve the overall efficiency of your HVAC system, and reduce energy consumption. Consulting with a professional HVAC contractor or engineer can provide valuable insights specific to your building’s requirements and help optimize energy efficiency.
https://homereadyinspections.com/builders-hvac/
4325 Phlox St Unit A, Houston TX 77051 Minimizing Energy Losses in Ducts
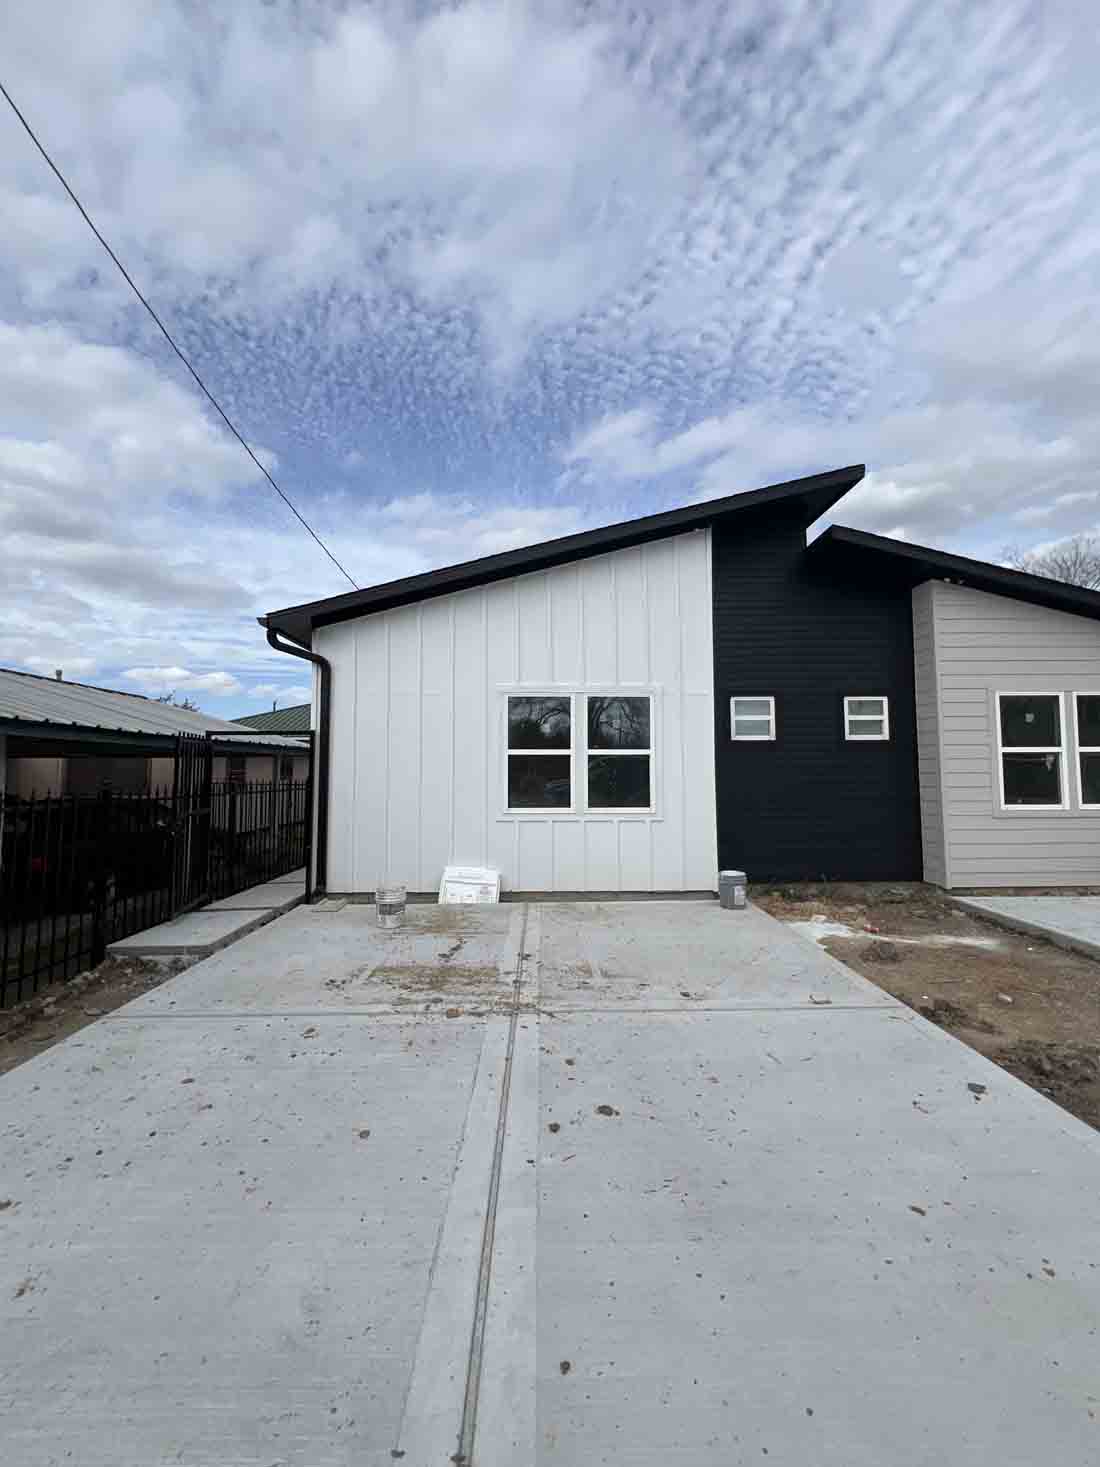
4325 Phlox St Unit A, Houston TX 77051
Minimizing Energy Losses in Ducts
Minimizing energy losses in ducts is an important aspect of energy efficiency in HVAC (Heating, Ventilation, and Air Conditioning) systems. Ducts are used to distribute conditioned air throughout a building, and any energy losses during the distribution process can lead to increased energy consumption and reduced system performance. Here are some key measures to minimize energy losses in ducts:
1. Proper Duct Design: Ensure that ductwork is properly designed to minimize pressure losses. Use appropriately sized ducts, minimize the number of bends and transitions, and maintain a balanced airflow distribution. Consult industry guidelines or work with an HVAC professional to design an efficient duct system.
2. Sealing: Duct leakage is a major source of energy losses. Seal all joints, connections, and seams in the ductwork using approved sealing materials such as mastic or metal tape. Pay particular attention to connections at registers, grilles, and air-handling units.
3. Insulation: Insulate ducts that run through unconditioned spaces, such as attics, crawlspaces, or basements. Insulation helps to prevent heat transfer between the ductwork and the surrounding environment, reducing energy losses and improving system efficiency.
4. Duct Material: Consider using insulated ducts with low thermal conductivity. Insulated ducts minimize heat transfer through the duct walls, helping to maintain the desired temperature of the conditioned air as it travels through the system.
5. Avoiding Overlong Duct Runs: Minimize the length of duct runs as much as possible. Longer ducts result in increased friction losses, which can reduce airflow and energy efficiency. Optimize the layout and location of HVAC equipment to keep duct runs as short and direct as feasible.
6. Balancing and Adjusting Dampers: Balancing the airflow within the duct system ensures that each room receives the appropriate amount of conditioned air. Adjust dampers at branch points and in individual ducts to balance the airflow and avoid over-pressurizing or under-pressurizing certain areas.
7. Regular Maintenance: Conduct regular inspections of the ductwork to check for leaks, obstructions, or damage. Clean the ducts periodically to remove dust, debris, or any substances that could impede airflow.
8. Air Filters: Install high-quality air filters and regularly replace them according to the manufacturer’s recommendations. Clean air filters help maintain optimal airflow, reducing pressure drops and energy losses.
By implementing these measures, you can significantly minimize energy losses in ducts, improve the overall efficiency of your HVAC system, and reduce energy consumption. Consulting with a professional HVAC contractor or engineer can provide valuable insights specific to your building’s requirements and help optimize energy efficiency.
https://homereadyinspections.com/builders-hvac/
5743 Lycomb Dr, Houston, TX 77053 – Minimizing Energy Losses in Ducts
5743 Lycomb Dr, Houston, TX 77053 – Minimizing Energy Losses in Ducts
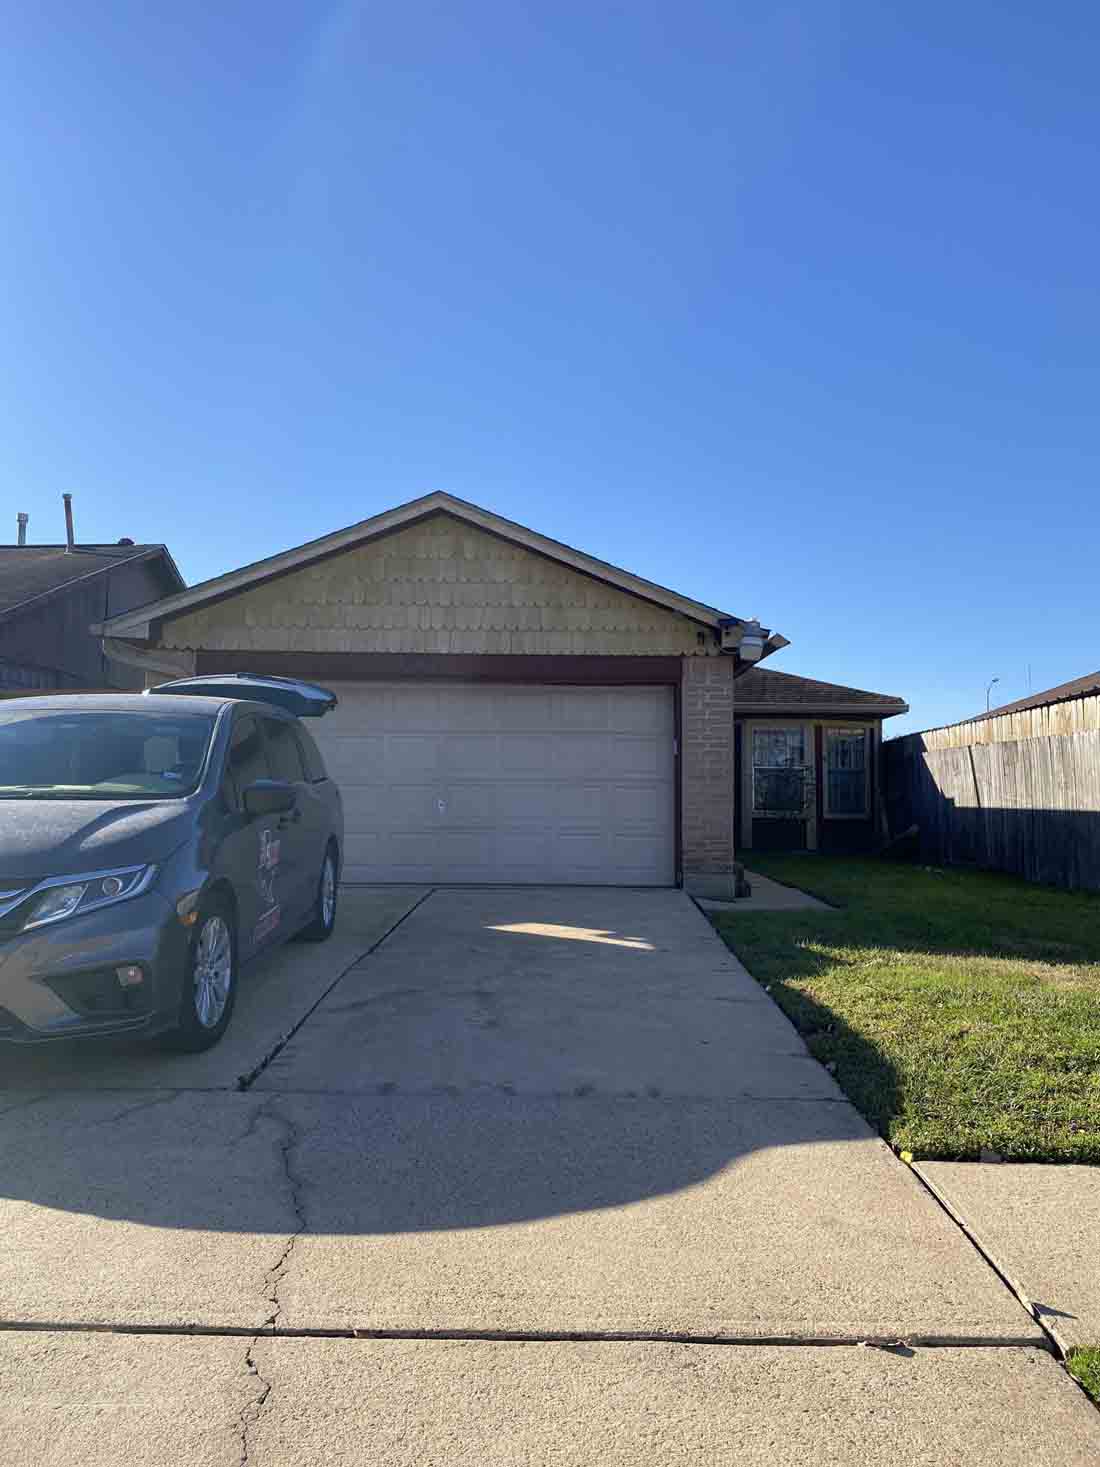
5743 Lycomb Dr, Houston, TX 77053
Third-party Energy Testing
Your air ducts are one of the most important systems in your home, and if the ducts are poorly sealed or insulated they are likely contributing to higher energy bills.
Blower Doors: What Are They and How Do They Work?
A blower door is a device used in energy testing to measure a building’s airtightness. It consists of a powerful fan mounted on a temporary frame that fits into a doorway or an exterior opening. During a blower door test, the fan creates a pressure difference between the inside and outside of the building. This pressure difference allows air leakage points to become apparent and measurable. The test helps identify areas of air infiltration or exfiltration, which can affect energy efficiency and indoor comfort.
The blower door test involves setting up the device, measuring the baseline pressure, and then either depressurizing or pressurizing the building using the fan. While the fan is running, the airflow rate is measured using instruments like a manometer or pressure gauge. This airflow measurement quantifies the amount of air leakage in the building. Smoke pencils or thermal imaging cameras can be used to locate specific air leakage points.
The blower door test can be conducted in both depressurization and pressurization modes, allowing for a comprehensive assessment of air leakage locations. Once the test is complete, the data is analyzed to determine the building’s airtightness and identify areas that need improvement. The results can be used to guide air sealing measures and improve energy efficiency.
Blower door tests are crucial in identifying air leakage points, reducing energy loss, improving indoor air quality, and enhancing the overall performance and comfort of a building.
Home Inspection Atascocita | Home Ready Inspections | Houston TX
4703 Park Dr, Houston, TX 77023 – Minimizing Energy Losses in Duct
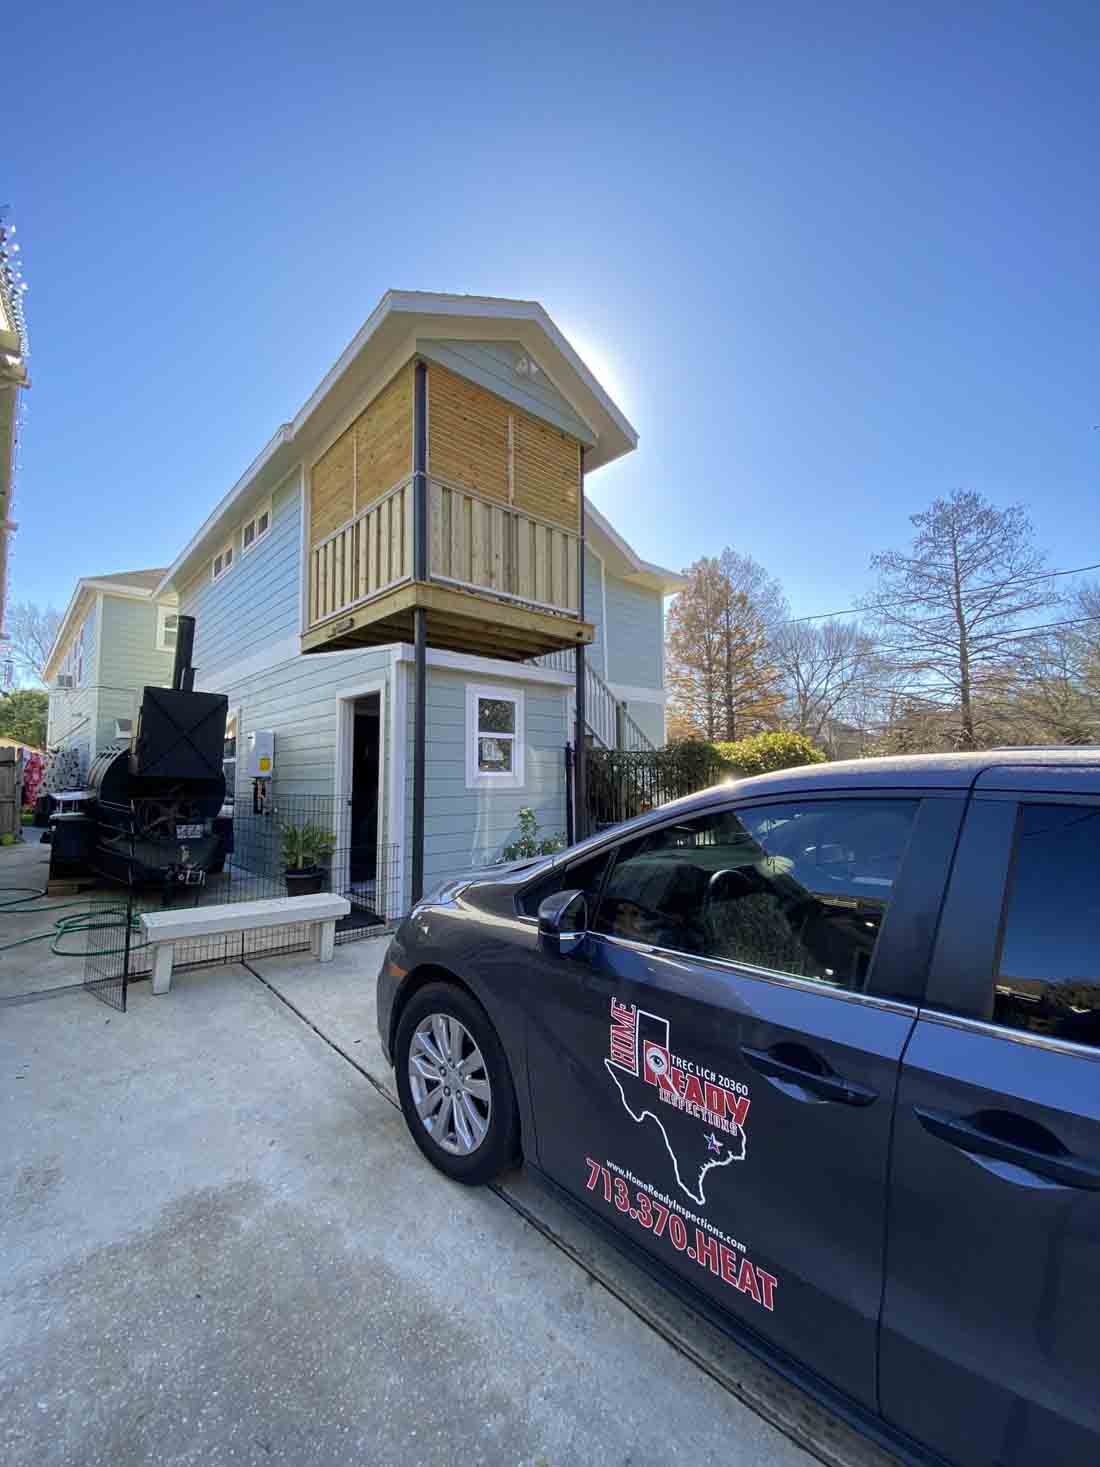
4703 Park Dr, Houston, TX 77023
Houston, TX, 77023 – Minimizing Energy Losses in Duct
Third-party Energy Testing
Your air ducts are one of the most important systems in your home, and if the ducts are poorly sealed or insulated they are likely contributing to higher energy bills.
Blower Doors: What Are They and How Do They Work?
A blower door is a device used in energy testing to measure a building’s airtightness. It consists of a powerful fan mounted on a temporary frame that fits into a doorway or an exterior opening. During a blower door test, the fan creates a pressure difference between the inside and outside of the building. This pressure difference allows air leakage points to become apparent and measurable. The test helps identify areas of air infiltration or exfiltration, which can affect energy efficiency and indoor comfort.
The blower door test involves setting up the device, measuring the baseline pressure, and then either depressurizing or pressurizing the building using the fan. While the fan is running, the airflow rate is measured using instruments like a manometer or pressure gauge. This airflow measurement quantifies the amount of air leakage in the building. Smoke pencils or thermal imaging cameras can be used to locate specific air leakage points.
The blower door test can be conducted in both depressurization and pressurization modes, allowing for a comprehensive assessment of air leakage locations. Once the test is complete, the data is analyzed to determine the building’s airtightness and identify areas that need improvement. The results can be used to guide air sealing measures and improve energy efficiency.
Blower door tests are crucial in identifying air leakage points, reducing energy loss, improving indoor air quality, and enhancing the overall performance and comfort of a building.
Home Inspection Atascocita | Home Ready Inspections | Houston TX
Energy Star – 45L Tax Credits for Zero Energy Ready Homes
1113 Amundsen St, Houston, TX 77009
45L Tax Credits for Zero Energy Ready Homes
Disclaimer: (Energy Star) This webpage provides an overview of the DOE Zero Energy Ready Home program and how it relates to the New Energy Efficient Home Tax Credit found in section 45L of the Internal Revenue Code. The information provided here does not constitute professional tax advice or other professional financial guidance. It should not be used as the only source of information when making decisions regarding design, purchasing, investments, or the tax implications of new home construction, or when executing other binding agreements. In the event that there is conflict between information provided on this webpage and guidance or notices published by IRS, the information published by IRS shall take precedence
The Updated Section 45L
The Inflation Reduction Act of 2022 (IRA) amended Internal Revenue Code Section 45L to provide taxpayers with a tax credit for eligible new or substantially reconstructed homes that meet applicable ENERGY STAR home program or DOE Zero Energy Ready Home (ZERH) program requirements. The new 45L provisions include two tiers of credits, with the higher credits for eligible homes and dwelling units certified to applicable ZERH program requirements. The 45L credit is $5,000 for single family and manufactured homes eligible to participate in the EPA’s ENERGY STAR Residential New Construction Program or the ENERGY STAR Manufactured New Homes Program, respectively, and which are certified to applicable ZERH program requirements. The 45L credit is $1,000 for dwelling units that are part of a building eligible to participate in the ENERGY STAR Multifamily New Construction Program, and which are certified to applicable ZERH program requirements, unless the project meets prevailing wage requirements, in which case the 45L credit is $5,000 per dwelling unit. These new 45L rules apply to qualified energy efficient homes acquired after December 31, 2022, and before January 1, 2033, for use as a residence during the taxable year. DOE continues to coordinate with the Internal Revenue Service (IRS) regarding forthcoming IRS 45L guidance.
DOE Zero Energy Ready Home (ZERH) Program Applicability for 45L Tax Credit, by Calendar Year
ZERH program requirements vary by housing sector. To improve the usability of the program requirements and the certification process for different sectors, DOE is developing and maintaining program requirements documents for each major housing sector. DOE anticipates updating these documents over the coming years, with new editions of the requirements referred to as versions.
The three housing sector tables below indicate DOE’s anticipated version release schedule for the ZERH program. The certification requirements for each housing sector are included below with links to detailed requirements documents (PDF) for each program version. IRS guidance will establish when a dwelling unit needs to be certified to the version in effect for that housing sector as listed below to qualify for the ZERH provisions of 45L tax credit. The tables list all current and planned versions through 2025, by Calendar Year (January 1-December 31). In conjunction with IRS, DOE will provide additional information on any planned ZERH program changes beyond 2025 on future dates to be determined. Note, for certain future planned versions the requirements documents are still under development.
https://www.energy.gov/eere/buildings/45l-tax-credits-zero-energy-ready-homes
Minimizing Energy Losses in Ducts at 1314 Chestnut Ridge Rd, Kingwood, TX 77339

1314 Chestnut Ridge Rd, Kingwood, TX 77339
Minimizing Energy Losses in Ducts
Minimizing energy losses in ducts by seeing if the ducts are poorly sealed or insulated. That could tell you why your energy bill in high. Your air ducts are one of the most important systems in your home, and if the ducts are poorly sealed or insulated, they are likely contributing to higher energy bills.
Your home’s duct system is a branching network of tubes in the walls, floors, and ceilings; it carries the air from your home’s furnace and central air conditioner to each room. Ducts are made of sheet metal, fiberglass, or other materials.
Ducts that leak heated air into unheated spaces can add hundreds of dollars a year to your heating and cooling bills, but you can reduce that loss by sealing and insulating your ducts. Insulating ducts in unconditioned spaces is usually very cost-effective. Existing ducts may also be blocked or may require simple upgrades.
Designing and Installing New Duct Systems
In new home construction or in retrofits, proper duct system design is critical. In recent years, energy-saving designs have sought to include ducts and heating systems in the conditioned space.
Efficient and well-designed duct systems distribute air properly throughout your home without leaking to keep all rooms at a comfortable temperature. The system should provide balanced supply and return flow to maintain a neutral pressure within the house.
Even well sealed and insulated ducts will leak and lose some heat, so many new energy-efficient homes place the duct system within the conditioned space of the home. The simplest way to accomplish this is to hide the ducts in dropped ceilings and in corners of rooms. Ducts can also be located in a sealed and insulated chase extending into the attic or built into raised floors. In both of these latter cases, care must be taken during construction to prevent contractors from using the duct chases for wiring or other utilities.
In either case, actual ducts must be used — chases and floor cavities should not be used as ducts. Regardless of where they are installed, ducts should be well sealed. Although ducts can be configured in a number of ways, the “trunk and branch” and “radial” supply duct configurations are most suitable for ducts located in conditioned spaces.
Air return duct systems can be configured in two ways: each room can have a return duct that sends air back to the heating and cooling equipment or return grills can be located in central locations on each floor. For the latter case, either grills must be installed to allow air to pass out of closed rooms, or short “jumper ducts” can be installed to connect the vent in one room with the next, allowing air to flow back to the central return grilles. Door undercuts help, but they are usually not sufficient for return airflow.
You can perform a simple check for adequate return air capacity by doing the following:
- Close all exterior doors and windows
- Close all interior room doors
- Turn on the central air handler
- “Crack” interior doors one by one and observe if the door closes or further opens “on its own.” (Whether it closes or opens will depend on the direction of the air handler-driven air flow.) Rooms served by air-moved doors have restricted return air flow and need pressure relief as described above.
Maintaining and Upgrading Existing Duct Systems
Sealing your ducts to prevent leaks is even more important if the ducts are located in an unconditioned area such as an attic or vented crawlspace. If the supply ducts are leaking, heated or cooled air can be forced out of unsealed joints and lost. In addition, unconditioned air can be drawn into return ducts through unsealed joints.
Although minor duct repairs are easy to make, qualified professionals should seal and insulate ducts in unconditioned spaces to ensure the use of appropriate sealing materials.
Aside from sealing your ducts, the simplest and most effective means of maintaining your air distribution system is to ensure that furniture and other objects are not blocking the airflow through your registers, and to vacuum the registers to remove any dust buildup.
Existing duct systems often suffer from design deficiencies in the return air system, and modifications by the homeowner (or just a tendency to keep doors closed) may contribute to these problems. Any rooms with a lack of sufficient return airflow may benefit from relatively simple upgrades, such as the installation of new return-air grilles, undercutting doors for return air, or installing a jumper duct.
Some rooms may also be hard to heat and cool because of inadequate supply ducts or grilles. If this is the case, you should first examine whether the problem is the room itself: fix any problems with insulation, air leakage, or inefficient windows first. If the problem persists, you may be able to increase the size of the supply duct or add an additional duct to provide the needed airflow to the room.
Minor Duct Repair Tips for Minimizing Energy Losses in Ducts
- Check your ducts for air leaks. First, look for sections that should be joined but have separated and then look for obvious holes.
- Duct mastic is the preferred material for sealing ductwork seams and joints. It is more durable than any available tape and generally easier for a do-it-yourself installation. Its only drawback is that it will not bridge gaps over ¼ inch. Such gaps must be first bridged with web-type drywall tape, or a good quality heat approved tape.
- If you use tape to seal your ducts, avoid cloth-backed, rubber adhesive duct tape — it tends to fail quickly. Instead, use mastic, butyl tape, foil tape, or other heat-approved tapes. Look for tape with the Underwriters Laboratories (UL) logo.
- Remember that insulating ducts in the basement will make the basement colder. If both the ducts and the basement walls are not insulated, consider insulating both. Water pipes and drains in unconditioned spaces could freeze and burst if the heat ducts are fully insulated because there would be no heat source to prevent the space from freezing in cold weather. However, using an electric heating tape wrap on the pipes can prevent this. Check with a professional contractor.
- Hire a professional to install both supply and return registers in the basement rooms after converting your basement to a living area.
- Be sure a well-sealed vapor barrier exists on the outside of the insulation on cooling ducts to prevent moisture condensation.
- If you have a fuel-burning furnace, stove, or other appliance or an attached garage, install a carbon monoxide (CO) monitor to alert you to harmful CO levels.
- Be sure to get professional help when doing ductwork. A qualified professional should always perform changes and repairs to a duct system.
Minimizing Energy Losses in Ducts at 3715 Piping Rock Ln, Houston, TX 77027
3715 Piping Rock Ln, Houston, TX 77027
Minimizing Energy Losses in Ducts
Minimizing energy losses in ducts by seeing if the ducts are poorly sealed or insulated. That could tell you why your energy bill in high. Your air ducts are one of the most important systems in your home, and if the ducts are poorly sealed or insulated, they are likely contributing to higher energy bills.
Your home’s duct system is a branching network of tubes in the walls, floors, and ceilings; it carries the air from your home’s furnace and central air conditioner to each room. Ducts are made of sheet metal, fiberglass, or other materials.
Ducts that leak heated air into unheated spaces can add hundreds of dollars a year to your heating and cooling bills, but you can reduce that loss by sealing and insulating your ducts. Insulating ducts in unconditioned spaces is usually very cost-effective. Existing ducts may also be blocked or may require simple upgrades.
Designing and Installing New Duct Systems
In new home construction or in retrofits, proper duct system design is critical. In recent years, energy-saving designs have sought to include ducts and heating systems in the conditioned space.
Efficient and well-designed duct systems distribute air properly throughout your home without leaking to keep all rooms at a comfortable temperature. The system should provide balanced supply and return flow to maintain a neutral pressure within the house.
Even well sealed and insulated ducts will leak and lose some heat, so many new energy-efficient homes place the duct system within the conditioned space of the home. The simplest way to accomplish this is to hide the ducts in dropped ceilings and in corners of rooms. Ducts can also be located in a sealed and insulated chase extending into the attic or built into raised floors. In both of these latter cases, care must be taken during construction to prevent contractors from using the duct chases for wiring or other utilities.
In either case, actual ducts must be used — chases and floor cavities should not be used as ducts. Regardless of where they are installed, ducts should be well sealed. Although ducts can be configured in a number of ways, the “trunk and branch” and “radial” supply duct configurations are most suitable for ducts located in conditioned spaces.
Air return duct systems can be configured in two ways: each room can have a return duct that sends air back to the heating and cooling equipment or return grills can be located in central locations on each floor. For the latter case, either grills must be installed to allow air to pass out of closed rooms, or short “jumper ducts” can be installed to connect the vent in one room with the next, allowing air to flow back to the central return grilles. Door undercuts help, but they are usually not sufficient for return airflow.
You can perform a simple check for adequate return air capacity by doing the following:
- Close all exterior doors and windows
- Close all interior room doors
- Turn on the central air handler
- “Crack” interior doors one by one and observe if the door closes or further opens “on its own.” (Whether it closes or opens will depend on the direction of the air handler-driven air flow.) Rooms served by air-moved doors have restricted return air flow and need pressure relief as described above.
Maintaining and Upgrading Existing Duct Systems
Sealing your ducts to prevent leaks is even more important if the ducts are located in an unconditioned area such as an attic or vented crawlspace. If the supply ducts are leaking, heated or cooled air can be forced out of unsealed joints and lost. In addition, unconditioned air can be drawn into return ducts through unsealed joints.
Although minor duct repairs are easy to make, qualified professionals should seal and insulate ducts in unconditioned spaces to ensure the use of appropriate sealing materials.
Aside from sealing your ducts, the simplest and most effective means of maintaining your air distribution system is to ensure that furniture and other objects are not blocking the airflow through your registers, and to vacuum the registers to remove any dust buildup.
Existing duct systems often suffer from design deficiencies in the return air system, and modifications by the homeowner (or just a tendency to keep doors closed) may contribute to these problems. Any rooms with a lack of sufficient return airflow may benefit from relatively simple upgrades, such as the installation of new return-air grilles, undercutting doors for return air, or installing a jumper duct.
Some rooms may also be hard to heat and cool because of inadequate supply ducts or grilles. If this is the case, you should first examine whether the problem is the room itself: fix any problems with insulation, air leakage, or inefficient windows first. If the problem persists, you may be able to increase the size of the supply duct or add an additional duct to provide the needed airflow to the room.
Minor Duct Repair Tips for Minimizing Energy Losses in Ducts
- Check your ducts for air leaks. First, look for sections that should be joined but have separated and then look for obvious holes.
- Duct mastic is the preferred material for sealing ductwork seams and joints. It is more durable than any available tape and generally easier for a do-it-yourself installation. Its only drawback is that it will not bridge gaps over ¼ inch. Such gaps must be first bridged with web-type drywall tape, or a good quality heat approved tape.
- If you use tape to seal your ducts, avoid cloth-backed, rubber adhesive duct tape — it tends to fail quickly. Instead, use mastic, butyl tape, foil tape, or other heat-approved tapes. Look for tape with the Underwriters Laboratories (UL) logo.
- Remember that insulating ducts in the basement will make the basement colder. If both the ducts and the basement walls are not insulated, consider insulating both. Water pipes and drains in unconditioned spaces could freeze and burst if the heat ducts are fully insulated because there would be no heat source to prevent the space from freezing in cold weather. However, using an electric heating tape wrap on the pipes can prevent this. Check with a professional contractor.
- Hire a professional to install both supply and return registers in the basement rooms after converting your basement to a living area.
- Be sure a well-sealed vapor barrier exists on the outside of the insulation on cooling ducts to prevent moisture condensation.
- If you have a fuel-burning furnace, stove, or other appliance or an attached garage, install a carbon monoxide (CO) monitor to alert you to harmful CO levels.
- Be sure to get professional help when doing ductwork. A qualified professional should always perform changes and repairs to a duct system.
Energy Star – 45L Tax Credits for Zero Energy Ready Homes
4139 Brinkley St, Houston, TX 77051
45L Tax Credits for Zero Energy Ready Homes
Disclaimer: (Energy Star) This webpage provides an overview of the DOE Zero Energy Ready Home program and how it relates to the New Energy Efficient Home Tax Credit found in section 45L of the Internal Revenue Code. The information provided here does not constitute professional tax advice or other professional financial guidance. It should not be used as the only source of information when making decisions regarding design, purchasing, investments, or the tax implications of new home construction, or when executing other binding agreements. In the event that there is conflict between information provided on this webpage and guidance or notices published by IRS, the information published by IRS shall take precedence
The Updated Section 45L
The Inflation Reduction Act of 2022 (IRA) amended Internal Revenue Code Section 45L to provide taxpayers with a tax credit for eligible new or substantially reconstructed homes that meet applicable ENERGY STAR home program or DOE Zero Energy Ready Home (ZERH) program requirements. The new 45L provisions include two tiers of credits, with the higher credits for eligible homes and dwelling units certified to applicable ZERH program requirements. The 45L credit is $5,000 for single family and manufactured homes eligible to participate in the EPA’s ENERGY STAR Residential New Construction Program or the ENERGY STAR Manufactured New Homes Program, respectively, and which are certified to applicable ZERH program requirements. The 45L credit is $1,000 for dwelling units that are part of a building eligible to participate in the ENERGY STAR Multifamily New Construction Program, and which are certified to applicable ZERH program requirements, unless the project meets prevailing wage requirements, in which case the 45L credit is $5,000 per dwelling unit. These new 45L rules apply to qualified energy efficient homes acquired after December 31, 2022, and before January 1, 2033, for use as a residence during the taxable year. DOE continues to coordinate with the Internal Revenue Service (IRS) regarding forthcoming IRS 45L guidance.
DOE Zero Energy Ready Home (ZERH) Program Applicability for 45L Tax Credit, by Calendar Year
ZERH program requirements vary by housing sector. To improve the usability of the program requirements and the certification process for different sectors, DOE is developing and maintaining program requirements documents for each major housing sector. DOE anticipates updating these documents over the coming years, with new editions of the requirements referred to as versions.
The three housing sector tables below indicate DOE’s anticipated version release schedule for the ZERH program. The certification requirements for each housing sector are included below with links to detailed requirements documents (PDF) for each program version. IRS guidance will establish when a dwelling unit needs to be certified to the version in effect for that housing sector as listed below to qualify for the ZERH provisions of 45L tax credit. The tables list all current and planned versions through 2025, by Calendar Year (January 1-December 31). In conjunction with IRS, DOE will provide additional information on any planned ZERH program changes beyond 2025 on future dates to be determined. Note, for certain future planned versions the requirements documents are still under development.
https://www.energy.gov/eere/buildings/45l-tax-credits-zero-energy-ready-homes
Energy Star – 45L Tax Credits for Zero Energy Ready Homes
10155 Valencia Dr, Houston, TX 77013
45L Tax Credits for Zero Energy Ready Homes
Disclaimer: (Energy Star) This webpage provides an overview of the DOE Zero Energy Ready Home program and how it relates to the New Energy Efficient Home Tax Credit found in section 45L of the Internal Revenue Code. The information provided here does not constitute professional tax advice or other professional financial guidance. It should not be used as the only source of information when making decisions regarding design, purchasing, investments, or the tax implications of new home construction, or when executing other binding agreements. In the event that there is conflict between information provided on this webpage and guidance or notices published by IRS, the information published by IRS shall take precedence
The Updated Section 45L
The Inflation Reduction Act of 2022 (IRA) amended Internal Revenue Code Section 45L to provide taxpayers with a tax credit for eligible new or substantially reconstructed homes that meet applicable ENERGY STAR home program or DOE Zero Energy Ready Home (ZERH) program requirements. The new 45L provisions include two tiers of credits, with the higher credits for eligible homes and dwelling units certified to applicable ZERH program requirements. The 45L credit is $5,000 for single family and manufactured homes eligible to participate in the EPA’s ENERGY STAR Residential New Construction Program or the ENERGY STAR Manufactured New Homes Program, respectively, and which are certified to applicable ZERH program requirements. The 45L credit is $1,000 for dwelling units that are part of a building eligible to participate in the ENERGY STAR Multifamily New Construction Program, and which are certified to applicable ZERH program requirements, unless the project meets prevailing wage requirements, in which case the 45L credit is $5,000 per dwelling unit. These new 45L rules apply to qualified energy efficient homes acquired after December 31, 2022, and before January 1, 2033, for use as a residence during the taxable year. DOE continues to coordinate with the Internal Revenue Service (IRS) regarding forthcoming IRS 45L guidance.
DOE Zero Energy Ready Home (ZERH) Program Applicability for 45L Tax Credit, by Calendar Year
ZERH program requirements vary by housing sector. To improve the usability of the program requirements and the certification process for different sectors, DOE is developing and maintaining program requirements documents for each major housing sector. DOE anticipates updating these documents over the coming years, with new editions of the requirements referred to as versions.
The three housing sector tables below indicate DOE’s anticipated version release schedule for the ZERH program. The certification requirements for each housing sector are included below with links to detailed requirements documents (PDF) for each program version. IRS guidance will establish when a dwelling unit needs to be certified to the version in effect for that housing sector as listed below to qualify for the ZERH provisions of 45L tax credit. The tables list all current and planned versions through 2025, by Calendar Year (January 1-December 31). In conjunction with IRS, DOE will provide additional information on any planned ZERH program changes beyond 2025 on future dates to be determined. Note, for certain future planned versions the requirements documents are still under development.
https://www.energy.gov/eere/buildings/45l-tax-credits-zero-energy-ready-homes
Minimizing Energy Losses in Ducts at 9511 Bundy Ln, Houston, TX 77080
9511 Bundy Ln, Houston, TX 77080
Minimizing Energy Losses in Ducts
Minimizing energy losses in ducts by seeing if the ducts are poorly sealed or insulated. That could tell you why your energy bill in high. Your air ducts are one of the most important systems in your home, and if the ducts are poorly sealed or insulated, they are likely contributing to higher energy bills.
Your home’s duct system is a branching network of tubes in the walls, floors, and ceilings; it carries the air from your home’s furnace and central air conditioner to each room. Ducts are made of sheet metal, fiberglass, or other materials.
Ducts that leak heated air into unheated spaces can add hundreds of dollars a year to your heating and cooling bills, but you can reduce that loss by sealing and insulating your ducts. Insulating ducts in unconditioned spaces is usually very cost-effective. Existing ducts may also be blocked or may require simple upgrades.
Designing and Installing New Duct Systems
In new home construction or in retrofits, proper duct system design is critical. In recent years, energy-saving designs have sought to include ducts and heating systems in the conditioned space.
Efficient and well-designed duct systems distribute air properly throughout your home without leaking to keep all rooms at a comfortable temperature. The system should provide balanced supply and return flow to maintain a neutral pressure within the house.
Even well sealed and insulated ducts will leak and lose some heat, so many new energy-efficient homes place the duct system within the conditioned space of the home. The simplest way to accomplish this is to hide the ducts in dropped ceilings and in corners of rooms. Ducts can also be located in a sealed and insulated chase extending into the attic or built into raised floors. In both of these latter cases, care must be taken during construction to prevent contractors from using the duct chases for wiring or other utilities.
In either case, actual ducts must be used — chases and floor cavities should not be used as ducts. Regardless of where they are installed, ducts should be well sealed. Although ducts can be configured in a number of ways, the “trunk and branch” and “radial” supply duct configurations are most suitable for ducts located in conditioned spaces.
Air return duct systems can be configured in two ways: each room can have a return duct that sends air back to the heating and cooling equipment or return grills can be located in central locations on each floor. For the latter case, either grills must be installed to allow air to pass out of closed rooms, or short “jumper ducts” can be installed to connect the vent in one room with the next, allowing air to flow back to the central return grilles. Door undercuts help, but they are usually not sufficient for return airflow.
You can perform a simple check for adequate return air capacity by doing the following:
- Close all exterior doors and windows
- Close all interior room doors
- Turn on the central air handler
- “Crack” interior doors one by one and observe if the door closes or further opens “on its own.” (Whether it closes or opens will depend on the direction of the air handler-driven air flow.) Rooms served by air-moved doors have restricted return air flow and need pressure relief as described above.
Maintaining and Upgrading Existing Duct Systems
Sealing your ducts to prevent leaks is even more important if the ducts are located in an unconditioned area such as an attic or vented crawlspace. If the supply ducts are leaking, heated or cooled air can be forced out of unsealed joints and lost. In addition, unconditioned air can be drawn into return ducts through unsealed joints.
Although minor duct repairs are easy to make, qualified professionals should seal and insulate ducts in unconditioned spaces to ensure the use of appropriate sealing materials.
Aside from sealing your ducts, the simplest and most effective means of maintaining your air distribution system is to ensure that furniture and other objects are not blocking the airflow through your registers, and to vacuum the registers to remove any dust buildup.
Existing duct systems often suffer from design deficiencies in the return air system, and modifications by the homeowner (or just a tendency to keep doors closed) may contribute to these problems. Any rooms with a lack of sufficient return airflow may benefit from relatively simple upgrades, such as the installation of new return-air grilles, undercutting doors for return air, or installing a jumper duct.
Some rooms may also be hard to heat and cool because of inadequate supply ducts or grilles. If this is the case, you should first examine whether the problem is the room itself: fix any problems with insulation, air leakage, or inefficient windows first. If the problem persists, you may be able to increase the size of the supply duct or add an additional duct to provide the needed airflow to the room.
Minor Duct Repair Tips for Minimizing Energy Losses in Ducts
- Check your ducts for air leaks. First, look for sections that should be joined but have separated and then look for obvious holes.
- Duct mastic is the preferred material for sealing ductwork seams and joints. It is more durable than any available tape and generally easier for a do-it-yourself installation. Its only drawback is that it will not bridge gaps over ¼ inch. Such gaps must be first bridged with web-type drywall tape, or a good quality heat approved tape.
- If you use tape to seal your ducts, avoid cloth-backed, rubber adhesive duct tape — it tends to fail quickly. Instead, use mastic, butyl tape, foil tape, or other heat-approved tapes. Look for tape with the Underwriters Laboratories (UL) logo.
- Remember that insulating ducts in the basement will make the basement colder. If both the ducts and the basement walls are not insulated, consider insulating both. Water pipes and drains in unconditioned spaces could freeze and burst if the heat ducts are fully insulated because there would be no heat source to prevent the space from freezing in cold weather. However, using an electric heating tape wrap on the pipes can prevent this. Check with a professional contractor.
- Hire a professional to install both supply and return registers in the basement rooms after converting your basement to a living area.
- Be sure a well-sealed vapor barrier exists on the outside of the insulation on cooling ducts to prevent moisture condensation.
- If you have a fuel-burning furnace, stove, or other appliance or an attached garage, install a carbon monoxide (CO) monitor to alert you to harmful CO levels.
- Be sure to get professional help when doing ductwork. A qualified professional should always perform changes and repairs to a duct system.
2119 Silver Leaf Dr, Missouri City, TX 77489 – Minimizing Energy Losses in Ducts
2119 Silver Leaf Dr, Missouri City, TX 77489
Minimizing Energy Losses in Ducts
Minimizing energy losses in ducts is an important aspect of energy efficiency in HVAC (Heating, Ventilation, and Air Conditioning) systems. Ducts are used to distribute conditioned air throughout a building, and any energy losses during the distribution process can lead to increased energy consumption and reduced system performance. Here are some key measures to minimize energy losses in ducts:
1. Proper Duct Design: Ensure that ductwork is properly designed to minimize pressure losses. Use appropriately sized ducts, minimize the number of bends and transitions, and maintain a balanced airflow distribution. Consult industry guidelines or work with an HVAC professional to design an efficient duct system.
2. Sealing: Duct leakage is a major source of energy losses. Seal all joints, connections, and seams in the ductwork using approved sealing materials such as mastic or metal tape. Pay particular attention to connections at registers, grilles, and air-handling units.
3. Insulation: Insulate ducts that run through unconditioned spaces, such as attics, crawlspaces, or basements. Insulation helps to prevent heat transfer between the ductwork and the surrounding environment, reducing energy losses and improving system efficiency.
4. Duct Material: Consider using insulated ducts with low thermal conductivity. Insulated ducts minimize heat transfer through the duct walls, helping to maintain the desired temperature of the conditioned air as it travels through the system.
5. Avoiding Overlong Duct Runs: Minimize the length of duct runs as much as possible. Longer ducts result in increased friction losses, which can reduce airflow and energy efficiency. Optimize the layout and location of HVAC equipment to keep duct runs as short and direct as feasible.
6. Balancing and Adjusting Dampers: Balancing the airflow within the duct system ensures that each room receives the appropriate amount of conditioned air. Adjust dampers at branch points and in individual ducts to balance the airflow and avoid over-pressurizing or under-pressurizing certain areas.
7. Regular Maintenance: Conduct regular inspections of the ductwork to check for leaks, obstructions, or damage. Clean the ducts periodically to remove dust, debris, or any substances that could impede airflow.
8. Air Filters: Install high-quality air filters and regularly replace them according to the manufacturer’s recommendations. Clean air filters help maintain optimal airflow, reducing pressure drops and energy losses.
By implementing these measures, you can significantly minimize energy losses in ducts, improve the overall efficiency of your HVAC system, and reduce energy consumption. Consulting with a professional HVAC contractor or engineer can provide valuable insights specific to your building’s requirements and help optimize energy efficiency.
https://homereadyinspections.com/builders-hvac/
2006 Dan St, Houston, TX 77020 – Minimizing Energy Losses in Ducts
2006 Dan St, Houston, TX 77020
Minimizing Energy Losses in Ducts
Minimizing energy losses in ducts is an important aspect of energy efficiency in HVAC (Heating, Ventilation, and Air Conditioning) systems. Ducts are used to distribute conditioned air throughout a building, and any energy losses during the distribution process can lead to increased energy consumption and reduced system performance. Here are some key measures to minimize energy losses in ducts:
1. Proper Duct Design: Ensure that ductwork is properly designed to minimize pressure losses. Use appropriately sized ducts, minimize the number of bends and transitions, and maintain a balanced airflow distribution. Consult industry guidelines or work with an HVAC professional to design an efficient duct system.
2. Sealing: Duct leakage is a major source of energy losses. Seal all joints, connections, and seams in the ductwork using approved sealing materials such as mastic or metal tape. Pay particular attention to connections at registers, grilles, and air-handling units.
3. Insulation: Insulate ducts that run through unconditioned spaces, such as attics, crawlspaces, or basements. Insulation helps to prevent heat transfer between the ductwork and the surrounding environment, reducing energy losses and improving system efficiency.
4. Duct Material: Consider using insulated ducts with low thermal conductivity. Insulated ducts minimize heat transfer through the duct walls, helping to maintain the desired temperature of the conditioned air as it travels through the system.
5. Avoiding Overlong Duct Runs: Minimize the length of duct runs as much as possible. Longer ducts result in increased friction losses, which can reduce airflow and energy efficiency. Optimize the layout and location of HVAC equipment to keep duct runs as short and direct as feasible.
6. Balancing and Adjusting Dampers: Balancing the airflow within the duct system ensures that each room receives the appropriate amount of conditioned air. Adjust dampers at branch points and in individual ducts to balance the airflow and avoid over-pressurizing or under-pressurizing certain areas.
7. Regular Maintenance: Conduct regular inspections of the ductwork to check for leaks, obstructions, or damage. Clean the ducts periodically to remove dust, debris, or any substances that could impede airflow.
8. Air Filters: Install high-quality air filters and regularly replace them according to the manufacturer’s recommendations. Clean air filters help maintain optimal airflow, reducing pressure drops and energy losses.
By implementing these measures, you can significantly minimize energy losses in ducts, improve the overall efficiency of your HVAC system, and reduce energy consumption. Consulting with a professional HVAC contractor or engineer can provide valuable insights specific to your building’s requirements and help optimize energy efficiency.
https://homereadyinspections.com/builders-hvac/
103 Blancroft Ct, Sugar Land, TX 77478 – Minimizing Energy Losses in Ducts
103 Blancroft Ct, Sugar Land, TX 77478
Minimizing Energy Losses in Ducts
Minimizing energy losses in ducts is an important aspect of energy efficiency in HVAC (Heating, Ventilation, and Air Conditioning) systems. Ducts are used to distribute conditioned air throughout a building, and any energy losses during the distribution process can lead to increased energy consumption and reduced system performance. Here are some key measures to minimize energy losses in ducts:
1. Proper Duct Design: Ensure that ductwork is properly designed to minimize pressure losses. Use appropriately sized ducts, minimize the number of bends and transitions, and maintain a balanced airflow distribution. Consult industry guidelines or work with an HVAC professional to design an efficient duct system.
2. Sealing: Duct leakage is a major source of energy losses. Seal all joints, connections, and seams in the ductwork using approved sealing materials such as mastic or metal tape. Pay particular attention to connections at registers, grilles, and air-handling units.
3. Insulation: Insulate ducts that run through unconditioned spaces, such as attics, crawlspaces, or basements. Insulation helps to prevent heat transfer between the ductwork and the surrounding environment, reducing energy losses and improving system efficiency.
4. Duct Material: Consider using insulated ducts with low thermal conductivity. Insulated ducts minimize heat transfer through the duct walls, helping to maintain the desired temperature of the conditioned air as it travels through the system.
5. Avoiding Overlong Duct Runs: Minimize the length of duct runs as much as possible. Longer ducts result in increased friction losses, which can reduce airflow and energy efficiency. Optimize the layout and location of HVAC equipment to keep duct runs as short and direct as feasible.
6. Balancing and Adjusting Dampers: Balancing the airflow within the duct system ensures that each room receives the appropriate amount of conditioned air. Adjust dampers at branch points and in individual ducts to balance the airflow and avoid over-pressurizing or under-pressurizing certain areas.
7. Regular Maintenance: Conduct regular inspections of the ductwork to check for leaks, obstructions, or damage. Clean the ducts periodically to remove dust, debris, or any substances that could impede airflow.
8. Air Filters: Install high-quality air filters and regularly replace them according to the manufacturer’s recommendations. Clean air filters help maintain optimal airflow, reducing pressure drops and energy losses.
By implementing these measures, you can significantly minimize energy losses in ducts, improve the overall efficiency of your HVAC system, and reduce energy consumption. Consulting with a professional HVAC contractor or engineer can provide valuable insights specific to your building’s requirements and help optimize energy efficiency.
https://homereadyinspections.com/builders-hvac/
Energy Star – 45L Tax Credits for Zero Energy Ready Homes
2407 Goldsmith St, Houston, TX 77030
45L Tax Credits for Zero Energy Ready Homes
Disclaimer: (Energy Star) This webpage provides an overview of the DOE Zero Energy Ready Home program and how it relates to the New Energy Efficient Home Tax Credit found in section 45L of the Internal Revenue Code. The information provided here does not constitute professional tax advice or other professional financial guidance. It should not be used as the only source of information when making decisions regarding design, purchasing, investments, or the tax implications of new home construction, or when executing other binding agreements. In the event that there is conflict between information provided on this webpage and guidance or notices published by IRS, the information published by IRS shall take precedence
The Updated Section 45L
The Inflation Reduction Act of 2022 (IRA) amended Internal Revenue Code Section 45L to provide taxpayers with a tax credit for eligible new or substantially reconstructed homes that meet applicable ENERGY STAR home program or DOE Zero Energy Ready Home (ZERH) program requirements. The new 45L provisions include two tiers of credits, with the higher credits for eligible homes and dwelling units certified to applicable ZERH program requirements. The 45L credit is $5,000 for single family and manufactured homes eligible to participate in the EPA’s ENERGY STAR Residential New Construction Program or the ENERGY STAR Manufactured New Homes Program, respectively, and which are certified to applicable ZERH program requirements. The 45L credit is $1,000 for dwelling units that are part of a building eligible to participate in the ENERGY STAR Multifamily New Construction Program, and which are certified to applicable ZERH program requirements, unless the project meets prevailing wage requirements, in which case the 45L credit is $5,000 per dwelling unit. These new 45L rules apply to qualified energy efficient homes acquired after December 31, 2022, and before January 1, 2033, for use as a residence during the taxable year. DOE continues to coordinate with the Internal Revenue Service (IRS) regarding forthcoming IRS 45L guidance.
DOE Zero Energy Ready Home (ZERH) Program Applicability for 45L Tax Credit, by Calendar Year
ZERH program requirements vary by housing sector. To improve the usability of the program requirements and the certification process for different sectors, DOE is developing and maintaining program requirements documents for each major housing sector. DOE anticipates updating these documents over the coming years, with new editions of the requirements referred to as versions.
The three housing sector tables below indicate DOE’s anticipated version release schedule for the ZERH program. The certification requirements for each housing sector are included below with links to detailed requirements documents (PDF) for each program version. IRS guidance will establish when a dwelling unit needs to be certified to the version in effect for that housing sector as listed below to qualify for the ZERH provisions of 45L tax credit. The tables list all current and planned versions through 2025, by Calendar Year (January 1-December 31). In conjunction with IRS, DOE will provide additional information on any planned ZERH program changes beyond 2025 on future dates to be determined. Note, for certain future planned versions the requirements documents are still under development.
https://www.energy.gov/eere/buildings/45l-tax-credits-zero-energy-ready-homes
8305 Comal St, Houston, TX 77051 – Minimizing Energy Losses in Ducts
8305 Comal St, Houston, TX 77051 – Minimizing Energy Losses in Ducts
8305 Comal St, Houston, TX 77051
Third-party Energy Testing
Your air ducts are one of the most important systems in your home, and if the ducts are poorly sealed or insulated they are likely contributing to higher energy bills.
Blower Doors: What Are They and How Do They Work?
A blower door is a device used in energy testing to measure a building’s airtightness. It consists of a powerful fan mounted on a temporary frame that fits into a doorway or an exterior opening. During a blower door test, the fan creates a pressure difference between the inside and outside of the building. This pressure difference allows air leakage points to become apparent and measurable. The test helps identify areas of air infiltration or exfiltration, which can affect energy efficiency and indoor comfort.
The blower door test involves setting up the device, measuring the baseline pressure, and then either depressurizing or pressurizing the building using the fan. While the fan is running, the airflow rate is measured using instruments like a manometer or pressure gauge. This airflow measurement quantifies the amount of air leakage in the building. Smoke pencils or thermal imaging cameras can be used to locate specific air leakage points.
The blower door test can be conducted in both depressurization and pressurization modes, allowing for a comprehensive assessment of air leakage locations. Once the test is complete, the data is analyzed to determine the building’s airtightness and identify areas that need improvement. The results can be used to guide air sealing measures and improve energy efficiency.
Blower door tests are crucial in identifying air leakage points, reducing energy loss, improving indoor air quality, and enhancing the overall performance and comfort of a building.
Home Inspection Atascocita | Home Ready Inspections | Houston TX
The Art of Air Balancing in Commercial HVAC Systems in Galveston TX, 77551

4917 Broadway Ave J, Galveston, TX 77551
Commercial Air Balancing in 77551
In the intricate dance of temperature control and energy efficiency, the often-overlooked hero is air balancing. For commercial HVAC systems, achieving the perfect balance of airflow is not just about comfort—it’s about optimizing energy consumption, extending equipment lifespan, and ensuring a healthy indoor environment. In this blog post, we’ll dive into the essential concept of air balancing and explore why it’s a crucial element in the realm of Commercial HVAC.
The Basics of Air Balancing:
Air balancing is the process of adjusting and optimizing the distribution of conditioned air within a building to meet the specified design requirements. It involves ensuring that each room receives an appropriate amount of airflow to maintain desired temperatures and air quality.
Key Components:
1. Ductwork Design:
The foundation of effective air balancing lies in a well-designed ductwork system. Properly sized and configured ducts are essential to deliver the right amount of air to each zone. Any shortcomings in the design can lead to uneven airflow, hot or cold spots, and increased energy consumption.
2. Variable Air Volume (VAV) Systems:
VAV systems provide an extra layer of control by adjusting the airflow to different zones based on their specific needs. This dynamic approach not only enhances comfort but also contributes significantly to energy efficiency.
3. Balancing Dampers:
Balancing dampers are strategically placed within the ductwork to regulate airflow. During the air balancing process, these dampers are adjusted to achieve the desired airflow in each zone. This fine-tuning helps in maintaining a uniform and comfortable environment.
Benefits of Air Balancing:
1. Energy Efficiency:
Balanced airflow ensures that each part of the building receives the necessary conditioned air. This prevents over-conditioning or under-conditioning of certain areas, reducing energy waste and lowering utility costs.
2. Improved Comfort:
Proper air balancing eliminates temperature variations, creating a consistent and comfortable environment throughout the building. Occupants can enjoy a space where the temperature is just right, regardless of their location.
3. Extended Equipment Lifespan:
When a system operates under balanced conditions, it experiences less stress and strain. This can lead to a longer lifespan for HVAC equipment, reducing the frequency of repairs and replacements.
4. Enhanced Indoor Air Quality:
By ensuring a balanced distribution of fresh air, air balancing contributes to maintaining optimal indoor air quality. This is crucial for the health and well-being of occupants, especially in commercial spaces where people spend a significant amount of time.
In the intricate world of Commercial HVAC systems, achieving the perfect balance of airflow is not just
a luxury but a necessity. Air balancing is the key to unlocking energy efficiency, comfort, and the longevity of HVAC equipment. As businesses strive to create environments that are both productive and sustainable, the art of air balancing stands out as a fundamental and transformative practice.
https://homereadyinspections.com/professional-inspection-services/
https://www.nationalcomfortinstitute.com/pro/index.cfm?pid=3085
Minimizing Energy Losses in Ducts at 1618 Gardenia Dr, Houston, TX 77018
1618 Gardenia Dr, Houston, TX 77018
Minimizing Energy Losses in Ducts
Minimizing energy losses in ducts by seeing if the ducts are poorly sealed or insulated. That could tell you why your energy bill in high. Your air ducts are one of the most important systems in your home, and if the ducts are poorly sealed or insulated, they are likely contributing to higher energy bills.
Your home’s duct system is a branching network of tubes in the walls, floors, and ceilings; it carries the air from your home’s furnace and central air conditioner to each room. Ducts are made of sheet metal, fiberglass, or other materials.
Ducts that leak heated air into unheated spaces can add hundreds of dollars a year to your heating and cooling bills, but you can reduce that loss by sealing and insulating your ducts. Insulating ducts in unconditioned spaces is usually very cost-effective. Existing ducts may also be blocked or may require simple upgrades.
Designing and Installing New Duct Systems
In new home construction or in retrofits, proper duct system design is critical. In recent years, energy-saving designs have sought to include ducts and heating systems in the conditioned space.
Efficient and well-designed duct systems distribute air properly throughout your home without leaking to keep all rooms at a comfortable temperature. The system should provide balanced supply and return flow to maintain a neutral pressure within the house.
Even well sealed and insulated ducts will leak and lose some heat, so many new energy-efficient homes place the duct system within the conditioned space of the home. The simplest way to accomplish this is to hide the ducts in dropped ceilings and in corners of rooms. Ducts can also be located in a sealed and insulated chase extending into the attic or built into raised floors. In both of these latter cases, care must be taken during construction to prevent contractors from using the duct chases for wiring or other utilities.
In either case, actual ducts must be used — chases and floor cavities should not be used as ducts. Regardless of where they are installed, ducts should be well sealed. Although ducts can be configured in a number of ways, the “trunk and branch” and “radial” supply duct configurations are most suitable for ducts located in conditioned spaces.
Air return duct systems can be configured in two ways: each room can have a return duct that sends air back to the heating and cooling equipment or return grills can be located in central locations on each floor. For the latter case, either grills must be installed to allow air to pass out of closed rooms, or short “jumper ducts” can be installed to connect the vent in one room with the next, allowing air to flow back to the central return grilles. Door undercuts help, but they are usually not sufficient for return airflow.
You can perform a simple check for adequate return air capacity by doing the following:
- Close all exterior doors and windows
- Close all interior room doors
- Turn on the central air handler
- “Crack” interior doors one by one and observe if the door closes or further opens “on its own.” (Whether it closes or opens will depend on the direction of the air handler-driven air flow.) Rooms served by air-moved doors have restricted return air flow and need pressure relief as described above.
Maintaining and Upgrading Existing Duct Systems
Sealing your ducts to prevent leaks is even more important if the ducts are located in an unconditioned area such as an attic or vented crawlspace. If the supply ducts are leaking, heated or cooled air can be forced out of unsealed joints and lost. In addition, unconditioned air can be drawn into return ducts through unsealed joints.
Although minor duct repairs are easy to make, qualified professionals should seal and insulate ducts in unconditioned spaces to ensure the use of appropriate sealing materials.
Aside from sealing your ducts, the simplest and most effective means of maintaining your air distribution system is to ensure that furniture and other objects are not blocking the airflow through your registers, and to vacuum the registers to remove any dust buildup.
Existing duct systems often suffer from design deficiencies in the return air system, and modifications by the homeowner (or just a tendency to keep doors closed) may contribute to these problems. Any rooms with a lack of sufficient return airflow may benefit from relatively simple upgrades, such as the installation of new return-air grilles, undercutting doors for return air, or installing a jumper duct.
Some rooms may also be hard to heat and cool because of inadequate supply ducts or grilles. If this is the case, you should first examine whether the problem is the room itself: fix any problems with insulation, air leakage, or inefficient windows first. If the problem persists, you may be able to increase the size of the supply duct or add an additional duct to provide the needed airflow to the room.
Minor Duct Repair Tips for Minimizing Energy Losses in Ducts
- Check your ducts for air leaks. First, look for sections that should be joined but have separated and then look for obvious holes.
- Duct mastic is the preferred material for sealing ductwork seams and joints. It is more durable than any available tape and generally easier for a do-it-yourself installation. Its only drawback is that it will not bridge gaps over ¼ inch. Such gaps must be first bridged with web-type drywall tape, or a good quality heat approved tape.
- If you use tape to seal your ducts, avoid cloth-backed, rubber adhesive duct tape — it tends to fail quickly. Instead, use mastic, butyl tape, foil tape, or other heat-approved tapes. Look for tape with the Underwriters Laboratories (UL) logo.
- Remember that insulating ducts in the basement will make the basement colder. If both the ducts and the basement walls are not insulated, consider insulating both. Water pipes and drains in unconditioned spaces could freeze and burst if the heat ducts are fully insulated because there would be no heat source to prevent the space from freezing in cold weather. However, using an electric heating tape wrap on the pipes can prevent this. Check with a professional contractor.
- Hire a professional to install both supply and return registers in the basement rooms after converting your basement to a living area.
- Be sure a well-sealed vapor barrier exists on the outside of the insulation on cooling ducts to prevent moisture condensation.
- If you have a fuel-burning furnace, stove, or other appliance or an attached garage, install a carbon monoxide (CO) monitor to alert you to harmful CO levels.
- Be sure to get professional help when doing ductwork. A qualified professional should always perform changes and repairs to a duct system.
45L Home Tax Credit – 8206 Delwin st, Houston, TX 77034
8206 Delwin St, Houston, TX 77034
45L Home Tax Credit
The 45L tax credit was established as part of the Energy Policy Act of 2005 and has been subsequently extended several times. It encourages the construction of energy-efficient residential buildings and promotes the use of more environmentally friendly building practices.
It’s aimed at promoting energy efficiency in residential properties. It provides tax incentives to home builders or developers who construct energy-efficient homes and multifamily properties. To qualify for the credit, the homes must meet certain energy-saving criteria related to heating, cooling, ventilation, water heating, and other components.
If you are building between 2015 and 2018 standards, you qualify for the 45L Home Tax Credit. Call us for more information. Home Ready Inspections is certified by an accredited Rating Provider to inspect and test a home in order to evaluate each of the minimum rated features and complete a Home Energy Rating according to the RESNET Standards.
As with any tax credit, there are specific application procedures and documentation requirements to claim the 45L tax credit. If you are a home builder or developer interested in this credit, I recommend consulting a tax professional or visiting the IRS website for the most up-to-date details and guidelines.
Call today to schedule your Blower Door and Duct Blaster test today.
832-661-6154
Energy Star – Home Ready Inspections
45L Tax Credits for Zero Energy Ready Homes
The information provided here is for general informational purposes only and should not be considered as tax advice. Tax laws and credits can vary based on individual circumstances and jurisdictions. For personalized advice, please consult with a qualified tax professional. We do not endorse any specific tax credit, product, or service mentioned herein.
Minimizing Energy Losses in Ducts at 1418 Blodgett St, Houston, TX 77004
1418 Blodgett St, Houston, TX 77004
Minimizing Energy Losses in Ducts
Minimizing energy losses in ducts by seeing if the ducts are poorly sealed or insulated. That could tell you why your energy bill in high. Your air ducts are one of the most important systems in your home, and if the ducts are poorly sealed or insulated, they are likely contributing to higher energy bills.
Your home’s duct system is a branching network of tubes in the walls, floors, and ceilings; it carries the air from your home’s furnace and central air conditioner to each room. Ducts are made of sheet metal, fiberglass, or other materials.
Ducts that leak heated air into unheated spaces can add hundreds of dollars a year to your heating and cooling bills, but you can reduce that loss by sealing and insulating your ducts. Insulating ducts in unconditioned spaces is usually very cost-effective. Existing ducts may also be blocked or may require simple upgrades.
Designing and Installing New Duct Systems
In new home construction or in retrofits, proper duct system design is critical. In recent years, energy-saving designs have sought to include ducts and heating systems in the conditioned space.
Efficient and well-designed duct systems distribute air properly throughout your home without leaking to keep all rooms at a comfortable temperature. The system should provide balanced supply and return flow to maintain a neutral pressure within the house.
Even well sealed and insulated ducts will leak and lose some heat, so many new energy-efficient homes place the duct system within the conditioned space of the home. The simplest way to accomplish this is to hide the ducts in dropped ceilings and in corners of rooms. Ducts can also be located in a sealed and insulated chase extending into the attic or built into raised floors. In both of these latter cases, care must be taken during construction to prevent contractors from using the duct chases for wiring or other utilities.
In either case, actual ducts must be used — chases and floor cavities should not be used as ducts. Regardless of where they are installed, ducts should be well sealed. Although ducts can be configured in a number of ways, the “trunk and branch” and “radial” supply duct configurations are most suitable for ducts located in conditioned spaces.
Air return duct systems can be configured in two ways: each room can have a return duct that sends air back to the heating and cooling equipment or return grills can be located in central locations on each floor. For the latter case, either grills must be installed to allow air to pass out of closed rooms, or short “jumper ducts” can be installed to connect the vent in one room with the next, allowing air to flow back to the central return grilles. Door undercuts help, but they are usually not sufficient for return airflow.
You can perform a simple check for adequate return air capacity by doing the following:
- Close all exterior doors and windows
- Close all interior room doors
- Turn on the central air handler
- “Crack” interior doors one by one and observe if the door closes or further opens “on its own.” (Whether it closes or opens will depend on the direction of the air handler-driven air flow.) Rooms served by air-moved doors have restricted return air flow and need pressure relief as described above.
Maintaining and Upgrading Existing Duct Systems
Sealing your ducts to prevent leaks is even more important if the ducts are located in an unconditioned area such as an attic or vented crawlspace. If the supply ducts are leaking, heated or cooled air can be forced out of unsealed joints and lost. In addition, unconditioned air can be drawn into return ducts through unsealed joints.
Although minor duct repairs are easy to make, qualified professionals should seal and insulate ducts in unconditioned spaces to ensure the use of appropriate sealing materials.
Aside from sealing your ducts, the simplest and most effective means of maintaining your air distribution system is to ensure that furniture and other objects are not blocking the airflow through your registers, and to vacuum the registers to remove any dust buildup.
Existing duct systems often suffer from design deficiencies in the return air system, and modifications by the homeowner (or just a tendency to keep doors closed) may contribute to these problems. Any rooms with a lack of sufficient return airflow may benefit from relatively simple upgrades, such as the installation of new return-air grilles, undercutting doors for return air, or installing a jumper duct.
Some rooms may also be hard to heat and cool because of inadequate supply ducts or grilles. If this is the case, you should first examine whether the problem is the room itself: fix any problems with insulation, air leakage, or inefficient windows first. If the problem persists, you may be able to increase the size of the supply duct or add an additional duct to provide the needed airflow to the room.
Minor Duct Repair Tips for Minimizing Energy Losses in Ducts
- Check your ducts for air leaks. First, look for sections that should be joined but have separated and then look for obvious holes.
- Duct mastic is the preferred material for sealing ductwork seams and joints. It is more durable than any available tape and generally easier for a do-it-yourself installation. Its only drawback is that it will not bridge gaps over ¼ inch. Such gaps must be first bridged with web-type drywall tape, or a good quality heat approved tape.
- If you use tape to seal your ducts, avoid cloth-backed, rubber adhesive duct tape — it tends to fail quickly. Instead, use mastic, butyl tape, foil tape, or other heat-approved tapes. Look for tape with the Underwriters Laboratories (UL) logo.
- Remember that insulating ducts in the basement will make the basement colder. If both the ducts and the basement walls are not insulated, consider insulating both. Water pipes and drains in unconditioned spaces could freeze and burst if the heat ducts are fully insulated because there would be no heat source to prevent the space from freezing in cold weather. However, using an electric heating tape wrap on the pipes can prevent this. Check with a professional contractor.
- Hire a professional to install both supply and return registers in the basement rooms after converting your basement to a living area.
- Be sure a well-sealed vapor barrier exists on the outside of the insulation on cooling ducts to prevent moisture condensation.
- If you have a fuel-burning furnace, stove, or other appliance or an attached garage, install a carbon monoxide (CO) monitor to alert you to harmful CO levels.
- Be sure to get professional help when doing ductwork. A qualified professional should always perform changes and repairs to a duct system.
5406 Belneath St, Houston, TX 77033 – Minimizing Energy Losses in Ducts
5406 Belneath St, Houston, TX 77033
Minimizing Energy Losses in Ducts
Minimizing energy losses in ducts is an important aspect of energy efficiency in HVAC (Heating, Ventilation, and Air Conditioning) systems. Ducts are used to distribute conditioned air throughout a building, and any energy losses during the distribution process can lead to increased energy consumption and reduced system performance. Here are some key measures to minimize energy losses in ducts:
1. Proper Duct Design: Ensure that ductwork is properly designed to minimize pressure losses. Use appropriately sized ducts, minimize the number of bends and transitions, and maintain a balanced airflow distribution. Consult industry guidelines or work with an HVAC professional to design an efficient duct system.
2. Sealing: Duct leakage is a major source of energy losses. Seal all joints, connections, and seams in the ductwork using approved sealing materials such as mastic or metal tape. Pay particular attention to connections at registers, grilles, and air-handling units.
3. Insulation: Insulate ducts that run through unconditioned spaces, such as attics, crawlspaces, or basements. Insulation helps to prevent heat transfer between the ductwork and the surrounding environment, reducing energy losses and improving system efficiency.
4. Duct Material: Consider using insulated ducts with low thermal conductivity. Insulated ducts minimize heat transfer through the duct walls, helping to maintain the desired temperature of the conditioned air as it travels through the system.
5. Avoiding Overlong Duct Runs: Minimize the length of duct runs as much as possible. Longer ducts result in increased friction losses, which can reduce airflow and energy efficiency. Optimize the layout and location of HVAC equipment to keep duct runs as short and direct as feasible.
6. Balancing and Adjusting Dampers: Balancing the airflow within the duct system ensures that each room receives the appropriate amount of conditioned air. Adjust dampers at branch points and in individual ducts to balance the airflow and avoid over-pressurizing or under-pressurizing certain areas.
7. Regular Maintenance: Conduct regular inspections of the ductwork to check for leaks, obstructions, or damage. Clean the ducts periodically to remove dust, debris, or any substances that could impede airflow.
8. Air Filters: Install high-quality air filters and regularly replace them according to the manufacturer’s recommendations. Clean air filters help maintain optimal airflow, reducing pressure drops and energy losses.
By implementing these measures, you can significantly minimize energy losses in ducts, improve the overall efficiency of your HVAC system, and reduce energy consumption. Consulting with a professional HVAC contractor or engineer can provide valuable insights specific to your building’s requirements and help optimize energy efficiency.
https://homereadyinspections.com/builders-hvac/
3825 Easy St, Houston, TX 77026 – Minimizing Energy Losses in Ducts
3825 Easy St, Houston, TX 77026
Minimizing Energy Losses in Ducts
Minimizing energy losses in ducts is an important aspect of energy efficiency in HVAC (Heating, Ventilation, and Air Conditioning) systems. Ducts are used to distribute conditioned air throughout a building, and any energy losses during the distribution process can lead to increased energy consumption and reduced system performance. Here are some key measures to minimize energy losses in ducts:
1. Proper Duct Design: Ensure that ductwork is properly designed to minimize pressure losses. Use appropriately sized ducts, minimize the number of bends and transitions, and maintain a balanced airflow distribution. Consult industry guidelines or work with an HVAC professional to design an efficient duct system.
2. Sealing: Duct leakage is a major source of energy losses. Seal all joints, connections, and seams in the ductwork using approved sealing materials such as mastic or metal tape. Pay particular attention to connections at registers, grilles, and air-handling units.
3. Insulation: Insulate ducts that run through unconditioned spaces, such as attics, crawlspaces, or basements. Insulation helps to prevent heat transfer between the ductwork and the surrounding environment, reducing energy losses and improving system efficiency.
4. Duct Material: Consider using insulated ducts with low thermal conductivity. Insulated ducts minimize heat transfer through the duct walls, helping to maintain the desired temperature of the conditioned air as it travels through the system.
5. Avoiding Overlong Duct Runs: Minimize the length of duct runs as much as possible. Longer ducts result in increased friction losses, which can reduce airflow and energy efficiency. Optimize the layout and location of HVAC equipment to keep duct runs as short and direct as feasible.
6. Balancing and Adjusting Dampers: Balancing the airflow within the duct system ensures that each room receives the appropriate amount of conditioned air. Adjust dampers at branch points and in individual ducts to balance the airflow and avoid over-pressurizing or under-pressurizing certain areas.
7. Regular Maintenance: Conduct regular inspections of the ductwork to check for leaks, obstructions, or damage. Clean the ducts periodically to remove dust, debris, or any substances that could impede airflow.
8. Air Filters: Install high-quality air filters and regularly replace them according to the manufacturer’s recommendations. Clean air filters help maintain optimal airflow, reducing pressure drops and energy losses.
By implementing these measures, you can significantly minimize energy losses in ducts, improve the overall efficiency of your HVAC system, and reduce energy consumption. Consulting with a professional HVAC contractor or engineer can provide valuable insights specific to your building’s requirements and help optimize energy efficiency.
https://homereadyinspections.com/builders-hvac/
5239 Braesvalley D, Houston, TX 77096 Minimizing Energy Losses in Ducts
5239 Braesvalley D, Houston, TX 77096
Minimizing Energy Losses in Ducts
Minimizing energy losses in ducts is an important aspect of energy efficiency in HVAC (Heating, Ventilation, and Air Conditioning) systems. Ducts are used to distribute conditioned air throughout a building, and any energy losses during the distribution process can lead to increased energy consumption and reduced system performance. Here are some key measures to minimize energy losses in ducts:
1. Proper Duct Design: Ensure that ductwork is properly designed to minimize pressure losses. Use appropriately sized ducts, minimize the number of bends and transitions, and maintain a balanced airflow distribution. Consult industry guidelines or work with an HVAC professional to design an efficient duct system.
2. Sealing: Duct leakage is a major source of energy losses. Seal all joints, connections, and seams in the ductwork using approved sealing materials such as mastic or metal tape. Pay particular attention to connections at registers, grilles, and air-handling units.
3. Insulation: Insulate ducts that run through unconditioned spaces, such as attics, crawlspaces, or basements. Insulation helps to prevent heat transfer between the ductwork and the surrounding environment, reducing energy losses and improving system efficiency.
4. Duct Material: Consider using insulated ducts with low thermal conductivity. Insulated ducts minimize heat transfer through the duct walls, helping to maintain the desired temperature of the conditioned air as it travels through the system.
5. Avoiding Overlong Duct Runs: Minimize the length of duct runs as much as possible. Longer ducts result in increased friction losses, which can reduce airflow and energy efficiency. Optimize the layout and location of HVAC equipment to keep duct runs as short and direct as feasible.
6. Balancing and Adjusting Dampers: Balancing the airflow within the duct system ensures that each room receives the appropriate amount of conditioned air. Adjust dampers at branch points and in individual ducts to balance the airflow and avoid over-pressurizing or under-pressurizing certain areas.
7. Regular Maintenance: Conduct regular inspections of the ductwork to check for leaks, obstructions, or damage. Clean the ducts periodically to remove dust, debris, or any substances that could impede airflow.
8. Air Filters: Install high-quality air filters and regularly replace them according to the manufacturer’s recommendations. Clean air filters help maintain optimal airflow, reducing pressure drops and energy losses.
By implementing these measures, you can significantly minimize energy losses in ducts, improve the overall efficiency of your HVAC system, and reduce energy consumption. Consulting with a professional HVAC contractor or engineer can provide valuable insights specific to your building’s requirements and help optimize energy efficiency.
https://homereadyinspections.com/builders-hvac/
5101 Sealy St, Galveston, TX 77551 – Minimizing Energy Losses in Ducts
5101 Sealy St, Galveston, TX 77551 – Minimizing Energy Losses in Ducts
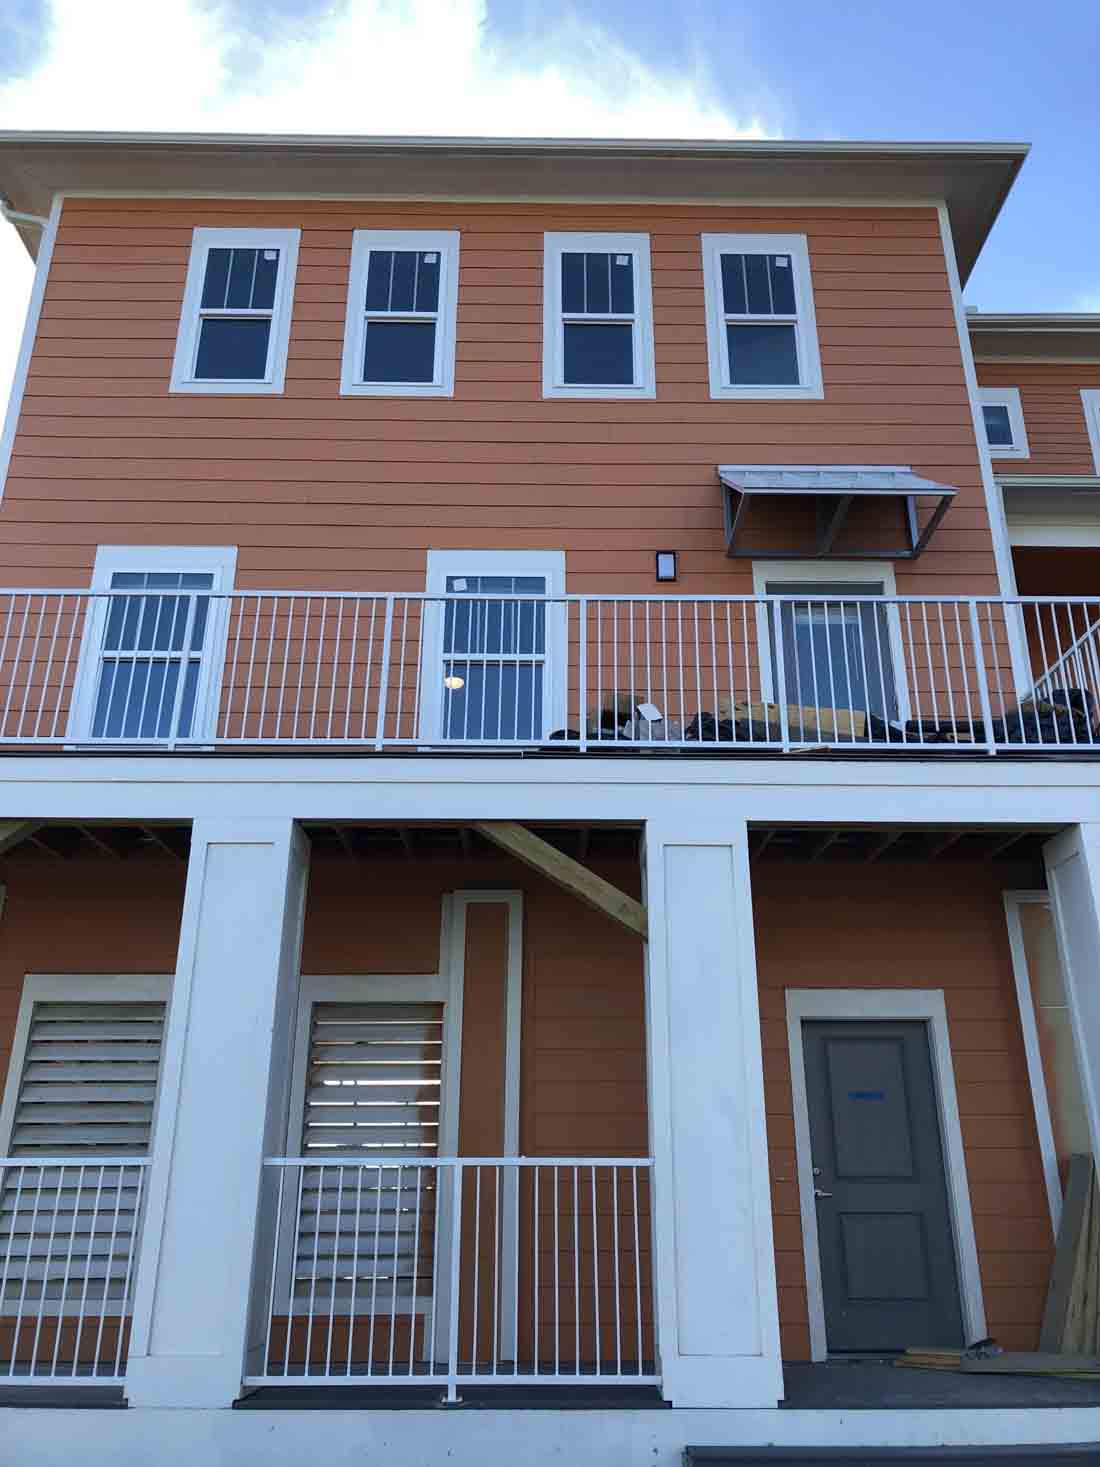
5101 Sealy St, Galveston, TX 77551
Third-party Energy Testing
Your air ducts are one of the most important systems in your home, and if the ducts are poorly sealed or insulated they are likely contributing to higher energy bills.
Blower Doors: What Are They and How Do They Work?
A blower door is a device used in energy testing to measure a building’s airtightness. It consists of a powerful fan mounted on a temporary frame that fits into a doorway or an exterior opening. During a blower door test, the fan creates a pressure difference between the inside and outside of the building. This pressure difference allows air leakage points to become apparent and measurable. The test helps identify areas of air infiltration or exfiltration, which can affect energy efficiency and indoor comfort.
The blower door test involves setting up the device, measuring the baseline pressure, and then either depressurizing or pressurizing the building using the fan. While the fan is running, the airflow rate is measured using instruments like a manometer or pressure gauge. This airflow measurement quantifies the amount of air leakage in the building. Smoke pencils or thermal imaging cameras can be used to locate specific air leakage points.
The blower door test can be conducted in both depressurization and pressurization modes, allowing for a comprehensive assessment of air leakage locations. Once the test is complete, the data is analyzed to determine the building’s airtightness and identify areas that need improvement. The results can be used to guide air sealing measures and improve energy efficiency.
Blower door tests are crucial in identifying air leakage points, reducing energy loss, improving indoor air quality, and enhancing the overall performance and comfort of a building.
Home Inspection Atascocita | Home Ready Inspections | Houston TX
347 Zoe St, Houston, TX 77020 – Minimizing Energy Losses in Duct
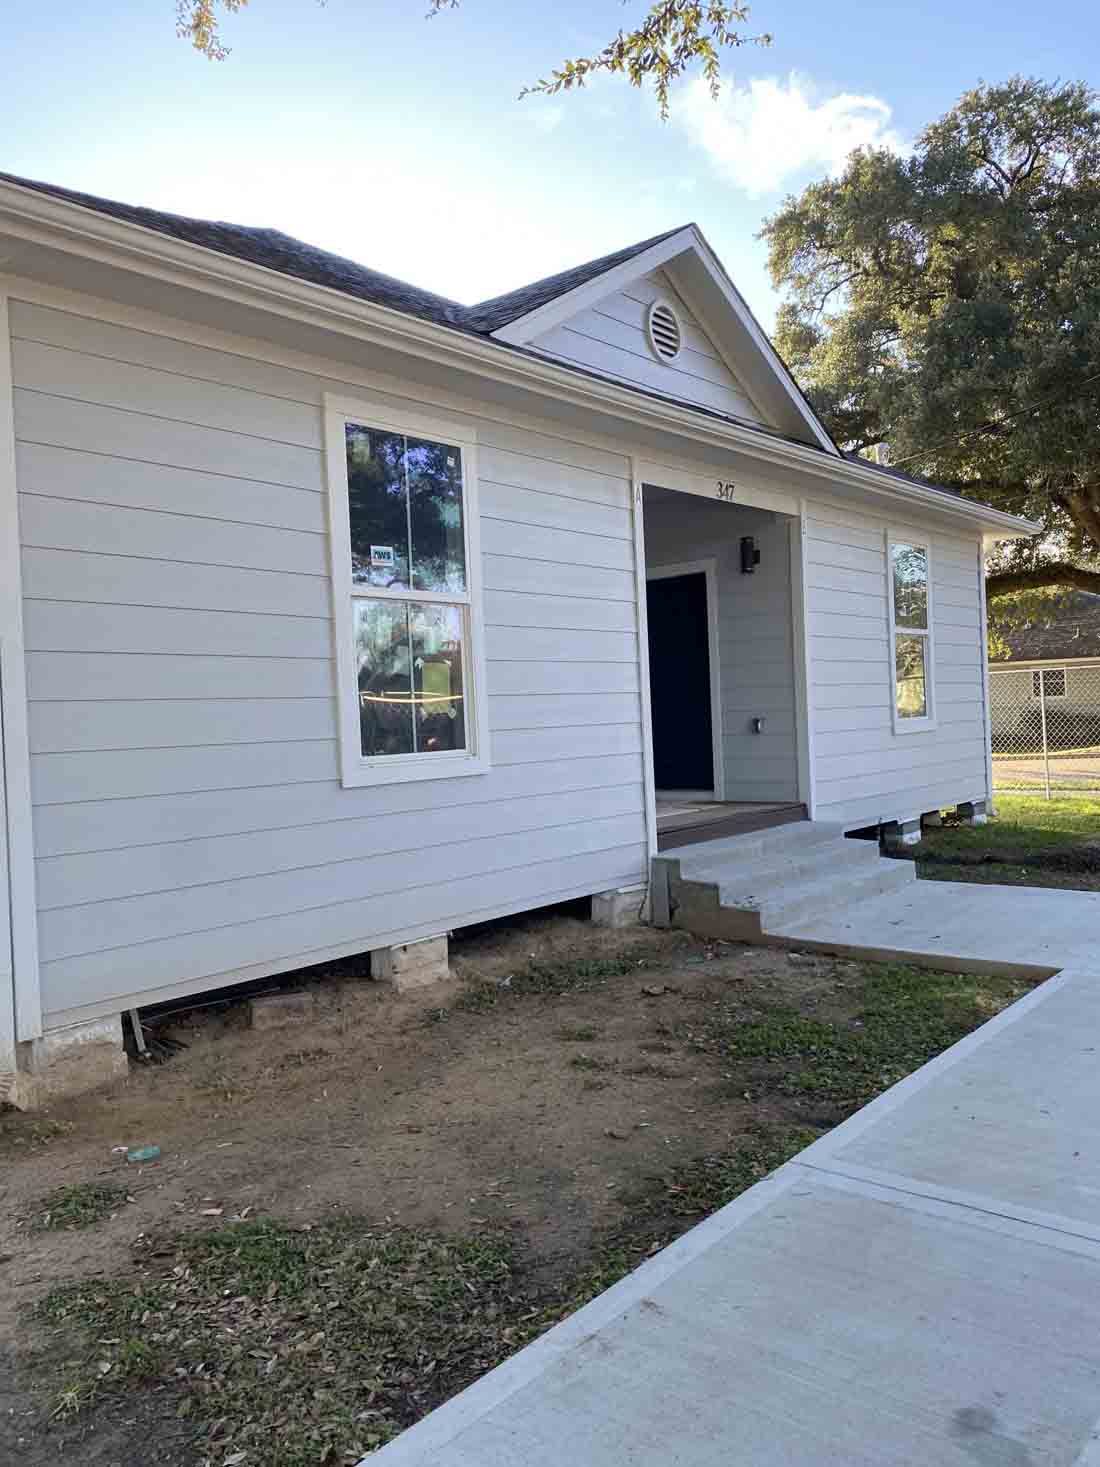
347 Zoe St, Houston, TX 77020
Houston, TX, 77020 – Minimizing Energy Losses in Duct
Third-party Energy Testing
Your air ducts are one of the most important systems in your home, and if the ducts are poorly sealed or insulated they are likely contributing to higher energy bills.
Blower Doors: What Are They and How Do They Work?
A blower door is a device used in energy testing to measure a building’s airtightness. It consists of a powerful fan mounted on a temporary frame that fits into a doorway or an exterior opening. During a blower door test, the fan creates a pressure difference between the inside and outside of the building. This pressure difference allows air leakage points to become apparent and measurable. The test helps identify areas of air infiltration or exfiltration, which can affect energy efficiency and indoor comfort.
The blower door test involves setting up the device, measuring the baseline pressure, and then either depressurizing or pressurizing the building using the fan. While the fan is running, the airflow rate is measured using instruments like a manometer or pressure gauge. This airflow measurement quantifies the amount of air leakage in the building. Smoke pencils or thermal imaging cameras can be used to locate specific air leakage points.
The blower door test can be conducted in both depressurization and pressurization modes, allowing for a comprehensive assessment of air leakage locations. Once the test is complete, the data is analyzed to determine the building’s airtightness and identify areas that need improvement. The results can be used to guide air sealing measures and improve energy efficiency.
Blower door tests are crucial in identifying air leakage points, reducing energy loss, improving indoor air quality, and enhancing the overall performance and comfort of a building.
Home Inspection Atascocita | Home Ready Inspections | Houston TX
Energy Star – 45L Tax Credits for Zero Energy Ready Homes
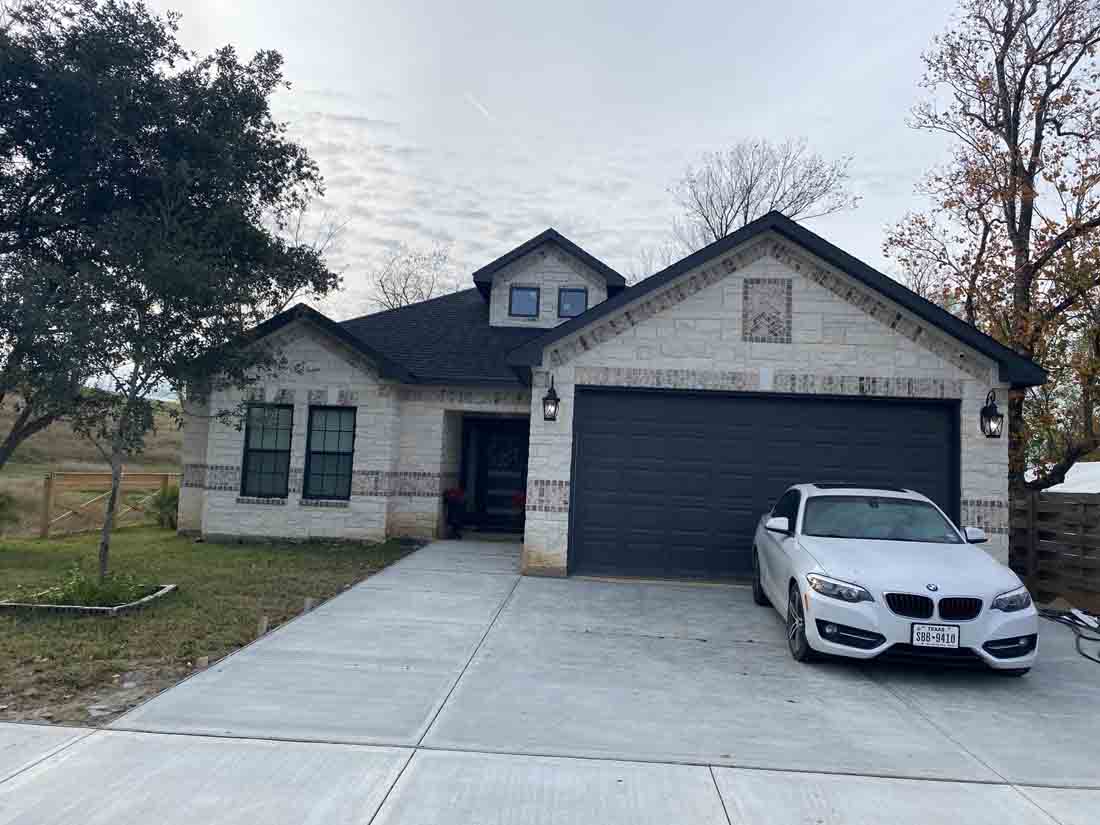
9838 Signet St, Houston, TX 77547
45L Tax Credits for Zero Energy Ready Homes
Disclaimer: (Energy Star) This webpage provides an overview of the DOE Zero Energy Ready Home program and how it relates to the New Energy Efficient Home Tax Credit found in section 45L of the Internal Revenue Code. The information provided here does not constitute professional tax advice or other professional financial guidance. It should not be used as the only source of information when making decisions regarding design, purchasing, investments, or the tax implications of new home construction, or when executing other binding agreements. In the event that there is conflict between information provided on this webpage and guidance or notices published by IRS, the information published by IRS shall take precedence
The Updated Section 45L
The Inflation Reduction Act of 2022 (IRA) amended Internal Revenue Code Section 45L to provide taxpayers with a tax credit for eligible new or substantially reconstructed homes that meet applicable ENERGY STAR home program or DOE Zero Energy Ready Home (ZERH) program requirements. The new 45L provisions include two tiers of credits, with the higher credits for eligible homes and dwelling units certified to applicable ZERH program requirements. The 45L credit is $5,000 for single family and manufactured homes eligible to participate in the EPA’s ENERGY STAR Residential New Construction Program or the ENERGY STAR Manufactured New Homes Program, respectively, and which are certified to applicable ZERH program requirements. The 45L credit is $1,000 for dwelling units that are part of a building eligible to participate in the ENERGY STAR Multifamily New Construction Program, and which are certified to applicable ZERH program requirements, unless the project meets prevailing wage requirements, in which case the 45L credit is $5,000 per dwelling unit. These new 45L rules apply to qualified energy efficient homes acquired after December 31, 2022, and before January 1, 2033, for use as a residence during the taxable year. DOE continues to coordinate with the Internal Revenue Service (IRS) regarding forthcoming IRS 45L guidance.
DOE Zero Energy Ready Home (ZERH) Program Applicability for 45L Tax Credit, by Calendar Year
ZERH program requirements vary by housing sector. To improve the usability of the program requirements and the certification process for different sectors, DOE is developing and maintaining program requirements documents for each major housing sector. DOE anticipates updating these documents over the coming years, with new editions of the requirements referred to as versions.
The three housing sector tables below indicate DOE’s anticipated version release schedule for the ZERH program. The certification requirements for each housing sector are included below with links to detailed requirements documents (PDF) for each program version. IRS guidance will establish when a dwelling unit needs to be certified to the version in effect for that housing sector as listed below to qualify for the ZERH provisions of 45L tax credit. The tables list all current and planned versions through 2025, by Calendar Year (January 1-December 31). In conjunction with IRS, DOE will provide additional information on any planned ZERH program changes beyond 2025 on future dates to be determined. Note, for certain future planned versions the requirements documents are still under development.
https://www.energy.gov/eere/buildings/45l-tax-credits-zero-energy-ready-homes