
Minimizing Energy Losses in Ducts at 519 Milwaukee St, Houston, TX 77009
519 Milwaukee St, Houston, TX 77009

Minimizing Energy Losses in Ducts
Minimizing energy losses in ducts by seeing if the ducts are poorly sealed or insulated. That could tell you why your energy bill in high. Your air ducts are one of the most important systems in your home, and if the ducts are poorly sealed or insulated, they are likely contributing to higher energy bills.
Your home’s duct system is a branching network of tubes in the walls, floors, and ceilings; it carries the air from your home’s furnace and central air conditioner to each room. Ducts are made of sheet metal, fiberglass, or other materials.
Ducts that leak heated air into unheated spaces can add hundreds of dollars a year to your heating and cooling bills, but you can reduce that loss by sealing and insulating your ducts. Insulating ducts in unconditioned spaces is usually very cost-effective. Existing ducts may also be blocked or may require simple upgrades.
Designing and Installing New Duct Systems
In new home construction or in retrofits, proper duct system design is critical. In recent years, energy-saving designs have sought to include ducts and heating systems in the conditioned space.
Efficient and well-designed duct systems distribute air properly throughout your home without leaking to keep all rooms at a comfortable temperature. The system should provide balanced supply and return flow to maintain a neutral pressure within the house.
Even well sealed and insulated ducts will leak and lose some heat, so many new energy-efficient homes place the duct system within the conditioned space of the home. The simplest way to accomplish this is to hide the ducts in dropped ceilings and in corners of rooms. Ducts can also be located in a sealed and insulated chase extending into the attic or built into raised floors. In both of these latter cases, care must be taken during construction to prevent contractors from using the duct chases for wiring or other utilities.
In either case, actual ducts must be used — chases and floor cavities should not be used as ducts. Regardless of where they are installed, ducts should be well sealed. Although ducts can be configured in a number of ways, the “trunk and branch” and “radial” supply duct configurations are most suitable for ducts located in conditioned spaces.
Air return duct systems can be configured in two ways: each room can have a return duct that sends air back to the heating and cooling equipment or return grills can be located in central locations on each floor. For the latter case, either grills must be installed to allow air to pass out of closed rooms, or short “jumper ducts” can be installed to connect the vent in one room with the next, allowing air to flow back to the central return grilles. Door undercuts help, but they are usually not sufficient for return airflow.
You can perform a simple check for adequate return air capacity by doing the following:
- Close all exterior doors and windows
- Close all interior room doors
- Turn on the central air handler
- “Crack” interior doors one by one and observe if the door closes or further opens “on its own.” (Whether it closes or opens will depend on the direction of the air handler-driven air flow.) Rooms served by air-moved doors have restricted return air flow and need pressure relief as described above.
Maintaining and Upgrading Existing Duct Systems
Sealing your ducts to prevent leaks is even more important if the ducts are located in an unconditioned area such as an attic or vented crawlspace. If the supply ducts are leaking, heated or cooled air can be forced out of unsealed joints and lost. In addition, unconditioned air can be drawn into return ducts through unsealed joints.
Although minor duct repairs are easy to make, qualified professionals should seal and insulate ducts in unconditioned spaces to ensure the use of appropriate sealing materials.
Aside from sealing your ducts, the simplest and most effective means of maintaining your air distribution system is to ensure that furniture and other objects are not blocking the airflow through your registers, and to vacuum the registers to remove any dust buildup.
Existing duct systems often suffer from design deficiencies in the return air system, and modifications by the homeowner (or just a tendency to keep doors closed) may contribute to these problems. Any rooms with a lack of sufficient return airflow may benefit from relatively simple upgrades, such as the installation of new return-air grilles, undercutting doors for return air, or installing a jumper duct.
Some rooms may also be hard to heat and cool because of inadequate supply ducts or grilles. If this is the case, you should first examine whether the problem is the room itself: fix any problems with insulation, air leakage, or inefficient windows first. If the problem persists, you may be able to increase the size of the supply duct or add an additional duct to provide the needed airflow to the room.
Minor Duct Repair Tips for Minimizing Energy Losses in Ducts
- Check your ducts for air leaks. First, look for sections that should be joined but have separated and then look for obvious holes.
- Duct mastic is the preferred material for sealing ductwork seams and joints. It is more durable than any available tape and generally easier for a do-it-yourself installation. Its only drawback is that it will not bridge gaps over ¼ inch. Such gaps must be first bridged with web-type drywall tape, or a good quality heat approved tape.
- If you use tape to seal your ducts, avoid cloth-backed, rubber adhesive duct tape — it tends to fail quickly. Instead, use mastic, butyl tape, foil tape, or other heat-approved tapes. Look for tape with the Underwriters Laboratories (UL) logo.
- Remember that insulating ducts in the basement will make the basement colder. If both the ducts and the basement walls are not insulated, consider insulating both. Water pipes and drains in unconditioned spaces could freeze and burst if the heat ducts are fully insulated because there would be no heat source to prevent the space from freezing in cold weather. However, using an electric heating tape wrap on the pipes can prevent this. Check with a professional contractor.
- Hire a professional to install both supply and return registers in the basement rooms after converting your basement to a living area.
- Be sure a well-sealed vapor barrier exists on the outside of the insulation on cooling ducts to prevent moisture condensation.
- If you have a fuel-burning furnace, stove, or other appliance or an attached garage, install a carbon monoxide (CO) monitor to alert you to harmful CO levels.
- Be sure to get professional help when doing ductwork. A qualified professional should always perform changes and repairs to a duct system.
Minimizing Energy Losses in Ducts at 143 Island Blvd, Missouri City, TX 77459
143 Island Blvd, Missouri City, TX 77459
Minimizing Energy Losses in Ducts
Minimizing energy losses in ducts by seeing if the ducts are poorly sealed or insulated. That could tell you why your energy bill in high. Your air ducts are one of the most important systems in your home, and if the ducts are poorly sealed or insulated, they are likely contributing to higher energy bills.
Your home’s duct system is a branching network of tubes in the walls, floors, and ceilings; it carries the air from your home’s furnace and central air conditioner to each room. Ducts are made of sheet metal, fiberglass, or other materials.
Ducts that leak heated air into unheated spaces can add hundreds of dollars a year to your heating and cooling bills, but you can reduce that loss by sealing and insulating your ducts. Insulating ducts in unconditioned spaces is usually very cost-effective. Existing ducts may also be blocked or may require simple upgrades.
Designing and Installing New Duct Systems
In new home construction or in retrofits, proper duct system design is critical. In recent years, energy-saving designs have sought to include ducts and heating systems in the conditioned space.
Efficient and well-designed duct systems distribute air properly throughout your home without leaking to keep all rooms at a comfortable temperature. The system should provide balanced supply and return flow to maintain a neutral pressure within the house.
Even well sealed and insulated ducts will leak and lose some heat, so many new energy-efficient homes place the duct system within the conditioned space of the home. The simplest way to accomplish this is to hide the ducts in dropped ceilings and in corners of rooms. Ducts can also be located in a sealed and insulated chase extending into the attic or built into raised floors. In both of these latter cases, care must be taken during construction to prevent contractors from using the duct chases for wiring or other utilities.
In either case, actual ducts must be used — chases and floor cavities should not be used as ducts. Regardless of where they are installed, ducts should be well sealed. Although ducts can be configured in a number of ways, the “trunk and branch” and “radial” supply duct configurations are most suitable for ducts located in conditioned spaces.
Air return duct systems can be configured in two ways: each room can have a return duct that sends air back to the heating and cooling equipment or return grills can be located in central locations on each floor. For the latter case, either grills must be installed to allow air to pass out of closed rooms, or short “jumper ducts” can be installed to connect the vent in one room with the next, allowing air to flow back to the central return grilles. Door undercuts help, but they are usually not sufficient for return airflow.
You can perform a simple check for adequate return air capacity by doing the following:
- Close all exterior doors and windows
- Close all interior room doors
- Turn on the central air handler
- “Crack” interior doors one by one and observe if the door closes or further opens “on its own.” (Whether it closes or opens will depend on the direction of the air handler-driven air flow.) Rooms served by air-moved doors have restricted return air flow and need pressure relief as described above.
Maintaining and Upgrading Existing Duct Systems
Sealing your ducts to prevent leaks is even more important if the ducts are located in an unconditioned area such as an attic or vented crawlspace. If the supply ducts are leaking, heated or cooled air can be forced out of unsealed joints and lost. In addition, unconditioned air can be drawn into return ducts through unsealed joints.
Although minor duct repairs are easy to make, qualified professionals should seal and insulate ducts in unconditioned spaces to ensure the use of appropriate sealing materials.
Aside from sealing your ducts, the simplest and most effective means of maintaining your air distribution system is to ensure that furniture and other objects are not blocking the airflow through your registers, and to vacuum the registers to remove any dust buildup.
Existing duct systems often suffer from design deficiencies in the return air system, and modifications by the homeowner (or just a tendency to keep doors closed) may contribute to these problems. Any rooms with a lack of sufficient return airflow may benefit from relatively simple upgrades, such as the installation of new return-air grilles, undercutting doors for return air, or installing a jumper duct.
Some rooms may also be hard to heat and cool because of inadequate supply ducts or grilles. If this is the case, you should first examine whether the problem is the room itself: fix any problems with insulation, air leakage, or inefficient windows first. If the problem persists, you may be able to increase the size of the supply duct or add an additional duct to provide the needed airflow to the room.
Minor Duct Repair Tips for Minimizing Energy Losses in Ducts
- Check your ducts for air leaks. First, look for sections that should be joined but have separated and then look for obvious holes.
- Duct mastic is the preferred material for sealing ductwork seams and joints. It is more durable than any available tape and generally easier for a do-it-yourself installation. Its only drawback is that it will not bridge gaps over ¼ inch. Such gaps must be first bridged with web-type drywall tape, or a good quality heat approved tape.
- If you use tape to seal your ducts, avoid cloth-backed, rubber adhesive duct tape — it tends to fail quickly. Instead, use mastic, butyl tape, foil tape, or other heat-approved tapes. Look for tape with the Underwriters Laboratories (UL) logo.
- Remember that insulating ducts in the basement will make the basement colder. If both the ducts and the basement walls are not insulated, consider insulating both. Water pipes and drains in unconditioned spaces could freeze and burst if the heat ducts are fully insulated because there would be no heat source to prevent the space from freezing in cold weather. However, using an electric heating tape wrap on the pipes can prevent this. Check with a professional contractor.
- Hire a professional to install both supply and return registers in the basement rooms after converting your basement to a living area.
- Be sure a well-sealed vapor barrier exists on the outside of the insulation on cooling ducts to prevent moisture condensation.
- If you have a fuel-burning furnace, stove, or other appliance or an attached garage, install a carbon monoxide (CO) monitor to alert you to harmful CO levels.
- Be sure to get professional help when doing ductwork. A qualified professional should always perform changes and repairs to a duct system.
Minimizing Energy Losses in Ducts at 6643 Tuskegee St, Houston, TX 77091
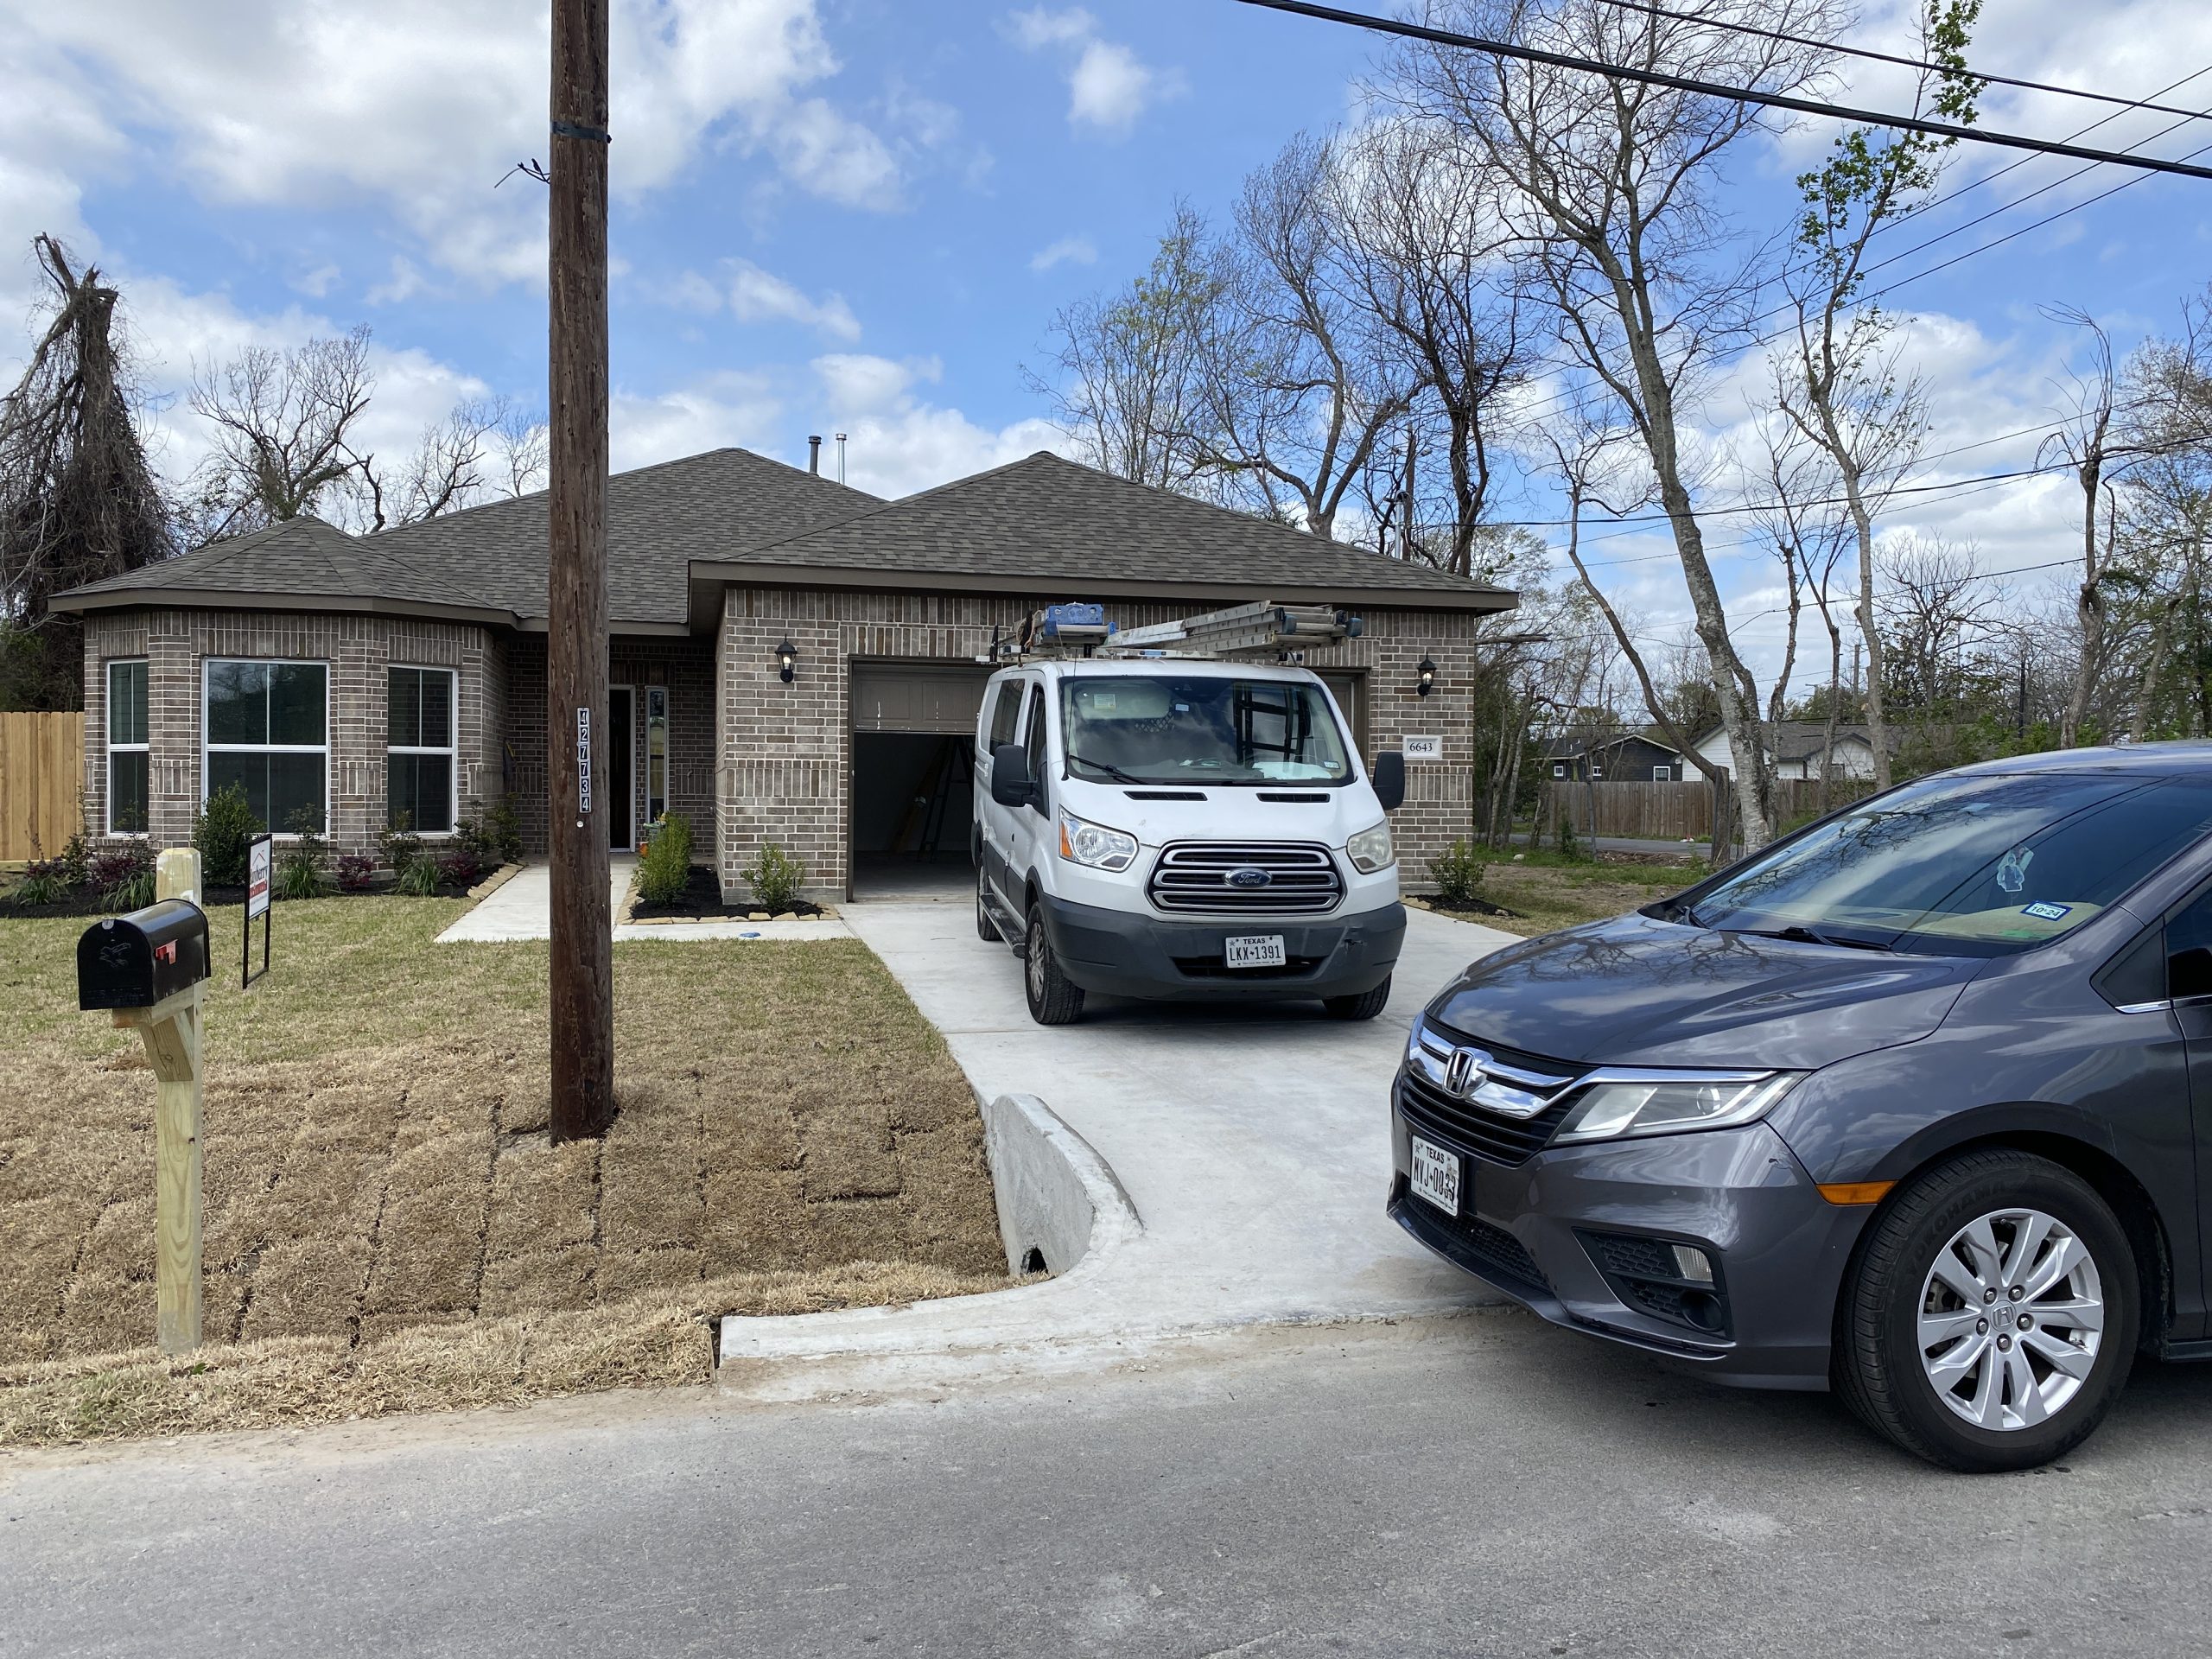
6643 Tuskegee St, Houston, TX 77091
Minimizing Energy Losses in Ducts
Minimizing energy losses in ducts by seeing if the ducts are poorly sealed or insulated. That could tell you why your energy bill in high. Your air ducts are one of the most important systems in your home, and if the ducts are poorly sealed or insulated, they are likely contributing to higher energy bills.
Your home’s duct system is a branching network of tubes in the walls, floors, and ceilings; it carries the air from your home’s furnace and central air conditioner to each room. Ducts are made of sheet metal, fiberglass, or other materials.
Ducts that leak heated air into unheated spaces can add hundreds of dollars a year to your heating and cooling bills, but you can reduce that loss by sealing and insulating your ducts. Insulating ducts in unconditioned spaces is usually very cost-effective. Existing ducts may also be blocked or may require simple upgrades.
Designing and Installing New Duct Systems
In new home construction or in retrofits, proper duct system design is critical. In recent years, energy-saving designs have sought to include ducts and heating systems in the conditioned space.
Efficient and well-designed duct systems distribute air properly throughout your home without leaking to keep all rooms at a comfortable temperature. The system should provide balanced supply and return flow to maintain a neutral pressure within the house.
Even well sealed and insulated ducts will leak and lose some heat, so many new energy-efficient homes place the duct system within the conditioned space of the home. The simplest way to accomplish this is to hide the ducts in dropped ceilings and in corners of rooms. Ducts can also be located in a sealed and insulated chase extending into the attic or built into raised floors. In both of these latter cases, care must be taken during construction to prevent contractors from using the duct chases for wiring or other utilities.
In either case, actual ducts must be used — chases and floor cavities should not be used as ducts. Regardless of where they are installed, ducts should be well sealed. Although ducts can be configured in a number of ways, the “trunk and branch” and “radial” supply duct configurations are most suitable for ducts located in conditioned spaces.
Air return duct systems can be configured in two ways: each room can have a return duct that sends air back to the heating and cooling equipment or return grills can be located in central locations on each floor. For the latter case, either grills must be installed to allow air to pass out of closed rooms, or short “jumper ducts” can be installed to connect the vent in one room with the next, allowing air to flow back to the central return grilles. Door undercuts help, but they are usually not sufficient for return airflow.
You can perform a simple check for adequate return air capacity by doing the following:
- Close all exterior doors and windows
- Close all interior room doors
- Turn on the central air handler
- “Crack” interior doors one by one and observe if the door closes or further opens “on its own.” (Whether it closes or opens will depend on the direction of the air handler-driven air flow.) Rooms served by air-moved doors have restricted return air flow and need pressure relief as described above.
Maintaining and Upgrading Existing Duct Systems
Sealing your ducts to prevent leaks is even more important if the ducts are located in an unconditioned area such as an attic or vented crawlspace. If the supply ducts are leaking, heated or cooled air can be forced out of unsealed joints and lost. In addition, unconditioned air can be drawn into return ducts through unsealed joints.
Although minor duct repairs are easy to make, qualified professionals should seal and insulate ducts in unconditioned spaces to ensure the use of appropriate sealing materials.
Aside from sealing your ducts, the simplest and most effective means of maintaining your air distribution system is to ensure that furniture and other objects are not blocking the airflow through your registers, and to vacuum the registers to remove any dust buildup.
Existing duct systems often suffer from design deficiencies in the return air system, and modifications by the homeowner (or just a tendency to keep doors closed) may contribute to these problems. Any rooms with a lack of sufficient return airflow may benefit from relatively simple upgrades, such as the installation of new return-air grilles, undercutting doors for return air, or installing a jumper duct.
Some rooms may also be hard to heat and cool because of inadequate supply ducts or grilles. If this is the case, you should first examine whether the problem is the room itself: fix any problems with insulation, air leakage, or inefficient windows first. If the problem persists, you may be able to increase the size of the supply duct or add an additional duct to provide the needed airflow to the room.
Minor Duct Repair Tips for Minimizing Energy Losses in Ducts
- Check your ducts for air leaks. First, look for sections that should be joined but have separated and then look for obvious holes.
- Duct mastic is the preferred material for sealing ductwork seams and joints. It is more durable than any available tape and generally easier for a do-it-yourself installation. Its only drawback is that it will not bridge gaps over ¼ inch. Such gaps must be first bridged with web-type drywall tape, or a good quality heat approved tape.
- If you use tape to seal your ducts, avoid cloth-backed, rubber adhesive duct tape — it tends to fail quickly. Instead, use mastic, butyl tape, foil tape, or other heat-approved tapes. Look for tape with the Underwriters Laboratories (UL) logo.
- Remember that insulating ducts in the basement will make the basement colder. If both the ducts and the basement walls are not insulated, consider insulating both. Water pipes and drains in unconditioned spaces could freeze and burst if the heat ducts are fully insulated because there would be no heat source to prevent the space from freezing in cold weather. However, using an electric heating tape wrap on the pipes can prevent this. Check with a professional contractor.
- Hire a professional to install both supply and return registers in the basement rooms after converting your basement to a living area.
- Be sure a well-sealed vapor barrier exists on the outside of the insulation on cooling ducts to prevent moisture condensation.
- If you have a fuel-burning furnace, stove, or other appliance or an attached garage, install a carbon monoxide (CO) monitor to alert you to harmful CO levels.
- Be sure to get professional help when doing ductwork. A qualified professional should always perform changes and repairs to a duct system.
Minimizing Energy Losses in Ducts at 3509 McIlhenny St, Houston, TX 77004


3509 McIlhenny St, Houston, TX 77004
Minimizing Energy Losses in Ducts
Minimizing energy losses in ducts by seeing if the ducts are poorly sealed or insulated. That could tell you why your energy bill in high. Your air ducts are one of the most important systems in your home, and if the ducts are poorly sealed or insulated, they are likely contributing to higher energy bills.
Your home’s duct system is a branching network of tubes in the walls, floors, and ceilings; it carries the air from your home’s furnace and central air conditioner to each room. Ducts are made of sheet metal, fiberglass, or other materials.
Ducts that leak heated air into unheated spaces can add hundreds of dollars a year to your heating and cooling bills, but you can reduce that loss by sealing and insulating your ducts. Insulating ducts in unconditioned spaces is usually very cost-effective. Existing ducts may also be blocked or may require simple upgrades.
Designing and Installing New Duct Systems
In new home construction or in retrofits, proper duct system design is critical. In recent years, energy-saving designs have sought to include ducts and heating systems in the conditioned space.
Efficient and well-designed duct systems distribute air properly throughout your home without leaking to keep all rooms at a comfortable temperature. The system should provide balanced supply and return flow to maintain a neutral pressure within the house.
Even well sealed and insulated ducts will leak and lose some heat, so many new energy-efficient homes place the duct system within the conditioned space of the home. The simplest way to accomplish this is to hide the ducts in dropped ceilings and in corners of rooms. Ducts can also be located in a sealed and insulated chase extending into the attic or built into raised floors. In both of these latter cases, care must be taken during construction to prevent contractors from using the duct chases for wiring or other utilities.
In either case, actual ducts must be used — chases and floor cavities should not be used as ducts. Regardless of where they are installed, ducts should be well sealed. Although ducts can be configured in a number of ways, the “trunk and branch” and “radial” supply duct configurations are most suitable for ducts located in conditioned spaces.
Air return duct systems can be configured in two ways: each room can have a return duct that sends air back to the heating and cooling equipment or return grills can be located in central locations on each floor. For the latter case, either grills must be installed to allow air to pass out of closed rooms, or short “jumper ducts” can be installed to connect the vent in one room with the next, allowing air to flow back to the central return grilles. Door undercuts help, but they are usually not sufficient for return airflow.
You can perform a simple check for adequate return air capacity by doing the following:
- Close all exterior doors and windows
- Close all interior room doors
- Turn on the central air handler
- “Crack” interior doors one by one and observe if the door closes or further opens “on its own.” (Whether it closes or opens will depend on the direction of the air handler-driven air flow.) Rooms served by air-moved doors have restricted return air flow and need pressure relief as described above.
Maintaining and Upgrading Existing Duct Systems
Sealing your ducts to prevent leaks is even more important if the ducts are located in an unconditioned area such as an attic or vented crawlspace. If the supply ducts are leaking, heated or cooled air can be forced out of unsealed joints and lost. In addition, unconditioned air can be drawn into return ducts through unsealed joints.
Although minor duct repairs are easy to make, qualified professionals should seal and insulate ducts in unconditioned spaces to ensure the use of appropriate sealing materials.
Aside from sealing your ducts, the simplest and most effective means of maintaining your air distribution system is to ensure that furniture and other objects are not blocking the airflow through your registers, and to vacuum the registers to remove any dust buildup.
Existing duct systems often suffer from design deficiencies in the return air system, and modifications by the homeowner (or just a tendency to keep doors closed) may contribute to these problems. Any rooms with a lack of sufficient return airflow may benefit from relatively simple upgrades, such as the installation of new return-air grilles, undercutting doors for return air, or installing a jumper duct.
Some rooms may also be hard to heat and cool because of inadequate supply ducts or grilles. If this is the case, you should first examine whether the problem is the room itself: fix any problems with insulation, air leakage, or inefficient windows first. If the problem persists, you may be able to increase the size of the supply duct or add an additional duct to provide the needed airflow to the room.
Minor Duct Repair Tips for Minimizing Energy Losses in Ducts
- Check your ducts for air leaks. First, look for sections that should be joined but have separated and then look for obvious holes.
- Duct mastic is the preferred material for sealing ductwork seams and joints. It is more durable than any available tape and generally easier for a do-it-yourself installation. Its only drawback is that it will not bridge gaps over ¼ inch. Such gaps must be first bridged with web-type drywall tape, or a good quality heat approved tape.
- If you use tape to seal your ducts, avoid cloth-backed, rubber adhesive duct tape — it tends to fail quickly. Instead, use mastic, butyl tape, foil tape, or other heat-approved tapes. Look for tape with the Underwriters Laboratories (UL) logo.
- Remember that insulating ducts in the basement will make the basement colder. If both the ducts and the basement walls are not insulated, consider insulating both. Water pipes and drains in unconditioned spaces could freeze and burst if the heat ducts are fully insulated because there would be no heat source to prevent the space from freezing in cold weather. However, using an electric heating tape wrap on the pipes can prevent this. Check with a professional contractor.
- Hire a professional to install both supply and return registers in the basement rooms after converting your basement to a living area.
- Be sure a well-sealed vapor barrier exists on the outside of the insulation on cooling ducts to prevent moisture condensation.
- If you have a fuel-burning furnace, stove, or other appliance or an attached garage, install a carbon monoxide (CO) monitor to alert you to harmful CO levels.
- Be sure to get professional help when doing ductwork. A qualified professional should always perform changes and repairs to a duct system.
Minimizing Energy Losses in Ducts at 3511 McIlhenny St, Houston, TX 77004
3511 McIlhenny St, Houston, TX 77004
Minimizing Energy Losses in Ducts
Minimizing energy losses in ducts by seeing if the ducts are poorly sealed or insulated. That could tell you why your energy bill in high. Your air ducts are one of the most important systems in your home, and if the ducts are poorly sealed or insulated, they are likely contributing to higher energy bills.
Your home’s duct system is a branching network of tubes in the walls, floors, and ceilings; it carries the air from your home’s furnace and central air conditioner to each room. Ducts are made of sheet metal, fiberglass, or other materials.
Ducts that leak heated air into unheated spaces can add hundreds of dollars a year to your heating and cooling bills, but you can reduce that loss by sealing and insulating your ducts. Insulating ducts in unconditioned spaces is usually very cost-effective. Existing ducts may also be blocked or may require simple upgrades.
Designing and Installing New Duct Systems
In new home construction or in retrofits, proper duct system design is critical. In recent years, energy-saving designs have sought to include ducts and heating systems in the conditioned space.
Efficient and well-designed duct systems distribute air properly throughout your home without leaking to keep all rooms at a comfortable temperature. The system should provide balanced supply and return flow to maintain a neutral pressure within the house.
Even well sealed and insulated ducts will leak and lose some heat, so many new energy-efficient homes place the duct system within the conditioned space of the home. The simplest way to accomplish this is to hide the ducts in dropped ceilings and in corners of rooms. Ducts can also be located in a sealed and insulated chase extending into the attic or built into raised floors. In both of these latter cases, care must be taken during construction to prevent contractors from using the duct chases for wiring or other utilities.
In either case, actual ducts must be used — chases and floor cavities should not be used as ducts. Regardless of where they are installed, ducts should be well sealed. Although ducts can be configured in a number of ways, the “trunk and branch” and “radial” supply duct configurations are most suitable for ducts located in conditioned spaces.
Air return duct systems can be configured in two ways: each room can have a return duct that sends air back to the heating and cooling equipment or return grills can be located in central locations on each floor. For the latter case, either grills must be installed to allow air to pass out of closed rooms, or short “jumper ducts” can be installed to connect the vent in one room with the next, allowing air to flow back to the central return grilles. Door undercuts help, but they are usually not sufficient for return airflow.
You can perform a simple check for adequate return air capacity by doing the following:
- Close all exterior doors and windows
- Close all interior room doors
- Turn on the central air handler
- “Crack” interior doors one by one and observe if the door closes or further opens “on its own.” (Whether it closes or opens will depend on the direction of the air handler-driven air flow.) Rooms served by air-moved doors have restricted return air flow and need pressure relief as described above.
Maintaining and Upgrading Existing Duct Systems
Sealing your ducts to prevent leaks is even more important if the ducts are located in an unconditioned area such as an attic or vented crawlspace. If the supply ducts are leaking, heated or cooled air can be forced out of unsealed joints and lost. In addition, unconditioned air can be drawn into return ducts through unsealed joints.
Although minor duct repairs are easy to make, qualified professionals should seal and insulate ducts in unconditioned spaces to ensure the use of appropriate sealing materials.
Aside from sealing your ducts, the simplest and most effective means of maintaining your air distribution system is to ensure that furniture and other objects are not blocking the airflow through your registers, and to vacuum the registers to remove any dust buildup.
Existing duct systems often suffer from design deficiencies in the return air system, and modifications by the homeowner (or just a tendency to keep doors closed) may contribute to these problems. Any rooms with a lack of sufficient return airflow may benefit from relatively simple upgrades, such as the installation of new return-air grilles, undercutting doors for return air, or installing a jumper duct.
Some rooms may also be hard to heat and cool because of inadequate supply ducts or grilles. If this is the case, you should first examine whether the problem is the room itself: fix any problems with insulation, air leakage, or inefficient windows first. If the problem persists, you may be able to increase the size of the supply duct or add an additional duct to provide the needed airflow to the room.
Minor Duct Repair Tips for Minimizing Energy Losses in Ducts
- Check your ducts for air leaks. First, look for sections that should be joined but have separated and then look for obvious holes.
- Duct mastic is the preferred material for sealing ductwork seams and joints. It is more durable than any available tape and generally easier for a do-it-yourself installation. Its only drawback is that it will not bridge gaps over ¼ inch. Such gaps must be first bridged with web-type drywall tape, or a good quality heat approved tape.
- If you use tape to seal your ducts, avoid cloth-backed, rubber adhesive duct tape — it tends to fail quickly. Instead, use mastic, butyl tape, foil tape, or other heat-approved tapes. Look for tape with the Underwriters Laboratories (UL) logo.
- Remember that insulating ducts in the basement will make the basement colder. If both the ducts and the basement walls are not insulated, consider insulating both. Water pipes and drains in unconditioned spaces could freeze and burst if the heat ducts are fully insulated because there would be no heat source to prevent the space from freezing in cold weather. However, using an electric heating tape wrap on the pipes can prevent this. Check with a professional contractor.
- Hire a professional to install both supply and return registers in the basement rooms after converting your basement to a living area.
- Be sure a well-sealed vapor barrier exists on the outside of the insulation on cooling ducts to prevent moisture condensation.
- If you have a fuel-burning furnace, stove, or other appliance or an attached garage, install a carbon monoxide (CO) monitor to alert you to harmful CO levels.
- Be sure to get professional help when doing ductwork. A qualified professional should always perform changes and repairs to a duct system.
Minimizing Energy Losses in Ducts at 5907 Wheatley Holw Ln, Houston, TX 77091

Ducts at 5907 Wheatley Holw Ln, Houston, TX 77091
Minimizing Energy Losses in Ducts
Minimizing energy losses in ducts by seeing if the ducts are poorly sealed or insulated. That could tell you why your energy bill in high. Your air ducts are one of the most important systems in your home, and if the ducts are poorly sealed or insulated, they are likely contributing to higher energy bills.
Your home’s duct system is a branching network of tubes in the walls, floors, and ceilings; it carries the air from your home’s furnace and central air conditioner to each room. Ducts are made of sheet metal, fiberglass, or other materials.
Ducts that leak heated air into unheated spaces can add hundreds of dollars a year to your heating and cooling bills, but you can reduce that loss by sealing and insulating your ducts. Insulating ducts in unconditioned spaces is usually very cost-effective. Existing ducts may also be blocked or may require simple upgrades.
Designing and Installing New Duct Systems
In new home construction or in retrofits, proper duct system design is critical. In recent years, energy-saving designs have sought to include ducts and heating systems in the conditioned space.
Efficient and well-designed duct systems distribute air properly throughout your home without leaking to keep all rooms at a comfortable temperature. The system should provide balanced supply and return flow to maintain a neutral pressure within the house.
Even well sealed and insulated ducts will leak and lose some heat, so many new energy-efficient homes place the duct system within the conditioned space of the home. The simplest way to accomplish this is to hide the ducts in dropped ceilings and in corners of rooms. Ducts can also be located in a sealed and insulated chase extending into the attic or built into raised floors. In both of these latter cases, care must be taken during construction to prevent contractors from using the duct chases for wiring or other utilities.
In either case, actual ducts must be used — chases and floor cavities should not be used as ducts. Regardless of where they are installed, ducts should be well sealed. Although ducts can be configured in a number of ways, the “trunk and branch” and “radial” supply duct configurations are most suitable for ducts located in conditioned spaces.
Air return duct systems can be configured in two ways: each room can have a return duct that sends air back to the heating and cooling equipment or return grills can be located in central locations on each floor. For the latter case, either grills must be installed to allow air to pass out of closed rooms, or short “jumper ducts” can be installed to connect the vent in one room with the next, allowing air to flow back to the central return grilles. Door undercuts help, but they are usually not sufficient for return airflow.
You can perform a simple check for adequate return air capacity by doing the following:
- Close all exterior doors and windows
- Close all interior room doors
- Turn on the central air handler
- “Crack” interior doors one by one and observe if the door closes or further opens “on its own.” (Whether it closes or opens will depend on the direction of the air handler-driven air flow.) Rooms served by air-moved doors have restricted return air flow and need pressure relief as described above.
Maintaining and Upgrading Existing Duct Systems
Sealing your ducts to prevent leaks is even more important if the ducts are located in an unconditioned area such as an attic or vented crawlspace. If the supply ducts are leaking, heated or cooled air can be forced out of unsealed joints and lost. In addition, unconditioned air can be drawn into return ducts through unsealed joints.
Although minor duct repairs are easy to make, qualified professionals should seal and insulate ducts in unconditioned spaces to ensure the use of appropriate sealing materials.
Aside from sealing your ducts, the simplest and most effective means of maintaining your air distribution system is to ensure that furniture and other objects are not blocking the airflow through your registers, and to vacuum the registers to remove any dust buildup.
Existing duct systems often suffer from design deficiencies in the return air system, and modifications by the homeowner (or just a tendency to keep doors closed) may contribute to these problems. Any rooms with a lack of sufficient return airflow may benefit from relatively simple upgrades, such as the installation of new return-air grilles, undercutting doors for return air, or installing a jumper duct.
Some rooms may also be hard to heat and cool because of inadequate supply ducts or grilles. If this is the case, you should first examine whether the problem is the room itself: fix any problems with insulation, air leakage, or inefficient windows first. If the problem persists, you may be able to increase the size of the supply duct or add an additional duct to provide the needed airflow to the room.
Minor Duct Repair Tips for Minimizing Energy Losses in Ducts
- Check your ducts for air leaks. First, look for sections that should be joined but have separated and then look for obvious holes.
- Duct mastic is the preferred material for sealing ductwork seams and joints. It is more durable than any available tape and generally easier for a do-it-yourself installation. Its only drawback is that it will not bridge gaps over ¼ inch. Such gaps must be first bridged with web-type drywall tape, or a good quality heat approved tape.
- If you use tape to seal your ducts, avoid cloth-backed, rubber adhesive duct tape — it tends to fail quickly. Instead, use mastic, butyl tape, foil tape, or other heat-approved tapes. Look for tape with the Underwriters Laboratories (UL) logo.
- Remember that insulating ducts in the basement will make the basement colder. If both the ducts and the basement walls are not insulated, consider insulating both. Water pipes and drains in unconditioned spaces could freeze and burst if the heat ducts are fully insulated because there would be no heat source to prevent the space from freezing in cold weather. However, using an electric heating tape wrap on the pipes can prevent this. Check with a professional contractor.
- Hire a professional to install both supply and return registers in the basement rooms after converting your basement to a living area.
- Be sure a well-sealed vapor barrier exists on the outside of the insulation on cooling ducts to prevent moisture condensation.
- If you have a fuel-burning furnace, stove, or other appliance or an attached garage, install a carbon monoxide (CO) monitor to alert you to harmful CO levels.
- Be sure to get professional help when doing ductwork. A qualified professional should always perform changes and repairs to a duct system.
Minimizing Energy Losses in Ducts at 800 Wilkes St, Houston, TX 77009

800 Wilkes St, Houston, TX 77009
Minimizing Energy Losses in Ducts
Minimizing energy losses in ducts by seeing if the ducts are poorly sealed or insulated. That could tell you why your energy bill in high. Your air ducts are one of the most important systems in your home, and if the ducts are poorly sealed or insulated, they are likely contributing to higher energy bills.
Your home’s duct system is a branching network of tubes in the walls, floors, and ceilings; it carries the air from your home’s furnace and central air conditioner to each room. Ducts are made of sheet metal, fiberglass, or other materials.
Ducts that leak heated air into unheated spaces can add hundreds of dollars a year to your heating and cooling bills, but you can reduce that loss by sealing and insulating your ducts. Insulating ducts in unconditioned spaces is usually very cost-effective. Existing ducts may also be blocked or may require simple upgrades.
Designing and Installing New Duct Systems
In new home construction or in retrofits, proper duct system design is critical. In recent years, energy-saving designs have sought to include ducts and heating systems in the conditioned space.
Efficient and well-designed duct systems distribute air properly throughout your home without leaking to keep all rooms at a comfortable temperature. The system should provide balanced supply and return flow to maintain a neutral pressure within the house.
Even well sealed and insulated ducts will leak and lose some heat, so many new energy-efficient homes place the duct system within the conditioned space of the home. The simplest way to accomplish this is to hide the ducts in dropped ceilings and in corners of rooms. Ducts can also be located in a sealed and insulated chase extending into the attic or built into raised floors. In both of these latter cases, care must be taken during construction to prevent contractors from using the duct chases for wiring or other utilities.
In either case, actual ducts must be used — chases and floor cavities should not be used as ducts. Regardless of where they are installed, ducts should be well sealed. Although ducts can be configured in a number of ways, the “trunk and branch” and “radial” supply duct configurations are most suitable for ducts located in conditioned spaces.
Air return duct systems can be configured in two ways: each room can have a return duct that sends air back to the heating and cooling equipment or return grills can be located in central locations on each floor. For the latter case, either grills must be installed to allow air to pass out of closed rooms, or short “jumper ducts” can be installed to connect the vent in one room with the next, allowing air to flow back to the central return grilles. Door undercuts help, but they are usually not sufficient for return airflow.
You can perform a simple check for adequate return air capacity by doing the following:
- Close all exterior doors and windows
- Close all interior room doors
- Turn on the central air handler
- “Crack” interior doors one by one and observe if the door closes or further opens “on its own.” (Whether it closes or opens will depend on the direction of the air handler-driven air flow.) Rooms served by air-moved doors have restricted return air flow and need pressure relief as described above.
Maintaining and Upgrading Existing Duct Systems
Sealing your ducts to prevent leaks is even more important if the ducts are located in an unconditioned area such as an attic or vented crawlspace. If the supply ducts are leaking, heated or cooled air can be forced out of unsealed joints and lost. In addition, unconditioned air can be drawn into return ducts through unsealed joints.
Although minor duct repairs are easy to make, qualified professionals should seal and insulate ducts in unconditioned spaces to ensure the use of appropriate sealing materials.
Aside from sealing your ducts, the simplest and most effective means of maintaining your air distribution system is to ensure that furniture and other objects are not blocking the airflow through your registers, and to vacuum the registers to remove any dust buildup.
Existing duct systems often suffer from design deficiencies in the return air system, and modifications by the homeowner (or just a tendency to keep doors closed) may contribute to these problems. Any rooms with a lack of sufficient return airflow may benefit from relatively simple upgrades, such as the installation of new return-air grilles, undercutting doors for return air, or installing a jumper duct.
Some rooms may also be hard to heat and cool because of inadequate supply ducts or grilles. If this is the case, you should first examine whether the problem is the room itself: fix any problems with insulation, air leakage, or inefficient windows first. If the problem persists, you may be able to increase the size of the supply duct or add an additional duct to provide the needed airflow to the room.
Minor Duct Repair Tips for Minimizing Energy Losses in Ducts
- Check your ducts for air leaks. First, look for sections that should be joined but have separated and then look for obvious holes.
- Duct mastic is the preferred material for sealing ductwork seams and joints. It is more durable than any available tape and generally easier for a do-it-yourself installation. Its only drawback is that it will not bridge gaps over ¼ inch. Such gaps must be first bridged with web-type drywall tape, or a good quality heat approved tape.
- If you use tape to seal your ducts, avoid cloth-backed, rubber adhesive duct tape — it tends to fail quickly. Instead, use mastic, butyl tape, foil tape, or other heat-approved tapes. Look for tape with the Underwriters Laboratories (UL) logo.
- Remember that insulating ducts in the basement will make the basement colder. If both the ducts and the basement walls are not insulated, consider insulating both. Water pipes and drains in unconditioned spaces could freeze and burst if the heat ducts are fully insulated because there would be no heat source to prevent the space from freezing in cold weather. However, using an electric heating tape wrap on the pipes can prevent this. Check with a professional contractor.
- Hire a professional to install both supply and return registers in the basement rooms after converting your basement to a living area.
- Be sure a well-sealed vapor barrier exists on the outside of the insulation on cooling ducts to prevent moisture condensation.
- If you have a fuel-burning furnace, stove, or other appliance or an attached garage, install a carbon monoxide (CO) monitor to alert you to harmful CO levels.
- Be sure to get professional help when doing ductwork. A qualified professional should always perform changes and repairs to a duct system.
Minimizing Energy Losses in Ducts at 8614 San Juanico St, Houston, TX 77044
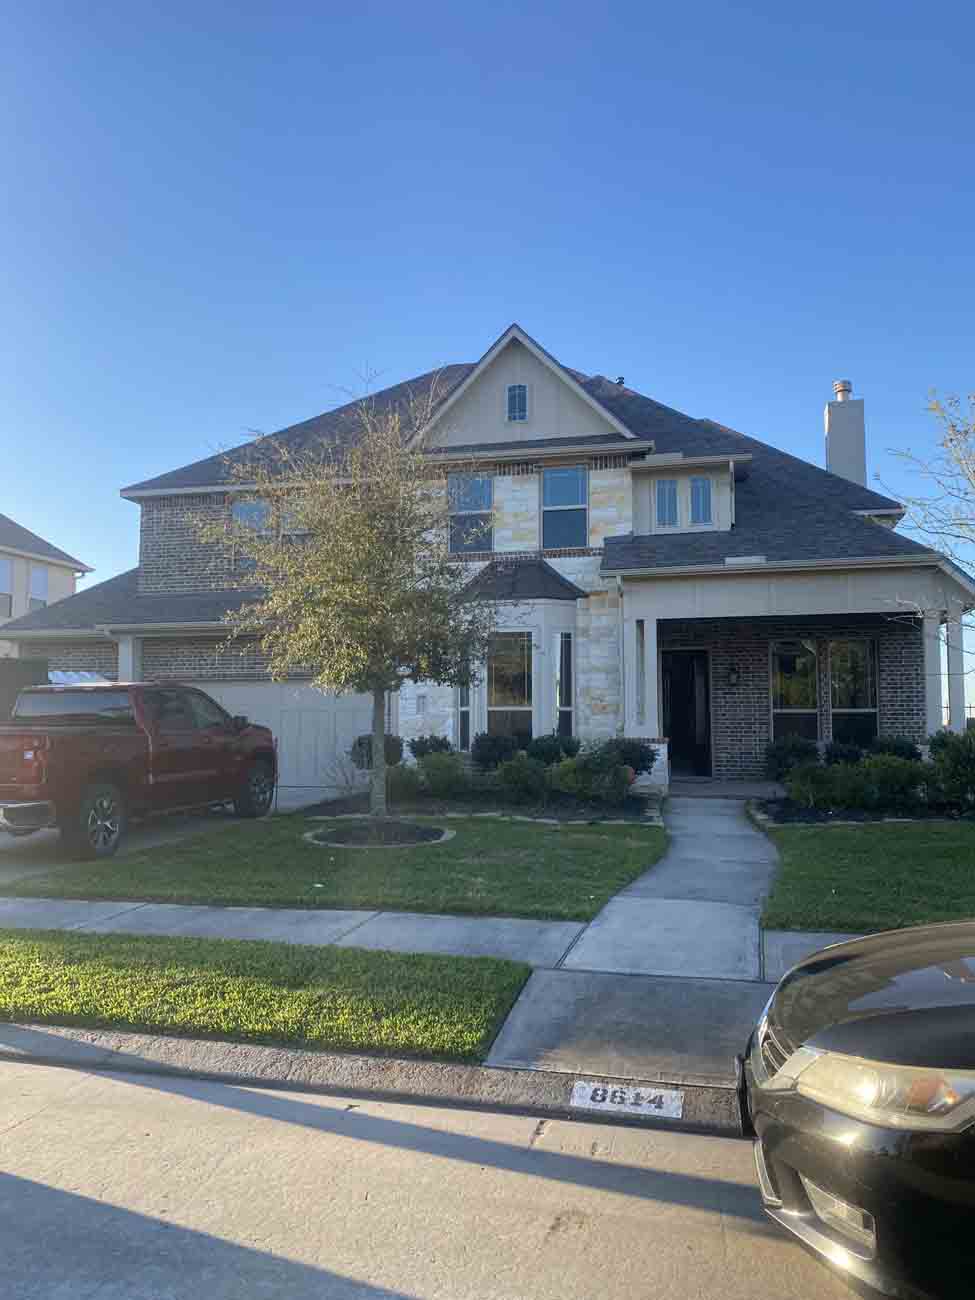
8614 San Juanico St, Houston, TX 77044
Minimizing Energy Losses in Ducts
Minimizing energy losses in ducts by seeing if the ducts are poorly sealed or insulated. That could tell you why your energy bill in high. Your air ducts are one of the most important systems in your home, and if the ducts are poorly sealed or insulated, they are likely contributing to higher energy bills.
Your home’s duct system is a branching network of tubes in the walls, floors, and ceilings; it carries the air from your home’s furnace and central air conditioner to each room. Ducts are made of sheet metal, fiberglass, or other materials.
Ducts that leak heated air into unheated spaces can add hundreds of dollars a year to your heating and cooling bills, but you can reduce that loss by sealing and insulating your ducts. Insulating ducts in unconditioned spaces is usually very cost-effective. Existing ducts may also be blocked or may require simple upgrades.
Designing and Installing New Duct Systems
In new home construction or in retrofits, proper duct system design is critical. In recent years, energy-saving designs have sought to include ducts and heating systems in the conditioned space.
Efficient and well-designed duct systems distribute air properly throughout your home without leaking to keep all rooms at a comfortable temperature. The system should provide balanced supply and return flow to maintain a neutral pressure within the house.
Even well sealed and insulated ducts will leak and lose some heat, so many new energy-efficient homes place the duct system within the conditioned space of the home. The simplest way to accomplish this is to hide the ducts in dropped ceilings and in corners of rooms. Ducts can also be located in a sealed and insulated chase extending into the attic or built into raised floors. In both of these latter cases, care must be taken during construction to prevent contractors from using the duct chases for wiring or other utilities.
In either case, actual ducts must be used — chases and floor cavities should not be used as ducts. Regardless of where they are installed, ducts should be well sealed. Although ducts can be configured in a number of ways, the “trunk and branch” and “radial” supply duct configurations are most suitable for ducts located in conditioned spaces.
Air return duct systems can be configured in two ways: each room can have a return duct that sends air back to the heating and cooling equipment or return grills can be located in central locations on each floor. For the latter case, either grills must be installed to allow air to pass out of closed rooms, or short “jumper ducts” can be installed to connect the vent in one room with the next, allowing air to flow back to the central return grilles. Door undercuts help, but they are usually not sufficient for return airflow.
You can perform a simple check for adequate return air capacity by doing the following:
- Close all exterior doors and windows
- Close all interior room doors
- Turn on the central air handler
- “Crack” interior doors one by one and observe if the door closes or further opens “on its own.” (Whether it closes or opens will depend on the direction of the air handler-driven air flow.) Rooms served by air-moved doors have restricted return air flow and need pressure relief as described above.
Maintaining and Upgrading Existing Duct Systems
Sealing your ducts to prevent leaks is even more important if the ducts are located in an unconditioned area such as an attic or vented crawlspace. If the supply ducts are leaking, heated or cooled air can be forced out of unsealed joints and lost. In addition, unconditioned air can be drawn into return ducts through unsealed joints.
Although minor duct repairs are easy to make, qualified professionals should seal and insulate ducts in unconditioned spaces to ensure the use of appropriate sealing materials.
Aside from sealing your ducts, the simplest and most effective means of maintaining your air distribution system is to ensure that furniture and other objects are not blocking the airflow through your registers, and to vacuum the registers to remove any dust buildup.
Existing duct systems often suffer from design deficiencies in the return air system, and modifications by the homeowner (or just a tendency to keep doors closed) may contribute to these problems. Any rooms with a lack of sufficient return airflow may benefit from relatively simple upgrades, such as the installation of new return-air grilles, undercutting doors for return air, or installing a jumper duct.
Some rooms may also be hard to heat and cool because of inadequate supply ducts or grilles. If this is the case, you should first examine whether the problem is the room itself: fix any problems with insulation, air leakage, or inefficient windows first. If the problem persists, you may be able to increase the size of the supply duct or add an additional duct to provide the needed airflow to the room.
Minor Duct Repair Tips for Minimizing Energy Losses in Ducts
- Check your ducts for air leaks. First, look for sections that should be joined but have separated and then look for obvious holes.
- Duct mastic is the preferred material for sealing ductwork seams and joints. It is more durable than any available tape and generally easier for a do-it-yourself installation. Its only drawback is that it will not bridge gaps over ¼ inch. Such gaps must be first bridged with web-type drywall tape, or a good quality heat approved tape.
- If you use tape to seal your ducts, avoid cloth-backed, rubber adhesive duct tape — it tends to fail quickly. Instead, use mastic, butyl tape, foil tape, or other heat-approved tapes. Look for tape with the Underwriters Laboratories (UL) logo.
- Remember that insulating ducts in the basement will make the basement colder. If both the ducts and the basement walls are not insulated, consider insulating both. Water pipes and drains in unconditioned spaces could freeze and burst if the heat ducts are fully insulated because there would be no heat source to prevent the space from freezing in cold weather. However, using an electric heating tape wrap on the pipes can prevent this. Check with a professional contractor.
- Hire a professional to install both supply and return registers in the basement rooms after converting your basement to a living area.
- Be sure a well-sealed vapor barrier exists on the outside of the insulation on cooling ducts to prevent moisture condensation.
- If you have a fuel-burning furnace, stove, or other appliance or an attached garage, install a carbon monoxide (CO) monitor to alert you to harmful CO levels.
- Be sure to get professional help when doing ductwork. A qualified professional should always perform changes and repairs to a duct system.
Minimizing Energy Losses in Ducts at 16518 Locke Haven Dr, Houston, TX 77059


16518 Locke Haven Dr, Houston, TX 77059
Minimizing Energy Losses in Ducts
Minimizing energy losses in ducts by seeing if the ducts are poorly sealed or insulated. That could tell you why your energy bill in high. Your air ducts are one of the most important systems in your home, and if the ducts are poorly sealed or insulated, they are likely contributing to higher energy bills.
Your home’s duct system is a branching network of tubes in the walls, floors, and ceilings; it carries the air from your home’s furnace and central air conditioner to each room. Ducts are made of sheet metal, fiberglass, or other materials.
Ducts that leak heated air into unheated spaces can add hundreds of dollars a year to your heating and cooling bills, but you can reduce that loss by sealing and insulating your ducts. Insulating ducts in unconditioned spaces is usually very cost-effective. Existing ducts may also be blocked or may require simple upgrades.
Designing and Installing New Duct Systems
In new home construction or in retrofits, proper duct system design is critical. In recent years, energy-saving designs have sought to include ducts and heating systems in the conditioned space.
Efficient and well-designed duct systems distribute air properly throughout your home without leaking to keep all rooms at a comfortable temperature. The system should provide balanced supply and return flow to maintain a neutral pressure within the house.
Even well sealed and insulated ducts will leak and lose some heat, so many new energy-efficient homes place the duct system within the conditioned space of the home. The simplest way to accomplish this is to hide the ducts in dropped ceilings and in corners of rooms. Ducts can also be located in a sealed and insulated chase extending into the attic or built into raised floors. In both of these latter cases, care must be taken during construction to prevent contractors from using the duct chases for wiring or other utilities.
In either case, actual ducts must be used — chases and floor cavities should not be used as ducts. Regardless of where they are installed, ducts should be well sealed. Although ducts can be configured in a number of ways, the “trunk and branch” and “radial” supply duct configurations are most suitable for ducts located in conditioned spaces.
Air return duct systems can be configured in two ways: each room can have a return duct that sends air back to the heating and cooling equipment or return grills can be located in central locations on each floor. For the latter case, either grills must be installed to allow air to pass out of closed rooms, or short “jumper ducts” can be installed to connect the vent in one room with the next, allowing air to flow back to the central return grilles. Door undercuts help, but they are usually not sufficient for return airflow.
You can perform a simple check for adequate return air capacity by doing the following:
- Close all exterior doors and windows
- Close all interior room doors
- Turn on the central air handler
- “Crack” interior doors one by one and observe if the door closes or further opens “on its own.” (Whether it closes or opens will depend on the direction of the air handler-driven air flow.) Rooms served by air-moved doors have restricted return air flow and need pressure relief as described above.
Maintaining and Upgrading Existing Duct Systems
Sealing your ducts to prevent leaks is even more important if the ducts are located in an unconditioned area such as an attic or vented crawlspace. If the supply ducts are leaking, heated or cooled air can be forced out of unsealed joints and lost. In addition, unconditioned air can be drawn into return ducts through unsealed joints.
Although minor duct repairs are easy to make, qualified professionals should seal and insulate ducts in unconditioned spaces to ensure the use of appropriate sealing materials.
Aside from sealing your ducts, the simplest and most effective means of maintaining your air distribution system is to ensure that furniture and other objects are not blocking the airflow through your registers, and to vacuum the registers to remove any dust buildup.
Existing duct systems often suffer from design deficiencies in the return air system, and modifications by the homeowner (or just a tendency to keep doors closed) may contribute to these problems. Any rooms with a lack of sufficient return airflow may benefit from relatively simple upgrades, such as the installation of new return-air grilles, undercutting doors for return air, or installing a jumper duct.
Some rooms may also be hard to heat and cool because of inadequate supply ducts or grilles. If this is the case, you should first examine whether the problem is the room itself: fix any problems with insulation, air leakage, or inefficient windows first. If the problem persists, you may be able to increase the size of the supply duct or add an additional duct to provide the needed airflow to the room.
Minor Duct Repair Tips for Minimizing Energy Losses in Ducts
- Check your ducts for air leaks. First, look for sections that should be joined but have separated and then look for obvious holes.
- Duct mastic is the preferred material for sealing ductwork seams and joints. It is more durable than any available tape and generally easier for a do-it-yourself installation. Its only drawback is that it will not bridge gaps over ¼ inch. Such gaps must be first bridged with web-type drywall tape, or a good quality heat approved tape.
- If you use tape to seal your ducts, avoid cloth-backed, rubber adhesive duct tape — it tends to fail quickly. Instead, use mastic, butyl tape, foil tape, or other heat-approved tapes. Look for tape with the Underwriters Laboratories (UL) logo.
- Remember that insulating ducts in the basement will make the basement colder. If both the ducts and the basement walls are not insulated, consider insulating both. Water pipes and drains in unconditioned spaces could freeze and burst if the heat ducts are fully insulated because there would be no heat source to prevent the space from freezing in cold weather. However, using an electric heating tape wrap on the pipes can prevent this. Check with a professional contractor.
- Hire a professional to install both supply and return registers in the basement rooms after converting your basement to a living area.
- Be sure a well-sealed vapor barrier exists on the outside of the insulation on cooling ducts to prevent moisture condensation.
- If you have a fuel-burning furnace, stove, or other appliance or an attached garage, install a carbon monoxide (CO) monitor to alert you to harmful CO levels.
- Be sure to get professional help when doing ductwork. A qualified professional should always perform changes and repairs to a duct system.
Minimizing Energy Losses in Ducts at 2828 Vega, Houston, TX 77088

2828 Vega, Houston, TX 77088

Minimizing Energy Losses in Ducts
Minimizing energy losses in ducts by seeing if the ducts are poorly sealed or insulated. That could tell you why your energy bill in high. Your air ducts are one of the most important systems in your home, and if the ducts are poorly sealed or insulated, they are likely contributing to higher energy bills.
Your home’s duct system is a branching network of tubes in the walls, floors, and ceilings; it carries the air from your home’s furnace and central air conditioner to each room. Ducts are made of sheet metal, fiberglass, or other materials.
Ducts that leak heated air into unheated spaces can add hundreds of dollars a year to your heating and cooling bills, but you can reduce that loss by sealing and insulating your ducts. Insulating ducts in unconditioned spaces is usually very cost-effective. Existing ducts may also be blocked or may require simple upgrades.
Designing and Installing New Duct Systems
In new home construction or in retrofits, proper duct system design is critical. In recent years, energy-saving designs have sought to include ducts and heating systems in the conditioned space.
Efficient and well-designed duct systems distribute air properly throughout your home without leaking to keep all rooms at a comfortable temperature. The system should provide balanced supply and return flow to maintain a neutral pressure within the house.
Even well sealed and insulated ducts will leak and lose some heat, so many new energy-efficient homes place the duct system within the conditioned space of the home. The simplest way to accomplish this is to hide the ducts in dropped ceilings and in corners of rooms. Ducts can also be located in a sealed and insulated chase extending into the attic or built into raised floors. In both of these latter cases, care must be taken during construction to prevent contractors from using the duct chases for wiring or other utilities.
In either case, actual ducts must be used — chases and floor cavities should not be used as ducts. Regardless of where they are installed, ducts should be well sealed. Although ducts can be configured in a number of ways, the “trunk and branch” and “radial” supply duct configurations are most suitable for ducts located in conditioned spaces.
Air return duct systems can be configured in two ways: each room can have a return duct that sends air back to the heating and cooling equipment or return grills can be located in central locations on each floor. For the latter case, either grills must be installed to allow air to pass out of closed rooms, or short “jumper ducts” can be installed to connect the vent in one room with the next, allowing air to flow back to the central return grilles. Door undercuts help, but they are usually not sufficient for return airflow.
You can perform a simple check for adequate return air capacity by doing the following:
- Close all exterior doors and windows
- Close all interior room doors
- Turn on the central air handler
- “Crack” interior doors one by one and observe if the door closes or further opens “on its own.” (Whether it closes or opens will depend on the direction of the air handler-driven air flow.) Rooms served by air-moved doors have restricted return air flow and need pressure relief as described above.
Maintaining and Upgrading Existing Duct Systems
Sealing your ducts to prevent leaks is even more important if the ducts are located in an unconditioned area such as an attic or vented crawlspace. If the supply ducts are leaking, heated or cooled air can be forced out of unsealed joints and lost. In addition, unconditioned air can be drawn into return ducts through unsealed joints.
Although minor duct repairs are easy to make, qualified professionals should seal and insulate ducts in unconditioned spaces to ensure the use of appropriate sealing materials.
Aside from sealing your ducts, the simplest and most effective means of maintaining your air distribution system is to ensure that furniture and other objects are not blocking the airflow through your registers, and to vacuum the registers to remove any dust buildup.
Existing duct systems often suffer from design deficiencies in the return air system, and modifications by the homeowner (or just a tendency to keep doors closed) may contribute to these problems. Any rooms with a lack of sufficient return airflow may benefit from relatively simple upgrades, such as the installation of new return-air grilles, undercutting doors for return air, or installing a jumper duct.
Some rooms may also be hard to heat and cool because of inadequate supply ducts or grilles. If this is the case, you should first examine whether the problem is the room itself: fix any problems with insulation, air leakage, or inefficient windows first. If the problem persists, you may be able to increase the size of the supply duct or add an additional duct to provide the needed airflow to the room.
Minor Duct Repair Tips for Minimizing Energy Losses in Ducts
- Check your ducts for air leaks. First, look for sections that should be joined but have separated and then look for obvious holes.
- Duct mastic is the preferred material for sealing ductwork seams and joints. It is more durable than any available tape and generally easier for a do-it-yourself installation. Its only drawback is that it will not bridge gaps over ¼ inch. Such gaps must be first bridged with web-type drywall tape, or a good quality heat approved tape.
- If you use tape to seal your ducts, avoid cloth-backed, rubber adhesive duct tape — it tends to fail quickly. Instead, use mastic, butyl tape, foil tape, or other heat-approved tapes. Look for tape with the Underwriters Laboratories (UL) logo.
- Remember that insulating ducts in the basement will make the basement colder. If both the ducts and the basement walls are not insulated, consider insulating both. Water pipes and drains in unconditioned spaces could freeze and burst if the heat ducts are fully insulated because there would be no heat source to prevent the space from freezing in cold weather. However, using an electric heating tape wrap on the pipes can prevent this. Check with a professional contractor.
- Hire a professional to install both supply and return registers in the basement rooms after converting your basement to a living area.
- Be sure a well-sealed vapor barrier exists on the outside of the insulation on cooling ducts to prevent moisture condensation.
- If you have a fuel-burning furnace, stove, or other appliance or an attached garage, install a carbon monoxide (CO) monitor to alert you to harmful CO levels.
- Be sure to get professional help when doing ductwork. A qualified professional should always perform changes and repairs to a duct system.
Minimizing Energy Losses in Ducts at 2436 Harrington St, Houston, TX 77026
2436 Harrington St, Houston, TX 77026

Minimizing Energy Losses in Ducts
Minimizing energy losses in ducts by seeing if the ducts are poorly sealed or insulated. That could tell you why your energy bill in high. Your air ducts are one of the most important systems in your home, and if the ducts are poorly sealed or insulated, they are likely contributing to higher energy bills.
Your home’s duct system is a branching network of tubes in the walls, floors, and ceilings; it carries the air from your home’s furnace and central air conditioner to each room. Ducts are made of sheet metal, fiberglass, or other materials.
Ducts that leak heated air into unheated spaces can add hundreds of dollars a year to your heating and cooling bills, but you can reduce that loss by sealing and insulating your ducts. Insulating ducts in unconditioned spaces is usually very cost-effective. Existing ducts may also be blocked or may require simple upgrades.
Designing and Installing New Duct Systems
In new home construction or in retrofits, proper duct system design is critical. In recent years, energy-saving designs have sought to include ducts and heating systems in the conditioned space.
Efficient and well-designed duct systems distribute air properly throughout your home without leaking to keep all rooms at a comfortable temperature. The system should provide balanced supply and return flow to maintain a neutral pressure within the house.
Even well sealed and insulated ducts will leak and lose some heat, so many new energy-efficient homes place the duct system within the conditioned space of the home. The simplest way to accomplish this is to hide the ducts in dropped ceilings and in corners of rooms. Ducts can also be located in a sealed and insulated chase extending into the attic or built into raised floors. In both of these latter cases, care must be taken during construction to prevent contractors from using the duct chases for wiring or other utilities.
In either case, actual ducts must be used — chases and floor cavities should not be used as ducts. Regardless of where they are installed, ducts should be well sealed. Although ducts can be configured in a number of ways, the “trunk and branch” and “radial” supply duct configurations are most suitable for ducts located in conditioned spaces.
Air return duct systems can be configured in two ways: each room can have a return duct that sends air back to the heating and cooling equipment or return grills can be located in central locations on each floor. For the latter case, either grills must be installed to allow air to pass out of closed rooms, or short “jumper ducts” can be installed to connect the vent in one room with the next, allowing air to flow back to the central return grilles. Door undercuts help, but they are usually not sufficient for return airflow.
You can perform a simple check for adequate return air capacity by doing the following:
- Close all exterior doors and windows
- Close all interior room doors
- Turn on the central air handler
- “Crack” interior doors one by one and observe if the door closes or further opens “on its own.” (Whether it closes or opens will depend on the direction of the air handler-driven air flow.) Rooms served by air-moved doors have restricted return air flow and need pressure relief as described above.
Maintaining and Upgrading Existing Duct Systems
Sealing your ducts to prevent leaks is even more important if the ducts are located in an unconditioned area such as an attic or vented crawlspace. If the supply ducts are leaking, heated or cooled air can be forced out of unsealed joints and lost. In addition, unconditioned air can be drawn into return ducts through unsealed joints.
Although minor duct repairs are easy to make, qualified professionals should seal and insulate ducts in unconditioned spaces to ensure the use of appropriate sealing materials.
Aside from sealing your ducts, the simplest and most effective means of maintaining your air distribution system is to ensure that furniture and other objects are not blocking the airflow through your registers, and to vacuum the registers to remove any dust buildup.
Existing duct systems often suffer from design deficiencies in the return air system, and modifications by the homeowner (or just a tendency to keep doors closed) may contribute to these problems. Any rooms with a lack of sufficient return airflow may benefit from relatively simple upgrades, such as the installation of new return-air grilles, undercutting doors for return air, or installing a jumper duct.
Some rooms may also be hard to heat and cool because of inadequate supply ducts or grilles. If this is the case, you should first examine whether the problem is the room itself: fix any problems with insulation, air leakage, or inefficient windows first. If the problem persists, you may be able to increase the size of the supply duct or add an additional duct to provide the needed airflow to the room.
Minor Duct Repair Tips for Minimizing Energy Losses in Ducts
- Check your ducts for air leaks. First, look for sections that should be joined but have separated and then look for obvious holes.
- Duct mastic is the preferred material for sealing ductwork seams and joints. It is more durable than any available tape and generally easier for a do-it-yourself installation. Its only drawback is that it will not bridge gaps over ¼ inch. Such gaps must be first bridged with web-type drywall tape, or a good quality heat approved tape.
- If you use tape to seal your ducts, avoid cloth-backed, rubber adhesive duct tape — it tends to fail quickly. Instead, use mastic, butyl tape, foil tape, or other heat-approved tapes. Look for tape with the Underwriters Laboratories (UL) logo.
- Remember that insulating ducts in the basement will make the basement colder. If both the ducts and the basement walls are not insulated, consider insulating both. Water pipes and drains in unconditioned spaces could freeze and burst if the heat ducts are fully insulated because there would be no heat source to prevent the space from freezing in cold weather. However, using an electric heating tape wrap on the pipes can prevent this. Check with a professional contractor.
- Hire a professional to install both supply and return registers in the basement rooms after converting your basement to a living area.
- Be sure a well-sealed vapor barrier exists on the outside of the insulation on cooling ducts to prevent moisture condensation.
- If you have a fuel-burning furnace, stove, or other appliance or an attached garage, install a carbon monoxide (CO) monitor to alert you to harmful CO levels.
- Be sure to get professional help when doing ductwork. A qualified professional should always perform changes and repairs to a duct system.
Minimizing Energy Losses in Ducts at 3623 Sandy Forks Dr, Humble, TX 77339
3623 Sandy Forks Dr, Humble, TX 77339

Minimizing Energy Losses in Ducts
Minimizing energy losses in ducts by seeing if the ducts are poorly sealed or insulated. That could tell you why your energy bill in high. Your air ducts are one of the most important systems in your home, and if the ducts are poorly sealed or insulated, they are likely contributing to higher energy bills.
Your home’s duct system is a branching network of tubes in the walls, floors, and ceilings; it carries the air from your home’s furnace and central air conditioner to each room. Ducts are made of sheet metal, fiberglass, or other materials.
Ducts that leak heated air into unheated spaces can add hundreds of dollars a year to your heating and cooling bills, but you can reduce that loss by sealing and insulating your ducts. Insulating ducts in unconditioned spaces is usually very cost-effective. Existing ducts may also be blocked or may require simple upgrades.
Designing and Installing New Duct Systems
In new home construction or in retrofits, proper duct system design is critical. In recent years, energy-saving designs have sought to include ducts and heating systems in the conditioned space.
Efficient and well-designed duct systems distribute air properly throughout your home without leaking to keep all rooms at a comfortable temperature. The system should provide balanced supply and return flow to maintain a neutral pressure within the house.
Even well sealed and insulated ducts will leak and lose some heat, so many new energy-efficient homes place the duct system within the conditioned space of the home. The simplest way to accomplish this is to hide the ducts in dropped ceilings and in corners of rooms. Ducts can also be located in a sealed and insulated chase extending into the attic or built into raised floors. In both of these latter cases, care must be taken during construction to prevent contractors from using the duct chases for wiring or other utilities.
In either case, actual ducts must be used — chases and floor cavities should not be used as ducts. Regardless of where they are installed, ducts should be well sealed. Although ducts can be configured in a number of ways, the “trunk and branch” and “radial” supply duct configurations are most suitable for ducts located in conditioned spaces.
Air return duct systems can be configured in two ways: each room can have a return duct that sends air back to the heating and cooling equipment or return grills can be located in central locations on each floor. For the latter case, either grills must be installed to allow air to pass out of closed rooms, or short “jumper ducts” can be installed to connect the vent in one room with the next, allowing air to flow back to the central return grilles. Door undercuts help, but they are usually not sufficient for return airflow.
You can perform a simple check for adequate return air capacity by doing the following:
- Close all exterior doors and windows
- Close all interior room doors
- Turn on the central air handler
- “Crack” interior doors one by one and observe if the door closes or further opens “on its own.” (Whether it closes or opens will depend on the direction of the air handler-driven air flow.) Rooms served by air-moved doors have restricted return air flow and need pressure relief as described above.
Maintaining and Upgrading Existing Duct Systems
Sealing your ducts to prevent leaks is even more important if the ducts are located in an unconditioned area such as an attic or vented crawlspace. If the supply ducts are leaking, heated or cooled air can be forced out of unsealed joints and lost. In addition, unconditioned air can be drawn into return ducts through unsealed joints.
Although minor duct repairs are easy to make, qualified professionals should seal and insulate ducts in unconditioned spaces to ensure the use of appropriate sealing materials.
Aside from sealing your ducts, the simplest and most effective means of maintaining your air distribution system is to ensure that furniture and other objects are not blocking the airflow through your registers, and to vacuum the registers to remove any dust buildup.
Existing duct systems often suffer from design deficiencies in the return air system, and modifications by the homeowner (or just a tendency to keep doors closed) may contribute to these problems. Any rooms with a lack of sufficient return airflow may benefit from relatively simple upgrades, such as the installation of new return-air grilles, undercutting doors for return air, or installing a jumper duct.
Some rooms may also be hard to heat and cool because of inadequate supply ducts or grilles. If this is the case, you should first examine whether the problem is the room itself: fix any problems with insulation, air leakage, or inefficient windows first. If the problem persists, you may be able to increase the size of the supply duct or add an additional duct to provide the needed airflow to the room.
Minor Duct Repair Tips for Minimizing Energy Losses in Ducts
- Check your ducts for air leaks. First, look for sections that should be joined but have separated and then look for obvious holes.
- Duct mastic is the preferred material for sealing ductwork seams and joints. It is more durable than any available tape and generally easier for a do-it-yourself installation. Its only drawback is that it will not bridge gaps over ¼ inch. Such gaps must be first bridged with web-type drywall tape, or a good quality heat approved tape.
- If you use tape to seal your ducts, avoid cloth-backed, rubber adhesive duct tape — it tends to fail quickly. Instead, use mastic, butyl tape, foil tape, or other heat-approved tapes. Look for tape with the Underwriters Laboratories (UL) logo.
- Remember that insulating ducts in the basement will make the basement colder. If both the ducts and the basement walls are not insulated, consider insulating both. Water pipes and drains in unconditioned spaces could freeze and burst if the heat ducts are fully insulated because there would be no heat source to prevent the space from freezing in cold weather. However, using an electric heating tape wrap on the pipes can prevent this. Check with a professional contractor.
- Hire a professional to install both supply and return registers in the basement rooms after converting your basement to a living area.
- Be sure a well-sealed vapor barrier exists on the outside of the insulation on cooling ducts to prevent moisture condensation.
- If you have a fuel-burning furnace, stove, or other appliance or an attached garage, install a carbon monoxide (CO) monitor to alert you to harmful CO levels.
- Be sure to get professional help when doing ductwork. A qualified professional should always perform changes and repairs to a duct system.
Minimizing Energy Losses in Ducts at 6210 Pecan Ln, Katy, TX 77493

6210 Pecan Ln, Katy, TX 77493
Minimizing Energy Losses in Ducts
Minimizing energy losses in ducts by seeing if the ducts are poorly sealed or insulated. That could tell you why your energy bill in high. Your air ducts are one of the most important systems in your home, and if the ducts are poorly sealed or insulated, they are likely contributing to higher energy bills.
Your home’s duct system is a branching network of tubes in the walls, floors, and ceilings; it carries the air from your home’s furnace and central air conditioner to each room. Ducts are made of sheet metal, fiberglass, or other materials.
Ducts that leak heated air into unheated spaces can add hundreds of dollars a year to your heating and cooling bills, but you can reduce that loss by sealing and insulating your ducts. Insulating ducts in unconditioned spaces is usually very cost-effective. Existing ducts may also be blocked or may require simple upgrades.
Designing and Installing New Duct Systems
In new home construction or in retrofits, proper duct system design is critical. In recent years, energy-saving designs have sought to include ducts and heating systems in the conditioned space.
Efficient and well-designed duct systems distribute air properly throughout your home without leaking to keep all rooms at a comfortable temperature. The system should provide balanced supply and return flow to maintain a neutral pressure within the house.
Even well sealed and insulated ducts will leak and lose some heat, so many new energy-efficient homes place the duct system within the conditioned space of the home. The simplest way to accomplish this is to hide the ducts in dropped ceilings and in corners of rooms. Ducts can also be located in a sealed and insulated chase extending into the attic or built into raised floors. In both of these latter cases, care must be taken during construction to prevent contractors from using the duct chases for wiring or other utilities.
In either case, actual ducts must be used — chases and floor cavities should not be used as ducts. Regardless of where they are installed, ducts should be well sealed. Although ducts can be configured in a number of ways, the “trunk and branch” and “radial” supply duct configurations are most suitable for ducts located in conditioned spaces.
Air return duct systems can be configured in two ways: each room can have a return duct that sends air back to the heating and cooling equipment or return grills can be located in central locations on each floor. For the latter case, either grills must be installed to allow air to pass out of closed rooms, or short “jumper ducts” can be installed to connect the vent in one room with the next, allowing air to flow back to the central return grilles. Door undercuts help, but they are usually not sufficient for return airflow.
You can perform a simple check for adequate return air capacity by doing the following:
- Close all exterior doors and windows
- Close all interior room doors
- Turn on the central air handler
- “Crack” interior doors one by one and observe if the door closes or further opens “on its own.” (Whether it closes or opens will depend on the direction of the air handler-driven air flow.) Rooms served by air-moved doors have restricted return air flow and need pressure relief as described above.
Maintaining and Upgrading Existing Duct Systems
Sealing your ducts to prevent leaks is even more important if the ducts are located in an unconditioned area such as an attic or vented crawlspace. If the supply ducts are leaking, heated or cooled air can be forced out of unsealed joints and lost. In addition, unconditioned air can be drawn into return ducts through unsealed joints.
Although minor duct repairs are easy to make, qualified professionals should seal and insulate ducts in unconditioned spaces to ensure the use of appropriate sealing materials.
Aside from sealing your ducts, the simplest and most effective means of maintaining your air distribution system is to ensure that furniture and other objects are not blocking the airflow through your registers, and to vacuum the registers to remove any dust buildup.
Existing duct systems often suffer from design deficiencies in the return air system, and modifications by the homeowner (or just a tendency to keep doors closed) may contribute to these problems. Any rooms with a lack of sufficient return airflow may benefit from relatively simple upgrades, such as the installation of new return-air grilles, undercutting doors for return air, or installing a jumper duct.
Some rooms may also be hard to heat and cool because of inadequate supply ducts or grilles. If this is the case, you should first examine whether the problem is the room itself: fix any problems with insulation, air leakage, or inefficient windows first. If the problem persists, you may be able to increase the size of the supply duct or add an additional duct to provide the needed airflow to the room.
Minor Duct Repair Tips for Minimizing Energy Losses in Ducts
- Check your ducts for air leaks. First, look for sections that should be joined but have separated and then look for obvious holes.
- Duct mastic is the preferred material for sealing ductwork seams and joints. It is more durable than any available tape and generally easier for a do-it-yourself installation. Its only drawback is that it will not bridge gaps over ¼ inch. Such gaps must be first bridged with web-type drywall tape, or a good quality heat approved tape.
- If you use tape to seal your ducts, avoid cloth-backed, rubber adhesive duct tape — it tends to fail quickly. Instead, use mastic, butyl tape, foil tape, or other heat-approved tapes. Look for tape with the Underwriters Laboratories (UL) logo.
- Remember that insulating ducts in the basement will make the basement colder. If both the ducts and the basement walls are not insulated, consider insulating both. Water pipes and drains in unconditioned spaces could freeze and burst if the heat ducts are fully insulated because there would be no heat source to prevent the space from freezing in cold weather. However, using an electric heating tape wrap on the pipes can prevent this. Check with a professional contractor.
- Hire a professional to install both supply and return registers in the basement rooms after converting your basement to a living area.
- Be sure a well-sealed vapor barrier exists on the outside of the insulation on cooling ducts to prevent moisture condensation.
- If you have a fuel-burning furnace, stove, or other appliance or an attached garage, install a carbon monoxide (CO) monitor to alert you to harmful CO levels.
- Be sure to get professional help when doing ductwork. A qualified professional should always perform changes and repairs to a duct system.
Minimizing Energy Losses in Ducts at 2109 Marnel Rd, Houston, TX 77055
2110 Garvey Dr, Pasadena, TX 77506
Minimizing Energy Losses in Ducts
Minimizing energy losses in ducts by seeing if the ducts are poorly sealed or insulated. That could tell you why your energy bill in high. Your air ducts are one of the most important systems in your home, and if the ducts are poorly sealed or insulated, they are likely contributing to higher energy bills.
Your home’s duct system is a branching network of tubes in the walls, floors, and ceilings; it carries the air from your home’s furnace and central air conditioner to each room. Ducts are made of sheet metal, fiberglass, or other materials.
Ducts that leak heated air into unheated spaces can add hundreds of dollars a year to your heating and cooling bills, but you can reduce that loss by sealing and insulating your ducts. Insulating ducts in unconditioned spaces is usually very cost-effective. Existing ducts may also be blocked or may require simple upgrades.
Designing and Installing New Duct Systems
In new home construction or in retrofits, proper duct system design is critical. In recent years, energy-saving designs have sought to include ducts and heating systems in the conditioned space.
Efficient and well-designed duct systems distribute air properly throughout your home without leaking to keep all rooms at a comfortable temperature. The system should provide balanced supply and return flow to maintain a neutral pressure within the house.
Even well sealed and insulated ducts will leak and lose some heat, so many new energy-efficient homes place the duct system within the conditioned space of the home. The simplest way to accomplish this is to hide the ducts in dropped ceilings and in corners of rooms. Ducts can also be located in a sealed and insulated chase extending into the attic or built into raised floors. In both of these latter cases, care must be taken during construction to prevent contractors from using the duct chases for wiring or other utilities.
In either case, actual ducts must be used — chases and floor cavities should not be used as ducts. Regardless of where they are installed, ducts should be well sealed. Although ducts can be configured in a number of ways, the “trunk and branch” and “radial” supply duct configurations are most suitable for ducts located in conditioned spaces.
Air return duct systems can be configured in two ways: each room can have a return duct that sends air back to the heating and cooling equipment or return grills can be located in central locations on each floor. For the latter case, either grills must be installed to allow air to pass out of closed rooms, or short “jumper ducts” can be installed to connect the vent in one room with the next, allowing air to flow back to the central return grilles. Door undercuts help, but they are usually not sufficient for return airflow.
You can perform a simple check for adequate return air capacity by doing the following:
- Close all exterior doors and windows
- Close all interior room doors
- Turn on the central air handler
- “Crack” interior doors one by one and observe if the door closes or further opens “on its own.” (Whether it closes or opens will depend on the direction of the air handler-driven air flow.) Rooms served by air-moved doors have restricted return air flow and need pressure relief as described above.
Maintaining and Upgrading Existing Duct Systems
Sealing your ducts to prevent leaks is even more important if the ducts are located in an unconditioned area such as an attic or vented crawlspace. If the supply ducts are leaking, heated or cooled air can be forced out of unsealed joints and lost. In addition, unconditioned air can be drawn into return ducts through unsealed joints.
Although minor duct repairs are easy to make, qualified professionals should seal and insulate ducts in unconditioned spaces to ensure the use of appropriate sealing materials.
Aside from sealing your ducts, the simplest and most effective means of maintaining your air distribution system is to ensure that furniture and other objects are not blocking the airflow through your registers, and to vacuum the registers to remove any dust buildup.
Existing duct systems often suffer from design deficiencies in the return air system, and modifications by the homeowner (or just a tendency to keep doors closed) may contribute to these problems. Any rooms with a lack of sufficient return airflow may benefit from relatively simple upgrades, such as the installation of new return-air grilles, undercutting doors for return air, or installing a jumper duct.
Some rooms may also be hard to heat and cool because of inadequate supply ducts or grilles. If this is the case, you should first examine whether the problem is the room itself: fix any problems with insulation, air leakage, or inefficient windows first. If the problem persists, you may be able to increase the size of the supply duct or add an additional duct to provide the needed airflow to the room.
Minor Duct Repair Tips for Minimizing Energy Losses in Ducts
- Check your ducts for air leaks. First, look for sections that should be joined but have separated and then look for obvious holes.
- Duct mastic is the preferred material for sealing ductwork seams and joints. It is more durable than any available tape and generally easier for a do-it-yourself installation. Its only drawback is that it will not bridge gaps over ¼ inch. Such gaps must be first bridged with web-type drywall tape, or a good quality heat approved tape.
- If you use tape to seal your ducts, avoid cloth-backed, rubber adhesive duct tape — it tends to fail quickly. Instead, use mastic, butyl tape, foil tape, or other heat-approved tapes. Look for tape with the Underwriters Laboratories (UL) logo.
- Remember that insulating ducts in the basement will make the basement colder. If both the ducts and the basement walls are not insulated, consider insulating both. Water pipes and drains in unconditioned spaces could freeze and burst if the heat ducts are fully insulated because there would be no heat source to prevent the space from freezing in cold weather. However, using an electric heating tape wrap on the pipes can prevent this. Check with a professional contractor.
- Hire a professional to install both supply and return registers in the basement rooms after converting your basement to a living area.
- Be sure a well-sealed vapor barrier exists on the outside of the insulation on cooling ducts to prevent moisture condensation.
- If you have a fuel-burning furnace, stove, or other appliance or an attached garage, install a carbon monoxide (CO) monitor to alert you to harmful CO levels.
- Be sure to get professional help when doing ductwork. A qualified professional should always perform changes and repairs to a duct system.
Minimizing Energy Losses in Ducts at 4210 Bellfort Ave, Houston, TX 77051
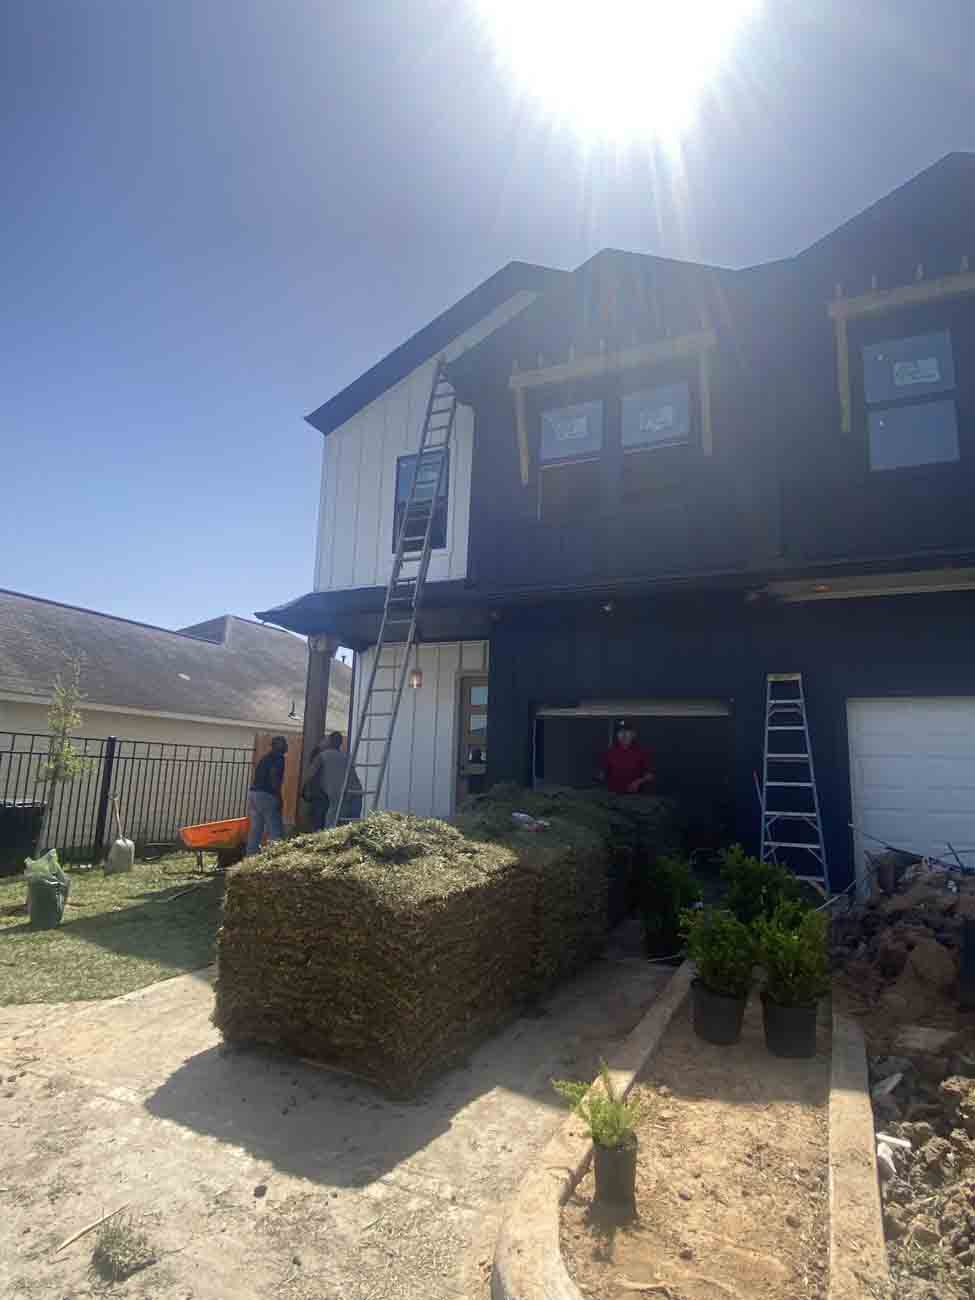
4210 Bellfort Ave, Houston, TX 77051
Minimizing Energy Losses in Ducts
Minimizing energy losses in ducts by seeing if the ducts are poorly sealed or insulated. That could tell you why your energy bill in high. Your air ducts are one of the most important systems in your home, and if the ducts are poorly sealed or insulated, they are likely contributing to higher energy bills.
Your home’s duct system is a branching network of tubes in the walls, floors, and ceilings; it carries the air from your home’s furnace and central air conditioner to each room. Ducts are made of sheet metal, fiberglass, or other materials.
Ducts that leak heated air into unheated spaces can add hundreds of dollars a year to your heating and cooling bills, but you can reduce that loss by sealing and insulating your ducts. Insulating ducts in unconditioned spaces is usually very cost-effective. Existing ducts may also be blocked or may require simple upgrades.
Designing and Installing New Duct Systems
In new home construction or in retrofits, proper duct system design is critical. In recent years, energy-saving designs have sought to include ducts and heating systems in the conditioned space.
Efficient and well-designed duct systems distribute air properly throughout your home without leaking to keep all rooms at a comfortable temperature. The system should provide balanced supply and return flow to maintain a neutral pressure within the house.
Even well sealed and insulated ducts will leak and lose some heat, so many new energy-efficient homes place the duct system within the conditioned space of the home. The simplest way to accomplish this is to hide the ducts in dropped ceilings and in corners of rooms. Ducts can also be located in a sealed and insulated chase extending into the attic or built into raised floors. In both of these latter cases, care must be taken during construction to prevent contractors from using the duct chases for wiring or other utilities.
In either case, actual ducts must be used — chases and floor cavities should not be used as ducts. Regardless of where they are installed, ducts should be well sealed. Although ducts can be configured in a number of ways, the “trunk and branch” and “radial” supply duct configurations are most suitable for ducts located in conditioned spaces.
Air return duct systems can be configured in two ways: each room can have a return duct that sends air back to the heating and cooling equipment or return grills can be located in central locations on each floor. For the latter case, either grills must be installed to allow air to pass out of closed rooms, or short “jumper ducts” can be installed to connect the vent in one room with the next, allowing air to flow back to the central return grilles. Door undercuts help, but they are usually not sufficient for return airflow.
You can perform a simple check for adequate return air capacity by doing the following:
- Close all exterior doors and windows
- Close all interior room doors
- Turn on the central air handler
- “Crack” interior doors one by one and observe if the door closes or further opens “on its own.” (Whether it closes or opens will depend on the direction of the air handler-driven air flow.) Rooms served by air-moved doors have restricted return air flow and need pressure relief as described above.
Maintaining and Upgrading Existing Duct Systems
Sealing your ducts to prevent leaks is even more important if the ducts are located in an unconditioned area such as an attic or vented crawlspace. If the supply ducts are leaking, heated or cooled air can be forced out of unsealed joints and lost. In addition, unconditioned air can be drawn into return ducts through unsealed joints.
Although minor duct repairs are easy to make, qualified professionals should seal and insulate ducts in unconditioned spaces to ensure the use of appropriate sealing materials.
Aside from sealing your ducts, the simplest and most effective means of maintaining your air distribution system is to ensure that furniture and other objects are not blocking the airflow through your registers, and to vacuum the registers to remove any dust buildup.
Existing duct systems often suffer from design deficiencies in the return air system, and modifications by the homeowner (or just a tendency to keep doors closed) may contribute to these problems. Any rooms with a lack of sufficient return airflow may benefit from relatively simple upgrades, such as the installation of new return-air grilles, undercutting doors for return air, or installing a jumper duct.
Some rooms may also be hard to heat and cool because of inadequate supply ducts or grilles. If this is the case, you should first examine whether the problem is the room itself: fix any problems with insulation, air leakage, or inefficient windows first. If the problem persists, you may be able to increase the size of the supply duct or add an additional duct to provide the needed airflow to the room.
Minor Duct Repair Tips for Minimizing Energy Losses in Ducts
- Check your ducts for air leaks. First, look for sections that should be joined but have separated and then look for obvious holes.
- Duct mastic is the preferred material for sealing ductwork seams and joints. It is more durable than any available tape and generally easier for a do-it-yourself installation. Its only drawback is that it will not bridge gaps over ¼ inch. Such gaps must be first bridged with web-type drywall tape, or a good quality heat approved tape.
- If you use tape to seal your ducts, avoid cloth-backed, rubber adhesive duct tape — it tends to fail quickly. Instead, use mastic, butyl tape, foil tape, or other heat-approved tapes. Look for tape with the Underwriters Laboratories (UL) logo.
- Remember that insulating ducts in the basement will make the basement colder. If both the ducts and the basement walls are not insulated, consider insulating both. Water pipes and drains in unconditioned spaces could freeze and burst if the heat ducts are fully insulated because there would be no heat source to prevent the space from freezing in cold weather. However, using an electric heating tape wrap on the pipes can prevent this. Check with a professional contractor.
- Hire a professional to install both supply and return registers in the basement rooms after converting your basement to a living area.
- Be sure a well-sealed vapor barrier exists on the outside of the insulation on cooling ducts to prevent moisture condensation.
- If you have a fuel-burning furnace, stove, or other appliance or an attached garage, install a carbon monoxide (CO) monitor to alert you to harmful CO levels.
- Be sure to get professional help when doing ductwork. A qualified professional should always perform changes and repairs to a duct system.
Minimizing Energy Losses in Ducts at 622 E 9th St, Houston, TX 77007


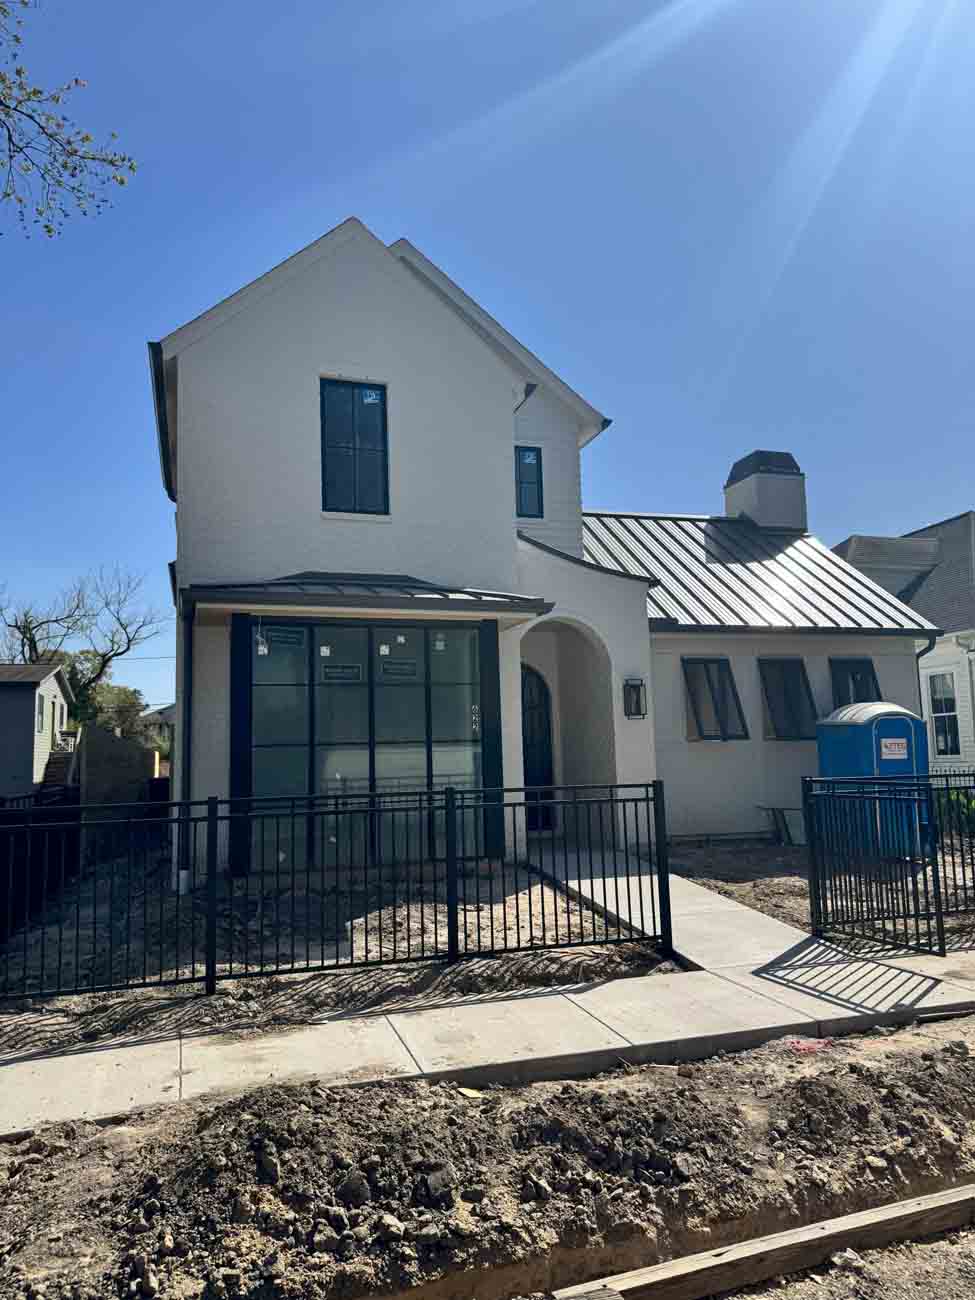
622 E 9th St, Houston, TX 77007
Minimizing Energy Losses in Ducts
Minimizing energy losses in ducts by seeing if the ducts are poorly sealed or insulated. That could tell you why your energy bill in high. Your air ducts are one of the most important systems in your home, and if the ducts are poorly sealed or insulated, they are likely contributing to higher energy bills.
Your home’s duct system is a branching network of tubes in the walls, floors, and ceilings; it carries the air from your home’s furnace and central air conditioner to each room. Ducts are made of sheet metal, fiberglass, or other materials.
Ducts that leak heated air into unheated spaces can add hundreds of dollars a year to your heating and cooling bills, but you can reduce that loss by sealing and insulating your ducts. Insulating ducts in unconditioned spaces is usually very cost-effective. Existing ducts may also be blocked or may require simple upgrades.
Designing and Installing New Duct Systems
In new home construction or in retrofits, proper duct system design is critical. In recent years, energy-saving designs have sought to include ducts and heating systems in the conditioned space.
Efficient and well-designed duct systems distribute air properly throughout your home without leaking to keep all rooms at a comfortable temperature. The system should provide balanced supply and return flow to maintain a neutral pressure within the house.
Even well sealed and insulated ducts will leak and lose some heat, so many new energy-efficient homes place the duct system within the conditioned space of the home. The simplest way to accomplish this is to hide the ducts in dropped ceilings and in corners of rooms. Ducts can also be located in a sealed and insulated chase extending into the attic or built into raised floors. In both of these latter cases, care must be taken during construction to prevent contractors from using the duct chases for wiring or other utilities.
In either case, actual ducts must be used — chases and floor cavities should not be used as ducts. Regardless of where they are installed, ducts should be well sealed. Although ducts can be configured in a number of ways, the “trunk and branch” and “radial” supply duct configurations are most suitable for ducts located in conditioned spaces.
Air return duct systems can be configured in two ways: each room can have a return duct that sends air back to the heating and cooling equipment or return grills can be located in central locations on each floor. For the latter case, either grills must be installed to allow air to pass out of closed rooms, or short “jumper ducts” can be installed to connect the vent in one room with the next, allowing air to flow back to the central return grilles. Door undercuts help, but they are usually not sufficient for return airflow.
You can perform a simple check for adequate return air capacity by doing the following:
- Close all exterior doors and windows
- Close all interior room doors
- Turn on the central air handler
- “Crack” interior doors one by one and observe if the door closes or further opens “on its own.” (Whether it closes or opens will depend on the direction of the air handler-driven air flow.) Rooms served by air-moved doors have restricted return air flow and need pressure relief as described above.
Maintaining and Upgrading Existing Duct Systems
Sealing your ducts to prevent leaks is even more important if the ducts are located in an unconditioned area such as an attic or vented crawlspace. If the supply ducts are leaking, heated or cooled air can be forced out of unsealed joints and lost. In addition, unconditioned air can be drawn into return ducts through unsealed joints.
Although minor duct repairs are easy to make, qualified professionals should seal and insulate ducts in unconditioned spaces to ensure the use of appropriate sealing materials.
Aside from sealing your ducts, the simplest and most effective means of maintaining your air distribution system is to ensure that furniture and other objects are not blocking the airflow through your registers, and to vacuum the registers to remove any dust buildup.
Existing duct systems often suffer from design deficiencies in the return air system, and modifications by the homeowner (or just a tendency to keep doors closed) may contribute to these problems. Any rooms with a lack of sufficient return airflow may benefit from relatively simple upgrades, such as the installation of new return-air grilles, undercutting doors for return air, or installing a jumper duct.
Some rooms may also be hard to heat and cool because of inadequate supply ducts or grilles. If this is the case, you should first examine whether the problem is the room itself: fix any problems with insulation, air leakage, or inefficient windows first. If the problem persists, you may be able to increase the size of the supply duct or add an additional duct to provide the needed airflow to the room.
Minor Duct Repair Tips for Minimizing Energy Losses in Ducts
- Check your ducts for air leaks. First, look for sections that should be joined but have separated and then look for obvious holes.
- Duct mastic is the preferred material for sealing ductwork seams and joints. It is more durable than any available tape and generally easier for a do-it-yourself installation. Its only drawback is that it will not bridge gaps over ¼ inch. Such gaps must be first bridged with web-type drywall tape, or a good quality heat approved tape.
- If you use tape to seal your ducts, avoid cloth-backed, rubber adhesive duct tape — it tends to fail quickly. Instead, use mastic, butyl tape, foil tape, or other heat-approved tapes. Look for tape with the Underwriters Laboratories (UL) logo.
- Remember that insulating ducts in the basement will make the basement colder. If both the ducts and the basement walls are not insulated, consider insulating both. Water pipes and drains in unconditioned spaces could freeze and burst if the heat ducts are fully insulated because there would be no heat source to prevent the space from freezing in cold weather. However, using an electric heating tape wrap on the pipes can prevent this. Check with a professional contractor.
- Hire a professional to install both supply and return registers in the basement rooms after converting your basement to a living area.
- Be sure a well-sealed vapor barrier exists on the outside of the insulation on cooling ducts to prevent moisture condensation.
- If you have a fuel-burning furnace, stove, or other appliance or an attached garage, install a carbon monoxide (CO) monitor to alert you to harmful CO levels.
- Be sure to get professional help when doing ductwork. A qualified professional should always perform changes and repairs to a duct system.
How Blower Doors Work – 4202 Bellfort Ave Unit A
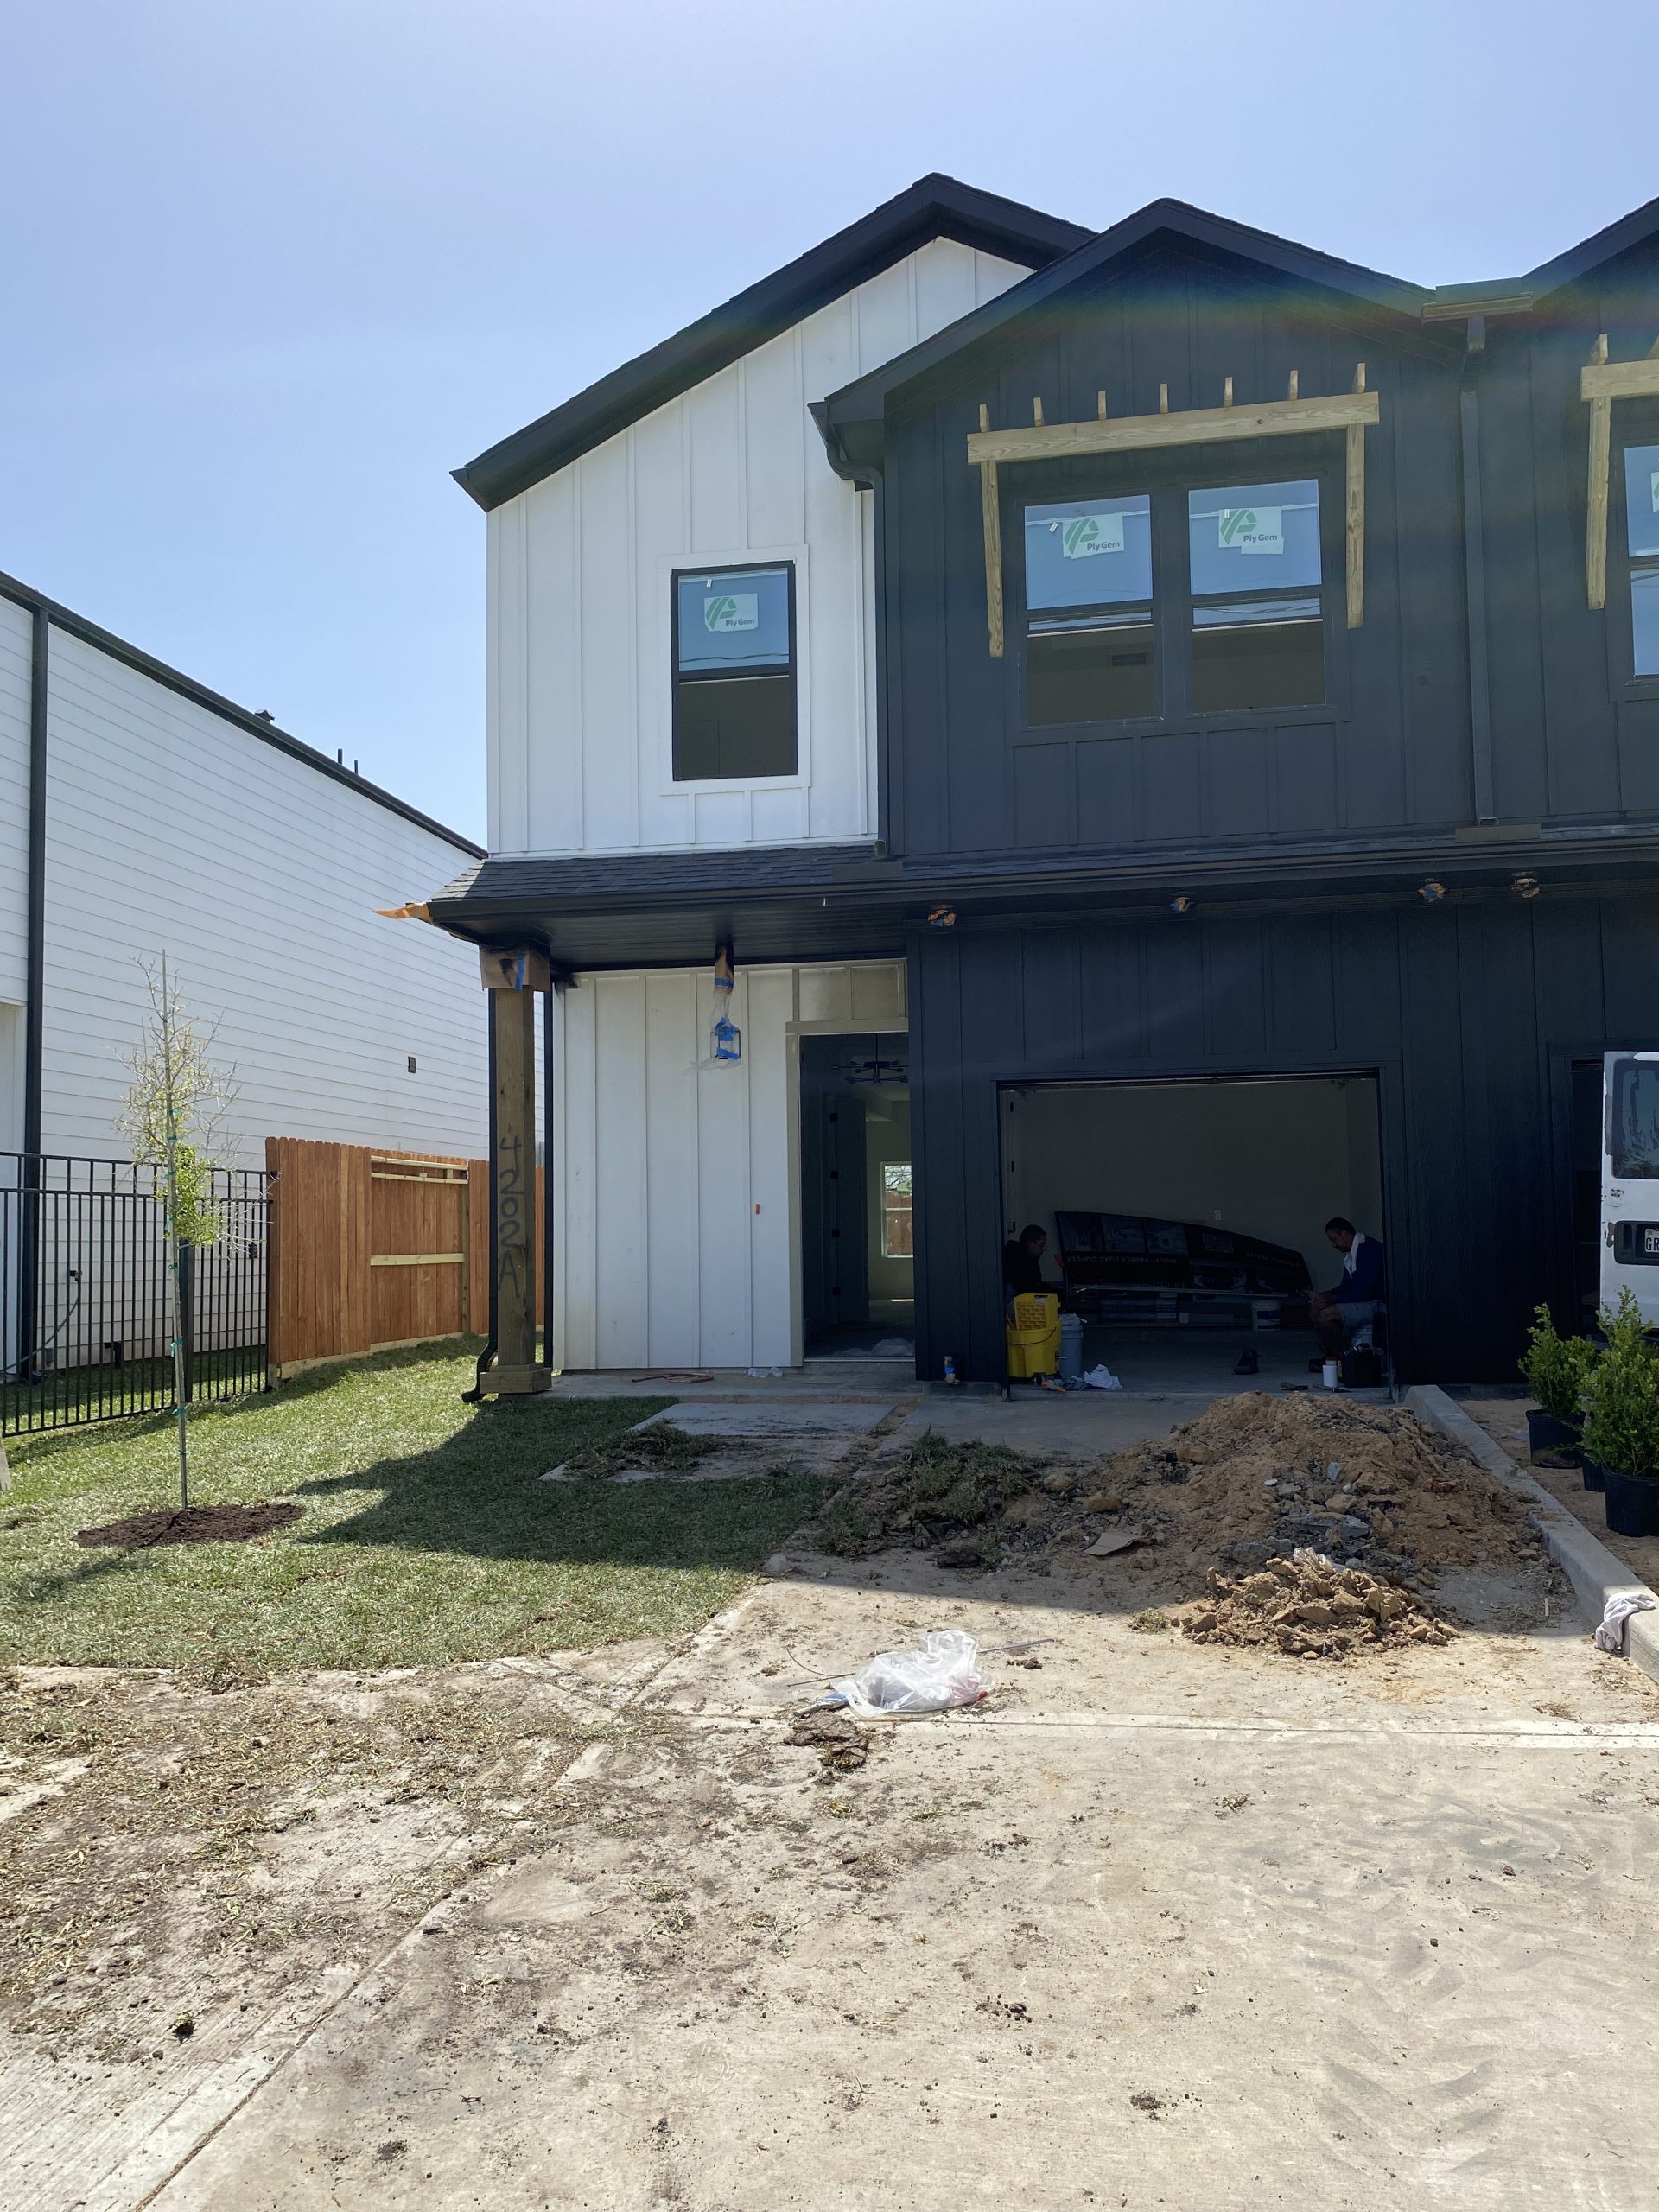
4202 Bellfort Ave, Houston, TX 77051
How Blower Doors Work – 4202 Bellfort Ave A
Third-party Energy Testing
A house’s air ducts are the most important systems. If these units are not properly sealed or insulated, they will inevitably lead to higher energy bills.
Blower Doors: What Are They and How Do They Work?
A blower door fan is a device used to measure air leakage in a home. Blower door tests are performed in homes to measure the amount of air leakage through cracks and gaps in the building envelope, essentially assessing how airtight a home is, which directly impacts energy efficiency, indoor comfort and air quality, identify areas where air is escaping and needs to be sealed; and making homeowners aware about prioritizing energy-saving improvements and reducing heating and cooling costs.
Air tightness and sealing is important, because air leakage can lead to a building’s energy efficiency being significantly impacted by substantial heat loss, which in return leads to other disadvantages such as higher energy bills, drafts and discomfort, and potential moisture issues. In the process, overall affecting indoor air quality, by allowing pollutants to enter the space. This is why it is imperative to search, identify and remedy air leaks.
Moisture or water vapor enters a home through various ways, which includes but not limited to air infiltration, diffusion through building material, leaks from the roof, plumbing leaks, flooding, human activities (bathing, cooking, dish washing, washing clothes), showering and some heating appliances.
Home Inspection Atascocita | Home Ready Inspections | Houston TX
Minimizing Energy Losses in Ducts at 4818 Wilmington St, Houston, TX 77033


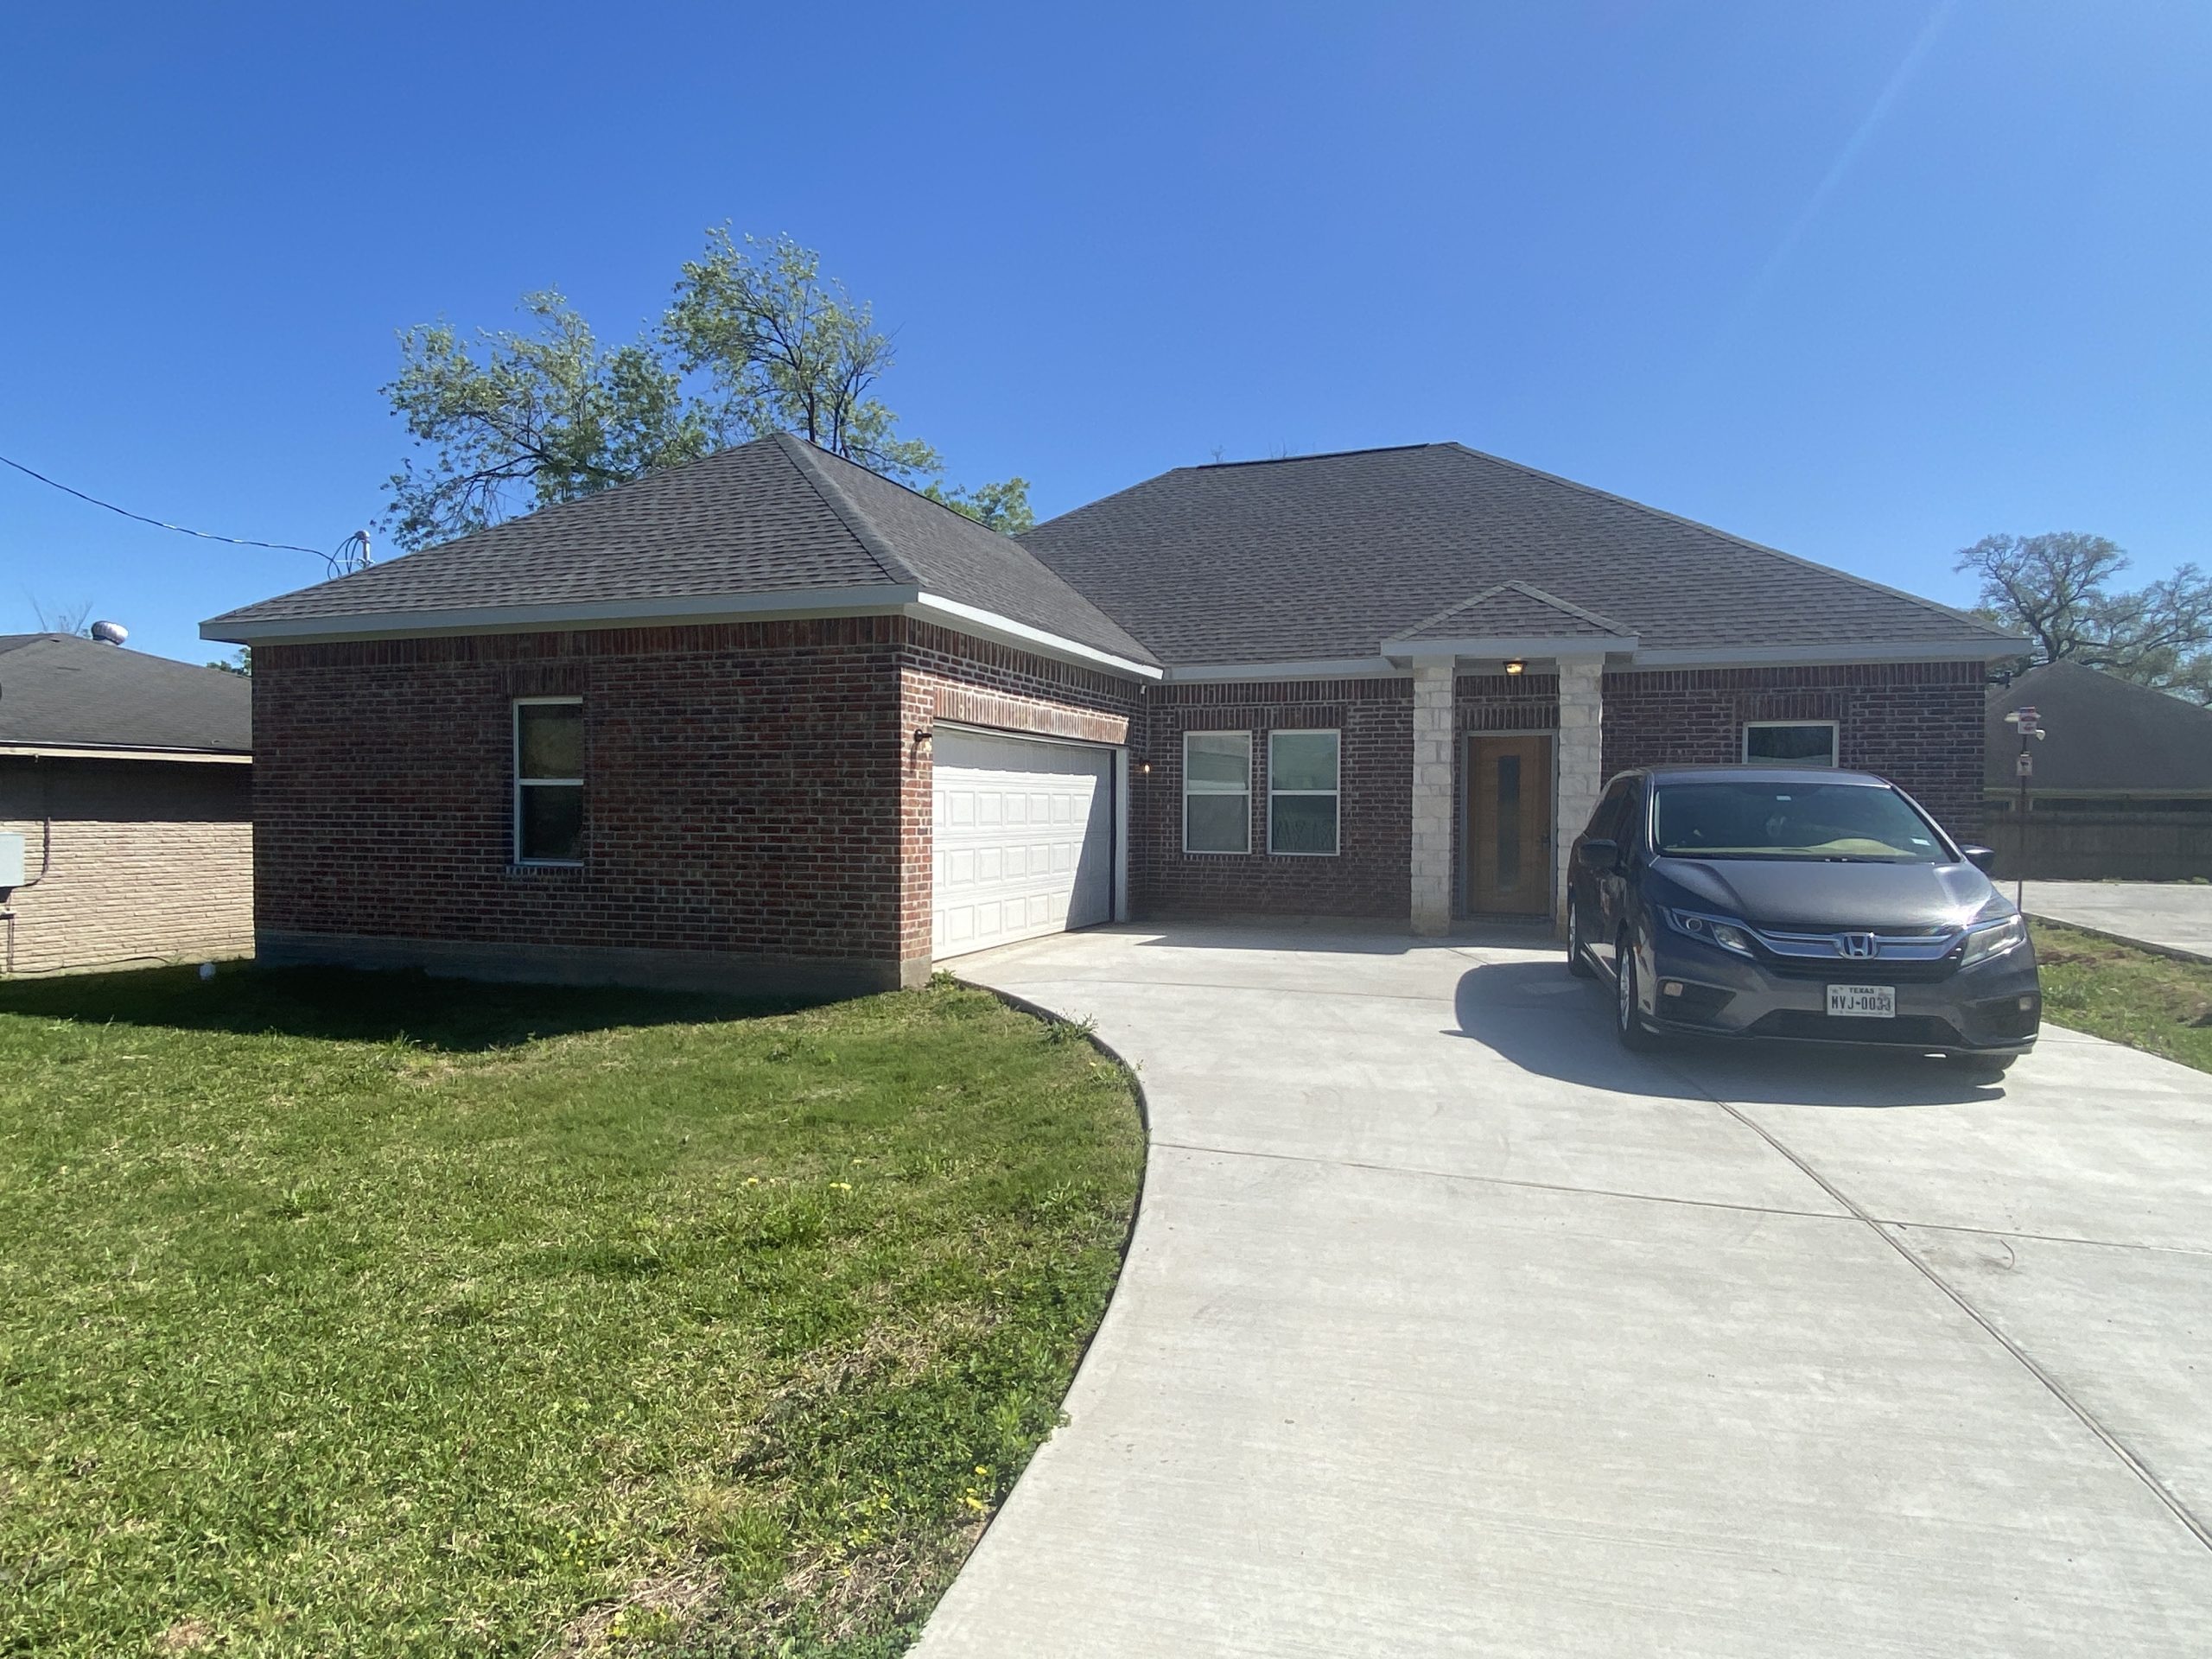
4818 Wilmington St, Houston, TX 77033
Minimizing Energy Losses in Ducts
Minimizing energy losses in ducts by seeing if the ducts are poorly sealed or insulated. That could tell you why your energy bill in high. Your air ducts are one of the most important systems in your home, and if the ducts are poorly sealed or insulated, they are likely contributing to higher energy bills.
Your home’s duct system is a branching network of tubes in the walls, floors, and ceilings; it carries the air from your home’s furnace and central air conditioner to each room. Ducts are made of sheet metal, fiberglass, or other materials.
Ducts that leak heated air into unheated spaces can add hundreds of dollars a year to your heating and cooling bills, but you can reduce that loss by sealing and insulating your ducts. Insulating ducts in unconditioned spaces is usually very cost-effective. Existing ducts may also be blocked or may require simple upgrades.
Designing and Installing New Duct Systems
In new home construction or in retrofits, proper duct system design is critical. In recent years, energy-saving designs have sought to include ducts and heating systems in the conditioned space.
Efficient and well-designed duct systems distribute air properly throughout your home without leaking to keep all rooms at a comfortable temperature. The system should provide balanced supply and return flow to maintain a neutral pressure within the house.
Even well sealed and insulated ducts will leak and lose some heat, so many new energy-efficient homes place the duct system within the conditioned space of the home. The simplest way to accomplish this is to hide the ducts in dropped ceilings and in corners of rooms. Ducts can also be located in a sealed and insulated chase extending into the attic or built into raised floors. In both of these latter cases, care must be taken during construction to prevent contractors from using the duct chases for wiring or other utilities.
In either case, actual ducts must be used — chases and floor cavities should not be used as ducts. Regardless of where they are installed, ducts should be well sealed. Although ducts can be configured in a number of ways, the “trunk and branch” and “radial” supply duct configurations are most suitable for ducts located in conditioned spaces.
Air return duct systems can be configured in two ways: each room can have a return duct that sends air back to the heating and cooling equipment or return grills can be located in central locations on each floor. For the latter case, either grills must be installed to allow air to pass out of closed rooms, or short “jumper ducts” can be installed to connect the vent in one room with the next, allowing air to flow back to the central return grilles. Door undercuts help, but they are usually not sufficient for return airflow.
You can perform a simple check for adequate return air capacity by doing the following:
- Close all exterior doors and windows
- Close all interior room doors
- Turn on the central air handler
- “Crack” interior doors one by one and observe if the door closes or further opens “on its own.” (Whether it closes or opens will depend on the direction of the air handler-driven air flow.) Rooms served by air-moved doors have restricted return air flow and need pressure relief as described above.
Maintaining and Upgrading Existing Duct Systems
Sealing your ducts to prevent leaks is even more important if the ducts are located in an unconditioned area such as an attic or vented crawlspace. If the supply ducts are leaking, heated or cooled air can be forced out of unsealed joints and lost. In addition, unconditioned air can be drawn into return ducts through unsealed joints.
Although minor duct repairs are easy to make, qualified professionals should seal and insulate ducts in unconditioned spaces to ensure the use of appropriate sealing materials.
Aside from sealing your ducts, the simplest and most effective means of maintaining your air distribution system is to ensure that furniture and other objects are not blocking the airflow through your registers, and to vacuum the registers to remove any dust buildup.
Existing duct systems often suffer from design deficiencies in the return air system, and modifications by the homeowner (or just a tendency to keep doors closed) may contribute to these problems. Any rooms with a lack of sufficient return airflow may benefit from relatively simple upgrades, such as the installation of new return-air grilles, undercutting doors for return air, or installing a jumper duct.
Some rooms may also be hard to heat and cool because of inadequate supply ducts or grilles. If this is the case, you should first examine whether the problem is the room itself: fix any problems with insulation, air leakage, or inefficient windows first. If the problem persists, you may be able to increase the size of the supply duct or add an additional duct to provide the needed airflow to the room.
Minor Duct Repair Tips for Minimizing Energy Losses in Ducts
- Check your ducts for air leaks. First, look for sections that should be joined but have separated and then look for obvious holes.
- Duct mastic is the preferred material for sealing ductwork seams and joints. It is more durable than any available tape and generally easier for a do-it-yourself installation. Its only drawback is that it will not bridge gaps over ¼ inch. Such gaps must be first bridged with web-type drywall tape, or a good quality heat approved tape.
- If you use tape to seal your ducts, avoid cloth-backed, rubber adhesive duct tape — it tends to fail quickly. Instead, use mastic, butyl tape, foil tape, or other heat-approved tapes. Look for tape with the Underwriters Laboratories (UL) logo.
- Remember that insulating ducts in the basement will make the basement colder. If both the ducts and the basement walls are not insulated, consider insulating both. Water pipes and drains in unconditioned spaces could freeze and burst if the heat ducts are fully insulated because there would be no heat source to prevent the space from freezing in cold weather. However, using an electric heating tape wrap on the pipes can prevent this. Check with a professional contractor.
- Hire a professional to install both supply and return registers in the basement rooms after converting your basement to a living area.
- Be sure a well-sealed vapor barrier exists on the outside of the insulation on cooling ducts to prevent moisture condensation.
- If you have a fuel-burning furnace, stove, or other appliance or an attached garage, install a carbon monoxide (CO) monitor to alert you to harmful CO levels.
- Be sure to get professional help when doing ductwork. A qualified professional should always perform changes and repairs to a duct system.
931 Lamonte Ln, Houston, TX 77018 – Losses in Ducts

819 Dorothy St, Houston, TX 77008
931 Lamonte Ln, Houston, TX 77018 – Losses in Ducts
Minimizing energy losses in ducts is an important aspect of energy efficiency in HVAC (Heating, Ventilation, and Air Conditioning) systems. Ducts are used to distribute conditioned air throughout a building, and any energy losses during the distribution process can lead to increased energy consumption and reduced system performance. Here are some key measures to minimize energy losses in ducts:
1. Proper Duct Design: Ensure that ductwork is properly designed to minimize pressure losses. Use appropriately sized ducts, minimize the number of bends and transitions, and maintain a balanced airflow distribution. Consult industry guidelines or work with an HVAC professional to design an efficient duct system.
2. Sealing: Duct leakage is a major source of energy losses. Seal all joints, connections, and seams in the ductwork using approved sealing materials such as mastic or metal tape. Pay particular attention to connections at registers, grilles, and air-handling units.
3. Insulation: Insulate ducts that run through unconditioned spaces, such as attics, crawlspaces, or basements. Insulation helps to prevent heat transfer between the ductwork and the surrounding environment, reducing energy losses and improving system efficiency.
4. Duct Material: Consider using insulated ducts with low thermal conductivity. Insulated ducts minimize heat transfer through the duct walls, helping to maintain the desired temperature of the conditioned air as it travels through the system.
5. Avoiding Overlong Duct Runs: Minimize the length of duct runs as much as possible. Longer ducts result in increased friction losses, which can reduce airflow and energy efficiency. Optimize the layout and location of HVAC equipment to keep duct runs as short and direct as feasible.
6. Balancing and Adjusting Dampers: Balancing the airflow within the duct system ensures that each room receives the appropriate amount of conditioned air. Adjust dampers at branch points and in individual ducts to balance the airflow and avoid over-pressurizing or under-pressurizing certain areas.
7. Regular Maintenance: Conduct regular inspections of the ductwork to check for leaks, obstructions, or damage. Clean the ducts periodically to remove dust, debris, or any substances that could impede airflow.
8. Air Filters: Install high-quality air filters and regularly replace them according to the manufacturer’s recommendations. Clean air filters help maintain optimal airflow, reducing pressure drops and energy losses.
By implementing these measures, you can significantly minimize energy losses in ducts, improve the overall efficiency of your HVAC system, and reduce energy consumption. Consulting with a professional HVAC contractor or engineer can provide valuable insights specific to your building’s requirements and help optimize energy efficiency.
https://homereadyinspections.com/builders-hvac/
How Blower Doors Work – 5439 Darling St, Houston, TX 77007
5439 Darling St, Houston, TX 77007
How Blower Doors Work – 5439 Darling St, Houston, TX 77007
Third-party Energy Testing
Your air ducts are one of the most important systems in your home, and if the ducts are poorly sealed or insulated they are likely contributing to higher energy bills.
Blower Doors: What Are They and How Do They Work?
A blower door is a device used in energy testing to measure a building’s airtightness. It consists of a powerful fan mounted on a temporary frame that fits into a doorway or an exterior opening. During a blower door test, the fan creates a pressure difference between the inside and outside of the building. This pressure difference allows air leakage points to become apparent and measurable. The test helps identify areas of air infiltration or exfiltration, which can affect energy efficiency and indoor comfort.
The blower door test involves setting up the device, measuring the baseline pressure, and then either depressurizing or pressurizing the building using the fan. While the fan is running, the airflow rate is measured using instruments like a manometer or pressure gauge. This airflow measurement quantifies the amount of air leakage in the building. Smoke pencils or thermal imaging cameras can be used to locate specific air leakage points.
The blower door test can be conducted in both depressurization and pressurization modes, allowing for a comprehensive assessment of air leakage locations. Once the test is complete, the data is analyzed to determine the building’s airtightness and identify areas that need improvement. The results can be used to guide air sealing measures and improve energy efficiency.
Blower door tests are crucial in identifying air leakage points, reducing energy loss, improving indoor air quality, and enhancing the overall performance and comfort of a building.
Home Inspection Atascocita | Home Ready Inspections | Houston TX
Minimizing Energy Losses in Ducts at 6710 Utah St, Houston, TX 77091
6710 Utah St, Houston, TX 77091
Minimizing Energy Losses in Ducts
Minimizing energy losses in ducts by seeing if the ducts are poorly sealed or insulated. That could tell you why your energy bill in high. Your air ducts are one of the most important systems in your home, and if the ducts are poorly sealed or insulated, they are likely contributing to higher energy bills.
Your home’s duct system is a branching network of tubes in the walls, floors, and ceilings; it carries the air from your home’s furnace and central air conditioner to each room. Ducts are made of sheet metal, fiberglass, or other materials.
Ducts that leak heated air into unheated spaces can add hundreds of dollars a year to your heating and cooling bills, but you can reduce that loss by sealing and insulating your ducts. Insulating ducts in unconditioned spaces is usually very cost-effective. Existing ducts may also be blocked or may require simple upgrades.
Designing and Installing New Duct Systems
In new home construction or in retrofits, proper duct system design is critical. In recent years, energy-saving designs have sought to include ducts and heating systems in the conditioned space.
Efficient and well-designed duct systems distribute air properly throughout your home without leaking to keep all rooms at a comfortable temperature. The system should provide balanced supply and return flow to maintain a neutral pressure within the house.
Even well sealed and insulated ducts will leak and lose some heat, so many new energy-efficient homes place the duct system within the conditioned space of the home. The simplest way to accomplish this is to hide the ducts in dropped ceilings and in corners of rooms. Ducts can also be located in a sealed and insulated chase extending into the attic or built into raised floors. In both of these latter cases, care must be taken during construction to prevent contractors from using the duct chases for wiring or other utilities.
In either case, actual ducts must be used — chases and floor cavities should not be used as ducts. Regardless of where they are installed, ducts should be well sealed. Although ducts can be configured in a number of ways, the “trunk and branch” and “radial” supply duct configurations are most suitable for ducts located in conditioned spaces.
Air return duct systems can be configured in two ways: each room can have a return duct that sends air back to the heating and cooling equipment or return grills can be located in central locations on each floor. For the latter case, either grills must be installed to allow air to pass out of closed rooms, or short “jumper ducts” can be installed to connect the vent in one room with the next, allowing air to flow back to the central return grilles. Door undercuts help, but they are usually not sufficient for return airflow.
You can perform a simple check for adequate return air capacity by doing the following:
- Close all exterior doors and windows
- Close all interior room doors
- Turn on the central air handler
- “Crack” interior doors one by one and observe if the door closes or further opens “on its own.” (Whether it closes or opens will depend on the direction of the air handler-driven air flow.) Rooms served by air-moved doors have restricted return air flow and need pressure relief as described above.
Maintaining and Upgrading Existing Duct Systems
Sealing your ducts to prevent leaks is even more important if the ducts are located in an unconditioned area such as an attic or vented crawlspace. If the supply ducts are leaking, heated or cooled air can be forced out of unsealed joints and lost. In addition, unconditioned air can be drawn into return ducts through unsealed joints.
Although minor duct repairs are easy to make, qualified professionals should seal and insulate ducts in unconditioned spaces to ensure the use of appropriate sealing materials.
Aside from sealing your ducts, the simplest and most effective means of maintaining your air distribution system is to ensure that furniture and other objects are not blocking the airflow through your registers, and to vacuum the registers to remove any dust buildup.
Existing duct systems often suffer from design deficiencies in the return air system, and modifications by the homeowner (or just a tendency to keep doors closed) may contribute to these problems. Any rooms with a lack of sufficient return airflow may benefit from relatively simple upgrades, such as the installation of new return-air grilles, undercutting doors for return air, or installing a jumper duct.
Some rooms may also be hard to heat and cool because of inadequate supply ducts or grilles. If this is the case, you should first examine whether the problem is the room itself: fix any problems with insulation, air leakage, or inefficient windows first. If the problem persists, you may be able to increase the size of the supply duct or add an additional duct to provide the needed airflow to the room.
Minor Duct Repair Tips for Minimizing Energy Losses in Ducts
- Check your ducts for air leaks. First, look for sections that should be joined but have separated and then look for obvious holes.
- Duct mastic is the preferred material for sealing ductwork seams and joints. It is more durable than any available tape and generally easier for a do-it-yourself installation. Its only drawback is that it will not bridge gaps over ¼ inch. Such gaps must be first bridged with web-type drywall tape, or a good quality heat approved tape.
- If you use tape to seal your ducts, avoid cloth-backed, rubber adhesive duct tape — it tends to fail quickly. Instead, use mastic, butyl tape, foil tape, or other heat-approved tapes. Look for tape with the Underwriters Laboratories (UL) logo.
- Remember that insulating ducts in the basement will make the basement colder. If both the ducts and the basement walls are not insulated, consider insulating both. Water pipes and drains in unconditioned spaces could freeze and burst if the heat ducts are fully insulated because there would be no heat source to prevent the space from freezing in cold weather. However, using an electric heating tape wrap on the pipes can prevent this. Check with a professional contractor.
- Hire a professional to install both supply and return registers in the basement rooms after converting your basement to a living area.
- Be sure a well-sealed vapor barrier exists on the outside of the insulation on cooling ducts to prevent moisture condensation.
- If you have a fuel-burning furnace, stove, or other appliance or an attached garage, install a carbon monoxide (CO) monitor to alert you to harmful CO levels.
- Be sure to get professional help when doing ductwork. A qualified professional should always perform changes and repairs to a duct system.
2021 IECC Insulation Inspection in the city of Houston, TX 77091
2021 IECC Insulation Inspection
6507 Radcliffe St, Houston, TX 77091
A 2021 IECC insulation inspection is a thorough assessment of insulation materials and their installation within a building or structure. The primary purpose of this inspection is to ensure that insulation is installed correctly, effectively, and in compliance with relevant building codes and standards. Here’s a more detailed overview:
Purpose of the 2021 IECC Insulation Inspection
- Energy Efficiency Verification:
- An insulation inspection helps confirm that the insulation is performing as intended. Proper insulation reduces heat transfer, contributing to energy savings and lower utility bills.
- Quality Assurance:
- Inspectors assess the quality of the insulation materials used, ensuring they meet specifications and are suitable for the specific application. This includes checking for damage, degradation, or improper installation that could compromise performance.
- Compliance with Codes and Standards:
- Building codes often specify minimum insulation levels and installation practices. An inspection verifies compliance with these regulations, which is crucial for safety and energy efficiency.
- Identification of Issues:
- The inspection can reveal problems such as gaps, voids, or compression in insulation that might hinder its effectiveness. Identifying these issues early can prevent future problems, such as higher energy costs or mold growth due to moisture accumulation.
- Moisture and Air Leakage Assessment:
- Inspections often include evaluations for air leaks and moisture issues. Proper insulation must be complemented by effective air sealing and moisture management to optimize performance and protect the building structure.
- Enhanced Comfort:
- By ensuring that insulation is installed correctly, inspectors contribute to improved thermal comfort for occupants, reducing drafts and temperature fluctuations within the space.
- Health and Safety Considerations:
- Certain insulation materials can pose health risks if not handled or installed correctly. Inspections help ensure that materials like fiberglass or spray foam are used safely and in accordance with health guidelines.
Components of an Insulation Inspection
- Visual Assessment: Inspectors visually evaluate accessible areas for visible signs of insulation integrity, including coverage, material condition, and installation quality.
- Measurement: Inspectors may measure insulation thickness and density to ensure it meets the specified R-values (thermal resistance).
- Thermal Imaging: Some inspectors use infrared cameras to identify heat loss areas, helping pinpoint insufficient insulation or air leaks.
- Moisture Testing: Tools may be employed to assess moisture levels within insulation materials, identifying potential risks of mold or decay.
Overall, insulation inspections are essential for ensuring the effectiveness, safety, and longevity of insulation systems in buildings. By identifying and addressing issues early, these inspections help optimize energy performance and enhance the overall comfort and safety of indoor environments.
Troubleshooting an HVAC System – 412 N Nagle St, Houston, TX 77003
Troubleshooting an HVAC System – How a Blower Door and Duct Test Can Help
412 N Nagle St, Houston, TX 77003
Troubleshooting an HVAC System – 412 N Nagle St, Houston, TX 77003
If you’re grappling with HVAC issues in your home—whether it’s inconsistent temperatures, high energy bills, or poor air quality—consider turning to two powerful diagnostic tools: the blower door test and the duct test. These tests can provide crucial insights into what’s going wrong and guide you towards effective solutions. Here’s a closer look at how each test works and how they can aid in troubleshooting your HVAC system.
What is a Blower Door Test?
A blower door test is a diagnostic tool used to measure the airtightness of a building. During the test, a powerful fan is mounted into an exterior door frame, and the home is pressurized or depressurized to identify leaks and assess how much air is escaping or entering the building. This test helps pinpoint areas where your home may be losing or gaining air, which directly impacts the efficiency of your HVAC system.
How It Helps Troubleshoot HVAC Issues:
Identifying Air Leaks: The blower door test reveals air leaks around windows, doors, walls, and ceilings. Leaks can cause your HVAC system to work harder than necessary, leading to higher energy bills and inconsistent indoor temperatures. By sealing these leaks, you can improve system efficiency and comfort.
Improving Insulation: If your home has inadequate insulation, the blower door test can help identify these gaps. Proper insulation ensures that the conditioned air from your HVAC system stays inside, reducing the workload on your system and improving energy efficiency.
Enhancing Comfort: Air leaks can lead to uneven temperatures and drafts. By fixing the identified leaks, you can achieve more consistent temperatures throughout your home, enhancing overall comfort.
What is a Duct Test?
A duct test evaluates the efficiency and integrity of your ductwork system. During this test, a special device measures the amount of air leaking from the ducts and assesses their overall performance. This is crucial because leaks and inefficiencies in the duct system can significantly impact HVAC performance.
How It Helps Troubleshoot HVAC Issues:
Locating Leaks: Duct leaks can cause a significant loss of conditioned air, which means your HVAC system has to work harder to maintain the desired temperature. A duct test helps pinpoint these leaks so they can be repaired, improving the overall efficiency of your system.
Assessing Duct Insulation: Proper insulation of ductwork is essential for maintaining temperature control and energy efficiency. A duct test can reveal areas where insulation is missing or inadequate, allowing you to address these issues and prevent energy loss.
Optimizing Airflow: Ductwork that is improperly sized, blocked, or poorly designed can restrict airflow and reduce the efficiency of your HVAC system. A duct test can identify airflow issues and help you make necessary adjustments to ensure that air is distributed evenly throughout your home.
Combining Both Tests for Comprehensive Troubleshooting
When troubleshooting an HVAC system, combining both the blower door test and the duct test can provide a comprehensive picture of your home’s performance. Here’s how they work together:
Holistic View: The blower door test identifies general air leakage in the building envelope, while the duct test focuses specifically on the ductwork. Together, they offer a complete view of where energy loss is occurring.
Targeted Solutions: By understanding both the building envelope and duct system’s performance, you can implement targeted solutions. For example, sealing air leaks and repairing duct leaks can lead to significant improvements in HVAC efficiency and comfort.
Cost Savings: Addressing the issues identified by these tests can lead to substantial cost savings on energy bills. A well-sealed home with efficient ductwork allows your HVAC system to operate more effectively, reducing the need for frequent repairs and extending the life of your equipment.
If you’re facing HVAC challenges, a blower door test and a duct test can be invaluable tools in diagnosing and solving the problem. By identifying air leaks, improving insulation, and optimizing ductwork, these tests can help enhance your home’s energy efficiency, comfort, and overall HVAC performance. For the best results, consider working with a professional who can accurately perform these tests and recommend effective solutions tailored to your home’s specific needs.
Taking these steps not only improves your HVAC system’s efficiency but also contributes to a more comfortable and energy-efficient living environment.
Visit our site https://homereadyinspections.com/
Minimizing Energy Losses in Ducts at 6523 Tuskegee St, Houston, TX 77091
6523 Tuskegee St, Houston, TX 77091
Minimizing Energy Losses in Ducts
Minimizing energy losses in ducts by seeing if the ducts are poorly sealed or insulated. That could tell you why your energy bill in high. Your air ducts are one of the most important systems in your home, and if the ducts are poorly sealed or insulated, they are likely contributing to higher energy bills.
Your home’s duct system is a branching network of tubes in the walls, floors, and ceilings; it carries the air from your home’s furnace and central air conditioner to each room. Ducts are made of sheet metal, fiberglass, or other materials.
Ducts that leak heated air into unheated spaces can add hundreds of dollars a year to your heating and cooling bills, but you can reduce that loss by sealing and insulating your ducts. Insulating ducts in unconditioned spaces is usually very cost-effective. Existing ducts may also be blocked or may require simple upgrades.
Designing and Installing New Duct Systems
In new home construction or in retrofits, proper duct system design is critical. In recent years, energy-saving designs have sought to include ducts and heating systems in the conditioned space.
Efficient and well-designed duct systems distribute air properly throughout your home without leaking to keep all rooms at a comfortable temperature. The system should provide balanced supply and return flow to maintain a neutral pressure within the house.
Even well sealed and insulated ducts will leak and lose some heat, so many new energy-efficient homes place the duct system within the conditioned space of the home. The simplest way to accomplish this is to hide the ducts in dropped ceilings and in corners of rooms. Ducts can also be located in a sealed and insulated chase extending into the attic or built into raised floors. In both of these latter cases, care must be taken during construction to prevent contractors from using the duct chases for wiring or other utilities.
In either case, actual ducts must be used — chases and floor cavities should not be used as ducts. Regardless of where they are installed, ducts should be well sealed. Although ducts can be configured in a number of ways, the “trunk and branch” and “radial” supply duct configurations are most suitable for ducts located in conditioned spaces.
Air return duct systems can be configured in two ways: each room can have a return duct that sends air back to the heating and cooling equipment or return grills can be located in central locations on each floor. For the latter case, either grills must be installed to allow air to pass out of closed rooms, or short “jumper ducts” can be installed to connect the vent in one room with the next, allowing air to flow back to the central return grilles. Door undercuts help, but they are usually not sufficient for return airflow.
You can perform a simple check for adequate return air capacity by doing the following:
- Close all exterior doors and windows
- Close all interior room doors
- Turn on the central air handler
- “Crack” interior doors one by one and observe if the door closes or further opens “on its own.” (Whether it closes or opens will depend on the direction of the air handler-driven air flow.) Rooms served by air-moved doors have restricted return air flow and need pressure relief as described above.
Maintaining and Upgrading Existing Duct Systems
Sealing your ducts to prevent leaks is even more important if the ducts are located in an unconditioned area such as an attic or vented crawlspace. If the supply ducts are leaking, heated or cooled air can be forced out of unsealed joints and lost. In addition, unconditioned air can be drawn into return ducts through unsealed joints.
Although minor duct repairs are easy to make, qualified professionals should seal and insulate ducts in unconditioned spaces to ensure the use of appropriate sealing materials.
Aside from sealing your ducts, the simplest and most effective means of maintaining your air distribution system is to ensure that furniture and other objects are not blocking the airflow through your registers, and to vacuum the registers to remove any dust buildup.
Existing duct systems often suffer from design deficiencies in the return air system, and modifications by the homeowner (or just a tendency to keep doors closed) may contribute to these problems. Any rooms with a lack of sufficient return airflow may benefit from relatively simple upgrades, such as the installation of new return-air grilles, undercutting doors for return air, or installing a jumper duct.
Some rooms may also be hard to heat and cool because of inadequate supply ducts or grilles. If this is the case, you should first examine whether the problem is the room itself: fix any problems with insulation, air leakage, or inefficient windows first. If the problem persists, you may be able to increase the size of the supply duct or add an additional duct to provide the needed airflow to the room.
Minor Duct Repair Tips for Minimizing Energy Losses in Ducts
- Check your ducts for air leaks. First, look for sections that should be joined but have separated and then look for obvious holes.
- Duct mastic is the preferred material for sealing ductwork seams and joints. It is more durable than any available tape and generally easier for a do-it-yourself installation. Its only drawback is that it will not bridge gaps over ¼ inch. Such gaps must be first bridged with web-type drywall tape, or a good quality heat approved tape.
- If you use tape to seal your ducts, avoid cloth-backed, rubber adhesive duct tape — it tends to fail quickly. Instead, use mastic, butyl tape, foil tape, or other heat-approved tapes. Look for tape with the Underwriters Laboratories (UL) logo.
- Remember that insulating ducts in the basement will make the basement colder. If both the ducts and the basement walls are not insulated, consider insulating both. Water pipes and drains in unconditioned spaces could freeze and burst if the heat ducts are fully insulated because there would be no heat source to prevent the space from freezing in cold weather. However, using an electric heating tape wrap on the pipes can prevent this. Check with a professional contractor.
- Hire a professional to install both supply and return registers in the basement rooms after converting your basement to a living area.
- Be sure a well-sealed vapor barrier exists on the outside of the insulation on cooling ducts to prevent moisture condensation.
- If you have a fuel-burning furnace, stove, or other appliance or an attached garage, install a carbon monoxide (CO) monitor to alert you to harmful CO levels.
- Be sure to get professional help when doing ductwork. A qualified professional should always perform changes and repairs to a duct system.
Minimizing Energy Losses in Ducts at 1838 Latexo Dr, Houston, TX 77018
1838 Latexo Dr, Houston, TX 77018
Minimizing Energy Losses in Ducts
Minimizing energy losses in ducts by seeing if the ducts are poorly sealed or insulated. That could tell you why your energy bill in high. Your air ducts are one of the most important systems in your home, and if the ducts are poorly sealed or insulated, they are likely contributing to higher energy bills.
Your home’s duct system is a branching network of tubes in the walls, floors, and ceilings; it carries the air from your home’s furnace and central air conditioner to each room. Ducts are made of sheet metal, fiberglass, or other materials.
Ducts that leak heated air into unheated spaces can add hundreds of dollars a year to your heating and cooling bills, but you can reduce that loss by sealing and insulating your ducts. Insulating ducts in unconditioned spaces is usually very cost-effective. Existing ducts may also be blocked or may require simple upgrades.
Designing and Installing New Duct Systems
In new home construction or in retrofits, proper duct system design is critical. In recent years, energy-saving designs have sought to include ducts and heating systems in the conditioned space.
Efficient and well-designed duct systems distribute air properly throughout your home without leaking to keep all rooms at a comfortable temperature. The system should provide balanced supply and return flow to maintain a neutral pressure within the house.
Even well sealed and insulated ducts will leak and lose some heat, so many new energy-efficient homes place the duct system within the conditioned space of the home. The simplest way to accomplish this is to hide the ducts in dropped ceilings and in corners of rooms. Ducts can also be located in a sealed and insulated chase extending into the attic or built into raised floors. In both of these latter cases, care must be taken during construction to prevent contractors from using the duct chases for wiring or other utilities.
In either case, actual ducts must be used — chases and floor cavities should not be used as ducts. Regardless of where they are installed, ducts should be well sealed. Although ducts can be configured in a number of ways, the “trunk and branch” and “radial” supply duct configurations are most suitable for ducts located in conditioned spaces.
Air return duct systems can be configured in two ways: each room can have a return duct that sends air back to the heating and cooling equipment or return grills can be located in central locations on each floor. For the latter case, either grills must be installed to allow air to pass out of closed rooms, or short “jumper ducts” can be installed to connect the vent in one room with the next, allowing air to flow back to the central return grilles. Door undercuts help, but they are usually not sufficient for return airflow.
You can perform a simple check for adequate return air capacity by doing the following:
- Close all exterior doors and windows
- Close all interior room doors
- Turn on the central air handler
- “Crack” interior doors one by one and observe if the door closes or further opens “on its own.” (Whether it closes or opens will depend on the direction of the air handler-driven air flow.) Rooms served by air-moved doors have restricted return air flow and need pressure relief as described above.
Maintaining and Upgrading Existing Duct Systems
Sealing your ducts to prevent leaks is even more important if the ducts are located in an unconditioned area such as an attic or vented crawlspace. If the supply ducts are leaking, heated or cooled air can be forced out of unsealed joints and lost. In addition, unconditioned air can be drawn into return ducts through unsealed joints.
Although minor duct repairs are easy to make, qualified professionals should seal and insulate ducts in unconditioned spaces to ensure the use of appropriate sealing materials.
Aside from sealing your ducts, the simplest and most effective means of maintaining your air distribution system is to ensure that furniture and other objects are not blocking the airflow through your registers, and to vacuum the registers to remove any dust buildup.
Existing duct systems often suffer from design deficiencies in the return air system, and modifications by the homeowner (or just a tendency to keep doors closed) may contribute to these problems. Any rooms with a lack of sufficient return airflow may benefit from relatively simple upgrades, such as the installation of new return-air grilles, undercutting doors for return air, or installing a jumper duct.
Some rooms may also be hard to heat and cool because of inadequate supply ducts or grilles. If this is the case, you should first examine whether the problem is the room itself: fix any problems with insulation, air leakage, or inefficient windows first. If the problem persists, you may be able to increase the size of the supply duct or add an additional duct to provide the needed airflow to the room.
Minor Duct Repair Tips for Minimizing Energy Losses in Ducts
- Check your ducts for air leaks. First, look for sections that should be joined but have separated and then look for obvious holes.
- Duct mastic is the preferred material for sealing ductwork seams and joints. It is more durable than any available tape and generally easier for a do-it-yourself installation. Its only drawback is that it will not bridge gaps over ¼ inch. Such gaps must be first bridged with web-type drywall tape, or a good quality heat approved tape.
- If you use tape to seal your ducts, avoid cloth-backed, rubber adhesive duct tape — it tends to fail quickly. Instead, use mastic, butyl tape, foil tape, or other heat-approved tapes. Look for tape with the Underwriters Laboratories (UL) logo.
- Remember that insulating ducts in the basement will make the basement colder. If both the ducts and the basement walls are not insulated, consider insulating both. Water pipes and drains in unconditioned spaces could freeze and burst if the heat ducts are fully insulated because there would be no heat source to prevent the space from freezing in cold weather. However, using an electric heating tape wrap on the pipes can prevent this. Check with a professional contractor.
- Hire a professional to install both supply and return registers in the basement rooms after converting your basement to a living area.
- Be sure a well-sealed vapor barrier exists on the outside of the insulation on cooling ducts to prevent moisture condensation.
- If you have a fuel-burning furnace, stove, or other appliance or an attached garage, install a carbon monoxide (CO) monitor to alert you to harmful CO levels.
- Be sure to get professional help when doing ductwork. A qualified professional should always perform changes and repairs to a duct system.
Minimizing Energy Losses in Ducts at 12250 Kirkgard Dr, Houston, TX 77045
12250 Kirkgard Dr, Houston, TX 77045
Minimizing Energy Losses in Ducts
Minimizing energy losses in ducts by seeing if the ducts are poorly sealed or insulated. That could tell you why your energy bill in high. Your air ducts are one of the most important systems in your home, and if the ducts are poorly sealed or insulated, they are likely contributing to higher energy bills.
Your home’s duct system is a branching network of tubes in the walls, floors, and ceilings; it carries the air from your home’s furnace and central air conditioner to each room. Ducts are made of sheet metal, fiberglass, or other materials.
Ducts that leak heated air into unheated spaces can add hundreds of dollars a year to your heating and cooling bills, but you can reduce that loss by sealing and insulating your ducts. Insulating ducts in unconditioned spaces is usually very cost-effective. Existing ducts may also be blocked or may require simple upgrades.
Designing and Installing New Duct Systems
In new home construction or in retrofits, proper duct system design is critical. In recent years, energy-saving designs have sought to include ducts and heating systems in the conditioned space.
Efficient and well-designed duct systems distribute air properly throughout your home without leaking to keep all rooms at a comfortable temperature. The system should provide balanced supply and return flow to maintain a neutral pressure within the house.
Even well sealed and insulated ducts will leak and lose some heat, so many new energy-efficient homes place the duct system within the conditioned space of the home. The simplest way to accomplish this is to hide the ducts in dropped ceilings and in corners of rooms. Ducts can also be located in a sealed and insulated chase extending into the attic or built into raised floors. In both of these latter cases, care must be taken during construction to prevent contractors from using the duct chases for wiring or other utilities.
In either case, actual ducts must be used — chases and floor cavities should not be used as ducts. Regardless of where they are installed, ducts should be well sealed. Although ducts can be configured in a number of ways, the “trunk and branch” and “radial” supply duct configurations are most suitable for ducts located in conditioned spaces.
Air return duct systems can be configured in two ways: each room can have a return duct that sends air back to the heating and cooling equipment or return grills can be located in central locations on each floor. For the latter case, either grills must be installed to allow air to pass out of closed rooms, or short “jumper ducts” can be installed to connect the vent in one room with the next, allowing air to flow back to the central return grilles. Door undercuts help, but they are usually not sufficient for return airflow.
You can perform a simple check for adequate return air capacity by doing the following:
- Close all exterior doors and windows
- Close all interior room doors
- Turn on the central air handler
- “Crack” interior doors one by one and observe if the door closes or further opens “on its own.” (Whether it closes or opens will depend on the direction of the air handler-driven air flow.) Rooms served by air-moved doors have restricted return air flow and need pressure relief as described above.
Maintaining and Upgrading Existing Duct Systems
Sealing your ducts to prevent leaks is even more important if the ducts are located in an unconditioned area such as an attic or vented crawlspace. If the supply ducts are leaking, heated or cooled air can be forced out of unsealed joints and lost. In addition, unconditioned air can be drawn into return ducts through unsealed joints.
Although minor duct repairs are easy to make, qualified professionals should seal and insulate ducts in unconditioned spaces to ensure the use of appropriate sealing materials.
Aside from sealing your ducts, the simplest and most effective means of maintaining your air distribution system is to ensure that furniture and other objects are not blocking the airflow through your registers, and to vacuum the registers to remove any dust buildup.
Existing duct systems often suffer from design deficiencies in the return air system, and modifications by the homeowner (or just a tendency to keep doors closed) may contribute to these problems. Any rooms with a lack of sufficient return airflow may benefit from relatively simple upgrades, such as the installation of new return-air grilles, undercutting doors for return air, or installing a jumper duct.
Some rooms may also be hard to heat and cool because of inadequate supply ducts or grilles. If this is the case, you should first examine whether the problem is the room itself: fix any problems with insulation, air leakage, or inefficient windows first. If the problem persists, you may be able to increase the size of the supply duct or add an additional duct to provide the needed airflow to the room.
Minor Duct Repair Tips for Minimizing Energy Losses in Ducts
- Check your ducts for air leaks. First, look for sections that should be joined but have separated and then look for obvious holes.
- Duct mastic is the preferred material for sealing ductwork seams and joints. It is more durable than any available tape and generally easier for a do-it-yourself installation. Its only drawback is that it will not bridge gaps over ¼ inch. Such gaps must be first bridged with web-type drywall tape, or a good quality heat approved tape.
- If you use tape to seal your ducts, avoid cloth-backed, rubber adhesive duct tape — it tends to fail quickly. Instead, use mastic, butyl tape, foil tape, or other heat-approved tapes. Look for tape with the Underwriters Laboratories (UL) logo.
- Remember that insulating ducts in the basement will make the basement colder. If both the ducts and the basement walls are not insulated, consider insulating both. Water pipes and drains in unconditioned spaces could freeze and burst if the heat ducts are fully insulated because there would be no heat source to prevent the space from freezing in cold weather. However, using an electric heating tape wrap on the pipes can prevent this. Check with a professional contractor.
- Hire a professional to install both supply and return registers in the basement rooms after converting your basement to a living area.
- Be sure a well-sealed vapor barrier exists on the outside of the insulation on cooling ducts to prevent moisture condensation.
- If you have a fuel-burning furnace, stove, or other appliance or an attached garage, install a carbon monoxide (CO) monitor to alert you to harmful CO levels.
- Be sure to get professional help when doing ductwork. A qualified professional should always perform changes and repairs to a duct system.
Minimizing Energy Losses in Ducts at 1604 Brooks St, Houston, TX 77009
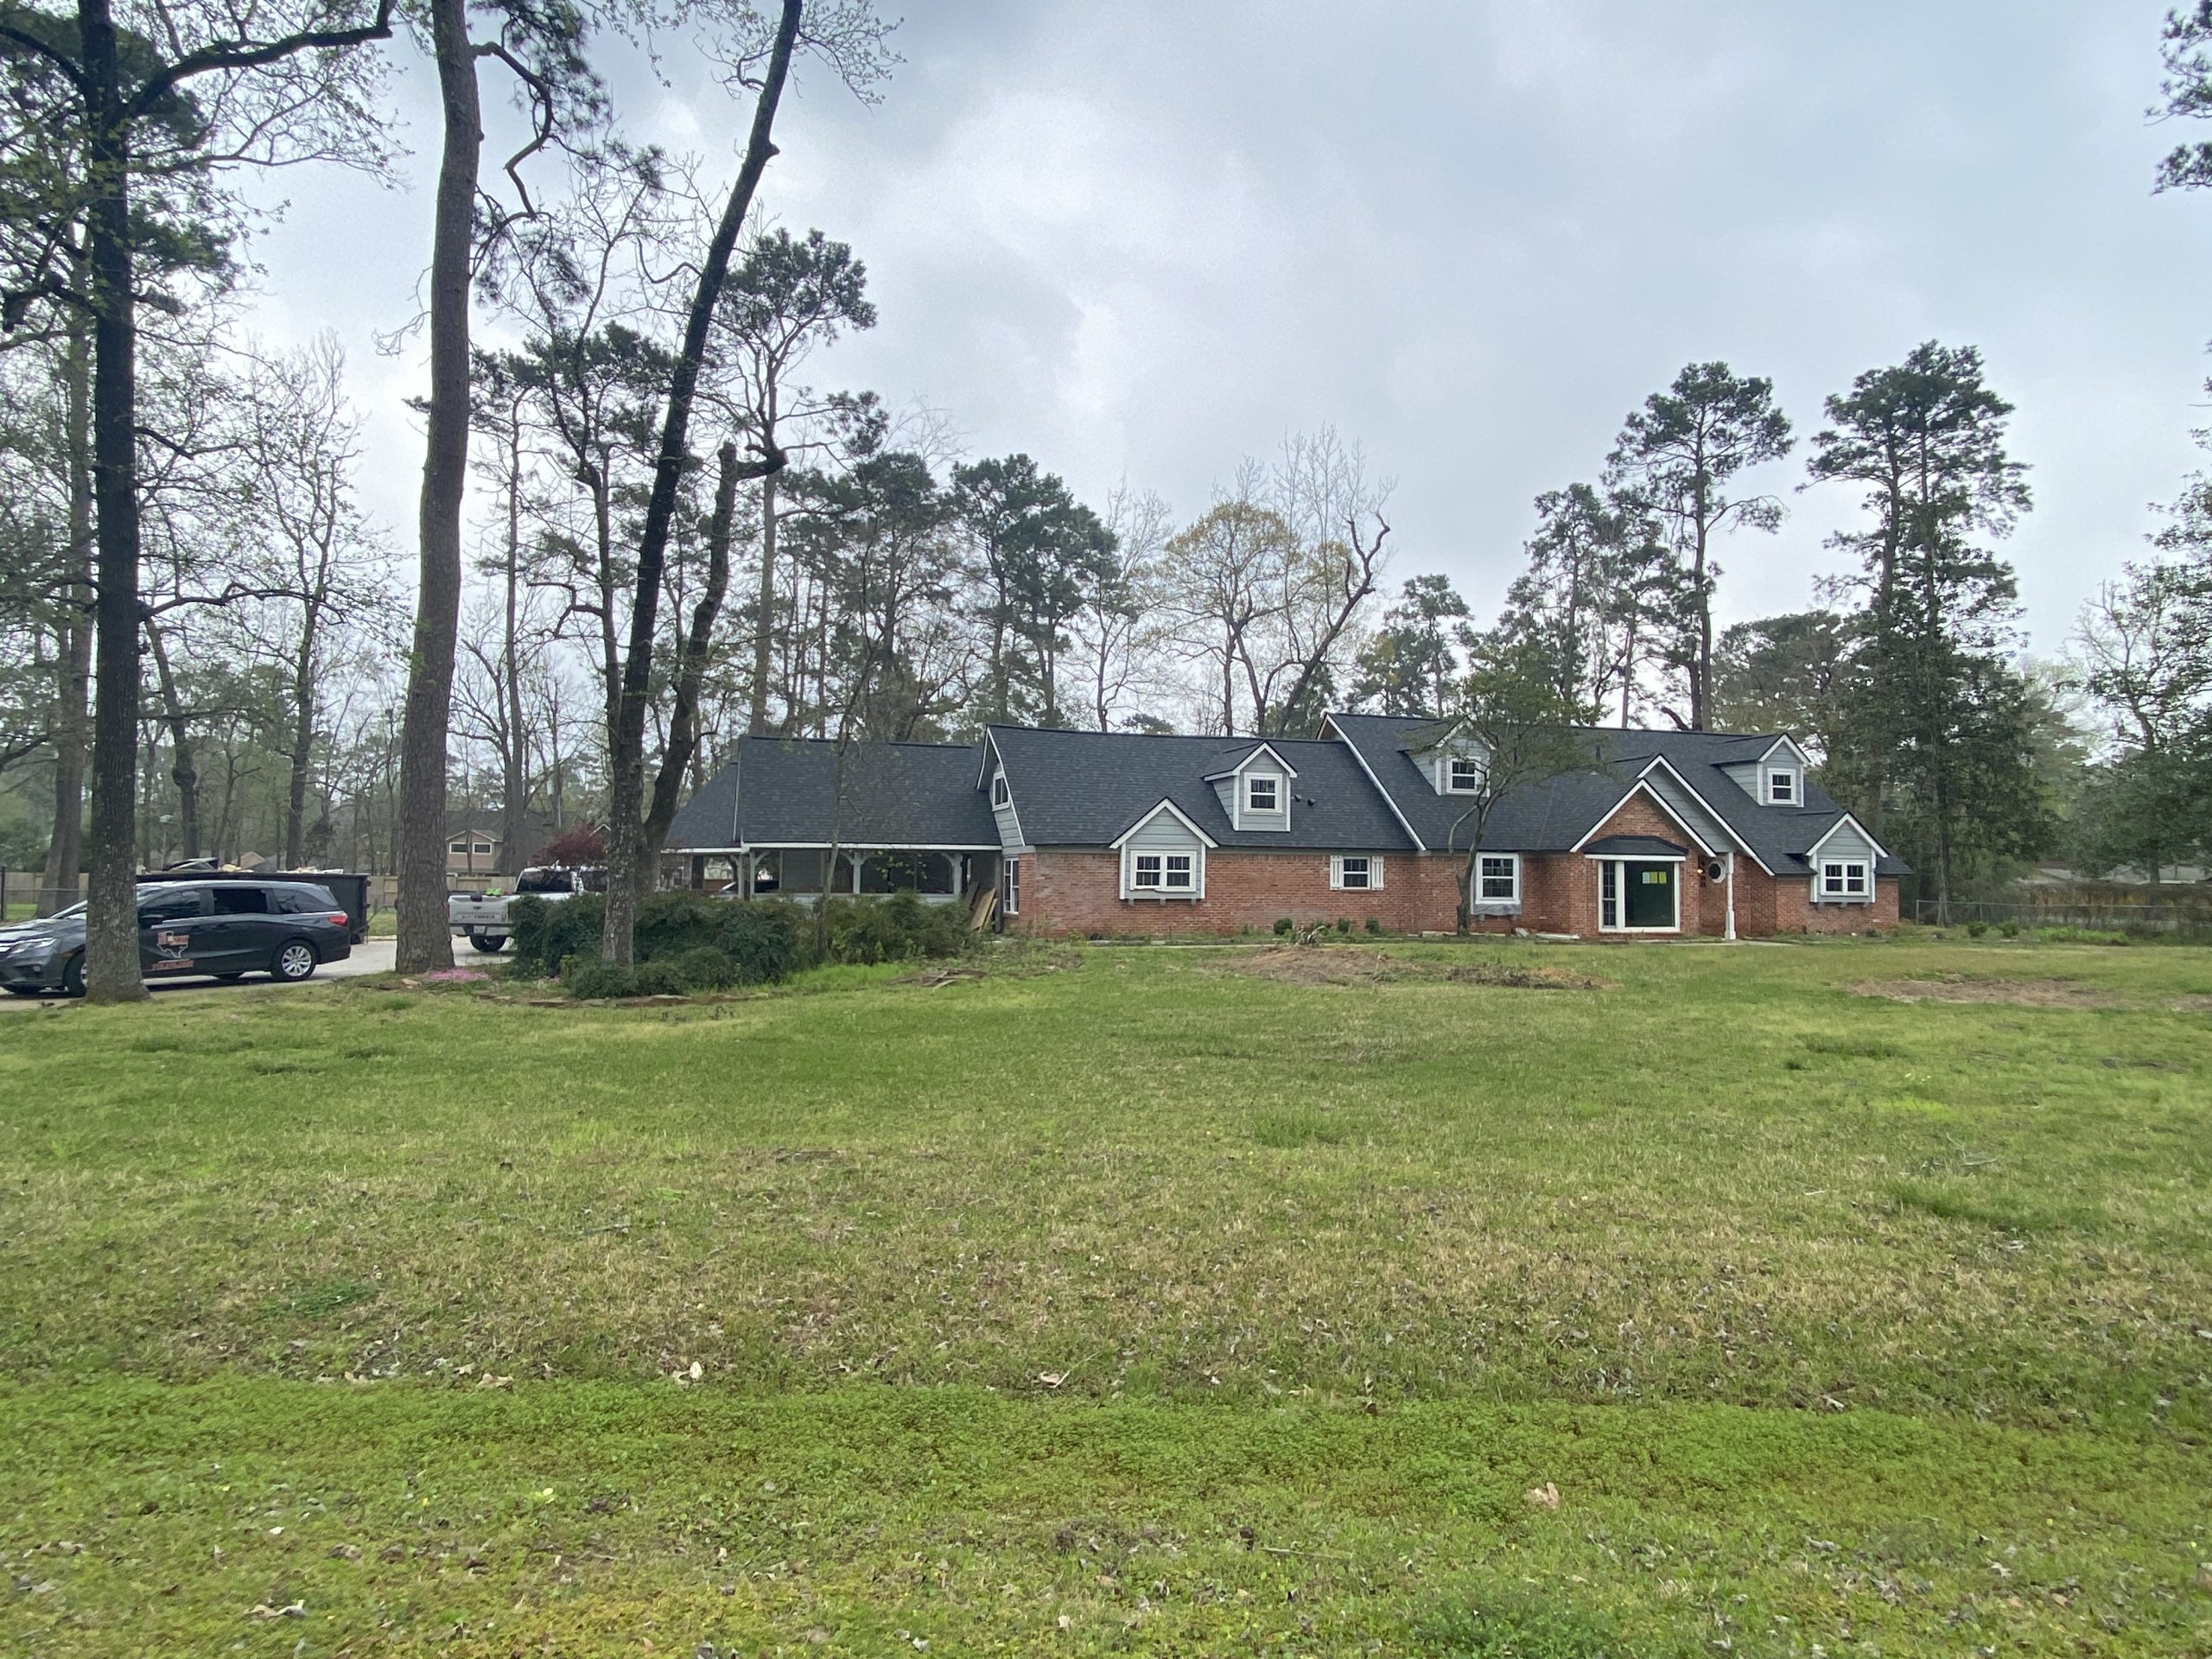
1500 Sweet Gum Ln, Humble, TX 77339
Minimizing Energy Losses in Ducts
Minimizing energy losses in ducts by seeing if the ducts are poorly sealed or insulated. That could tell you why your energy bill in high. Your air ducts are one of the most important systems in your home, and if the ducts are poorly sealed or insulated, they are likely contributing to higher energy bills.
Your home’s duct system is a branching network of tubes in the walls, floors, and ceilings; it carries the air from your home’s furnace and central air conditioner to each room. Ducts are made of sheet metal, fiberglass, or other materials.
Ducts that leak heated air into unheated spaces can add hundreds of dollars a year to your heating and cooling bills, but you can reduce that loss by sealing and insulating your ducts. Insulating ducts in unconditioned spaces is usually very cost-effective. Existing ducts may also be blocked or may require simple upgrades.
Designing and Installing New Duct Systems
In new home construction or in retrofits, proper duct system design is critical. In recent years, energy-saving designs have sought to include ducts and heating systems in the conditioned space.
Efficient and well-designed duct systems distribute air properly throughout your home without leaking to keep all rooms at a comfortable temperature. The system should provide balanced supply and return flow to maintain a neutral pressure within the house.
Even well sealed and insulated ducts will leak and lose some heat, so many new energy-efficient homes place the duct system within the conditioned space of the home. The simplest way to accomplish this is to hide the ducts in dropped ceilings and in corners of rooms. Ducts can also be located in a sealed and insulated chase extending into the attic or built into raised floors. In both of these latter cases, care must be taken during construction to prevent contractors from using the duct chases for wiring or other utilities.
In either case, actual ducts must be used — chases and floor cavities should not be used as ducts. Regardless of where they are installed, ducts should be well sealed. Although ducts can be configured in a number of ways, the “trunk and branch” and “radial” supply duct configurations are most suitable for ducts located in conditioned spaces.
Air return duct systems can be configured in two ways: each room can have a return duct that sends air back to the heating and cooling equipment or return grills can be located in central locations on each floor. For the latter case, either grills must be installed to allow air to pass out of closed rooms, or short “jumper ducts” can be installed to connect the vent in one room with the next, allowing air to flow back to the central return grilles. Door undercuts help, but they are usually not sufficient for return airflow.
You can perform a simple check for adequate return air capacity by doing the following:
- Close all exterior doors and windows
- Close all interior room doors
- Turn on the central air handler
- “Crack” interior doors one by one and observe if the door closes or further opens “on its own.” (Whether it closes or opens will depend on the direction of the air handler-driven air flow.) Rooms served by air-moved doors have restricted return air flow and need pressure relief as described above.
Maintaining and Upgrading Existing Duct Systems
Sealing your ducts to prevent leaks is even more important if the ducts are located in an unconditioned area such as an attic or vented crawlspace. If the supply ducts are leaking, heated or cooled air can be forced out of unsealed joints and lost. In addition, unconditioned air can be drawn into return ducts through unsealed joints.
Although minor duct repairs are easy to make, qualified professionals should seal and insulate ducts in unconditioned spaces to ensure the use of appropriate sealing materials.
Aside from sealing your ducts, the simplest and most effective means of maintaining your air distribution system is to ensure that furniture and other objects are not blocking the airflow through your registers, and to vacuum the registers to remove any dust buildup.
Existing duct systems often suffer from design deficiencies in the return air system, and modifications by the homeowner (or just a tendency to keep doors closed) may contribute to these problems. Any rooms with a lack of sufficient return airflow may benefit from relatively simple upgrades, such as the installation of new return-air grilles, undercutting doors for return air, or installing a jumper duct.
Some rooms may also be hard to heat and cool because of inadequate supply ducts or grilles. If this is the case, you should first examine whether the problem is the room itself: fix any problems with insulation, air leakage, or inefficient windows first. If the problem persists, you may be able to increase the size of the supply duct or add an additional duct to provide the needed airflow to the room.
Minor Duct Repair Tips for Minimizing Energy Losses in Ducts
- Check your ducts for air leaks. First, look for sections that should be joined but have separated and then look for obvious holes.
- Duct mastic is the preferred material for sealing ductwork seams and joints. It is more durable than any available tape and generally easier for a do-it-yourself installation. Its only drawback is that it will not bridge gaps over ¼ inch. Such gaps must be first bridged with web-type drywall tape, or a good quality heat approved tape.
- If you use tape to seal your ducts, avoid cloth-backed, rubber adhesive duct tape — it tends to fail quickly. Instead, use mastic, butyl tape, foil tape, or other heat-approved tapes. Look for tape with the Underwriters Laboratories (UL) logo.
- Remember that insulating ducts in the basement will make the basement colder. If both the ducts and the basement walls are not insulated, consider insulating both. Water pipes and drains in unconditioned spaces could freeze and burst if the heat ducts are fully insulated because there would be no heat source to prevent the space from freezing in cold weather. However, using an electric heating tape wrap on the pipes can prevent this. Check with a professional contractor.
- Hire a professional to install both supply and return registers in the basement rooms after converting your basement to a living area.
- Be sure a well-sealed vapor barrier exists on the outside of the insulation on cooling ducts to prevent moisture condensation.
- If you have a fuel-burning furnace, stove, or other appliance or an attached garage, install a carbon monoxide (CO) monitor to alert you to harmful CO levels.
- Be sure to get professional help when doing ductwork. A qualified professional should always perform changes and repairs to a duct system.
Energy Star – 45L Tax Credits for Zero Energy Ready Homes
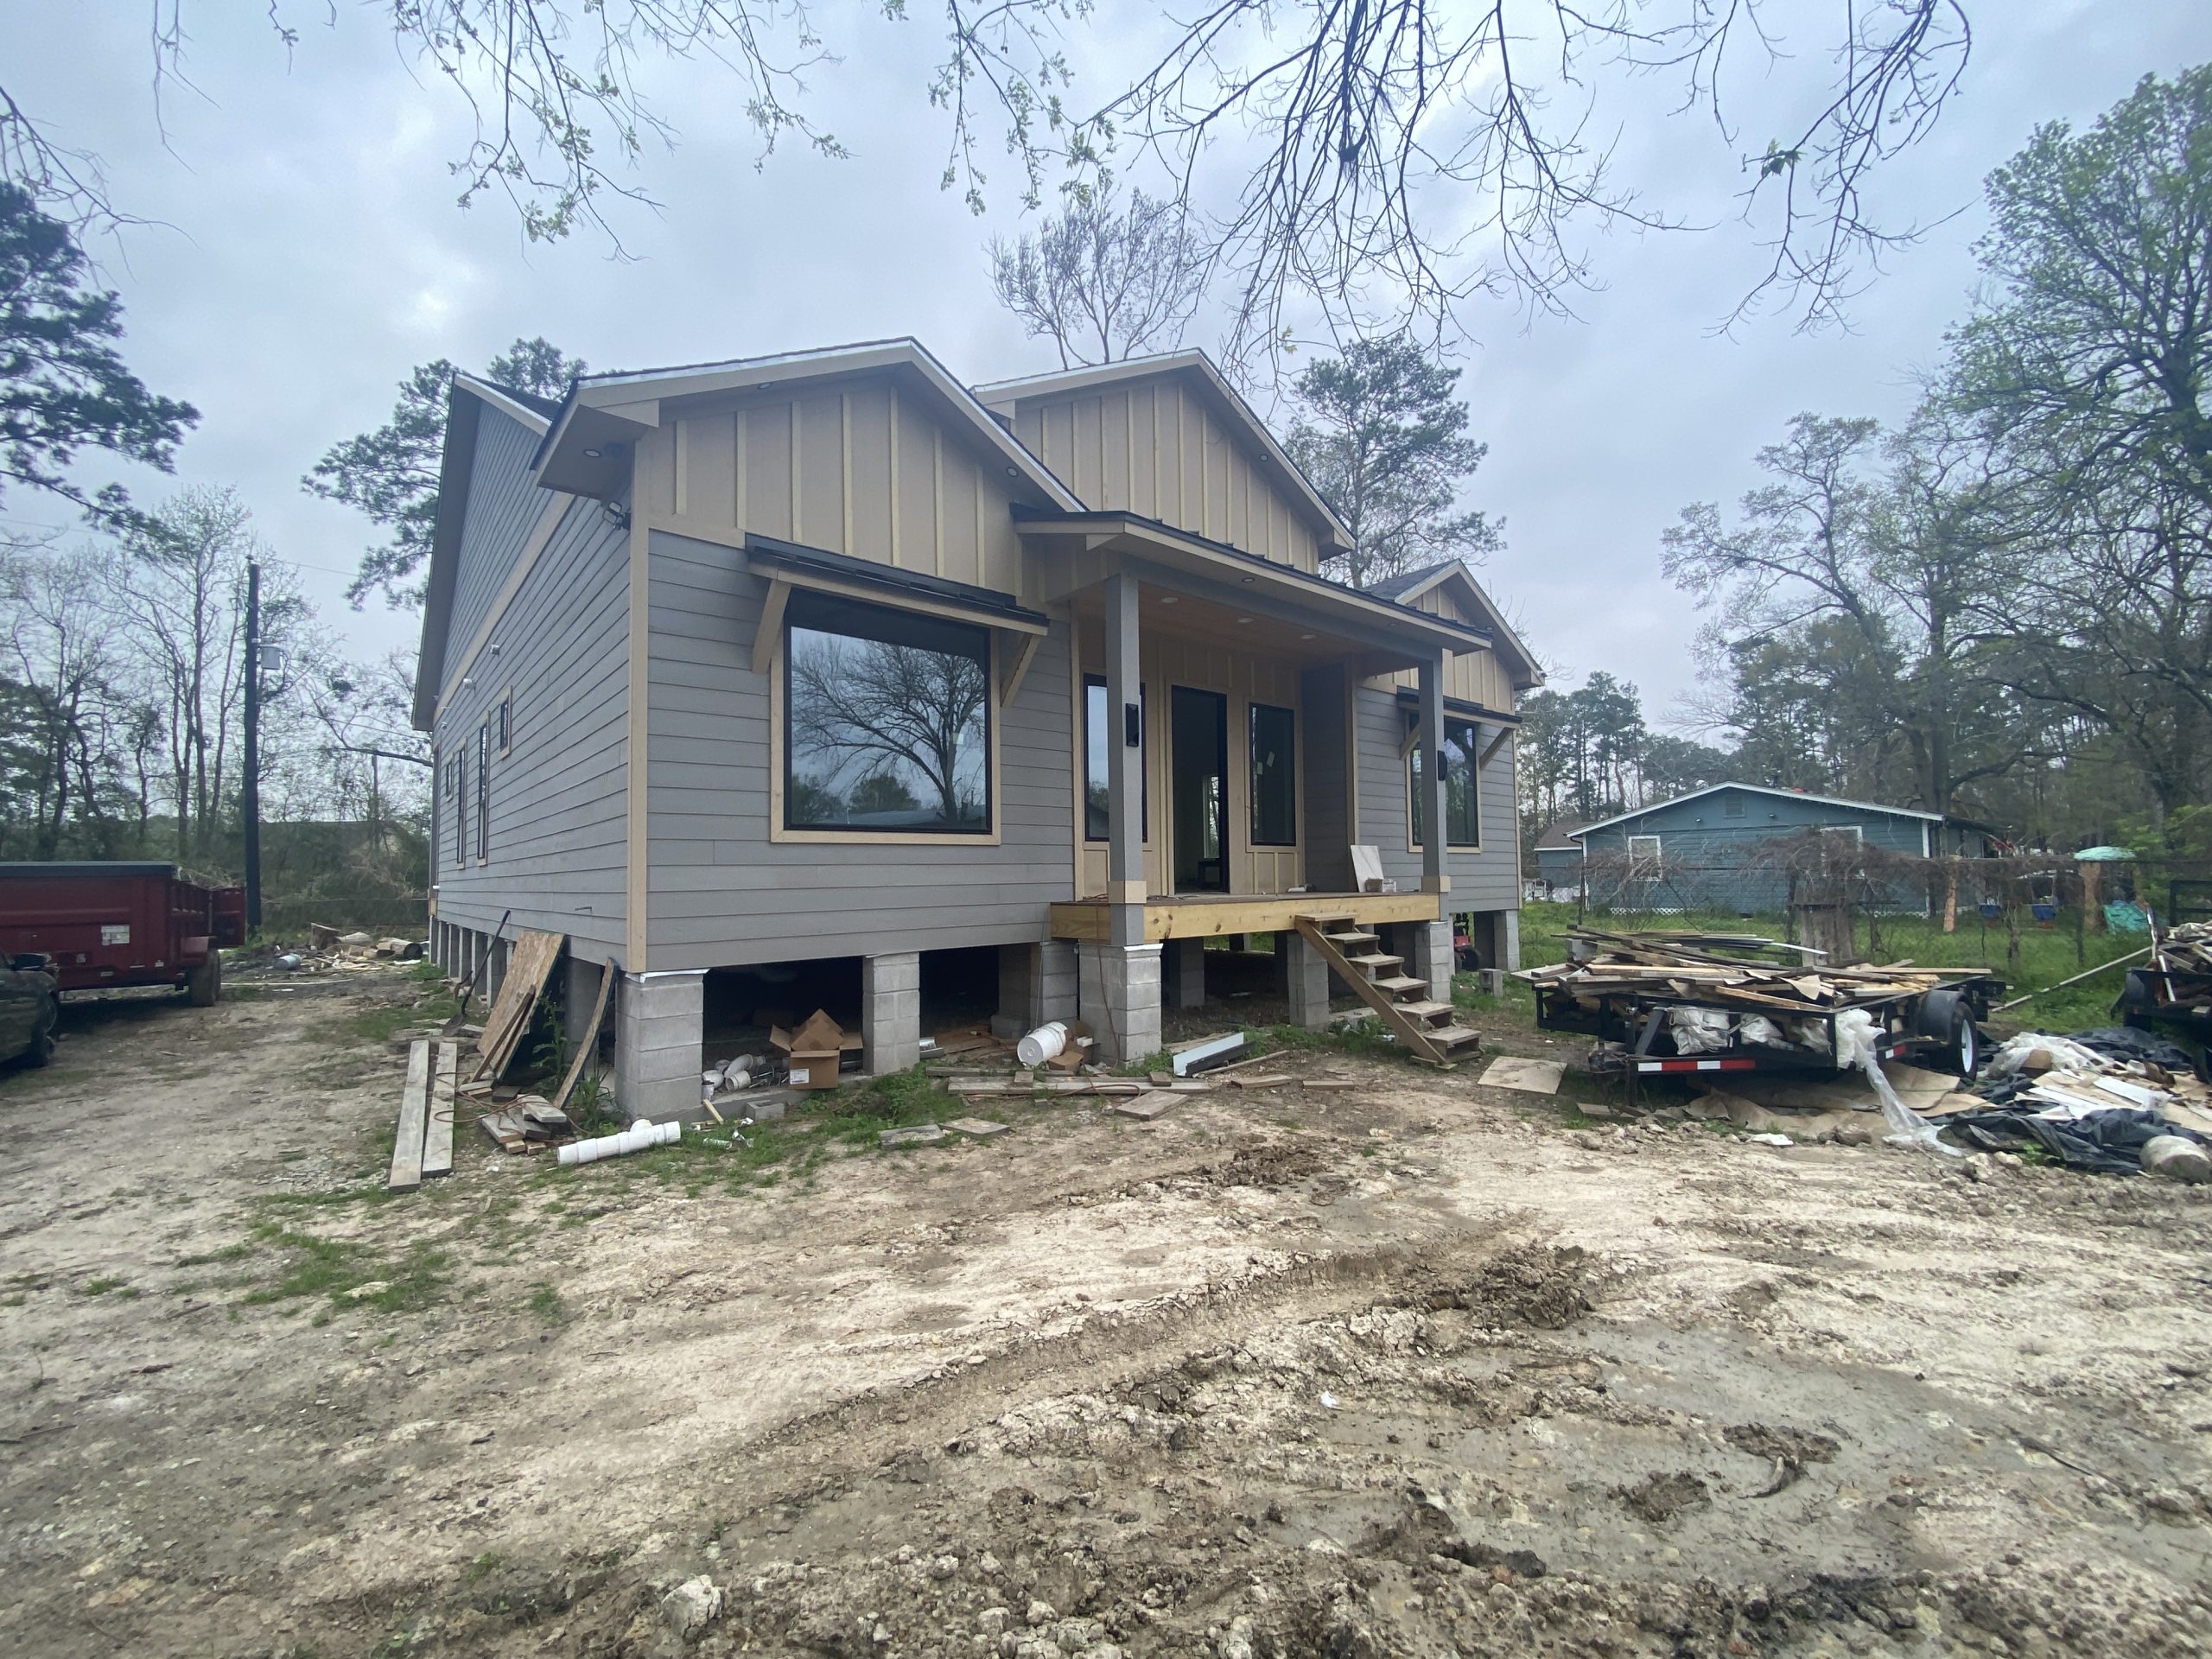
16611 Larchwood Dr, Humble, TX 77396
45L Tax Credits for Zero Energy Ready Homes
Disclaimer: (Energy Star) This webpage provides an overview of the DOE Zero Energy Ready Home program and how it relates to the New Energy Efficient Home Tax Credit found in section 45L of the Internal Revenue Code. The information provided here does not constitute professional tax advice or other professional financial guidance. It should not be used as the only source of information when making decisions regarding design, purchasing, investments, or the tax implications of new home construction, or when executing other binding agreements. In the event that there is conflict between information provided on this webpage and guidance or notices published by IRS, the information published by IRS shall take precedence
The Updated Section 45L
The Inflation Reduction Act of 2022 (IRA) amended Internal Revenue Code Section 45L to provide taxpayers with a tax credit for eligible new or substantially reconstructed homes that meet applicable ENERGY STAR home program or DOE Zero Energy Ready Home (ZERH) program requirements. The new 45L provisions include two tiers of credits, with the higher credits for eligible homes and dwelling units certified to applicable ZERH program requirements. The 45L credit is $5,000 for single family and manufactured homes eligible to participate in the EPA’s ENERGY STAR Residential New Construction Program or the ENERGY STAR Manufactured New Homes Program, respectively, and which are certified to applicable ZERH program requirements. The 45L credit is $1,000 for dwelling units that are part of a building eligible to participate in the ENERGY STAR Multifamily New Construction Program, and which are certified to applicable ZERH program requirements, unless the project meets prevailing wage requirements, in which case the 45L credit is $5,000 per dwelling unit. These new 45L rules apply to qualified energy efficient homes acquired after December 31, 2022, and before January 1, 2033, for use as a residence during the taxable year. DOE continues to coordinate with the Internal Revenue Service (IRS) regarding forthcoming IRS 45L guidance.
DOE Zero Energy Ready Home (ZERH) Program Applicability for 45L Tax Credit, by Calendar Year
ZERH program requirements vary by housing sector. To improve the usability of the program requirements and the certification process for different sectors, DOE is developing and maintaining program requirements documents for each major housing sector. DOE anticipates updating these documents over the coming years, with new editions of the requirements referred to as versions.
The three housing sector tables below indicate DOE’s anticipated version release schedule for the ZERH program. The certification requirements for each housing sector are included below with links to detailed requirements documents (PDF) for each program version. IRS guidance will establish when a dwelling unit needs to be certified to the version in effect for that housing sector as listed below to qualify for the ZERH provisions of 45L tax credit. The tables list all current and planned versions through 2025, by Calendar Year (January 1-December 31). In conjunction with IRS, DOE will provide additional information on any planned ZERH program changes beyond 2025 on future dates to be determined. Note, for certain future planned versions the requirements documents are still under development.
https://www.energy.gov/eere/buildings/45l-tax-credits-zero-energy-ready-homes
3 Long Haven Ln, Conroe, TX 77304 – Losses in Ducts


3 Long Haven Ln, Conroe, TX 77304
Losses in Ducts
Minimizing energy losses in ducts is an important aspect of energy efficiency in HVAC (Heating, Ventilation, and Air Conditioning) systems. Ducts are used to distribute conditioned air throughout a building, and any energy losses during the distribution process can lead to increased energy consumption and reduced system performance. Here are some key measures to minimize energy losses in ducts:
1. Proper Duct Design: Ensure that ductwork is properly designed to minimize pressure losses. Use appropriately sized ducts, minimize the number of bends and transitions, and maintain a balanced airflow distribution. Consult industry guidelines or work with an HVAC professional to design an efficient duct system.
2. Sealing: Duct leakage is a major source of energy losses. Seal all joints, connections, and seams in the ductwork using approved sealing materials such as mastic or metal tape. Pay particular attention to connections at registers, grilles, and air-handling units.
3. Insulation: Insulate ducts that run through unconditioned spaces, such as attics, crawlspaces, or basements. Insulation helps to prevent heat transfer between the ductwork and the surrounding environment, reducing energy losses and improving system efficiency.
4. Duct Material: Consider using insulated ducts with low thermal conductivity. Insulated ducts minimize heat transfer through the duct walls, helping to maintain the desired temperature of the conditioned air as it travels through the system.
5. Avoiding Overlong Duct Runs: Minimize the length of duct runs as much as possible. Longer ducts result in increased friction losses, which can reduce airflow and energy efficiency. Optimize the layout and location of HVAC equipment to keep duct runs as short and direct as feasible.
6. Balancing and Adjusting Dampers: Balancing the airflow within the duct system ensures that each room receives the appropriate amount of conditioned air. Adjust dampers at branch points and in individual ducts to balance the airflow and avoid over-pressurizing or under-pressurizing certain areas.
7. Regular Maintenance: Conduct regular inspections of the ductwork to check for leaks, obstructions, or damage. Clean the ducts periodically to remove dust, debris, or any substances that could impede airflow.
8. Air Filters: Install high-quality air filters and regularly replace them according to the manufacturer’s recommendations. Clean air filters help maintain optimal airflow, reducing pressure drops and energy losses.
By implementing these measures, you can significantly minimize energy losses in ducts, improve the overall efficiency of your HVAC system, and reduce energy consumption. Consulting with a professional HVAC contractor or engineer can provide valuable insights specific to your building’s requirements and help optimize energy efficiency.
https://homereadyinspections.com/builders-hvac/
How Blower Doors Work – 335 E Newton St, Luling, TX 78648


335 E Newton St, Luling, TX 78648
How Blower Doors Work – 335 E Newton St, Luling, TX 78648
Third-party Energy Testing
Your air ducts are one of the most important systems in your home, and if the ducts are poorly sealed or insulated they are likely contributing to higher energy bills.
Blower Doors: What Are They and How Do They Work?
A blower door is a device used in energy testing to measure a building’s airtightness. It consists of a powerful fan mounted on a temporary frame that fits into a doorway or an exterior opening. During a blower door test, the fan creates a pressure difference between the inside and outside of the building. This pressure difference allows air leakage points to become apparent and measurable. The test helps identify areas of air infiltration or exfiltration, which can affect energy efficiency and indoor comfort.
The blower door test involves setting up the device, measuring the baseline pressure, and then either depressurizing or pressurizing the building using the fan. While the fan is running, the airflow rate is measured using instruments like a manometer or pressure gauge. This airflow measurement quantifies the amount of air leakage in the building. Smoke pencils or thermal imaging cameras can be used to locate specific air leakage points.
The blower door test can be conducted in both depressurization and pressurization modes, allowing for a comprehensive assessment of air leakage locations. Once the test is complete, the data is analyzed to determine the building’s airtightness and identify areas that need improvement. The results can be used to guide air sealing measures and improve energy efficiency.
Blower door tests are crucial in identifying air leakage points, reducing energy loss, improving indoor air quality, and enhancing the overall performance and comfort of a building.
Home Inspection Atascocita | Home Ready Inspections | Houston TX
Minimizing Energy Losses in Ducts at 106 Armstrong St, Houston, TX 77029
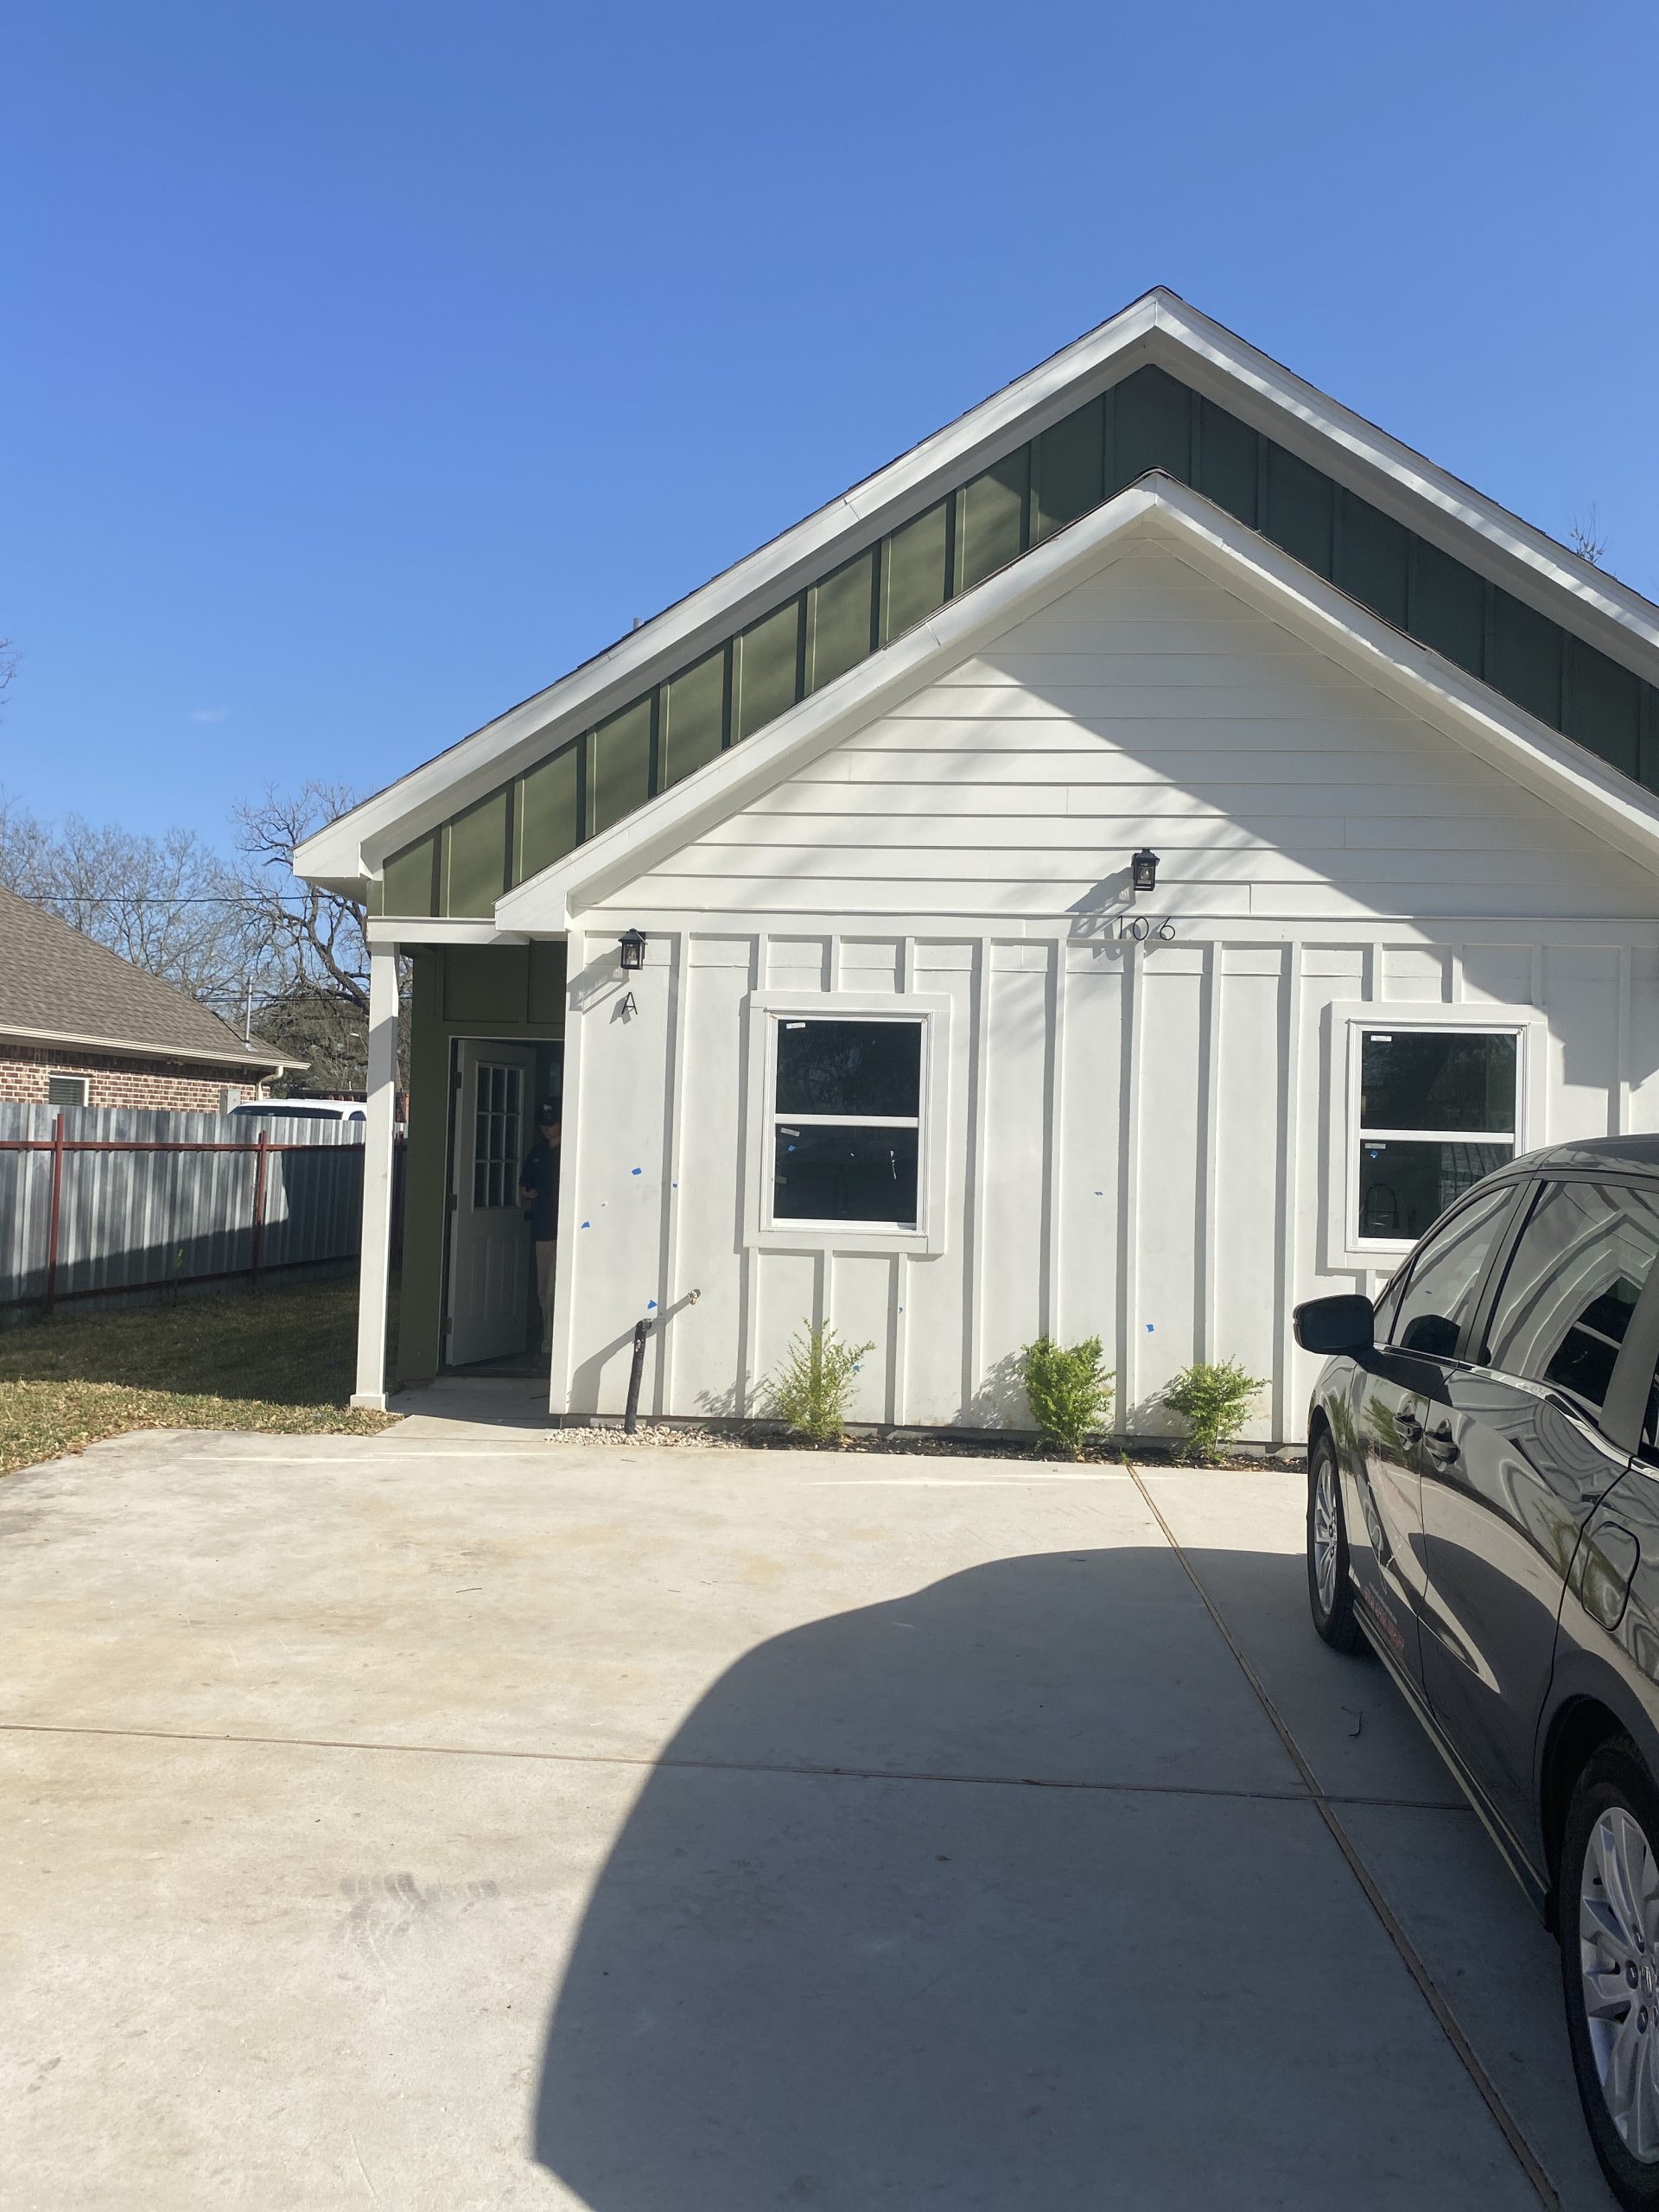
106 Armstrong St, Houston, TX 77029
Minimizing Energy Losses in Ducts
Minimizing energy losses in ducts by seeing if the ducts are poorly sealed or insulated. That could tell you why your energy bill in high. Your air ducts are one of the most important systems in your home, and if the ducts are poorly sealed or insulated, they are likely contributing to higher energy bills.
Your home’s duct system is a branching network of tubes in the walls, floors, and ceilings; it carries the air from your home’s furnace and central air conditioner to each room. Ducts are made of sheet metal, fiberglass, or other materials.
Ducts that leak heated air into unheated spaces can add hundreds of dollars a year to your heating and cooling bills, but you can reduce that loss by sealing and insulating your ducts. Insulating ducts in unconditioned spaces is usually very cost-effective. Existing ducts may also be blocked or may require simple upgrades.
Designing and Installing New Duct Systems
In new home construction or in retrofits, proper duct system design is critical. In recent years, energy-saving designs have sought to include ducts and heating systems in the conditioned space.
Efficient and well-designed duct systems distribute air properly throughout your home without leaking to keep all rooms at a comfortable temperature. The system should provide balanced supply and return flow to maintain a neutral pressure within the house.
Even well sealed and insulated ducts will leak and lose some heat, so many new energy-efficient homes place the duct system within the conditioned space of the home. The simplest way to accomplish this is to hide the ducts in dropped ceilings and in corners of rooms. Ducts can also be located in a sealed and insulated chase extending into the attic or built into raised floors. In both of these latter cases, care must be taken during construction to prevent contractors from using the duct chases for wiring or other utilities.
In either case, actual ducts must be used — chases and floor cavities should not be used as ducts. Regardless of where they are installed, ducts should be well sealed. Although ducts can be configured in a number of ways, the “trunk and branch” and “radial” supply duct configurations are most suitable for ducts located in conditioned spaces.
Air return duct systems can be configured in two ways: each room can have a return duct that sends air back to the heating and cooling equipment or return grills can be located in central locations on each floor. For the latter case, either grills must be installed to allow air to pass out of closed rooms, or short “jumper ducts” can be installed to connect the vent in one room with the next, allowing air to flow back to the central return grilles. Door undercuts help, but they are usually not sufficient for return airflow.
You can perform a simple check for adequate return air capacity by doing the following:
- Close all exterior doors and windows
- Close all interior room doors
- Turn on the central air handler
- “Crack” interior doors one by one and observe if the door closes or further opens “on its own.” (Whether it closes or opens will depend on the direction of the air handler-driven air flow.) Rooms served by air-moved doors have restricted return air flow and need pressure relief as described above.
Maintaining and Upgrading Existing Duct Systems
Sealing your ducts to prevent leaks is even more important if the ducts are located in an unconditioned area such as an attic or vented crawlspace. If the supply ducts are leaking, heated or cooled air can be forced out of unsealed joints and lost. In addition, unconditioned air can be drawn into return ducts through unsealed joints.
Although minor duct repairs are easy to make, qualified professionals should seal and insulate ducts in unconditioned spaces to ensure the use of appropriate sealing materials.
Aside from sealing your ducts, the simplest and most effective means of maintaining your air distribution system is to ensure that furniture and other objects are not blocking the airflow through your registers, and to vacuum the registers to remove any dust buildup.
Existing duct systems often suffer from design deficiencies in the return air system, and modifications by the homeowner (or just a tendency to keep doors closed) may contribute to these problems. Any rooms with a lack of sufficient return airflow may benefit from relatively simple upgrades, such as the installation of new return-air grilles, undercutting doors for return air, or installing a jumper duct.
Some rooms may also be hard to heat and cool because of inadequate supply ducts or grilles. If this is the case, you should first examine whether the problem is the room itself: fix any problems with insulation, air leakage, or inefficient windows first. If the problem persists, you may be able to increase the size of the supply duct or add an additional duct to provide the needed airflow to the room.
Minor Duct Repair Tips for Minimizing Energy Losses in Ducts
- Check your ducts for air leaks. First, look for sections that should be joined but have separated and then look for obvious holes.
- Duct mastic is the preferred material for sealing ductwork seams and joints. It is more durable than any available tape and generally easier for a do-it-yourself installation. Its only drawback is that it will not bridge gaps over ¼ inch. Such gaps must be first bridged with web-type drywall tape, or a good quality heat approved tape.
- If you use tape to seal your ducts, avoid cloth-backed, rubber adhesive duct tape — it tends to fail quickly. Instead, use mastic, butyl tape, foil tape, or other heat-approved tapes. Look for tape with the Underwriters Laboratories (UL) logo.
- Remember that insulating ducts in the basement will make the basement colder. If both the ducts and the basement walls are not insulated, consider insulating both. Water pipes and drains in unconditioned spaces could freeze and burst if the heat ducts are fully insulated because there would be no heat source to prevent the space from freezing in cold weather. However, using an electric heating tape wrap on the pipes can prevent this. Check with a professional contractor.
- Hire a professional to install both supply and return registers in the basement rooms after converting your basement to a living area.
- Be sure a well-sealed vapor barrier exists on the outside of the insulation on cooling ducts to prevent moisture condensation.
- If you have a fuel-burning furnace, stove, or other appliance or an attached garage, install a carbon monoxide (CO) monitor to alert you to harmful CO levels.
- Be sure to get professional help when doing ductwork. A qualified professional should always perform changes and repairs to a duct system.
Minimizing Energy Losses in Ducts at 4416 Alvin St, Houston, TX 77051
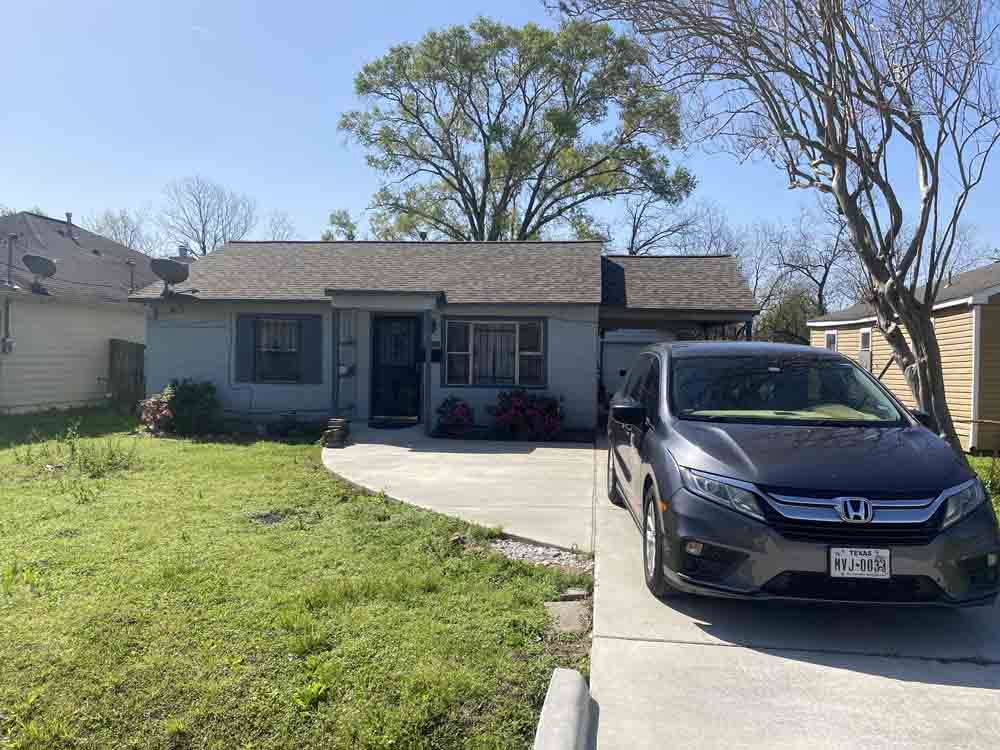
4416 Alvin St, Houston, TX 77051
Minimizing Energy Losses in Ducts
Minimizing energy losses in ducts by seeing if the ducts are poorly sealed or insulated. That could tell you why your energy bill in high. Your air ducts are one of the most important systems in your home, and if the ducts are poorly sealed or insulated, they are likely contributing to higher energy bills.
Your home’s duct system is a branching network of tubes in the walls, floors, and ceilings; it carries the air from your home’s furnace and central air conditioner to each room. Ducts are made of sheet metal, fiberglass, or other materials.
Ducts that leak heated air into unheated spaces can add hundreds of dollars a year to your heating and cooling bills, but you can reduce that loss by sealing and insulating your ducts. Insulating ducts in unconditioned spaces is usually very cost-effective. Existing ducts may also be blocked or may require simple upgrades.
Designing and Installing New Duct Systems
In new home construction or in retrofits, proper duct system design is critical. In recent years, energy-saving designs have sought to include ducts and heating systems in the conditioned space.
Efficient and well-designed duct systems distribute air properly throughout your home without leaking to keep all rooms at a comfortable temperature. The system should provide balanced supply and return flow to maintain a neutral pressure within the house.
Even well sealed and insulated ducts will leak and lose some heat, so many new energy-efficient homes place the duct system within the conditioned space of the home. The simplest way to accomplish this is to hide the ducts in dropped ceilings and in corners of rooms. Ducts can also be located in a sealed and insulated chase extending into the attic or built into raised floors. In both of these latter cases, care must be taken during construction to prevent contractors from using the duct chases for wiring or other utilities.
In either case, actual ducts must be used — chases and floor cavities should not be used as ducts. Regardless of where they are installed, ducts should be well sealed. Although ducts can be configured in a number of ways, the “trunk and branch” and “radial” supply duct configurations are most suitable for ducts located in conditioned spaces.
Air return duct systems can be configured in two ways: each room can have a return duct that sends air back to the heating and cooling equipment or return grills can be located in central locations on each floor. For the latter case, either grills must be installed to allow air to pass out of closed rooms, or short “jumper ducts” can be installed to connect the vent in one room with the next, allowing air to flow back to the central return grilles. Door undercuts help, but they are usually not sufficient for return airflow.
You can perform a simple check for adequate return air capacity by doing the following:
- Close all exterior doors and windows
- Close all interior room doors
- Turn on the central air handler
- “Crack” interior doors one by one and observe if the door closes or further opens “on its own.” (Whether it closes or opens will depend on the direction of the air handler-driven air flow.) Rooms served by air-moved doors have restricted return air flow and need pressure relief as described above.
Maintaining and Upgrading Existing Duct Systems
Sealing your ducts to prevent leaks is even more important if the ducts are located in an unconditioned area such as an attic or vented crawlspace. If the supply ducts are leaking, heated or cooled air can be forced out of unsealed joints and lost. In addition, unconditioned air can be drawn into return ducts through unsealed joints.
Although minor duct repairs are easy to make, qualified professionals should seal and insulate ducts in unconditioned spaces to ensure the use of appropriate sealing materials.
Aside from sealing your ducts, the simplest and most effective means of maintaining your air distribution system is to ensure that furniture and other objects are not blocking the airflow through your registers, and to vacuum the registers to remove any dust buildup.
Existing duct systems often suffer from design deficiencies in the return air system, and modifications by the homeowner (or just a tendency to keep doors closed) may contribute to these problems. Any rooms with a lack of sufficient return airflow may benefit from relatively simple upgrades, such as the installation of new return-air grilles, undercutting doors for return air, or installing a jumper duct.
Some rooms may also be hard to heat and cool because of inadequate supply ducts or grilles. If this is the case, you should first examine whether the problem is the room itself: fix any problems with insulation, air leakage, or inefficient windows first. If the problem persists, you may be able to increase the size of the supply duct or add an additional duct to provide the needed airflow to the room.
Minor Duct Repair Tips for Minimizing Energy Losses in Ducts
- Check your ducts for air leaks. First, look for sections that should be joined but have separated and then look for obvious holes.
- Duct mastic is the preferred material for sealing ductwork seams and joints. It is more durable than any available tape and generally easier for a do-it-yourself installation. Its only drawback is that it will not bridge gaps over ¼ inch. Such gaps must be first bridged with web-type drywall tape, or a good quality heat approved tape.
- If you use tape to seal your ducts, avoid cloth-backed, rubber adhesive duct tape — it tends to fail quickly. Instead, use mastic, butyl tape, foil tape, or other heat-approved tapes. Look for tape with the Underwriters Laboratories (UL) logo.
- Remember that insulating ducts in the basement will make the basement colder. If both the ducts and the basement walls are not insulated, consider insulating both. Water pipes and drains in unconditioned spaces could freeze and burst if the heat ducts are fully insulated because there would be no heat source to prevent the space from freezing in cold weather. However, using an electric heating tape wrap on the pipes can prevent this. Check with a professional contractor.
- Hire a professional to install both supply and return registers in the basement rooms after converting your basement to a living area.
- Be sure a well-sealed vapor barrier exists on the outside of the insulation on cooling ducts to prevent moisture condensation.
- If you have a fuel-burning furnace, stove, or other appliance or an attached garage, install a carbon monoxide (CO) monitor to alert you to harmful CO levels.
- Be sure to get professional help when doing ductwork. A qualified professional should always perform changes and repairs to a duct system.
2021 IECC Insulation Inspection in the city of 5117 Schuler St, Houston, TX 77007
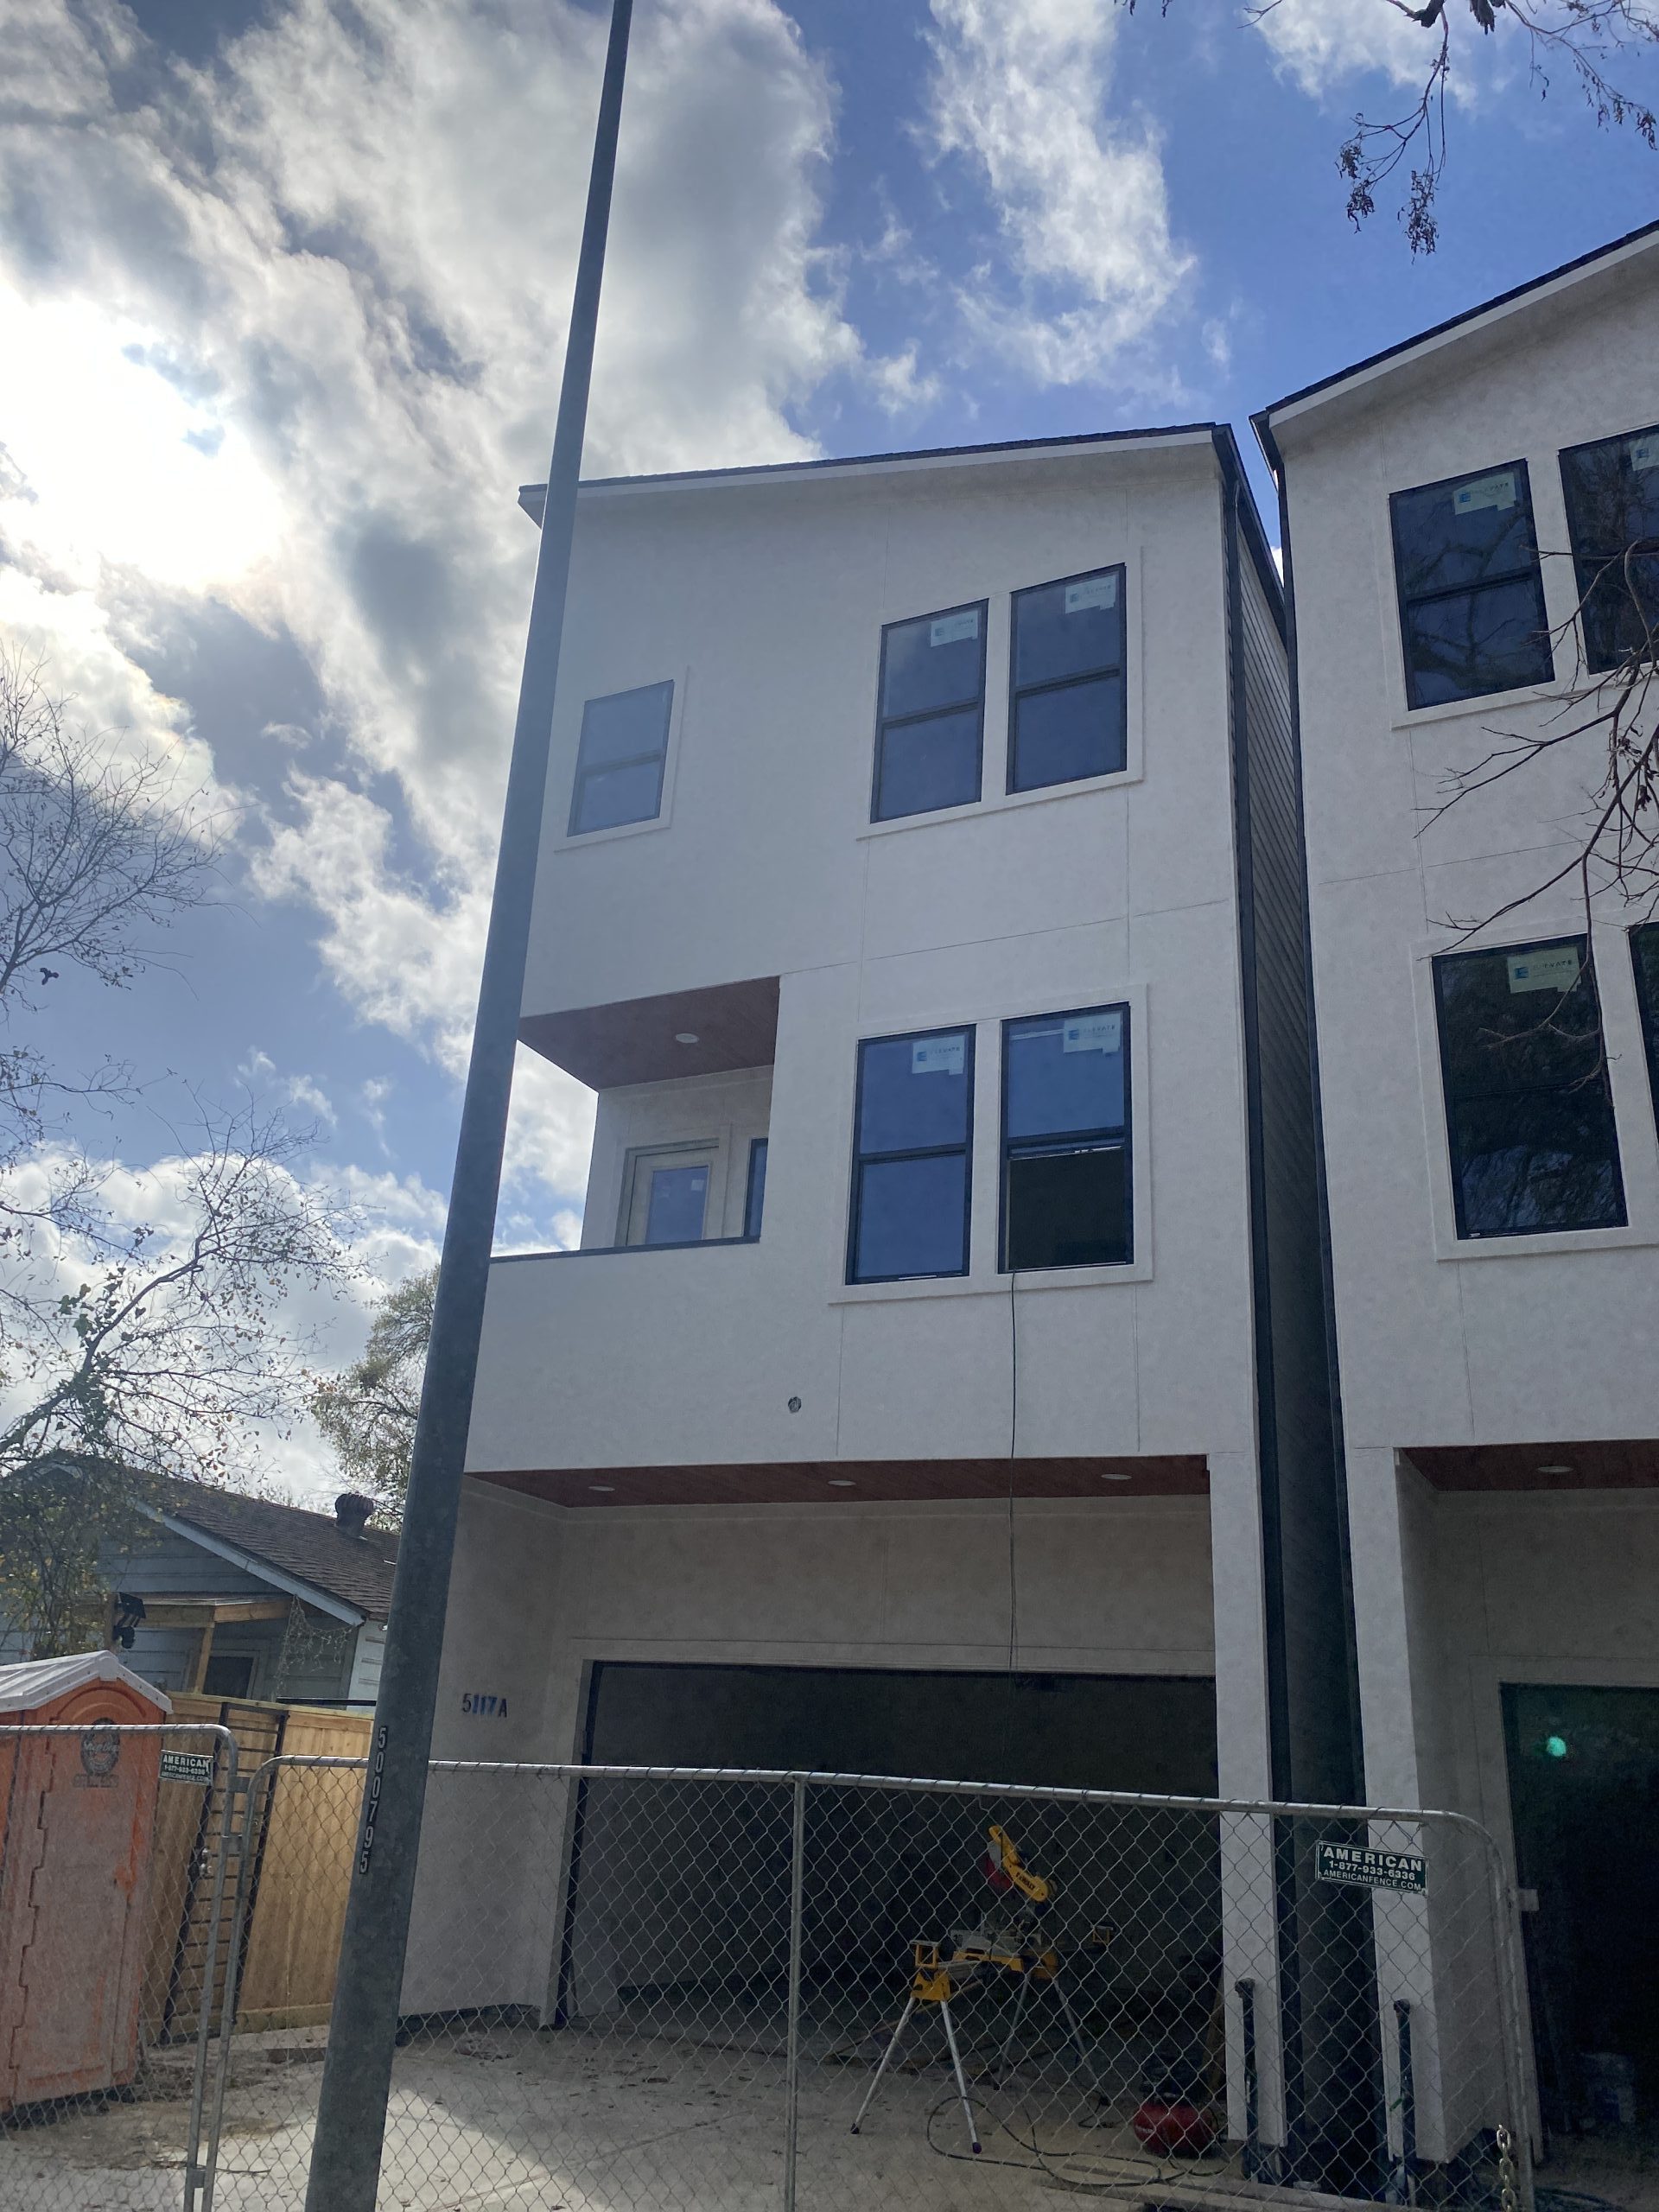
5117 Schuler St, Houston, TX 77007
2021 IECC Insulation Inspection
A 2021 IECC insulation inspection is a thorough assessment of insulation materials and their installation within a building or structure. The primary purpose of this inspection is to ensure that insulation is installed correctly, effectively, and in compliance with relevant building codes and standards. Here’s a more detailed overview:
Purpose of the 2021 IECC Insulation Inspection
- Energy Efficiency Verification:
- An insulation inspection helps confirm that the insulation is performing as intended. Proper insulation reduces heat transfer, contributing to energy savings and lower utility bills.
- Quality Assurance:
- Inspectors assess the quality of the insulation materials used, ensuring they meet specifications and are suitable for the specific application. This includes checking for damage, degradation, or improper installation that could compromise performance.
- Compliance with Codes and Standards:
- Building codes often specify minimum insulation levels and installation practices. An inspection verifies compliance with these regulations, which is crucial for safety and energy efficiency.
- Identification of Issues:
- The inspection can reveal problems such as gaps, voids, or compression in insulation that might hinder its effectiveness. Identifying these issues early can prevent future problems, such as higher energy costs or mold growth due to moisture accumulation.
- Moisture and Air Leakage Assessment:
- Inspections often include evaluations for air leaks and moisture issues. Proper insulation must be complemented by effective air sealing and moisture management to optimize performance and protect the building structure.
- Enhanced Comfort:
- By ensuring that insulation is installed correctly, inspectors contribute to improved thermal comfort for occupants, reducing drafts and temperature fluctuations within the space.
- Health and Safety Considerations:
- Certain insulation materials can pose health risks if not handled or installed correctly. Inspections help ensure that materials like fiberglass or spray foam are used safely and in accordance with health guidelines.
Components of an Insulation Inspection
- Visual Assessment: Inspectors visually evaluate accessible areas for visible signs of insulation integrity, including coverage, material condition, and installation quality.
- Measurement: Inspectors may measure insulation thickness and density to ensure it meets the specified R-values (thermal resistance).
- Thermal Imaging: Some inspectors use infrared cameras to identify heat loss areas, helping pinpoint insufficient insulation or air leaks.
- Moisture Testing: Tools may be employed to assess moisture levels within insulation materials, identifying potential risks of mold or decay.
Overall, insulation inspections are essential for ensuring the effectiveness, safety, and longevity of insulation systems in buildings. By identifying and addressing issues early, these inspections help optimize energy performance and enhance the overall comfort and safety of indoor environments.
2713 Delano St, Houston, TX 77004 – Losses in Ducts
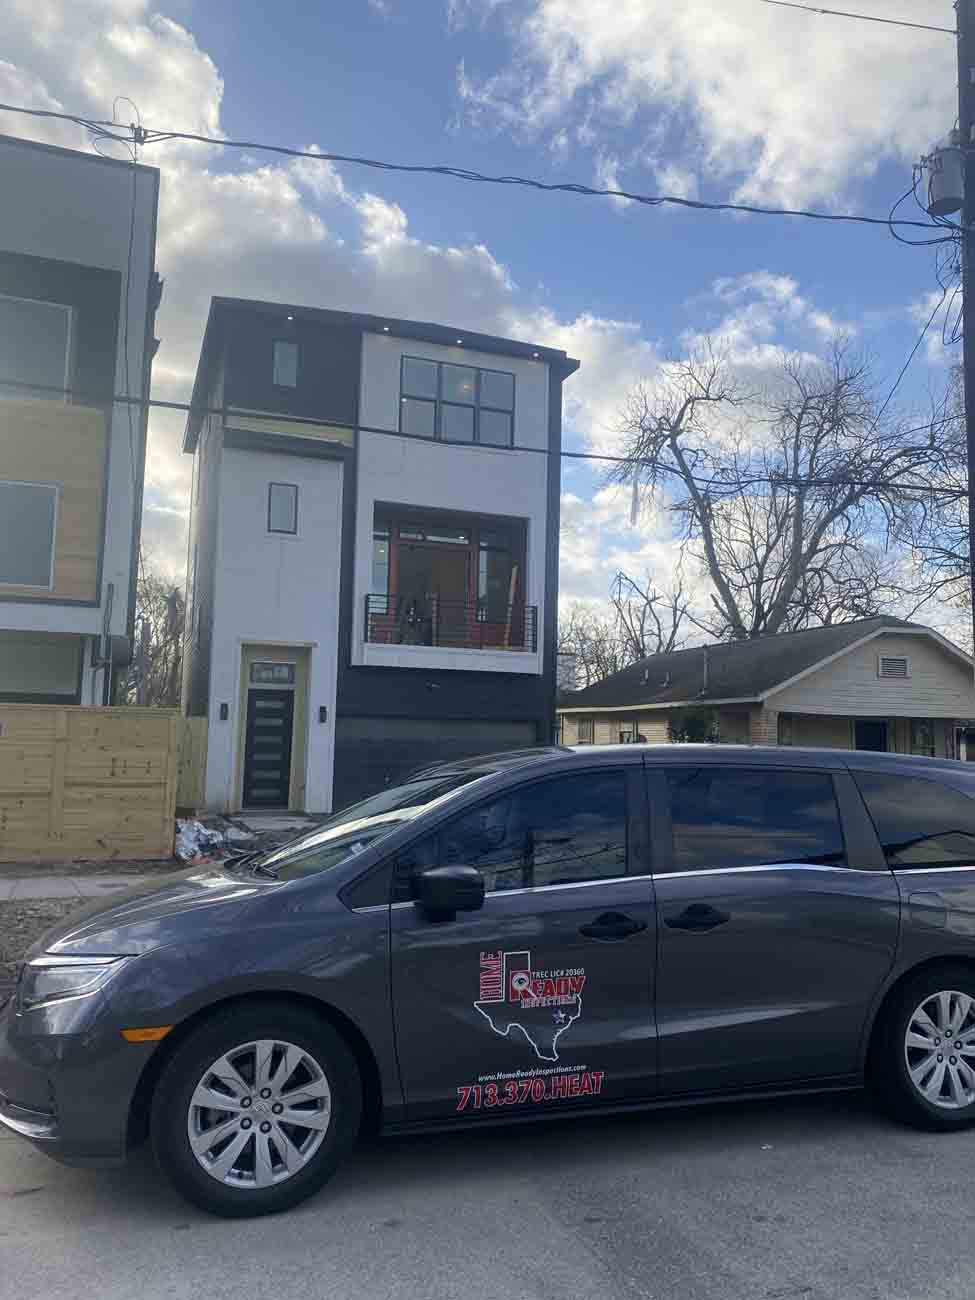
2713 Delano St, Houston, TX 77004
Losses in Ducts
Minimizing energy losses in ducts is an important aspect of energy efficiency in HVAC (Heating, Ventilation, and Air Conditioning) systems. Ducts are used to distribute conditioned air throughout a building, and any energy losses during the distribution process can lead to increased energy consumption and reduced system performance. Here are some key measures to minimize energy losses in ducts:
1. Proper Duct Design: Ensure that ductwork is properly designed to minimize pressure losses. Use appropriately sized ducts, minimize the number of bends and transitions, and maintain a balanced airflow distribution. Consult industry guidelines or work with an HVAC professional to design an efficient duct system.
2. Sealing: Duct leakage is a major source of energy losses. Seal all joints, connections, and seams in the ductwork using approved sealing materials such as mastic or metal tape. Pay particular attention to connections at registers, grilles, and air-handling units.
3. Insulation: Insulate ducts that run through unconditioned spaces, such as attics, crawlspaces, or basements. Insulation helps to prevent heat transfer between the ductwork and the surrounding environment, reducing energy losses and improving system efficiency.
4. Duct Material: Consider using insulated ducts with low thermal conductivity. Insulated ducts minimize heat transfer through the duct walls, helping to maintain the desired temperature of the conditioned air as it travels through the system.
5. Avoiding Overlong Duct Runs: Minimize the length of duct runs as much as possible. Longer ducts result in increased friction losses, which can reduce airflow and energy efficiency. Optimize the layout and location of HVAC equipment to keep duct runs as short and direct as feasible.
6. Balancing and Adjusting Dampers: Balancing the airflow within the duct system ensures that each room receives the appropriate amount of conditioned air. Adjust dampers at branch points and in individual ducts to balance the airflow and avoid over-pressurizing or under-pressurizing certain areas.
7. Regular Maintenance: Conduct regular inspections of the ductwork to check for leaks, obstructions, or damage. Clean the ducts periodically to remove dust, debris, or any substances that could impede airflow.
8. Air Filters: Install high-quality air filters and regularly replace them according to the manufacturer’s recommendations. Clean air filters help maintain optimal airflow, reducing pressure drops and energy losses.
By implementing these measures, you can significantly minimize energy losses in ducts, improve the overall efficiency of your HVAC system, and reduce energy consumption. Consulting with a professional HVAC contractor or engineer can provide valuable insights specific to your building’s requirements and help optimize energy efficiency.
https://homereadyinspections.com/builders-hvac/
462 Carriage Trail, Montgomery, TX 77316 – Losses in Ducts

462 Carriage Trail, Montgomery, TX 77316
Losses in Ducts
Minimizing energy losses in ducts is an important aspect of energy efficiency in HVAC (Heating, Ventilation, and Air Conditioning) systems. Ducts are used to distribute conditioned air throughout a building, and any energy losses during the distribution process can lead to increased energy consumption and reduced system performance. Here are some key measures to minimize energy losses in ducts:
1. Proper Duct Design: Ensure that ductwork is properly designed to minimize pressure losses. Use appropriately sized ducts, minimize the number of bends and transitions, and maintain a balanced airflow distribution. Consult industry guidelines or work with an HVAC professional to design an efficient duct system.
2. Sealing: Duct leakage is a major source of energy losses. Seal all joints, connections, and seams in the ductwork using approved sealing materials such as mastic or metal tape. Pay particular attention to connections at registers, grilles, and air-handling units.
3. Insulation: Insulate ducts that run through unconditioned spaces, such as attics, crawlspaces, or basements. Insulation helps to prevent heat transfer between the ductwork and the surrounding environment, reducing energy losses and improving system efficiency.
4. Duct Material: Consider using insulated ducts with low thermal conductivity. Insulated ducts minimize heat transfer through the duct walls, helping to maintain the desired temperature of the conditioned air as it travels through the system.
5. Avoiding Overlong Duct Runs: Minimize the length of duct runs as much as possible. Longer ducts result in increased friction losses, which can reduce airflow and energy efficiency. Optimize the layout and location of HVAC equipment to keep duct runs as short and direct as feasible.
6. Balancing and Adjusting Dampers: Balancing the airflow within the duct system ensures that each room receives the appropriate amount of conditioned air. Adjust dampers at branch points and in individual ducts to balance the airflow and avoid over-pressurizing or under-pressurizing certain areas.
7. Regular Maintenance: Conduct regular inspections of the ductwork to check for leaks, obstructions, or damage. Clean the ducts periodically to remove dust, debris, or any substances that could impede airflow.
8. Air Filters: Install high-quality air filters and regularly replace them according to the manufacturer’s recommendations. Clean air filters help maintain optimal airflow, reducing pressure drops and energy losses.
By implementing these measures, you can significantly minimize energy losses in ducts, improve the overall efficiency of your HVAC system, and reduce energy consumption. Consulting with a professional HVAC contractor or engineer can provide valuable insights specific to your building’s requirements and help optimize energy efficiency.
https://homereadyinspections.com/builders-hvac/
Minimizing Energy Losses in Ducts at 1510 E 31st St, Houston, TX 77022

1510 E 31st St, Houston, TX 77022
Minimizing Energy Losses in Ducts
Minimizing energy losses in ducts by seeing if the ducts are poorly sealed or insulated. That could tell you why your energy bill in high. Your air ducts are one of the most important systems in your home, and if the ducts are poorly sealed or insulated, they are likely contributing to higher energy bills.
Your home’s duct system is a branching network of tubes in the walls, floors, and ceilings; it carries the air from your home’s furnace and central air conditioner to each room. Ducts are made of sheet metal, fiberglass, or other materials.
Ducts that leak heated air into unheated spaces can add hundreds of dollars a year to your heating and cooling bills, but you can reduce that loss by sealing and insulating your ducts. Insulating ducts in unconditioned spaces is usually very cost-effective. Existing ducts may also be blocked or may require simple upgrades.
Designing and Installing New Duct Systems
In new home construction or in retrofits, proper duct system design is critical. In recent years, energy-saving designs have sought to include ducts and heating systems in the conditioned space.
Efficient and well-designed duct systems distribute air properly throughout your home without leaking to keep all rooms at a comfortable temperature. The system should provide balanced supply and return flow to maintain a neutral pressure within the house.
Even well sealed and insulated ducts will leak and lose some heat, so many new energy-efficient homes place the duct system within the conditioned space of the home. The simplest way to accomplish this is to hide the ducts in dropped ceilings and in corners of rooms. Ducts can also be located in a sealed and insulated chase extending into the attic or built into raised floors. In both of these latter cases, care must be taken during construction to prevent contractors from using the duct chases for wiring or other utilities.
In either case, actual ducts must be used — chases and floor cavities should not be used as ducts. Regardless of where they are installed, ducts should be well sealed. Although ducts can be configured in a number of ways, the “trunk and branch” and “radial” supply duct configurations are most suitable for ducts located in conditioned spaces.
Air return duct systems can be configured in two ways: each room can have a return duct that sends air back to the heating and cooling equipment or return grills can be located in central locations on each floor. For the latter case, either grills must be installed to allow air to pass out of closed rooms, or short “jumper ducts” can be installed to connect the vent in one room with the next, allowing air to flow back to the central return grilles. Door undercuts help, but they are usually not sufficient for return airflow.
You can perform a simple check for adequate return air capacity by doing the following:
- Close all exterior doors and windows
- Close all interior room doors
- Turn on the central air handler
- “Crack” interior doors one by one and observe if the door closes or further opens “on its own.” (Whether it closes or opens will depend on the direction of the air handler-driven air flow.) Rooms served by air-moved doors have restricted return air flow and need pressure relief as described above.
Maintaining and Upgrading Existing Duct Systems
Sealing your ducts to prevent leaks is even more important if the ducts are located in an unconditioned area such as an attic or vented crawlspace. If the supply ducts are leaking, heated or cooled air can be forced out of unsealed joints and lost. In addition, unconditioned air can be drawn into return ducts through unsealed joints.
Although minor duct repairs are easy to make, qualified professionals should seal and insulate ducts in unconditioned spaces to ensure the use of appropriate sealing materials.
Aside from sealing your ducts, the simplest and most effective means of maintaining your air distribution system is to ensure that furniture and other objects are not blocking the airflow through your registers, and to vacuum the registers to remove any dust buildup.
Existing duct systems often suffer from design deficiencies in the return air system, and modifications by the homeowner (or just a tendency to keep doors closed) may contribute to these problems. Any rooms with a lack of sufficient return airflow may benefit from relatively simple upgrades, such as the installation of new return-air grilles, undercutting doors for return air, or installing a jumper duct.
Some rooms may also be hard to heat and cool because of inadequate supply ducts or grilles. If this is the case, you should first examine whether the problem is the room itself: fix any problems with insulation, air leakage, or inefficient windows first. If the problem persists, you may be able to increase the size of the supply duct or add an additional duct to provide the needed airflow to the room.
Minor Duct Repair Tips for Minimizing Energy Losses in Ducts
- Check your ducts for air leaks. First, look for sections that should be joined but have separated and then look for obvious holes.
- Duct mastic is the preferred material for sealing ductwork seams and joints. It is more durable than any available tape and generally easier for a do-it-yourself installation. Its only drawback is that it will not bridge gaps over ¼ inch. Such gaps must be first bridged with web-type drywall tape, or a good quality heat approved tape.
- If you use tape to seal your ducts, avoid cloth-backed, rubber adhesive duct tape — it tends to fail quickly. Instead, use mastic, butyl tape, foil tape, or other heat-approved tapes. Look for tape with the Underwriters Laboratories (UL) logo.
- Remember that insulating ducts in the basement will make the basement colder. If both the ducts and the basement walls are not insulated, consider insulating both. Water pipes and drains in unconditioned spaces could freeze and burst if the heat ducts are fully insulated because there would be no heat source to prevent the space from freezing in cold weather. However, using an electric heating tape wrap on the pipes can prevent this. Check with a professional contractor.
- Hire a professional to install both supply and return registers in the basement rooms after converting your basement to a living area.
- Be sure a well-sealed vapor barrier exists on the outside of the insulation on cooling ducts to prevent moisture condensation.
- If you have a fuel-burning furnace, stove, or other appliance or an attached garage, install a carbon monoxide (CO) monitor to alert you to harmful CO levels.
- Be sure to get professional help when doing ductwork. A qualified professional should always perform changes and repairs to a duct system.
How Blower Doors Work – 6934 Neff St, Houston, TX 77074
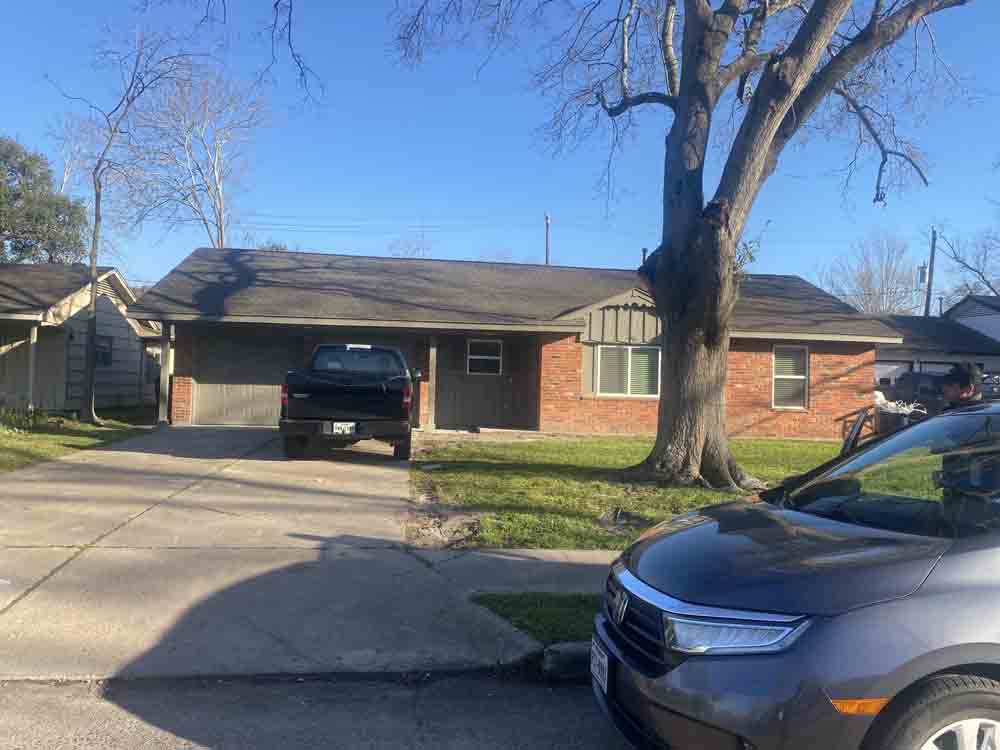
6934 Neff St, Houston, TX 77074
How Blower Doors Work – 6934 Neff St, Houston, TX 77074
Third-party Energy Testing
Your air ducts are one of the most important systems in your home, and if the ducts are poorly sealed or insulated they are likely contributing to higher energy bills.
Blower Doors: What Are They and How Do They Work?
A blower door is a device used in energy testing to measure a building’s airtightness. It consists of a powerful fan mounted on a temporary frame that fits into a doorway or an exterior opening. During a blower door test, the fan creates a pressure difference between the inside and outside of the building. This pressure difference allows air leakage points to become apparent and measurable. The test helps identify areas of air infiltration or exfiltration, which can affect energy efficiency and indoor comfort.
The blower door test involves setting up the device, measuring the baseline pressure, and then either depressurizing or pressurizing the building using the fan. While the fan is running, the airflow rate is measured using instruments like a manometer or pressure gauge. This airflow measurement quantifies the amount of air leakage in the building. Smoke pencils or thermal imaging cameras can be used to locate specific air leakage points.
The blower door test can be conducted in both depressurization and pressurization modes, allowing for a comprehensive assessment of air leakage locations. Once the test is complete, the data is analyzed to determine the building’s airtightness and identify areas that need improvement. The results can be used to guide air sealing measures and improve energy efficiency.
Blower door tests are crucial in identifying air leakage points, reducing energy loss, improving indoor air quality, and enhancing the overall performance and comfort of a building.
Home Inspection Atascocita | Home Ready Inspections | Houston TX
Minimizing Energy Losses in Ducts at 115 S Idaho St, La Porte, TX 77571
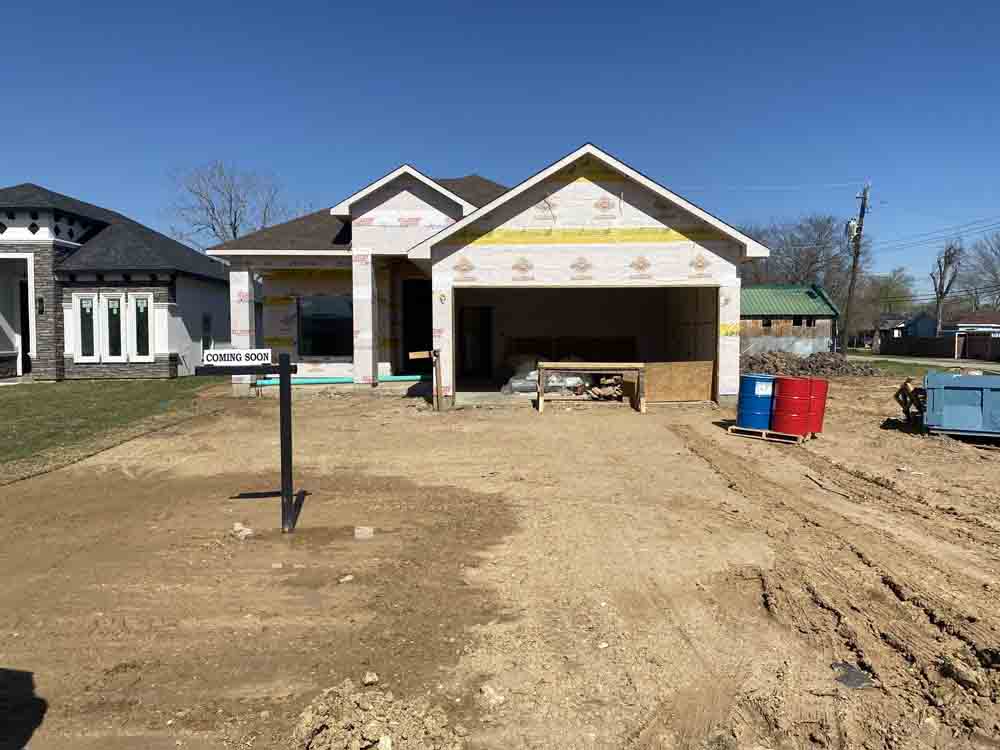
115 S Idaho St, La Porte, TX 77571
Minimizing Energy Losses in Ducts
Minimizing energy losses in ducts by seeing if the ducts are poorly sealed or insulated. That could tell you why your energy bill in high. Your air ducts are one of the most important systems in your home, and if the ducts are poorly sealed or insulated, they are likely contributing to higher energy bills.
Your home’s duct system is a branching network of tubes in the walls, floors, and ceilings; it carries the air from your home’s furnace and central air conditioner to each room. Ducts are made of sheet metal, fiberglass, or other materials.
Ducts that leak heated air into unheated spaces can add hundreds of dollars a year to your heating and cooling bills, but you can reduce that loss by sealing and insulating your ducts. Insulating ducts in unconditioned spaces is usually very cost-effective. Existing ducts may also be blocked or may require simple upgrades.
Designing and Installing New Duct Systems
In new home construction or in retrofits, proper duct system design is critical. In recent years, energy-saving designs have sought to include ducts and heating systems in the conditioned space.
Efficient and well-designed duct systems distribute air properly throughout your home without leaking to keep all rooms at a comfortable temperature. The system should provide balanced supply and return flow to maintain a neutral pressure within the house.
Even well sealed and insulated ducts will leak and lose some heat, so many new energy-efficient homes place the duct system within the conditioned space of the home. The simplest way to accomplish this is to hide the ducts in dropped ceilings and in corners of rooms. Ducts can also be located in a sealed and insulated chase extending into the attic or built into raised floors. In both of these latter cases, care must be taken during construction to prevent contractors from using the duct chases for wiring or other utilities.
In either case, actual ducts must be used — chases and floor cavities should not be used as ducts. Regardless of where they are installed, ducts should be well sealed. Although ducts can be configured in a number of ways, the “trunk and branch” and “radial” supply duct configurations are most suitable for ducts located in conditioned spaces.
Air return duct systems can be configured in two ways: each room can have a return duct that sends air back to the heating and cooling equipment or return grills can be located in central locations on each floor. For the latter case, either grills must be installed to allow air to pass out of closed rooms, or short “jumper ducts” can be installed to connect the vent in one room with the next, allowing air to flow back to the central return grilles. Door undercuts help, but they are usually not sufficient for return airflow.
You can perform a simple check for adequate return air capacity by doing the following:
- Close all exterior doors and windows
- Close all interior room doors
- Turn on the central air handler
- “Crack” interior doors one by one and observe if the door closes or further opens “on its own.” (Whether it closes or opens will depend on the direction of the air handler-driven air flow.) Rooms served by air-moved doors have restricted return air flow and need pressure relief as described above.
Maintaining and Upgrading Existing Duct Systems
Sealing your ducts to prevent leaks is even more important if the ducts are located in an unconditioned area such as an attic or vented crawlspace. If the supply ducts are leaking, heated or cooled air can be forced out of unsealed joints and lost. In addition, unconditioned air can be drawn into return ducts through unsealed joints.
Although minor duct repairs are easy to make, qualified professionals should seal and insulate ducts in unconditioned spaces to ensure the use of appropriate sealing materials.
Aside from sealing your ducts, the simplest and most effective means of maintaining your air distribution system is to ensure that furniture and other objects are not blocking the airflow through your registers, and to vacuum the registers to remove any dust buildup.
Existing duct systems often suffer from design deficiencies in the return air system, and modifications by the homeowner (or just a tendency to keep doors closed) may contribute to these problems. Any rooms with a lack of sufficient return airflow may benefit from relatively simple upgrades, such as the installation of new return-air grilles, undercutting doors for return air, or installing a jumper duct.
Some rooms may also be hard to heat and cool because of inadequate supply ducts or grilles. If this is the case, you should first examine whether the problem is the room itself: fix any problems with insulation, air leakage, or inefficient windows first. If the problem persists, you may be able to increase the size of the supply duct or add an additional duct to provide the needed airflow to the room.
Minor Duct Repair Tips for Minimizing Energy Losses in Ducts
- Check your ducts for air leaks. First, look for sections that should be joined but have separated and then look for obvious holes.
- Duct mastic is the preferred material for sealing ductwork seams and joints. It is more durable than any available tape and generally easier for a do-it-yourself installation. Its only drawback is that it will not bridge gaps over ¼ inch. Such gaps must be first bridged with web-type drywall tape, or a good quality heat approved tape.
- If you use tape to seal your ducts, avoid cloth-backed, rubber adhesive duct tape — it tends to fail quickly. Instead, use mastic, butyl tape, foil tape, or other heat-approved tapes. Look for tape with the Underwriters Laboratories (UL) logo.
- Remember that insulating ducts in the basement will make the basement colder. If both the ducts and the basement walls are not insulated, consider insulating both. Water pipes and drains in unconditioned spaces could freeze and burst if the heat ducts are fully insulated because there would be no heat source to prevent the space from freezing in cold weather. However, using an electric heating tape wrap on the pipes can prevent this. Check with a professional contractor.
- Hire a professional to install both supply and return registers in the basement rooms after converting your basement to a living area.
- Be sure a well-sealed vapor barrier exists on the outside of the insulation on cooling ducts to prevent moisture condensation.
- If you have a fuel-burning furnace, stove, or other appliance or an attached garage, install a carbon monoxide (CO) monitor to alert you to harmful CO levels.
- Be sure to get professional help when doing ductwork. A qualified professional should always perform changes and repairs to a duct system.
18318 Shaman Rd, Galveston, TX 77554 – Losses in Ducts

18318 Shaman Rd, Galveston, TX 77554
18318 Shaman Rd, Galveston, TX 77554 – Losses in Ducts
Minimizing energy losses in ducts is an important aspect of energy efficiency in HVAC (Heating, Ventilation, and Air Conditioning) systems. Ducts are used to distribute conditioned air throughout a building, and any energy losses during the distribution process can lead to increased energy consumption and reduced system performance. Here are some key measures to minimize energy losses in ducts:
1. Proper Duct Design: Ensure that ductwork is properly designed to minimize pressure losses. Use appropriately sized ducts, minimize the number of bends and transitions, and maintain a balanced airflow distribution. Consult industry guidelines or work with an HVAC professional to design an efficient duct system.
2. Sealing: Duct leakage is a major source of energy losses. Seal all joints, connections, and seams in the ductwork using approved sealing materials such as mastic or metal tape. Pay particular attention to connections at registers, grilles, and air-handling units.
3. Insulation: Insulate ducts that run through unconditioned spaces, such as attics, crawlspaces, or basements. Insulation helps to prevent heat transfer between the ductwork and the surrounding environment, reducing energy losses and improving system efficiency.
4. Duct Material: Consider using insulated ducts with low thermal conductivity. Insulated ducts minimize heat transfer through the duct walls, helping to maintain the desired temperature of the conditioned air as it travels through the system.
5. Avoiding Overlong Duct Runs: Minimize the length of duct runs as much as possible. Longer ducts result in increased friction losses, which can reduce airflow and energy efficiency. Optimize the layout and location of HVAC equipment to keep duct runs as short and direct as feasible.
6. Balancing and Adjusting Dampers: Balancing the airflow within the duct system ensures that each room receives the appropriate amount of conditioned air. Adjust dampers at branch points and in individual ducts to balance the airflow and avoid over-pressurizing or under-pressurizing certain areas.
7. Regular Maintenance: Conduct regular inspections of the ductwork to check for leaks, obstructions, or damage. Clean the ducts periodically to remove dust, debris, or any substances that could impede airflow.
8. Air Filters: Install high-quality air filters and regularly replace them according to the manufacturer’s recommendations. Clean air filters help maintain optimal airflow, reducing pressure drops and energy losses.
By implementing these measures, you can significantly minimize energy losses in ducts, improve the overall efficiency of your HVAC system, and reduce energy consumption. Consulting with a professional HVAC contractor or engineer can provide valuable insights specific to your building’s requirements and help optimize energy efficiency.
https://homereadyinspections.com/builders-hvac/
How Blower Doors Work – 10 Gulf Ln, Galveston, TX 77550
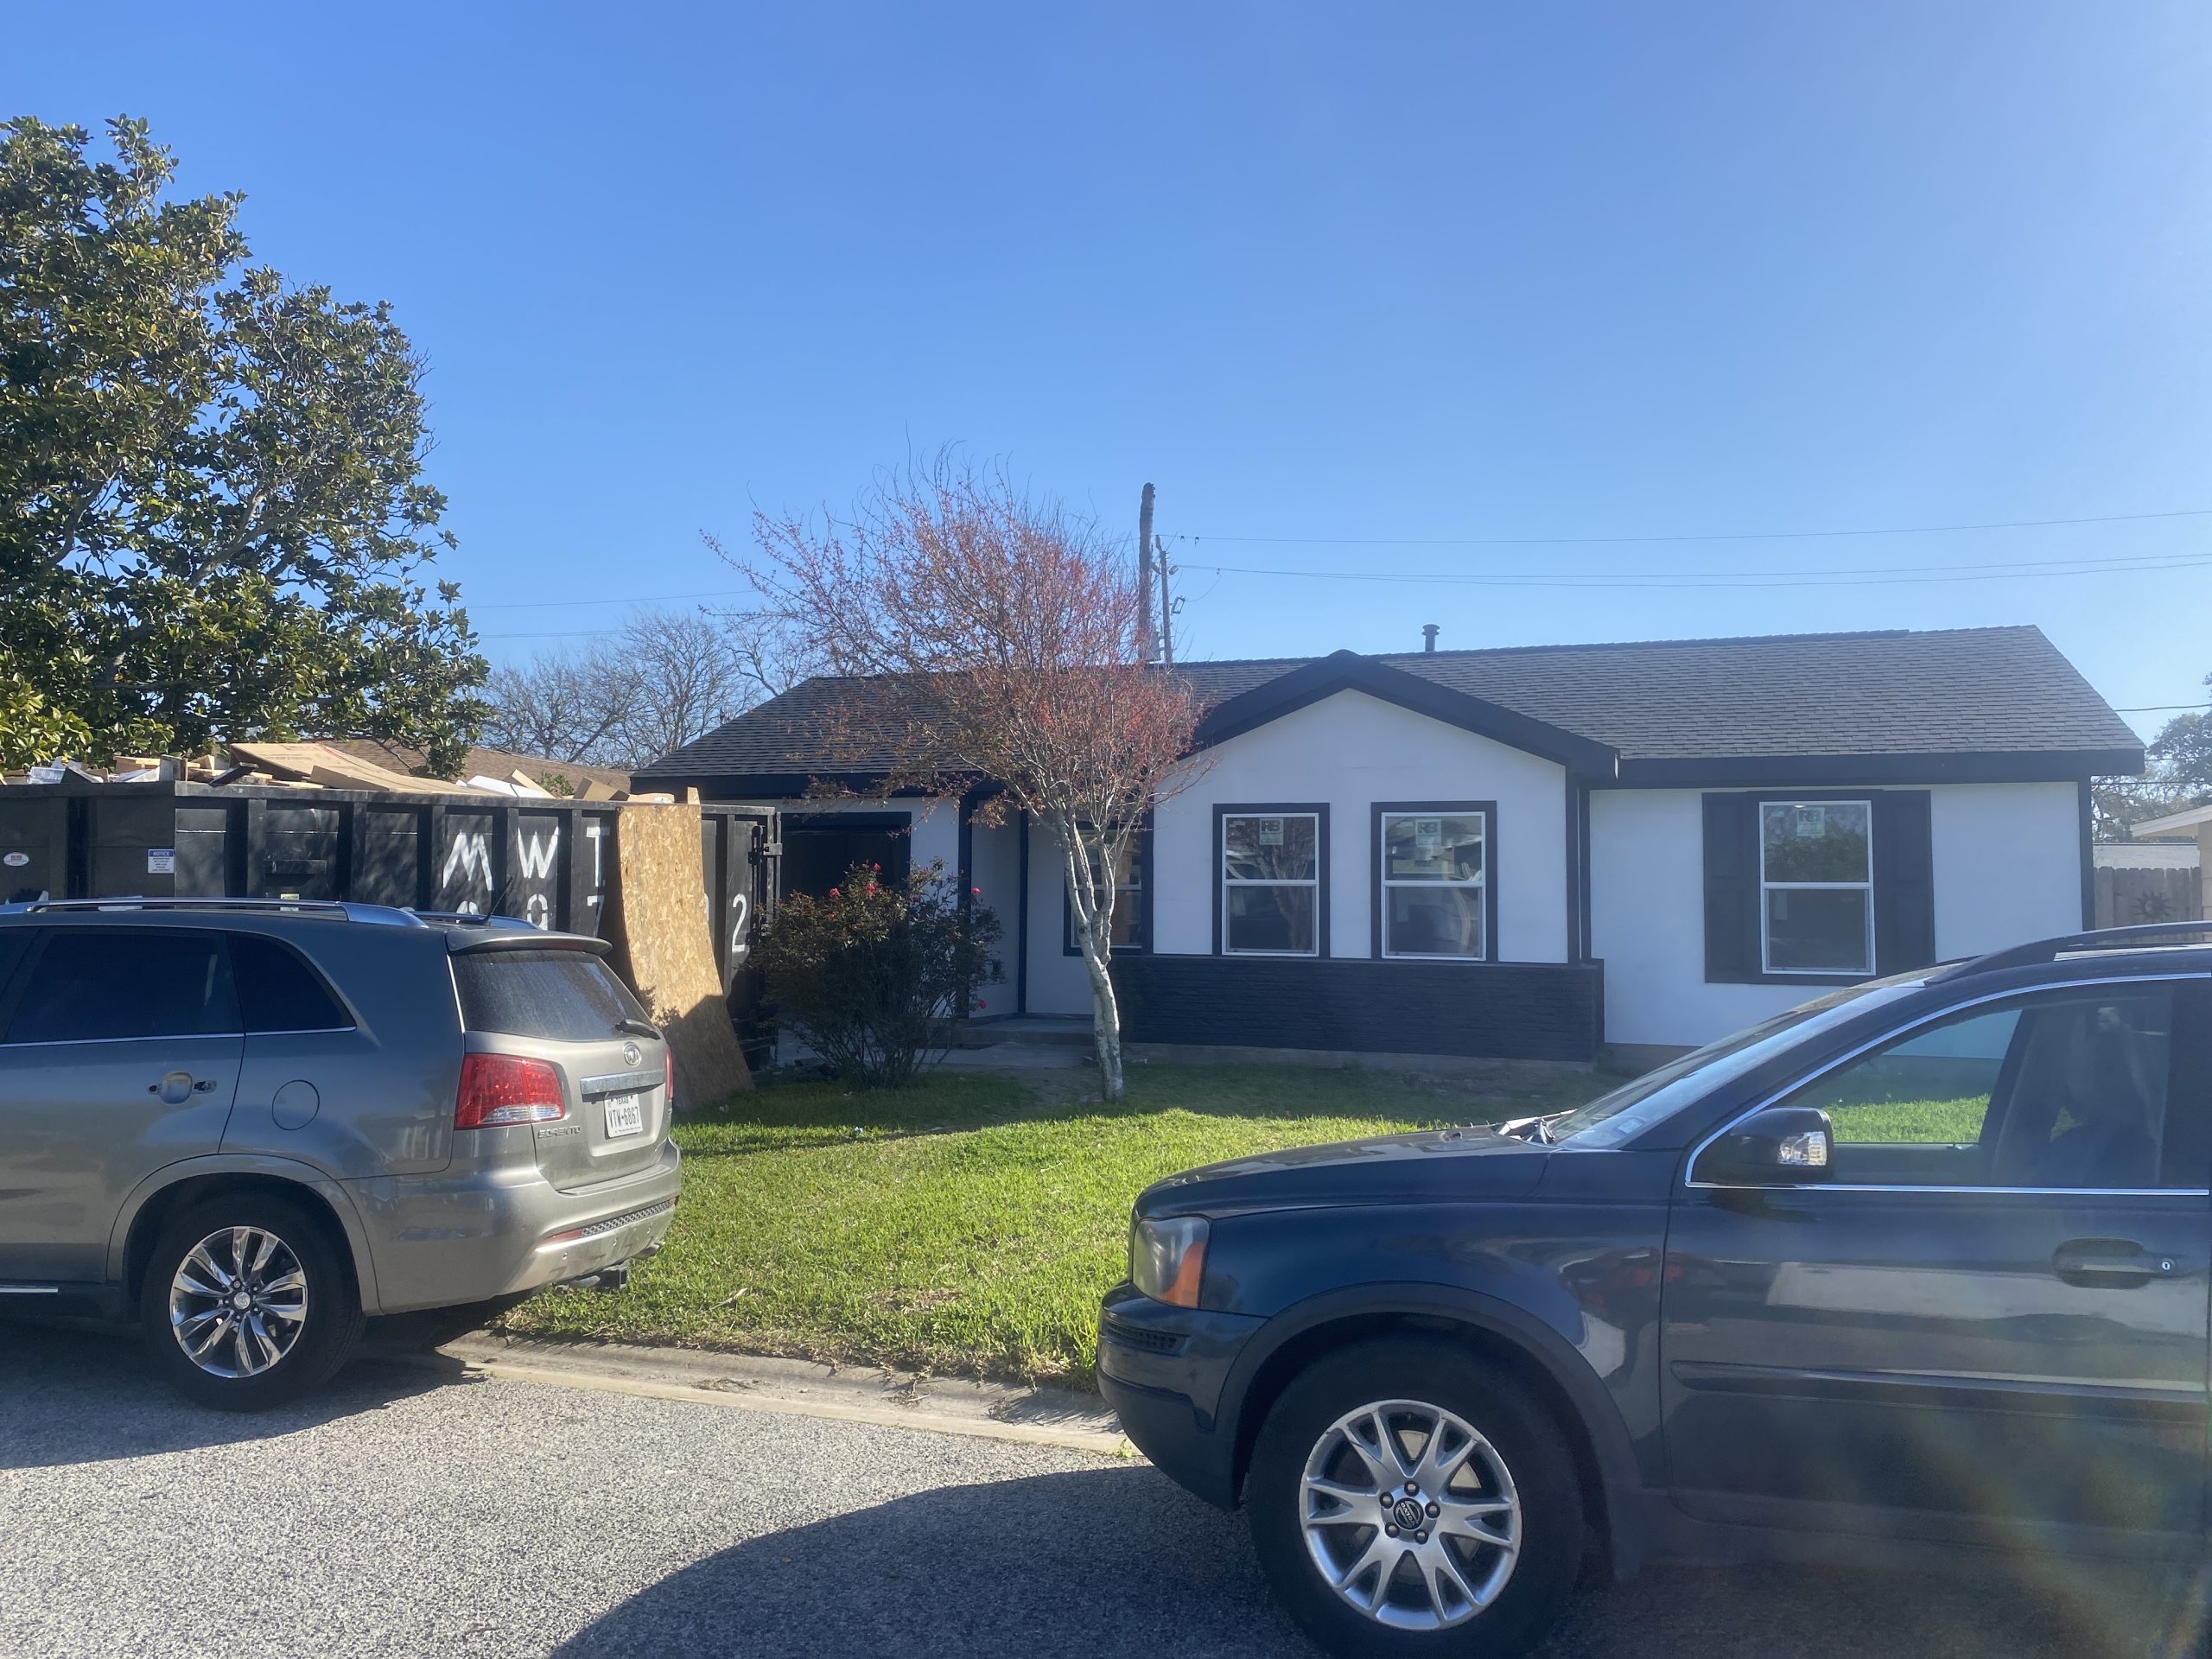
10 Gulf Ln, Galveston, TX 77550
How Blower Doors Work – 10 Gulf Ln, Galveston, TX 77550
Third-party Energy Testing
Your air ducts are one of the most important systems in your home, and if the ducts are poorly sealed or insulated they are likely contributing to higher energy bills.
Blower Doors: What Are They and How Do They Work?
A blower door is a device used in energy testing to measure a building’s airtightness. It consists of a powerful fan mounted on a temporary frame that fits into a doorway or an exterior opening. During a blower door test, the fan creates a pressure difference between the inside and outside of the building. This pressure difference allows air leakage points to become apparent and measurable. The test helps identify areas of air infiltration or exfiltration, which can affect energy efficiency and indoor comfort.
The blower door test involves setting up the device, measuring the baseline pressure, and then either depressurizing or pressurizing the building using the fan. While the fan is running, the airflow rate is measured using instruments like a manometer or pressure gauge. This airflow measurement quantifies the amount of air leakage in the building. Smoke pencils or thermal imaging cameras can be used to locate specific air leakage points.
The blower door test can be conducted in both depressurization and pressurization modes, allowing for a comprehensive assessment of air leakage locations. Once the test is complete, the data is analyzed to determine the building’s airtightness and identify areas that need improvement. The results can be used to guide air sealing measures and improve energy efficiency.
Blower door tests are crucial in identifying air leakage points, reducing energy loss, improving indoor air quality, and enhancing the overall performance and comfort of a building.
Home Inspection Atascocita | Home Ready Inspections | Houston TX
Minimizing Energy Losses in Ducts at 216 W 31st St, Houston, TX 77018

216 W 31st St, Houston, TX 77018
Minimizing Energy Losses in Ducts
Minimizing energy losses in ducts by seeing if the ducts are poorly sealed or insulated. That could tell you why your energy bill in high. Your air ducts are one of the most important systems in your home, and if the ducts are poorly sealed or insulated, they are likely contributing to higher energy bills.
Your home’s duct system is a branching network of tubes in the walls, floors, and ceilings; it carries the air from your home’s furnace and central air conditioner to each room. Ducts are made of sheet metal, fiberglass, or other materials.
Ducts that leak heated air into unheated spaces can add hundreds of dollars a year to your heating and cooling bills, but you can reduce that loss by sealing and insulating your ducts. Insulating ducts in unconditioned spaces is usually very cost-effective. Existing ducts may also be blocked or may require simple upgrades.
Designing and Installing New Duct Systems
In new home construction or in retrofits, proper duct system design is critical. In recent years, energy-saving designs have sought to include ducts and heating systems in the conditioned space.
Efficient and well-designed duct systems distribute air properly throughout your home without leaking to keep all rooms at a comfortable temperature. The system should provide balanced supply and return flow to maintain a neutral pressure within the house.
Even well sealed and insulated ducts will leak and lose some heat, so many new energy-efficient homes place the duct system within the conditioned space of the home. The simplest way to accomplish this is to hide the ducts in dropped ceilings and in corners of rooms. Ducts can also be located in a sealed and insulated chase extending into the attic or built into raised floors. In both of these latter cases, care must be taken during construction to prevent contractors from using the duct chases for wiring or other utilities.
In either case, actual ducts must be used — chases and floor cavities should not be used as ducts. Regardless of where they are installed, ducts should be well sealed. Although ducts can be configured in a number of ways, the “trunk and branch” and “radial” supply duct configurations are most suitable for ducts located in conditioned spaces.
Air return duct systems can be configured in two ways: each room can have a return duct that sends air back to the heating and cooling equipment or return grills can be located in central locations on each floor. For the latter case, either grills must be installed to allow air to pass out of closed rooms, or short “jumper ducts” can be installed to connect the vent in one room with the next, allowing air to flow back to the central return grilles. Door undercuts help, but they are usually not sufficient for return airflow.
You can perform a simple check for adequate return air capacity by doing the following:
- Close all exterior doors and windows
- Close all interior room doors
- Turn on the central air handler
- “Crack” interior doors one by one and observe if the door closes or further opens “on its own.” (Whether it closes or opens will depend on the direction of the air handler-driven air flow.) Rooms served by air-moved doors have restricted return air flow and need pressure relief as described above.
Maintaining and Upgrading Existing Duct Systems
Sealing your ducts to prevent leaks is even more important if the ducts are located in an unconditioned area such as an attic or vented crawlspace. If the supply ducts are leaking, heated or cooled air can be forced out of unsealed joints and lost. In addition, unconditioned air can be drawn into return ducts through unsealed joints.
Although minor duct repairs are easy to make, qualified professionals should seal and insulate ducts in unconditioned spaces to ensure the use of appropriate sealing materials.
Aside from sealing your ducts, the simplest and most effective means of maintaining your air distribution system is to ensure that furniture and other objects are not blocking the airflow through your registers, and to vacuum the registers to remove any dust buildup.
Existing duct systems often suffer from design deficiencies in the return air system, and modifications by the homeowner (or just a tendency to keep doors closed) may contribute to these problems. Any rooms with a lack of sufficient return airflow may benefit from relatively simple upgrades, such as the installation of new return-air grilles, undercutting doors for return air, or installing a jumper duct.
Some rooms may also be hard to heat and cool because of inadequate supply ducts or grilles. If this is the case, you should first examine whether the problem is the room itself: fix any problems with insulation, air leakage, or inefficient windows first. If the problem persists, you may be able to increase the size of the supply duct or add an additional duct to provide the needed airflow to the room.
Minor Duct Repair Tips for Minimizing Energy Losses in Ducts
- Check your ducts for air leaks. First, look for sections that should be joined but have separated and then look for obvious holes.
- Duct mastic is the preferred material for sealing ductwork seams and joints. It is more durable than any available tape and generally easier for a do-it-yourself installation. Its only drawback is that it will not bridge gaps over ¼ inch. Such gaps must be first bridged with web-type drywall tape, or a good quality heat approved tape.
- If you use tape to seal your ducts, avoid cloth-backed, rubber adhesive duct tape — it tends to fail quickly. Instead, use mastic, butyl tape, foil tape, or other heat-approved tapes. Look for tape with the Underwriters Laboratories (UL) logo.
- Remember that insulating ducts in the basement will make the basement colder. If both the ducts and the basement walls are not insulated, consider insulating both. Water pipes and drains in unconditioned spaces could freeze and burst if the heat ducts are fully insulated because there would be no heat source to prevent the space from freezing in cold weather. However, using an electric heating tape wrap on the pipes can prevent this. Check with a professional contractor.
- Hire a professional to install both supply and return registers in the basement rooms after converting your basement to a living area.
- Be sure a well-sealed vapor barrier exists on the outside of the insulation on cooling ducts to prevent moisture condensation.
- If you have a fuel-burning furnace, stove, or other appliance or an attached garage, install a carbon monoxide (CO) monitor to alert you to harmful CO levels.
- Be sure to get professional help when doing ductwork. A qualified professional should always perform changes and repairs to a duct system.
2021 IECC Insulation Inspection in the city of Houston, TX 77020
2021 IECC Insulation Inspection
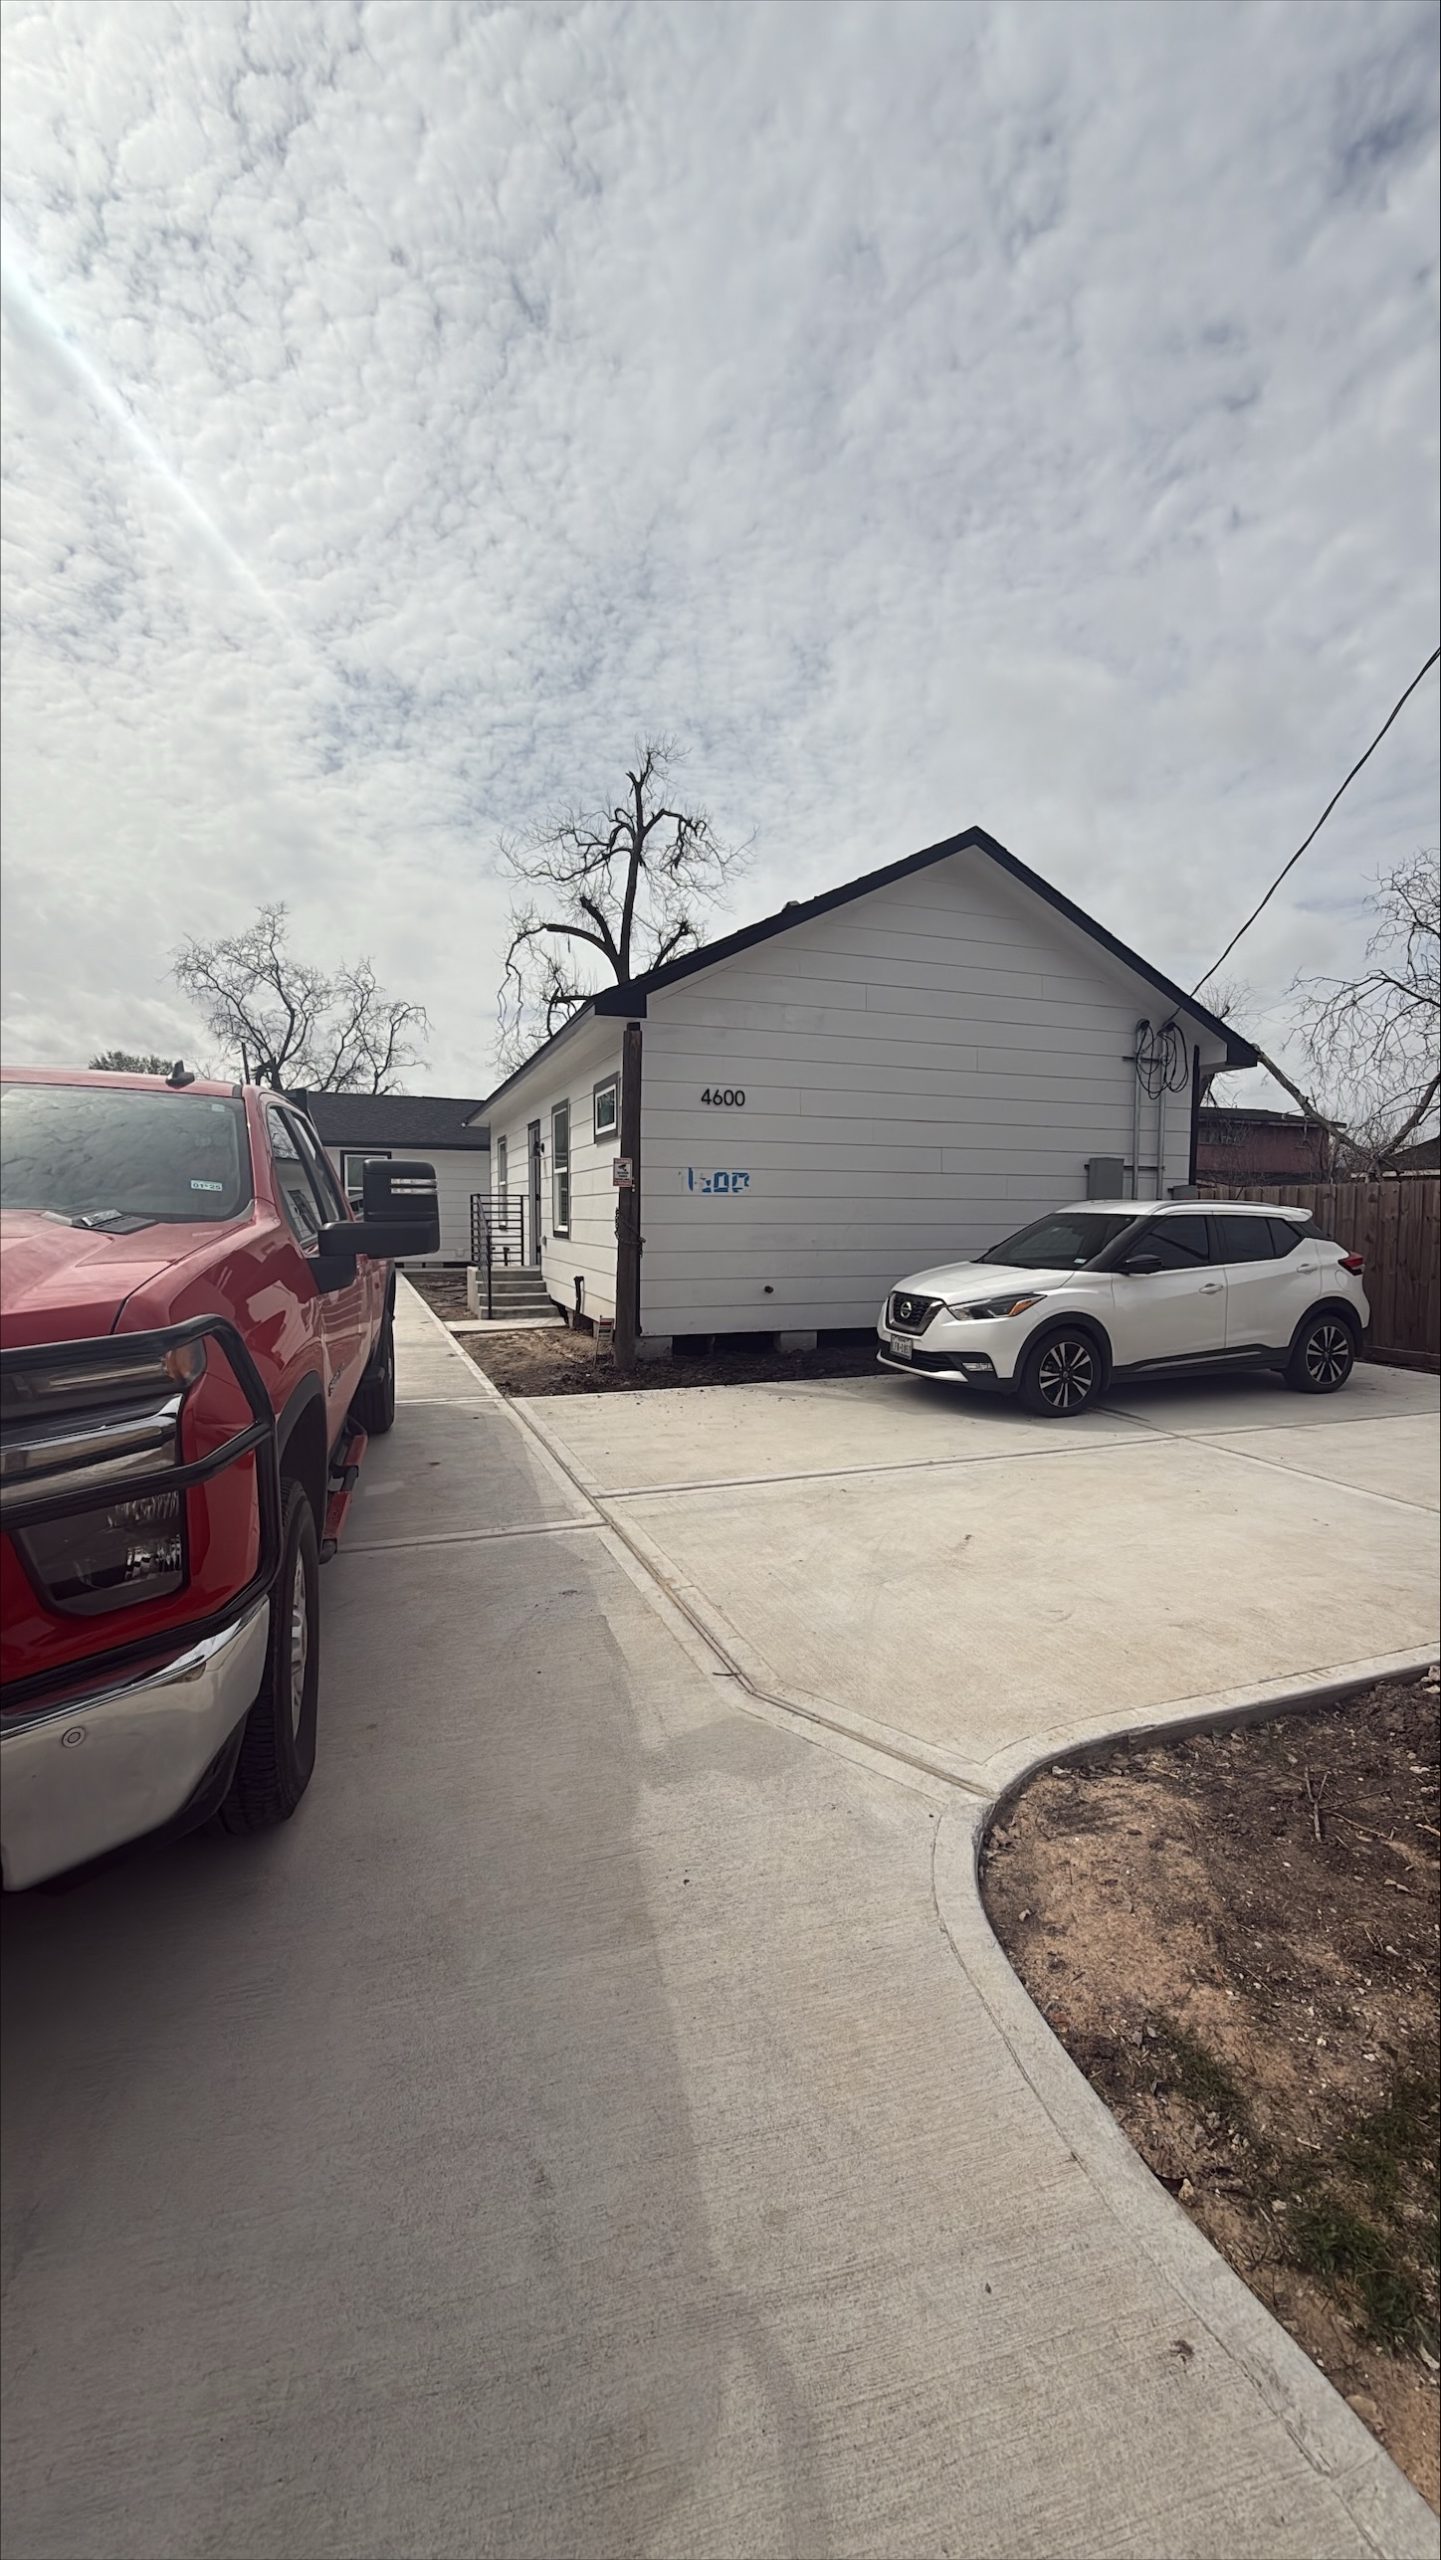
4600 Vernon St, Houston, TX 77020
A 2021 IECC insulation inspection is a thorough assessment of insulation materials and their installation within a building or structure. The primary purpose of this inspection is to ensure that insulation is installed correctly, effectively, and in compliance with relevant building codes and standards. Here’s a more detailed overview:
Purpose of the 2021 IECC Insulation Inspection
- Energy Efficiency Verification:
- An insulation inspection helps confirm that the insulation is performing as intended. Proper insulation reduces heat transfer, contributing to energy savings and lower utility bills.
- Quality Assurance:
- Inspectors assess the quality of the insulation materials used, ensuring they meet specifications and are suitable for the specific application. This includes checking for damage, degradation, or improper installation that could compromise performance.
- Compliance with Codes and Standards:
- Building codes often specify minimum insulation levels and installation practices. An inspection verifies compliance with these regulations, which is crucial for safety and energy efficiency.
- Identification of Issues:
- The inspection can reveal problems such as gaps, voids, or compression in insulation that might hinder its effectiveness. Identifying these issues early can prevent future problems, such as higher energy costs or mold growth due to moisture accumulation.
- Moisture and Air Leakage Assessment:
- Inspections often include evaluations for air leaks and moisture issues. Proper insulation must be complemented by effective air sealing and moisture management to optimize performance and protect the building structure.
- Enhanced Comfort:
- By ensuring that insulation is installed correctly, inspectors contribute to improved thermal comfort for occupants, reducing drafts and temperature fluctuations within the space.
- Health and Safety Considerations:
- Certain insulation materials can pose health risks if not handled or installed correctly. Inspections help ensure that materials like fiberglass or spray foam are used safely and in accordance with health guidelines.
Components of an Insulation Inspection
- Visual Assessment: Inspectors visually evaluate accessible areas for visible signs of insulation integrity, including coverage, material condition, and installation quality.
- Measurement: Inspectors may measure insulation thickness and density to ensure it meets the specified R-values (thermal resistance).
- Thermal Imaging: Some inspectors use infrared cameras to identify heat loss areas, helping pinpoint insufficient insulation or air leaks.
- Moisture Testing: Tools may be employed to assess moisture levels within insulation materials, identifying potential risks of mold or decay.
Overall, insulation inspections are essential for ensuring the effectiveness, safety, and longevity of insulation systems in buildings. By identifying and addressing issues early, these inspections help optimize energy performance and enhance the overall comfort and safety of indoor environments.
Troubleshooting an HVAC System – 1173 W 19th St, Houston, TX 77008
Troubleshooting an HVAC System – How a Blower Door and Duct Test Can Help
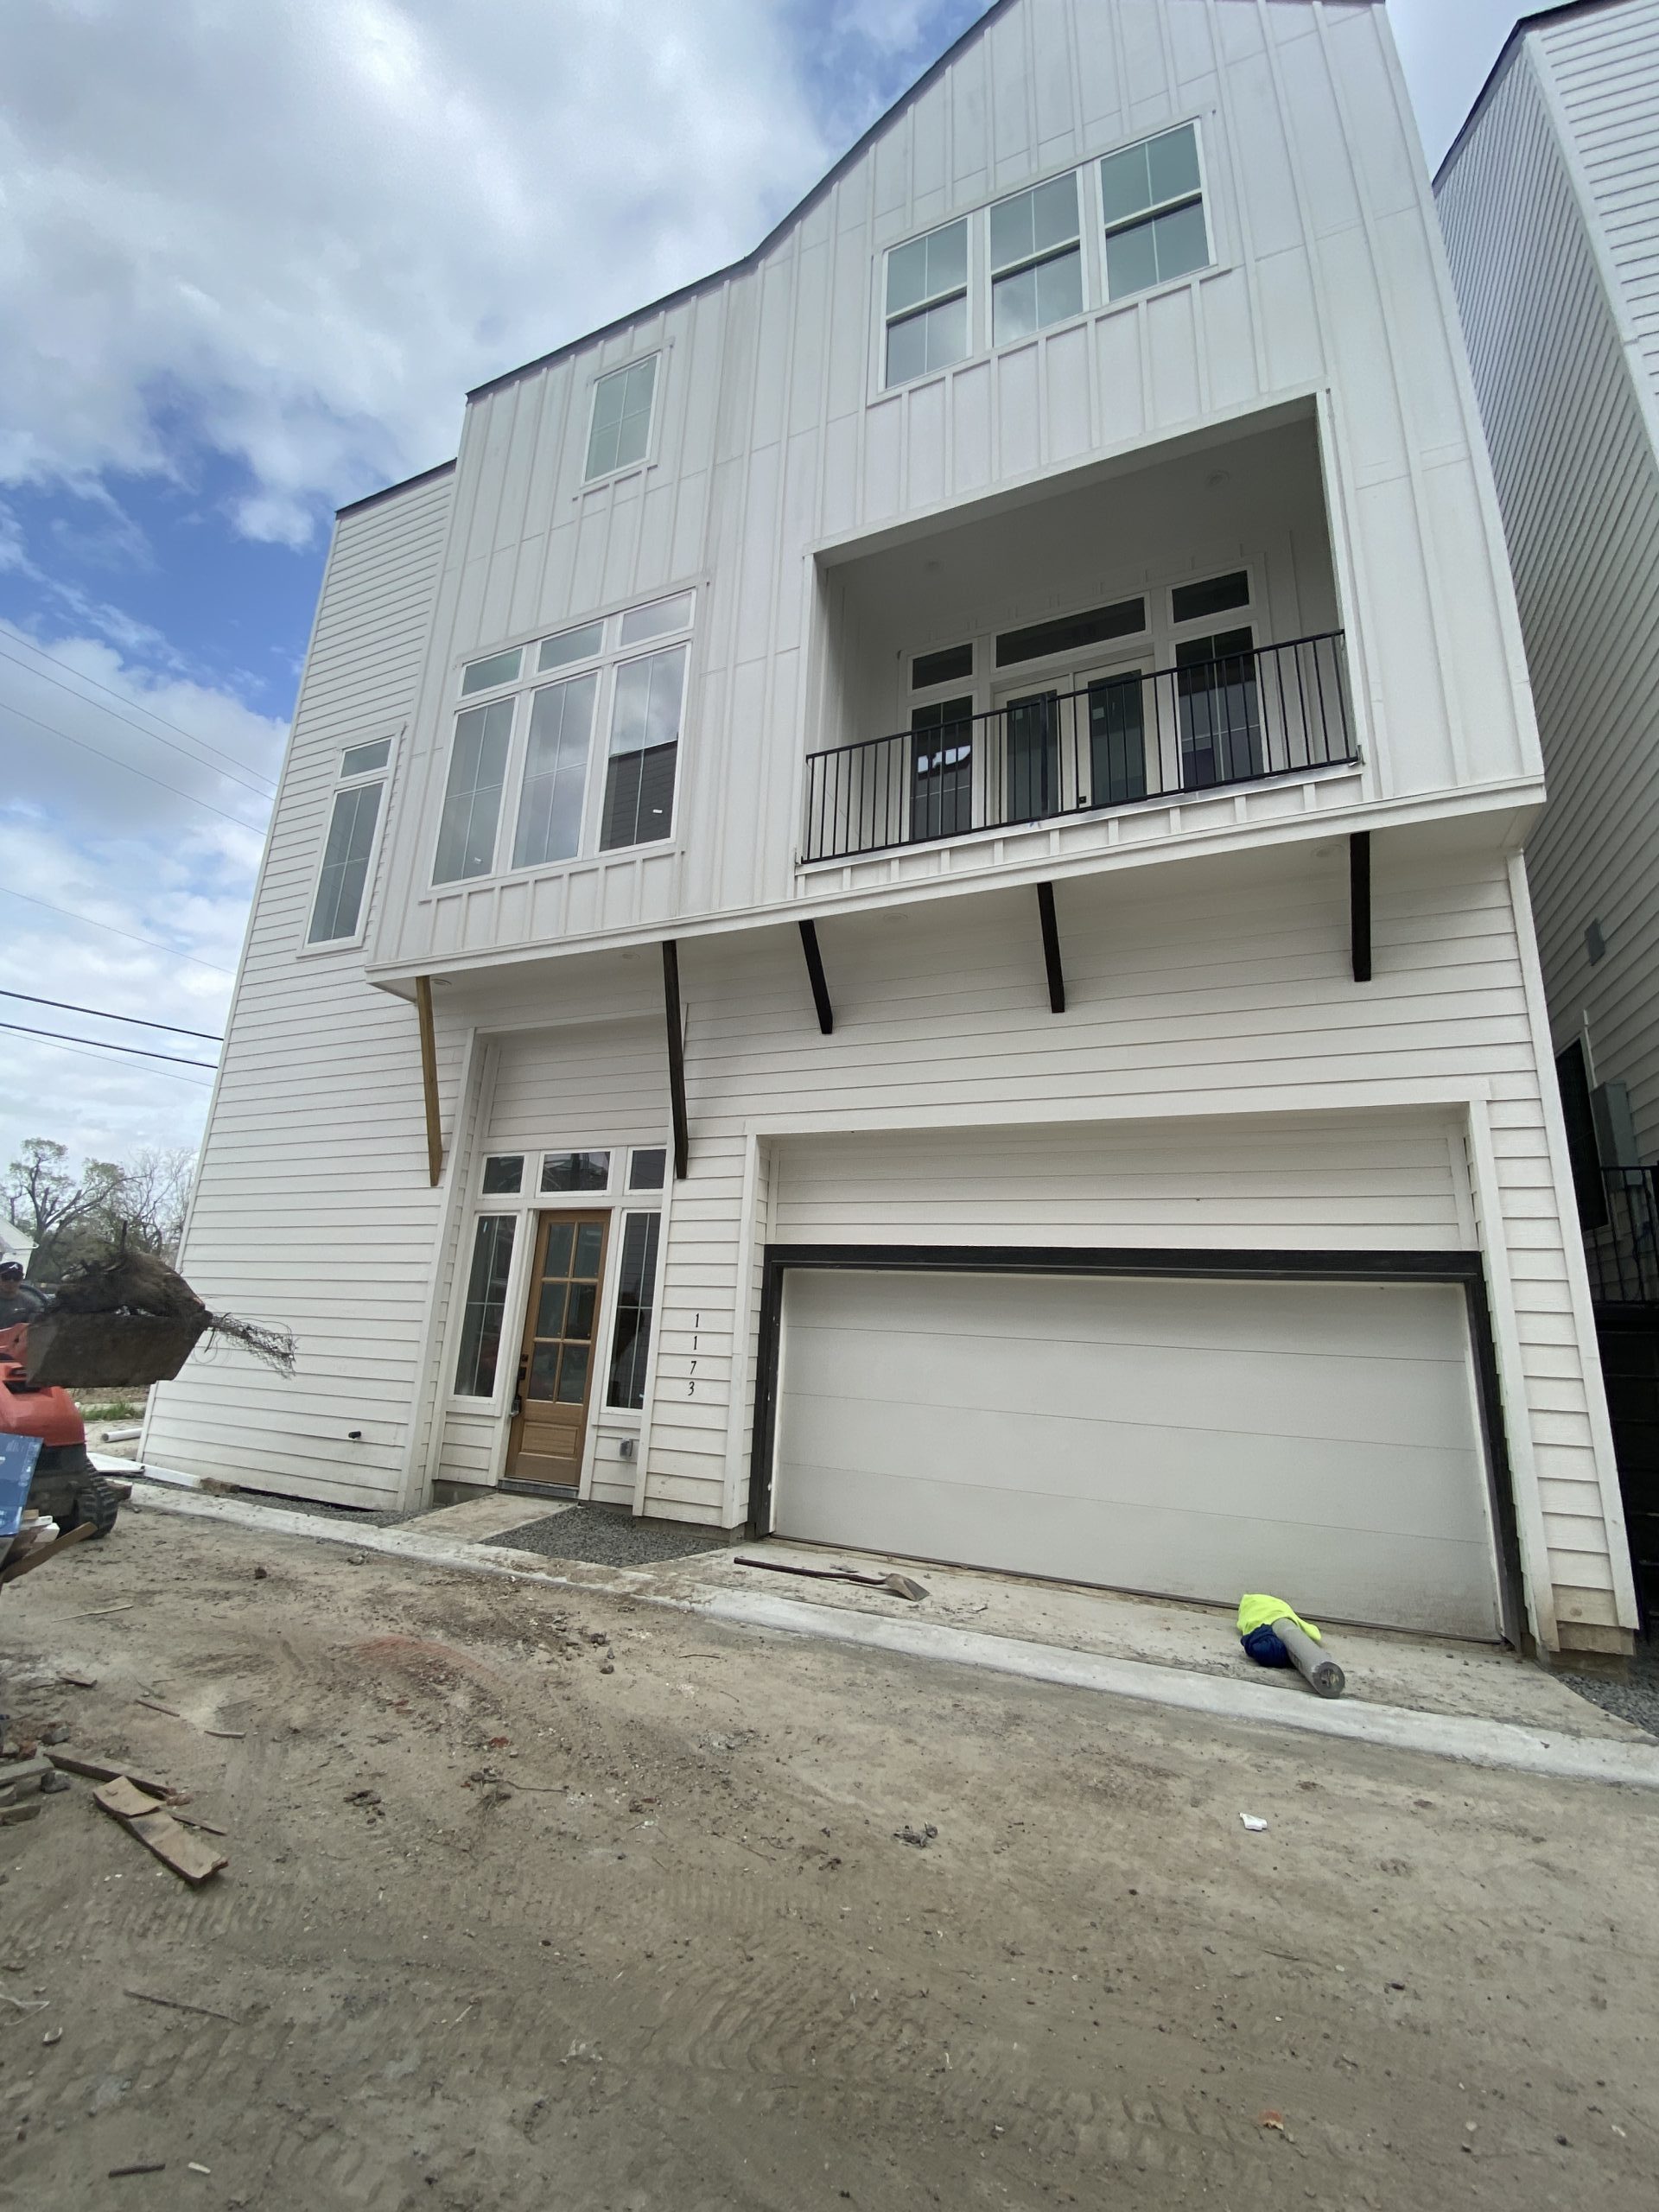
1173 W 19th St, Houston, TX 77008
Troubleshooting an HVAC System – 1173 W 19th St, Houston, TX 77008
If you’re grappling with HVAC issues in your home—whether it’s inconsistent temperatures, high energy bills, or poor air quality—consider turning to two powerful diagnostic tools: the blower door test and the duct test. These tests can provide crucial insights into what’s going wrong and guide you towards effective solutions. Here’s a closer look at how each test works and how they can aid in troubleshooting your HVAC system.
What is a Blower Door Test?
A blower door test is a diagnostic tool used to measure the airtightness of a building. During the test, a powerful fan is mounted into an exterior door frame, and the home is pressurized or depressurized to identify leaks and assess how much air is escaping or entering the building. This test helps pinpoint areas where your home may be losing or gaining air, which directly impacts the efficiency of your HVAC system.
How It Helps Troubleshoot HVAC Issues:
Identifying Air Leaks: The blower door test reveals air leaks around windows, doors, walls, and ceilings. Leaks can cause your HVAC system to work harder than necessary, leading to higher energy bills and inconsistent indoor temperatures. By sealing these leaks, you can improve system efficiency and comfort.
Improving Insulation: If your home has inadequate insulation, the blower door test can help identify these gaps. Proper insulation ensures that the conditioned air from your HVAC system stays inside, reducing the workload on your system and improving energy efficiency.
Enhancing Comfort: Air leaks can lead to uneven temperatures and drafts. By fixing the identified leaks, you can achieve more consistent temperatures throughout your home, enhancing overall comfort.
What is a Duct Test?
A duct test evaluates the efficiency and integrity of your ductwork system. During this test, a special device measures the amount of air leaking from the ducts and assesses their overall performance. This is crucial because leaks and inefficiencies in the duct system can significantly impact HVAC performance.
How It Helps Troubleshoot HVAC Issues:
Locating Leaks: Duct leaks can cause a significant loss of conditioned air, which means your HVAC system has to work harder to maintain the desired temperature. A duct test helps pinpoint these leaks so they can be repaired, improving the overall efficiency of your system.
Assessing Duct Insulation: Proper insulation of ductwork is essential for maintaining temperature control and energy efficiency. A duct test can reveal areas where insulation is missing or inadequate, allowing you to address these issues and prevent energy loss.
Optimizing Airflow: Ductwork that is improperly sized, blocked, or poorly designed can restrict airflow and reduce the efficiency of your HVAC system. A duct test can identify airflow issues and help you make necessary adjustments to ensure that air is distributed evenly throughout your home.
Combining Both Tests for Comprehensive Troubleshooting
When troubleshooting an HVAC system, combining both the blower door test and the duct test can provide a comprehensive picture of your home’s performance. Here’s how they work together:
Holistic View: The blower door test identifies general air leakage in the building envelope, while the duct test focuses specifically on the ductwork. Together, they offer a complete view of where energy loss is occurring.
Targeted Solutions: By understanding both the building envelope and duct system’s performance, you can implement targeted solutions. For example, sealing air leaks and repairing duct leaks can lead to significant improvements in HVAC efficiency and comfort.
Cost Savings: Addressing the issues identified by these tests can lead to substantial cost savings on energy bills. A well-sealed home with efficient ductwork allows your HVAC system to operate more effectively, reducing the need for frequent repairs and extending the life of your equipment.
If you’re facing HVAC challenges, a blower door test and a duct test can be invaluable tools in diagnosing and solving the problem. By identifying air leaks, improving insulation, and optimizing ductwork, these tests can help enhance your home’s energy efficiency, comfort, and overall HVAC performance. For the best results, consider working with a professional who can accurately perform these tests and recommend effective solutions tailored to your home’s specific needs.
Taking these steps not only improves your HVAC system’s efficiency but also contributes to a more comfortable and energy-efficient living environment.
Visit our site https://homereadyinspections.com/
Minimizing Energy Losses in Ducts at 2206 Mansfield St, Houston, TX 77091
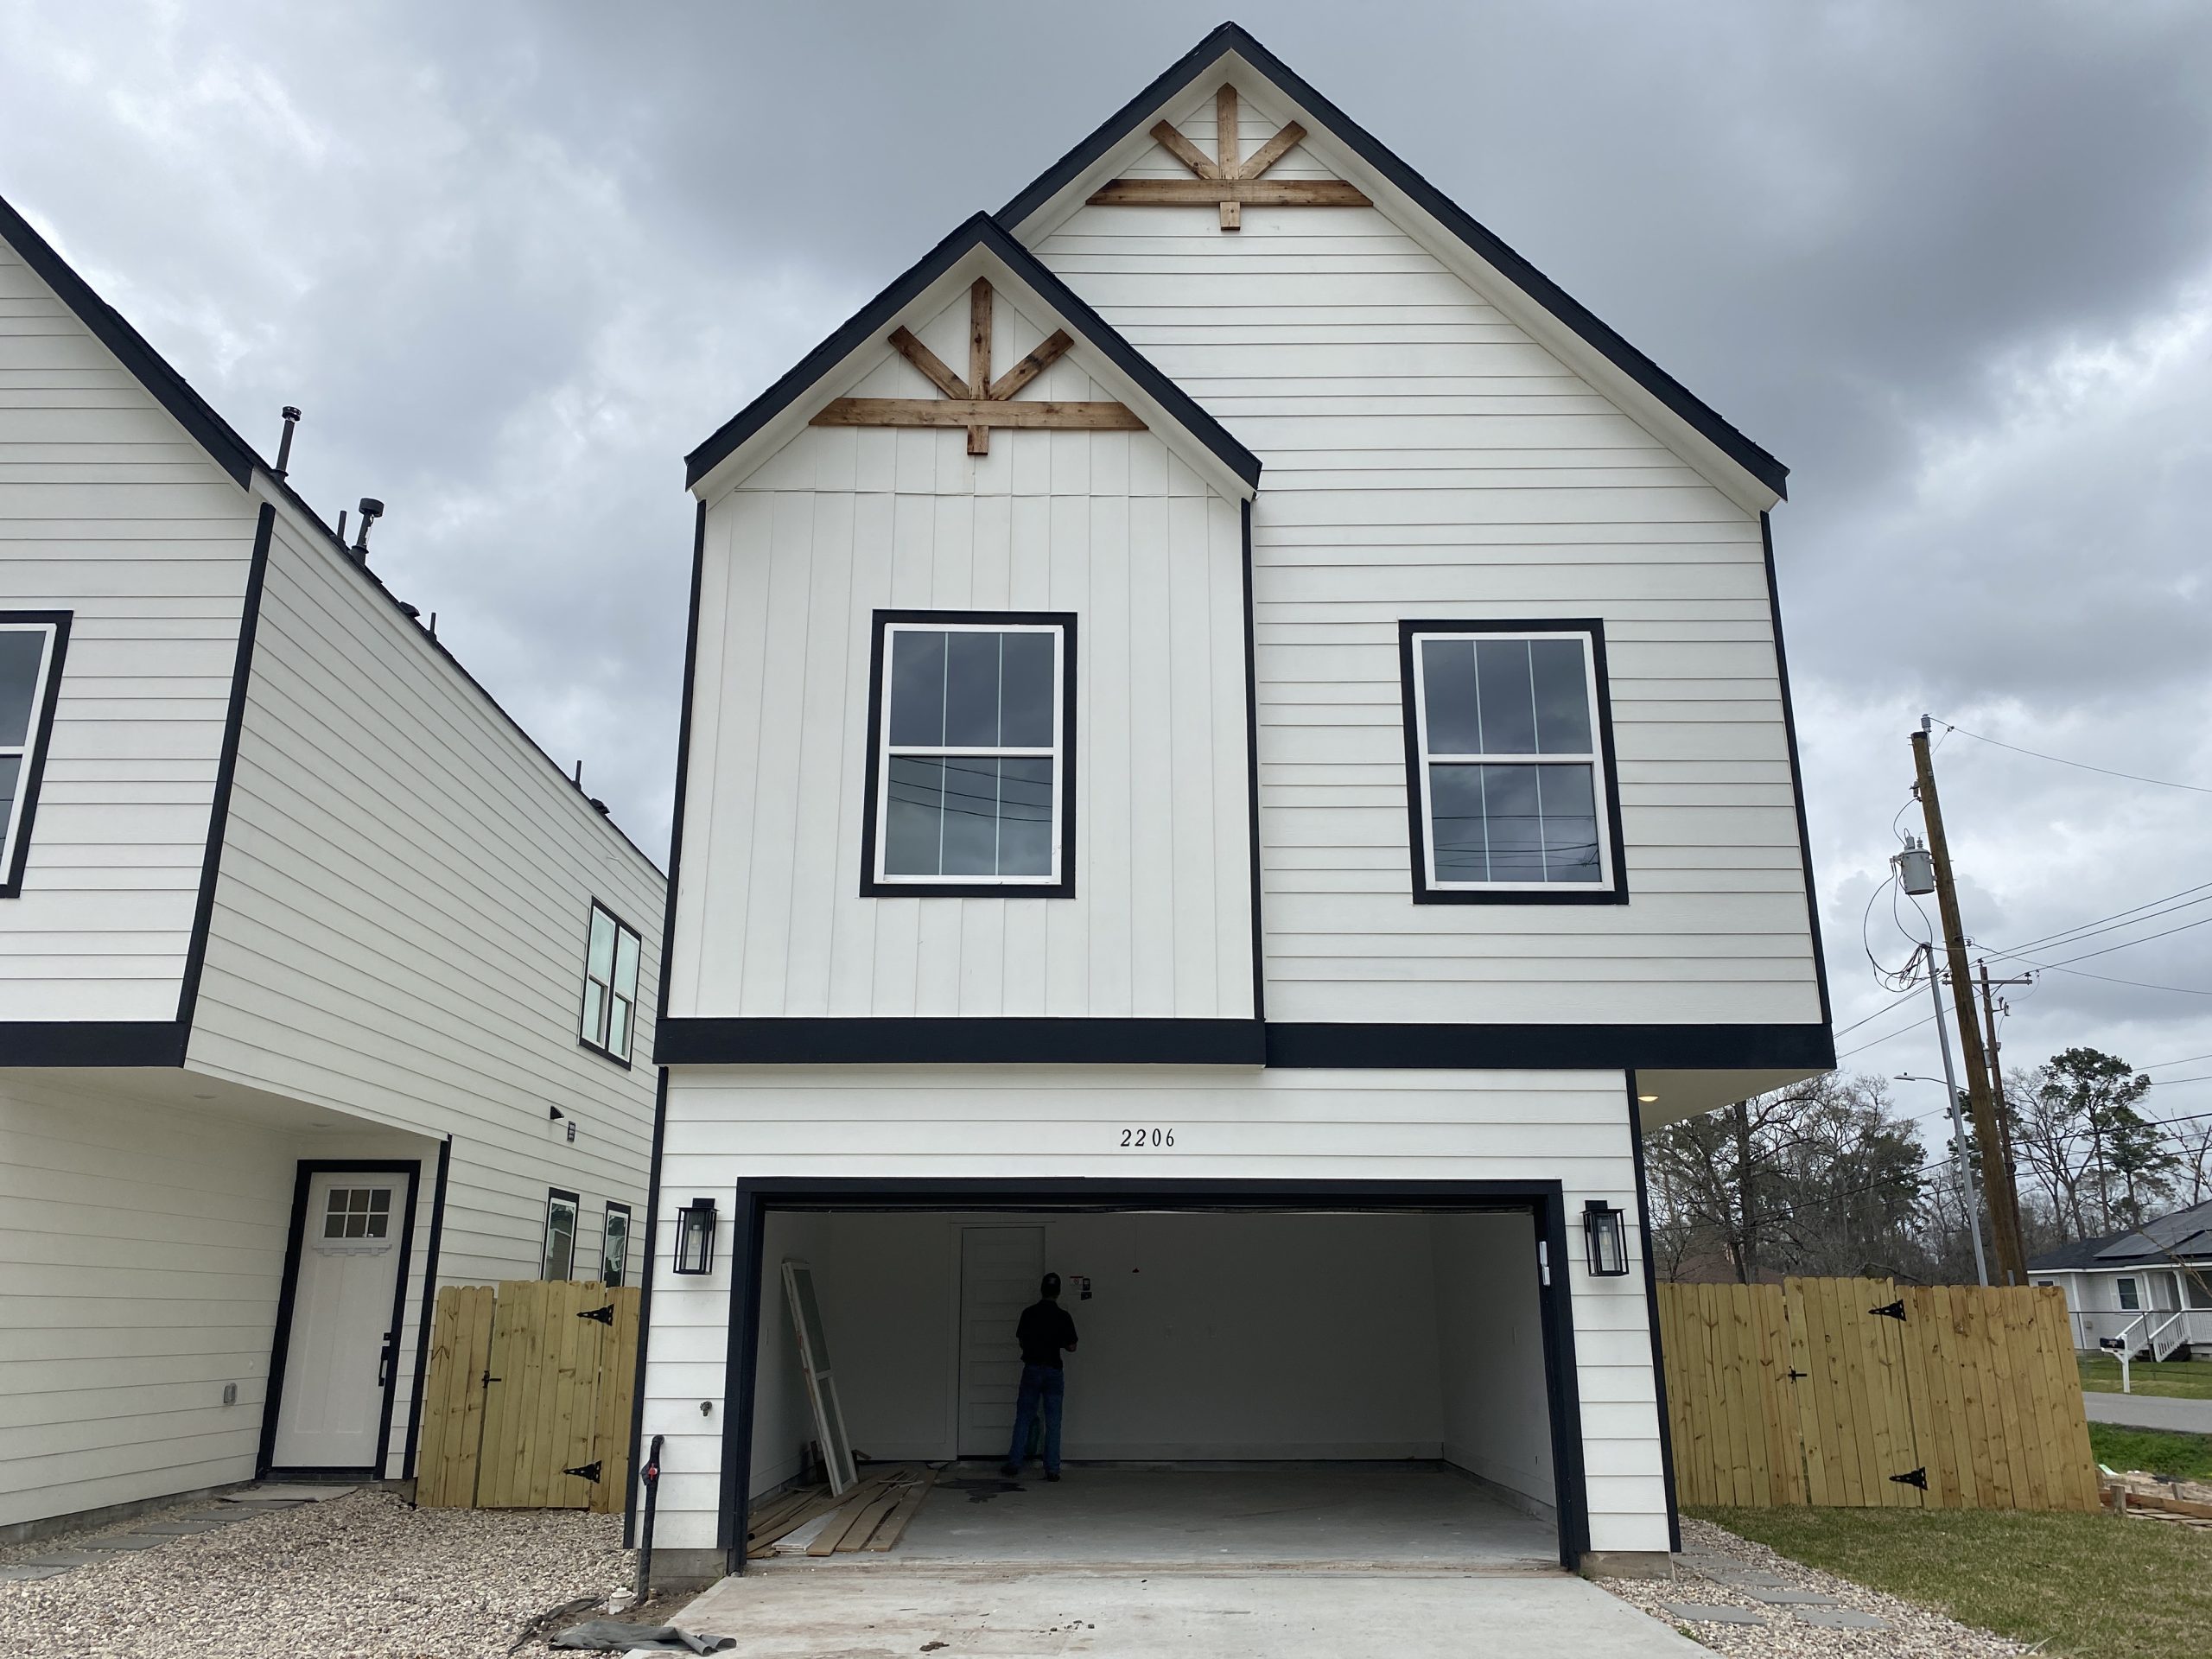
2206 Mansfield St, Houston, TX 77091
Minimizing Energy Losses in Ducts
Minimizing energy losses in ducts by seeing if the ducts are poorly sealed or insulated. That could tell you why your energy bill in high. Your air ducts are one of the most important systems in your home, and if the ducts are poorly sealed or insulated, they are likely contributing to higher energy bills.
Your home’s duct system is a branching network of tubes in the walls, floors, and ceilings; it carries the air from your home’s furnace and central air conditioner to each room. Ducts are made of sheet metal, fiberglass, or other materials.
Ducts that leak heated air into unheated spaces can add hundreds of dollars a year to your heating and cooling bills, but you can reduce that loss by sealing and insulating your ducts. Insulating ducts in unconditioned spaces is usually very cost-effective. Existing ducts may also be blocked or may require simple upgrades.
Designing and Installing New Duct Systems
In new home construction or in retrofits, proper duct system design is critical. In recent years, energy-saving designs have sought to include ducts and heating systems in the conditioned space.
Efficient and well-designed duct systems distribute air properly throughout your home without leaking to keep all rooms at a comfortable temperature. The system should provide balanced supply and return flow to maintain a neutral pressure within the house.
Even well sealed and insulated ducts will leak and lose some heat, so many new energy-efficient homes place the duct system within the conditioned space of the home. The simplest way to accomplish this is to hide the ducts in dropped ceilings and in corners of rooms. Ducts can also be located in a sealed and insulated chase extending into the attic or built into raised floors. In both of these latter cases, care must be taken during construction to prevent contractors from using the duct chases for wiring or other utilities.
In either case, actual ducts must be used — chases and floor cavities should not be used as ducts. Regardless of where they are installed, ducts should be well sealed. Although ducts can be configured in a number of ways, the “trunk and branch” and “radial” supply duct configurations are most suitable for ducts located in conditioned spaces.
Air return duct systems can be configured in two ways: each room can have a return duct that sends air back to the heating and cooling equipment or return grills can be located in central locations on each floor. For the latter case, either grills must be installed to allow air to pass out of closed rooms, or short “jumper ducts” can be installed to connect the vent in one room with the next, allowing air to flow back to the central return grilles. Door undercuts help, but they are usually not sufficient for return airflow.
You can perform a simple check for adequate return air capacity by doing the following:
- Close all exterior doors and windows
- Close all interior room doors
- Turn on the central air handler
- “Crack” interior doors one by one and observe if the door closes or further opens “on its own.” (Whether it closes or opens will depend on the direction of the air handler-driven air flow.) Rooms served by air-moved doors have restricted return air flow and need pressure relief as described above.
Maintaining and Upgrading Existing Duct Systems
Sealing your ducts to prevent leaks is even more important if the ducts are located in an unconditioned area such as an attic or vented crawlspace. If the supply ducts are leaking, heated or cooled air can be forced out of unsealed joints and lost. In addition, unconditioned air can be drawn into return ducts through unsealed joints.
Although minor duct repairs are easy to make, qualified professionals should seal and insulate ducts in unconditioned spaces to ensure the use of appropriate sealing materials.
Aside from sealing your ducts, the simplest and most effective means of maintaining your air distribution system is to ensure that furniture and other objects are not blocking the airflow through your registers, and to vacuum the registers to remove any dust buildup.
Existing duct systems often suffer from design deficiencies in the return air system, and modifications by the homeowner (or just a tendency to keep doors closed) may contribute to these problems. Any rooms with a lack of sufficient return airflow may benefit from relatively simple upgrades, such as the installation of new return-air grilles, undercutting doors for return air, or installing a jumper duct.
Some rooms may also be hard to heat and cool because of inadequate supply ducts or grilles. If this is the case, you should first examine whether the problem is the room itself: fix any problems with insulation, air leakage, or inefficient windows first. If the problem persists, you may be able to increase the size of the supply duct or add an additional duct to provide the needed airflow to the room.
Minor Duct Repair Tips for Minimizing Energy Losses in Ducts
- Check your ducts for air leaks. First, look for sections that should be joined but have separated and then look for obvious holes.
- Duct mastic is the preferred material for sealing ductwork seams and joints. It is more durable than any available tape and generally easier for a do-it-yourself installation. Its only drawback is that it will not bridge gaps over ¼ inch. Such gaps must be first bridged with web-type drywall tape, or a good quality heat approved tape.
- If you use tape to seal your ducts, avoid cloth-backed, rubber adhesive duct tape — it tends to fail quickly. Instead, use mastic, butyl tape, foil tape, or other heat-approved tapes. Look for tape with the Underwriters Laboratories (UL) logo.
- Remember that insulating ducts in the basement will make the basement colder. If both the ducts and the basement walls are not insulated, consider insulating both. Water pipes and drains in unconditioned spaces could freeze and burst if the heat ducts are fully insulated because there would be no heat source to prevent the space from freezing in cold weather. However, using an electric heating tape wrap on the pipes can prevent this. Check with a professional contractor.
- Hire a professional to install both supply and return registers in the basement rooms after converting your basement to a living area.
- Be sure a well-sealed vapor barrier exists on the outside of the insulation on cooling ducts to prevent moisture condensation.
- If you have a fuel-burning furnace, stove, or other appliance or an attached garage, install a carbon monoxide (CO) monitor to alert you to harmful CO levels.
- Be sure to get professional help when doing ductwork. A qualified professional should always perform changes and repairs to a duct system.
Minimizing Energy Losses in Ducts at 5933 Cebra St, Houston, TX 77091
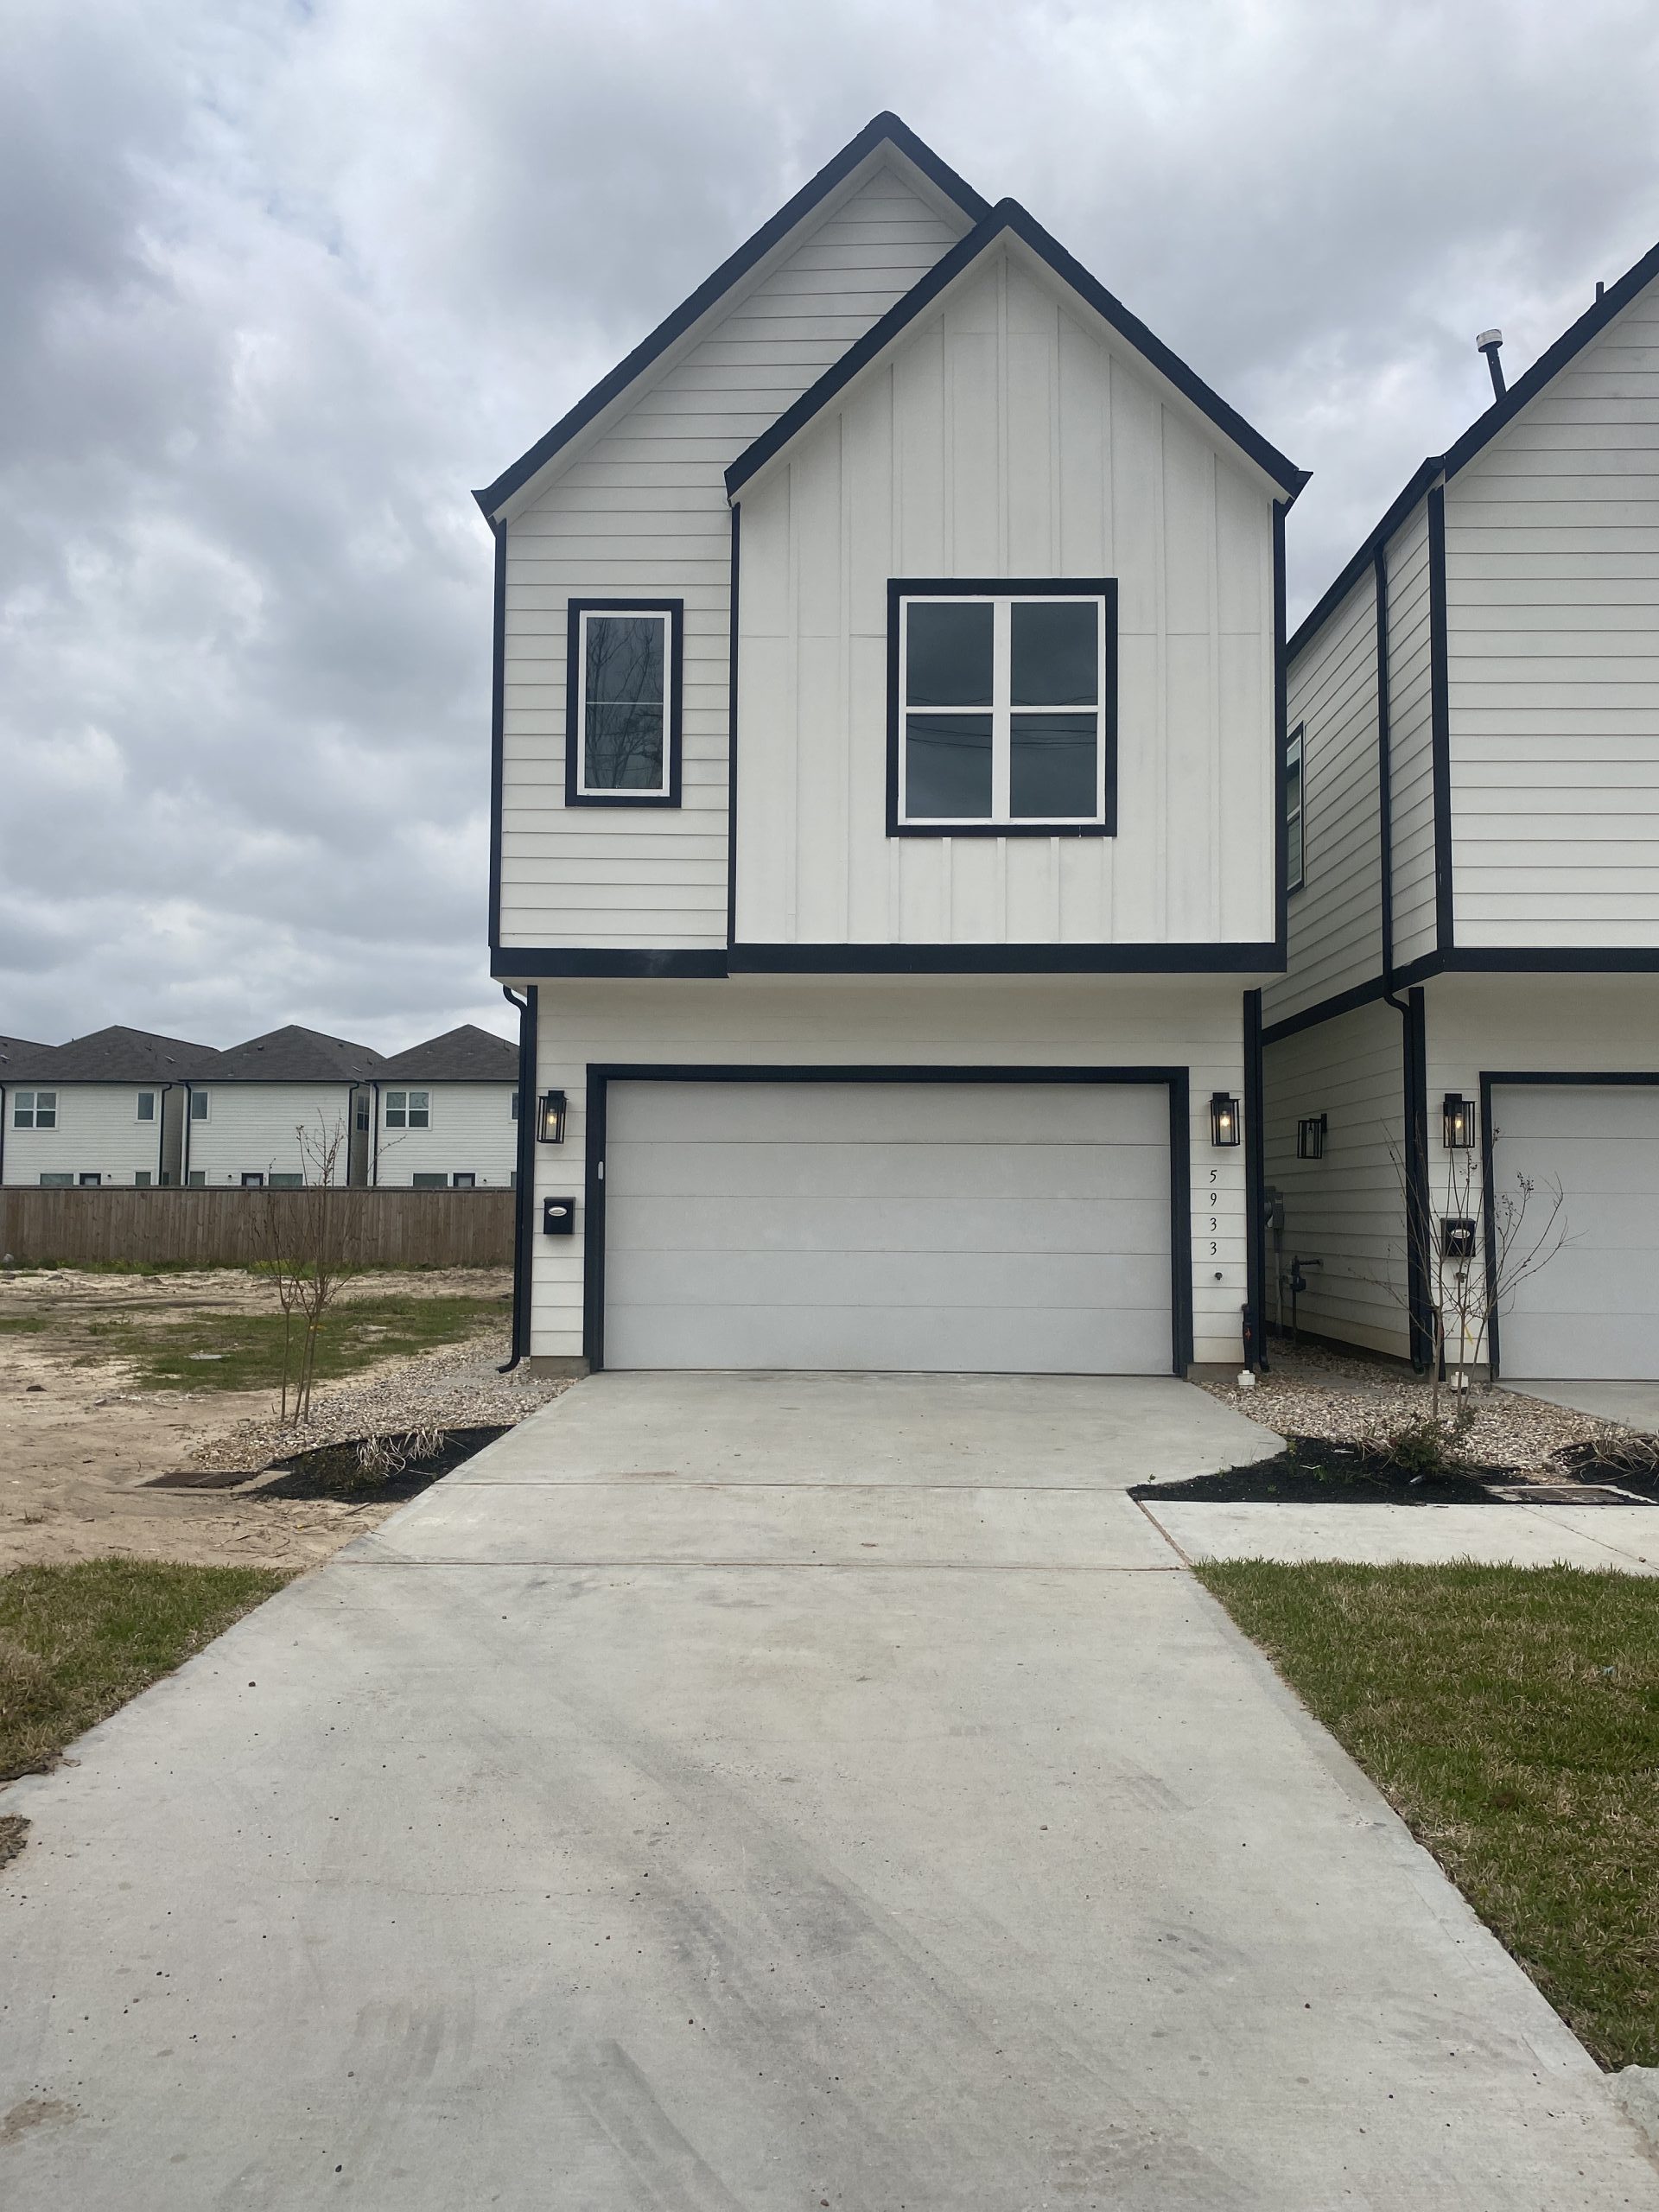
5933 Cebra St, Houston, TX 77091
Minimizing Energy Losses in Ducts
Minimizing energy losses in ducts by seeing if the ducts are poorly sealed or insulated. That could tell you why your energy bill in high. Your air ducts are one of the most important systems in your home, and if the ducts are poorly sealed or insulated, they are likely contributing to higher energy bills.
Your home’s duct system is a branching network of tubes in the walls, floors, and ceilings; it carries the air from your home’s furnace and central air conditioner to each room. Ducts are made of sheet metal, fiberglass, or other materials.
Ducts that leak heated air into unheated spaces can add hundreds of dollars a year to your heating and cooling bills, but you can reduce that loss by sealing and insulating your ducts. Insulating ducts in unconditioned spaces is usually very cost-effective. Existing ducts may also be blocked or may require simple upgrades.
Designing and Installing New Duct Systems
In new home construction or in retrofits, proper duct system design is critical. In recent years, energy-saving designs have sought to include ducts and heating systems in the conditioned space.
Efficient and well-designed duct systems distribute air properly throughout your home without leaking to keep all rooms at a comfortable temperature. The system should provide balanced supply and return flow to maintain a neutral pressure within the house.
Even well sealed and insulated ducts will leak and lose some heat, so many new energy-efficient homes place the duct system within the conditioned space of the home. The simplest way to accomplish this is to hide the ducts in dropped ceilings and in corners of rooms. Ducts can also be located in a sealed and insulated chase extending into the attic or built into raised floors. In both of these latter cases, care must be taken during construction to prevent contractors from using the duct chases for wiring or other utilities.
In either case, actual ducts must be used — chases and floor cavities should not be used as ducts. Regardless of where they are installed, ducts should be well sealed. Although ducts can be configured in a number of ways, the “trunk and branch” and “radial” supply duct configurations are most suitable for ducts located in conditioned spaces.
Air return duct systems can be configured in two ways: each room can have a return duct that sends air back to the heating and cooling equipment or return grills can be located in central locations on each floor. For the latter case, either grills must be installed to allow air to pass out of closed rooms, or short “jumper ducts” can be installed to connect the vent in one room with the next, allowing air to flow back to the central return grilles. Door undercuts help, but they are usually not sufficient for return airflow.
You can perform a simple check for adequate return air capacity by doing the following:
- Close all exterior doors and windows
- Close all interior room doors
- Turn on the central air handler
- “Crack” interior doors one by one and observe if the door closes or further opens “on its own.” (Whether it closes or opens will depend on the direction of the air handler-driven air flow.) Rooms served by air-moved doors have restricted return air flow and need pressure relief as described above.
Maintaining and Upgrading Existing Duct Systems
Sealing your ducts to prevent leaks is even more important if the ducts are located in an unconditioned area such as an attic or vented crawlspace. If the supply ducts are leaking, heated or cooled air can be forced out of unsealed joints and lost. In addition, unconditioned air can be drawn into return ducts through unsealed joints.
Although minor duct repairs are easy to make, qualified professionals should seal and insulate ducts in unconditioned spaces to ensure the use of appropriate sealing materials.
Aside from sealing your ducts, the simplest and most effective means of maintaining your air distribution system is to ensure that furniture and other objects are not blocking the airflow through your registers, and to vacuum the registers to remove any dust buildup.
Existing duct systems often suffer from design deficiencies in the return air system, and modifications by the homeowner (or just a tendency to keep doors closed) may contribute to these problems. Any rooms with a lack of sufficient return airflow may benefit from relatively simple upgrades, such as the installation of new return-air grilles, undercutting doors for return air, or installing a jumper duct.
Some rooms may also be hard to heat and cool because of inadequate supply ducts or grilles. If this is the case, you should first examine whether the problem is the room itself: fix any problems with insulation, air leakage, or inefficient windows first. If the problem persists, you may be able to increase the size of the supply duct or add an additional duct to provide the needed airflow to the room.
Minor Duct Repair Tips for Minimizing Energy Losses in Ducts
- Check your ducts for air leaks. First, look for sections that should be joined but have separated and then look for obvious holes.
- Duct mastic is the preferred material for sealing ductwork seams and joints. It is more durable than any available tape and generally easier for a do-it-yourself installation. Its only drawback is that it will not bridge gaps over ¼ inch. Such gaps must be first bridged with web-type drywall tape, or a good quality heat approved tape.
- If you use tape to seal your ducts, avoid cloth-backed, rubber adhesive duct tape — it tends to fail quickly. Instead, use mastic, butyl tape, foil tape, or other heat-approved tapes. Look for tape with the Underwriters Laboratories (UL) logo.
- Remember that insulating ducts in the basement will make the basement colder. If both the ducts and the basement walls are not insulated, consider insulating both. Water pipes and drains in unconditioned spaces could freeze and burst if the heat ducts are fully insulated because there would be no heat source to prevent the space from freezing in cold weather. However, using an electric heating tape wrap on the pipes can prevent this. Check with a professional contractor.
- Hire a professional to install both supply and return registers in the basement rooms after converting your basement to a living area.
- Be sure a well-sealed vapor barrier exists on the outside of the insulation on cooling ducts to prevent moisture condensation.
- If you have a fuel-burning furnace, stove, or other appliance or an attached garage, install a carbon monoxide (CO) monitor to alert you to harmful CO levels.
- Be sure to get professional help when doing ductwork. A qualified professional should always perform changes and repairs to a duct system.
Minimizing Energy Losses in Ducts at 222 Blanche St, Houston, TX 77011
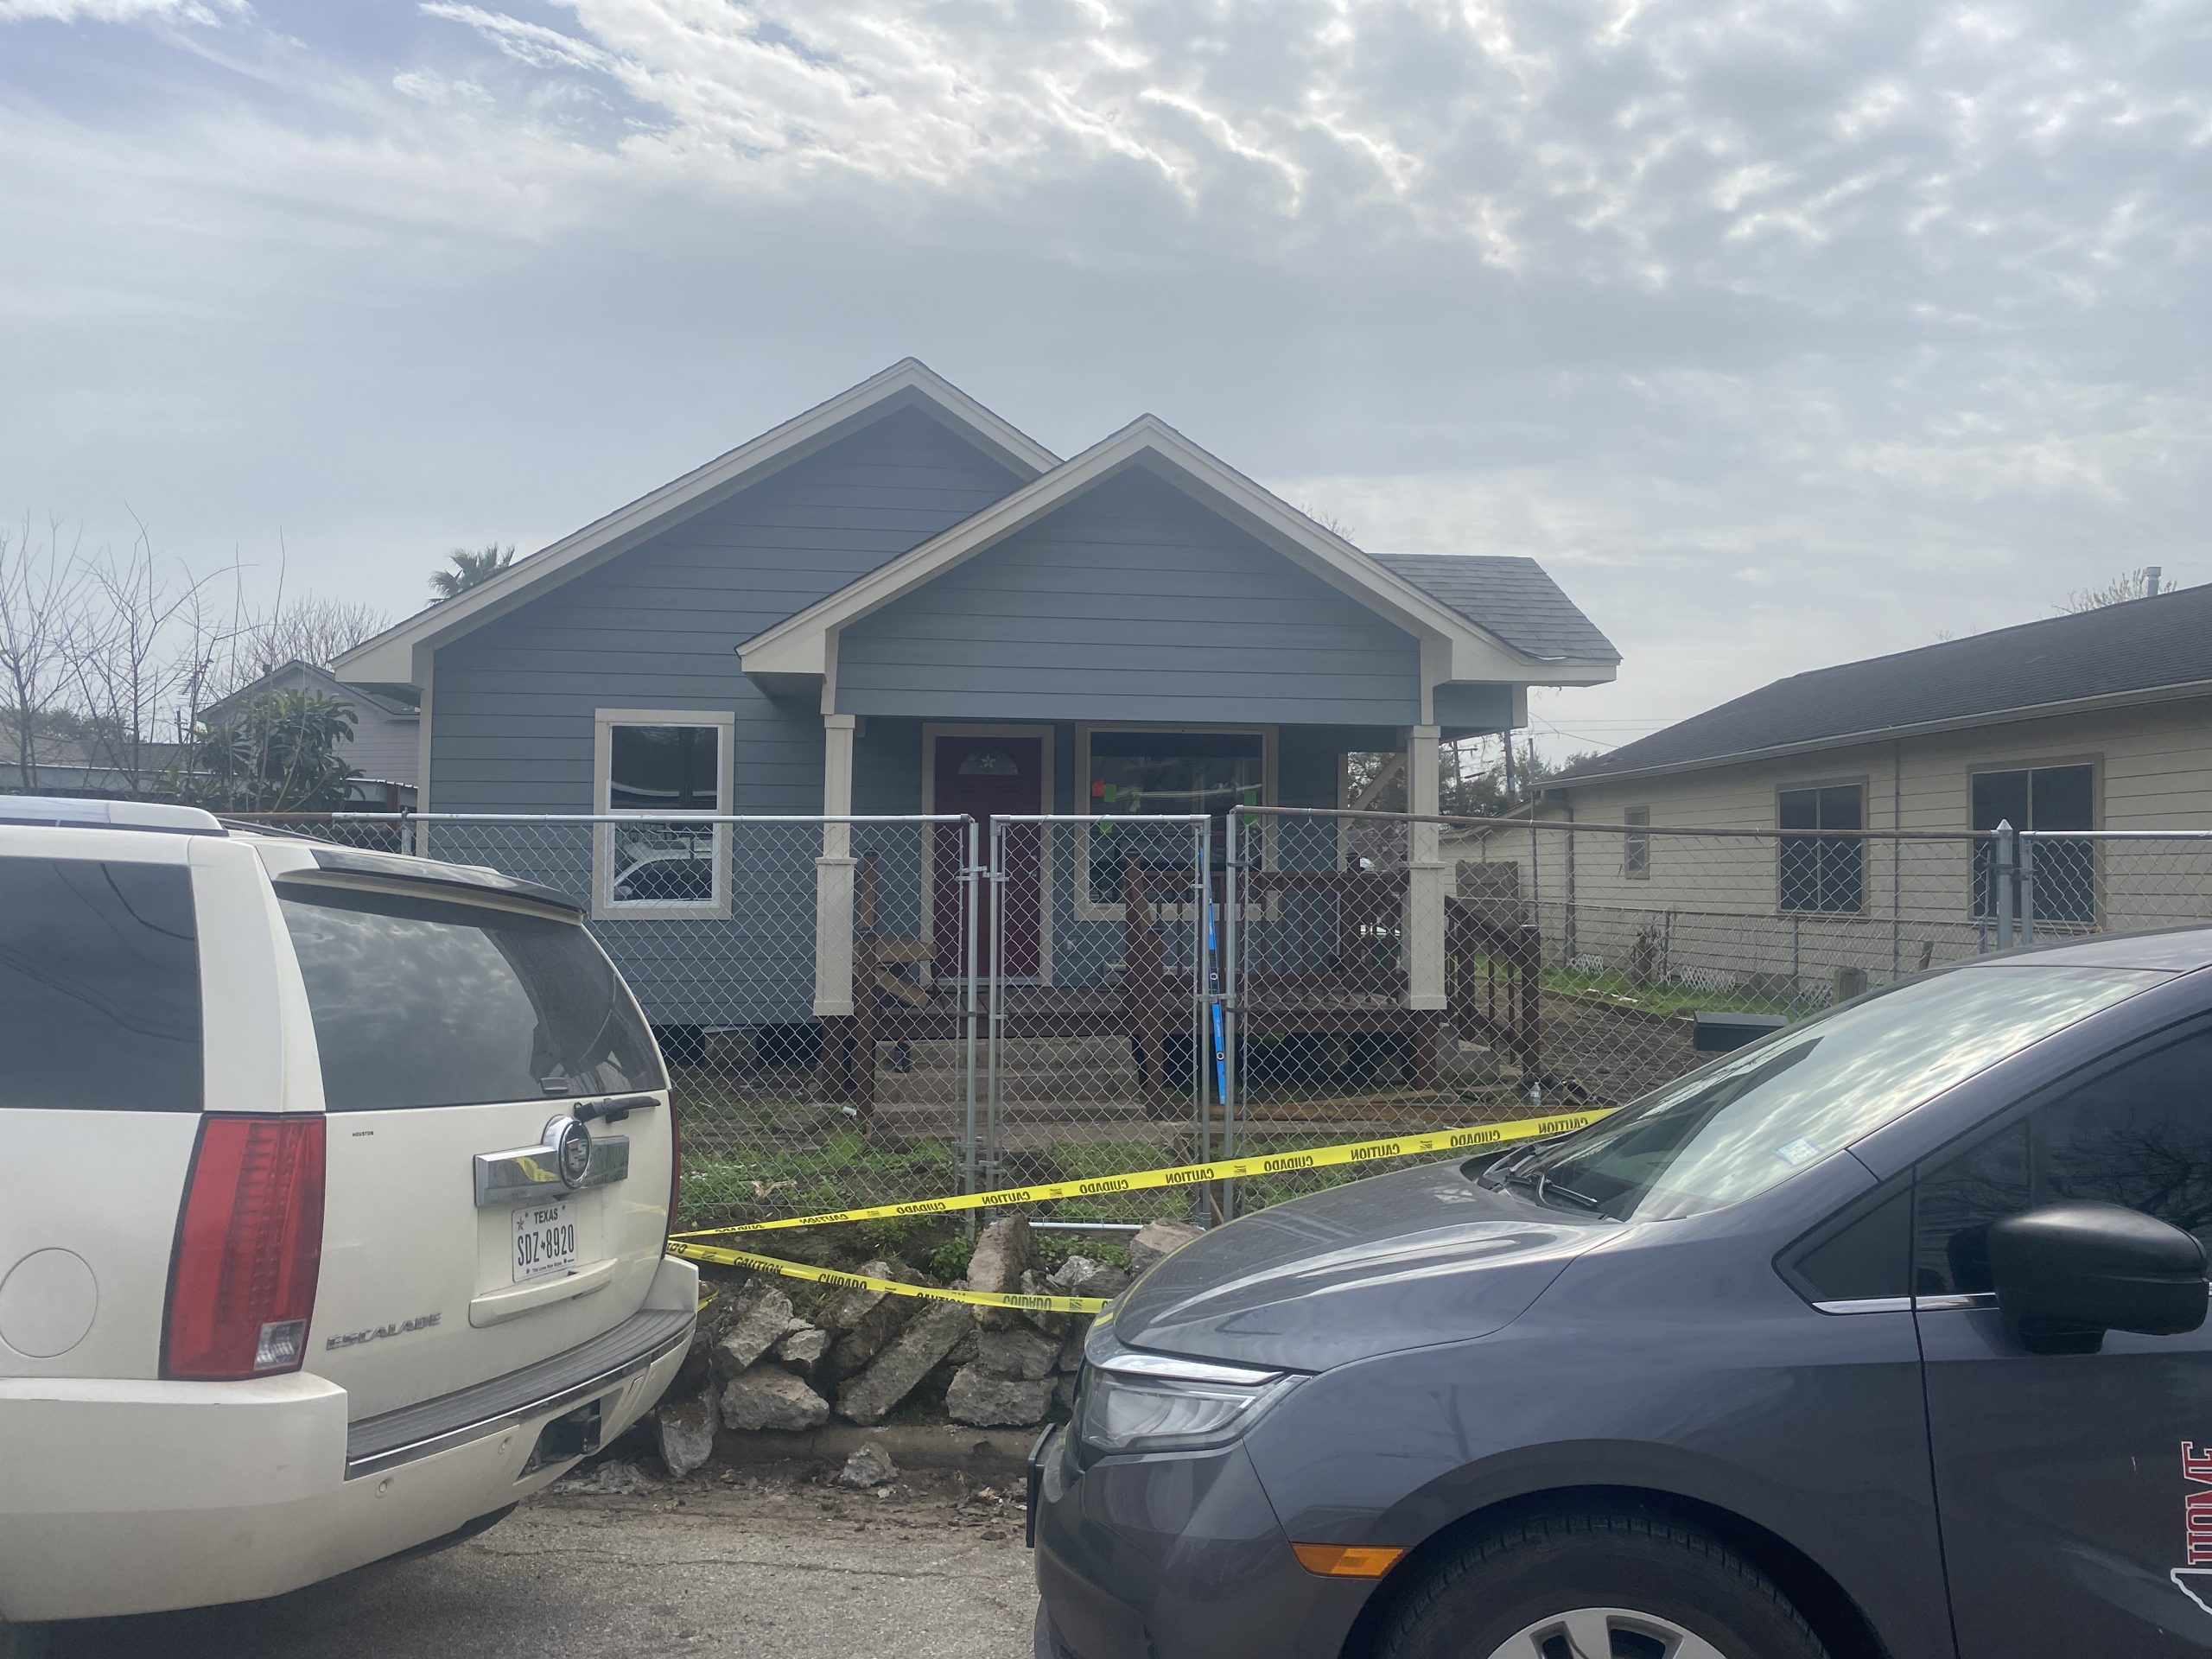
222 Blanche St, Houston, TX 77011
Minimizing Energy Losses in Ducts
Minimizing energy losses in ducts by seeing if the ducts are poorly sealed or insulated. That could tell you why your energy bill in high. Your air ducts are one of the most important systems in your home, and if the ducts are poorly sealed or insulated, they are likely contributing to higher energy bills.
Your home’s duct system is a branching network of tubes in the walls, floors, and ceilings; it carries the air from your home’s furnace and central air conditioner to each room. Ducts are made of sheet metal, fiberglass, or other materials.
Ducts that leak heated air into unheated spaces can add hundreds of dollars a year to your heating and cooling bills, but you can reduce that loss by sealing and insulating your ducts. Insulating ducts in unconditioned spaces is usually very cost-effective. Existing ducts may also be blocked or may require simple upgrades.
Designing and Installing New Duct Systems
In new home construction or in retrofits, proper duct system design is critical. In recent years, energy-saving designs have sought to include ducts and heating systems in the conditioned space.
Efficient and well-designed duct systems distribute air properly throughout your home without leaking to keep all rooms at a comfortable temperature. The system should provide balanced supply and return flow to maintain a neutral pressure within the house.
Even well sealed and insulated ducts will leak and lose some heat, so many new energy-efficient homes place the duct system within the conditioned space of the home. The simplest way to accomplish this is to hide the ducts in dropped ceilings and in corners of rooms. Ducts can also be located in a sealed and insulated chase extending into the attic or built into raised floors. In both of these latter cases, care must be taken during construction to prevent contractors from using the duct chases for wiring or other utilities.
In either case, actual ducts must be used — chases and floor cavities should not be used as ducts. Regardless of where they are installed, ducts should be well sealed. Although ducts can be configured in a number of ways, the “trunk and branch” and “radial” supply duct configurations are most suitable for ducts located in conditioned spaces.
Air return duct systems can be configured in two ways: each room can have a return duct that sends air back to the heating and cooling equipment or return grills can be located in central locations on each floor. For the latter case, either grills must be installed to allow air to pass out of closed rooms, or short “jumper ducts” can be installed to connect the vent in one room with the next, allowing air to flow back to the central return grilles. Door undercuts help, but they are usually not sufficient for return airflow.
You can perform a simple check for adequate return air capacity by doing the following:
- Close all exterior doors and windows
- Close all interior room doors
- Turn on the central air handler
- “Crack” interior doors one by one and observe if the door closes or further opens “on its own.” (Whether it closes or opens will depend on the direction of the air handler-driven air flow.) Rooms served by air-moved doors have restricted return air flow and need pressure relief as described above.
Maintaining and Upgrading Existing Duct Systems
Sealing your ducts to prevent leaks is even more important if the ducts are located in an unconditioned area such as an attic or vented crawlspace. If the supply ducts are leaking, heated or cooled air can be forced out of unsealed joints and lost. In addition, unconditioned air can be drawn into return ducts through unsealed joints.
Although minor duct repairs are easy to make, qualified professionals should seal and insulate ducts in unconditioned spaces to ensure the use of appropriate sealing materials.
Aside from sealing your ducts, the simplest and most effective means of maintaining your air distribution system is to ensure that furniture and other objects are not blocking the airflow through your registers, and to vacuum the registers to remove any dust buildup.
Existing duct systems often suffer from design deficiencies in the return air system, and modifications by the homeowner (or just a tendency to keep doors closed) may contribute to these problems. Any rooms with a lack of sufficient return airflow may benefit from relatively simple upgrades, such as the installation of new return-air grilles, undercutting doors for return air, or installing a jumper duct.
Some rooms may also be hard to heat and cool because of inadequate supply ducts or grilles. If this is the case, you should first examine whether the problem is the room itself: fix any problems with insulation, air leakage, or inefficient windows first. If the problem persists, you may be able to increase the size of the supply duct or add an additional duct to provide the needed airflow to the room.
Minor Duct Repair Tips for Minimizing Energy Losses in Ducts
- Check your ducts for air leaks. First, look for sections that should be joined but have separated and then look for obvious holes.
- Duct mastic is the preferred material for sealing ductwork seams and joints. It is more durable than any available tape and generally easier for a do-it-yourself installation. Its only drawback is that it will not bridge gaps over ¼ inch. Such gaps must be first bridged with web-type drywall tape, or a good quality heat approved tape.
- If you use tape to seal your ducts, avoid cloth-backed, rubber adhesive duct tape — it tends to fail quickly. Instead, use mastic, butyl tape, foil tape, or other heat-approved tapes. Look for tape with the Underwriters Laboratories (UL) logo.
- Remember that insulating ducts in the basement will make the basement colder. If both the ducts and the basement walls are not insulated, consider insulating both. Water pipes and drains in unconditioned spaces could freeze and burst if the heat ducts are fully insulated because there would be no heat source to prevent the space from freezing in cold weather. However, using an electric heating tape wrap on the pipes can prevent this. Check with a professional contractor.
- Hire a professional to install both supply and return registers in the basement rooms after converting your basement to a living area.
- Be sure a well-sealed vapor barrier exists on the outside of the insulation on cooling ducts to prevent moisture condensation.
- If you have a fuel-burning furnace, stove, or other appliance or an attached garage, install a carbon monoxide (CO) monitor to alert you to harmful CO levels.
- Be sure to get professional help when doing ductwork. A qualified professional should always perform changes and repairs to a duct system.
Minimizing Energy Losses in Ducts at 144 Rebecca Ln, Willis, TX 77378
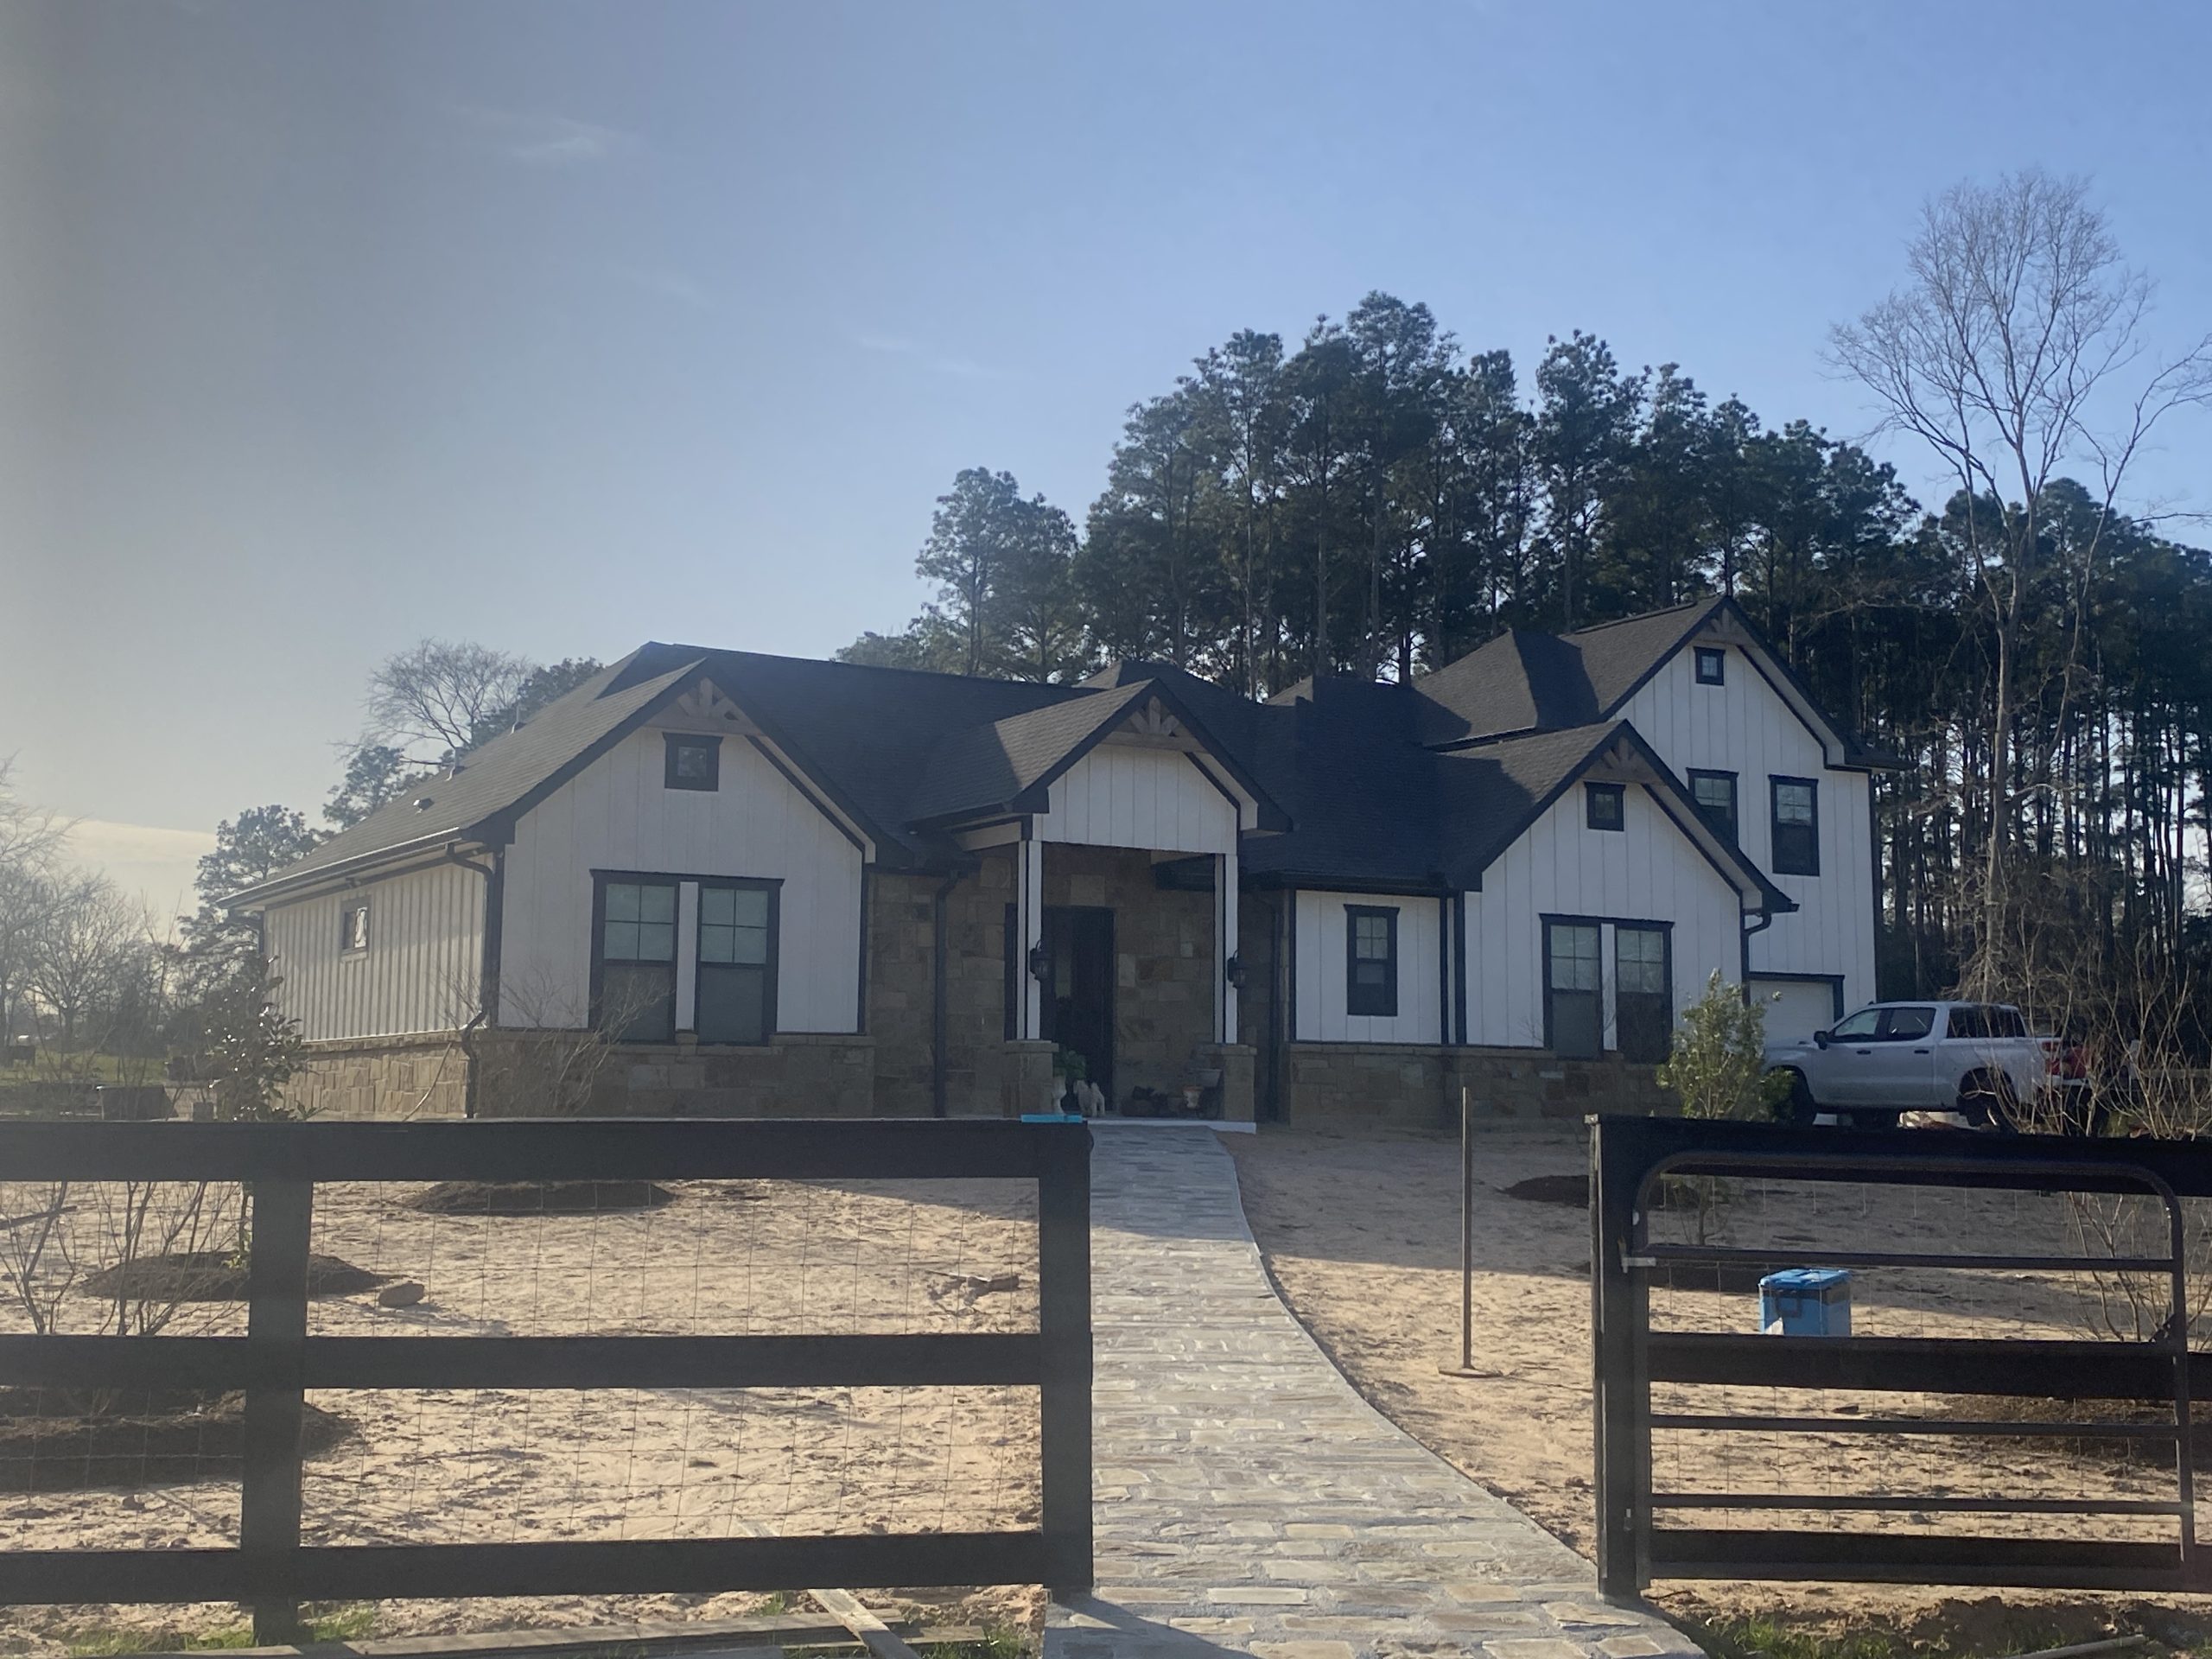
144 Rebecca Ln, Willis, TX 77378
Minimizing Energy Losses in Ducts
Minimizing energy losses in ducts by seeing if the ducts are poorly sealed or insulated. That could tell you why your energy bill in high. Your air ducts are one of the most important systems in your home, and if the ducts are poorly sealed or insulated, they are likely contributing to higher energy bills.
Your home’s duct system is a branching network of tubes in the walls, floors, and ceilings; it carries the air from your home’s furnace and central air conditioner to each room. Ducts are made of sheet metal, fiberglass, or other materials.
Ducts that leak heated air into unheated spaces can add hundreds of dollars a year to your heating and cooling bills, but you can reduce that loss by sealing and insulating your ducts. Insulating ducts in unconditioned spaces is usually very cost-effective. Existing ducts may also be blocked or may require simple upgrades.
Designing and Installing New Duct Systems
In new home construction or in retrofits, proper duct system design is critical. In recent years, energy-saving designs have sought to include ducts and heating systems in the conditioned space.
Efficient and well-designed duct systems distribute air properly throughout your home without leaking to keep all rooms at a comfortable temperature. The system should provide balanced supply and return flow to maintain a neutral pressure within the house.
Even well sealed and insulated ducts will leak and lose some heat, so many new energy-efficient homes place the duct system within the conditioned space of the home. The simplest way to accomplish this is to hide the ducts in dropped ceilings and in corners of rooms. Ducts can also be located in a sealed and insulated chase extending into the attic or built into raised floors. In both of these latter cases, care must be taken during construction to prevent contractors from using the duct chases for wiring or other utilities.
In either case, actual ducts must be used — chases and floor cavities should not be used as ducts. Regardless of where they are installed, ducts should be well sealed. Although ducts can be configured in a number of ways, the “trunk and branch” and “radial” supply duct configurations are most suitable for ducts located in conditioned spaces.
Air return duct systems can be configured in two ways: each room can have a return duct that sends air back to the heating and cooling equipment or return grills can be located in central locations on each floor. For the latter case, either grills must be installed to allow air to pass out of closed rooms, or short “jumper ducts” can be installed to connect the vent in one room with the next, allowing air to flow back to the central return grilles. Door undercuts help, but they are usually not sufficient for return airflow.
You can perform a simple check for adequate return air capacity by doing the following:
- Close all exterior doors and windows
- Close all interior room doors
- Turn on the central air handler
- “Crack” interior doors one by one and observe if the door closes or further opens “on its own.” (Whether it closes or opens will depend on the direction of the air handler-driven air flow.) Rooms served by air-moved doors have restricted return air flow and need pressure relief as described above.
Maintaining and Upgrading Existing Duct Systems
Sealing your ducts to prevent leaks is even more important if the ducts are located in an unconditioned area such as an attic or vented crawlspace. If the supply ducts are leaking, heated or cooled air can be forced out of unsealed joints and lost. In addition, unconditioned air can be drawn into return ducts through unsealed joints.
Although minor duct repairs are easy to make, qualified professionals should seal and insulate ducts in unconditioned spaces to ensure the use of appropriate sealing materials.
Aside from sealing your ducts, the simplest and most effective means of maintaining your air distribution system is to ensure that furniture and other objects are not blocking the airflow through your registers, and to vacuum the registers to remove any dust buildup.
Existing duct systems often suffer from design deficiencies in the return air system, and modifications by the homeowner (or just a tendency to keep doors closed) may contribute to these problems. Any rooms with a lack of sufficient return airflow may benefit from relatively simple upgrades, such as the installation of new return-air grilles, undercutting doors for return air, or installing a jumper duct.
Some rooms may also be hard to heat and cool because of inadequate supply ducts or grilles. If this is the case, you should first examine whether the problem is the room itself: fix any problems with insulation, air leakage, or inefficient windows first. If the problem persists, you may be able to increase the size of the supply duct or add an additional duct to provide the needed airflow to the room.
Minor Duct Repair Tips for Minimizing Energy Losses in Ducts
- Check your ducts for air leaks. First, look for sections that should be joined but have separated and then look for obvious holes.
- Duct mastic is the preferred material for sealing ductwork seams and joints. It is more durable than any available tape and generally easier for a do-it-yourself installation. Its only drawback is that it will not bridge gaps over ¼ inch. Such gaps must be first bridged with web-type drywall tape, or a good quality heat approved tape.
- If you use tape to seal your ducts, avoid cloth-backed, rubber adhesive duct tape — it tends to fail quickly. Instead, use mastic, butyl tape, foil tape, or other heat-approved tapes. Look for tape with the Underwriters Laboratories (UL) logo.
- Remember that insulating ducts in the basement will make the basement colder. If both the ducts and the basement walls are not insulated, consider insulating both. Water pipes and drains in unconditioned spaces could freeze and burst if the heat ducts are fully insulated because there would be no heat source to prevent the space from freezing in cold weather. However, using an electric heating tape wrap on the pipes can prevent this. Check with a professional contractor.
- Hire a professional to install both supply and return registers in the basement rooms after converting your basement to a living area.
- Be sure a well-sealed vapor barrier exists on the outside of the insulation on cooling ducts to prevent moisture condensation.
- If you have a fuel-burning furnace, stove, or other appliance or an attached garage, install a carbon monoxide (CO) monitor to alert you to harmful CO levels.
- Be sure to get professional help when doing ductwork. A qualified professional should always perform changes and repairs to a duct system.
Energy Star – 45L Tax Credits for Zero Energy Ready Homes

45L Tax Credits for Zero Energy Ready Homes
Disclaimer: (Energy Star) This webpage provides an overview of the DOE Zero Energy Ready Home program and how it relates to the New Energy Efficient Home Tax Credit found in section 45L of the Internal Revenue Code. The information provided here does not constitute professional tax advice or other professional financial guidance. It should not be used as the only source of information when making decisions regarding design, purchasing, investments, or the tax implications of new home construction, or when executing other binding agreements. In the event that there is conflict between information provided on this webpage and guidance or notices published by IRS, the information published by IRS shall take precedence
The Updated Section 45L
The Inflation Reduction Act of 2022 (IRA) amended Internal Revenue Code Section 45L to provide taxpayers with a tax credit for eligible new or substantially reconstructed homes that meet applicable ENERGY STAR home program or DOE Zero Energy Ready Home (ZERH) program requirements. The new 45L provisions include two tiers of credits, with the higher credits for eligible homes and dwelling units certified to applicable ZERH program requirements. The 45L credit is $5,000 for single family and manufactured homes eligible to participate in the EPA’s ENERGY STAR Residential New Construction Program or the ENERGY STAR Manufactured New Homes Program, respectively, and which are certified to applicable ZERH program requirements. The 45L credit is $1,000 for dwelling units that are part of a building eligible to participate in the ENERGY STAR Multifamily New Construction Program, and which are certified to applicable ZERH program requirements, unless the project meets prevailing wage requirements, in which case the 45L credit is $5,000 per dwelling unit. These new 45L rules apply to qualified energy efficient homes acquired after December 31, 2022, and before January 1, 2033, for use as a residence during the taxable year. DOE continues to coordinate with the Internal Revenue Service (IRS) regarding forthcoming IRS 45L guidance.
DOE Zero Energy Ready Home (ZERH) Program Applicability for 45L Tax Credit, by Calendar Year
ZERH program requirements vary by housing sector. To improve the usability of the program requirements and the certification process for different sectors, DOE is developing and maintaining program requirements documents for each major housing sector. DOE anticipates updating these documents over the coming years, with new editions of the requirements referred to as versions.
The three housing sector tables below indicate DOE’s anticipated version release schedule for the ZERH program. The certification requirements for each housing sector are included below with links to detailed requirements documents (PDF) for each program version. IRS guidance will establish when a dwelling unit needs to be certified to the version in effect for that housing sector as listed below to qualify for the ZERH provisions of 45L tax credit. The tables list all current and planned versions through 2025, by Calendar Year (January 1-December 31). In conjunction with IRS, DOE will provide additional information on any planned ZERH program changes beyond 2025 on future dates to be determined. Note, for certain future planned versions the requirements documents are still under development.
https://www.energy.gov/eere/buildings/45l-tax-credits-zero-energy-ready-homes
204 E 30th St, Houston, TX 77018 – Losses in Ducts
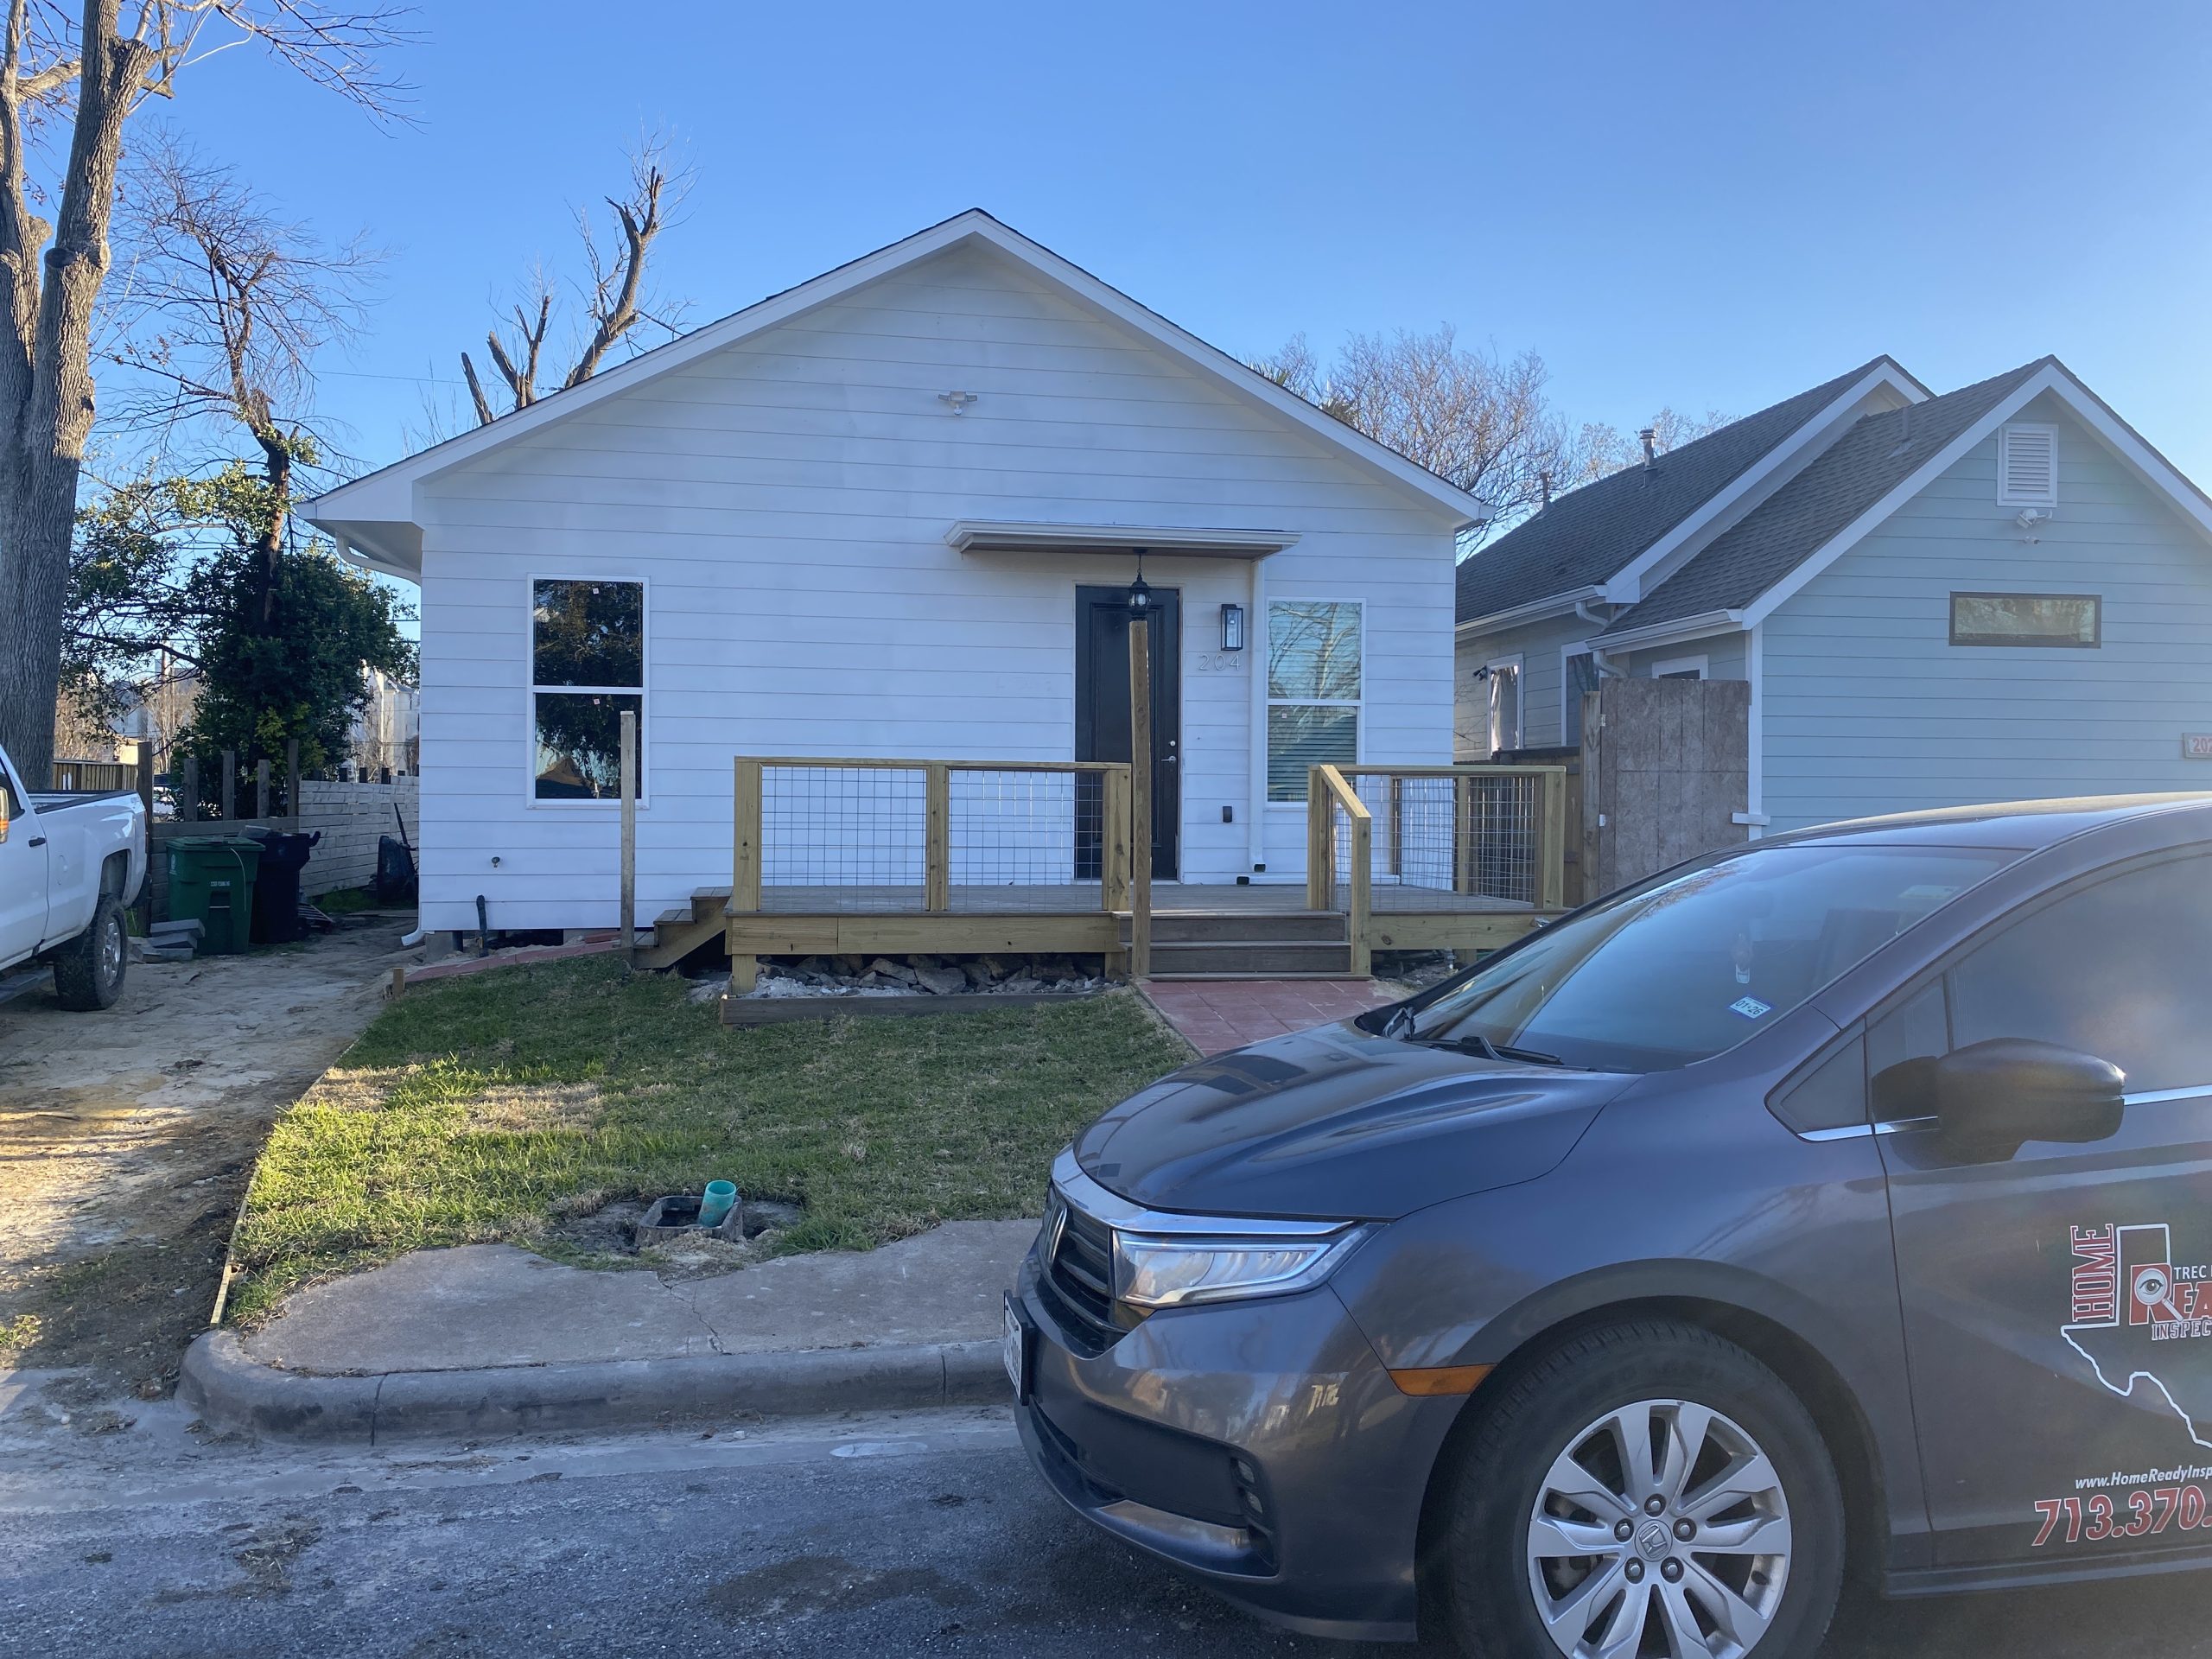
204 E 30th St, Houston, TX 77018
Losses in Ducts
Minimizing energy losses in ducts is an important aspect of energy efficiency in HVAC (Heating, Ventilation, and Air Conditioning) systems. Ducts are used to distribute conditioned air throughout a building, and any energy losses during the distribution process can lead to increased energy consumption and reduced system performance. Here are some key measures to minimize energy losses in ducts:
1. Proper Duct Design: Ensure that ductwork is properly designed to minimize pressure losses. Use appropriately sized ducts, minimize the number of bends and transitions, and maintain a balanced airflow distribution. Consult industry guidelines or work with an HVAC professional to design an efficient duct system.
2. Sealing: Duct leakage is a major source of energy losses. Seal all joints, connections, and seams in the ductwork using approved sealing materials such as mastic or metal tape. Pay particular attention to connections at registers, grilles, and air-handling units.
3. Insulation: Insulate ducts that run through unconditioned spaces, such as attics, crawlspaces, or basements. Insulation helps to prevent heat transfer between the ductwork and the surrounding environment, reducing energy losses and improving system efficiency.
4. Duct Material: Consider using insulated ducts with low thermal conductivity. Insulated ducts minimize heat transfer through the duct walls, helping to maintain the desired temperature of the conditioned air as it travels through the system.
5. Avoiding Overlong Duct Runs: Minimize the length of duct runs as much as possible. Longer ducts result in increased friction losses, which can reduce airflow and energy efficiency. Optimize the layout and location of HVAC equipment to keep duct runs as short and direct as feasible.
6. Balancing and Adjusting Dampers: Balancing the airflow within the duct system ensures that each room receives the appropriate amount of conditioned air. Adjust dampers at branch points and in individual ducts to balance the airflow and avoid over-pressurizing or under-pressurizing certain areas.
7. Regular Maintenance: Conduct regular inspections of the ductwork to check for leaks, obstructions, or damage. Clean the ducts periodically to remove dust, debris, or any substances that could impede airflow.
8. Air Filters: Install high-quality air filters and regularly replace them according to the manufacturer’s recommendations. Clean air filters help maintain optimal airflow, reducing pressure drops and energy losses.
By implementing these measures, you can significantly minimize energy losses in ducts, improve the overall efficiency of your HVAC system, and reduce energy consumption. Consulting with a professional HVAC contractor or engineer can provide valuable insights specific to your building’s requirements and help optimize energy efficiency.
https://homereadyinspections.com/builders-hvac/
How Blower Doors Work – 5009 Yesenia Palm St, Houston, TX 77021
5009 Yesenia Palm St, Houston, TX 77021
How Blower Doors Work – 5009 Yesenia Palm St, Houston, TX 77021
Third-party Energy Testing
Your air ducts are one of the most important systems in your home, and if the ducts are poorly sealed or insulated they are likely contributing to higher energy bills.
Blower Doors: What Are They and How Do They Work?
A blower door is a device used in energy testing to measure a building’s airtightness. It consists of a powerful fan mounted on a temporary frame that fits into a doorway or an exterior opening. During a blower door test, the fan creates a pressure difference between the inside and outside of the building. This pressure difference allows air leakage points to become apparent and measurable. The test helps identify areas of air infiltration or exfiltration, which can affect energy efficiency and indoor comfort.
The blower door test involves setting up the device, measuring the baseline pressure, and then either depressurizing or pressurizing the building using the fan. While the fan is running, the airflow rate is measured using instruments like a manometer or pressure gauge. This airflow measurement quantifies the amount of air leakage in the building. Smoke pencils or thermal imaging cameras can be used to locate specific air leakage points.
The blower door test can be conducted in both depressurization and pressurization modes, allowing for a comprehensive assessment of air leakage locations. Once the test is complete, the data is analyzed to determine the building’s airtightness and identify areas that need improvement. The results can be used to guide air sealing measures and improve energy efficiency.
Blower door tests are crucial in identifying air leakage points, reducing energy loss, improving indoor air quality, and enhancing the overall performance and comfort of a building.
Home Inspection Atascocita | Home Ready Inspections | Houston TX