
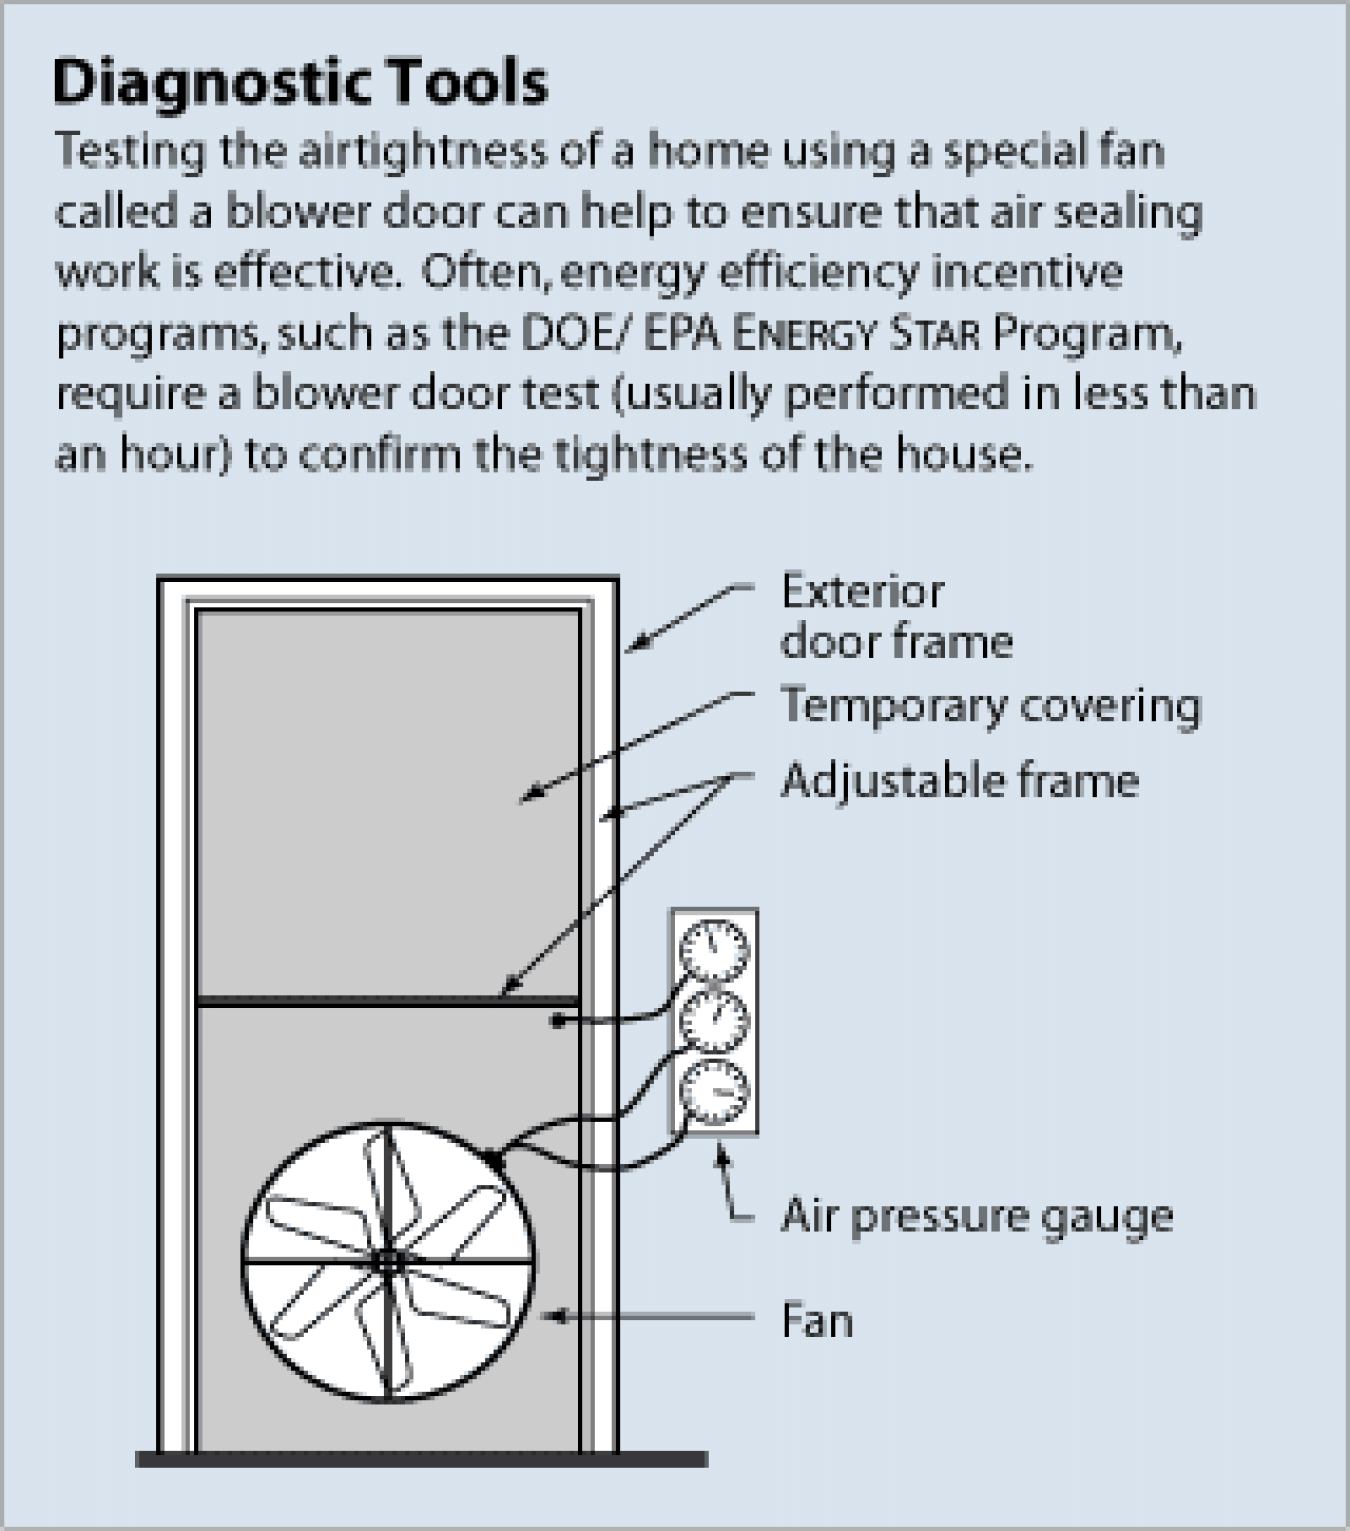
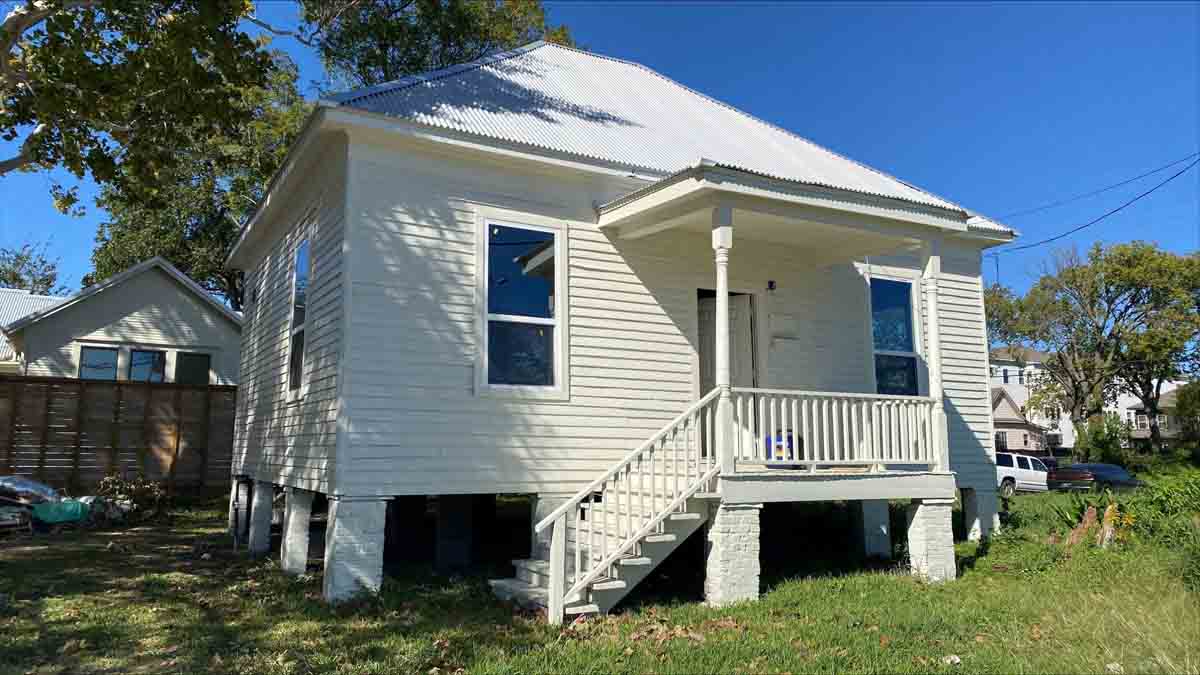
3425 Mount Pleasant Unit A&B Houston TX, 77021 – Blower Door

3425 Mount Pleasant Unit A&B Houston TX, 77021 – Blower Door
Home energy professionals use a blower door as a diagnostic tool to determine how much air is entering or escaping from your home.
Professional energy assessors use blower door tests to help determine a home’s airtightness. Our blower door instructional video illustrates how a blower door test is performed, and how your contractor utilizes the diagnostic information provided to identify areas of air leakage in your home and make energy-saving improvements.
These are some reasons for establishing the proper building tightness:
- Reducing energy consumption from excess air leakage
- Avoiding moisture condensation problems
- Avoiding uncomfortable drafts caused by cold or warm air leaking in from outside
- Controlling outdoor contaminants, pests, and odors from entering your home.
- Determining proper sizing and airflow requirements of heating and cooling equipment.
- Determining whether mechanical ventilation is needed to provide acceptable fresh air and maintain indoor air quality in your home.
Blower Doors: What Are They and How Do They Work?
A blower door is a powerful fan that a trained energy professional temporarily mounts into the frame of an exterior doorway in your home. After calibrating the device, the fan pulls air out of the house, lowering the air pressure inside. The higher outside air pressure then flows in through all unsealed gaps, cracks and openings such as gaps, cracks, or wiring penetrations. If conditions do not allow for lowering the pressure in the home, the fan may also be operated in reverse, with air pressure increased inside the home.
While the blower test is being conducted, the analyst may use an infrared camera to look at the walls, ceilings, and floors, to find specific locations where insulation is missing, and air is leaking. The analyst may also use a nontoxic smoke pencil to detect air leaks in your home. These tests determine the air infiltration rate of your home, which is recorded on a laptop or tablet.
The blower door test is conducted as part of the energy assessment of your home. Your contractor may also operate the blower door while performing air sealing (a method known as blower door assisted air sealing), and after to measure and verify the level of air leakage reduction achieved.
Blower doors consist of a frame and flexible panel that fit in a doorway, a variable-speed fan, a digital pressure gauge to measure the pressure differences inside and outside the home, which are connected to a device for measuring airflow, known as a manometer.
There are two types of blower doors: calibrated and uncalibrated. It is important that auditors use a calibrated door. This type of blower door has several gauges that measure the amount of air flowing out of the house through the fan.
Uncalibrated blower doors can only locate leaks in homes. They provide no method for determining the overall tightness of the home.
The calibrated blower door’s data allow your contractor to quantify the amount of air leakage prior to installation of air-sealing improvements, and the reduction in leakage achieved after air-sealing is completed.
Preparing for a Blower Door Test
Your home energy professional will perform the blower door test, including a walk-through of your home, setting up the blower door, and conducting the test. The following steps will help prepare your home for a blower door test:
- Plan to do a walk-through of your home with the auditor. Be prepared to point out areas that you know are drafty or difficult to condition comfortably.
- Expect the auditor to request access to all areas of your home including closets, built-in cabinets, attics, crawl spaces, and any unused rooms.
- The auditor will need to close all exterior doors and windows, open all interior doors, and close any fireplace dampers, doors, and woodstove air inlets.
- If you heat with wood, be sure all fires are completely out – not even coals – before the auditor arrives. Remove any ashes from open fireplaces.
- Expect the auditor to set controls on all atmospheric fossil fuel appliances (e.g., furnace, water heater, fireplaces, and stoves) to ensure that they do not fire during the test. The auditor should return them to the original position after the test.
- Expect the test to take up to an hour or more, depending on the complexity of your home.
3403 Gano St. Houston TX, 77009 – Houston Blower Door

3403 Gano St. Houston TX, 77009 – Houston Blower Door
Home energy professionals use a blower door as a diagnostic tool to determine how much air is entering or escaping from your home.
Professional energy assessors use blower door tests to help determine a home’s airtightness. Our blower door instructional video illustrates how a blower door test is performed, and how your contractor utilizes the diagnostic information provided to identify areas of air leakage in your home and make energy-saving improvements.
These are some reasons for establishing the proper building tightness:
- Reducing energy consumption from excess air leakage
- Avoiding moisture condensation problems
- Avoiding uncomfortable drafts caused by cold or warm air leaking in from outside
- Controlling outdoor contaminants, pests, and odors from entering your home.
- Determining proper sizing and airflow requirements of heating and cooling equipment.
- Determining whether mechanical ventilation is needed to provide acceptable fresh air and maintain indoor air quality in your home.
Blower Doors: What Are They and How Do They Work?
A blower door is a powerful fan that a trained energy professional temporarily mounts into the frame of an exterior doorway in your home. After calibrating the device, the fan pulls air out of the house, lowering the air pressure inside. The higher outside air pressure then flows in through all unsealed gaps, cracks and openings such as gaps, cracks, or wiring penetrations. If conditions do not allow for lowering the pressure in the home, the fan may also be operated in reverse, with air pressure increased inside the home.
While the blower test is being conducted, the analyst may use an infrared camera to look at the walls, ceilings, and floors, to find specific locations where insulation is missing, and air is leaking. The analyst may also use a nontoxic smoke pencil to detect air leaks in your home. These tests determine the air infiltration rate of your home, which is recorded on a laptop or tablet.
The blower door test is conducted as part of the energy assessment of your home. Your contractor may also operate the blower door while performing air sealing (a method known as blower door assisted air sealing), and after to measure and verify the level of air leakage reduction achieved.
Blower doors consist of a frame and flexible panel that fit in a doorway, a variable-speed fan, a digital pressure gauge to measure the pressure differences inside and outside the home, which are connected to a device for measuring airflow, known as a manometer.
There are two types of blower doors: calibrated and uncalibrated. It is important that auditors use a calibrated door. This type of blower door has several gauges that measure the amount of air flowing out of the house through the fan.
Uncalibrated blower doors can only locate leaks in homes. They provide no method for determining the overall tightness of the home.
The calibrated blower door’s data allow your contractor to quantify the amount of air leakage prior to installation of air-sealing improvements, and the reduction in leakage achieved after air-sealing is completed.
Preparing for a Blower Door Test
Your home energy professional will perform the blower door test, including a walk-through of your home, setting up the blower door, and conducting the test. The following steps will help prepare your home for a blower door test:
- Plan to do a walk-through of your home with the auditor. Be prepared to point out areas that you know are drafty or difficult to condition comfortably.
- Expect the auditor to request access to all areas of your home including closets, built-in cabinets, attics, crawl spaces, and any unused rooms.
- The auditor will need to close all exterior doors and windows, open all interior doors, and close any fireplace dampers, doors, and woodstove air inlets.
- If you heat with wood, be sure all fires are completely out – not even coals – before the auditor arrives. Remove any ashes from open fireplaces.
- Expect the auditor to set controls on all atmospheric fossil fuel appliances (e.g., furnace, water heater, fireplaces, and stoves) to ensure that they do not fire during the test. The auditor should return them to the original position after the test.
- Expect the test to take up to an hour or more, depending on the complexity of your home.
3352 Pinemont Dr. Houston TX, 77004 – Houston Blower Door
3352 Pinemont Dr. Houston TX, 77004 – Houston Blower Door
Home energy professionals use a blower door as a diagnostic tool to determine how much air is entering or escaping from your home.
Professional energy assessors use blower door tests to help determine a home’s airtightness. Our blower door instructional video illustrates how a blower door test is performed, and how your contractor utilizes the diagnostic information provided to identify areas of air leakage in your home and make energy-saving improvements.
These are some reasons for establishing the proper building tightness:
- Reducing energy consumption from excess air leakage
- Avoiding moisture condensation problems
- Avoiding uncomfortable drafts caused by cold or warm air leaking in from outside
- Controlling outdoor contaminants, pests, and odors from entering your home.
- Determining proper sizing and airflow requirements of heating and cooling equipment.
- Determining whether mechanical ventilation is needed to provide acceptable fresh air and maintain indoor air quality in your home.
Blower Doors: What Are They and How Do They Work?
A blower door is a powerful fan that a trained energy professional temporarily mounts into the frame of an exterior doorway in your home. After calibrating the device, the fan pulls air out of the house, lowering the air pressure inside. The higher outside air pressure then flows in through all unsealed gaps, cracks and openings such as gaps, cracks, or wiring penetrations. If conditions do not allow for lowering the pressure in the home, the fan may also be operated in reverse, with air pressure increased inside the home.
While the blower test is being conducted, the analyst may use an infrared camera to look at the walls, ceilings, and floors, to find specific locations where insulation is missing, and air is leaking. The analyst may also use a nontoxic smoke pencil to detect air leaks in your home. These tests determine the air infiltration rate of your home, which is recorded on a laptop or tablet.
The blower door test is conducted as part of the energy assessment of your home. Your contractor may also operate the blower door while performing air sealing (a method known as blower door assisted air sealing), and after to measure and verify the level of air leakage reduction achieved.
Blower doors consist of a frame and flexible panel that fit in a doorway, a variable-speed fan, a digital pressure gauge to measure the pressure differences inside and outside the home, which are connected to a device for measuring airflow, known as a manometer.
There are two types of blower doors: calibrated and uncalibrated. It is important that auditors use a calibrated door. This type of blower door has several gauges that measure the amount of air flowing out of the house through the fan.
Uncalibrated blower doors can only locate leaks in homes. They provide no method for determining the overall tightness of the home.
The calibrated blower door’s data allow your contractor to quantify the amount of air leakage prior to installation of air-sealing improvements, and the reduction in leakage achieved after air-sealing is completed.
Preparing for a Blower Door Test
Your home energy professional will perform the blower door test, including a walk-through of your home, setting up the blower door, and conducting the test. The following steps will help prepare your home for a blower door test:
- Plan to do a walk-through of your home with the auditor. Be prepared to point out areas that you know are drafty or difficult to condition comfortably.
- Expect the auditor to request access to all areas of your home including closets, built-in cabinets, attics, crawl spaces, and any unused rooms.
- The auditor will need to close all exterior doors and windows, open all interior doors, and close any fireplace dampers, doors, and woodstove air inlets.
- If you heat with wood, be sure all fires are completely out – not even coals – before the auditor arrives. Remove any ashes from open fireplaces.
- Expect the auditor to set controls on all atmospheric fossil fuel appliances (e.g., furnace, water heater, fireplaces, and stoves) to ensure that they do not fire during the test. The auditor should return them to the original position after the test.
- Expect the test to take up to an hour or more, depending on the complexity of your home.
3210 Rice Blvd Houston TX, 77005 – Houston Blower Door
3210 Rice Blvd Houston TX, 77005 – Houston Blower Door
Home energy professionals use a blower door as a diagnostic tool to determine how much air is entering or escaping from your home.
Professional energy assessors use blower door tests to help determine a home’s airtightness. Our blower door instructional video illustrates how a blower door test is performed, and how your contractor utilizes the diagnostic information provided to identify areas of air leakage in your home and make energy-saving improvements.
These are some reasons for establishing the proper building tightness:
- Reducing energy consumption from excess air leakage
- Avoiding moisture condensation problems
- Avoiding uncomfortable drafts caused by cold or warm air leaking in from outside
- Controlling outdoor contaminants, pests, and odors from entering your home.
- Determining proper sizing and airflow requirements of heating and cooling equipment.
- Determining whether mechanical ventilation is needed to provide acceptable fresh air and maintain indoor air quality in your home.
Blower Doors: What Are They and How Do They Work?
A blower door is a powerful fan that a trained energy professional temporarily mounts into the frame of an exterior doorway in your home. After calibrating the device, the fan pulls air out of the house, lowering the air pressure inside. The higher outside air pressure then flows in through all unsealed gaps, cracks and openings such as gaps, cracks, or wiring penetrations. If conditions do not allow for lowering the pressure in the home, the fan may also be operated in reverse, with air pressure increased inside the home.
While the blower test is being conducted, the analyst may use an infrared camera to look at the walls, ceilings, and floors, to find specific locations where insulation is missing, and air is leaking. The analyst may also use a nontoxic smoke pencil to detect air leaks in your home. These tests determine the air infiltration rate of your home, which is recorded on a laptop or tablet.
The blower door test is conducted as part of the energy assessment of your home. Your contractor may also operate the blower door while performing air sealing (a method known as blower door assisted air sealing), and after to measure and verify the level of air leakage reduction achieved.
Blower doors consist of a frame and flexible panel that fit in a doorway, a variable-speed fan, a digital pressure gauge to measure the pressure differences inside and outside the home, which are connected to a device for measuring airflow, known as a manometer.
There are two types of blower doors: calibrated and uncalibrated. It is important that auditors use a calibrated door. This type of blower door has several gauges that measure the amount of air flowing out of the house through the fan.
Uncalibrated blower doors can only locate leaks in homes. They provide no method for determining the overall tightness of the home.
The calibrated blower door’s data allow your contractor to quantify the amount of air leakage prior to installation of air-sealing improvements, and the reduction in leakage achieved after air-sealing is completed.
Preparing for a Blower Door Test
Your home energy professional will perform the blower door test, including a walk-through of your home, setting up the blower door, and conducting the test. The following steps will help prepare your home for a blower door test:
- Plan to do a walk-through of your home with the auditor. Be prepared to point out areas that you know are drafty or difficult to condition comfortably.
- Expect the auditor to request access to all areas of your home including closets, built-in cabinets, attics, crawl spaces, and any unused rooms.
- The auditor will need to close all exterior doors and windows, open all interior doors, and close any fireplace dampers, doors, and woodstove air inlets.
- If you heat with wood, be sure all fires are completely out – not even coals – before the auditor arrives. Remove any ashes from open fireplaces.
- Expect the auditor to set controls on all atmospheric fossil fuel appliances (e.g., furnace, water heater, fireplaces, and stoves) to ensure that they do not fire during the test. The auditor should return them to the original position after the test.
- Expect the test to take up to an hour or more, depending on the complexity of your home.
3208 Saint Emanuel St. Houston TX, 77004 – Houston Blower Door
3208 Saint Emanuel St. Houston TX, 77004 – Houston Blower Door
Home energy professionals use a blower door as a diagnostic tool to determine how much air is entering or escaping from your home.
Professional energy assessors use blower door tests to help determine a home’s airtightness. Our blower door instructional video illustrates how a blower door test is performed, and how your contractor utilizes the diagnostic information provided to identify areas of air leakage in your home and make energy-saving improvements.
These are some reasons for establishing the proper building tightness:
- Reducing energy consumption from excess air leakage
- Avoiding moisture condensation problems
- Avoiding uncomfortable drafts caused by cold or warm air leaking in from outside
- Controlling outdoor contaminants, pests, and odors from entering your home.
- Determining proper sizing and airflow requirements of heating and cooling equipment.
- Determining whether mechanical ventilation is needed to provide acceptable fresh air and maintain indoor air quality in your home.
Blower Doors: What Are They and How Do They Work?
A blower door is a powerful fan that a trained energy professional temporarily mounts into the frame of an exterior doorway in your home. After calibrating the device, the fan pulls air out of the house, lowering the air pressure inside. The higher outside air pressure then flows in through all unsealed gaps, cracks and openings such as gaps, cracks, or wiring penetrations. If conditions do not allow for lowering the pressure in the home, the fan may also be operated in reverse, with air pressure increased inside the home.
While the blower test is being conducted, the analyst may use an infrared camera to look at the walls, ceilings, and floors, to find specific locations where insulation is missing, and air is leaking. The analyst may also use a nontoxic smoke pencil to detect air leaks in your home. These tests determine the air infiltration rate of your home, which is recorded on a laptop or tablet.
The blower door test is conducted as part of the energy assessment of your home. Your contractor may also operate the blower door while performing air sealing (a method known as blower door assisted air sealing), and after to measure and verify the level of air leakage reduction achieved.
Blower doors consist of a frame and flexible panel that fit in a doorway, a variable-speed fan, a digital pressure gauge to measure the pressure differences inside and outside the home, which are connected to a device for measuring airflow, known as a manometer.
There are two types of blower doors: calibrated and uncalibrated. It is important that auditors use a calibrated door. This type of blower door has several gauges that measure the amount of air flowing out of the house through the fan.
Uncalibrated blower doors can only locate leaks in homes. They provide no method for determining the overall tightness of the home.
The calibrated blower door’s data allow your contractor to quantify the amount of air leakage prior to installation of air-sealing improvements, and the reduction in leakage achieved after air-sealing is completed.
Preparing for a Blower Door Test
Your home energy professional will perform the blower door test, including a walk-through of your home, setting up the blower door, and conducting the test. The following steps will help prepare your home for a blower door test:
- Plan to do a walk-through of your home with the auditor. Be prepared to point out areas that you know are drafty or difficult to condition comfortably.
- Expect the auditor to request access to all areas of your home including closets, built-in cabinets, attics, crawl spaces, and any unused rooms.
- The auditor will need to close all exterior doors and windows, open all interior doors, and close any fireplace dampers, doors, and woodstove air inlets.
- If you heat with wood, be sure all fires are completely out – not even coals – before the auditor arrives. Remove any ashes from open fireplaces.
- Expect the auditor to set controls on all atmospheric fossil fuel appliances (e.g., furnace, water heater, fireplaces, and stoves) to ensure that they do not fire during the test. The auditor should return them to the original position after the test.
- Expect the test to take up to an hour or more, depending on the complexity of your home.
3206 Live Oak St. Houston TX, 77004 – Houston Blower Door
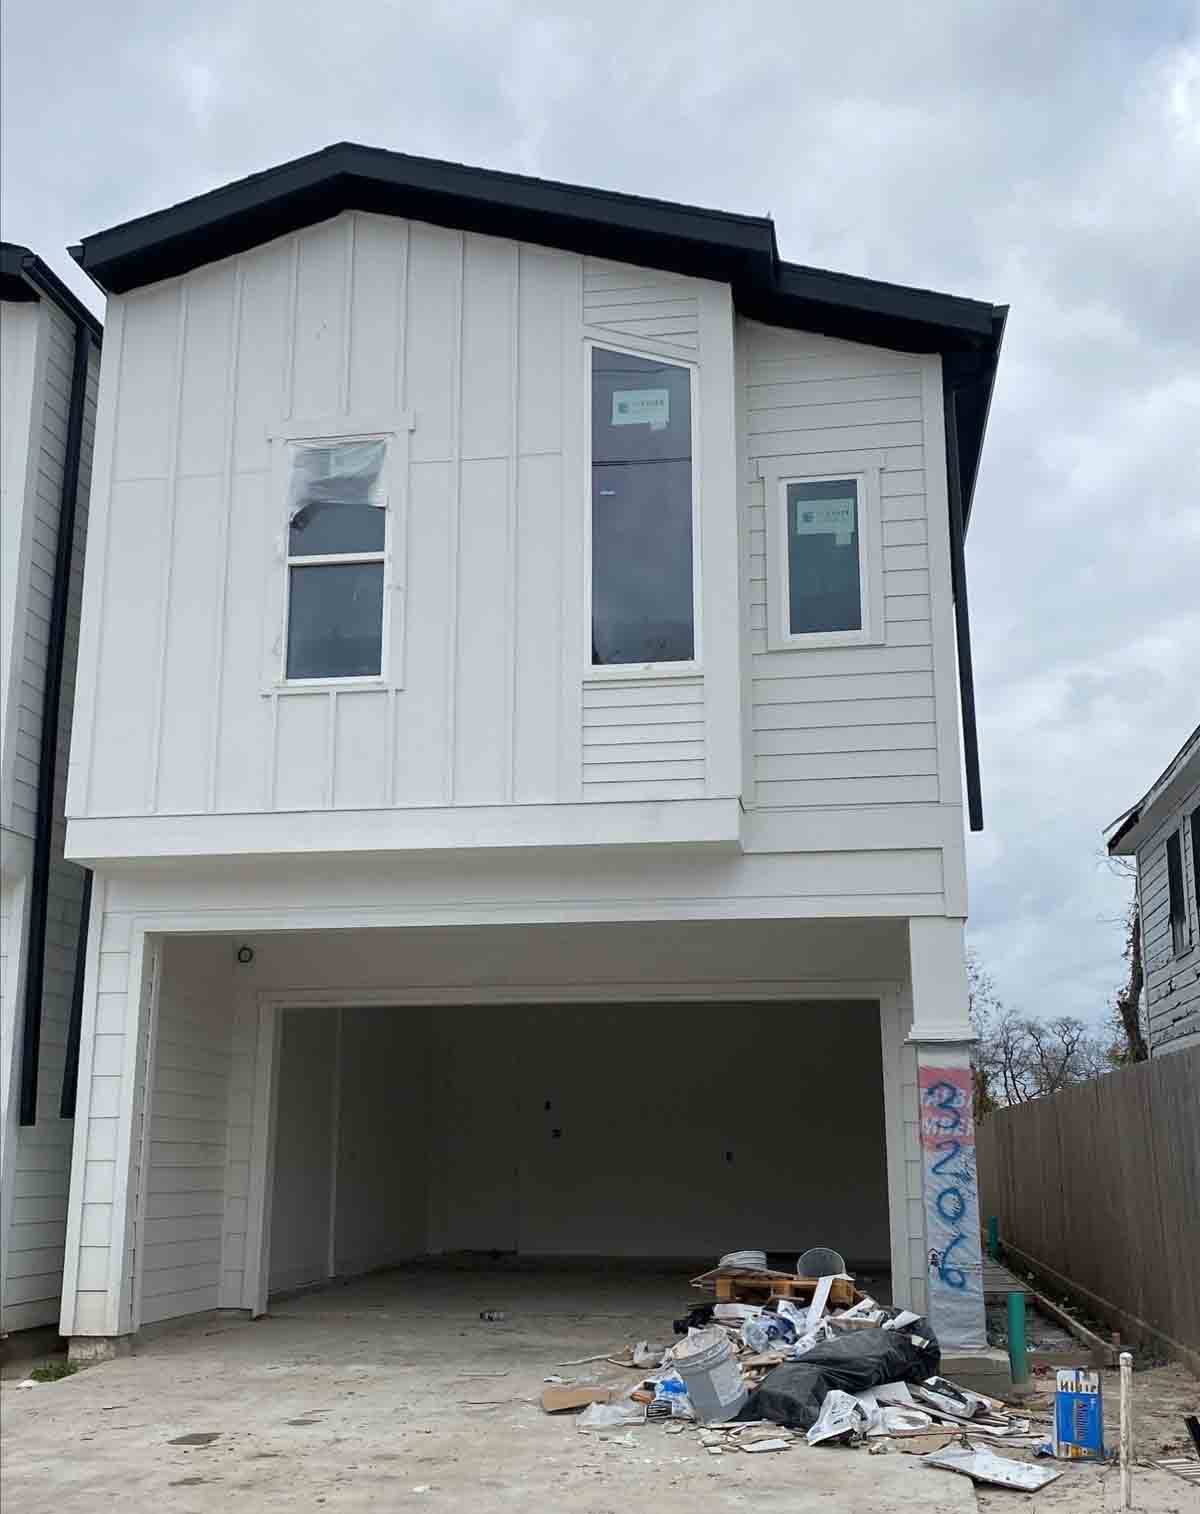
3206 Live Oak St. Houston TX, 77004 – Houston Blower Door
Home energy professionals use a blower door as a diagnostic tool to determine how much air is entering or escaping from your home.
Professional energy assessors use blower door tests to help determine a home’s airtightness. Our blower door instructional video illustrates how a blower door test is performed, and how your contractor utilizes the diagnostic information provided to identify areas of air leakage in your home and make energy-saving improvements.
These are some reasons for establishing the proper building tightness:
- Reducing energy consumption from excess air leakage
- Avoiding moisture condensation problems
- Avoiding uncomfortable drafts caused by cold or warm air leaking in from outside
- Controlling outdoor contaminants, pests, and odors from entering your home.
- Determining proper sizing and airflow requirements of heating and cooling equipment.
- Determining whether mechanical ventilation is needed to provide acceptable fresh air and maintain indoor air quality in your home.
Blower Doors: What Are They and How Do They Work?
A blower door is a powerful fan that a trained energy professional temporarily mounts into the frame of an exterior doorway in your home. After calibrating the device, the fan pulls air out of the house, lowering the air pressure inside. The higher outside air pressure then flows in through all unsealed gaps, cracks and openings such as gaps, cracks, or wiring penetrations. If conditions do not allow for lowering the pressure in the home, the fan may also be operated in reverse, with air pressure increased inside the home.
While the blower test is being conducted, the analyst may use an infrared camera to look at the walls, ceilings, and floors, to find specific locations where insulation is missing, and air is leaking. The analyst may also use a nontoxic smoke pencil to detect air leaks in your home. These tests determine the air infiltration rate of your home, which is recorded on a laptop or tablet.
The blower door test is conducted as part of the energy assessment of your home. Your contractor may also operate the blower door while performing air sealing (a method known as blower door assisted air sealing), and after to measure and verify the level of air leakage reduction achieved.
Blower doors consist of a frame and flexible panel that fit in a doorway, a variable-speed fan, a digital pressure gauge to measure the pressure differences inside and outside the home, which are connected to a device for measuring airflow, known as a manometer.
There are two types of blower doors: calibrated and uncalibrated. It is important that auditors use a calibrated door. This type of blower door has several gauges that measure the amount of air flowing out of the house through the fan.
Uncalibrated blower doors can only locate leaks in homes. They provide no method for determining the overall tightness of the home.
The calibrated blower door’s data allow your contractor to quantify the amount of air leakage prior to installation of air-sealing improvements, and the reduction in leakage achieved after air-sealing is completed.
Preparing for a Blower Door Test
Your home energy professional will perform the blower door test, including a walk-through of your home, setting up the blower door, and conducting the test. The following steps will help prepare your home for a blower door test:
- Plan to do a walk-through of your home with the auditor. Be prepared to point out areas that you know are drafty or difficult to condition comfortably.
- Expect the auditor to request access to all areas of your home including closets, built-in cabinets, attics, crawl spaces, and any unused rooms.
- The auditor will need to close all exterior doors and windows, open all interior doors, and close any fireplace dampers, doors, and woodstove air inlets.
- If you heat with wood, be sure all fires are completely out – not even coals – before the auditor arrives. Remove any ashes from open fireplaces.
- Expect the auditor to set controls on all atmospheric fossil fuel appliances (e.g., furnace, water heater, fireplaces, and stoves) to ensure that they do not fire during the test. The auditor should return them to the original position after the test.
- Expect the test to take up to an hour or more, depending on the complexity of your home.
2709 Truxillo St. Houston TX 77004 – Houston Blower Door
2709 Truxillo St. Houston TX 77004 – Houston Blower Door
Home energy professionals use a blower door as a diagnostic tool to determine how much air is entering or escaping from your home.
Professional energy assessors use blower door tests to help determine a home’s airtightness. Our blower door instructional video illustrates how a blower door test is performed, and how your contractor utilizes the diagnostic information provided to identify areas of air leakage in your home and make energy-saving improvements.
These are some reasons for establishing the proper building tightness:
- Reducing energy consumption from excess air leakage
- Avoiding moisture condensation problems
- Avoiding uncomfortable drafts caused by cold or warm air leaking in from outside
- Controlling outdoor contaminants, pests, and odors from entering your home.
- Determining proper sizing and airflow requirements of heating and cooling equipment.
- Determining whether mechanical ventilation is needed to provide acceptable fresh air and maintain indoor air quality in your home.
Blower Doors: What Are They and How Do They Work?
A blower door is a powerful fan that a trained energy professional temporarily mounts into the frame of an exterior doorway in your home. After calibrating the device, the fan pulls air out of the house, lowering the air pressure inside. The higher outside air pressure then flows in through all unsealed gaps, cracks and openings such as gaps, cracks, or wiring penetrations. If conditions do not allow for lowering the pressure in the home, the fan may also be operated in reverse, with air pressure increased inside the home.
While the blower test is being conducted, the analyst may use an infrared camera to look at the walls, ceilings, and floors, to find specific locations where insulation is missing, and air is leaking. The analyst may also use a nontoxic smoke pencil to detect air leaks in your home. These tests determine the air infiltration rate of your home, which is recorded on a laptop or tablet.
The blower door test is conducted as part of the energy assessment of your home. Your contractor may also operate the blower door while performing air sealing (a method known as blower door assisted air sealing), and after to measure and verify the level of air leakage reduction achieved.
Blower doors consist of a frame and flexible panel that fit in a doorway, a variable-speed fan, a digital pressure gauge to measure the pressure differences inside and outside the home, which are connected to a device for measuring airflow, known as a manometer.
There are two types of blower doors: calibrated and uncalibrated. It is important that auditors use a calibrated door. This type of blower door has several gauges that measure the amount of air flowing out of the house through the fan.
Uncalibrated blower doors can only locate leaks in homes. They provide no method for determining the overall tightness of the home.
The calibrated blower door’s data allow your contractor to quantify the amount of air leakage prior to installation of air-sealing improvements, and the reduction in leakage achieved after air-sealing is completed.
Preparing for a Blower Door Test
Your home energy professional will perform the blower door test, including a walk-through of your home, setting up the blower door, and conducting the test. The following steps will help prepare your home for a blower door test:
- Plan to do a walk-through of your home with the auditor. Be prepared to point out areas that you know are drafty or difficult to condition comfortably.
- Expect the auditor to request access to all areas of your home including closets, built-in cabinets, attics, crawl spaces, and any unused rooms.
- The auditor will need to close all exterior doors and windows, open all interior doors, and close any fireplace dampers, doors, and woodstove air inlets.
- If you heat with wood, be sure all fires are completely out – not even coals – before the auditor arrives. Remove any ashes from open fireplaces.
- Expect the auditor to set controls on all atmospheric fossil fuel appliances (e.g., furnace, water heater, fireplaces, and stoves) to ensure that they do not fire during the test. The auditor should return them to the original position after the test.
- Expect the test to take up to an hour or more, depending on the complexity of your home.
2619 Sadler St. Houston TX, 77093 – Houston Blower Door
2619 Sadler St. Houston TX, 77093 – Houston Blower Door
Home energy professionals use a blower door as a diagnostic tool to determine how much air is entering or escaping from your home.
Professional energy assessors use blower door tests to help determine a home’s airtightness. Our blower door instructional video illustrates how a blower door test is performed, and how your contractor utilizes the diagnostic information provided to identify areas of air leakage in your home and make energy-saving improvements.
These are some reasons for establishing the proper building tightness:
- Reducing energy consumption from excess air leakage
- Avoiding moisture condensation problems
- Avoiding uncomfortable drafts caused by cold or warm air leaking in from outside
- Controlling outdoor contaminants, pests, and odors from entering your home.
- Determining proper sizing and airflow requirements of heating and cooling equipment.
- Determining whether mechanical ventilation is needed to provide acceptable fresh air and maintain indoor air quality in your home.
Blower Doors: What Are They and How Do They Work?
A blower door is a powerful fan that a trained energy professional temporarily mounts into the frame of an exterior doorway in your home. After calibrating the device, the fan pulls air out of the house, lowering the air pressure inside. The higher outside air pressure then flows in through all unsealed gaps, cracks and openings such as gaps, cracks, or wiring penetrations. If conditions do not allow for lowering the pressure in the home, the fan may also be operated in reverse, with air pressure increased inside the home.
While the blower test is being conducted, the analyst may use an infrared camera to look at the walls, ceilings, and floors, to find specific locations where insulation is missing, and air is leaking. The analyst may also use a nontoxic smoke pencil to detect air leaks in your home. These tests determine the air infiltration rate of your home, which is recorded on a laptop or tablet.
The blower door test is conducted as part of the energy assessment of your home. Your contractor may also operate the blower door while performing air sealing (a method known as blower door assisted air sealing), and after to measure and verify the level of air leakage reduction achieved.
Blower doors consist of a frame and flexible panel that fit in a doorway, a variable-speed fan, a digital pressure gauge to measure the pressure differences inside and outside the home, which are connected to a device for measuring airflow, known as a manometer.
There are two types of blower doors: calibrated and uncalibrated. It is important that auditors use a calibrated door. This type of blower door has several gauges that measure the amount of air flowing out of the house through the fan.
Uncalibrated blower doors can only locate leaks in homes. They provide no method for determining the overall tightness of the home.
The calibrated blower door’s data allow your contractor to quantify the amount of air leakage prior to installation of air-sealing improvements, and the reduction in leakage achieved after air-sealing is completed.
Preparing for a Blower Door Test
Your home energy professional will perform the blower door test, including a walk-through of your home, setting up the blower door, and conducting the test. The following steps will help prepare your home for a blower door test:
- Plan to do a walk-through of your home with the auditor. Be prepared to point out areas that you know are drafty or difficult to condition comfortably.
- Expect the auditor to request access to all areas of your home including closets, built-in cabinets, attics, crawl spaces, and any unused rooms.
- The auditor will need to close all exterior doors and windows, open all interior doors, and close any fireplace dampers, doors, and woodstove air inlets.
- If you heat with wood, be sure all fires are completely out – not even coals – before the auditor arrives. Remove any ashes from open fireplaces.
- Expect the auditor to set controls on all atmospheric fossil fuel appliances (e.g., furnace, water heater, fireplaces, and stoves) to ensure that they do not fire during the test. The auditor should return them to the original position after the test.
- Expect the test to take up to an hour or more, depending on the complexity of your home.
2518 Terry St Houston TX 77009 – Houston Blower Door
2518 Terry St Houston TX 77009 – Houston Blower Door
Home energy professionals use a blower door as a diagnostic tool to determine how much air is entering or escaping from your home.
Professional energy assessors use blower door tests to help determine a home’s airtightness. Our blower door instructional video illustrates how a blower door test is performed, and how your contractor utilizes the diagnostic information provided to identify areas of air leakage in your home and make energy-saving improvements.
These are some reasons for establishing the proper building tightness:
- Reducing energy consumption from excess air leakage
- Avoiding moisture condensation problems
- Avoiding uncomfortable drafts caused by cold or warm air leaking in from outside
- Controlling outdoor contaminants, pests, and odors from entering your home.
- Determining proper sizing and airflow requirements of heating and cooling equipment.
- Determining whether mechanical ventilation is needed to provide acceptable fresh air and maintain indoor air quality in your home.
Blower Doors: What Are They and How Do They Work?
A blower door is a powerful fan that a trained energy professional temporarily mounts into the frame of an exterior doorway in your home. After calibrating the device, the fan pulls air out of the house, lowering the air pressure inside. The higher outside air pressure then flows in through all unsealed gaps, cracks and openings such as gaps, cracks, or wiring penetrations. If conditions do not allow for lowering the pressure in the home, the fan may also be operated in reverse, with air pressure increased inside the home.
While the blower test is being conducted, the analyst may use an infrared camera to look at the walls, ceilings, and floors, to find specific locations where insulation is missing, and air is leaking. The analyst may also use a nontoxic smoke pencil to detect air leaks in your home. These tests determine the air infiltration rate of your home, which is recorded on a laptop or tablet.
The blower door test is conducted as part of the energy assessment of your home. Your contractor may also operate the blower door while performing air sealing (a method known as blower door assisted air sealing), and after to measure and verify the level of air leakage reduction achieved.
Blower doors consist of a frame and flexible panel that fit in a doorway, a variable-speed fan, a digital pressure gauge to measure the pressure differences inside and outside the home, which are connected to a device for measuring airflow, known as a manometer.
There are two types of blower doors: calibrated and uncalibrated. It is important that auditors use a calibrated door. This type of blower door has several gauges that measure the amount of air flowing out of the house through the fan.
Uncalibrated blower doors can only locate leaks in homes. They provide no method for determining the overall tightness of the home.
The calibrated blower door’s data allow your contractor to quantify the amount of air leakage prior to installation of air-sealing improvements, and the reduction in leakage achieved after air-sealing is completed.
Preparing for a Blower Door Test
Your home energy professional will perform the blower door test, including a walk-through of your home, setting up the blower door, and conducting the test. The following steps will help prepare your home for a blower door test:
- Plan to do a walk-through of your home with the auditor. Be prepared to point out areas that you know are drafty or difficult to condition comfortably.
- Expect the auditor to request access to all areas of your home including closets, built-in cabinets, attics, crawl spaces, and any unused rooms.
- The auditor will need to close all exterior doors and windows, open all interior doors, and close any fireplace dampers, doors, and woodstove air inlets.
- If you heat with wood, be sure all fires are completely out – not even coals – before the auditor arrives. Remove any ashes from open fireplaces.
- Expect the auditor to set controls on all atmospheric fossil fuel appliances (e.g., furnace, water heater, fireplaces, and stoves) to ensure that they do not fire during the test. The auditor should return them to the original position after the test.
- Expect the test to take up to an hour or more, depending on the complexity of your home.
2107 Houston Ave Houston TX, 77007 – Houston Blower Door
2107 Houston Ave Houston TX, 77007 – Houston Blower Door
Home energy professionals use a blower door as a diagnostic tool to determine how much air is entering or escaping from your home.
Professional energy assessors use blower door tests to help determine a home’s airtightness. Our blower door instructional video illustrates how a blower door test is performed, and how your contractor utilizes the diagnostic information provided to identify areas of air leakage in your home and make energy-saving improvements.
These are some reasons for establishing the proper building tightness:
- Reducing energy consumption from excess air leakage
- Avoiding moisture condensation problems
- Avoiding uncomfortable drafts caused by cold or warm air leaking in from outside
- Controlling outdoor contaminants, pests, and odors from entering your home.
- Determining proper sizing and airflow requirements of heating and cooling equipment.
- Determining whether mechanical ventilation is needed to provide acceptable fresh air and maintain indoor air quality in your home.
Blower Doors: What Are They and How Do They Work?
A blower door is a powerful fan that a trained energy professional temporarily mounts into the frame of an exterior doorway in your home. After calibrating the device, the fan pulls air out of the house, lowering the air pressure inside. The higher outside air pressure then flows in through all unsealed gaps, cracks and openings such as gaps, cracks, or wiring penetrations. If conditions do not allow for lowering the pressure in the home, the fan may also be operated in reverse, with air pressure increased inside the home.
While the blower test is being conducted, the analyst may use an infrared camera to look at the walls, ceilings, and floors, to find specific locations where insulation is missing, and air is leaking. The analyst may also use a nontoxic smoke pencil to detect air leaks in your home. These tests determine the air infiltration rate of your home, which is recorded on a laptop or tablet.
The blower door test is conducted as part of the energy assessment of your home. Your contractor may also operate the blower door while performing air sealing (a method known as blower door assisted air sealing), and after to measure and verify the level of air leakage reduction achieved.
Blower doors consist of a frame and flexible panel that fit in a doorway, a variable-speed fan, a digital pressure gauge to measure the pressure differences inside and outside the home, which are connected to a device for measuring airflow, known as a manometer.
There are two types of blower doors: calibrated and uncalibrated. It is important that auditors use a calibrated door. This type of blower door has several gauges that measure the amount of air flowing out of the house through the fan.
Uncalibrated blower doors can only locate leaks in homes. They provide no method for determining the overall tightness of the home.
The calibrated blower door’s data allow your contractor to quantify the amount of air leakage prior to installation of air-sealing improvements, and the reduction in leakage achieved after air-sealing is completed.
Preparing for a Blower Door Test
Your home energy professional will perform the blower door test, including a walk-through of your home, setting up the blower door, and conducting the test. The following steps will help prepare your home for a blower door test:
- Plan to do a walk-through of your home with the auditor. Be prepared to point out areas that you know are drafty or difficult to condition comfortably.
- Expect the auditor to request access to all areas of your home including closets, built-in cabinets, attics, crawl spaces, and any unused rooms.
- The auditor will need to close all exterior doors and windows, open all interior doors, and close any fireplace dampers, doors, and woodstove air inlets.
- If you heat with wood, be sure all fires are completely out – not even coals – before the auditor arrives. Remove any ashes from open fireplaces.
- Expect the auditor to set controls on all atmospheric fossil fuel appliances (e.g., furnace, water heater, fireplaces, and stoves) to ensure that they do not fire during the test. The auditor should return them to the original position after the test.
- Expect the test to take up to an hour or more, depending on the complexity of your home.
2043 Santa Rosa St Houston TX, 77023 – Houston Blower Door
2043 Santa Rosa St Houston TX, 77023 – Houston Blower Door
Home energy professionals use a blower door as a diagnostic tool to determine how much air is entering or escaping from your home.
Professional energy assessors use blower door tests to help determine a home’s airtightness. Our blower door instructional video illustrates how a blower door test is performed, and how your contractor utilizes the diagnostic information provided to identify areas of air leakage in your home and make energy-saving improvements.
These are some reasons for establishing the proper building tightness:
- Reducing energy consumption from excess air leakage
- Avoiding moisture condensation problems
- Avoiding uncomfortable drafts caused by cold or warm air leaking in from outside
- Controlling outdoor contaminants, pests, and odors from entering your home.
- Determining proper sizing and airflow requirements of heating and cooling equipment.
- Determining whether mechanical ventilation is needed to provide acceptable fresh air and maintain indoor air quality in your home.
Blower Doors: What Are They and How Do They Work?
A blower door is a powerful fan that a trained energy professional temporarily mounts into the frame of an exterior doorway in your home. After calibrating the device, the fan pulls air out of the house, lowering the air pressure inside. The higher outside air pressure then flows in through all unsealed gaps, cracks and openings such as gaps, cracks, or wiring penetrations. If conditions do not allow for lowering the pressure in the home, the fan may also be operated in reverse, with air pressure increased inside the home.
While the blower test is being conducted, the analyst may use an infrared camera to look at the walls, ceilings, and floors, to find specific locations where insulation is missing, and air is leaking. The analyst may also use a nontoxic smoke pencil to detect air leaks in your home. These tests determine the air infiltration rate of your home, which is recorded on a laptop or tablet.
The blower door test is conducted as part of the energy assessment of your home. Your contractor may also operate the blower door while performing air sealing (a method known as blower door assisted air sealing), and after to measure and verify the level of air leakage reduction achieved.
Blower doors consist of a frame and flexible panel that fit in a doorway, a variable-speed fan, a digital pressure gauge to measure the pressure differences inside and outside the home, which are connected to a device for measuring airflow, known as a manometer.
There are two types of blower doors: calibrated and uncalibrated. It is important that auditors use a calibrated door. This type of blower door has several gauges that measure the amount of air flowing out of the house through the fan.
Uncalibrated blower doors can only locate leaks in homes. They provide no method for determining the overall tightness of the home.
The calibrated blower door’s data allow your contractor to quantify the amount of air leakage prior to installation of air-sealing improvements, and the reduction in leakage achieved after air-sealing is completed.
Preparing for a Blower Door Test
Your home energy professional will perform the blower door test, including a walk-through of your home, setting up the blower door, and conducting the test. The following steps will help prepare your home for a blower door test:
- Plan to do a walk-through of your home with the auditor. Be prepared to point out areas that you know are drafty or difficult to condition comfortably.
- Expect the auditor to request access to all areas of your home including closets, built-in cabinets, attics, crawl spaces, and any unused rooms.
- The auditor will need to close all exterior doors and windows, open all interior doors, and close any fireplace dampers, doors, and woodstove air inlets.
- If you heat with wood, be sure all fires are completely out – not even coals – before the auditor arrives. Remove any ashes from open fireplaces.
- Expect the auditor to set controls on all atmospheric fossil fuel appliances (e.g., furnace, water heater, fireplaces, and stoves) to ensure that they do not fire during the test. The auditor should return them to the original position after the test.
- Expect the test to take up to an hour or more, depending on the complexity of your home.
1439 W 25th #A Houston TX 77008 – Houston Blower Door
1439 W 25th #A Houston TX 77008 – Houston Blower Door
Home energy professionals use a blower door as a diagnostic tool to determine how much air is entering or escaping from your home.
Professional energy assessors use blower door tests to help determine a home’s airtightness. Our blower door instructional video illustrates how a blower door test is performed, and how your contractor utilizes the diagnostic information provided to identify areas of air leakage in your home and make energy-saving improvements.
These are some reasons for establishing the proper building tightness:
- Reducing energy consumption from excess air leakage
- Avoiding moisture condensation problems
- Avoiding uncomfortable drafts caused by cold or warm air leaking in from outside
- Controlling outdoor contaminants, pests, and odors from entering your home.
- Determining proper sizing and airflow requirements of heating and cooling equipment.
- Determining whether mechanical ventilation is needed to provide acceptable fresh air and maintain indoor air quality in your home.
Blower Doors: What Are They and How Do They Work?
A blower door is a powerful fan that a trained energy professional temporarily mounts into the frame of an exterior doorway in your home. After calibrating the device, the fan pulls air out of the house, lowering the air pressure inside. The higher outside air pressure then flows in through all unsealed gaps, cracks and openings such as gaps, cracks, or wiring penetrations. If conditions do not allow for lowering the pressure in the home, the fan may also be operated in reverse, with air pressure increased inside the home.
While the blower test is being conducted, the analyst may use an infrared camera to look at the walls, ceilings, and floors, to find specific locations where insulation is missing, and air is leaking. The analyst may also use a nontoxic smoke pencil to detect air leaks in your home. These tests determine the air infiltration rate of your home, which is recorded on a laptop or tablet.
The blower door test is conducted as part of the energy assessment of your home. Your contractor may also operate the blower door while performing air sealing (a method known as blower door assisted air sealing), and after to measure and verify the level of air leakage reduction achieved.
Blower doors consist of a frame and flexible panel that fit in a doorway, a variable-speed fan, a digital pressure gauge to measure the pressure differences inside and outside the home, which are connected to a device for measuring airflow, known as a manometer.
There are two types of blower doors: calibrated and uncalibrated. It is important that auditors use a calibrated door. This type of blower door has several gauges that measure the amount of air flowing out of the house through the fan.
Uncalibrated blower doors can only locate leaks in homes. They provide no method for determining the overall tightness of the home.
The calibrated blower door’s data allow your contractor to quantify the amount of air leakage prior to installation of air-sealing improvements, and the reduction in leakage achieved after air-sealing is completed.
Preparing for a Blower Door Test
Your home energy professional will perform the blower door test, including a walk-through of your home, setting up the blower door, and conducting the test. The following steps will help prepare your home for a blower door test:
- Plan to do a walk-through of your home with the auditor. Be prepared to point out areas that you know are drafty or difficult to condition comfortably.
- Expect the auditor to request access to all areas of your home including closets, built-in cabinets, attics, crawl spaces, and any unused rooms.
- The auditor will need to close all exterior doors and windows, open all interior doors, and close any fireplace dampers, doors, and woodstove air inlets.
- If you heat with wood, be sure all fires are completely out – not even coals – before the auditor arrives. Remove any ashes from open fireplaces.
- Expect the auditor to set controls on all atmospheric fossil fuel appliances (e.g., furnace, water heater, fireplaces, and stoves) to ensure that they do not fire during the test. The auditor should return them to the original position after the test.
- Expect the test to take up to an hour or more, depending on the complexity of your home.
2014 Turner Unit B Houston TX, 77093 – Minimizing Energy Losses in Ducts
2014 Turner Unit B Houston TX, 77093 – Minimizing Energy Losses in Ducts
Minimizing energy losses in ducts
Minimizing energy losses in ducts by seeing if the ducts are poorly sealed or insulated. That could tell you why your energy bill in high. Your air ducts are one of the most important systems in your home, and if the ducts are poorly sealed or insulated, they are likely contributing to higher energy bills.
Your home’s duct system is a branching network of tubes in the walls, floors, and ceilings; it carries the air from your home’s furnace and central air conditioner to each room. Ducts are made of sheet metal, fiberglass, or other materials.
Ducts that leak heated air into unheated spaces can add hundreds of dollars a year to your heating and cooling bills, but you can reduce that loss by sealing and insulating your ducts. Insulating ducts in unconditioned spaces is usually very cost-effective. Existing ducts may also be blocked or may require simple upgrades.
Designing and Installing New Duct Systems
In new home construction or in retrofits, proper duct system design is critical. In recent years, energy-saving designs have sought to include ducts and heating systems in the conditioned space.
Efficient and well-designed duct systems distribute air properly throughout your home without leaking to keep all rooms at a comfortable temperature. The system should provide balanced supply and return flow to maintain a neutral pressure within the house.
Even well sealed and insulated ducts will leak and lose some heat, so many new energy-efficient homes place the duct system within the conditioned space of the home. The simplest way to accomplish this is to hide the ducts in dropped ceilings and in corners of rooms. Ducts can also be located in a sealed and insulated chase extending into the attic or built into raised floors. In both of these latter cases, care must be taken during construction to prevent contractors from using the duct chases for wiring or other utilities.
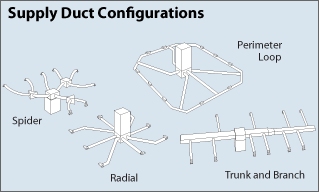
In either case, actual ducts must be used — chases and floor cavities should not be used as ducts. Regardless of where they are installed, ducts should be well sealed. Although ducts can be configured in a number of ways, the “trunk and branch” and “radial” supply duct configurations are most suitable for ducts located in conditioned spaces.
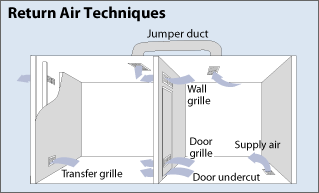
Air return duct systems can be configured in two ways: each room can have a return duct that sends air back to the heating and cooling equipment or return grills can be located in central locations on each floor. For the latter case, either grills must be installed to allow air to pass out of closed rooms, or short “jumper ducts” can be installed to connect the vent in one room with the next, allowing air to flow back to the central return grilles. Door undercuts help, but they are usually not sufficient for return airflow.
You can perform a simple check for adequate return air capacity by doing the following:
- Close all exterior doors and windows
- Close all interior room doors
- Turn on the central air handler
- “Crack” interior doors one by one and observe if the door closes or further opens “on its own.” (Whether it closes or opens will depend on the direction of the air handler-driven air flow.) Rooms served by air-moved doors have restricted return air flow and need pressure relief as described above.
Maintaining and Upgrading Existing Duct Systems
Sealing your ducts to prevent leaks is even more important if the ducts are located in an unconditioned area such as an attic or vented crawlspace. If the supply ducts are leaking, heated or cooled air can be forced out of unsealed joints and lost. In addition, unconditioned air can be drawn into return ducts through unsealed joints.
Although minor duct repairs are easy to make, qualified professionals should seal and insulate ducts in unconditioned spaces to ensure the use of appropriate sealing materials.
Aside from sealing your ducts, the simplest and most effective means of maintaining your air distribution system is to ensure that furniture and other objects are not blocking the airflow through your registers, and to vacuum the registers to remove any dust buildup.
Existing duct systems often suffer from design deficiencies in the return air system, and modifications by the homeowner (or just a tendency to keep doors closed) may contribute to these problems. Any rooms with a lack of sufficient return airflow may benefit from relatively simple upgrades, such as the installation of new return-air grilles, undercutting doors for return air, or installing a jumper duct.
Some rooms may also be hard to heat and cool because of inadequate supply ducts or grilles. If this is the case, you should first examine whether the problem is the room itself: fix any problems with insulation, air leakage, or inefficient windows first. If the problem persists, you may be able to increase the size of the supply duct or add an additional duct to provide the needed airflow to the room.
Minor Duct Repair Tips for Minimizing Energy Losses in Ducts
- Check your ducts for air leaks. First, look for sections that should be joined but have separated and then look for obvious holes.
- Duct mastic is the preferred material for sealing ductwork seams and joints. It is more durable than any available tape and generally easier for a do-it-yourself installation. Its only drawback is that it will not bridge gaps over ¼ inch. Such gaps must be first bridged with web-type drywall tape, or a good quality heat approved tape.
- If you use tape to seal your ducts, avoid cloth-backed, rubber adhesive duct tape — it tends to fail quickly. Instead, use mastic, butyl tape, foil tape, or other heat-approved tapes. Look for tape with the Underwriters Laboratories (UL) logo.
- Remember that insulating ducts in the basement will make the basement colder. If both the ducts and the basement walls are not insulated, consider insulating both. Water pipes and drains in unconditioned spaces could freeze and burst if the heat ducts are fully insulated because there would be no heat source to prevent the space from freezing in cold weather. However, using an electric heating tape wrap on the pipes can prevent this. Check with a professional contractor.
- Hire a professional to install both supply and return registers in the basement rooms after converting your basement to a living area.
- Be sure a well-sealed vapor barrier exists on the outside of the insulation on cooling ducts to prevent moisture condensation.
- If you have a fuel-burning furnace, stove, or other appliance or an attached garage, install a carbon monoxide (CO) monitor to alert you to harmful CO levels.
- Be sure to get professional help when doing ductwork. A qualified professional should always perform changes and repairs to a duct system.
2014 Turner Unit B Houston TX, 77093 – Minimizing Energy Losses in Ducts
2014 Turner Unit B Houston TX, 77093 – Minimizing Energy Losses in Ducts
Minimizing energy losses in ducts
Minimizing energy losses in ducts by seeing if the ducts are poorly sealed or insulated. That could tell you why your energy bill in high. Your air ducts are one of the most important systems in your home, and if the ducts are poorly sealed or insulated, they are likely contributing to higher energy bills.
Your home’s duct system is a branching network of tubes in the walls, floors, and ceilings; it carries the air from your home’s furnace and central air conditioner to each room. Ducts are made of sheet metal, fiberglass, or other materials.
Ducts that leak heated air into unheated spaces can add hundreds of dollars a year to your heating and cooling bills, but you can reduce that loss by sealing and insulating your ducts. Insulating ducts in unconditioned spaces is usually very cost-effective. Existing ducts may also be blocked or may require simple upgrades.
Designing and Installing New Duct Systems
In new home construction or in retrofits, proper duct system design is critical. In recent years, energy-saving designs have sought to include ducts and heating systems in the conditioned space.
Efficient and well-designed duct systems distribute air properly throughout your home without leaking to keep all rooms at a comfortable temperature. The system should provide balanced supply and return flow to maintain a neutral pressure within the house.
Even well sealed and insulated ducts will leak and lose some heat, so many new energy-efficient homes place the duct system within the conditioned space of the home. The simplest way to accomplish this is to hide the ducts in dropped ceilings and in corners of rooms. Ducts can also be located in a sealed and insulated chase extending into the attic or built into raised floors. In both of these latter cases, care must be taken during construction to prevent contractors from using the duct chases for wiring or other utilities.
In either case, actual ducts must be used — chases and floor cavities should not be used as ducts. Regardless of where they are installed, ducts should be well sealed. Although ducts can be configured in a number of ways, the “trunk and branch” and “radial” supply duct configurations are most suitable for ducts located in conditioned spaces.
Air return duct systems can be configured in two ways: each room can have a return duct that sends air back to the heating and cooling equipment or return grills can be located in central locations on each floor. For the latter case, either grills must be installed to allow air to pass out of closed rooms, or short “jumper ducts” can be installed to connect the vent in one room with the next, allowing air to flow back to the central return grilles. Door undercuts help, but they are usually not sufficient for return airflow.
You can perform a simple check for adequate return air capacity by doing the following:
- Close all exterior doors and windows
- Close all interior room doors
- Turn on the central air handler
- “Crack” interior doors one by one and observe if the door closes or further opens “on its own.” (Whether it closes or opens will depend on the direction of the air handler-driven air flow.) Rooms served by air-moved doors have restricted return air flow and need pressure relief as described above.
Maintaining and Upgrading Existing Duct Systems
Sealing your ducts to prevent leaks is even more important if the ducts are located in an unconditioned area such as an attic or vented crawlspace. If the supply ducts are leaking, heated or cooled air can be forced out of unsealed joints and lost. In addition, unconditioned air can be drawn into return ducts through unsealed joints.
Although minor duct repairs are easy to make, qualified professionals should seal and insulate ducts in unconditioned spaces to ensure the use of appropriate sealing materials.
Aside from sealing your ducts, the simplest and most effective means of maintaining your air distribution system is to ensure that furniture and other objects are not blocking the airflow through your registers, and to vacuum the registers to remove any dust buildup.
Existing duct systems often suffer from design deficiencies in the return air system, and modifications by the homeowner (or just a tendency to keep doors closed) may contribute to these problems. Any rooms with a lack of sufficient return airflow may benefit from relatively simple upgrades, such as the installation of new return-air grilles, undercutting doors for return air, or installing a jumper duct.
Some rooms may also be hard to heat and cool because of inadequate supply ducts or grilles. If this is the case, you should first examine whether the problem is the room itself: fix any problems with insulation, air leakage, or inefficient windows first. If the problem persists, you may be able to increase the size of the supply duct or add an additional duct to provide the needed airflow to the room.
Minor Duct Repair Tips for Minimizing Energy Losses in Ducts
- Check your ducts for air leaks. First, look for sections that should be joined but have separated and then look for obvious holes.
- Duct mastic is the preferred material for sealing ductwork seams and joints. It is more durable than any available tape and generally easier for a do-it-yourself installation. Its only drawback is that it will not bridge gaps over ¼ inch. Such gaps must be first bridged with web-type drywall tape, or a good quality heat approved tape.
- If you use tape to seal your ducts, avoid cloth-backed, rubber adhesive duct tape — it tends to fail quickly. Instead, use mastic, butyl tape, foil tape, or other heat-approved tapes. Look for tape with the Underwriters Laboratories (UL) logo.
- Remember that insulating ducts in the basement will make the basement colder. If both the ducts and the basement walls are not insulated, consider insulating both. Water pipes and drains in unconditioned spaces could freeze and burst if the heat ducts are fully insulated because there would be no heat source to prevent the space from freezing in cold weather. However, using an electric heating tape wrap on the pipes can prevent this. Check with a professional contractor.
- Hire a professional to install both supply and return registers in the basement rooms after converting your basement to a living area.
- Be sure a well-sealed vapor barrier exists on the outside of the insulation on cooling ducts to prevent moisture condensation.
- If you have a fuel-burning furnace, stove, or other appliance or an attached garage, install a carbon monoxide (CO) monitor to alert you to harmful CO levels.
- Be sure to get professional help when doing ductwork. A qualified professional should always perform changes and repairs to a duct system.
2005 De Soto Houston TX, 77091 – Minimizing Energy Losses in Ducts
2005 De Soto Houston TX, 77091 – Minimizing Energy Losses in Ducts
Minimizing energy losses in ducts
Minimizing energy losses in ducts by seeing if the ducts are poorly sealed or insulated. That could tell you why your energy bill in high. Your air ducts are one of the most important systems in your home, and if the ducts are poorly sealed or insulated, they are likely contributing to higher energy bills.
Your home’s duct system is a branching network of tubes in the walls, floors, and ceilings; it carries the air from your home’s furnace and central air conditioner to each room. Ducts are made of sheet metal, fiberglass, or other materials.
Ducts that leak heated air into unheated spaces can add hundreds of dollars a year to your heating and cooling bills, but you can reduce that loss by sealing and insulating your ducts. Insulating ducts in unconditioned spaces is usually very cost-effective. Existing ducts may also be blocked or may require simple upgrades.
Designing and Installing New Duct Systems
In new home construction or in retrofits, proper duct system design is critical. In recent years, energy-saving designs have sought to include ducts and heating systems in the conditioned space.
Efficient and well-designed duct systems distribute air properly throughout your home without leaking to keep all rooms at a comfortable temperature. The system should provide balanced supply and return flow to maintain a neutral pressure within the house.
Even well sealed and insulated ducts will leak and lose some heat, so many new energy-efficient homes place the duct system within the conditioned space of the home. The simplest way to accomplish this is to hide the ducts in dropped ceilings and in corners of rooms. Ducts can also be located in a sealed and insulated chase extending into the attic or built into raised floors. In both of these latter cases, care must be taken during construction to prevent contractors from using the duct chases for wiring or other utilities.
In either case, actual ducts must be used — chases and floor cavities should not be used as ducts. Regardless of where they are installed, ducts should be well sealed. Although ducts can be configured in a number of ways, the “trunk and branch” and “radial” supply duct configurations are most suitable for ducts located in conditioned spaces.
Air return duct systems can be configured in two ways: each room can have a return duct that sends air back to the heating and cooling equipment or return grills can be located in central locations on each floor. For the latter case, either grills must be installed to allow air to pass out of closed rooms, or short “jumper ducts” can be installed to connect the vent in one room with the next, allowing air to flow back to the central return grilles. Door undercuts help, but they are usually not sufficient for return airflow.
You can perform a simple check for adequate return air capacity by doing the following:
- Close all exterior doors and windows
- Close all interior room doors
- Turn on the central air handler
- “Crack” interior doors one by one and observe if the door closes or further opens “on its own.” (Whether it closes or opens will depend on the direction of the air handler-driven air flow.) Rooms served by air-moved doors have restricted return air flow and need pressure relief as described above.
Maintaining and Upgrading Existing Duct Systems
Sealing your ducts to prevent leaks is even more important if the ducts are located in an unconditioned area such as an attic or vented crawlspace. If the supply ducts are leaking, heated or cooled air can be forced out of unsealed joints and lost. In addition, unconditioned air can be drawn into return ducts through unsealed joints.
Although minor duct repairs are easy to make, qualified professionals should seal and insulate ducts in unconditioned spaces to ensure the use of appropriate sealing materials.
Aside from sealing your ducts, the simplest and most effective means of maintaining your air distribution system is to ensure that furniture and other objects are not blocking the airflow through your registers, and to vacuum the registers to remove any dust buildup.
Existing duct systems often suffer from design deficiencies in the return air system, and modifications by the homeowner (or just a tendency to keep doors closed) may contribute to these problems. Any rooms with a lack of sufficient return airflow may benefit from relatively simple upgrades, such as the installation of new return-air grilles, undercutting doors for return air, or installing a jumper duct.
Some rooms may also be hard to heat and cool because of inadequate supply ducts or grilles. If this is the case, you should first examine whether the problem is the room itself: fix any problems with insulation, air leakage, or inefficient windows first. If the problem persists, you may be able to increase the size of the supply duct or add an additional duct to provide the needed airflow to the room.
Minor Duct Repair Tips for Minimizing Energy Losses in Ducts
- Check your ducts for air leaks. First, look for sections that should be joined but have separated and then look for obvious holes.
- Duct mastic is the preferred material for sealing ductwork seams and joints. It is more durable than any available tape and generally easier for a do-it-yourself installation. Its only drawback is that it will not bridge gaps over ¼ inch. Such gaps must be first bridged with web-type drywall tape, or a good quality heat approved tape.
- If you use tape to seal your ducts, avoid cloth-backed, rubber adhesive duct tape — it tends to fail quickly. Instead, use mastic, butyl tape, foil tape, or other heat-approved tapes. Look for tape with the Underwriters Laboratories (UL) logo.
- Remember that insulating ducts in the basement will make the basement colder. If both the ducts and the basement walls are not insulated, consider insulating both. Water pipes and drains in unconditioned spaces could freeze and burst if the heat ducts are fully insulated because there would be no heat source to prevent the space from freezing in cold weather. However, using an electric heating tape wrap on the pipes can prevent this. Check with a professional contractor.
- Hire a professional to install both supply and return registers in the basement rooms after converting your basement to a living area.
- Be sure a well-sealed vapor barrier exists on the outside of the insulation on cooling ducts to prevent moisture condensation.
- If you have a fuel-burning furnace, stove, or other appliance or an attached garage, install a carbon monoxide (CO) monitor to alert you to harmful CO levels.
- Be sure to get professional help when doing ductwork. A qualified professional should always perform changes and repairs to a duct system.
1819 Tattenhall Dr. Houston TX 77008 – Minimizing Energy Losses in Ducts

1819 Tattenhall Dr. Houston TX 77008 – Minimizing Energy Losses in Ducts
Minimizing energy losses in ducts
Minimizing energy losses in ducts by seeing if the ducts are poorly sealed or insulated. That could tell you why your energy bill in high. Your air ducts are one of the most important systems in your home, and if the ducts are poorly sealed or insulated, they are likely contributing to higher energy bills.
Your home’s duct system is a branching network of tubes in the walls, floors, and ceilings; it carries the air from your home’s furnace and central air conditioner to each room. Ducts are made of sheet metal, fiberglass, or other materials.
Ducts that leak heated air into unheated spaces can add hundreds of dollars a year to your heating and cooling bills, but you can reduce that loss by sealing and insulating your ducts. Insulating ducts in unconditioned spaces is usually very cost-effective. Existing ducts may also be blocked or may require simple upgrades.
Designing and Installing New Duct Systems
In new home construction or in retrofits, proper duct system design is critical. In recent years, energy-saving designs have sought to include ducts and heating systems in the conditioned space.
Efficient and well-designed duct systems distribute air properly throughout your home without leaking to keep all rooms at a comfortable temperature. The system should provide balanced supply and return flow to maintain a neutral pressure within the house.
Even well sealed and insulated ducts will leak and lose some heat, so many new energy-efficient homes place the duct system within the conditioned space of the home. The simplest way to accomplish this is to hide the ducts in dropped ceilings and in corners of rooms. Ducts can also be located in a sealed and insulated chase extending into the attic or built into raised floors. In both of these latter cases, care must be taken during construction to prevent contractors from using the duct chases for wiring or other utilities.
In either case, actual ducts must be used — chases and floor cavities should not be used as ducts. Regardless of where they are installed, ducts should be well sealed. Although ducts can be configured in a number of ways, the “trunk and branch” and “radial” supply duct configurations are most suitable for ducts located in conditioned spaces.
Air return duct systems can be configured in two ways: each room can have a return duct that sends air back to the heating and cooling equipment or return grills can be located in central locations on each floor. For the latter case, either grills must be installed to allow air to pass out of closed rooms, or short “jumper ducts” can be installed to connect the vent in one room with the next, allowing air to flow back to the central return grilles. Door undercuts help, but they are usually not sufficient for return airflow.
You can perform a simple check for adequate return air capacity by doing the following:
- Close all exterior doors and windows
- Close all interior room doors
- Turn on the central air handler
- “Crack” interior doors one by one and observe if the door closes or further opens “on its own.” (Whether it closes or opens will depend on the direction of the air handler-driven air flow.) Rooms served by air-moved doors have restricted return air flow and need pressure relief as described above.
Maintaining and Upgrading Existing Duct Systems
Sealing your ducts to prevent leaks is even more important if the ducts are located in an unconditioned area such as an attic or vented crawlspace. If the supply ducts are leaking, heated or cooled air can be forced out of unsealed joints and lost. In addition, unconditioned air can be drawn into return ducts through unsealed joints.
Although minor duct repairs are easy to make, qualified professionals should seal and insulate ducts in unconditioned spaces to ensure the use of appropriate sealing materials.
Aside from sealing your ducts, the simplest and most effective means of maintaining your air distribution system is to ensure that furniture and other objects are not blocking the airflow through your registers, and to vacuum the registers to remove any dust buildup.
Existing duct systems often suffer from design deficiencies in the return air system, and modifications by the homeowner (or just a tendency to keep doors closed) may contribute to these problems. Any rooms with a lack of sufficient return airflow may benefit from relatively simple upgrades, such as the installation of new return-air grilles, undercutting doors for return air, or installing a jumper duct.
Some rooms may also be hard to heat and cool because of inadequate supply ducts or grilles. If this is the case, you should first examine whether the problem is the room itself: fix any problems with insulation, air leakage, or inefficient windows first. If the problem persists, you may be able to increase the size of the supply duct or add an additional duct to provide the needed airflow to the room.
Minor Duct Repair Tips for Minimizing Energy Losses in Ducts
- Check your ducts for air leaks. First, look for sections that should be joined but have separated and then look for obvious holes.
- Duct mastic is the preferred material for sealing ductwork seams and joints. It is more durable than any available tape and generally easier for a do-it-yourself installation. Its only drawback is that it will not bridge gaps over ¼ inch. Such gaps must be first bridged with web-type drywall tape, or a good quality heat approved tape.
- If you use tape to seal your ducts, avoid cloth-backed, rubber adhesive duct tape — it tends to fail quickly. Instead, use mastic, butyl tape, foil tape, or other heat-approved tapes. Look for tape with the Underwriters Laboratories (UL) logo.
- Remember that insulating ducts in the basement will make the basement colder. If both the ducts and the basement walls are not insulated, consider insulating both. Water pipes and drains in unconditioned spaces could freeze and burst if the heat ducts are fully insulated because there would be no heat source to prevent the space from freezing in cold weather. However, using an electric heating tape wrap on the pipes can prevent this. Check with a professional contractor.
- Hire a professional to install both supply and return registers in the basement rooms after converting your basement to a living area.
- Be sure a well-sealed vapor barrier exists on the outside of the insulation on cooling ducts to prevent moisture condensation.
- If you have a fuel-burning furnace, stove, or other appliance or an attached garage, install a carbon monoxide (CO) monitor to alert you to harmful CO levels.
- Be sure to get professional help when doing ductwork. A qualified professional should always perform changes and repairs to a duct system.
1610 Antoine Dr. Houston TX, 77055 – Minimizing Energy Losses in Ducts
1610 Antoine Dr. Houston TX, 77055 – Minimizing Energy Losses in Ducts
Minimizing energy losses in ducts
Minimizing energy losses in ducts by seeing if the ducts are poorly sealed or insulated. That could tell you why your energy bill in high. Your air ducts are one of the most important systems in your home, and if the ducts are poorly sealed or insulated, they are likely contributing to higher energy bills.
Your home’s duct system is a branching network of tubes in the walls, floors, and ceilings; it carries the air from your home’s furnace and central air conditioner to each room. Ducts are made of sheet metal, fiberglass, or other materials.
Ducts that leak heated air into unheated spaces can add hundreds of dollars a year to your heating and cooling bills, but you can reduce that loss by sealing and insulating your ducts. Insulating ducts in unconditioned spaces is usually very cost-effective. Existing ducts may also be blocked or may require simple upgrades.
Designing and Installing New Duct Systems
In new home construction or in retrofits, proper duct system design is critical. In recent years, energy-saving designs have sought to include ducts and heating systems in the conditioned space.
Efficient and well-designed duct systems distribute air properly throughout your home without leaking to keep all rooms at a comfortable temperature. The system should provide balanced supply and return flow to maintain a neutral pressure within the house.
Even well sealed and insulated ducts will leak and lose some heat, so many new energy-efficient homes place the duct system within the conditioned space of the home. The simplest way to accomplish this is to hide the ducts in dropped ceilings and in corners of rooms. Ducts can also be located in a sealed and insulated chase extending into the attic or built into raised floors. In both of these latter cases, care must be taken during construction to prevent contractors from using the duct chases for wiring or other utilities.
In either case, actual ducts must be used — chases and floor cavities should not be used as ducts. Regardless of where they are installed, ducts should be well sealed. Although ducts can be configured in a number of ways, the “trunk and branch” and “radial” supply duct configurations are most suitable for ducts located in conditioned spaces.
Air return duct systems can be configured in two ways: each room can have a return duct that sends air back to the heating and cooling equipment or return grills can be located in central locations on each floor. For the latter case, either grills must be installed to allow air to pass out of closed rooms, or short “jumper ducts” can be installed to connect the vent in one room with the next, allowing air to flow back to the central return grilles. Door undercuts help, but they are usually not sufficient for return airflow.
You can perform a simple check for adequate return air capacity by doing the following:
- Close all exterior doors and windows
- Close all interior room doors
- Turn on the central air handler
- “Crack” interior doors one by one and observe if the door closes or further opens “on its own.” (Whether it closes or opens will depend on the direction of the air handler-driven air flow.) Rooms served by air-moved doors have restricted return air flow and need pressure relief as described above.
Maintaining and Upgrading Existing Duct Systems
Sealing your ducts to prevent leaks is even more important if the ducts are located in an unconditioned area such as an attic or vented crawlspace. If the supply ducts are leaking, heated or cooled air can be forced out of unsealed joints and lost. In addition, unconditioned air can be drawn into return ducts through unsealed joints.
Although minor duct repairs are easy to make, qualified professionals should seal and insulate ducts in unconditioned spaces to ensure the use of appropriate sealing materials.
Aside from sealing your ducts, the simplest and most effective means of maintaining your air distribution system is to ensure that furniture and other objects are not blocking the airflow through your registers, and to vacuum the registers to remove any dust buildup.
Existing duct systems often suffer from design deficiencies in the return air system, and modifications by the homeowner (or just a tendency to keep doors closed) may contribute to these problems. Any rooms with a lack of sufficient return airflow may benefit from relatively simple upgrades, such as the installation of new return-air grilles, undercutting doors for return air, or installing a jumper duct.
Some rooms may also be hard to heat and cool because of inadequate supply ducts or grilles. If this is the case, you should first examine whether the problem is the room itself: fix any problems with insulation, air leakage, or inefficient windows first. If the problem persists, you may be able to increase the size of the supply duct or add an additional duct to provide the needed airflow to the room.
Minor Duct Repair Tips for Minimizing Energy Losses in Ducts
- Check your ducts for air leaks. First, look for sections that should be joined but have separated and then look for obvious holes.
- Duct mastic is the preferred material for sealing ductwork seams and joints. It is more durable than any available tape and generally easier for a do-it-yourself installation. Its only drawback is that it will not bridge gaps over ¼ inch. Such gaps must be first bridged with web-type drywall tape, or a good quality heat approved tape.
- If you use tape to seal your ducts, avoid cloth-backed, rubber adhesive duct tape — it tends to fail quickly. Instead, use mastic, butyl tape, foil tape, or other heat-approved tapes. Look for tape with the Underwriters Laboratories (UL) logo.
- Remember that insulating ducts in the basement will make the basement colder. If both the ducts and the basement walls are not insulated, consider insulating both. Water pipes and drains in unconditioned spaces could freeze and burst if the heat ducts are fully insulated because there would be no heat source to prevent the space from freezing in cold weather. However, using an electric heating tape wrap on the pipes can prevent this. Check with a professional contractor.
- Hire a professional to install both supply and return registers in the basement rooms after converting your basement to a living area.
- Be sure a well-sealed vapor barrier exists on the outside of the insulation on cooling ducts to prevent moisture condensation.
- If you have a fuel-burning furnace, stove, or other appliance or an attached garage, install a carbon monoxide (CO) monitor to alert you to harmful CO levels.
- Be sure to get professional help when doing ductwork. A qualified professional should always perform changes and repairs to a duct system.
1423 Woodcrest Dr. Houston TX, 77018 – Minimizing Energy Losses in Ducts
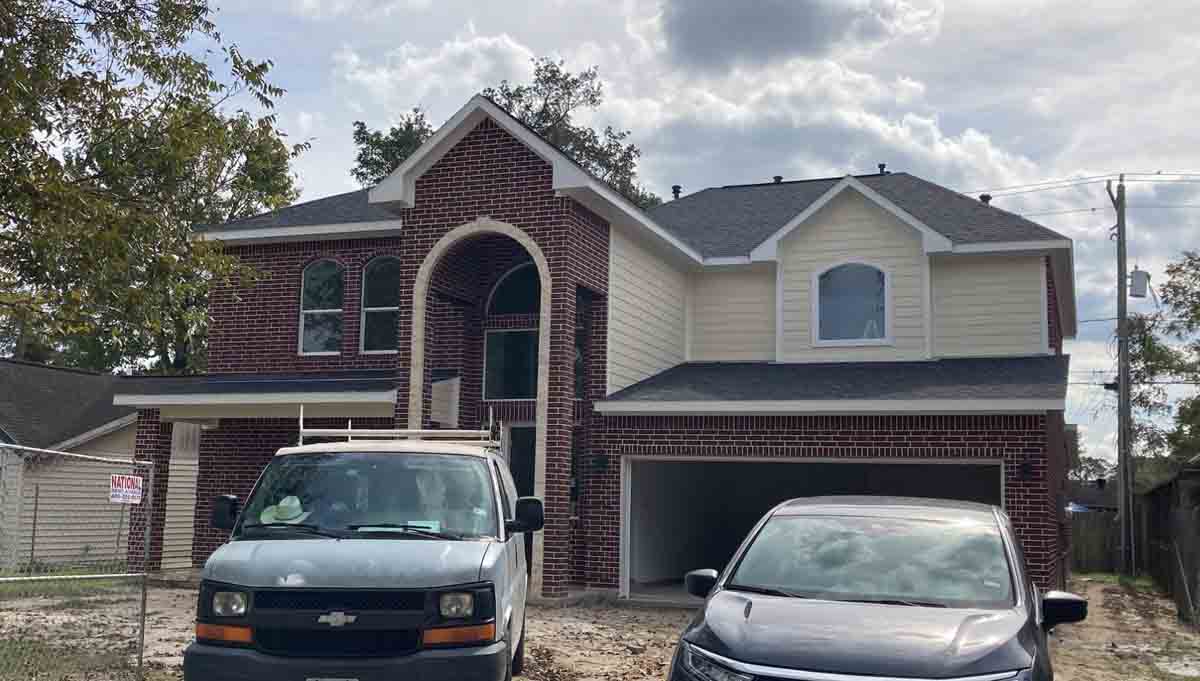
1423 Woodcrest Dr. Houston TX, 77018 – Minimizing Energy Losses in Ducts
Minimizing energy losses in ducts
Minimizing energy losses in ducts by seeing if the ducts are poorly sealed or insulated. That could tell you why your energy bill in high. Your air ducts are one of the most important systems in your home, and if the ducts are poorly sealed or insulated, they are likely contributing to higher energy bills.
Your home’s duct system is a branching network of tubes in the walls, floors, and ceilings; it carries the air from your home’s furnace and central air conditioner to each room. Ducts are made of sheet metal, fiberglass, or other materials.
Ducts that leak heated air into unheated spaces can add hundreds of dollars a year to your heating and cooling bills, but you can reduce that loss by sealing and insulating your ducts. Insulating ducts in unconditioned spaces is usually very cost-effective. Existing ducts may also be blocked or may require simple upgrades.
Designing and Installing New Duct Systems
In new home construction or in retrofits, proper duct system design is critical. In recent years, energy-saving designs have sought to include ducts and heating systems in the conditioned space.
Efficient and well-designed duct systems distribute air properly throughout your home without leaking to keep all rooms at a comfortable temperature. The system should provide balanced supply and return flow to maintain a neutral pressure within the house.
Even well sealed and insulated ducts will leak and lose some heat, so many new energy-efficient homes place the duct system within the conditioned space of the home. The simplest way to accomplish this is to hide the ducts in dropped ceilings and in corners of rooms. Ducts can also be located in a sealed and insulated chase extending into the attic or built into raised floors. In both of these latter cases, care must be taken during construction to prevent contractors from using the duct chases for wiring or other utilities.
In either case, actual ducts must be used — chases and floor cavities should not be used as ducts. Regardless of where they are installed, ducts should be well sealed. Although ducts can be configured in a number of ways, the “trunk and branch” and “radial” supply duct configurations are most suitable for ducts located in conditioned spaces.
Air return duct systems can be configured in two ways: each room can have a return duct that sends air back to the heating and cooling equipment or return grills can be located in central locations on each floor. For the latter case, either grills must be installed to allow air to pass out of closed rooms, or short “jumper ducts” can be installed to connect the vent in one room with the next, allowing air to flow back to the central return grilles. Door undercuts help, but they are usually not sufficient for return airflow.
You can perform a simple check for adequate return air capacity by doing the following:
- Close all exterior doors and windows
- Close all interior room doors
- Turn on the central air handler
- “Crack” interior doors one by one and observe if the door closes or further opens “on its own.” (Whether it closes or opens will depend on the direction of the air handler-driven air flow.) Rooms served by air-moved doors have restricted return air flow and need pressure relief as described above.
Maintaining and Upgrading Existing Duct Systems
Sealing your ducts to prevent leaks is even more important if the ducts are located in an unconditioned area such as an attic or vented crawlspace. If the supply ducts are leaking, heated or cooled air can be forced out of unsealed joints and lost. In addition, unconditioned air can be drawn into return ducts through unsealed joints.
Although minor duct repairs are easy to make, qualified professionals should seal and insulate ducts in unconditioned spaces to ensure the use of appropriate sealing materials.
Aside from sealing your ducts, the simplest and most effective means of maintaining your air distribution system is to ensure that furniture and other objects are not blocking the airflow through your registers, and to vacuum the registers to remove any dust buildup.
Existing duct systems often suffer from design deficiencies in the return air system, and modifications by the homeowner (or just a tendency to keep doors closed) may contribute to these problems. Any rooms with a lack of sufficient return airflow may benefit from relatively simple upgrades, such as the installation of new return-air grilles, undercutting doors for return air, or installing a jumper duct.
Some rooms may also be hard to heat and cool because of inadequate supply ducts or grilles. If this is the case, you should first examine whether the problem is the room itself: fix any problems with insulation, air leakage, or inefficient windows first. If the problem persists, you may be able to increase the size of the supply duct or add an additional duct to provide the needed airflow to the room.
Minor Duct Repair Tips for Minimizing Energy Losses in Ducts
- Check your ducts for air leaks. First, look for sections that should be joined but have separated and then look for obvious holes.
- Duct mastic is the preferred material for sealing ductwork seams and joints. It is more durable than any available tape and generally easier for a do-it-yourself installation. Its only drawback is that it will not bridge gaps over ¼ inch. Such gaps must be first bridged with web-type drywall tape, or a good quality heat approved tape.
- If you use tape to seal your ducts, avoid cloth-backed, rubber adhesive duct tape — it tends to fail quickly. Instead, use mastic, butyl tape, foil tape, or other heat-approved tapes. Look for tape with the Underwriters Laboratories (UL) logo.
- Remember that insulating ducts in the basement will make the basement colder. If both the ducts and the basement walls are not insulated, consider insulating both. Water pipes and drains in unconditioned spaces could freeze and burst if the heat ducts are fully insulated because there would be no heat source to prevent the space from freezing in cold weather. However, using an electric heating tape wrap on the pipes can prevent this. Check with a professional contractor.
- Hire a professional to install both supply and return registers in the basement rooms after converting your basement to a living area.
- Be sure a well-sealed vapor barrier exists on the outside of the insulation on cooling ducts to prevent moisture condensation.
- If you have a fuel-burning furnace, stove, or other appliance or an attached garage, install a carbon monoxide (CO) monitor to alert you to harmful CO levels.
- Be sure to get professional help when doing ductwork. A qualified professional should always perform changes and repairs to a duct system.
1422 W 22nd St. Houston TX, 77008 – Minimizing Energy Losses in Ducts
1422 W 22nd St. Houston TX, 77008 – Minimizing Energy Losses in Ducts
Minimizing energy losses in ducts
Minimizing energy losses in ducts by seeing if the ducts are poorly sealed or insulated. That could tell you why your energy bill in high. Your air ducts are one of the most important systems in your home, and if the ducts are poorly sealed or insulated, they are likely contributing to higher energy bills.
Your home’s duct system is a branching network of tubes in the walls, floors, and ceilings; it carries the air from your home’s furnace and central air conditioner to each room. Ducts are made of sheet metal, fiberglass, or other materials.
Ducts that leak heated air into unheated spaces can add hundreds of dollars a year to your heating and cooling bills, but you can reduce that loss by sealing and insulating your ducts. Insulating ducts in unconditioned spaces is usually very cost-effective. Existing ducts may also be blocked or may require simple upgrades.
Designing and Installing New Duct Systems
In new home construction or in retrofits, proper duct system design is critical. In recent years, energy-saving designs have sought to include ducts and heating systems in the conditioned space.
Efficient and well-designed duct systems distribute air properly throughout your home without leaking to keep all rooms at a comfortable temperature. The system should provide balanced supply and return flow to maintain a neutral pressure within the house.
Even well sealed and insulated ducts will leak and lose some heat, so many new energy-efficient homes place the duct system within the conditioned space of the home. The simplest way to accomplish this is to hide the ducts in dropped ceilings and in corners of rooms. Ducts can also be located in a sealed and insulated chase extending into the attic or built into raised floors. In both of these latter cases, care must be taken during construction to prevent contractors from using the duct chases for wiring or other utilities.
In either case, actual ducts must be used — chases and floor cavities should not be used as ducts. Regardless of where they are installed, ducts should be well sealed. Although ducts can be configured in a number of ways, the “trunk and branch” and “radial” supply duct configurations are most suitable for ducts located in conditioned spaces.
Air return duct systems can be configured in two ways: each room can have a return duct that sends air back to the heating and cooling equipment or return grills can be located in central locations on each floor. For the latter case, either grills must be installed to allow air to pass out of closed rooms, or short “jumper ducts” can be installed to connect the vent in one room with the next, allowing air to flow back to the central return grilles. Door undercuts help, but they are usually not sufficient for return airflow.
You can perform a simple check for adequate return air capacity by doing the following:
- Close all exterior doors and windows
- Close all interior room doors
- Turn on the central air handler
- “Crack” interior doors one by one and observe if the door closes or further opens “on its own.” (Whether it closes or opens will depend on the direction of the air handler-driven air flow.) Rooms served by air-moved doors have restricted return air flow and need pressure relief as described above.
Maintaining and Upgrading Existing Duct Systems
Sealing your ducts to prevent leaks is even more important if the ducts are located in an unconditioned area such as an attic or vented crawlspace. If the supply ducts are leaking, heated or cooled air can be forced out of unsealed joints and lost. In addition, unconditioned air can be drawn into return ducts through unsealed joints.
Although minor duct repairs are easy to make, qualified professionals should seal and insulate ducts in unconditioned spaces to ensure the use of appropriate sealing materials.
Aside from sealing your ducts, the simplest and most effective means of maintaining your air distribution system is to ensure that furniture and other objects are not blocking the airflow through your registers, and to vacuum the registers to remove any dust buildup.
Existing duct systems often suffer from design deficiencies in the return air system, and modifications by the homeowner (or just a tendency to keep doors closed) may contribute to these problems. Any rooms with a lack of sufficient return airflow may benefit from relatively simple upgrades, such as the installation of new return-air grilles, undercutting doors for return air, or installing a jumper duct.
Some rooms may also be hard to heat and cool because of inadequate supply ducts or grilles. If this is the case, you should first examine whether the problem is the room itself: fix any problems with insulation, air leakage, or inefficient windows first. If the problem persists, you may be able to increase the size of the supply duct or add an additional duct to provide the needed airflow to the room.
Minor Duct Repair Tips for Minimizing Energy Losses in Ducts
- Check your ducts for air leaks. First, look for sections that should be joined but have separated and then look for obvious holes.
- Duct mastic is the preferred material for sealing ductwork seams and joints. It is more durable than any available tape and generally easier for a do-it-yourself installation. Its only drawback is that it will not bridge gaps over ¼ inch. Such gaps must be first bridged with web-type drywall tape, or a good quality heat approved tape.
- If you use tape to seal your ducts, avoid cloth-backed, rubber adhesive duct tape — it tends to fail quickly. Instead, use mastic, butyl tape, foil tape, or other heat-approved tapes. Look for tape with the Underwriters Laboratories (UL) logo.
- Remember that insulating ducts in the basement will make the basement colder. If both the ducts and the basement walls are not insulated, consider insulating both. Water pipes and drains in unconditioned spaces could freeze and burst if the heat ducts are fully insulated because there would be no heat source to prevent the space from freezing in cold weather. However, using an electric heating tape wrap on the pipes can prevent this. Check with a professional contractor.
- Hire a professional to install both supply and return registers in the basement rooms after converting your basement to a living area.
- Be sure a well-sealed vapor barrier exists on the outside of the insulation on cooling ducts to prevent moisture condensation.
- If you have a fuel-burning furnace, stove, or other appliance or an attached garage, install a carbon monoxide (CO) monitor to alert you to harmful CO levels.
- Be sure to get professional help when doing ductwork. A qualified professional should always perform changes and repairs to a duct system.
1325 W Banks St. Houston TX, 77006 – Minimizing Energy Losses in Ducts

1325 W Banks St. Houston TX, 77006 – Minimizing Energy Losses in Ducts
Minimizing energy losses in ducts
Minimizing energy losses in ducts by seeing if the ducts are poorly sealed or insulated. That could tell you why your energy bill in high. Your air ducts are one of the most important systems in your home, and if the ducts are poorly sealed or insulated, they are likely contributing to higher energy bills.
Your home’s duct system is a branching network of tubes in the walls, floors, and ceilings; it carries the air from your home’s furnace and central air conditioner to each room. Ducts are made of sheet metal, fiberglass, or other materials.
Ducts that leak heated air into unheated spaces can add hundreds of dollars a year to your heating and cooling bills, but you can reduce that loss by sealing and insulating your ducts. Insulating ducts in unconditioned spaces is usually very cost-effective. Existing ducts may also be blocked or may require simple upgrades.
Designing and Installing New Duct Systems
In new home construction or in retrofits, proper duct system design is critical. In recent years, energy-saving designs have sought to include ducts and heating systems in the conditioned space.
Efficient and well-designed duct systems distribute air properly throughout your home without leaking to keep all rooms at a comfortable temperature. The system should provide balanced supply and return flow to maintain a neutral pressure within the house.
Even well sealed and insulated ducts will leak and lose some heat, so many new energy-efficient homes place the duct system within the conditioned space of the home. The simplest way to accomplish this is to hide the ducts in dropped ceilings and in corners of rooms. Ducts can also be located in a sealed and insulated chase extending into the attic or built into raised floors. In both of these latter cases, care must be taken during construction to prevent contractors from using the duct chases for wiring or other utilities.
In either case, actual ducts must be used — chases and floor cavities should not be used as ducts. Regardless of where they are installed, ducts should be well sealed. Although ducts can be configured in a number of ways, the “trunk and branch” and “radial” supply duct configurations are most suitable for ducts located in conditioned spaces.
Air return duct systems can be configured in two ways: each room can have a return duct that sends air back to the heating and cooling equipment or return grills can be located in central locations on each floor. For the latter case, either grills must be installed to allow air to pass out of closed rooms, or short “jumper ducts” can be installed to connect the vent in one room with the next, allowing air to flow back to the central return grilles. Door undercuts help, but they are usually not sufficient for return airflow.
You can perform a simple check for adequate return air capacity by doing the following:
- Close all exterior doors and windows
- Close all interior room doors
- Turn on the central air handler
- “Crack” interior doors one by one and observe if the door closes or further opens “on its own.” (Whether it closes or opens will depend on the direction of the air handler-driven air flow.) Rooms served by air-moved doors have restricted return air flow and need pressure relief as described above.
Maintaining and Upgrading Existing Duct Systems
Sealing your ducts to prevent leaks is even more important if the ducts are located in an unconditioned area such as an attic or vented crawlspace. If the supply ducts are leaking, heated or cooled air can be forced out of unsealed joints and lost. In addition, unconditioned air can be drawn into return ducts through unsealed joints.
Although minor duct repairs are easy to make, qualified professionals should seal and insulate ducts in unconditioned spaces to ensure the use of appropriate sealing materials.
Aside from sealing your ducts, the simplest and most effective means of maintaining your air distribution system is to ensure that furniture and other objects are not blocking the airflow through your registers, and to vacuum the registers to remove any dust buildup.
Existing duct systems often suffer from design deficiencies in the return air system, and modifications by the homeowner (or just a tendency to keep doors closed) may contribute to these problems. Any rooms with a lack of sufficient return airflow may benefit from relatively simple upgrades, such as the installation of new return-air grilles, undercutting doors for return air, or installing a jumper duct.
Some rooms may also be hard to heat and cool because of inadequate supply ducts or grilles. If this is the case, you should first examine whether the problem is the room itself: fix any problems with insulation, air leakage, or inefficient windows first. If the problem persists, you may be able to increase the size of the supply duct or add an additional duct to provide the needed airflow to the room.
Minor Duct Repair Tips for Minimizing Energy Losses in Ducts
- Check your ducts for air leaks. First, look for sections that should be joined but have separated and then look for obvious holes.
- Duct mastic is the preferred material for sealing ductwork seams and joints. It is more durable than any available tape and generally easier for a do-it-yourself installation. Its only drawback is that it will not bridge gaps over ¼ inch. Such gaps must be first bridged with web-type drywall tape, or a good quality heat approved tape.
- If you use tape to seal your ducts, avoid cloth-backed, rubber adhesive duct tape — it tends to fail quickly. Instead, use mastic, butyl tape, foil tape, or other heat-approved tapes. Look for tape with the Underwriters Laboratories (UL) logo.
- Remember that insulating ducts in the basement will make the basement colder. If both the ducts and the basement walls are not insulated, consider insulating both. Water pipes and drains in unconditioned spaces could freeze and burst if the heat ducts are fully insulated because there would be no heat source to prevent the space from freezing in cold weather. However, using an electric heating tape wrap on the pipes can prevent this. Check with a professional contractor.
- Hire a professional to install both supply and return registers in the basement rooms after converting your basement to a living area.
- Be sure a well-sealed vapor barrier exists on the outside of the insulation on cooling ducts to prevent moisture condensation.
- If you have a fuel-burning furnace, stove, or other appliance or an attached garage, install a carbon monoxide (CO) monitor to alert you to harmful CO levels.
- Be sure to get professional help when doing ductwork. A qualified professional should always perform changes and repairs to a duct system.
1322 W Bell St Houston TX 77019 – Minimizing Energy Losses in Ducts
1322 W Bell St Houston TX 77019 – Minimizing Energy Losses in Ducts
Minimizing energy losses in ducts
Minimizing energy losses in ducts by seeing if the ducts are poorly sealed or insulated. That could tell you why your energy bill in high. Your air ducts are one of the most important systems in your home, and if the ducts are poorly sealed or insulated, they are likely contributing to higher energy bills.
Your home’s duct system is a branching network of tubes in the walls, floors, and ceilings; it carries the air from your home’s furnace and central air conditioner to each room. Ducts are made of sheet metal, fiberglass, or other materials.
Ducts that leak heated air into unheated spaces can add hundreds of dollars a year to your heating and cooling bills, but you can reduce that loss by sealing and insulating your ducts. Insulating ducts in unconditioned spaces is usually very cost-effective. Existing ducts may also be blocked or may require simple upgrades.
Designing and Installing New Duct Systems
In new home construction or in retrofits, proper duct system design is critical. In recent years, energy-saving designs have sought to include ducts and heating systems in the conditioned space.
Efficient and well-designed duct systems distribute air properly throughout your home without leaking to keep all rooms at a comfortable temperature. The system should provide balanced supply and return flow to maintain a neutral pressure within the house.
Even well sealed and insulated ducts will leak and lose some heat, so many new energy-efficient homes place the duct system within the conditioned space of the home. The simplest way to accomplish this is to hide the ducts in dropped ceilings and in corners of rooms. Ducts can also be located in a sealed and insulated chase extending into the attic or built into raised floors. In both of these latter cases, care must be taken during construction to prevent contractors from using the duct chases for wiring or other utilities.
In either case, actual ducts must be used — chases and floor cavities should not be used as ducts. Regardless of where they are installed, ducts should be well sealed. Although ducts can be configured in a number of ways, the “trunk and branch” and “radial” supply duct configurations are most suitable for ducts located in conditioned spaces.
Air return duct systems can be configured in two ways: each room can have a return duct that sends air back to the heating and cooling equipment or return grills can be located in central locations on each floor. For the latter case, either grills must be installed to allow air to pass out of closed rooms, or short “jumper ducts” can be installed to connect the vent in one room with the next, allowing air to flow back to the central return grilles. Door undercuts help, but they are usually not sufficient for return airflow.
You can perform a simple check for adequate return air capacity by doing the following:
- Close all exterior doors and windows
- Close all interior room doors
- Turn on the central air handler
- “Crack” interior doors one by one and observe if the door closes or further opens “on its own.” (Whether it closes or opens will depend on the direction of the air handler-driven air flow.) Rooms served by air-moved doors have restricted return air flow and need pressure relief as described above.
Maintaining and Upgrading Existing Duct Systems
Sealing your ducts to prevent leaks is even more important if the ducts are located in an unconditioned area such as an attic or vented crawlspace. If the supply ducts are leaking, heated or cooled air can be forced out of unsealed joints and lost. In addition, unconditioned air can be drawn into return ducts through unsealed joints.
Although minor duct repairs are easy to make, qualified professionals should seal and insulate ducts in unconditioned spaces to ensure the use of appropriate sealing materials.
Aside from sealing your ducts, the simplest and most effective means of maintaining your air distribution system is to ensure that furniture and other objects are not blocking the airflow through your registers, and to vacuum the registers to remove any dust buildup.
Existing duct systems often suffer from design deficiencies in the return air system, and modifications by the homeowner (or just a tendency to keep doors closed) may contribute to these problems. Any rooms with a lack of sufficient return airflow may benefit from relatively simple upgrades, such as the installation of new return-air grilles, undercutting doors for return air, or installing a jumper duct.
Some rooms may also be hard to heat and cool because of inadequate supply ducts or grilles. If this is the case, you should first examine whether the problem is the room itself: fix any problems with insulation, air leakage, or inefficient windows first. If the problem persists, you may be able to increase the size of the supply duct or add an additional duct to provide the needed airflow to the room.
Minor Duct Repair Tips for Minimizing Energy Losses in Ducts
- Check your ducts for air leaks. First, look for sections that should be joined but have separated and then look for obvious holes.
- Duct mastic is the preferred material for sealing ductwork seams and joints. It is more durable than any available tape and generally easier for a do-it-yourself installation. Its only drawback is that it will not bridge gaps over ¼ inch. Such gaps must be first bridged with web-type drywall tape, or a good quality heat approved tape.
- If you use tape to seal your ducts, avoid cloth-backed, rubber adhesive duct tape — it tends to fail quickly. Instead, use mastic, butyl tape, foil tape, or other heat-approved tapes. Look for tape with the Underwriters Laboratories (UL) logo.
- Remember that insulating ducts in the basement will make the basement colder. If both the ducts and the basement walls are not insulated, consider insulating both. Water pipes and drains in unconditioned spaces could freeze and burst if the heat ducts are fully insulated because there would be no heat source to prevent the space from freezing in cold weather. However, using an electric heating tape wrap on the pipes can prevent this. Check with a professional contractor.
- Hire a professional to install both supply and return registers in the basement rooms after converting your basement to a living area.
- Be sure a well-sealed vapor barrier exists on the outside of the insulation on cooling ducts to prevent moisture condensation.
- If you have a fuel-burning furnace, stove, or other appliance or an attached garage, install a carbon monoxide (CO) monitor to alert you to harmful CO levels.
- Be sure to get professional help when doing ductwork. A qualified professional should always perform changes and repairs to a duct system.
1304 W 24th St D Houston TX, 77008 – Minimizing Energy Losses in Ducts
1304 W 24th St D Houston TX, 77008 – Minimizing Energy Losses in Ducts
Minimizing energy losses in ducts
Minimizing energy losses in ducts by seeing if the ducts are poorly sealed or insulated. That could tell you why your energy bill in high. Your air ducts are one of the most important systems in your home, and if the ducts are poorly sealed or insulated, they are likely contributing to higher energy bills.
Your home’s duct system is a branching network of tubes in the walls, floors, and ceilings; it carries the air from your home’s furnace and central air conditioner to each room. Ducts are made of sheet metal, fiberglass, or other materials.
Ducts that leak heated air into unheated spaces can add hundreds of dollars a year to your heating and cooling bills, but you can reduce that loss by sealing and insulating your ducts. Insulating ducts in unconditioned spaces is usually very cost-effective. Existing ducts may also be blocked or may require simple upgrades.
Designing and Installing New Duct Systems
In new home construction or in retrofits, proper duct system design is critical. In recent years, energy-saving designs have sought to include ducts and heating systems in the conditioned space.
Efficient and well-designed duct systems distribute air properly throughout your home without leaking to keep all rooms at a comfortable temperature. The system should provide balanced supply and return flow to maintain a neutral pressure within the house.
Even well sealed and insulated ducts will leak and lose some heat, so many new energy-efficient homes place the duct system within the conditioned space of the home. The simplest way to accomplish this is to hide the ducts in dropped ceilings and in corners of rooms. Ducts can also be located in a sealed and insulated chase extending into the attic or built into raised floors. In both of these latter cases, care must be taken during construction to prevent contractors from using the duct chases for wiring or other utilities.
In either case, actual ducts must be used — chases and floor cavities should not be used as ducts. Regardless of where they are installed, ducts should be well sealed. Although ducts can be configured in a number of ways, the “trunk and branch” and “radial” supply duct configurations are most suitable for ducts located in conditioned spaces.
Air return duct systems can be configured in two ways: each room can have a return duct that sends air back to the heating and cooling equipment or return grills can be located in central locations on each floor. For the latter case, either grills must be installed to allow air to pass out of closed rooms, or short “jumper ducts” can be installed to connect the vent in one room with the next, allowing air to flow back to the central return grilles. Door undercuts help, but they are usually not sufficient for return airflow.
You can perform a simple check for adequate return air capacity by doing the following:
- Close all exterior doors and windows
- Close all interior room doors
- Turn on the central air handler
- “Crack” interior doors one by one and observe if the door closes or further opens “on its own.” (Whether it closes or opens will depend on the direction of the air handler-driven air flow.) Rooms served by air-moved doors have restricted return air flow and need pressure relief as described above.
Maintaining and Upgrading Existing Duct Systems
Sealing your ducts to prevent leaks is even more important if the ducts are located in an unconditioned area such as an attic or vented crawlspace. If the supply ducts are leaking, heated or cooled air can be forced out of unsealed joints and lost. In addition, unconditioned air can be drawn into return ducts through unsealed joints.
Although minor duct repairs are easy to make, qualified professionals should seal and insulate ducts in unconditioned spaces to ensure the use of appropriate sealing materials.
Aside from sealing your ducts, the simplest and most effective means of maintaining your air distribution system is to ensure that furniture and other objects are not blocking the airflow through your registers, and to vacuum the registers to remove any dust buildup.
Existing duct systems often suffer from design deficiencies in the return air system, and modifications by the homeowner (or just a tendency to keep doors closed) may contribute to these problems. Any rooms with a lack of sufficient return airflow may benefit from relatively simple upgrades, such as the installation of new return-air grilles, undercutting doors for return air, or installing a jumper duct.
Some rooms may also be hard to heat and cool because of inadequate supply ducts or grilles. If this is the case, you should first examine whether the problem is the room itself: fix any problems with insulation, air leakage, or inefficient windows first. If the problem persists, you may be able to increase the size of the supply duct or add an additional duct to provide the needed airflow to the room.
Minor Duct Repair Tips for Minimizing Energy Losses in Ducts
- Check your ducts for air leaks. First, look for sections that should be joined but have separated and then look for obvious holes.
- Duct mastic is the preferred material for sealing ductwork seams and joints. It is more durable than any available tape and generally easier for a do-it-yourself installation. Its only drawback is that it will not bridge gaps over ¼ inch. Such gaps must be first bridged with web-type drywall tape, or a good quality heat approved tape.
- If you use tape to seal your ducts, avoid cloth-backed, rubber adhesive duct tape — it tends to fail quickly. Instead, use mastic, butyl tape, foil tape, or other heat-approved tapes. Look for tape with the Underwriters Laboratories (UL) logo.
- Remember that insulating ducts in the basement will make the basement colder. If both the ducts and the basement walls are not insulated, consider insulating both. Water pipes and drains in unconditioned spaces could freeze and burst if the heat ducts are fully insulated because there would be no heat source to prevent the space from freezing in cold weather. However, using an electric heating tape wrap on the pipes can prevent this. Check with a professional contractor.
- Hire a professional to install both supply and return registers in the basement rooms after converting your basement to a living area.
- Be sure a well-sealed vapor barrier exists on the outside of the insulation on cooling ducts to prevent moisture condensation.
- If you have a fuel-burning furnace, stove, or other appliance or an attached garage, install a carbon monoxide (CO) monitor to alert you to harmful CO levels.
- Be sure to get professional help when doing ductwork. A qualified professional should always perform changes and repairs to a duct system.
946 Lehman St. Houston TX, 77018 – Minimizing Energy Losses in Ducts

946 Lehman St. Houston TX, 77018 – Minimizing Energy Losses in Ducts
Minimizing energy losses in ducts
Minimizing energy losses in ducts by seeing if the ducts are poorly sealed or insulated. That could tell you why your energy bill in high. Your air ducts are one of the most important systems in your home, and if the ducts are poorly sealed or insulated, they are likely contributing to higher energy bills.
Your home’s duct system is a branching network of tubes in the walls, floors, and ceilings; it carries the air from your home’s furnace and central air conditioner to each room. Ducts are made of sheet metal, fiberglass, or other materials.
Ducts that leak heated air into unheated spaces can add hundreds of dollars a year to your heating and cooling bills, but you can reduce that loss by sealing and insulating your ducts. Insulating ducts in unconditioned spaces is usually very cost-effective. Existing ducts may also be blocked or may require simple upgrades.
Designing and Installing New Duct Systems
In new home construction or in retrofits, proper duct system design is critical. In recent years, energy-saving designs have sought to include ducts and heating systems in the conditioned space.
Efficient and well-designed duct systems distribute air properly throughout your home without leaking to keep all rooms at a comfortable temperature. The system should provide balanced supply and return flow to maintain a neutral pressure within the house.
Even well sealed and insulated ducts will leak and lose some heat, so many new energy-efficient homes place the duct system within the conditioned space of the home. The simplest way to accomplish this is to hide the ducts in dropped ceilings and in corners of rooms. Ducts can also be located in a sealed and insulated chase extending into the attic or built into raised floors. In both of these latter cases, care must be taken during construction to prevent contractors from using the duct chases for wiring or other utilities.
In either case, actual ducts must be used — chases and floor cavities should not be used as ducts. Regardless of where they are installed, ducts should be well sealed. Although ducts can be configured in a number of ways, the “trunk and branch” and “radial” supply duct configurations are most suitable for ducts located in conditioned spaces.
Air return duct systems can be configured in two ways: each room can have a return duct that sends air back to the heating and cooling equipment or return grills can be located in central locations on each floor. For the latter case, either grills must be installed to allow air to pass out of closed rooms, or short “jumper ducts” can be installed to connect the vent in one room with the next, allowing air to flow back to the central return grilles. Door undercuts help, but they are usually not sufficient for return airflow.
You can perform a simple check for adequate return air capacity by doing the following:
- Close all exterior doors and windows
- Close all interior room doors
- Turn on the central air handler
- “Crack” interior doors one by one and observe if the door closes or further opens “on its own.” (Whether it closes or opens will depend on the direction of the air handler-driven air flow.) Rooms served by air-moved doors have restricted return air flow and need pressure relief as described above.
Maintaining and Upgrading Existing Duct Systems
Sealing your ducts to prevent leaks is even more important if the ducts are located in an unconditioned area such as an attic or vented crawlspace. If the supply ducts are leaking, heated or cooled air can be forced out of unsealed joints and lost. In addition, unconditioned air can be drawn into return ducts through unsealed joints.
Although minor duct repairs are easy to make, qualified professionals should seal and insulate ducts in unconditioned spaces to ensure the use of appropriate sealing materials.
Aside from sealing your ducts, the simplest and most effective means of maintaining your air distribution system is to ensure that furniture and other objects are not blocking the airflow through your registers, and to vacuum the registers to remove any dust buildup.
Existing duct systems often suffer from design deficiencies in the return air system, and modifications by the homeowner (or just a tendency to keep doors closed) may contribute to these problems. Any rooms with a lack of sufficient return airflow may benefit from relatively simple upgrades, such as the installation of new return-air grilles, undercutting doors for return air, or installing a jumper duct.
Some rooms may also be hard to heat and cool because of inadequate supply ducts or grilles. If this is the case, you should first examine whether the problem is the room itself: fix any problems with insulation, air leakage, or inefficient windows first. If the problem persists, you may be able to increase the size of the supply duct or add an additional duct to provide the needed airflow to the room.
Minor Duct Repair Tips for Minimizing Energy Losses in Ducts
- Check your ducts for air leaks. First, look for sections that should be joined but have separated and then look for obvious holes.
- Duct mastic is the preferred material for sealing ductwork seams and joints. It is more durable than any available tape and generally easier for a do-it-yourself installation. Its only drawback is that it will not bridge gaps over ¼ inch. Such gaps must be first bridged with web-type drywall tape, or a good quality heat approved tape.
- If you use tape to seal your ducts, avoid cloth-backed, rubber adhesive duct tape — it tends to fail quickly. Instead, use mastic, butyl tape, foil tape, or other heat-approved tapes. Look for tape with the Underwriters Laboratories (UL) logo.
- Remember that insulating ducts in the basement will make the basement colder. If both the ducts and the basement walls are not insulated, consider insulating both. Water pipes and drains in unconditioned spaces could freeze and burst if the heat ducts are fully insulated because there would be no heat source to prevent the space from freezing in cold weather. However, using an electric heating tape wrap on the pipes can prevent this. Check with a professional contractor.
- Hire a professional to install both supply and return registers in the basement rooms after converting your basement to a living area.
- Be sure a well-sealed vapor barrier exists on the outside of the insulation on cooling ducts to prevent moisture condensation.
- If you have a fuel-burning furnace, stove, or other appliance or an attached garage, install a carbon monoxide (CO) monitor to alert you to harmful CO levels.
- Be sure to get professional help when doing ductwork. A qualified professional should always perform changes and repairs to a duct system.
907 Lowe St. Dayton TX, 77535 – Minimizing Energy in Ducts
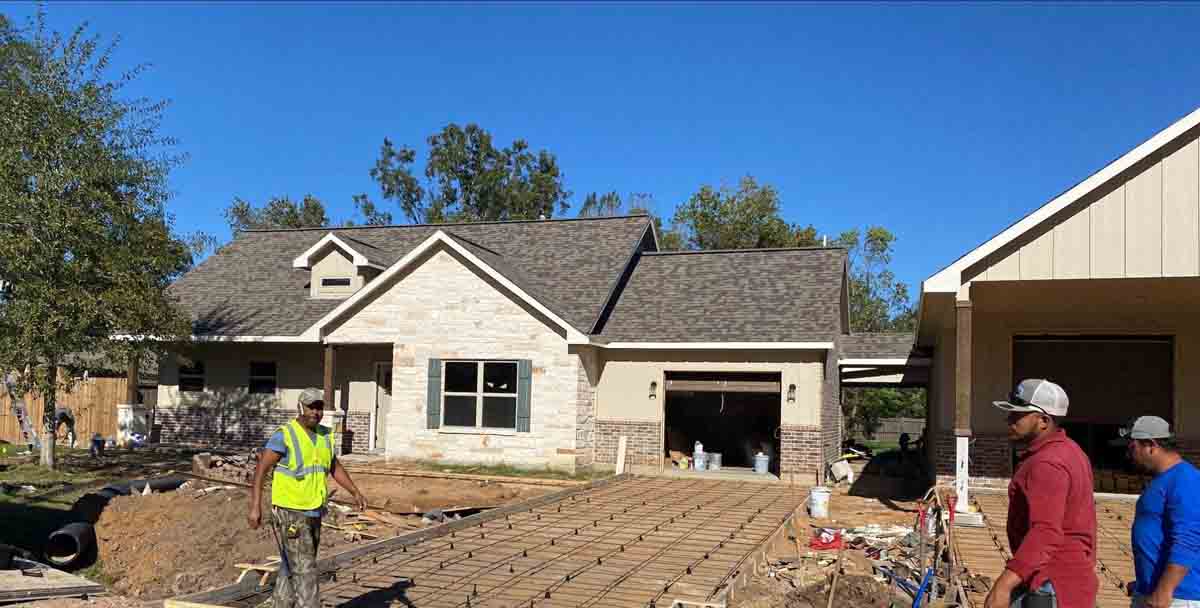
907 Lowe St. Dayton TX, 77535 – Minimizing Energy in Ducts
Minimizing energy losses in ducts
Minimizing energy losses in ducts by seeing if the ducts are poorly sealed or insulated. That could tell you why your energy bill in high. Your air ducts are one of the most important systems in your home, and if the ducts are poorly sealed or insulated, they are likely contributing to higher energy bills.
Your home’s duct system is a branching network of tubes in the walls, floors, and ceilings; it carries the air from your home’s furnace and central air conditioner to each room. Ducts are made of sheet metal, fiberglass, or other materials.
Ducts that leak heated air into unheated spaces can add hundreds of dollars a year to your heating and cooling bills, but you can reduce that loss by sealing and insulating your ducts. Insulating ducts in unconditioned spaces is usually very cost-effective. Existing ducts may also be blocked or may require simple upgrades.
Designing and Installing New Duct Systems
In new home construction or in retrofits, proper duct system design is critical. In recent years, energy-saving designs have sought to include ducts and heating systems in the conditioned space.
Efficient and well-designed duct systems distribute air properly throughout your home without leaking to keep all rooms at a comfortable temperature. The system should provide balanced supply and return flow to maintain a neutral pressure within the house.
Even well sealed and insulated ducts will leak and lose some heat, so many new energy-efficient homes place the duct system within the conditioned space of the home. The simplest way to accomplish this is to hide the ducts in dropped ceilings and in corners of rooms. Ducts can also be located in a sealed and insulated chase extending into the attic or built into raised floors. In both of these latter cases, care must be taken during construction to prevent contractors from using the duct chases for wiring or other utilities.
In either case, actual ducts must be used — chases and floor cavities should not be used as ducts. Regardless of where they are installed, ducts should be well sealed. Although ducts can be configured in a number of ways, the “trunk and branch” and “radial” supply duct configurations are most suitable for ducts located in conditioned spaces.
Air return duct systems can be configured in two ways: each room can have a return duct that sends air back to the heating and cooling equipment or return grills can be located in central locations on each floor. For the latter case, either grills must be installed to allow air to pass out of closed rooms, or short “jumper ducts” can be installed to connect the vent in one room with the next, allowing air to flow back to the central return grilles. Door undercuts help, but they are usually not sufficient for return airflow.
You can perform a simple check for adequate return air capacity by doing the following:
- Close all exterior doors and windows
- Close all interior room doors
- Turn on the central air handler
- “Crack” interior doors one by one and observe if the door closes or further opens “on its own.” (Whether it closes or opens will depend on the direction of the air handler-driven air flow.) Rooms served by air-moved doors have restricted return air flow and need pressure relief as described above.
Maintaining and Upgrading Existing Duct Systems
Sealing your ducts to prevent leaks is even more important if the ducts are located in an unconditioned area such as an attic or vented crawlspace. If the supply ducts are leaking, heated or cooled air can be forced out of unsealed joints and lost. In addition, unconditioned air can be drawn into return ducts through unsealed joints.
Although minor duct repairs are easy to make, qualified professionals should seal and insulate ducts in unconditioned spaces to ensure the use of appropriate sealing materials.
Aside from sealing your ducts, the simplest and most effective means of maintaining your air distribution system is to ensure that furniture and other objects are not blocking the airflow through your registers, and to vacuum the registers to remove any dust buildup.
Existing duct systems often suffer from design deficiencies in the return air system, and modifications by the homeowner (or just a tendency to keep doors closed) may contribute to these problems. Any rooms with a lack of sufficient return airflow may benefit from relatively simple upgrades, such as the installation of new return-air grilles, undercutting doors for return air, or installing a jumper duct.
Some rooms may also be hard to heat and cool because of inadequate supply ducts or grilles. If this is the case, you should first examine whether the problem is the room itself: fix any problems with insulation, air leakage, or inefficient windows first. If the problem persists, you may be able to increase the size of the supply duct or add an additional duct to provide the needed airflow to the room.
Minor Duct Repair Tips for Minimizing Energy Losses in Ducts
- Check your ducts for air leaks. First, look for sections that should be joined but have separated and then look for obvious holes.
- Duct mastic is the preferred material for sealing ductwork seams and joints. It is more durable than any available tape and generally easier for a do-it-yourself installation. Its only drawback is that it will not bridge gaps over ¼ inch. Such gaps must be first bridged with web-type drywall tape, or a good quality heat approved tape.
- If you use tape to seal your ducts, avoid cloth-backed, rubber adhesive duct tape — it tends to fail quickly. Instead, use mastic, butyl tape, foil tape, or other heat-approved tapes. Look for tape with the Underwriters Laboratories (UL) logo.
- Remember that insulating ducts in the basement will make the basement colder. If both the ducts and the basement walls are not insulated, consider insulating both. Water pipes and drains in unconditioned spaces could freeze and burst if the heat ducts are fully insulated because there would be no heat source to prevent the space from freezing in cold weather. However, using an electric heating tape wrap on the pipes can prevent this. Check with a professional contractor.
- Hire a professional to install both supply and return registers in the basement rooms after converting your basement to a living area.
- Be sure a well-sealed vapor barrier exists on the outside of the insulation on cooling ducts to prevent moisture condensation.
- If you have a fuel-burning furnace, stove, or other appliance or an attached garage, install a carbon monoxide (CO) monitor to alert you to harmful CO levels.
- Be sure to get professional help when doing ductwork. A qualified professional should always perform changes and repairs to a duct system.
905 Euclid St. Houston TX, 77009 – Minimizing Energy in Ducts
905 Euclid St. Houston TX, 77009 – Minimizing Energy in Ducts
Minimizing energy losses in ducts
Minimizing energy losses in ducts by seeing if the ducts are poorly sealed or insulated. That could tell you why your energy bill in high. Your air ducts are one of the most important systems in your home, and if the ducts are poorly sealed or insulated, they are likely contributing to higher energy bills.
Your home’s duct system is a branching network of tubes in the walls, floors, and ceilings; it carries the air from your home’s furnace and central air conditioner to each room. Ducts are made of sheet metal, fiberglass, or other materials.
Ducts that leak heated air into unheated spaces can add hundreds of dollars a year to your heating and cooling bills, but you can reduce that loss by sealing and insulating your ducts. Insulating ducts in unconditioned spaces is usually very cost-effective. Existing ducts may also be blocked or may require simple upgrades.
Designing and Installing New Duct Systems
In new home construction or in retrofits, proper duct system design is critical. In recent years, energy-saving designs have sought to include ducts and heating systems in the conditioned space.
Efficient and well-designed duct systems distribute air properly throughout your home without leaking to keep all rooms at a comfortable temperature. The system should provide balanced supply and return flow to maintain a neutral pressure within the house.
Even well sealed and insulated ducts will leak and lose some heat, so many new energy-efficient homes place the duct system within the conditioned space of the home. The simplest way to accomplish this is to hide the ducts in dropped ceilings and in corners of rooms. Ducts can also be located in a sealed and insulated chase extending into the attic or built into raised floors. In both of these latter cases, care must be taken during construction to prevent contractors from using the duct chases for wiring or other utilities.
In either case, actual ducts must be used — chases and floor cavities should not be used as ducts. Regardless of where they are installed, ducts should be well sealed. Although ducts can be configured in a number of ways, the “trunk and branch” and “radial” supply duct configurations are most suitable for ducts located in conditioned spaces.
Air return duct systems can be configured in two ways: each room can have a return duct that sends air back to the heating and cooling equipment or return grills can be located in central locations on each floor. For the latter case, either grills must be installed to allow air to pass out of closed rooms, or short “jumper ducts” can be installed to connect the vent in one room with the next, allowing air to flow back to the central return grilles. Door undercuts help, but they are usually not sufficient for return airflow.
You can perform a simple check for adequate return air capacity by doing the following:
- Close all exterior doors and windows
- Close all interior room doors
- Turn on the central air handler
- “Crack” interior doors one by one and observe if the door closes or further opens “on its own.” (Whether it closes or opens will depend on the direction of the air handler-driven air flow.) Rooms served by air-moved doors have restricted return air flow and need pressure relief as described above.
Maintaining and Upgrading Existing Duct Systems
Sealing your ducts to prevent leaks is even more important if the ducts are located in an unconditioned area such as an attic or vented crawlspace. If the supply ducts are leaking, heated or cooled air can be forced out of unsealed joints and lost. In addition, unconditioned air can be drawn into return ducts through unsealed joints.
Although minor duct repairs are easy to make, qualified professionals should seal and insulate ducts in unconditioned spaces to ensure the use of appropriate sealing materials.
Aside from sealing your ducts, the simplest and most effective means of maintaining your air distribution system is to ensure that furniture and other objects are not blocking the airflow through your registers, and to vacuum the registers to remove any dust buildup.
Existing duct systems often suffer from design deficiencies in the return air system, and modifications by the homeowner (or just a tendency to keep doors closed) may contribute to these problems. Any rooms with a lack of sufficient return airflow may benefit from relatively simple upgrades, such as the installation of new return-air grilles, undercutting doors for return air, or installing a jumper duct.
Some rooms may also be hard to heat and cool because of inadequate supply ducts or grilles. If this is the case, you should first examine whether the problem is the room itself: fix any problems with insulation, air leakage, or inefficient windows first. If the problem persists, you may be able to increase the size of the supply duct or add an additional duct to provide the needed airflow to the room.
Minor Duct Repair Tips for Minimizing Energy Losses in Ducts
- Check your ducts for air leaks. First, look for sections that should be joined but have separated and then look for obvious holes.
- Duct mastic is the preferred material for sealing ductwork seams and joints. It is more durable than any available tape and generally easier for a do-it-yourself installation. Its only drawback is that it will not bridge gaps over ¼ inch. Such gaps must be first bridged with web-type drywall tape, or a good quality heat approved tape.
- If you use tape to seal your ducts, avoid cloth-backed, rubber adhesive duct tape — it tends to fail quickly. Instead, use mastic, butyl tape, foil tape, or other heat-approved tapes. Look for tape with the Underwriters Laboratories (UL) logo.
- Remember that insulating ducts in the basement will make the basement colder. If both the ducts and the basement walls are not insulated, consider insulating both. Water pipes and drains in unconditioned spaces could freeze and burst if the heat ducts are fully insulated because there would be no heat source to prevent the space from freezing in cold weather. However, using an electric heating tape wrap on the pipes can prevent this. Check with a professional contractor.
- Hire a professional to install both supply and return registers in the basement rooms after converting your basement to a living area.
- Be sure a well-sealed vapor barrier exists on the outside of the insulation on cooling ducts to prevent moisture condensation.
- If you have a fuel-burning furnace, stove, or other appliance or an attached garage, install a carbon monoxide (CO) monitor to alert you to harmful CO levels.
- Be sure to get professional help when doing ductwork. A qualified professional should always perform changes and repairs to a duct system.
834 Mansfield St. Houston TX, 77091 – Minimizing Energy Losses in Ducts
834 Mansfield St. Houston TX, 77091 – Minimizing Energy Losses in Ducts
Minimizing energy losses in ducts
Minimizing energy losses in ducts by seeing if the ducts are poorly sealed or insulated. That could tell you why your energy bill in high. Your air ducts are one of the most important systems in your home, and if the ducts are poorly sealed or insulated, they are likely contributing to higher energy bills.
Your home’s duct system is a branching network of tubes in the walls, floors, and ceilings; it carries the air from your home’s furnace and central air conditioner to each room. Ducts are made of sheet metal, fiberglass, or other materials.
Ducts that leak heated air into unheated spaces can add hundreds of dollars a year to your heating and cooling bills, but you can reduce that loss by sealing and insulating your ducts. Insulating ducts in unconditioned spaces is usually very cost-effective. Existing ducts may also be blocked or may require simple upgrades.
Designing and Installing New Duct Systems
In new home construction or in retrofits, proper duct system design is critical. In recent years, energy-saving designs have sought to include ducts and heating systems in the conditioned space.
Efficient and well-designed duct systems distribute air properly throughout your home without leaking to keep all rooms at a comfortable temperature. The system should provide balanced supply and return flow to maintain a neutral pressure within the house.
Even well sealed and insulated ducts will leak and lose some heat, so many new energy-efficient homes place the duct system within the conditioned space of the home. The simplest way to accomplish this is to hide the ducts in dropped ceilings and in corners of rooms. Ducts can also be located in a sealed and insulated chase extending into the attic or built into raised floors. In both of these latter cases, care must be taken during construction to prevent contractors from using the duct chases for wiring or other utilities.
In either case, actual ducts must be used — chases and floor cavities should not be used as ducts. Regardless of where they are installed, ducts should be well sealed. Although ducts can be configured in a number of ways, the “trunk and branch” and “radial” supply duct configurations are most suitable for ducts located in conditioned spaces.
Air return duct systems can be configured in two ways: each room can have a return duct that sends air back to the heating and cooling equipment or return grills can be located in central locations on each floor. For the latter case, either grills must be installed to allow air to pass out of closed rooms, or short “jumper ducts” can be installed to connect the vent in one room with the next, allowing air to flow back to the central return grilles. Door undercuts help, but they are usually not sufficient for return airflow.
You can perform a simple check for adequate return air capacity by doing the following:
- Close all exterior doors and windows
- Close all interior room doors
- Turn on the central air handler
- “Crack” interior doors one by one and observe if the door closes or further opens “on its own.” (Whether it closes or opens will depend on the direction of the air handler-driven air flow.) Rooms served by air-moved doors have restricted return air flow and need pressure relief as described above.
Maintaining and Upgrading Existing Duct Systems
Sealing your ducts to prevent leaks is even more important if the ducts are located in an unconditioned area such as an attic or vented crawlspace. If the supply ducts are leaking, heated or cooled air can be forced out of unsealed joints and lost. In addition, unconditioned air can be drawn into return ducts through unsealed joints.
Although minor duct repairs are easy to make, qualified professionals should seal and insulate ducts in unconditioned spaces to ensure the use of appropriate sealing materials.
Aside from sealing your ducts, the simplest and most effective means of maintaining your air distribution system is to ensure that furniture and other objects are not blocking the airflow through your registers, and to vacuum the registers to remove any dust buildup.
Existing duct systems often suffer from design deficiencies in the return air system, and modifications by the homeowner (or just a tendency to keep doors closed) may contribute to these problems. Any rooms with a lack of sufficient return airflow may benefit from relatively simple upgrades, such as the installation of new return-air grilles, undercutting doors for return air, or installing a jumper duct.
Some rooms may also be hard to heat and cool because of inadequate supply ducts or grilles. If this is the case, you should first examine whether the problem is the room itself: fix any problems with insulation, air leakage, or inefficient windows first. If the problem persists, you may be able to increase the size of the supply duct or add an additional duct to provide the needed airflow to the room.
Minor Duct Repair Tips for Minimizing Energy Losses in Ducts
- Check your ducts for air leaks. First, look for sections that should be joined but have separated and then look for obvious holes.
- Duct mastic is the preferred material for sealing ductwork seams and joints. It is more durable than any available tape and generally easier for a do-it-yourself installation. Its only drawback is that it will not bridge gaps over ¼ inch. Such gaps must be first bridged with web-type drywall tape, or a good quality heat approved tape.
- If you use tape to seal your ducts, avoid cloth-backed, rubber adhesive duct tape — it tends to fail quickly. Instead, use mastic, butyl tape, foil tape, or other heat-approved tapes. Look for tape with the Underwriters Laboratories (UL) logo.
- Remember that insulating ducts in the basement will make the basement colder. If both the ducts and the basement walls are not insulated, consider insulating both. Water pipes and drains in unconditioned spaces could freeze and burst if the heat ducts are fully insulated because there would be no heat source to prevent the space from freezing in cold weather. However, using an electric heating tape wrap on the pipes can prevent this. Check with a professional contractor.
- Hire a professional to install both supply and return registers in the basement rooms after converting your basement to a living area.
- Be sure a well-sealed vapor barrier exists on the outside of the insulation on cooling ducts to prevent moisture condensation.
- If you have a fuel-burning furnace, stove, or other appliance or an attached garage, install a carbon monoxide (CO) monitor to alert you to harmful CO levels.
- Be sure to get professional help when doing ductwork. A qualified professional should always perform changes and repairs to a duct system.
810 Archer St. Houston TX, 77009 – Minimizing Energy Losses in Ducts
810 Archer St. Houston TX, 77009 – Minimizing Energy Losses in Ducts
Minimizing energy losses in ducts
Minimizing energy losses in ducts by seeing if the ducts are poorly sealed or insulated. That could tell you why your energy bill in high. Your air ducts are one of the most important systems in your home, and if the ducts are poorly sealed or insulated, they are likely contributing to higher energy bills.
Your home’s duct system is a branching network of tubes in the walls, floors, and ceilings; it carries the air from your home’s furnace and central air conditioner to each room. Ducts are made of sheet metal, fiberglass, or other materials.
Ducts that leak heated air into unheated spaces can add hundreds of dollars a year to your heating and cooling bills, but you can reduce that loss by sealing and insulating your ducts. Insulating ducts in unconditioned spaces is usually very cost-effective. Existing ducts may also be blocked or may require simple upgrades.
Designing and Installing New Duct Systems
In new home construction or in retrofits, proper duct system design is critical. In recent years, energy-saving designs have sought to include ducts and heating systems in the conditioned space.
Efficient and well-designed duct systems distribute air properly throughout your home without leaking to keep all rooms at a comfortable temperature. The system should provide balanced supply and return flow to maintain a neutral pressure within the house.
Even well sealed and insulated ducts will leak and lose some heat, so many new energy-efficient homes place the duct system within the conditioned space of the home. The simplest way to accomplish this is to hide the ducts in dropped ceilings and in corners of rooms. Ducts can also be located in a sealed and insulated chase extending into the attic or built into raised floors. In both of these latter cases, care must be taken during construction to prevent contractors from using the duct chases for wiring or other utilities.
In either case, actual ducts must be used — chases and floor cavities should not be used as ducts. Regardless of where they are installed, ducts should be well sealed. Although ducts can be configured in a number of ways, the “trunk and branch” and “radial” supply duct configurations are most suitable for ducts located in conditioned spaces.
Air return duct systems can be configured in two ways: each room can have a return duct that sends air back to the heating and cooling equipment or return grills can be located in central locations on each floor. For the latter case, either grills must be installed to allow air to pass out of closed rooms, or short “jumper ducts” can be installed to connect the vent in one room with the next, allowing air to flow back to the central return grilles. Door undercuts help, but they are usually not sufficient for return airflow.
You can perform a simple check for adequate return air capacity by doing the following:
- Close all exterior doors and windows
- Close all interior room doors
- Turn on the central air handler
- “Crack” interior doors one by one and observe if the door closes or further opens “on its own.” (Whether it closes or opens will depend on the direction of the air handler-driven air flow.) Rooms served by air-moved doors have restricted return air flow and need pressure relief as described above.
Maintaining and Upgrading Existing Duct Systems
Sealing your ducts to prevent leaks is even more important if the ducts are located in an unconditioned area such as an attic or vented crawlspace. If the supply ducts are leaking, heated or cooled air can be forced out of unsealed joints and lost. In addition, unconditioned air can be drawn into return ducts through unsealed joints.
Although minor duct repairs are easy to make, qualified professionals should seal and insulate ducts in unconditioned spaces to ensure the use of appropriate sealing materials.
Aside from sealing your ducts, the simplest and most effective means of maintaining your air distribution system is to ensure that furniture and other objects are not blocking the airflow through your registers, and to vacuum the registers to remove any dust buildup.
Existing duct systems often suffer from design deficiencies in the return air system, and modifications by the homeowner (or just a tendency to keep doors closed) may contribute to these problems. Any rooms with a lack of sufficient return airflow may benefit from relatively simple upgrades, such as the installation of new return-air grilles, undercutting doors for return air, or installing a jumper duct.
Some rooms may also be hard to heat and cool because of inadequate supply ducts or grilles. If this is the case, you should first examine whether the problem is the room itself: fix any problems with insulation, air leakage, or inefficient windows first. If the problem persists, you may be able to increase the size of the supply duct or add an additional duct to provide the needed airflow to the room.
Minor Duct Repair Tips for Minimizing Energy Losses in Ducts
- Check your ducts for air leaks. First, look for sections that should be joined but have separated and then look for obvious holes.
- Duct mastic is the preferred material for sealing ductwork seams and joints. It is more durable than any available tape and generally easier for a do-it-yourself installation. Its only drawback is that it will not bridge gaps over ¼ inch. Such gaps must be first bridged with web-type drywall tape, or a good quality heat approved tape.
- If you use tape to seal your ducts, avoid cloth-backed, rubber adhesive duct tape — it tends to fail quickly. Instead, use mastic, butyl tape, foil tape, or other heat-approved tapes. Look for tape with the Underwriters Laboratories (UL) logo.
- Remember that insulating ducts in the basement will make the basement colder. If both the ducts and the basement walls are not insulated, consider insulating both. Water pipes and drains in unconditioned spaces could freeze and burst if the heat ducts are fully insulated because there would be no heat source to prevent the space from freezing in cold weather. However, using an electric heating tape wrap on the pipes can prevent this. Check with a professional contractor.
- Hire a professional to install both supply and return registers in the basement rooms after converting your basement to a living area.
- Be sure a well-sealed vapor barrier exists on the outside of the insulation on cooling ducts to prevent moisture condensation.
- If you have a fuel-burning furnace, stove, or other appliance or an attached garage, install a carbon monoxide (CO) monitor to alert you to harmful CO levels.
- Be sure to get professional help when doing ductwork. A qualified professional should always perform changes and repairs to a duct system.
710 Pinemont Canyon Ln. Houston TX, 77018 – Minimizing Energy Losses in Ducts

710 Pinemont Canyon Ln. Houston TX, 77018 – Minimizing Energy Losses in Ducts
Minimizing energy losses in ducts
Minimizing energy losses in ducts by seeing if the ducts are poorly sealed or insulated. That could tell you why your energy bill in high. Your air ducts are one of the most important systems in your home, and if the ducts are poorly sealed or insulated, they are likely contributing to higher energy bills.
Your home’s duct system is a branching network of tubes in the walls, floors, and ceilings; it carries the air from your home’s furnace and central air conditioner to each room. Ducts are made of sheet metal, fiberglass, or other materials.
Ducts that leak heated air into unheated spaces can add hundreds of dollars a year to your heating and cooling bills, but you can reduce that loss by sealing and insulating your ducts. Insulating ducts in unconditioned spaces is usually very cost-effective. Existing ducts may also be blocked or may require simple upgrades.
Designing and Installing New Duct Systems
In new home construction or in retrofits, proper duct system design is critical. In recent years, energy-saving designs have sought to include ducts and heating systems in the conditioned space.
Efficient and well-designed duct systems distribute air properly throughout your home without leaking to keep all rooms at a comfortable temperature. The system should provide balanced supply and return flow to maintain a neutral pressure within the house.
Even well sealed and insulated ducts will leak and lose some heat, so many new energy-efficient homes place the duct system within the conditioned space of the home. The simplest way to accomplish this is to hide the ducts in dropped ceilings and in corners of rooms. Ducts can also be located in a sealed and insulated chase extending into the attic or built into raised floors. In both of these latter cases, care must be taken during construction to prevent contractors from using the duct chases for wiring or other utilities.
In either case, actual ducts must be used — chases and floor cavities should not be used as ducts. Regardless of where they are installed, ducts should be well sealed. Although ducts can be configured in a number of ways, the “trunk and branch” and “radial” supply duct configurations are most suitable for ducts located in conditioned spaces.
Air return duct systems can be configured in two ways: each room can have a return duct that sends air back to the heating and cooling equipment or return grills can be located in central locations on each floor. For the latter case, either grills must be installed to allow air to pass out of closed rooms, or short “jumper ducts” can be installed to connect the vent in one room with the next, allowing air to flow back to the central return grilles. Door undercuts help, but they are usually not sufficient for return airflow.
You can perform a simple check for adequate return air capacity by doing the following:
- Close all exterior doors and windows
- Close all interior room doors
- Turn on the central air handler
- “Crack” interior doors one by one and observe if the door closes or further opens “on its own.” (Whether it closes or opens will depend on the direction of the air handler-driven air flow.) Rooms served by air-moved doors have restricted return air flow and need pressure relief as described above.
Maintaining and Upgrading Existing Duct Systems
Sealing your ducts to prevent leaks is even more important if the ducts are located in an unconditioned area such as an attic or vented crawlspace. If the supply ducts are leaking, heated or cooled air can be forced out of unsealed joints and lost. In addition, unconditioned air can be drawn into return ducts through unsealed joints.
Although minor duct repairs are easy to make, qualified professionals should seal and insulate ducts in unconditioned spaces to ensure the use of appropriate sealing materials.
Aside from sealing your ducts, the simplest and most effective means of maintaining your air distribution system is to ensure that furniture and other objects are not blocking the airflow through your registers, and to vacuum the registers to remove any dust buildup.
Existing duct systems often suffer from design deficiencies in the return air system, and modifications by the homeowner (or just a tendency to keep doors closed) may contribute to these problems. Any rooms with a lack of sufficient return airflow may benefit from relatively simple upgrades, such as the installation of new return-air grilles, undercutting doors for return air, or installing a jumper duct.
Some rooms may also be hard to heat and cool because of inadequate supply ducts or grilles. If this is the case, you should first examine whether the problem is the room itself: fix any problems with insulation, air leakage, or inefficient windows first. If the problem persists, you may be able to increase the size of the supply duct or add an additional duct to provide the needed airflow to the room.
Minor Duct Repair Tips for Minimizing Energy Losses in Ducts
- Check your ducts for air leaks. First, look for sections that should be joined but have separated and then look for obvious holes.
- Duct mastic is the preferred material for sealing ductwork seams and joints. It is more durable than any available tape and generally easier for a do-it-yourself installation. Its only drawback is that it will not bridge gaps over ¼ inch. Such gaps must be first bridged with web-type drywall tape, or a good quality heat approved tape.
- If you use tape to seal your ducts, avoid cloth-backed, rubber adhesive duct tape — it tends to fail quickly. Instead, use mastic, butyl tape, foil tape, or other heat-approved tapes. Look for tape with the Underwriters Laboratories (UL) logo.
- Remember that insulating ducts in the basement will make the basement colder. If both the ducts and the basement walls are not insulated, consider insulating both. Water pipes and drains in unconditioned spaces could freeze and burst if the heat ducts are fully insulated because there would be no heat source to prevent the space from freezing in cold weather. However, using an electric heating tape wrap on the pipes can prevent this. Check with a professional contractor.
- Hire a professional to install both supply and return registers in the basement rooms after converting your basement to a living area.
- Be sure a well-sealed vapor barrier exists on the outside of the insulation on cooling ducts to prevent moisture condensation.
- If you have a fuel-burning furnace, stove, or other appliance or an attached garage, install a carbon monoxide (CO) monitor to alert you to harmful CO levels.
- Be sure to get professional help when doing ductwork. A qualified professional should always perform changes and repairs to a duct system.
703 E Crestwood Dr. Victoria TX, 77901 – Minimizing Energy Losses in Ducts
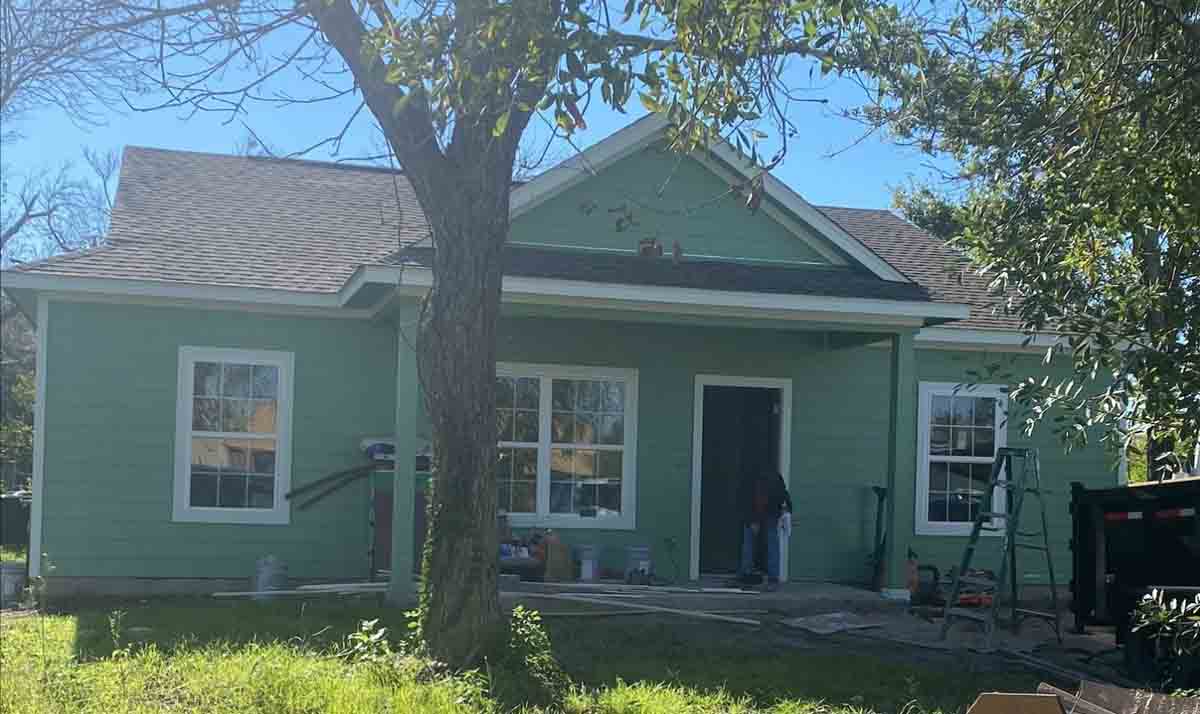
703 E Crestwood Dr. Victoria TX, 77901 – Minimizing Energy Losses in Ducts
Minimizing energy losses in ducts
Minimizing energy losses in ducts by seeing if the ducts are poorly sealed or insulated. That could tell you why your energy bill in high. Your air ducts are one of the most important systems in your home, and if the ducts are poorly sealed or insulated, they are likely contributing to higher energy bills.
Your home’s duct system is a branching network of tubes in the walls, floors, and ceilings; it carries the air from your home’s furnace and central air conditioner to each room. Ducts are made of sheet metal, fiberglass, or other materials.
Ducts that leak heated air into unheated spaces can add hundreds of dollars a year to your heating and cooling bills, but you can reduce that loss by sealing and insulating your ducts. Insulating ducts in unconditioned spaces is usually very cost-effective. Existing ducts may also be blocked or may require simple upgrades.
Designing and Installing New Duct Systems
In new home construction or in retrofits, proper duct system design is critical. In recent years, energy-saving designs have sought to include ducts and heating systems in the conditioned space.
Efficient and well-designed duct systems distribute air properly throughout your home without leaking to keep all rooms at a comfortable temperature. The system should provide balanced supply and return flow to maintain a neutral pressure within the house.
Even well sealed and insulated ducts will leak and lose some heat, so many new energy-efficient homes place the duct system within the conditioned space of the home. The simplest way to accomplish this is to hide the ducts in dropped ceilings and in corners of rooms. Ducts can also be located in a sealed and insulated chase extending into the attic or built into raised floors. In both of these latter cases, care must be taken during construction to prevent contractors from using the duct chases for wiring or other utilities.
In either case, actual ducts must be used — chases and floor cavities should not be used as ducts. Regardless of where they are installed, ducts should be well sealed. Although ducts can be configured in a number of ways, the “trunk and branch” and “radial” supply duct configurations are most suitable for ducts located in conditioned spaces.
Air return duct systems can be configured in two ways: each room can have a return duct that sends air back to the heating and cooling equipment or return grills can be located in central locations on each floor. For the latter case, either grills must be installed to allow air to pass out of closed rooms, or short “jumper ducts” can be installed to connect the vent in one room with the next, allowing air to flow back to the central return grilles. Door undercuts help, but they are usually not sufficient for return airflow.
You can perform a simple check for adequate return air capacity by doing the following:
- Close all exterior doors and windows
- Close all interior room doors
- Turn on the central air handler
- “Crack” interior doors one by one and observe if the door closes or further opens “on its own.” (Whether it closes or opens will depend on the direction of the air handler-driven air flow.) Rooms served by air-moved doors have restricted return air flow and need pressure relief as described above.
Maintaining and Upgrading Existing Duct Systems
Sealing your ducts to prevent leaks is even more important if the ducts are located in an unconditioned area such as an attic or vented crawlspace. If the supply ducts are leaking, heated or cooled air can be forced out of unsealed joints and lost. In addition, unconditioned air can be drawn into return ducts through unsealed joints.
Although minor duct repairs are easy to make, qualified professionals should seal and insulate ducts in unconditioned spaces to ensure the use of appropriate sealing materials.
Aside from sealing your ducts, the simplest and most effective means of maintaining your air distribution system is to ensure that furniture and other objects are not blocking the airflow through your registers, and to vacuum the registers to remove any dust buildup.
Existing duct systems often suffer from design deficiencies in the return air system, and modifications by the homeowner (or just a tendency to keep doors closed) may contribute to these problems. Any rooms with a lack of sufficient return airflow may benefit from relatively simple upgrades, such as the installation of new return-air grilles, undercutting doors for return air, or installing a jumper duct.
Some rooms may also be hard to heat and cool because of inadequate supply ducts or grilles. If this is the case, you should first examine whether the problem is the room itself: fix any problems with insulation, air leakage, or inefficient windows first. If the problem persists, you may be able to increase the size of the supply duct or add an additional duct to provide the needed airflow to the room.
Minor Duct Repair Tips for Minimizing Energy Losses in Ducts
- Check your ducts for air leaks. First, look for sections that should be joined but have separated and then look for obvious holes.
- Duct mastic is the preferred material for sealing ductwork seams and joints. It is more durable than any available tape and generally easier for a do-it-yourself installation. Its only drawback is that it will not bridge gaps over ¼ inch. Such gaps must be first bridged with web-type drywall tape, or a good quality heat approved tape.
- If you use tape to seal your ducts, avoid cloth-backed, rubber adhesive duct tape — it tends to fail quickly. Instead, use mastic, butyl tape, foil tape, or other heat-approved tapes. Look for tape with the Underwriters Laboratories (UL) logo.
- Remember that insulating ducts in the basement will make the basement colder. If both the ducts and the basement walls are not insulated, consider insulating both. Water pipes and drains in unconditioned spaces could freeze and burst if the heat ducts are fully insulated because there would be no heat source to prevent the space from freezing in cold weather. However, using an electric heating tape wrap on the pipes can prevent this. Check with a professional contractor.
- Hire a professional to install both supply and return registers in the basement rooms after converting your basement to a living area.
- Be sure a well-sealed vapor barrier exists on the outside of the insulation on cooling ducts to prevent moisture condensation.
- If you have a fuel-burning furnace, stove, or other appliance or an attached garage, install a carbon monoxide (CO) monitor to alert you to harmful CO levels.
- Be sure to get professional help when doing ductwork. A qualified professional should always perform changes and repairs to a duct system.
501 43rd St. Galveston TX, 77550 – Minimizing Energy Losses in Ducts
501 43rd St. Galveston TX, 77550 – Minimizing Energy Losses in Ducts
Minimizing energy losses in ducts
Minimizing energy losses in ducts by seeing if the ducts are poorly sealed or insulated. That could tell you why your energy bill in high. Your air ducts are one of the most important systems in your home, and if the ducts are poorly sealed or insulated, they are likely contributing to higher energy bills.
Your home’s duct system is a branching network of tubes in the walls, floors, and ceilings; it carries the air from your home’s furnace and central air conditioner to each room. Ducts are made of sheet metal, fiberglass, or other materials.
Ducts that leak heated air into unheated spaces can add hundreds of dollars a year to your heating and cooling bills, but you can reduce that loss by sealing and insulating your ducts. Insulating ducts in unconditioned spaces is usually very cost-effective. Existing ducts may also be blocked or may require simple upgrades.
Designing and Installing New Duct Systems
In new home construction or in retrofits, proper duct system design is critical. In recent years, energy-saving designs have sought to include ducts and heating systems in the conditioned space.
Efficient and well-designed duct systems distribute air properly throughout your home without leaking to keep all rooms at a comfortable temperature. The system should provide balanced supply and return flow to maintain a neutral pressure within the house.
Even well sealed and insulated ducts will leak and lose some heat, so many new energy-efficient homes place the duct system within the conditioned space of the home. The simplest way to accomplish this is to hide the ducts in dropped ceilings and in corners of rooms. Ducts can also be located in a sealed and insulated chase extending into the attic or built into raised floors. In both of these latter cases, care must be taken during construction to prevent contractors from using the duct chases for wiring or other utilities.
In either case, actual ducts must be used — chases and floor cavities should not be used as ducts. Regardless of where they are installed, ducts should be well sealed. Although ducts can be configured in a number of ways, the “trunk and branch” and “radial” supply duct configurations are most suitable for ducts located in conditioned spaces.
Air return duct systems can be configured in two ways: each room can have a return duct that sends air back to the heating and cooling equipment or return grills can be located in central locations on each floor. For the latter case, either grills must be installed to allow air to pass out of closed rooms, or short “jumper ducts” can be installed to connect the vent in one room with the next, allowing air to flow back to the central return grilles. Door undercuts help, but they are usually not sufficient for return airflow.
You can perform a simple check for adequate return air capacity by doing the following:
- Close all exterior doors and windows
- Close all interior room doors
- Turn on the central air handler
- “Crack” interior doors one by one and observe if the door closes or further opens “on its own.” (Whether it closes or opens will depend on the direction of the air handler-driven air flow.) Rooms served by air-moved doors have restricted return air flow and need pressure relief as described above.
Maintaining and Upgrading Existing Duct Systems
Sealing your ducts to prevent leaks is even more important if the ducts are located in an unconditioned area such as an attic or vented crawlspace. If the supply ducts are leaking, heated or cooled air can be forced out of unsealed joints and lost. In addition, unconditioned air can be drawn into return ducts through unsealed joints.
Although minor duct repairs are easy to make, qualified professionals should seal and insulate ducts in unconditioned spaces to ensure the use of appropriate sealing materials.
Aside from sealing your ducts, the simplest and most effective means of maintaining your air distribution system is to ensure that furniture and other objects are not blocking the airflow through your registers, and to vacuum the registers to remove any dust buildup.
Existing duct systems often suffer from design deficiencies in the return air system, and modifications by the homeowner (or just a tendency to keep doors closed) may contribute to these problems. Any rooms with a lack of sufficient return airflow may benefit from relatively simple upgrades, such as the installation of new return-air grilles, undercutting doors for return air, or installing a jumper duct.
Some rooms may also be hard to heat and cool because of inadequate supply ducts or grilles. If this is the case, you should first examine whether the problem is the room itself: fix any problems with insulation, air leakage, or inefficient windows first. If the problem persists, you may be able to increase the size of the supply duct or add an additional duct to provide the needed airflow to the room.
Minor Duct Repair Tips for Minimizing Energy Losses in Ducts
- Check your ducts for air leaks. First, look for sections that should be joined but have separated and then look for obvious holes.
- Duct mastic is the preferred material for sealing ductwork seams and joints. It is more durable than any available tape and generally easier for a do-it-yourself installation. Its only drawback is that it will not bridge gaps over ¼ inch. Such gaps must be first bridged with web-type drywall tape, or a good quality heat approved tape.
- If you use tape to seal your ducts, avoid cloth-backed, rubber adhesive duct tape — it tends to fail quickly. Instead, use mastic, butyl tape, foil tape, or other heat-approved tapes. Look for tape with the Underwriters Laboratories (UL) logo.
- Remember that insulating ducts in the basement will make the basement colder. If both the ducts and the basement walls are not insulated, consider insulating both. Water pipes and drains in unconditioned spaces could freeze and burst if the heat ducts are fully insulated because there would be no heat source to prevent the space from freezing in cold weather. However, using an electric heating tape wrap on the pipes can prevent this. Check with a professional contractor.
- Hire a professional to install both supply and return registers in the basement rooms after converting your basement to a living area.
- Be sure a well-sealed vapor barrier exists on the outside of the insulation on cooling ducts to prevent moisture condensation.
- If you have a fuel-burning furnace, stove, or other appliance or an attached garage, install a carbon monoxide (CO) monitor to alert you to harmful CO levels.
- Be sure to get professional help when doing ductwork. A qualified professional should always perform changes and repairs to a duct system.
410 Gans St Houston TX, 77029 – Minimizing Energy Losses in Ducts

410 Gans St Houston TX, 77029 – Minimizing Energy Losses in Ducts
Minimizing energy losses in ducts
Minimizing energy losses in ducts by seeing if the ducts are poorly sealed or insulated. That could tell you why your energy bill in high. Your air ducts are one of the most important systems in your home, and if the ducts are poorly sealed or insulated, they are likely contributing to higher energy bills.
Your home’s duct system is a branching network of tubes in the walls, floors, and ceilings; it carries the air from your home’s furnace and central air conditioner to each room. Ducts are made of sheet metal, fiberglass, or other materials.
Ducts that leak heated air into unheated spaces can add hundreds of dollars a year to your heating and cooling bills, but you can reduce that loss by sealing and insulating your ducts. Insulating ducts in unconditioned spaces is usually very cost-effective. Existing ducts may also be blocked or may require simple upgrades.
Designing and Installing New Duct Systems
In new home construction or in retrofits, proper duct system design is critical. In recent years, energy-saving designs have sought to include ducts and heating systems in the conditioned space.
Efficient and well-designed duct systems distribute air properly throughout your home without leaking to keep all rooms at a comfortable temperature. The system should provide balanced supply and return flow to maintain a neutral pressure within the house.
Even well sealed and insulated ducts will leak and lose some heat, so many new energy-efficient homes place the duct system within the conditioned space of the home. The simplest way to accomplish this is to hide the ducts in dropped ceilings and in corners of rooms. Ducts can also be located in a sealed and insulated chase extending into the attic or built into raised floors. In both of these latter cases, care must be taken during construction to prevent contractors from using the duct chases for wiring or other utilities.
In either case, actual ducts must be used — chases and floor cavities should not be used as ducts. Regardless of where they are installed, ducts should be well sealed. Although ducts can be configured in a number of ways, the “trunk and branch” and “radial” supply duct configurations are most suitable for ducts located in conditioned spaces.
Air return duct systems can be configured in two ways: each room can have a return duct that sends air back to the heating and cooling equipment or return grills can be located in central locations on each floor. For the latter case, either grills must be installed to allow air to pass out of closed rooms, or short “jumper ducts” can be installed to connect the vent in one room with the next, allowing air to flow back to the central return grilles. Door undercuts help, but they are usually not sufficient for return airflow.
You can perform a simple check for adequate return air capacity by doing the following:
- Close all exterior doors and windows
- Close all interior room doors
- Turn on the central air handler
- “Crack” interior doors one by one and observe if the door closes or further opens “on its own.” (Whether it closes or opens will depend on the direction of the air handler-driven air flow.) Rooms served by air-moved doors have restricted return air flow and need pressure relief as described above.
Maintaining and Upgrading Existing Duct Systems
Sealing your ducts to prevent leaks is even more important if the ducts are located in an unconditioned area such as an attic or vented crawlspace. If the supply ducts are leaking, heated or cooled air can be forced out of unsealed joints and lost. In addition, unconditioned air can be drawn into return ducts through unsealed joints.
Although minor duct repairs are easy to make, qualified professionals should seal and insulate ducts in unconditioned spaces to ensure the use of appropriate sealing materials.
Aside from sealing your ducts, the simplest and most effective means of maintaining your air distribution system is to ensure that furniture and other objects are not blocking the airflow through your registers, and to vacuum the registers to remove any dust buildup.
Existing duct systems often suffer from design deficiencies in the return air system, and modifications by the homeowner (or just a tendency to keep doors closed) may contribute to these problems. Any rooms with a lack of sufficient return airflow may benefit from relatively simple upgrades, such as the installation of new return-air grilles, undercutting doors for return air, or installing a jumper duct.
Some rooms may also be hard to heat and cool because of inadequate supply ducts or grilles. If this is the case, you should first examine whether the problem is the room itself: fix any problems with insulation, air leakage, or inefficient windows first. If the problem persists, you may be able to increase the size of the supply duct or add an additional duct to provide the needed airflow to the room.
Minor Duct Repair Tips for Minimizing Energy Losses in Ducts
- Check your ducts for air leaks. First, look for sections that should be joined but have separated and then look for obvious holes.
- Duct mastic is the preferred material for sealing ductwork seams and joints. It is more durable than any available tape and generally easier for a do-it-yourself installation. Its only drawback is that it will not bridge gaps over ¼ inch. Such gaps must be first bridged with web-type drywall tape, or a good quality heat approved tape.
- If you use tape to seal your ducts, avoid cloth-backed, rubber adhesive duct tape — it tends to fail quickly. Instead, use mastic, butyl tape, foil tape, or other heat-approved tapes. Look for tape with the Underwriters Laboratories (UL) logo.
- Remember that insulating ducts in the basement will make the basement colder. If both the ducts and the basement walls are not insulated, consider insulating both. Water pipes and drains in unconditioned spaces could freeze and burst if the heat ducts are fully insulated because there would be no heat source to prevent the space from freezing in cold weather. However, using an electric heating tape wrap on the pipes can prevent this. Check with a professional contractor.
- Hire a professional to install both supply and return registers in the basement rooms after converting your basement to a living area.
- Be sure a well-sealed vapor barrier exists on the outside of the insulation on cooling ducts to prevent moisture condensation.
- If you have a fuel-burning furnace, stove, or other appliance or an attached garage, install a carbon monoxide (CO) monitor to alert you to harmful CO levels.
- Be sure to get professional help when doing ductwork. A qualified professional should always perform changes and repairs to a duct system.
403 Elm Lake Dr Huffman TX 77336 – Minimizing Energy Loss in Ducts

403 Elm Lake Dr Huffman TX 77336 – Minimizing Energy Loss in Ducts
Minimizing energy losses in ducts
Minimizing energy losses in ducts by seeing if the ducts are poorly sealed or insulated. That could tell you why your energy bill in high. Your air ducts are one of the most important systems in your home, and if the ducts are poorly sealed or insulated, they are likely contributing to higher energy bills.
Your home’s duct system is a branching network of tubes in the walls, floors, and ceilings; it carries the air from your home’s furnace and central air conditioner to each room. Ducts are made of sheet metal, fiberglass, or other materials.
Ducts that leak heated air into unheated spaces can add hundreds of dollars a year to your heating and cooling bills, but you can reduce that loss by sealing and insulating your ducts. Insulating ducts in unconditioned spaces is usually very cost-effective. Existing ducts may also be blocked or may require simple upgrades.
Designing and Installing New Duct Systems
In new home construction or in retrofits, proper duct system design is critical. In recent years, energy-saving designs have sought to include ducts and heating systems in the conditioned space.
Efficient and well-designed duct systems distribute air properly throughout your home without leaking to keep all rooms at a comfortable temperature. The system should provide balanced supply and return flow to maintain a neutral pressure within the house.
Even well sealed and insulated ducts will leak and lose some heat, so many new energy-efficient homes place the duct system within the conditioned space of the home. The simplest way to accomplish this is to hide the ducts in dropped ceilings and in corners of rooms. Ducts can also be located in a sealed and insulated chase extending into the attic or built into raised floors. In both of these latter cases, care must be taken during construction to prevent contractors from using the duct chases for wiring or other utilities.
In either case, actual ducts must be used — chases and floor cavities should not be used as ducts. Regardless of where they are installed, ducts should be well sealed. Although ducts can be configured in a number of ways, the “trunk and branch” and “radial” supply duct configurations are most suitable for ducts located in conditioned spaces.
Air return duct systems can be configured in two ways: each room can have a return duct that sends air back to the heating and cooling equipment or return grills can be located in central locations on each floor. For the latter case, either grills must be installed to allow air to pass out of closed rooms, or short “jumper ducts” can be installed to connect the vent in one room with the next, allowing air to flow back to the central return grilles. Door undercuts help, but they are usually not sufficient for return airflow.
You can perform a simple check for adequate return air capacity by doing the following:
- Close all exterior doors and windows
- Close all interior room doors
- Turn on the central air handler
- “Crack” interior doors one by one and observe if the door closes or further opens “on its own.” (Whether it closes or opens will depend on the direction of the air handler-driven air flow.) Rooms served by air-moved doors have restricted return air flow and need pressure relief as described above.
Maintaining and Upgrading Existing Duct Systems
Sealing your ducts to prevent leaks is even more important if the ducts are located in an unconditioned area such as an attic or vented crawlspace. If the supply ducts are leaking, heated or cooled air can be forced out of unsealed joints and lost. In addition, unconditioned air can be drawn into return ducts through unsealed joints.
Although minor duct repairs are easy to make, qualified professionals should seal and insulate ducts in unconditioned spaces to ensure the use of appropriate sealing materials.
Aside from sealing your ducts, the simplest and most effective means of maintaining your air distribution system is to ensure that furniture and other objects are not blocking the airflow through your registers, and to vacuum the registers to remove any dust buildup.
Existing duct systems often suffer from design deficiencies in the return air system, and modifications by the homeowner (or just a tendency to keep doors closed) may contribute to these problems. Any rooms with a lack of sufficient return airflow may benefit from relatively simple upgrades, such as the installation of new return-air grilles, undercutting doors for return air, or installing a jumper duct.
Some rooms may also be hard to heat and cool because of inadequate supply ducts or grilles. If this is the case, you should first examine whether the problem is the room itself: fix any problems with insulation, air leakage, or inefficient windows first. If the problem persists, you may be able to increase the size of the supply duct or add an additional duct to provide the needed airflow to the room.
Minor Duct Repair Tips for Minimizing Energy Losses in Ducts
- Check your ducts for air leaks. First, look for sections that should be joined but have separated and then look for obvious holes.
- Duct mastic is the preferred material for sealing ductwork seams and joints. It is more durable than any available tape and generally easier for a do-it-yourself installation. Its only drawback is that it will not bridge gaps over ¼ inch. Such gaps must be first bridged with web-type drywall tape, or a good quality heat approved tape.
- If you use tape to seal your ducts, avoid cloth-backed, rubber adhesive duct tape — it tends to fail quickly. Instead, use mastic, butyl tape, foil tape, or other heat-approved tapes. Look for tape with the Underwriters Laboratories (UL) logo.
- Remember that insulating ducts in the basement will make the basement colder. If both the ducts and the basement walls are not insulated, consider insulating both. Water pipes and drains in unconditioned spaces could freeze and burst if the heat ducts are fully insulated because there would be no heat source to prevent the space from freezing in cold weather. However, using an electric heating tape wrap on the pipes can prevent this. Check with a professional contractor.
- Hire a professional to install both supply and return registers in the basement rooms after converting your basement to a living area.
- Be sure a well-sealed vapor barrier exists on the outside of the insulation on cooling ducts to prevent moisture condensation.
- If you have a fuel-burning furnace, stove, or other appliance or an attached garage, install a carbon monoxide (CO) monitor to alert you to harmful CO levels.
- Be sure to get professional help when doing ductwork. A qualified professional should always perform changes and repairs to a duct system.
243 Calloway St Unit A Houston TX, 77029 – Houston Blower Door
243 Calloway St Unit A Houston TX, 77029 – Houston Blower Door
Home energy professionals use a blower door as a diagnostic tool to determine how much air is entering or escaping from your home.
Professional energy assessors use blower door tests to help determine a home’s airtightness. Our blower door instructional video illustrates how a blower door test is performed, and how your contractor utilizes the diagnostic information provided to identify areas of air leakage in your home and make energy-saving improvements.
These are some reasons for establishing the proper building tightness:
- Reducing energy consumption from excess air leakage
- Avoiding moisture condensation problems
- Avoiding uncomfortable drafts caused by cold or warm air leaking in from outside
- Controlling outdoor contaminants, pests, and odors from entering your home.
- Determining proper sizing and airflow requirements of heating and cooling equipment.
- Determining whether mechanical ventilation is needed to provide acceptable fresh air and maintain indoor air quality in your home.
Blower Doors: What Are They and How Do They Work?
A blower door is a powerful fan that a trained energy professional temporarily mounts into the frame of an exterior doorway in your home. After calibrating the device, the fan pulls air out of the house, lowering the air pressure inside. The higher outside air pressure then flows in through all unsealed gaps, cracks and openings such as gaps, cracks, or wiring penetrations. If conditions do not allow for lowering the pressure in the home, the fan may also be operated in reverse, with air pressure increased inside the home.
While the blower test is being conducted, the analyst may use an infrared camera to look at the walls, ceilings, and floors, to find specific locations where insulation is missing, and air is leaking. The analyst may also use a nontoxic smoke pencil to detect air leaks in your home. These tests determine the air infiltration rate of your home, which is recorded on a laptop or tablet.
The blower door test is conducted as part of the energy assessment of your home. Your contractor may also operate the blower door while performing air sealing (a method known as blower door assisted air sealing), and after to measure and verify the level of air leakage reduction achieved.
Blower doors consist of a frame and flexible panel that fit in a doorway, a variable-speed fan, a digital pressure gauge to measure the pressure differences inside and outside the home, which are connected to a device for measuring airflow, known as a manometer.
There are two types of blower doors: calibrated and uncalibrated. It is important that auditors use a calibrated door. This type of blower door has several gauges that measure the amount of air flowing out of the house through the fan.
Uncalibrated blower doors can only locate leaks in homes. They provide no method for determining the overall tightness of the home.
The calibrated blower door’s data allow your contractor to quantify the amount of air leakage prior to installation of air-sealing improvements, and the reduction in leakage achieved after air-sealing is completed.
Preparing for a Blower Door Test
Your home energy professional will perform the blower door test, including a walk-through of your home, setting up the blower door, and conducting the test. The following steps will help prepare your home for a blower door test:
- Plan to do a walk-through of your home with the auditor. Be prepared to point out areas that you know are drafty or difficult to condition comfortably.
- Expect the auditor to request access to all areas of your home including closets, built-in cabinets, attics, crawl spaces, and any unused rooms.
- The auditor will need to close all exterior doors and windows, open all interior doors, and close any fireplace dampers, doors, and woodstove air inlets.
- If you heat with wood, be sure all fires are completely out – not even coals – before the auditor arrives. Remove any ashes from open fireplaces.
- Expect the auditor to set controls on all atmospheric fossil fuel appliances (e.g., furnace, water heater, fireplaces, and stoves) to ensure that they do not fire during the test. The auditor should return them to the original position after the test.
- Expect the test to take up to an hour or more, depending on the complexity of your home.
207 E 24th St Houston TX, 77008 – Blower Door
207 E 24th St Houston TX, 77008 – Blower Door
Home energy professionals use a blower door as a diagnostic tool to determine how much air is entering or escaping from your home.
Professional energy assessors use blower door tests to help determine a home’s airtightness. Our blower door instructional video illustrates how a blower door test is performed, and how your contractor utilizes the diagnostic information provided to identify areas of air leakage in your home and make energy-saving improvements.
These are some reasons for establishing the proper building tightness:
- Reducing energy consumption from excess air leakage
- Avoiding moisture condensation problems
- Avoiding uncomfortable drafts caused by cold or warm air leaking in from outside
- Controlling outdoor contaminants, pests, and odors from entering your home.
- Determining proper sizing and airflow requirements of heating and cooling equipment.
- Determining whether mechanical ventilation is needed to provide acceptable fresh air and maintain indoor air quality in your home.
Blower Doors: What Are They and How Do They Work?
A blower door is a powerful fan that a trained energy professional temporarily mounts into the frame of an exterior doorway in your home. After calibrating the device, the fan pulls air out of the house, lowering the air pressure inside. The higher outside air pressure then flows in through all unsealed gaps, cracks and openings such as gaps, cracks, or wiring penetrations. If conditions do not allow for lowering the pressure in the home, the fan may also be operated in reverse, with air pressure increased inside the home.
While the blower test is being conducted, the analyst may use an infrared camera to look at the walls, ceilings, and floors, to find specific locations where insulation is missing, and air is leaking. The analyst may also use a nontoxic smoke pencil to detect air leaks in your home. These tests determine the air infiltration rate of your home, which is recorded on a laptop or tablet.
The blower door test is conducted as part of the energy assessment of your home. Your contractor may also operate the blower door while performing air sealing (a method known as blower door assisted air sealing), and after to measure and verify the level of air leakage reduction achieved.
Blower doors consist of a frame and flexible panel that fit in a doorway, a variable-speed fan, a digital pressure gauge to measure the pressure differences inside and outside the home, which are connected to a device for measuring airflow, known as a manometer.
There are two types of blower doors: calibrated and uncalibrated. It is important that auditors use a calibrated door. This type of blower door has several gauges that measure the amount of air flowing out of the house through the fan.
Uncalibrated blower doors can only locate leaks in homes. They provide no method for determining the overall tightness of the home.
The calibrated blower door’s data allow your contractor to quantify the amount of air leakage prior to installation of air-sealing improvements, and the reduction in leakage achieved after air-sealing is completed.
Preparing for a Blower Door Test
Your home energy professional will perform the blower door test, including a walk-through of your home, setting up the blower door, and conducting the test. The following steps will help prepare your home for a blower door test:
- Plan to do a walk-through of your home with the auditor. Be prepared to point out areas that you know are drafty or difficult to condition comfortably.
- Expect the auditor to request access to all areas of your home including closets, built-in cabinets, attics, crawl spaces, and any unused rooms.
- The auditor will need to close all exterior doors and windows, open all interior doors, and close any fireplace dampers, doors, and woodstove air inlets.
- If you heat with wood, be sure all fires are completely out – not even coals – before the auditor arrives. Remove any ashes from open fireplaces.
- Expect the auditor to set controls on all atmospheric fossil fuel appliances (e.g., furnace, water heater, fireplaces, and stoves) to ensure that they do not fire during the test. The auditor should return them to the original position after the test.
- Expect the test to take up to an hour or more, depending on the complexity of your home.
115 E 44th St A Houston TX, 77018 – Blower Door & Duct Leakage Test
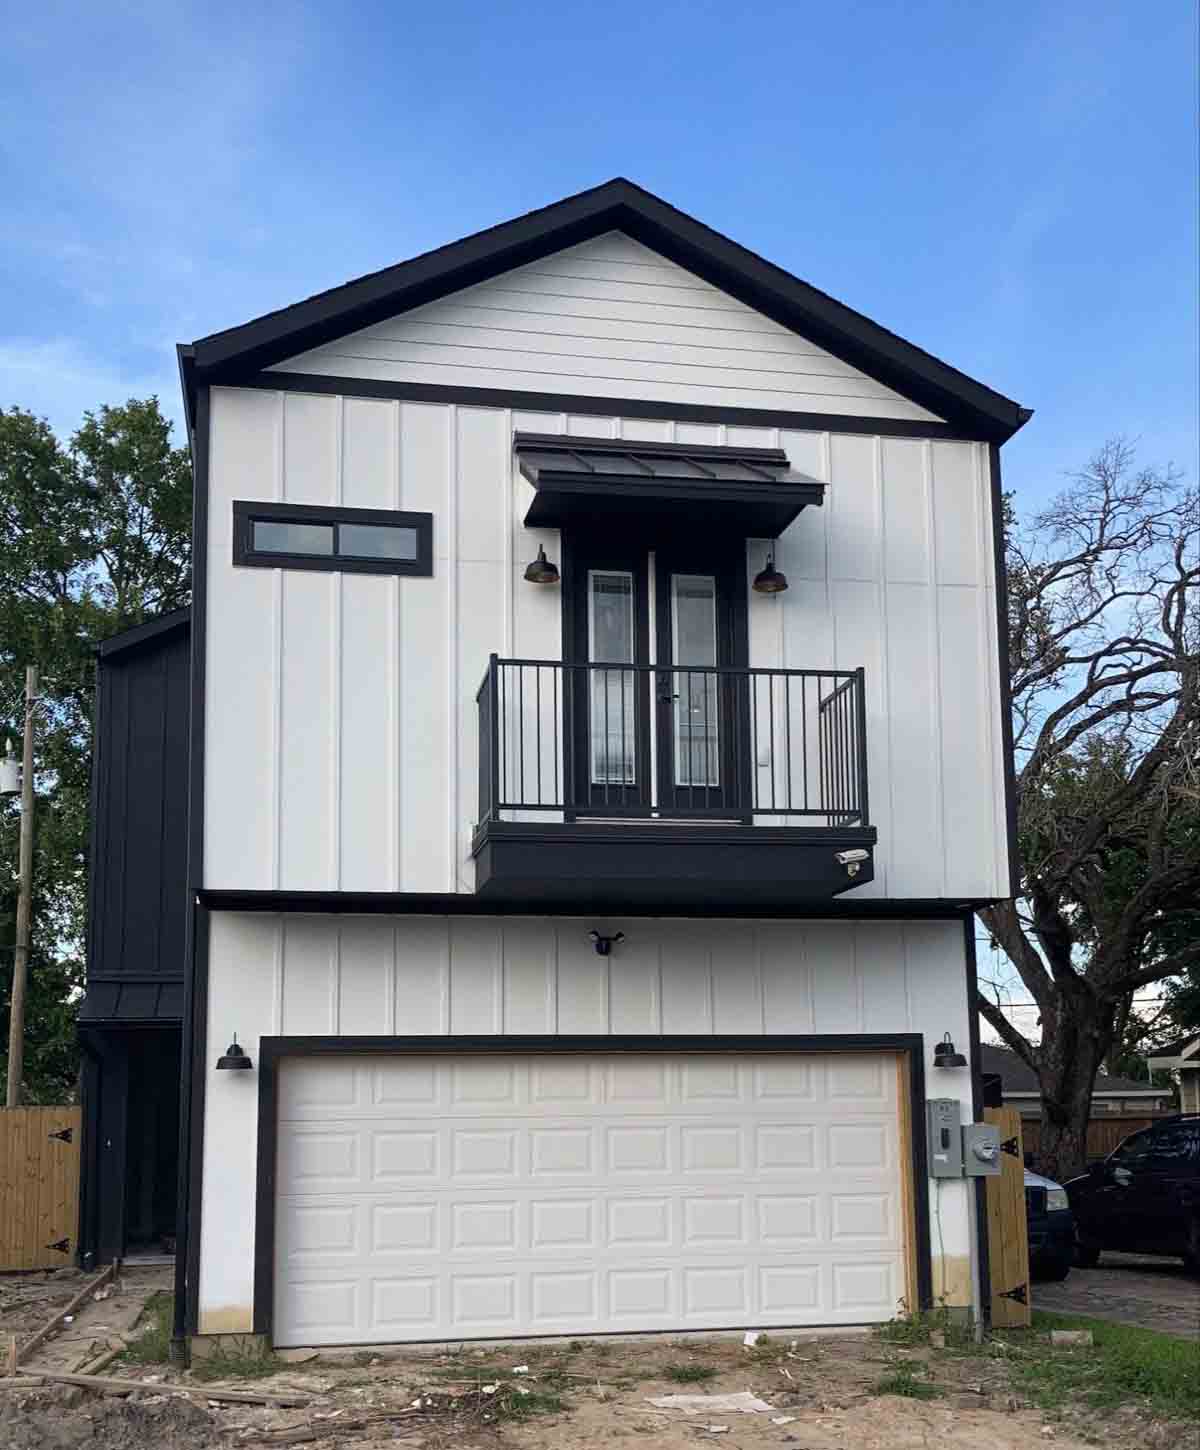
115 E 44th St A Houston TX, 77018 – Blower Door & Duct Leakage Test
Home energy professionals use a blower door as a diagnostic tool to determine how much air is entering or escaping from your home.
Professional energy assessors use blower door tests to help determine a home’s airtightness. Our blower door instructional video illustrates how a blower door test is performed, and how your contractor utilizes the diagnostic information provided to identify areas of air leakage in your home and make energy-saving improvements.
These are some reasons for establishing the proper building tightness:
- Reducing energy consumption from excess air leakage
- Avoiding moisture condensation problems
- Avoiding uncomfortable drafts caused by cold or warm air leaking in from outside
- Controlling outdoor contaminants, pests, and odors from entering your home.
- Determining proper sizing and airflow requirements of heating and cooling equipment.
- Determining whether mechanical ventilation is needed to provide acceptable fresh air and maintain indoor air quality in your home.
Blower Doors: What Are They and How Do They Work?
A blower door is a powerful fan that a trained energy professional temporarily mounts into the frame of an exterior doorway in your home. After calibrating the device, the fan pulls air out of the house, lowering the air pressure inside. The higher outside air pressure then flows in through all unsealed gaps, cracks and openings such as gaps, cracks, or wiring penetrations. If conditions do not allow for lowering the pressure in the home, the fan may also be operated in reverse, with air pressure increased inside the home.
While the blower test is being conducted, the analyst may use an infrared camera to look at the walls, ceilings, and floors, to find specific locations where insulation is missing, and air is leaking. The analyst may also use a nontoxic smoke pencil to detect air leaks in your home. These tests determine the air infiltration rate of your home, which is recorded on a laptop or tablet.
The blower door test is conducted as part of the energy assessment of your home. Your contractor may also operate the blower door while performing air sealing (a method known as blower door assisted air sealing), and after to measure and verify the level of air leakage reduction achieved.
Blower doors consist of a frame and flexible panel that fit in a doorway, a variable-speed fan, a digital pressure gauge to measure the pressure differences inside and outside the home, which are connected to a device for measuring airflow, known as a manometer.
There are two types of blower doors: calibrated and uncalibrated. It is important that auditors use a calibrated door. This type of blower door has several gauges that measure the amount of air flowing out of the house through the fan.
Uncalibrated blower doors can only locate leaks in homes. They provide no method for determining the overall tightness of the home.
The calibrated blower door’s data allow your contractor to quantify the amount of air leakage prior to installation of air-sealing improvements, and the reduction in leakage achieved after air-sealing is completed.
Preparing for a Blower Door Test
Your home energy professional will perform the blower door test, including a walk-through of your home, setting up the blower door, and conducting the test. The following steps will help prepare your home for a blower door test:
- Plan to do a walk-through of your home with the auditor. Be prepared to point out areas that you know are drafty or difficult to condition comfortably.
- Expect the auditor to request access to all areas of your home including closets, built-in cabinets, attics, crawl spaces, and any unused rooms.
- The auditor will need to close all exterior doors and windows, open all interior doors, and close any fireplace dampers, doors, and woodstove air inlets.
- If you heat with wood, be sure all fires are completely out – not even coals – before the auditor arrives. Remove any ashes from open fireplaces.
- Expect the auditor to set controls on all atmospheric fossil fuel appliances (e.g., furnace, water heater, fireplaces, and stoves) to ensure that they do not fire during the test. The auditor should return them to the original position after the test.
- Expect the test to take up to an hour or more, depending on the complexity of your home.
11 Grand Beach Blvd Galveston TX, 77550 – City of Galveston Blower Door
11 Grand Beach Blvd Galveston TX, 77550 – Blower Door
Home energy professionals use a blower door as a diagnostic tool to determine how much air is entering or escaping from your home.
Professional energy assessors use blower door tests to help determine a home’s airtightness. Our blower door instructional video illustrates how a blower door test is performed, and how your contractor utilizes the diagnostic information provided to identify areas of air leakage in your home and make energy-saving improvements.
These are some reasons for establishing the proper building tightness:
- Reducing energy consumption from excess air leakage
- Avoiding moisture condensation problems
- Avoiding uncomfortable drafts caused by cold or warm air leaking in from outside
- Controlling outdoor contaminants, pests, and odors from entering your home.
- Determining proper sizing and airflow requirements of heating and cooling equipment.
- Determining whether mechanical ventilation is needed to provide acceptable fresh air and maintain indoor air quality in your home.
Blower Doors: What Are They and How Do They Work?
A blower door is a powerful fan that a trained energy professional temporarily mounts into the frame of an exterior doorway in your home. After calibrating the device, the fan pulls air out of the house, lowering the air pressure inside. The higher outside air pressure then flows in through all unsealed gaps, cracks and openings such as gaps, cracks, or wiring penetrations. If conditions do not allow for lowering the pressure in the home, the fan may also be operated in reverse, with air pressure increased inside the home.
While the blower test is being conducted, the analyst may use an infrared camera to look at the walls, ceilings, and floors, to find specific locations where insulation is missing, and air is leaking. The analyst may also use a nontoxic smoke pencil to detect air leaks in your home. These tests determine the air infiltration rate of your home, which is recorded on a laptop or tablet.
The blower door test is conducted as part of the energy assessment of your home. Your contractor may also operate the blower door while performing air sealing (a method known as blower door assisted air sealing), and after to measure and verify the level of air leakage reduction achieved.
Blower doors consist of a frame and flexible panel that fit in a doorway, a variable-speed fan, a digital pressure gauge to measure the pressure differences inside and outside the home, which are connected to a device for measuring airflow, known as a manometer.
There are two types of blower doors: calibrated and uncalibrated. It is important that auditors use a calibrated door. This type of blower door has several gauges that measure the amount of air flowing out of the house through the fan.
Uncalibrated blower doors can only locate leaks in homes. They provide no method for determining the overall tightness of the home.
The calibrated blower door’s data allow your contractor to quantify the amount of air leakage prior to installation of air-sealing improvements, and the reduction in leakage achieved after air-sealing is completed.
Preparing for a Blower Door Test
Your home energy professional will perform the blower door test, including a walk-through of your home, setting up the blower door, and conducting the test. The following steps will help prepare your home for a blower door test:
- Plan to do a walk-through of your home with the auditor. Be prepared to point out areas that you know are drafty or difficult to condition comfortably.
- Expect the auditor to request access to all areas of your home including closets, built-in cabinets, attics, crawl spaces, and any unused rooms.
- The auditor will need to close all exterior doors and windows, open all interior doors, and close any fireplace dampers, doors, and woodstove air inlets.
- If you heat with wood, be sure all fires are completely out – not even coals – before the auditor arrives. Remove any ashes from open fireplaces.
- Expect the auditor to set controls on all atmospheric fossil fuel appliances (e.g., furnace, water heater, fireplaces, and stoves) to ensure that they do not fire during the test. The auditor should return them to the original position after the test.
- Expect the test to take up to an hour or more, depending on the complexity of your home.
2411 Charles Rd Unit A Houston TX, 77093 – Houston Blower Door
2411 Charles Rd Unit A Houston TX, 77093 – Houston Blower Door
Home energy professionals use a blower door as a diagnostic tool to determine how much air is entering or escaping from your home.
Professional energy assessors use blower door tests to help determine a home’s airtightness. Our blower door instructional video illustrates how a blower door test is performed, and how your contractor utilizes the diagnostic information provided to identify areas of air leakage in your home and make energy-saving improvements.
These are some reasons for establishing the proper building tightness:
- Reducing energy consumption from excess air leakage
- Avoiding moisture condensation problems
- Avoiding uncomfortable drafts caused by cold or warm air leaking in from outside
- Controlling outdoor contaminants, pests, and odors from entering your home.
- Determining proper sizing and airflow requirements of heating and cooling equipment.
- Determining whether mechanical ventilation is needed to provide acceptable fresh air and maintain indoor air quality in your home.
Blower Doors: What Are They and How Do They Work?
A blower door is a powerful fan that a trained energy professional temporarily mounts into the frame of an exterior doorway in your home. After calibrating the device, the fan pulls air out of the house, lowering the air pressure inside. The higher outside air pressure then flows in through all unsealed gaps, cracks and openings such as gaps, cracks, or wiring penetrations. If conditions do not allow for lowering the pressure in the home, the fan may also be operated in reverse, with air pressure increased inside the home.
While the blower test is being conducted, the analyst may use an infrared camera to look at the walls, ceilings, and floors, to find specific locations where insulation is missing, and air is leaking. The analyst may also use a nontoxic smoke pencil to detect air leaks in your home. These tests determine the air infiltration rate of your home, which is recorded on a laptop or tablet.
The blower door test is conducted as part of the energy assessment of your home. Your contractor may also operate the blower door while performing air sealing (a method known as blower door assisted air sealing), and after to measure and verify the level of air leakage reduction achieved.
Blower doors consist of a frame and flexible panel that fit in a doorway, a variable-speed fan, a digital pressure gauge to measure the pressure differences inside and outside the home, which are connected to a device for measuring airflow, known as a manometer.
There are two types of blower doors: calibrated and uncalibrated. It is important that auditors use a calibrated door. This type of blower door has several gauges that measure the amount of air flowing out of the house through the fan.
Uncalibrated blower doors can only locate leaks in homes. They provide no method for determining the overall tightness of the home.
The calibrated blower door’s data allow your contractor to quantify the amount of air leakage prior to installation of air-sealing improvements, and the reduction in leakage achieved after air-sealing is completed.
Preparing for a Blower Door Test
Your home energy professional will perform the blower door test, including a walk-through of your home, setting up the blower door, and conducting the test. The following steps will help prepare your home for a blower door test:
- Plan to do a walk-through of your home with the auditor. Be prepared to point out areas that you know are drafty or difficult to condition comfortably.
- Expect the auditor to request access to all areas of your home including closets, built-in cabinets, attics, crawl spaces, and any unused rooms.
- The auditor will need to close all exterior doors and windows, open all interior doors, and close any fireplace dampers, doors, and woodstove air inlets.
- If you heat with wood, be sure all fires are completely out – not even coals – before the auditor arrives. Remove any ashes from open fireplaces.
- Expect the auditor to set controls on all atmospheric fossil fuel appliances (e.g., furnace, water heater, fireplaces, and stoves) to ensure that they do not fire during the test. The auditor should return them to the original position after the test.
- Expect the test to take up to an hour or more, depending on the complexity of your home.
22520 Bay Point Dr. Galveston TX, 77554 – Weatherstripping
22520 Bay Point Dr. Galveston TX, 77554 – Weatherstripping
You can use weatherstripping in your home to seal air leaks around movable building components, such as doors or operable windows. For stationary components, caulk is the appropriate material for filling cracks and gaps.
Before applying to your home, you will need to detect the air leaks and assess your ventilation needs to ensure adequate indoor air quality.
Choosing Weatherstrip Materials
Choose a type of weatherstripping that will withstand the friction, weather, temperature changes, and wear and tear associated with its location. Weatherstripping in a window sash must accommodate the sliding of panes — up and down, sideways, or out. The strip you choose should seal well when the door or window is closed but allow it to open freely.
Choose a product for each specific location. Felt and open-cell foams tend to be inexpensive, susceptible to weather, visible, and inefficient at blocking airflow. However, the ease of applying these materials may make them valuable in low-traffic areas. Vinyl, which is slightly more expensive, holds up well and resists moisture. Metals (bronze, copper, stainless steel, and aluminum) last for years and are affordable. Metal weatherstripping can also provide a nice touch to older homes where vinyl might seem out of place.
You can use more than one type to seal an irregularly shaped space. Also take durability into account when comparing costs.
Apply
To determine how much weatherstripping you will need, add the perimeters of all windows and doors to be weather-stripped, then add 5% to 10% to accommodate any waste. Also consider that they come in varying depths and widths.
Weatherstripping supplies and techniques range from simple to the technical.
Here are a few basic guidelines:
- Should be applied to clean, dry surfaces in temperatures above 20°F (-7° C).
- Measure the area to be weather-stripped twice before making a cut.
- Apply snugly against both surfaces. The material should compress when the window or door is shut.
When weatherstripping doors:
- Choose the appropriate door sweeps and thresholds for the bottom of the doors.
- Weatherstrip the entire door jamb.
- Apply one continuous strip along each side.
- Make sure the strip meets tightly at the corners.
- Use a thickness that causes it to press tightly between the door and the door jamb when the door closes without making it difficult to shut.
For air sealing windows, apply weatherstripping between the sash and the frame. The weatherstripping shouldn’t interfere with the operation of the window.
4617 Verone St. Bellaire TX, 77401 – Caulking

4617 Verone St. Bellaire TX, 77401 – Caulking
Caulk is a flexible material used to seal air leaks through cracks, gaps, or joints less than 1-quarter-inch wide between stationary building components and materials. For components that move — doors and operable windows, for example — weatherstripping is the appropriate material.
Before caulking air leaks in an existing home, you will need to detect the leaks and assess your ventilation needs to ensure adequate indoor air quality. In addition to sealing air leaks, caulking can also prevent water damage inside and outside of the home when applied around faucets, ceiling fixtures, water pipes, drains, bathtubs, and other plumbing fixtures.
Selecting Caulking
Most caulking compounds come in disposable cartridges that fit in half-barrel caulking guns (if possible, purchase one with an automatic release). Some pressurized cartridges do not require caulking guns.
When deciding how much caulking to purchase, consider that you’ll probably need a half-cartridge per window or door and four cartridges for the foundation sill of an average home. Caulking compounds can also be found in aerosol cans, squeeze tubes, and ropes for small jobs or special applications.
Caulking compounds vary in strength, properties, and prices. Water-based caulk can be cleaned with water, while solvent-based compounds require a solvent for cleanup.
Applying Caulk
Although not a high-tech operation, caulking can be tricky. Read and follow the instructions on the compound cartridge, and remember these tips:
- For good adhesion, clean all areas to be caulked. Remove any old caulk and paint, using a putty knife, large screwdriver, stiff brush, or special solvent. Make sure the area is dry so you don’t seal in moisture.
- Apply caulk to all joints in a window frame and the joint between the frame and the wall.
- Hold the gun at a consistent angle. Forty-five degrees is best for getting deep into the crack. You know you’ve got the right angle when the caulk is immediately forced into the crack as it comes out of the tube.
- Caulk in one straight continuous stream, if possible. Avoid stops and starts.
- Send caulk to the bottom of an opening to avoid bubbles.
- Make sure the caulk sticks to both sides of a crack or seam.
- Release the trigger before pulling the gun away to avoid applying too much caulking compound. A caulking gun with an automatic release makes this much easier.
- If caulk oozes out of a crack, use a putty knife to push it back in.
- Don’t skimp. If the caulk shrinks, reapply it to form a smooth bead that will seal the crack completely.
The best time to apply caulk is during dry weather when the outdoor temperature is above 45°F (7.2°C). Low humidity is important during application to prevent cracks from swelling with moisture. Warm temperatures are also necessary so the caulk will set properly and adhere to the surfaces.
8134 Sunbury St. Houston TX, 77028 – Air Movement
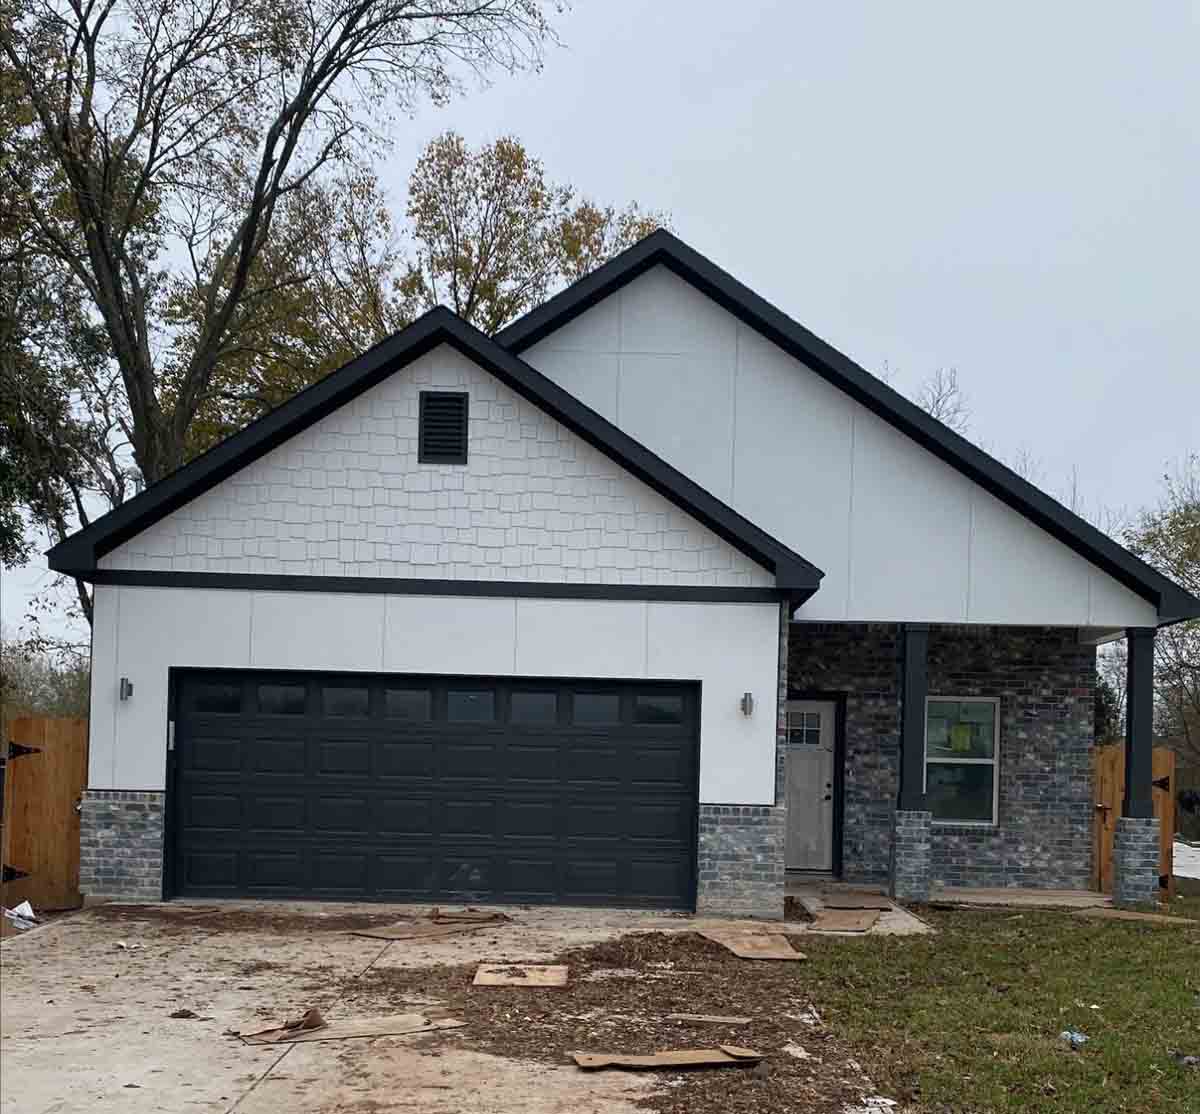
8134 Sunbury St. Houston TX, 77028 – Air Movement
Minimizing air movement in and out of a house is key to building an energy-efficient home. Controlling air leakage is also critical to moisture control. Before developing an air sealing strategy, you should also consider the interactions among air sealing materials and techniques and other building components, including insulation, moisture control, and ventilation. This is called the whole-house systems approach.
It’s always best to use techniques and materials identified as best practices for your site and climate. Climate-specific construction details are available through Building America.
Here are some general air sealing techniques and materials for new homes.
Air Barriers
Air barriers block random air movement through building cavities. As a result, they help prevent air leakage into and out of your home, which can account for 30% or more of a home’s heating and cooling costs. Although they stop most air movement, air barriers are not necessarily vapor barriers. The placement of air and vapor barriers in a structure is climate-dependent, and it’s wise to work with building professionals familiar with energy-efficient construction in your area.
Many of the materials used in a house as structural and finish components also act as air barriers. Sealing all the holes and seams between sheet goods such as drywall, sheathing, and subflooring with durable caulk, gaskets, tape, and/or foam sealants will reduce air leakage. In addition, some types of insulation, when densely packed in wall cavities and crevices, can reduce airflow as well as heat flow.
House Wrap
The most common air barrier material is house wrap, which is wrapped around the exterior of a house during construction. Wraps usually consist of fibrous spun polyolefin plastic, which is matted into sheets and rolled up for shipping. House wraps may also have other materials woven or bonded to them to help resist tearing. Sealing house wrap joints with tape improves the wrap’s performance by about 20%. All house wrap manufacturers have a special tape for this purpose.
1423 Woodcrest Dr. Houston TX, 77018 – Moisture Control
1423 Woodcrest Dr. Houston TX, 77018 – Moisture Control
Controlling moisture can make your home more energy-efficient, less costly to heat and cool, more comfortable, and prevent mold growth.
Properly controlling moisture in your home will improve the effectiveness of your air sealing and insulation efforts, and these efforts in turn will help control moisture. The best strategies for controlling moisture in your home depend on your climate and how your home is constructed. Proper ventilation should also be part of your efforts to control moisture.
Before you decide on a moisture control strategy, it helps to understand that moisture or water vapor moves in and out of a home in a variety of ways including:
- With air movement
- By diffusion through materials
- By heat transfer
- Creating moisture within the home (cooking, showering, etc.),
Of these, air movement accounts for more than 98% of all water vapor movement in building cavities. Air naturally moves from high-pressure areas to lower pressure areas by the easiest path available — generally through any available hole or crack in the building envelope. Moisture transfer by air currents happens quickly, and carefully and permanently air sealing any unintended paths for air movement in and out of the house is a very effective way to control moisture.
The other two driving forces — diffusion through materials and heat transfer — are much slower processes. Most common building materials slow moisture diffusion to a large degree, although they never stop it completely. Insulation also helps reduce heat transfer or flow.
The laws of physics govern how moist air reacts in various temperature conditions. The temperature and moisture concentration at which water vapor begins to condense is called the “dew point.” Relative humidity (RH) refers to the amount of moisture contained in a quantity of air compared to the maximum amount of moisture the air could hold at the same temperature. The ability of air to hold water vapor increases as it warms and decreases as it cools. Once air has reached its dew point, the moisture that the air can no longer hold condenses on the first cold surface it encounters. If this surface is within an exterior wall cavity, the result is wet insulation and framing.
In addition to air movement, you also can control temperature and moisture content. Insulation reduces heat transfer or flow, so it also moderates the effect of temperature across the building envelope cavity. In most U.S. climates, properly installed vapor diffusion retarders can be used to reduce the amount of moisture transfer. Except in deliberately ventilated spaces such as attics, insulation and vapor diffusion retarders work together to reduce the opportunity for condensation in a house’s ceilings, walls, and floors.
Moisture can cause problems in attics, various types of foundations, and walls, and the solutions to those problems vary by climate. See Building America’s Climate-Specific Publications for construction details specific to your climate.
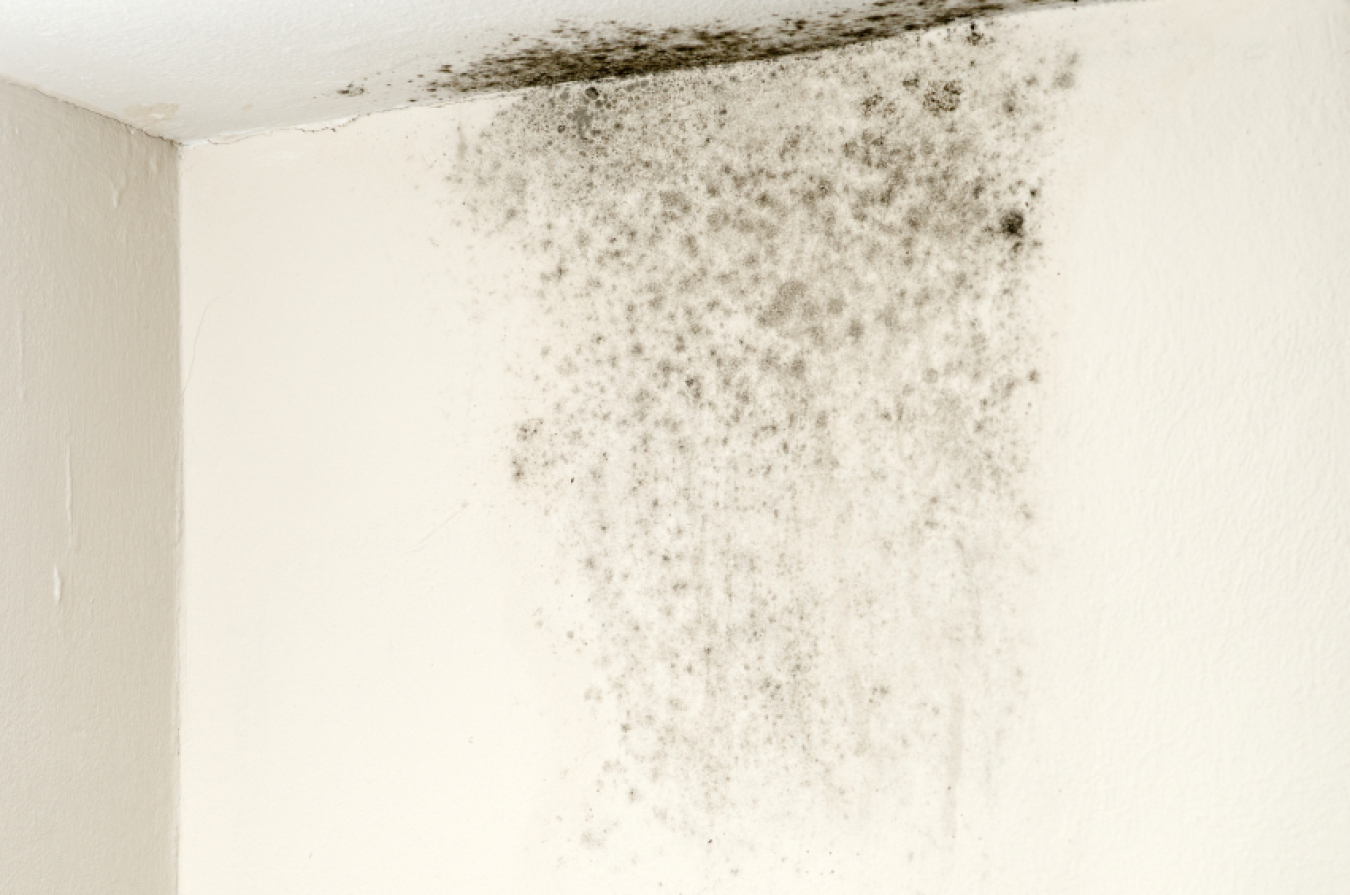
Foundation Moisture Control
The potential for moisture problems exists anywhere building components are below grade, whether you have a basement, crawlspace, or slab-on-grade foundation. To create an energy-efficient and comfortable living space in your basement, you will need to insulate as well as properly control moisture.
Most basement water leakage results from water flowing through holes, cracks, and other discontinuities into the home’s basement walls or water wicking into the cracks and pores of porous building materials, such as masonry blocks, concrete, or wood. These tiny cracks and pores can absorb water in any direction — even upward.
The best approaches for preventing these problems will depend on your local climate, type of insulation, and style of construction. If you need to correct moisture problems in your existing home, consult a qualified builder, basement designer, and/or insulation contractor in your area for specific basement moisture control measures tailored to your climate, type of insulation, and construction style.
If you’re building a new home, pay particular attention to how water will be managed around the foundation. The following guidelines will apply in most circumstances:
- Keep all untreated wood materials away from earth contact.
- Install well-designed guttering and downspouts connected to a drainage system that diverts rainwater completely away from the house.
- Slope the earth away from all sides of the house for at least 5 feet at a minimum 5% grade (3 inches in 5 feet). Establish drainage swales to direct rainwater around and away from the house.
- Add a gasket under the sill plate to provide air sealing.
- Install a protective membrane, such as rubberized roofing or ice-dam protection materials, between the foundation and the sill plate to serve as a capillary break and reduce wicking of water up from the masonry foundation wall. This membrane can also serve as a termite shield on top of foam board insulation.
- Damp-proof all below-grade portions of the foundation wall and footing to prevent the wall from absorbing ground moisture by capillary action.
- Place a continuous drainage plane over the damp-proofing or exterior insulation to channel water to the foundation drain and relieve hydrostatic pressure. Drainage plane materials include special drainage mats, high-density fiberglass insulation products, and washed gravel. All drainage planes should be protected with a filter fabric to prevent dirt from clogging the intentional gaps in the drainage material.
- Install a foundation drain directly below the drainage plane and beside (not on top of) the footing. This prevents water from flowing against the seam between the footing and the foundation wall. Surround a perforated 4-inch plastic drainpipe with gravel and wrap both with filter fabric.
- Underneath the basement or on-grade slab floor, install a capillary break and vapor diffusion retarder, consisting of a layer of 6- to 10-mil polyethylene over at least 4 inches of gravel.
If you your new or existing home has a crawlspace, you can also Install a 6-mil polyethylene vapor diffusion barrier across the crawlspace floor to prevent soil moisture from migrating into the crawlspace. Overlap all seams by 12 inches and tape them and seal the polyethylene 6 inches up the crawlspace walls. As an option, pour two inches (51 mm) of concrete over the vapor barrier to protect the polyethylene from damage.
Moisture Control in Walls
It is a myth that installing vapor barriers is the most important step for controlling moisture in walls. Vapor barriers only retard moisture due to diffusion, while most moisture enters walls either through fluid capillary action or as water vapor through air leaks.
Most climates require these moisture control steps:
- Install a polyethylene ground cover on the earth floor of houses with crawlspaces.
- Slope the ground away from the foundations of all houses.
- Install a continuous vapor barrier (if required in your climate) with a perm rating of less than one.
Place a termite shield, sill gaskets, or other vapor-impermeable membrane on the top of the foundation wall to prevent moisture from wicking into the framed wall from the concrete foundation wall by capillary action.
Rain — especially wind-driven rain — can also cause moisture problems in walls. Rain leaks through exterior walls are usually a result of improper installation of:
- Siding materials.
- Poor quality flashing.
- Weatherstripping or caulking around joints in the building exterior (such as windows, doors, and bottom plates).
To protect against rain penetration, you should also create a drainage plane within the wall system of your home.
6227 Grey Oaks Dr. Houston TX, 77050 – Whole House Ventilation
6227 Grey Oaks Dr. Houston TX, 77050 – Whole House Ventilation
Ventilation is very important in an energy-efficient home. The “appropriate” amount and type of ventilation varies from home to home and from occupant to occupant. Different households have different occupancy levels (people and pets), schedules, activities, health concerns, and other preferences that will influence appropriate ventilation systems and operation. Ventilation also helps control moisture, thus reducing the chances of mold growth and structural damage. The American Society of Heating, Refrigerating and Air-Conditioning Engineers (ASHRAE) specifies how a home’s living area should be ventilated in ASHRAE Standard 62.2. Whole house ventilation.
Ventilation Options
There are three basic ventilation options —natural ventilation, spot ventilation, and whole-house ventilation.
Natural Ventilation
Natural ventilation is the uncontrolled air movement in and out of the cracks and small holes in a home. In the past, this air leakage usually diluted air pollutants enough to maintain adequate indoor air quality. Today, we are sealing those cracks and holes to make our homes more energy-efficient, and after a home is properly air sealed, ventilation is necessary to maintain a healthy and comfortable indoor environment. Opening windows and doors also provides natural ventilation, but many people keep their homes closed up because they use central heating and cooling systems year-round.
Natural ventilation is unpredictable and uncontrollable—you can’t rely on it to ventilate a house uniformly. Natural ventilation depends on a home’s airtightness, outdoor temperatures, wind, and other factors. During mild weather, some homes may lack sufficient natural ventilation for pollutant removal. During windy or extreme weather, a home that hasn’t been air sealed properly will be drafty, uncomfortable, and expensive to heat and cool.
Spot Ventilation
Spot ventilation can improve the effectiveness of natural and whole-house ventilation by removing indoor air pollution and/or moisture at its source. Spot ventilation includes the use of localized exhaust fans, such as those used above kitchen ranges and in bathrooms. ASHRAE recommends intermittent or continuous ventilation rates for bathrooms of 50 or 20 cubic feet per minute and kitchens of 100 or 25 cubic feet per minute, respectively.

The decision to use whole-house ventilation is typically motivated by concerns that natural ventilation won’t provide adequate air quality, even with source control by spot ventilation. Whole-house ventilation systems provide controlled, uniform ventilation throughout a house. These systems use one or more fans and duct systems to exhaust stale air and/or supply fresh air to the house.
There are four types of systems:
- Exhaust ventilation systems work by depressurizing the building and are relatively simple and inexpensive to install.
- Supply ventilation systems work by pressurizing the building and are also relatively simple and inexpensive to install.
- Balanced ventilation systems, if properly designed and installed, neither pressurize nor depressurize a house. Rather, they introduce and exhaust approximately equal quantities of fresh outside air and polluted inside air.
- Energy recovery ventilation systems provide controlled ventilation while minimizing energy loss. They reduce the costs of heating ventilated air in the winter by transferring heat from the warm inside air being exhausted to the fresh (but cold) supply air. In the summer, the inside air cools the warmer supply air to reduce ventilation cooling costs. Compare whole-house ventilation systems to determine which is right for your home.
Ventilation for cooling is the least expensive and most energy-efficient way to cool buildings. Ventilation works best when combined with techniques to avoid heat buildup in your home. In some climates, natural ventilation is sufficient to keep the house comfortable, although it usually needs to be supplemented with spot ventilation, ceiling fans, window fans, and—in larger homes—whole-house fans.
Ventilation is not an effective cooling strategy in hot, humid climates where temperature swings between day and night are small. In these climates, however, natural ventilation of your attic (often required by building codes) will help to reduce your use of air conditioning, and attic fans may also help keep cooling costs down.
8610 Lee Otis St. Houston TX, 77051 – Insulation for New Construction

8610 Lee Otis St. Houston TX, 77051 — Insulation for New Construction
State and local building codes typically include minimum insulation requirements, but your energy-efficient home will likely exceed those mandates. To optimize energy efficiency, you should also consider the interaction between the insulation and other building components. This strategy is known as the whole-house systems design approach. If you would like to maximize the energy efficiency of your new home, consider ultra-efficient home design or purchasing a new Energy Star home or a Zero Energy Ready Home.
It is more cost-effective to add insulation during construction than to retrofit it after the house is finished. To properly insulate a new home, you’ll need to know where to insulate and the recommended R-values for each of those areas. Use the Home Energy Saver tool to determine where you need to insulate and the recommended R-values based on your climate, type of heating and cooling system, etc.
Once you know where you need to insulate and the recommended R-values, review our information on the types of insulation to help you decide what type to use and where. Before you insulate a new home, you also need to properly air seal it and consider moisture control. Energy losses due to air leakage can be greater than the conductive losses in a well-insulated home.
In most climates, you will save money and energy when you build a new home or addition if you install a combination of cavity insulation and insulated sheathing. Reduce exterior wall leaks by taping the joints of exterior sheathing and caulking and sealing exterior walls. Use tapes and adhesives that are designed for this application since they need to last many years and are nearly impossible to replace. Cavity fibrous or cellulose insulation can be installed at levels up to R-15 in a 2-inch x 4-inch wall and up to R-21 in a 2 inch x 6-inch wall. R-values can be higher for foam insulation and other advanced insulation systems.
Consider products that provide both insulation and structural support, such as structural insulated panels (SIPs), and masonry products like insulating concrete forms.
You should consider attic or roof radiant barriers (in hot climates), reflective insulation, and foundation insulation for new home construction. Check with your contractor for more information about these options.
Choose a team of local building professionals familiar with energy-efficient home construction in your area. The performance of insulation is very dependent on the quality of the installlation; contractors that are familiar with the products you are considering will increase the likelihood that they will be installed properly.
26119 Flamingo Dr. Galveston TX, 77554 – Where to Insulate in A Home

26119 Flamingo Dr. Galveston TX, 77554 – Where to Insulate in A Home
For optimal energy efficiency, your home should be properly insulated from the roof down to its foundation. The illustration above shows all the areas of the home where there should be insulation. The numbered areas shown in the illustration are as follows:
1. In unfinished attic spaces, insulate between and over the floor joists to seal off living spaces below. If the air distribution is in the attic space, then consider insulating the rafters to move the distribution into the conditioned space.
(1A). Insulate the attic access door
2. In finished attic rooms with or without dormers, insulate (2A) between the studs of “knee” walls, (2B) between the studs and rafters of the exterior walls and the roof, (2C) and ceilings with unconditioned spaces above.
(2D) Extend insulation into joist space to reduce air flows.
3. Insulate all exterior walls, including (3A) walls between living spaces and unheated garages, shed roofs, or storage areas; (3B) foundation walls above ground level; (3C) foundation walls in heated basements.
4. Apply insulation to floors above unconditioned spaces, such as vented crawl spaces and unheated garages. Also insulate (4A) any portion of the floor in a room that is cantilevered beyond the exterior wall below; (4B) slab floors built directly on the ground; (4C) as an alternative to floor insulation, foundation walls of unvented crawl spaces. (4D) Extend insulation into joist space to reduce air flows.
5. Do not forget to insulate the band joists.
6. Caulk and seal around all windows and doors.
In addition to insulation, consider moisture and air leakage control in each area of your house. If radon is an issue where you live, you’ll also need to consider radon and radon-resistant construction techniques as you research foundation insulation options. In addition, if you live in an area with termites, you’ll have to consider how termite protection will affect the choice and placement of insulation in your home and plan for a means of inspection.
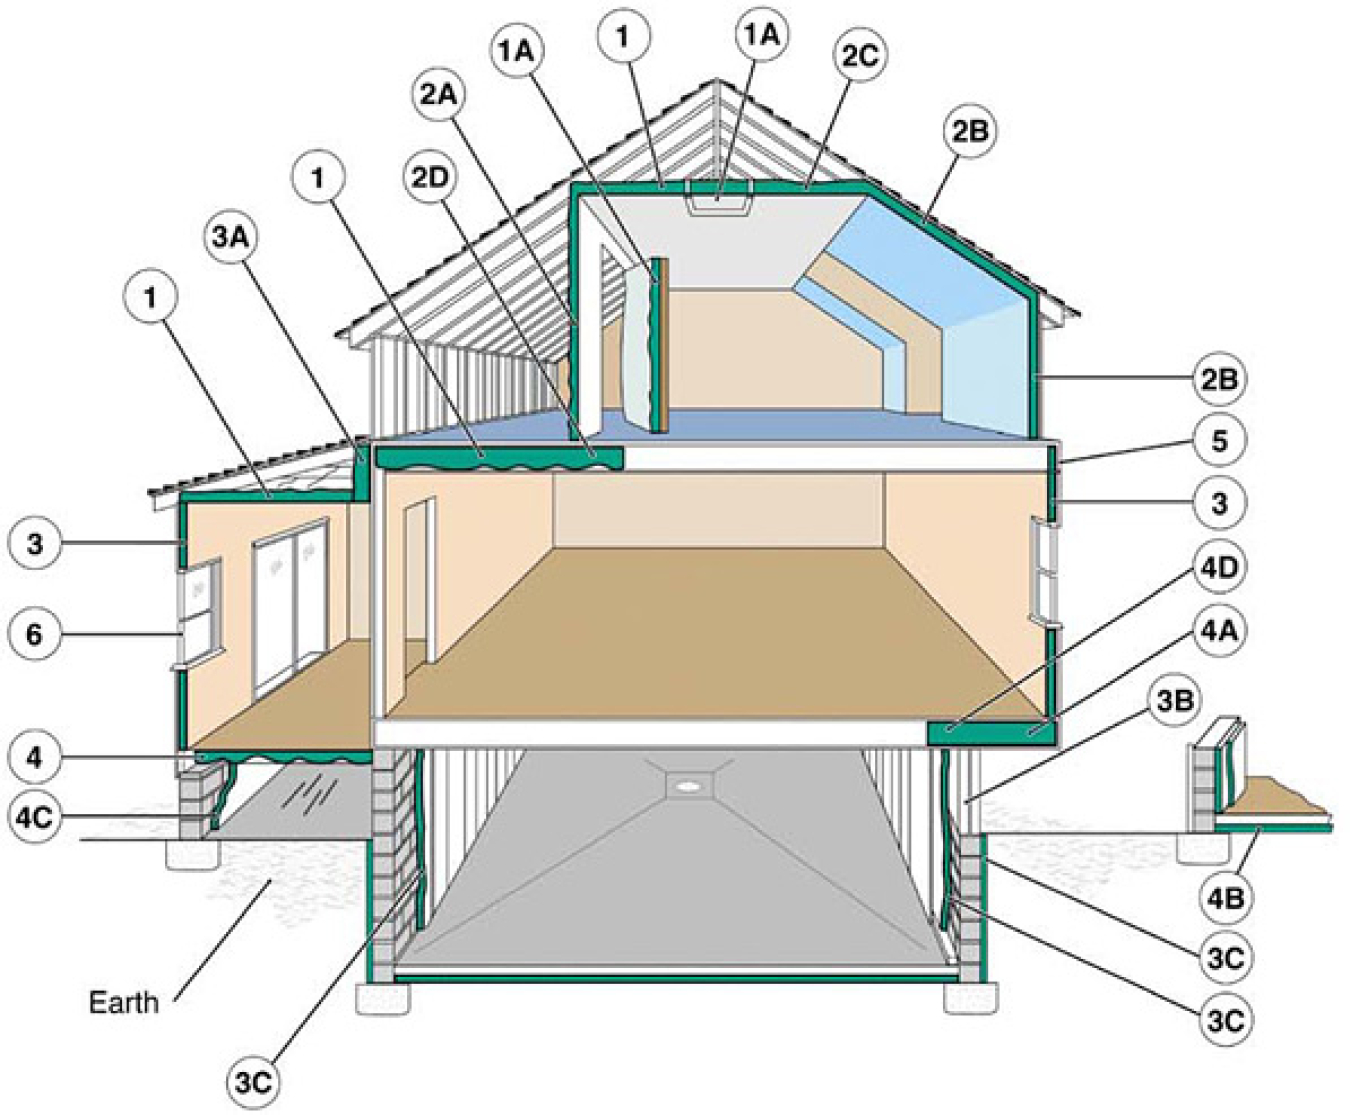
Examples of where to insulate.
Attic Insulation
Loose-fill or batt insulation is typically installed in an attic. Loose-fill insulation is usually less expensive to install than batt insulation and provides better coverage when installed properly. See more on different types of insulation.
To find out if you have enough attic insulation, measure the thickness of the insulation. If it is less than an equivalent of R-30 (about 10 to 13 inches), you could probably benefit by adding more. Before insulating, seal any air leaks and make roof and other necessary repairs. If it is located in a conditioned part of the house, also remember to insulate and air seal your attic access.
Insulate and air seal any knee walls — vertical walls with attic space directly behind them — in your home as well. In addition, if you’re building a new home or remodeling, make sure any attic decking that provides additional storage space or a platform for a heating and/or cooling unit or hot water tank is raised above the ceiling joists to leave room for adequate insulation. If the air distribution system is not within the conditioned space but within the attic, insulating the rafters will enclose the distribution system. Finally, if you live in a hot or warm climate, consider installing a radiant barrier in your attic rafters to reduce summer heat gain.
Duct Insulation
If the ducts in your home are in unconditioned space, seal and insulate them. If you’re building a new house, place ducts in the conditioned space to avoid the energy losses associated with most duct systems.
Cathedral Ceiling Insulation
Properly insulating your cathedral ceilings will allow ceiling temperatures to remain closer to room temperatures, providing an even temperature distribution throughout the house. Cathedral ceilings must provide space between the roof deck and home’s ceiling for adequate insulation and ventilation. This can be achieved through the use of truss joists, scissor truss framing, or sufficiently large rafters. For example, cathedral ceilings built with 2×12 rafters have space for standard 10-inch batts (R-30) and ventilation. Unvented (hot roof design) cathedral ceilings are also an option. The hot roof design allows more insulation to be installed in the roof cavity as the need for a vent space is eliminated. It is important that the roof cavity be totally air sealed from the conditioned space below to prevent moisture intrusion and roof degradation.
Foil-faced batt insulation is often used in cathedral ceilings because it provides the permeability rating often required for use in ceilings without attics. A vent baffle should be installed between the insulation and the roof decking to maintain the ventilation channel.
Consider using high-density R-30 batts, which are as thick as R-25 batts, but fit into 2×10 framing. You can also add rigid foam insulation under the rafters, which adds R-value and eliminates thermal bridging through wood rafters. However, rigid foam insulation must be covered with a fire-rated material when used on the interior of a building. Half-inch drywall is usually sufficient but check with local building officials before installing.
Exterior Wall Insulation
If your attic has enough insulation and proper air sealing, and your home still feels drafty and cold in the winter or too warm in the summer, chances are you need to add insulation to the exterior walls. This is more expensive and usually requires a contractor, but it may be worth the cost—especially if you live in a very cold climate. If you replace the exterior siding on your home, consider adding insulation at the same time.
In an existing home, consider using blow-in insulation, which, when installed with the dense pack technique, will provide a higher R-value. It can be added to exterior walls without much disturbance to finished areas of your home. If you’re remodeling and your wall cavities will be open, look into two-part spray foam or wet spray cellulose insulation. If your wall cavities are not going to be open, you could consider injectable spray foam insulation. If you’ll be doing the work yourself, blanket (batt and roll) insulation, while not capable of providing an air seal as and two-part spray foam will, may be an affordable option.
In a new home, first see our information about insulating a new home, which will help you choose from among the many types of insulation on the market. If you’re in the design phase of planning your new home, consider structural insulated panels, insulating concrete forms, and insulated concrete blocks. These materials literally have insulation built in, and houses built using these products often have superior insulating qualities and minimal thermal bridging.
If you’re building a traditional framed house, consider using advanced wall framing techniques. These techniques improve the whole-wall R-value by reducing thermal bridging and maximizing the insulated wall area.
Also consider using insulating foam wall sheathing rather than wood sheathing products, as they provide superior R-value. Foam sheathing:
- Provides a continuous layer of insulation, which reduces thermal bridging through wood studs, saving energy and improving comfort.
- Is easier to cut and install than heavier sheathing products.
- Protects against condensation on the inside wall by keeping the interior of the wall closer to the interior conditions.
- Usually costs less than plywood or oriented strand board (OSB).
If you replace plywood or OSB with foam sheathing, your walls will require bracing or other structural reinforcement.
Insulating Floors Above Unheated Garages
When insulating floors above unconditioned garages, first seal all possible sources of air leakage. This strategy has the added benefit of minimizing the danger of contaminants (from car exhaust, paint, solvents, gardening supplies, etc.) in the garage migrating into the conditioned space. Also install an air barrier to prevent cold air in the garage from “short circuiting” the insulation underneath the subfloor.
Basement Insulation
A properly insulated basement can save you money on heating and provide a dry, comfortable living space. In most cases, a basement with insulation installed on its exterior walls should be considered a conditioned space. Even in a house with an unconditioned basement, the basement is more connected to other living spaces than to the outside, which makes basement wall insulation preferable to ceiling insulation.
In new construction, adding insulation on the exterior of the basement walls will do the following:
- Minimize thermal bridging and reduce heat loss through the foundation
- Protect the damp-proof coating from damage during backfilling
- Provide some protection against moisture intrusion
- Make the foundation part of the thermal mass of the conditioned space, thereby reducing interior temperature swings
- Reduce the potential for condensation on surfaces in the basement
- Conserve room area, relative to installing insulation on the interior.
In an existing home, adding insulation to the exterior of the basement walls is impractical. Interior basement wall insulation has the following advantages:
- It is much less expensive to install than exterior insulation for existing buildings.
- Almost any insulation type can be used.
- It eliminates the threat of insect infestation.
Here are a few things to consider when installing interior basement wall insulation:
- Many insulation types require a fire-rated covering because they release toxic gases when ignited.
- Interior insulation reduces usable interior space by a few inches.
- It doesn’t protect the damp-proof coating like exterior insulation does.
- If perimeter drainage is poor, the insulation may become saturated by moisture weeping through foundation walls.
- Superior air-sealing details and vapor diffusion retarders are important for adequate performance.
To determine appropriate R-values for basement walls in your area, use these R-value recommendations. Then choose the type of insulation:
- Blanket (batt and roll) insulation
- Insulating concrete blocks (new construction)
- Foam board insulation
- Insulating concrete forms (new construction)
- Loose-fill insulation
- Sprayed foam insulation (good choice for finished basements).
Moisture control is particularly important for basements, because they are notorious for problems with water intrusion, humidity, and mold.
Foundation Insulation
In addition to reducing heating costs, a properly insulated foundation will keep below-grade rooms more comfortable and prevent moisture problems, insect infestation, and radon infiltration. In new construction, consider construction techniques that provide both foundation structure and insulation, such as insulating concrete forms and insulating concrete blocks.
During the construction process, many builders insulate the outside of foundation walls before backfilling. This strategy is possible but impractical and disruptive for existing homes. Optimal foundation insulation materials and placement vary by climate, so consult a local insulation professional if you’re planning a new home.
Crawlspace Insulation
How you insulate a crawlspace depends on whether it’s ventilated or unventilated. Most building codes require vents to aid in removing moisture from the crawlspace. However, many building professionals now recognize that building an unventilated crawlspace (or closing vents after the crawlspace dries out following construction) is the best option in homes in hot and humid climates using proper moisture control and exterior drainage techniques.
If you have or will have an unventilated crawlspace, the best approach is to seal and insulate the foundation walls rather than the floor between the crawlspace and the house. This strategy has the advantage of keeping piping and ductwork within the conditioned volume of the house so these building components don’t require insulation for energy efficiency or protection against freezing. The downside of this strategy is that rodents, pests, or water can damage the insulation and the crawlspace must be built airtight and the air barrier maintained. Cover the ground with a thick vapor barrier to reduce moisture entering the crawlspace from the ground. It’s best to locate the access door to the crawlspace inside the home through the subfloor unless you build and maintain an airtight, insulated access door in the perimeter wall.
Slab-on-Grade Insulation
Cold concrete slabs can be a source of discomfort in a home. A home with an insulated slab is easier to heat and placing the mass of the slab within your home’s thermal envelope helps moderate indoor temperatures.
Insulating a slab in an existing home can be expensive and disruptive, but if the slab in your home is cold it is possible to dig around the perimeter of the house and install insulation, usually foam board. In most parts of the United States, insulating the exterior edge of a slab can reduce heating bills by 10% to 20%.
Installing slab insulation during the construction process is more straightforward. Slab insulation, typically foam board, is installed either directly against the exterior of the slab and footing before backfilling or under the slab and along the inside of the stem wall of the foundation. Construction details vary widely, so it’s best to consult a building professional in your area. Building America’s climate-specific publications also have useful construction details for different climate zones.
Termites can tunnel undetected through exterior slab insulation to gain access to the wood framing in a home’s walls. As a result, some insurance companies won’t guarantee homes with slab insulation against termites. Building codes in several southern U.S. states prohibit installing foam insulation in contact with the ground. Slab foundations with interior insulation provide more termite resistance, but some builders in the southeastern United States have even reported termite infestations through foam insulation on contained slabs.
1101 Ruthven St Houston TX 77019 – Radiant Barriers
1101 Ruthven St Houston TX 77019 – Radiant Barriers
Radiant barriers are installed in homes — usually in attics — primarily to reduce summer heat gain and reduce cooling costs. The barriers consist of a highly reflective material that reflects radiant heat rather than absorbing it. They don’t, however, reduce heat conduction like thermal insulation materials.
How They Work
Heat travels from a warm area to a cool area by a combination of conduction, convection, and radiation. Heat flows by conduction from a hotter location within a material or assembly to a colder location, like the way a spoon placed in a hot cup of coffee conducts heat through its handle to your hand. Heat transfer by convection occurs when a liquid or gas — air, for example — is heated, becomes less dense, and rises. As the liquid or gas cools, it becomes denser and falls. Radiant heat travels in a straight line away from any surface and heats anything solid that absorbs its energy.
Most common insulation materials work by slowing conductive heat flow and — to a lesser extent — convective heat flow. Radiant barriers and reflective insulation systems work by reducing radiant heat gain. To be effective, the reflective surface must face an air space. Dust accumulation on the reflective surface will reduce its reflective capability. The radiant barrier should be installed in a manner to minimize dust accumulation on the reflective surface.
When the sun heats a roof, it’s primarily the sun’s radiant energy that makes the roof hot. Much of this heat travels by conduction through the roofing materials to the attic side of the roof. The hot roof material then radiates its gained heat energy onto the cooler attic surfaces, including the air ducts and the attic floor. A radiant barrier reduces the radiant heat transfer from the underside of the roof to the other surfaces in the attic.
A radiant barrier works best when it is perpendicular to the radiant energy striking it. Also, the greater the temperature difference between the sides of the radiant barrier material, the greater the benefits a radiant barrier can offer.
Radiant barriers are more effective in hot climates than in cool climates, especially when cooling air ducts are located in the attic. Some studies show that radiant barriers can reduce cooling costs 5% to 10% when used in a warm, sunny climate. The reduced heat gain may even allow for a smaller air conditioning system. In cool climates, however, it’s usually more cost-effective to install more thermal insulation than to add a radiant barrier.
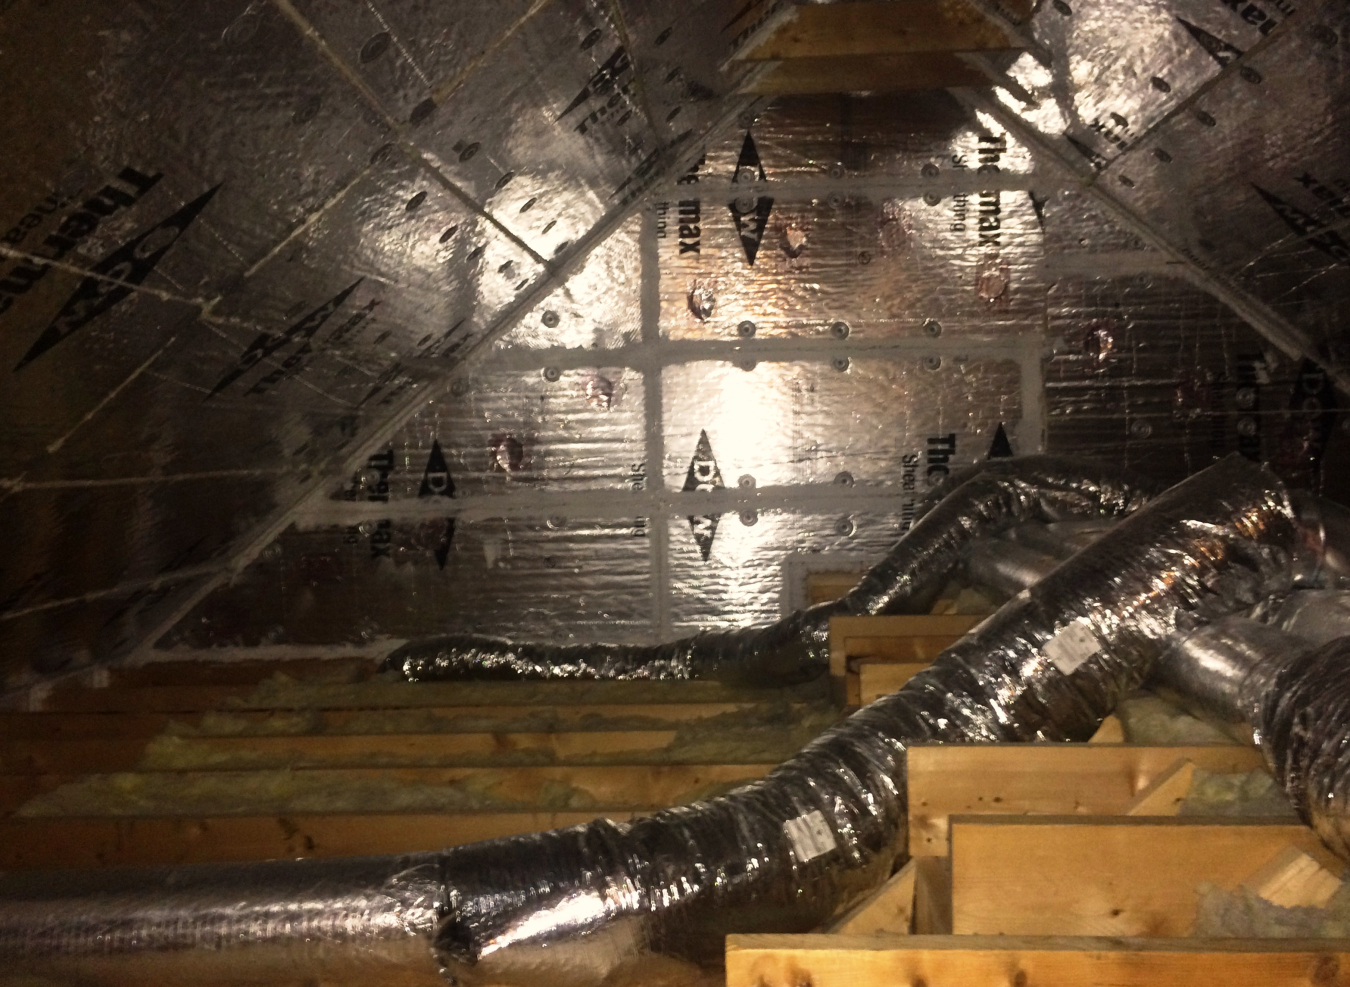
Radiant barriers in an attic with dense-pack insulation and sealed air vents.
Types of Radiant Barriers
Radiant barriers consist of a highly reflective material, usually aluminum foil, which is applied to one or both sides of a number of substrate materials such as kraft paper, plastic films, cardboard, oriented strand board, and air infiltration barrier material. Some products are fiber-reinforced to increase durability and ease of handling.
Radiant barriers can be combined with many types of insulation materials in reflective insulation systems. In these combinations, radiant barriers can act as the thermal insulation’s facing material.
Installation
A radiant barrier’s effectiveness depends on proper installation, so it’s best to use a certified installer. If you choose to do the installation yourself, carefully study and follow the manufacturer’s instructions and safety precautions and check your local building and fire codes. The reflective insulation trade association also offers installation tips.
It’s easier to incorporate radiant barriers into a new home, but you can also install them in an existing home, especially if it has an open attic. In a new house, an installer typically drapes a rolled-foil radiant barrier foil-face down between the roof rafters to minimize dust accumulation on the reflective faces (double-faced radiant barriers are available). This is generally done just before the roof sheathing goes on, but can be done afterwards from inside the attic by stapling the material to the bottom of the rafters.
When installing a foil-type barrier, it’s important to allow the material to “droop” between the attachment points to make at least a 1.0 inch (2.5 cm) air space between it and the bottom of the roof. Foil-faced plywood or oriented strand board sheathing is also available.
Note that reflective foil will conduct electricity, so workers and homeowners must avoid making contact with bare electrical wiring. If installed on top of attic floor insulation, the foil will be susceptible to dust accumulation and may trap moisture in fiber insulation, so it is strongly recommended that you NOT apply radiant barriers directly on top of the attic floor insulation.
6519 Hollow Oaks Dr. Houston TX, 77050 – Types of Insulation
6519 Hollow Oaks Dr. Houston TX, 77050 – Types of Insulation
When insulating your home, you can choose from many types of insulation. To choose the best type of insulation, you should first determine the following:
- Where you want or need to install/add insulation
- The recommended R-values for areas you want to insulate.
Installing Insulation
The maximum thermal performance or R-value of insulation is very dependent on proper installation. Homeowners can install some types of insulation — notably blankets, boards, and materials that can be poured in place. (Liquid foam insulation materials can be poured, but they require professional installation). Other types require professional installation.
When hiring a professional certified installer:
- Obtain written cost estimates from several contractors for the R-value you need, and don’t be surprised if quoted prices for a given R-value installation vary by more than a factor of two.
- Ask contractors about their experience in installing the product you are considering. The application can significantly impact the insulation’s performance.
- Ask contractors about their air-sealing services and costs as well, because it’s a good idea to seal air leaks before installing insulation.
To evaluate blanket installation, you can measure batt thickness and check for gaps between batts as well as between batts and framing. In addition, inspect insulation for a tight fit around building components that penetrate the insulation, such as electrical boxes. To evaluate sprayed or blown-in types of insulation, measure the depth of the insulation and check for gaps in coverage.
If you choose to install the insulation yourself, follow the manufacturer’s instructions and safety precautions carefully and check local building and fire codes. Do-it-yourself instructions are available from the fiberglass and mineral wool trade group. The cellulose trade group recommends hiring a professional, but if there isn’t a qualified installer in your area or you feel comfortable taking on the job, you may be able to find guidance from manufacturers.
The table below provides an overview of most available insulation materials, how they are installed, where they’re typically installed, and their advantages.
Blanket: Batt and Roll Insulation
Blanket insulation — the most common and widely available type of insulation — comes in the form of batts or rolls. It consists of flexible fibers, most commonly fiberglass. You also can find batts and rolls made from mineral (rock and slag) wool, plastic fibers, and natural fibers, such as cotton and sheep’s wool. Learn more about these insulation materials.
Batts and rolls are available in widths suited to standard spacing of wall studs, attic trusses or rafters, and floor joists: 2 inch x 4 inch walls can hold R-13 or R-15 batts; 2 inch x 6 inch walls can use R-19 or R-21 products. Continuous rolls can be hand-cut and trimmed to fit. They are available with or without facings. Manufacturers often attach a facing (such as kraft paper, foil-kraft paper, or vinyl) to act as a vapor barrier and/or air barrier. Batts with a special flame-resistant facing are available in various widths for basement walls and other places where the insulation will be left exposed. A facing also helps facilitate handling and fastening during installation.
Work with your manufacturer and/or local building supplier to determine actual thickness, R-value, and cost of fiberglass blankets and batts.
Concrete Block Insulation
Concrete blocks are used to build home foundations and walls, and there are several ways to insulate them. If the cores aren’t filled with steel and concrete for structural reasons, they can be filled with insulation, which raises the average wall R-value. Field studies and computer simulations have shown, however, that core filling of any type offers little fuel savings, because heat is readily conducted through the solid parts of the walls.
It is more effective to install insulation over the surface of the blocks either on the exterior or interior of the foundation walls. Placing insulation on the exterior has the added advantage of containing the thermal mass of the blocks within the conditioned space, which can moderate indoor temperatures.
Some manufacturers incorporate polystyrene beads into concrete blocks, while others make concrete blocks that accommodate rigid foam inserts.
In the United States, two varieties of solid, precast autoclaved concrete masonry units are now available: autoclaved aerated concrete (AAC) and autoclaved cellular concrete (ACC). This material contains about 80% air by volume and has been commonly used in Europe since the late 1940s. Autoclaved concrete can have up to ten times the insulating value of conventional concrete. The blocks are large, light, and easily sawed, nailed, and shaped with ordinary tools. The material absorbs water readily, so it requires protection from moisture. Precast ACC uses fly ash instead of high-silica sand, which distinguishes it from AAC. Fly ash is a waste ash produced from burning coal in electric power plants.
Hollow-core units made with a mix of concrete and wood chips are also available. They are installed by stacking the units without using mortar (dry-stacking) and filling the cores with concrete and structural steel. One potential problem with this type of unit is that the wood is subject to the effects of moisture and insects.
Concrete block walls are typically insulated or built with insulating concrete blocks during new home construction or major renovations. Block walls in existing homes can be insulated from the inside. Go to insulation materials for more information about the products commonly used to insulate concrete block.
Foam Board or Rigid Foam
Foam boards — rigid panels of insulation — can be used to insulate almost any part of your home, from the roof down to the foundation. They are very effective in exterior wall sheathing, interior sheathing for basement walls, and special applications such as attic hatches. They provide good thermal resistance (up to 2 times greater than most other insulating materials of the same thickness), and reduce heat conduction through structural elements, like wood and steel studs. The most common types of materials used in making foam board include polystyrene, polyisocyanurate (polyiso), and polyurethane.
Insulating Concrete Forms
Insulating concrete forms (ICFs) are basically forms for poured concrete walls, which remain as part of the wall assembly. This system creates walls with a high thermal resistance, typically about R-20. Even though ICF homes are constructed using concrete, they look like traditional stick-built homes.
ICF systems consist of interconnected foam boards or interlocking, hollow-core foam insulation blocks. Foam boards are fastened together using plastic ties. Along with the foam boards, steel rods (rebar) can be added for reinforcement before the concrete is poured. When using foam blocks, steel rods are often used inside the hollow cores to strengthen the walls.
The foam webbing around the concrete-filled cores of blocks can provide easy access for insects and groundwater. To help prevent these problems, some manufacturers make insecticide-treated foam blocks and promote methods for waterproofing them. Installing an ICF system requires an experienced contractor, available through the Insulating Concrete Form Association.
Loose-Fill and Blown-In Insulation
Loose-fill insulation consists of small particles of fiber, foam, or other materials. These small particles form an insulation material that can conform to any space without disturbing structures or finishes. This ability to conform makes loose-fill insulation well suited for retrofits and locations where it would be difficult to install other types of insulation.
The most common types of materials used for loose-fill insulation include cellulose, fiberglass, and mineral (rock or slag) wool. All of these materials are produced using recycled waste materials. Cellulose is primarily made from recycled newsprint. Most fiberglass products contain 40% to 60% recycled glass. Mineral wool is usually produced from 75% post-industrial recycled content.
Some less common loose-fill insulation materials include polystyrene beads and perlite. Loose-fill insulation can be installed in either enclosed cavities such as walls, or unenclosed spaces such as attics. Cellulose, fiberglass, and rock wool are typically blown in by experienced installers skilled at achieving the correct density and R-values. Polystyrene beads, vermiculite, and perlite are typically poured.
The Federal Trade Commission has issued the “Trade Regulation Rule Concerning the Labeling and Advertising of Home Insulation” (16 CFR Part 460). The Commission issued the R-value Rule to prohibit, on an industry-wide basis, specific unfair or deceptive acts or practices. The Rule requires that manufacturers and others who sell home insulation determine and disclose each products’ R-value and related information (e.g., thickness, coverage area per package) on package labels and manufacturers’ fact sheets. R-value ratings vary among different types and forms of home insulations and among products of the same type and form.
For loose-fill insulation, each manufacturer must determine the R-value of its product at settled density and create coverage charts showing the minimum settled thickness, minimum weight per square foot, and coverage area per bag for various total R-values.
This is because as the installed thickness of loose-fill insulation increases, its settled density also increases due to compression of the insulation under its own weight. Thus, the R-value of loose-fill insulation does not change proportionately with thickness. The manufacturers’ coverage charts specify the bags of insulation needed per square foot of coverage area; the maximum coverage area for one bag of insulation; the minimum weight per square foot of the installed insulation; and the initial and settled thickness of the installed insulation needed to achieve a particular R-value.
Radiant Barriers and Reflective Insulation Systems
Unlike most common insulation systems, which resist conductive and convective heat flow, radiant barriers and reflective insulation work by reflecting radiant heat. Radiant barriers are installed in homes — usually in attics — primarily to reduce summer heat gain, which helps lower cooling costs. Reflective insulation incorporates reflective surfaces — typically aluminum foils — into insulation systems that can include a variety of backings, such as kraft paper, plastic film, polyethylene bubbles, or cardboard, as well as thermal insulation materials.
Radiant heat travels in a straight line away from any surface and heats anything solid that absorbs its energy. When the sun heats a roof, it’s primarily the sun’s radiant energy that makes the roof hot. A large portion of this heat travels by conduction through the roofing materials to the attic side of the roof. The hot roof material then radiates its gained heat energy onto the cooler attic surfaces, including the air ducts and the attic floor. A radiant barrier reduces the radiant heat transfer from the underside of the roof to the other surfaces in the attic. To be effective, it must face a large air space.
Radiant barriers are more effective in hot climates, especially when cooling air ducts are located in the attic. Some studies show that radiant barriers can lower cooling costs 5% to 10% when used in a warm, sunny climate. The reduced heat gain may even allow for a smaller air conditioning system. In cool climates, however, it’s usually more cost-effective to install more thermal insulation.
Rigid Fiber Board Insulation
Rigid fiber or fibrous board insulation consists of either fiberglass or mineral wool material and is primarily used for insulating air ducts in homes. It is also used when there’s a need for insulation that can withstand high temperatures. These products come in a range of thicknesses from 1 inch to 2.5 inches.
Installation in air ducts is usually done by HVAC contractors, who fabricate the insulation at their shops or at job sites. On exterior duct surfaces, they can install the insulation by impaling it on weld pins and securing with speed clips or washers. They can also use special weld pins with integral-cupped head washers. Unfaced boards can then be finished with reinforced insulating cement, canvas, or weatherproof mastic. Faced boards can be installed in the same way, and the joints between boards sealed with pressure-sensitive tape or glass fabric and mastic.
Sprayed-Foam and Foamed-In-Place Insulation
Liquid foam insulation materials can be sprayed, foamed-in-place, injected, or poured. Foam-in-place insulation can be blown into walls, on attic surfaces, or under floors to insulate and reduce air leakage. Some installations can yield a higher R-value than traditional batt insulation for the same thickness, and can fill even the smallest cavities, creating an effective air barrier. You can use the small pressurized cans of foam-in-place insulation to reduce air leakage in holes and cracks, such as window and door frames, and electrical and plumbing penetrations.
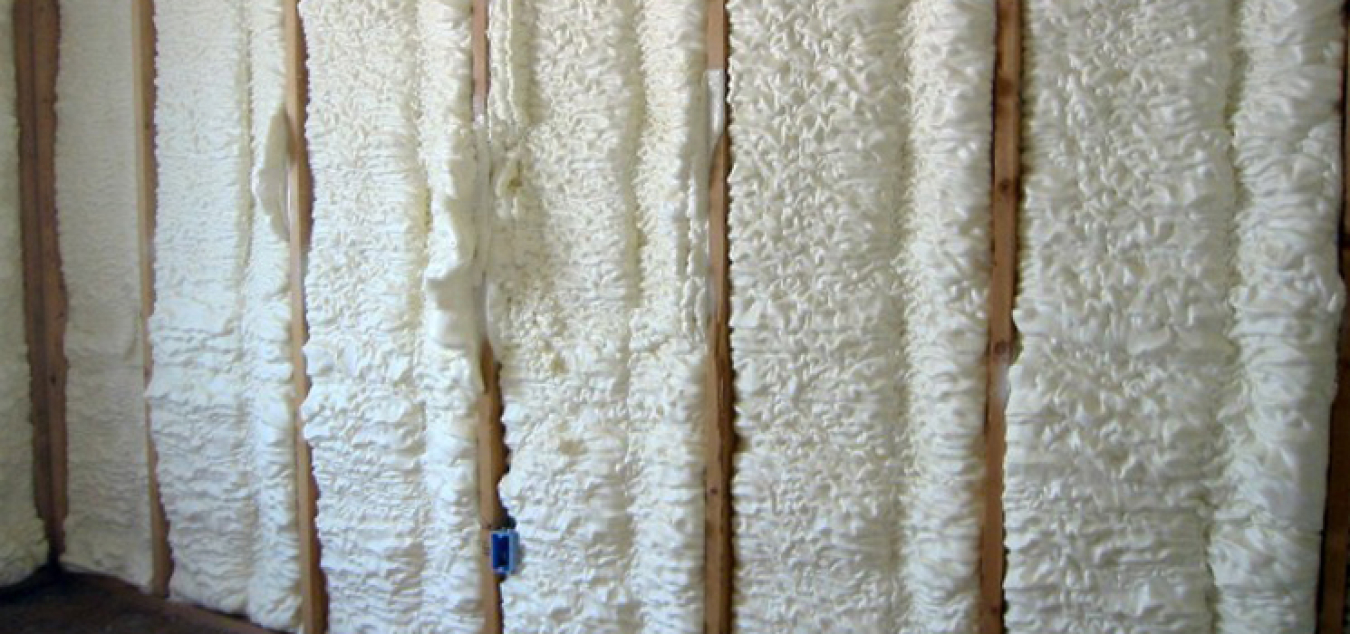
Icynene plastic insulation blown into the walls of a home near Denver. Icynene fills cracks and crevices and adheres to the framing.
Types of Foam Insulation
Today, most foam materials use foaming agents that don’t use chlorofluorocarbons (CFCs) or hydrochlorofluorocarbons (HCFCs), which are harmful to the earth’s ozone layer.
There are two types of foam-in-place insulation: closed-cell and open-cell. Both are typically made with polyurethane. With closed-cell foam, the high-density cells are closed and filled with a gas that helps the foam expand to fill the spaces around it. Open-cell foam cells are not as dense and are filled with air, which gives the insulation a spongy texture.
The type of insulation you should choose depends on how you will use it and on your budget. While closed-cell foam has a greater R-value and provides stronger resistance against moisture and air leakage, the material is also much denser and is more expensive. Open-cell foam is lighter and less expensive but should not be used below ground level where it could absorb water. Consult a professional insulation installer to decide what type of insulation is best for you.
Other available foam insulation materials include:
- Cementitious
- Phenolic
- Polyisocyanurate (polyiso)
Some less common types include Icynene foam and Tripolymer foam. Icynene foam can be either sprayed or injected, which makes it the most versatile. It also has good resistance to both air and water intrusion. Tripolymer foam—a water-soluble foam—is injected into wall cavities. It has excellent resistance to fire and air intrusion.
Installation
Liquid foam insulation — combined with a foaming agent — can be applied using small spray containers or in larger quantities as a pressure-sprayed (foamed-in-place) product. Both types expand and harden as the mixture cures. They also conform to the shape of the cavity, filling and sealing it thoroughly.
Slow-curing liquid foams are also available. These foams are designed to flow over obstructions before expanding and curing, and they are often used for empty wall cavities in existing buildings. There are also liquid foam materials that can be poured from a container.
Installation of most types of liquid foam insulation requires special equipment and certification and should only be done by experienced installers. Following installation, an approved thermal barrier equal in fire resistance to half-inch gypsum board must cover all foam materials. Also, some building codes don’t recognize sprayed foam insulation as a vapor barrier, so installation might require an additional vapor retarder.
Costs
Foam insulation products and installation usually cost more than traditional batt insulation. However, foam insulation has higher R-values and forms an air barrier, which can eliminate some of the other costs and tasks associated with weatherizing a home, such as caulking, applying housewrap and vapor barrier, and taping joints. When building a new home, this type of insulation can also help reduce construction time and the number of specialized contractors, which saves money.
Structural Insulated Panels
Structural insulated panels (SIPs) are prefabricated insulated structural elements for use in building walls, ceilings, floors, and roofs. They provide superior and uniform insulation compared to more traditional construction methods (stud or “stick frame”), offering energy savings of 12% to 14%. When installed properly, SIPs also result in a more airtight dwelling, which makes a house energy efficient, quieter, and more comfortable.
SIPs not only have high R-values but also high strength-to-weight ratios. A SIP typically consists of 4- to 8-inch-thick foam board insulation sandwiched between two sheets of oriented strand board (OSB) or other structural facing materials. Manufacturers can usually customize the exterior and interior sheathing materials to meet customer requirements. The facing is glued to the foam core, and the panel is then either pressed or placed in a vacuum to bond the sheathing and core together.
SIPs can be produced in various sizes or dimensions. Some manufacturers make panels as large as 8 by 24 feet, which require a crane to erect.
The quality of SIP manufacturing is very important to the long life and performance of the product. The panels must be glued, pressed, and cured properly to ensure that they don’t delaminate. The panels also must have smooth surfaces and square edges to prevent gaps from occurring when they’re connected at the job site. Before purchasing SIPs, ask manufacturers about their quality control and testing procedures and read and compare warranties carefully. SIPs are available with different insulating materials, usually polystyrene or polyisocyanurate foam.
Installation
SIPs are made in a factory and shipped to job sites. Builders then connect them together to construct a house. For an experienced builder, a SIPs home goes up much more quickly than other homes, which saves time and money without compromising quality. These savings can help offset the usually higher cost of SIPs.
Many SIP manufacturers also offer “panelized housing kits.” The builder need only assemble the pre-cut pieces, and additional openings for doors and windows can be cut with standard tools at the construction site.
When installed according to manufacturers’ recommendations, SIPs meet all building codes and pass the American Society for Testing and Materials (ASTM) standards of safety.
Areas of Concern
Fire safety is a concern, but when the interior of the SIP is covered with a fire-rated material, such as gypsum board, it protects the facing and foam long enough to give building occupants a chance to escape.
As in any house, insects and rodents can be a problem. In a few cases, insects and rodents have tunneled throughout the SIPs, and some manufacturers have issued guidelines for preventing these problems, including:
- Applying insecticides to the panels
- Treating the ground with insecticides both before and after initial construction and backfilling
- Maintaining indoor humidity levels below 50%
- Locating outdoor plantings at least two feet (0.6 meters) away from the walls
- Trimming any over-hanging tree limbs.
Boric acid-treated insulation panels are also available. These panels deter insects, but are relatively harmless to humans and pets.
Because it can be very airtight, a well-built SIP structure may require controlled fresh-air ventilation for safety, health, and performance, and to meet many building codes. A well-designed, installed, and properly operated mechanical ventilation system can also help prevent indoor moisture problems, which is important for achieving the energy-saving benefits of a SIP structure.
1222 W Drew St. Houston TX, 77006 – Insulation

1222 W Drew St. Houston TX, 77006 – Insulation
Insulation in your home provides resistance to heat flow and lowers your heating and cooling costs. Properly insulating your home not only reduces heating and cooling costs, but also improves comfort.
How Insulation Works
To understand how insulation works it helps to understand heat flow, which involves three basic mechanisms — conduction, convection, and radiation. Conduction is the way heat moves through materials, such as when a spoon placed in a hot cup of coffee conducts heat through its handle to your hand. Convection is the way heat circulates through liquids and gases, and is why lighter, warmer air rises, and cooler, denser air sinks in your home. Radiant heat travels in a straight line and heats anything solid in its path that absorbs its energy.
Most common insulation materials work by slowing conductive heat flow and convective heat flow. Radiant barriers and reflective insulation systems work by reducing radiant heat gain. To be effective, the reflective surface must be in contact with an air space.
Regardless of the mechanism, heat flows from warmer to cooler areas until there is no longer a temperature difference. In your home, this means that in winter, heat flows directly from all heated living spaces to adjacent unheated attics, garages, basements, and especially to the outdoors. Heat flow can also move indirectly through interior ceilings, walls, and floors–wherever there is a difference in temperature. During the cooling season, heat flows from the outdoors to the interior of a house.
To maintain comfort, the heat lost in the winter must be replaced by your heating system and the heat gained in the summer must be removed by your cooling system. Properly insulating your home will decrease this heat flow by providing an effective resistance to the flow of heat.
R-Values
An insulating material’s resistance to conductive heat flow is measured or rated in terms of its thermal resistance or R-value — the higher the R-value, the greater the insulating effectiveness. The R-value depends on the type of insulation, its thickness, and its density. The R-value of most insulations also depends on temperature, aging, and moisture accumulation. When calculating the R-value of a multilayered installation, add the R-values of the individual layers.
Installing more insulation in your home increases the R-value and the resistance to heat flow. In general, increased insulation thickness will proportionally increase the R-value. However, as the installed thickness increases for loose-fill insulation, the settled density of the product increases due to compression of the insulation under its own weight. Because of this compression, loose-fill insulation R-value does not change proportionately with thickness. To determine how much insulation, you need for your climate, consult a local insulation contractor.
The effectiveness of an insulation material’s resistance to heat flow also depends on how and where the insulation is installed. For example, insulation that is compressed will not provide its full rated R-value. The overall R-value of a wall or ceiling will be somewhat different from the R-value of the insulation itself because heat flows more readily through studs, joists, and other building materials, in a phenomenon known as thermal bridging. In addition, insulation that fills building cavities reduces airflow or leakage and saves energy.
Unlike traditional insulation materials, radiant barriers are highly reflective materials that re-emit radiant heat rather than absorbing it, reducing cooling loads. As such, a radiant barrier has no inherent R-value.
Although it is possible to calculate an R-value for a specific radiant barrier or reflective insulation installation, the effectiveness of these systems lies in their ability to reduce heat gain by reflecting heat away from the living space.
The amount of insulation or R-value you’ll need depends on your climate, type of heating and cooling system, and the part of the house you plan to insulate. To learn more, see our information on adding insulation to an existing house or insulating a new house. Also, remember that air sealing and moisture control are important to home energy efficiency, health, and comfort.
Use the following map to determine your climate zone and then the following tables to estimate the required R-values. See the 2021 International Energy Conservation Code for more information on climate zones.
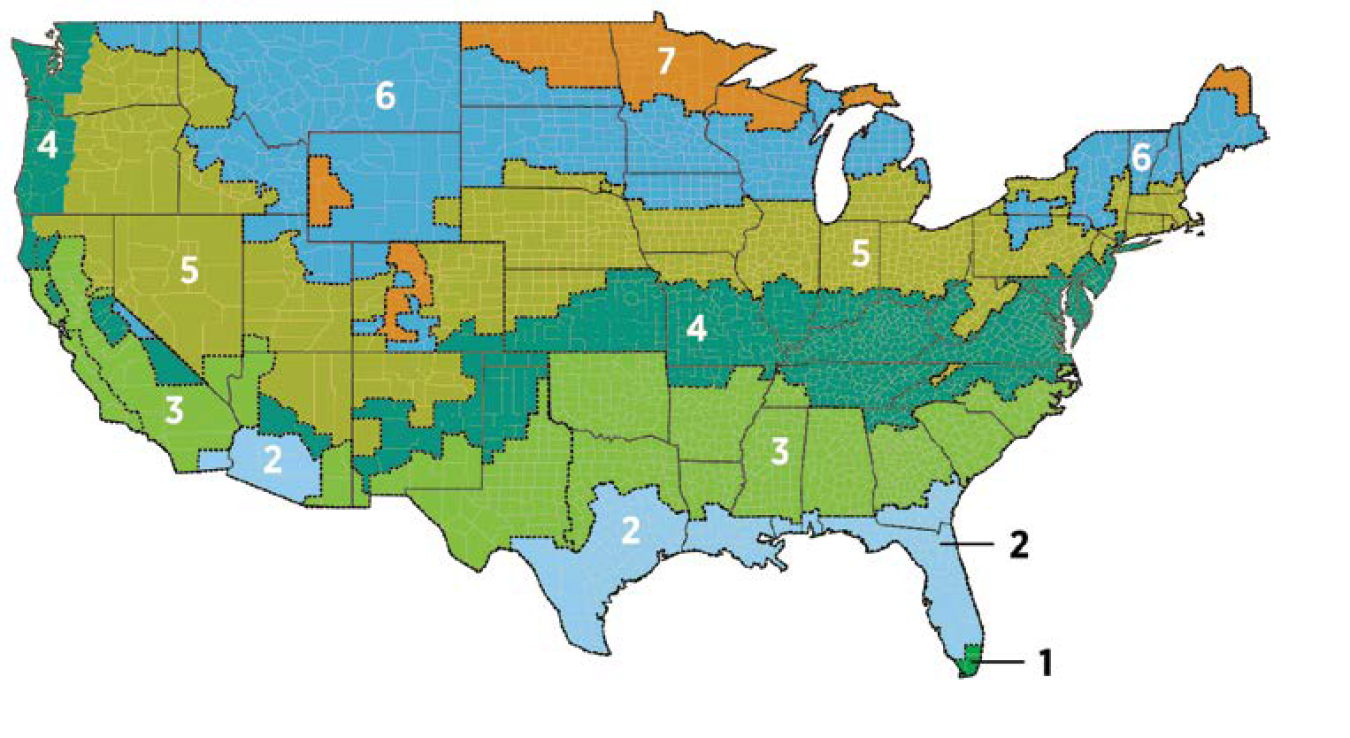
Alaska climate zones:
- 7 – Aleutians East
- 7 – Aleutians West
- 7 – Anchorage
- 7 – Bethel
- 7 – Bristol Bay
- 8 – Denali
- 7 – Dillingham
- 8 – Fairbanks North Star
- 6 – Haines
- 6 – Juneau
- 7 – Kenai Peninsula
- 5 – Ketchikan Gateway
- 6 – Kodiak Island
- 7 – Lake and Peninsula
- 7 – Matanuska-Susitna
- 8 – Nome
- 8 – North Slope
- 8 – Northwest Arctic
- 5 – Prince of Wales-Outer Ketchikan
- 5 – Sitka
- 6 – Skagway-Hoonah-Angoon
- 8 – Southeast Fairbanks
- 7 – Valdez-Cordova
- 8 – Wade Hampton
- 6 – Wrangell-Petersburg
- 7 – Yakutat
- 8 – Yukon-Koyukuk
Zone 1 includes Hawaii, Guam, Puerto Rico, and the Virgin Islands.
| CLIMATE ZONE | UNINSULATED ATTIC | 3-4 INCHES OF EXISTING ATTIC INSULATION | UNINSULATED FLOOR | UNINSULATED WOOD-FRAME WALL | INSULATED WOOD FRAME WALL |
|---|---|---|---|---|---|
| 1 | R30–R49 | R19–R38 | R13 | R13 or R0 + R10 CI* | N/A |
| 2 | R49–R60 | R38–R49 | R13 | R13 or R0 + R10 CI | N/A |
| 3 | R49–R60 | R38–R49 | R19 | R20 or R13 + R5 CI or R0 + R15 CI | Add R5 CI |
| 4 EXCEPT MARINE | R60 | R49 | R19 | R20 + R5 CI or R13 + R10 CI or R0 + R15 CI | Add R10 CI |
| 4 MARINE AND 5 | R60 | R49 | R30 | R20 + R5 CI or R13 + R10 CI or R0 + R15 CI | Add R10 CI |
| 6 | R60 | R49 | R30 | R20 + R5 CI or R13 + R10 CI or R0 + R20 CI | Add R10 CI |
| 7 AND 8 | R60 | R49 | R38 | R20 + R5 CI or R13 + R10 CI or R0 + R20 CI | Add R10 CI |
*Note: In the table above, CI stands for “continuous insulation” that is applied to the exterior of the wall assembly just inside the cladding.
Whenever exterior siding is removed on an uninsulated wood-frame wall:
- Drill holes in the sheathing and blow insulation into the empty wall cavity before installing the new siding, and
- Add the amounts of continuous insulation recommended in the table above.
Whenever exterior siding is removed on an insulated wood-frame wall:
- Add the amounts of continuous insulation recommended in the table above.
Types
To choose the best insulation for your home from the many types of insulation on the market, you’ll need to know where you want or need to install the insulation, and what R-value you want the installation to achieve. Other considerations may include indoor air quality impacts, life cycle costs, recycled content, embodied carbon, and ease of installation, especially if you plan to do the installation yourself. Some insulation strategies require professional installation, while homeowners can easily handle others.
Materials
Insulation materials run the gamut from bulky fiber materials such as fiberglass, rockwool, cellulose, and natural fibers to rigid foam boards to sleek foils. Bulky materials resist conductive heat flow in a building cavity. Rigid foam boards trap air or another gas in their cells to resist conductive heat flow. Highly reflective foils in radiant barriers and reflective insulation systems reflect radiant heat away from living spaces, making them particularly useful in cooling climates. Other less common materials such as cementitious and phenolic foams and perlite are also available.
702 Pinemont Canyon Ln Houston TX, 77018 – Air Sealing Your Home
702 Pinemont Canyon Ln Houston TX, 77018
Reducing the amount of air that leaks in and out of your home is a cost-effective way to cut heating and cooling costs, improve durability, increase comfort, and create a healthier indoor environment. Caulking and weatherstripping are two simple and effective air-sealing techniques that offer quick returns on investment, often one year or less. Caulk is generally used for cracks and openings between stationary house components such as around door and window frames, and weatherstripping is used to seal components that move, such as doors and operable windows. Air Sealing Your Home.
Save on heating and cooling costs by checking for air leaks in common trouble spots in your home.
Air Leakage
Air leakage occurs when outside air enters, and conditioned air leaves your house uncontrollably through cracks and openings. Relying on air leakage for natural ventilation is not recommended. During cold or windy weather, too much air may enter the house. When it’s warmer and less windy, not enough air may enter, which can result in poor indoor air quality. Air leakage also can contribute to moisture problems that affect occupants’ health and the structure’s durability. Sealing cracks and openings reduces drafts and cold spots, improving comfort.
The recommended strategy is to reduce air leakage as much as possible and to provide controlled ventilation as needed. Before air sealing, you should first:
You can then apply air sealing techniques and materials, including caulk and weatherstripping. If you’re planning an extensive remodel of your home that will include some construction, review some of the techniques used for air sealing in new home construction and consider a home energy assessment to identify all the opportunities to save energy and money in your home.
Tips for Sealing Air Leaks
- Hire an energy assessor or other weatherization expert to test your home for air tightness.
- Caulk and weatherstrip doors and windows that leak air.
- Caulk and seal air leaks where plumbing, ducting, or electrical wiring comes through walls, floors, ceilings, and soffits over cabinets.
- Install foam gaskets behind outlet and switch plates on walls.
- Inspect dirty spots on any visual insulation for air leaks and mold. Seal leaks with low-expansion spray foam made for this purpose and install house flashing if needed.
- Look for dirty spots on your ceiling paint and carpet, which may indicate air leaks at interior wall/ceiling joints and wall/floor joists and caulk them.
- Replace single-pane windows with more efficient double-pane low- emissivity windows. See the Windows section for more information.
- Use foam sealant on larger gaps around windows, baseboards, and other places where air may leak out.
- Check your dryer vent to be sure it is not blocked. This will save energy and may prevent a fire.
- Replace exterior door bottoms and thresholds with ones that have pliable sealing gaskets.
- Keep the fireplace flue damper tightly closed when not in use.
- Seal air leaks around fireplace chimneys, furnaces, and gas-fired water heater vents with fire-resistant materials such as sheet metal or sheetrock and furnace cement caulk.
Fireplace flues are made from metal, and over time repeated heating and cooling can cause the metal to warp or break, creating a channel for air loss. To seal your flue when not in use, consider an inflatable chimney balloon. Inflatable chimney balloons fit beneath your fireplace flue when not in use, are made from durable plastic, and can be removed easily and reused hundreds of times. If you forget to remove the balloon before making a fire, the balloon will automatically deflate within seconds of coming into contact with heat. A reasonably capable do-it-yourselfer can create an inexpensive, reusable fireplace flue plug by filling a plastic trash bag with fiberglass batt scraps and jamming it into the flue. Attach a durable cord with a tag that hangs down into the fireplace to (1) remind you the flue is blocked and (2) provide an easy plug removal method. If you want to save money on fireplaces, replace them with an EPA-certified insert, installed by a certified professional. Air Sealing Your Home.
Note that air sealing alone doesn’t eliminate the need for proper insulation to reduce heat flow through the building envelope.
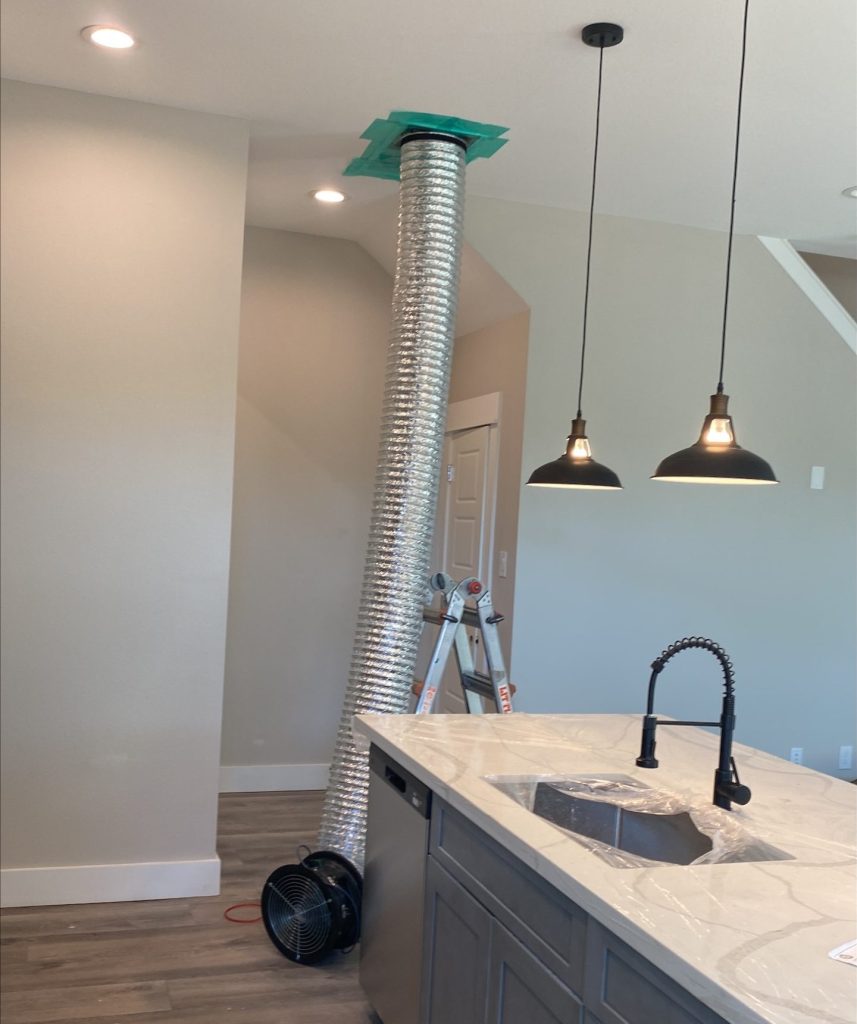
3636 Rebecca St. Houston TX, 77021 – Swimming Pool Heating

3636 Rebecca St. Houston TX, 77021 – Swimming Pool Heating
Heating a swimming pool can consume a lot of energy and add up to high heating bills. You can improve your swimming pool’s heating and energy efficiency by installing an energy efficient pool heater and by taking steps to reduce pool heating costs.
A heat pump is a device that uses a small amount of energy to move heat from one location to another. Heat pumps used for heating pools transfer heat from the outdoors into the water. Because they use heat that is already available and just move it from one place to another, they use less electricity.
How a Heat Pump Pool Heater Works
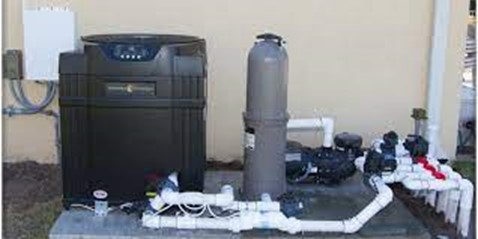
As the pool water circulates through the pool pump, it passes through a filter and the heat pump heater. The heat pump heater has a fan that draws in the outside air and directs it over the evaporator coil. Liquid refrigerant within the evaporator coil absorbs the heat from the outside air and becomes a gas. The warm gas in the coil then passes through the compressor. The compressor increases the heat, creating a very hot gas that then passes through the condenser. The condenser transfers the heat from the hot gas to the cooler pool water circulating through the heater. The heated water then returns to the pool. The hot gas, as it flows through the condenser coil, returns to liquid form and back to the evaporator, where the whole process begins again.
Higher efficiency heat pump pool heaters usually use scroll compressors versus the reciprocal compressors of standard units.
Heat pump pool heaters work efficiently as long as the outside temperature remains above the 45ºF–50ºF range. The cooler the outside air they draw in, the less efficient they are, resulting in higher energy bills. However, since most people use outdoor pools during warm and mild weather, this usually isn’t an issue.
Selecting a Heat Pump Pool Heater
Heat pump pool heaters cost more than gas pool heaters, but they typically have much lower annual operating costs because of their higher efficiencies. With proper maintenance, heat pump pool heaters typically last longer than gas pool heaters. Therefore, you’ll save more money in the long run.
When selecting a heat pump pool heater, you should consider its:
- Size
- Efficiency
- Costs.
Sizing a Heat Pump Pool Heater
You should have a trained pool professional perform a proper sizing analysis for your specific pool to determine pool heater size.
Sizing a heat pump pool heater involves many factors. Basically, a heater is sized according to the surface area of the pool and the difference between the pool and the average air temperatures. Other factors also affect the heating load for outdoor pools, such as wind exposure, humidity levels, and cool night temperatures. Therefore, pools located in areas with higher average wind speeds at the pool surface, lower humidity, and cool nights will require a larger heater.
Heat pump pool heaters are rated by Btu output and horsepower (hp). Standard sizes include 3.5 hp/75,000 Btu, 5 hp/100,000 Btu, and 6 hp/125,000 Btu.
To calculate an approximate heater size for an outdoor swimming pool, follow these steps:
- Determine your desired swimming pool temperature.
- Determine the average temperature for the coldest month of pool use.
- Subtract the average temperature for the coldest month from the desired pool temperature. This will give you the temperature rise needed.
- Calculate the pool surface area in square feet.
- Use the following formula to determine the Btu/hour output requirement of the heater:
Pool Area x Temperature Rise x 12
This formula is based on 1º to 1-1/4ºF temperature rise per hour and a 3-1/2 mile per hour average wind at the pool surface. For a 1-1/2ºF rise multiply by 1.5. For a 2ºF rise multiply by 2.0.
Determining Heat Pump Pool Heater Efficiency
The energy efficiency of heat pump pool heaters is measured by coefficient of performance (COP). The higher the COP number, the more efficient. The federal test procedure for heat pump pool heaters sets the test conditions at 80ºF ambient dry bulb, 63% relative humidity, and 80ºF pool water. COPs usually range from 3.0 to 7.0, which converts to an efficiency of 300%–700%. This means that for every unit of electricity it takes to runs the compressor, you get 3–7 units of heat out of the heat pump.
Estimating Heat Pump Pool Heater Costs and Savings
For an outdoor pool, use the following tables to help estimate your annual heat pump pool heater costs and savings compared to using an electric resistance or a gas pool heater.
Table 1 estimates annual heat pump pool heating costs by location, by water temperature, and with or without using a pool cover.
704 Pinemont Canyon Ln. Houston TX, 77018 – Storage Water Heaters
704 Pinemont Canyon Ln. Houston TX, 77018 – Storage Water Heaters
Conventional storage water heaters remain the most popular type of water heating system for the home. Here you’ll find basic information about how storage water heaters work; what criteria to use when selecting the right model; and some installation, maintenance, and safety tips.
How They Work
A single-family storage water heater offers a ready reservoir — from 20 to 80 gallons — of hot water. It operates by releasing hot water from the top of the tank when you turn on the hot water tap. To replace that hot water, cold water enters the bottom of the tank through the dip tube where it is heated, ensuring that the tank is always full.
Conventional storage water heater fuel sources include natural gas, propane, fuel oil, and electricity. Learn more about fuel types available when selecting a new water heater.
Since water is heated in the tank until the thermostat setpoint temperature is reached, energy can be wasted even when a hot water tap isn’t running due to standby heat losses, which result from the tank losing heat to the surrounding environment. Only tankless water heaters — such as demand-type water heaters and tankless coil water heaters — avoid standby heat losses. Some storage water heater models have heavily insulated tank, which significantly reduce standby heat losses and lower annual operating costs. Look for models with tanks that have a thermal resistance (R-Value) of R-24 and above to avoid adding an insulation blanket (electric water heaters only).
Gas and oil water heaters also have venting-related energy losses. Two types of water heaters — a fan-assisted gas water heater and an atmospheric sealed-combustion water heater — reduce these losses. Visit the Energy Basics site to learn more about how conventional storage water heaters work.
For low energy bills the best choice to consider are heat pump water heaters and solar water heaters. These water heaters are usually more expensive but they have significantly lower annual operating costs that result in short payback periods.
Selecting a Storage Water Heater
The lowest-priced storage water heater may be the most expensive to operate and maintain over its lifetime. While an oversized unit may be alluring, it carries a higher purchase price and increased energy costs due to higher standby energy losses.
Before buying a new storage water heater, consider the following:
Installation and Maintenance
Proper installation and maintenance of your water heater can optimize its energy efficiency.
Proper installation depends on many factors. These factors include fuel type, climate, local building code requirements, and safety issues, especially concerning the combustion of gas- and oil-fired water heaters. Therefore, it’s best to have a qualified plumbing and heating contractor install your storage water heater. Be sure to do the following when selecting a contractor:
- Request cost estimates in writing
- Ask for references
- Check the company with your local Better Business Bureau
- See if the company will obtain a local permit if necessary and understands local building codes, etc.
If you’re determined to install it yourself, first consult the water heater’s manufacturer. Manufacturers usually have the necessary installation and instruction manuals. Also, contact your city or town for information about obtaining a permit, if necessary, and about local water heater building codes.
Periodic water heater maintenance can significantly extend your water heater’s life and minimize loss of efficiency. Read your owner’s manual for specific maintenance recommendations.
Routine maintenance for storage water heaters, depending on what type/model you have, may include:
- Flushing a quart of water from the storage tank every three months
- Checking the temperature and pressure valve every six months
- Inspecting the anode rod every three to four years.
Improving Energy Efficiency
After your water heater is properly installed and maintained, try some additional energy-saving steps to help lower your water heating bills. Some energy-saving devices and systems are more cost-effective to install with the water heater.